CASTLE
Study: the mirror beams
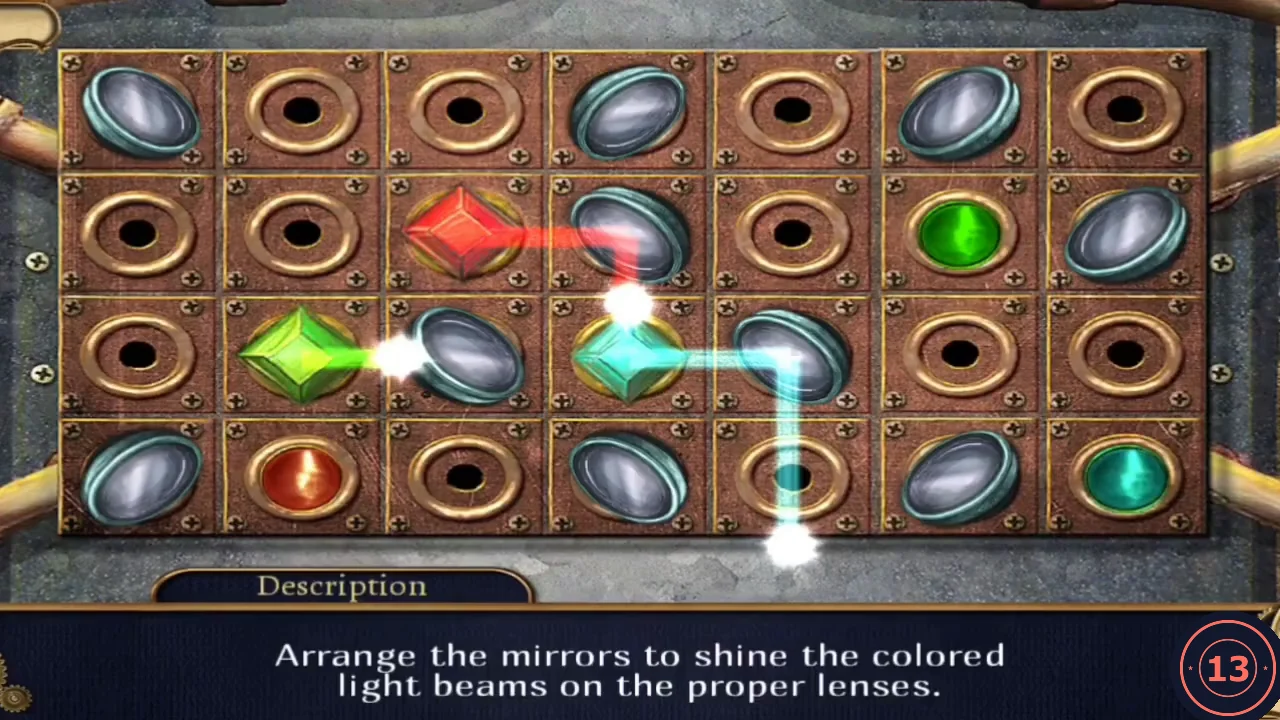
Use the three quartz gems on the Study desk to open the hidden room. The goal is to route each coloured beam into the lens of the same colour. Click a mirror to rotate it, or drag it to an empty hole to move it. The final layout below is the solved board from the recorded game.
- Insert the Red, Green and Blue Quartz into the gold sockets of the Study desk board.
- Count rows 1-4 from the top and columns 1-7 from the left. Put the Blue Quartz in the empty gold socket at row 3, column 4. Drag three mirrors to new holes: row 1 col 6 to row 1 col 5, row 2 col 7 to row 1 col 7, and row 4 col 4 to row 4 col 3. Then click mirrors to rotate them until the beams run like this. Red (crystal at row 2 col 3, shining right): the mirror at r2c4 turns it up, r1c4 turns it left, r1c1 turns it down and r4c1 turns it right into the red lens at r4c2. Green (crystal at r3c2): r3c3 turns it down, r4c3 turns it right and r4c6 turns it up into the green lens at r2c6. Blue (crystal at r3c4): r3c5 turns it up, r1c5 turns it right and r1c7 turns it down into the blue lens at r4c7.
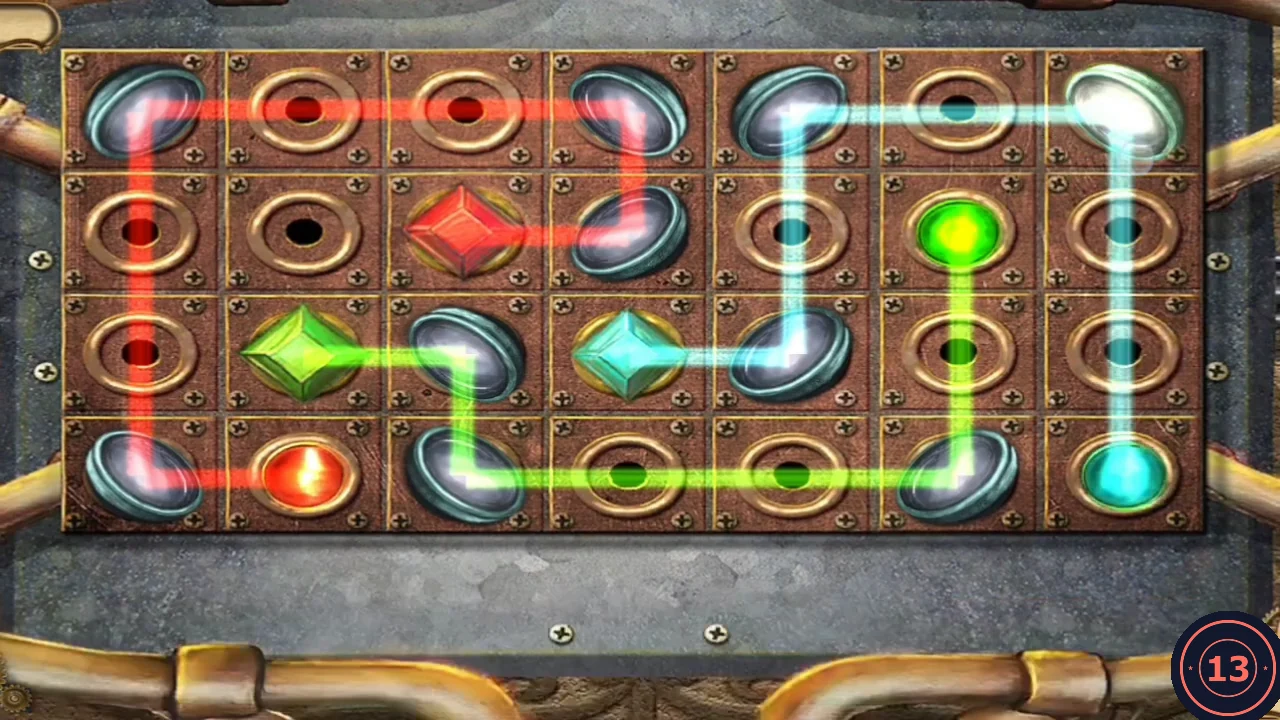
The finished mirror board: every beam ends in the lens of its colour. - Enter the hidden room, switch on the light and take the three-pronged Lever from the box on the left wall.
- Steambug (Castle): in the hidden room (after switching the light on), on the back wall left of centre above the desk. Click it to collect it.
CASTLE
Salon cabinet again: Sulfur
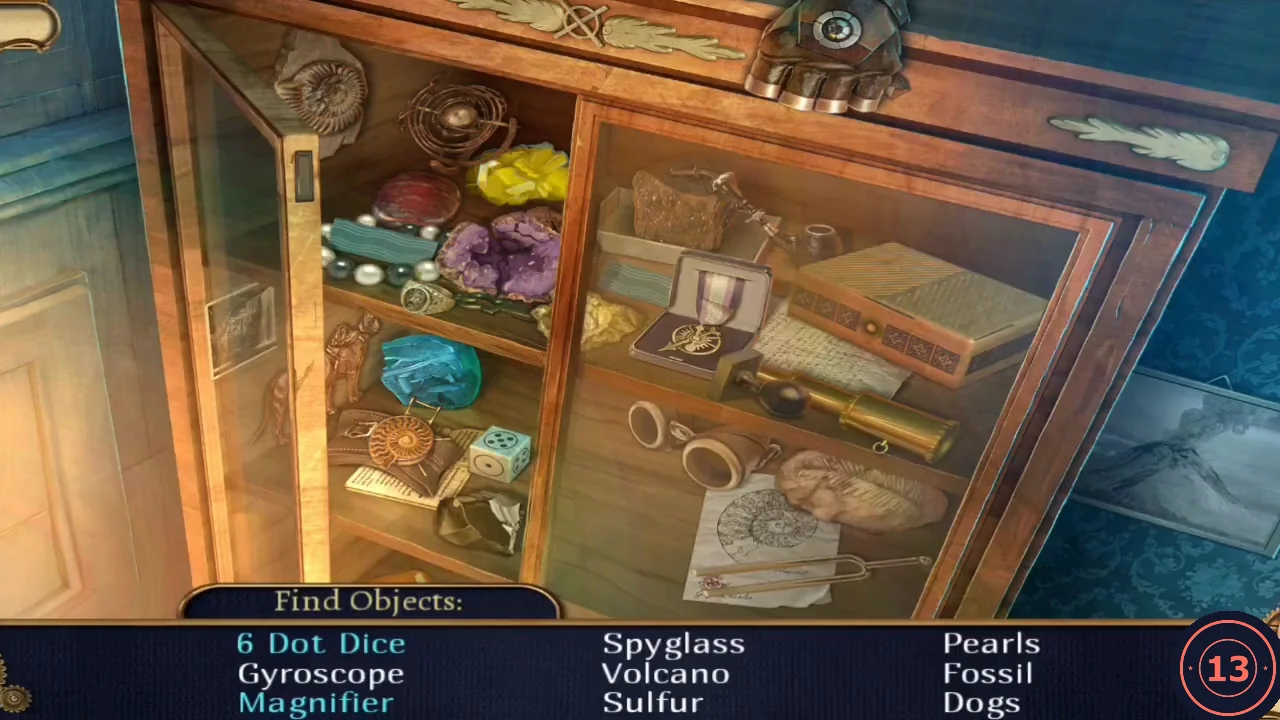
Search the Salon glass cabinet a second time.
- Search the Salon glass cabinet again. Interactive: take the key from the left shelf and unlock the carved box on the top-right shelf for the Magnifier; click the die on the lower-left shelf (6 Dot Dice). Reward: Sulfur.
CASTLE
Kitchen rack again: the Empty Oil Can
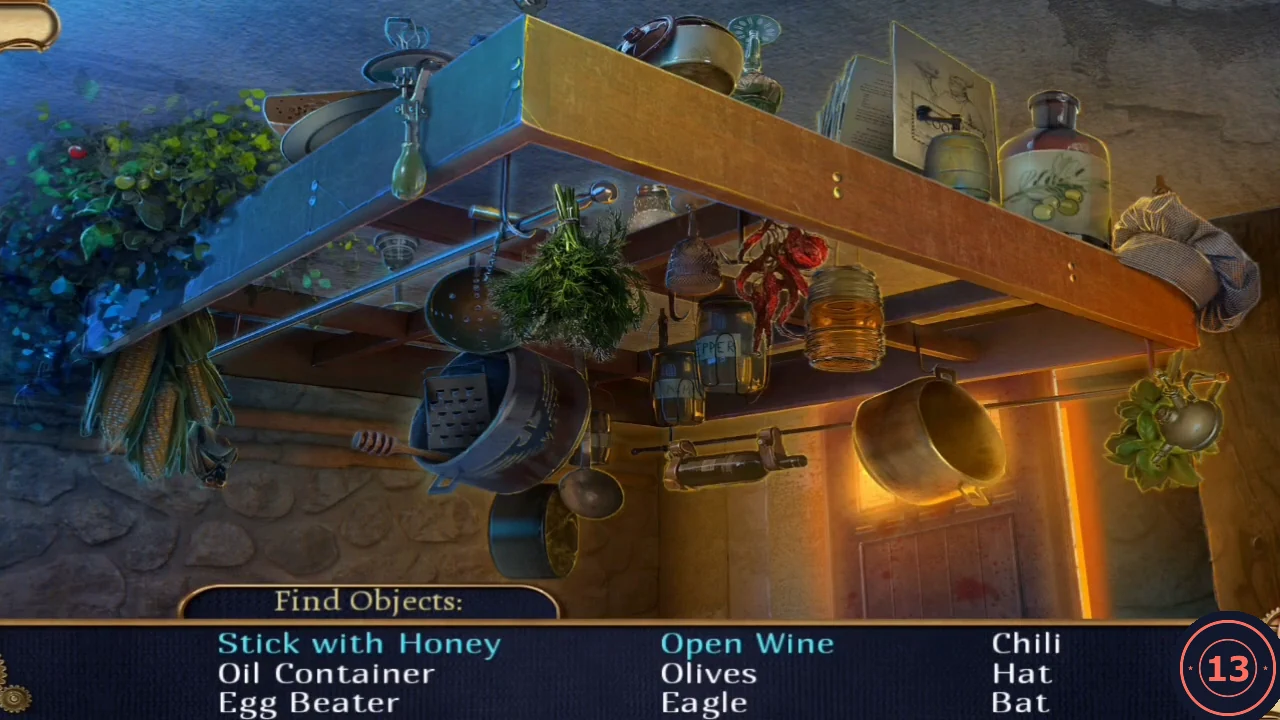
Search the kitchen's hanging rack a second time, then use the stove to get water and coal.
- In the kitchen, sharpen the Blunt Blade (the saber) on the grindstone at the window: Sharp Blade.
- Search the hanging rack again. Interactive: dip the stick (lower left) in the honey jar (Stick with Honey); open the wine with the corkscrew by the herbs at the upper left (Open Wine). Reward: Empty Oil Can.
- Zoom on the stove: read the maintenance log on the floor (frozen pipes need a fire in the stove). Open the firebox and put the Ember in. When the fire is burning, turn the red valve wheel on the pipe left of the firebox so water runs from the tap, then hold the Flask under the tap: Full Canteen.
- Douse the Study fireplace with the Full Canteen and take the Coal.
CASTLE
Hidden room: black powder
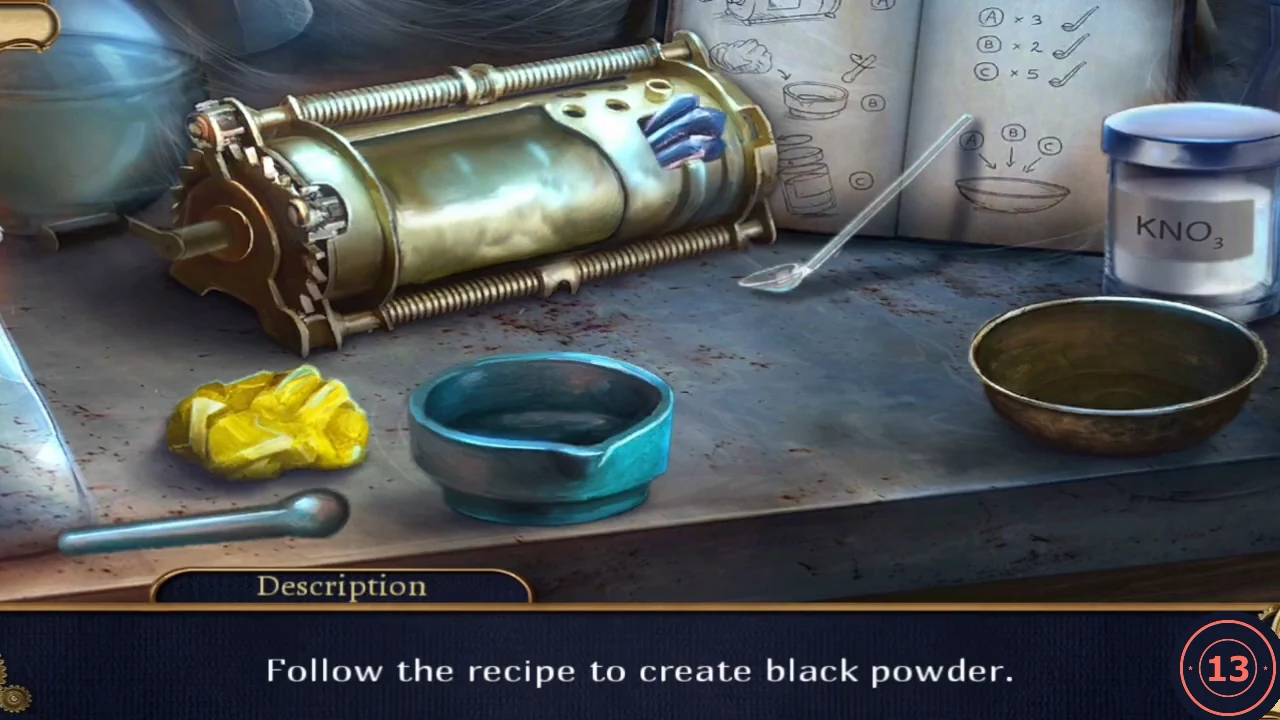
Follow the recipe on the hidden-room desk to make gunpowder for the rifle.
- Place the Sulfur and the Coal on the hidden-room desk.
- Recipe: grind the coal in the cylinder grinder (turn the crank), grind the sulfur in the mortar with the pestle and open the KNO3 jar. With the spoon put 3 spoons of coal, 2 of sulfur and 5 of KNO3 into the brass bowl, mix with the pestle, then fill the Horn from the bowl: Gunpowder.CODECoal 3, Sulfur 2, KNO3 5
- In the Salon open the left display case and load the rifle: Gunpowder, then the Bullet. Take the loaded Rifle.
CASTLE
Upstairs Lobby: the chandelier maze
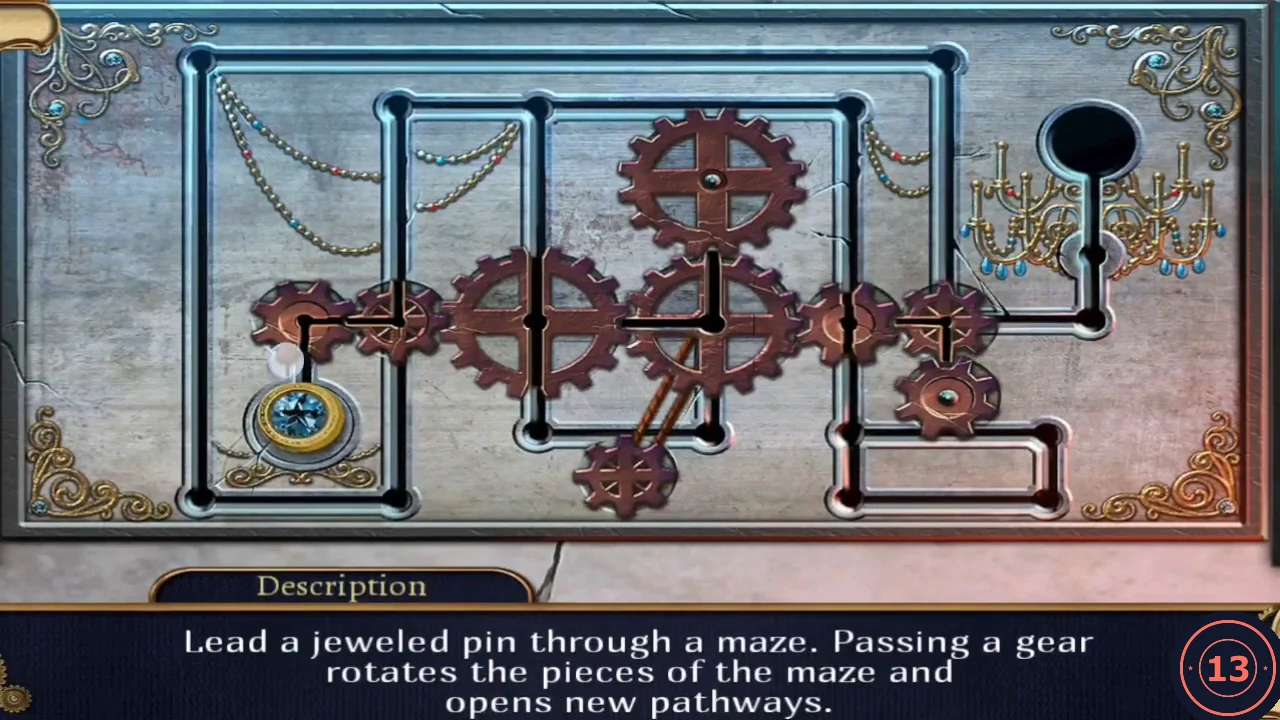
Move the chandelier over the golem guards and bring it down.
- Fit the Lever into the lobby lectern console that moves the chandelier.
- Lead the jeweled pin from its socket at the lower left to the dark hole at the upper right. Every time the pin passes a gear's teeth, all gear-mounted track pieces rotate, so keep moving past gears until the pieces open a path. The outer frame rail touches no gears and is a safe way back to the top; the final approach is through the small gear beside the chandelier.
- Use the Rifle from the balcony to shoot the chandelier down onto the golem guards.
CASTLE
Acid and the portrait safe
Collect oil and acid to open the safe hidden behind Barber's portrait.
- Go to the Downstairs Lobby and fill the Empty Oil Can from the smashed golem: Full Oil Can.
- Take the Cane from the umbrella basket at the guest desk.
- Use the Cane on the kitchen stove's drain grate to fish out the Cupboard Key.
- In the hidden room, unlock the wire cabinet with the Cupboard Key and take the Pipette.
- Oil the rusty hinges of the round acid container with the Full Oil Can, open it and fill the Pipette: Acid.
- In the Salon zoom on Barber's portrait and slash the canvas with the Sharp Blade. Use the Acid on the welded safe behind it and take the Pendant Key and the rolled tube.
CASTLE
Elevator: the crystal gears
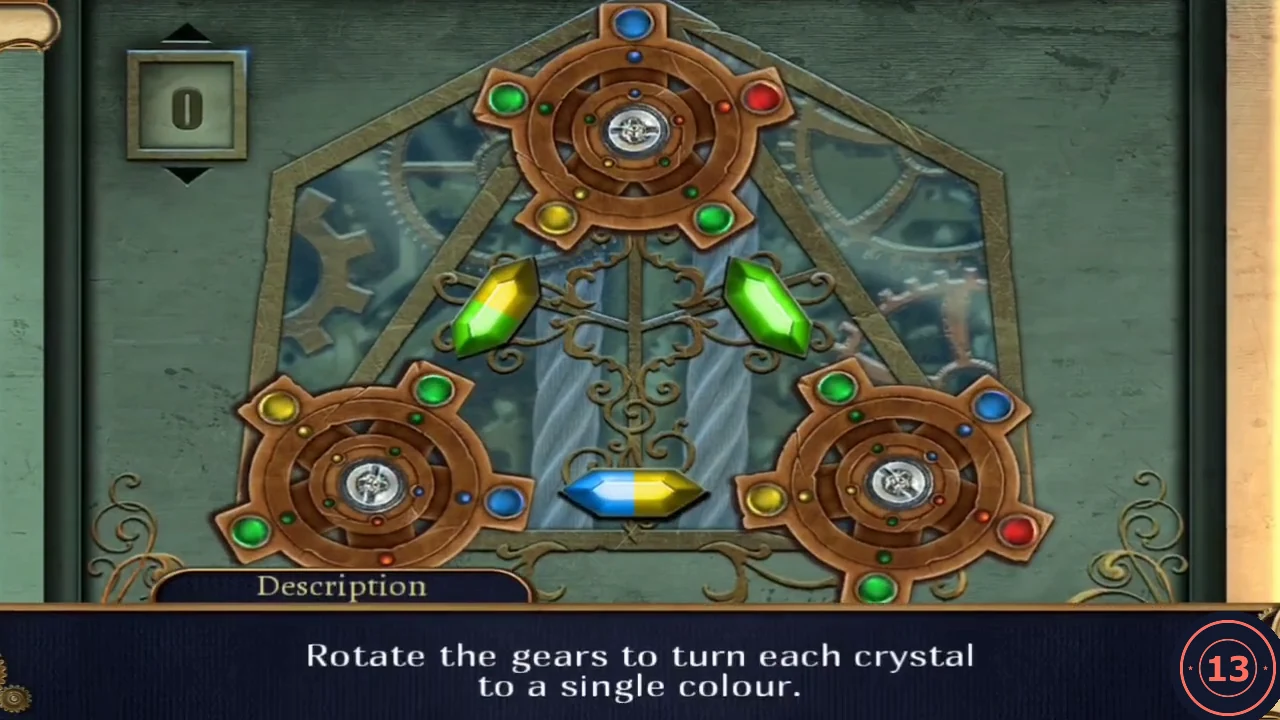
Unlock Barber's elevator with the Pendant Key.
- In the Downstairs Lobby put the Pendant Key into the winged keyhole of the elevator panel.
- Three five-gem gears surround three crystals; each crystal half takes the colour of the gem pointing at it. Click gears to turn them until each crystal is a single colour: left blue, right green, bottom red.
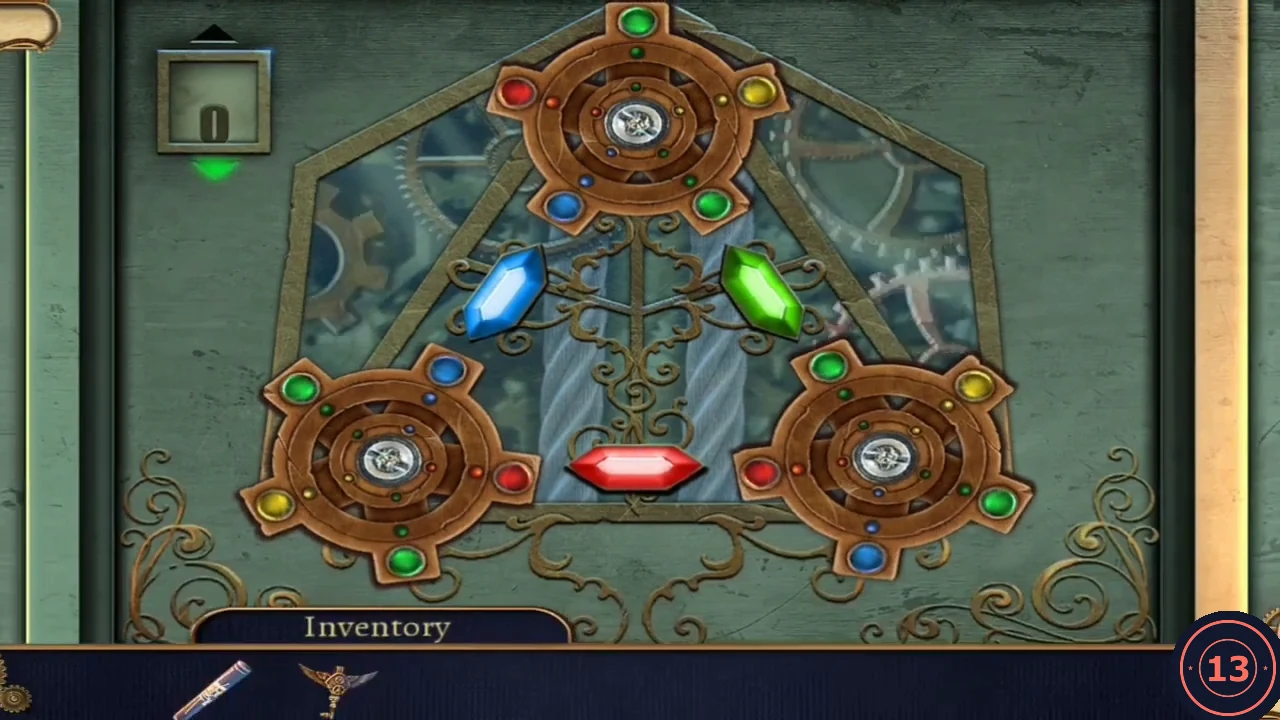
The solved crystal gears. - Check that you have all 8 castle steambugs, then take the elevator down (achievement Even Deeper).