Forest Entrance: Hidden Camera and Drone
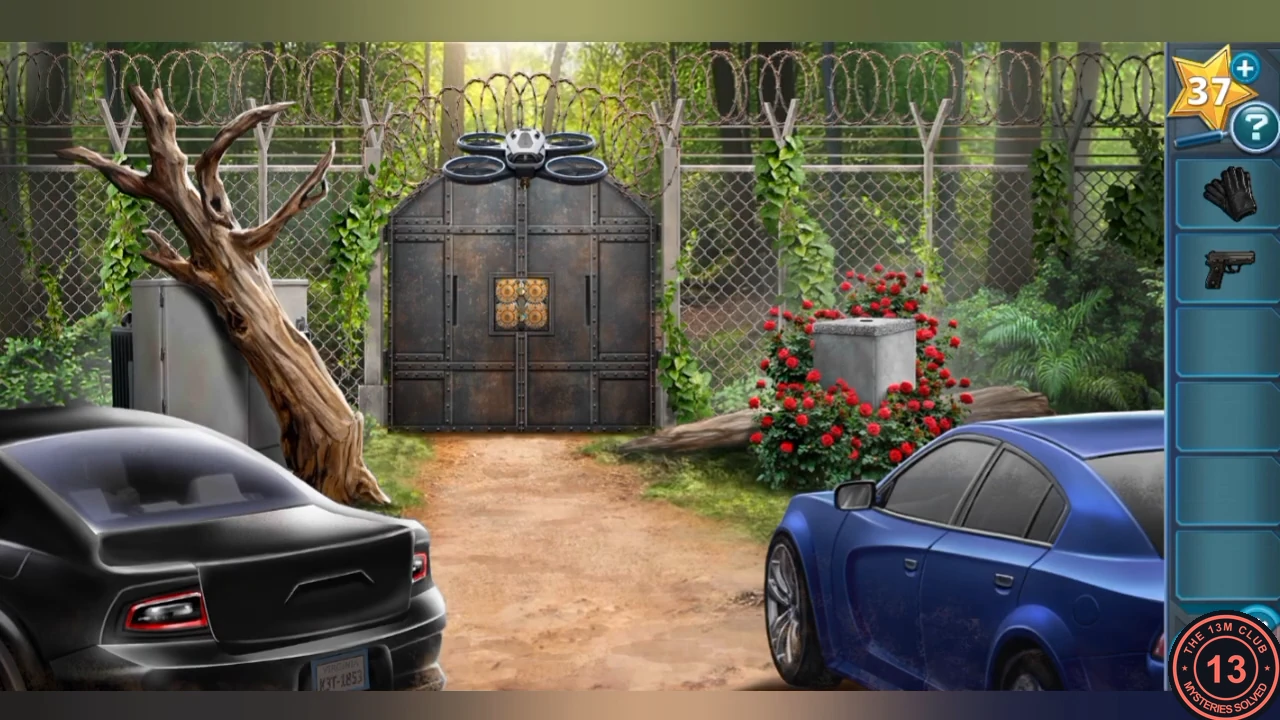
You play as Alden Parker at a locked forest gate. Disable the security camera, then bring down the patrol drone.
- Take the Walking Stick. Open the car trunk and take the Gloves and the Gun.
- Use the Gloves on the rose bush; a camera rises. Use the Gun and fire when the reticle is on the camera.
- Remove the broken camera and press the red button inside the pedestal hole with the Walking Stick. A gear lock appears on the gate.
- A drone appears. Shoot it down with the Gun, then use the Gloves to pick up its dart and bag it as evidence.
Gate Gear Lock
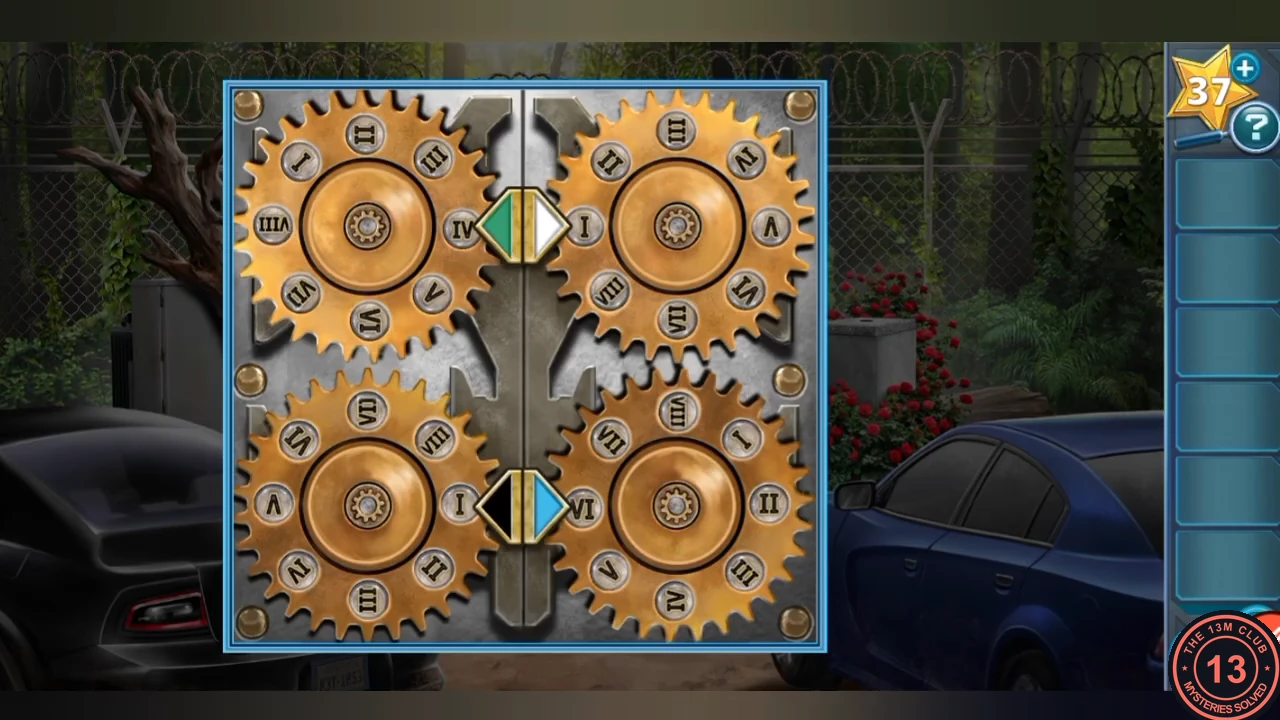
Each of the drone's coloured wings carries a symbol, and the stone pillar repeats those symbols around its frieze.
- Note the wing symbols: blue = maze square, white = bracketed X, green = C in a circle, black = square with a triangle. The circles with a plus sign on the pillar are decoys.
- Set each coloured gear to the number of times its symbol appears around the pillar: green IV, white VIII, black II, blue VI. Only two faces of the pillar are visible; together they show half of each count (maze 3, circle-C 2, bracketed X 4, square-triangle 1), so double what you see.CODEgreen IV, white VIII, black II, blue VI
Electrical Box Fuse Puzzle
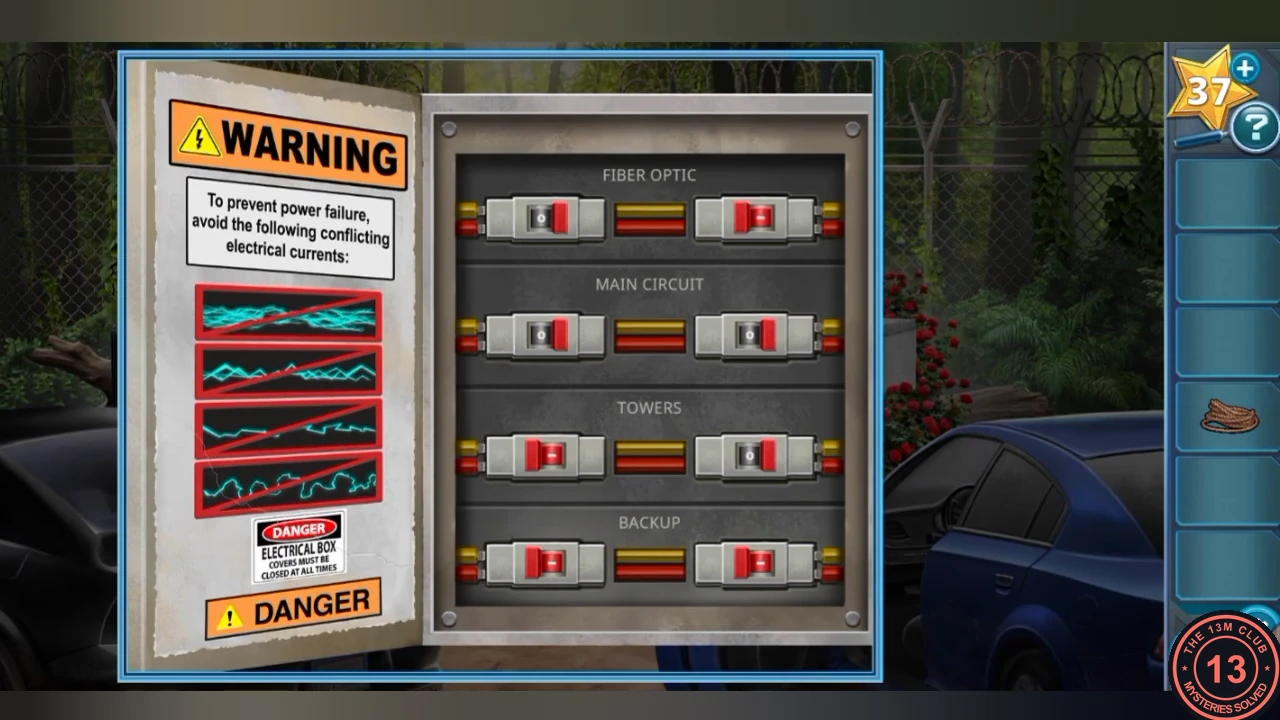
Laser trip wires guard the trail. Cause a deliberate power failure at the electrical box.
- Pass the gate. Take the Torn Page from the boat. Return to the blue car: take the Knife from the door pocket and the Lockpick Kit from the glove box.
- Cut a length of Rope from the boat with the Knife. Use the Rope to pull in the Shovel, then dig where the ground is scratched to expose the fiber optic cables.
- Use the Rope to drag away the fallen tree, open the electrical box with the Lockpick Kit and place the Torn Page inside. The page shows four crossed-out patterns to avoid.
- You want the failure, so set the switches to recreate the forbidden patterns (compare the dug-up cables with the page). In the solved panel the red sliders sit: Fiber Optic - left switch to the left, right switch to the right; Main Circuit - left switch to the right, right switch to the left; Towers - both to the left; Backup - both to the right. A slider pushed to the right uncovers a white 0 mark on its left; Backup is the last row to change, and the puzzle completes as soon as both its sliders are on the right.
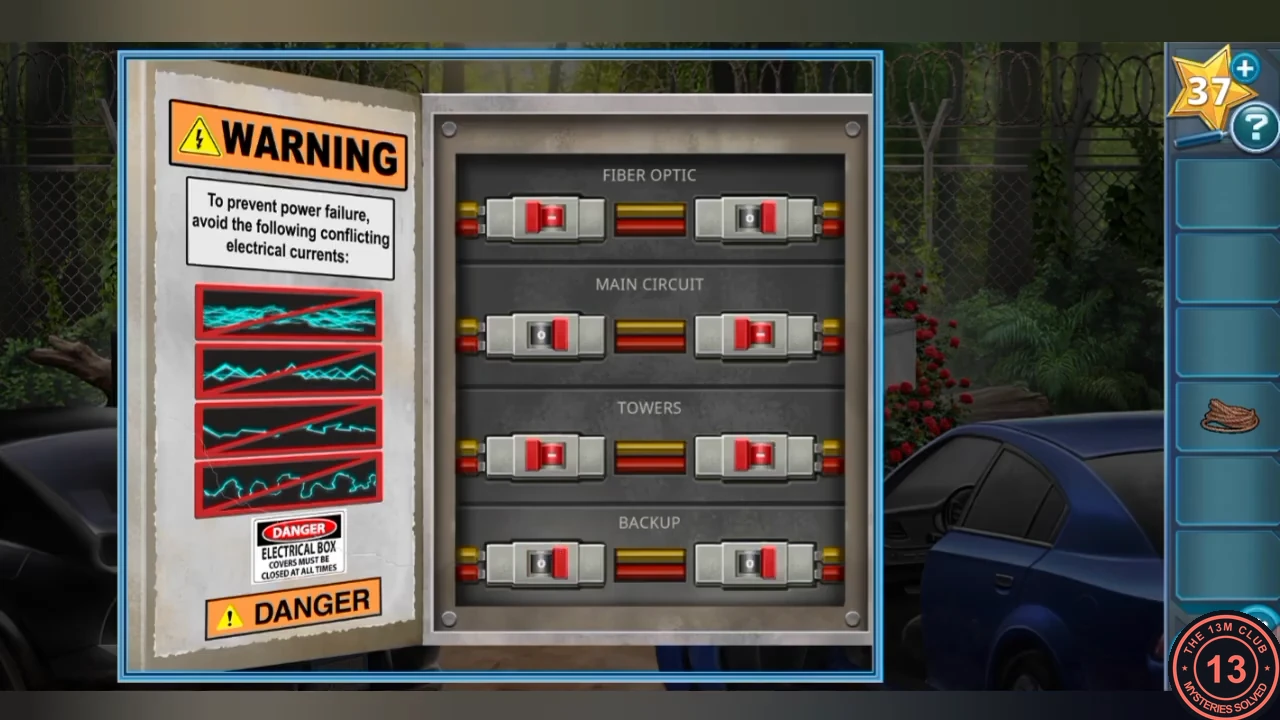
Solved switch positions, just before the puzzle completes: both Backup sliders are on the right.
Crossing the River
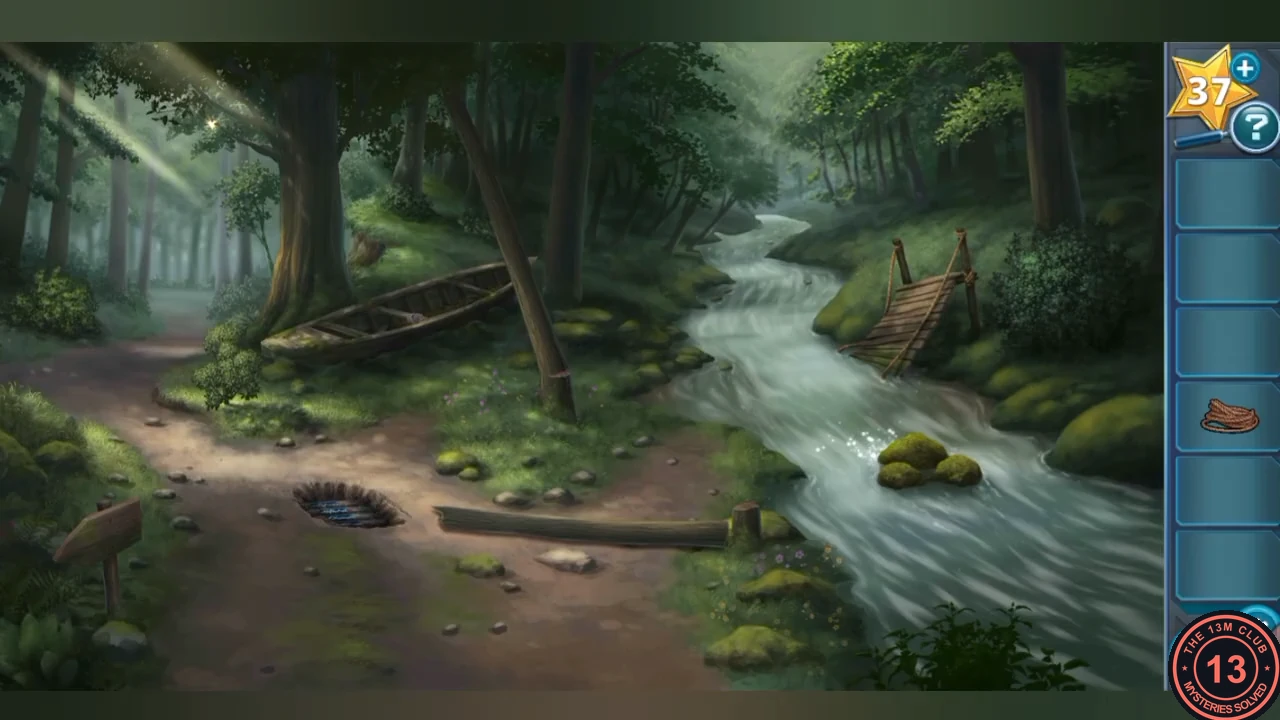
Build a log bridge to cross the river beyond the trip wires.
- Move the leaves aside and take the Axe. Chop down the two trees, tie them together with the Rope and tap the bridge to cross.
Forest Trail Maze
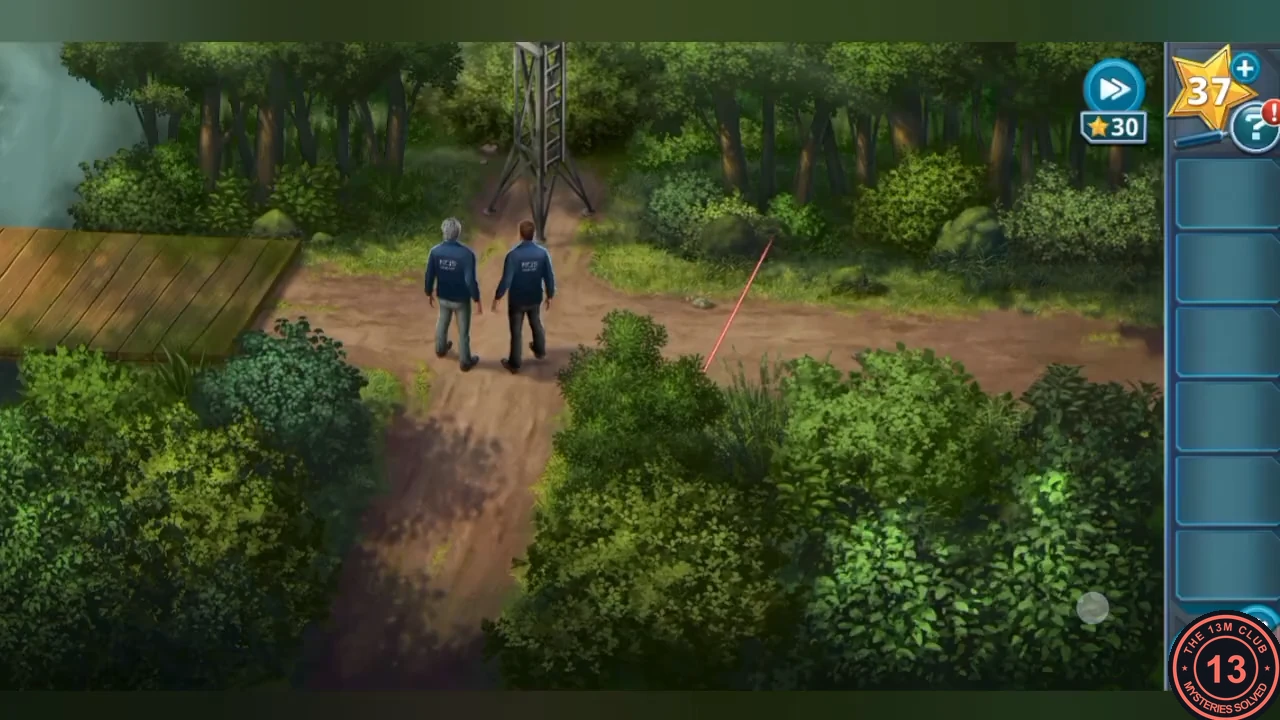
Navigate a grid of forest screens to the broken bridge in the north. The phone Map shows the grid; this guide names squares by row (1 = top, 4 = bottom) and column (1 = left, 3 = right), and the exit is north of row 1, column 2. Red laser trip wires block some paths; tapping the cell towers switches them, so follow the taps in order.
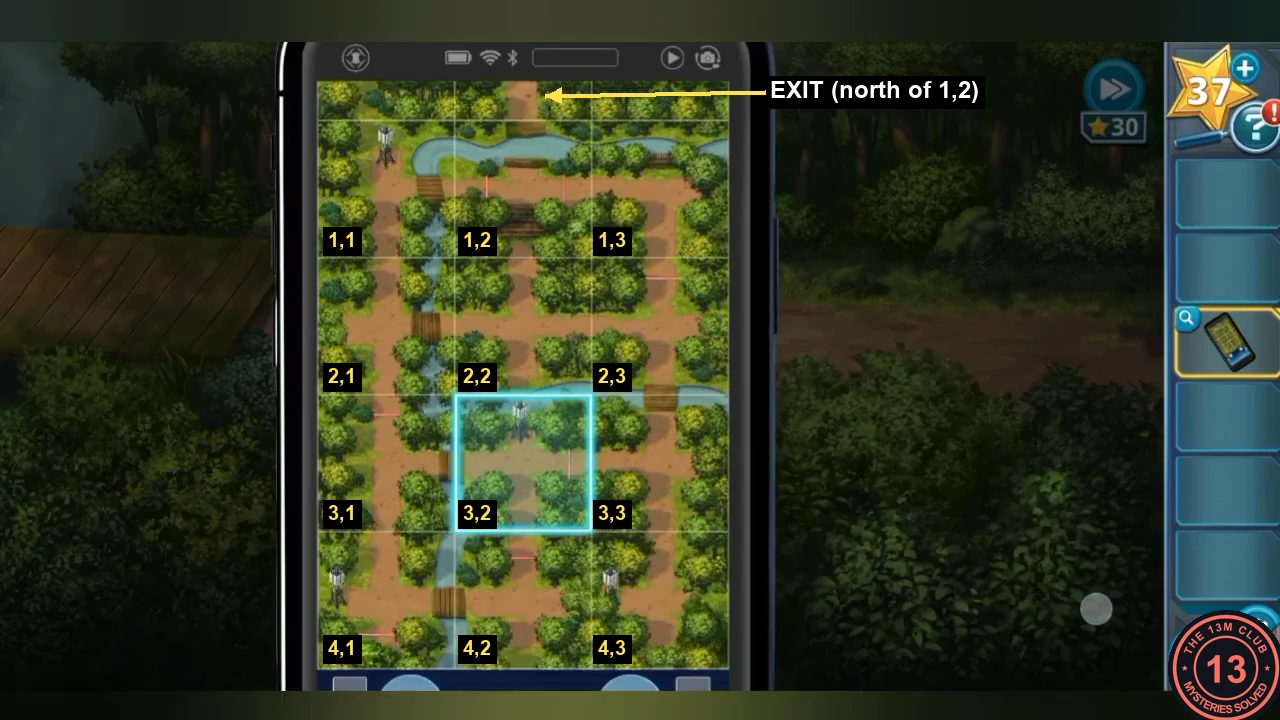
- At the start (row 4, column 2) take the Broken Drone. Go left (4,1), then up (3,1) and take the Battery. Go right to the tower square (3,2), take the Propeller and tap the tower.
- Attach the Propeller and Battery to the Broken Drone. Its camera syncs the Map to your phone.
- Go left (3,1), down to the tower square (4,1) and take a Wooden Plank. Go up twice to (2,1) and take the Satellite Panels from the box.
- Go right to (2,2): a board floats in the river out of reach. Go up to (1,2), where the exit bridge is out, and take the Machete.
- Go down (2,2), left (2,1), down twice to (4,1) and tap the tower. Go up (3,1), right (3,2) and tap that tower. Go right (3,3) and take another Wooden Plank.
- Go down to the busted tower at (4,3), repair it with the Satellite Panels and tap it.
- Go up twice (2,3), left (2,2), up (1,2), down (2,2), left (2,1) and up to the vine-covered tower at (1,1). Cut the vines with the Machete and tap the tower.
- Go right (1,2) and take the Net. Go left (1,1), down (2,1), back up (1,1) and tap the tower again.
- Go down (2,1) and right (2,2), then use the Net to fish the floating Wooden Plank out of the river.
- Go left (2,1), up (1,1) and tap the tower a third time. Go right (1,2), then right again (1,3), where a plank is stuck in a tree.
- Go down (2,3) and take the Broken Umbrella. Go back up (1,3) and hook the Wooden Plank out of the tree with it.
- Go left to the exit square (1,2) and use the four Wooden Planks to rebuild the bridge.
Cabin Shed Emblem Lock
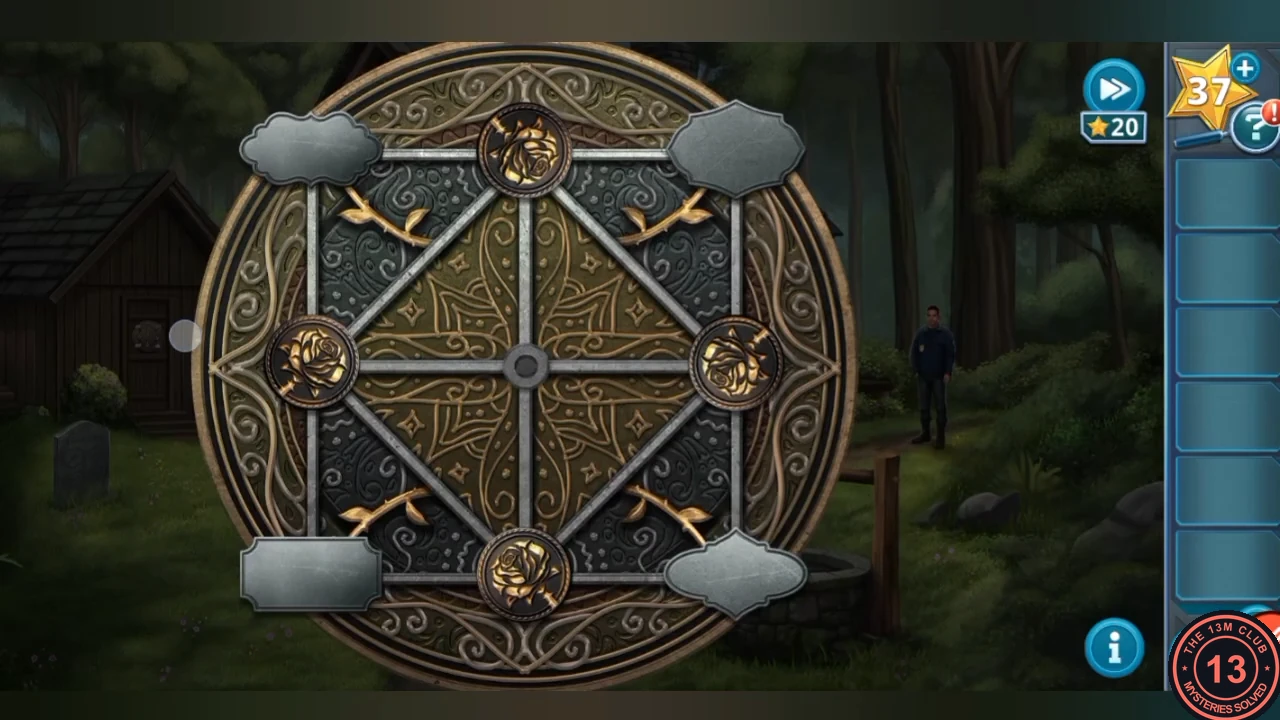
At the cabin, the door uses a biometric scanner and is too heavy to kick in. Start with the padlocked shed.
- Take the Ladder leaning by the cabin. The shed lock is missing pieces. Read the headstone (McGee translates Dari: Mother, Father, Brother, Sister) and take its Emblem. Take another Emblem from the window.
- Place the Ladder against the cabin side to reach the compass carving: Sister north, Brother east, Father west, Mother south. Take the third Emblem.
- Place the Emblems in the shed lock. Use the headstone outlines: Mother = cusped frame, Father = pointed oval, Brother = wavy cloud, Sister = notched rectangle. Following the compass, put the notched rectangle at the top, pointed oval on the left, cloud on the right and cusped frame at the bottom. Rotate the corner roses so their stems point inward to join.
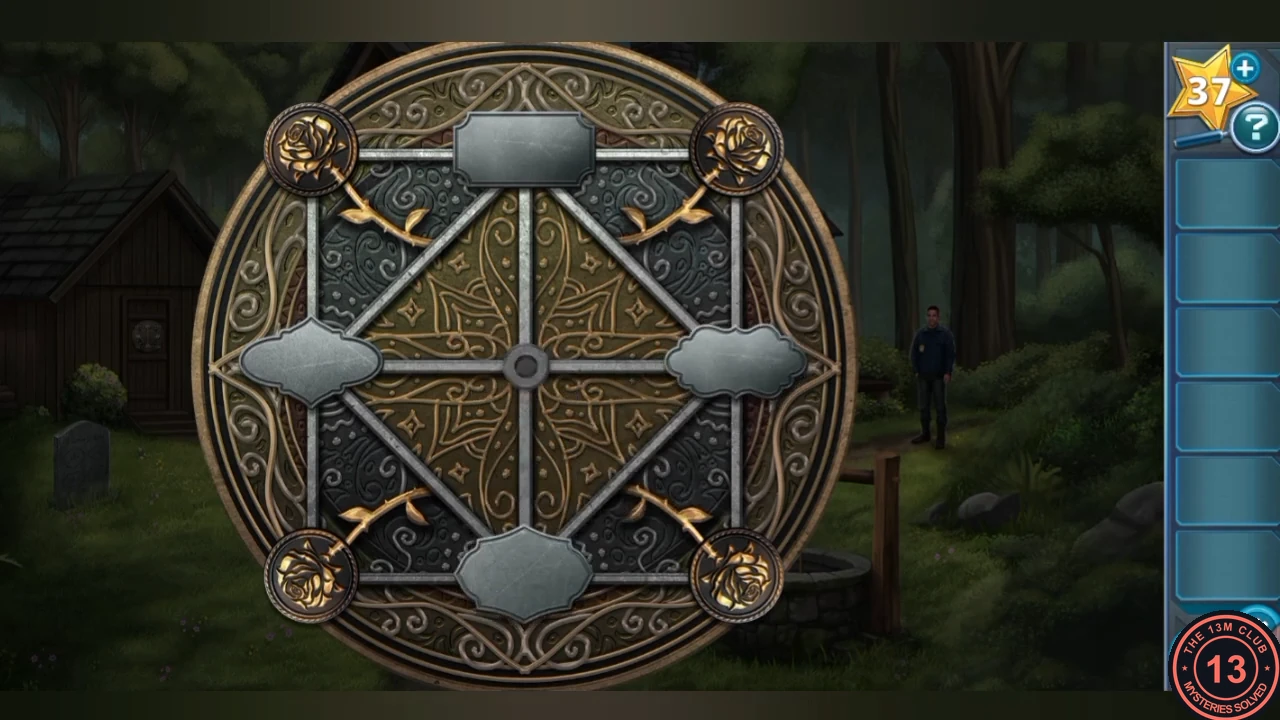
Emblems and roses in the solved positions.
Lifting a Fingerprint for the Cabin Door
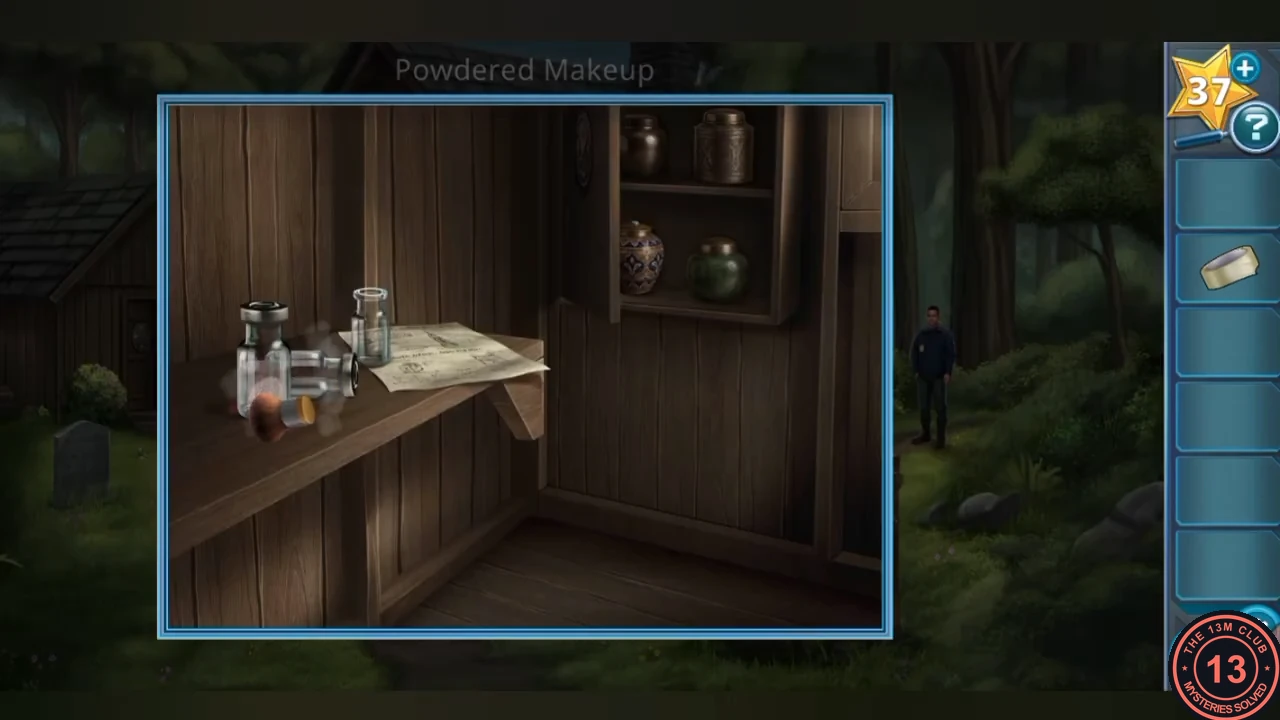
The cabin's scanner needs the suspect's fingerprint, which is on the vials in the shed.
- In the shed take the Crank Handle. Tap the vials: they need to be dusted for fingerprints.
- Use the Crank Handle on the well and turn it to raise the bucket; take the Family Crest. Put the Family Crest on the shed cabinet and take the Tape.
- Talk to the agents to ask for something to dust with; you receive Powdered Makeup. Dust a vial with it and lift the print with the Tape to get the Fingerprint.
- Use the Fingerprint on the cabin door scanner.
Cabin Door Shield Puzzle
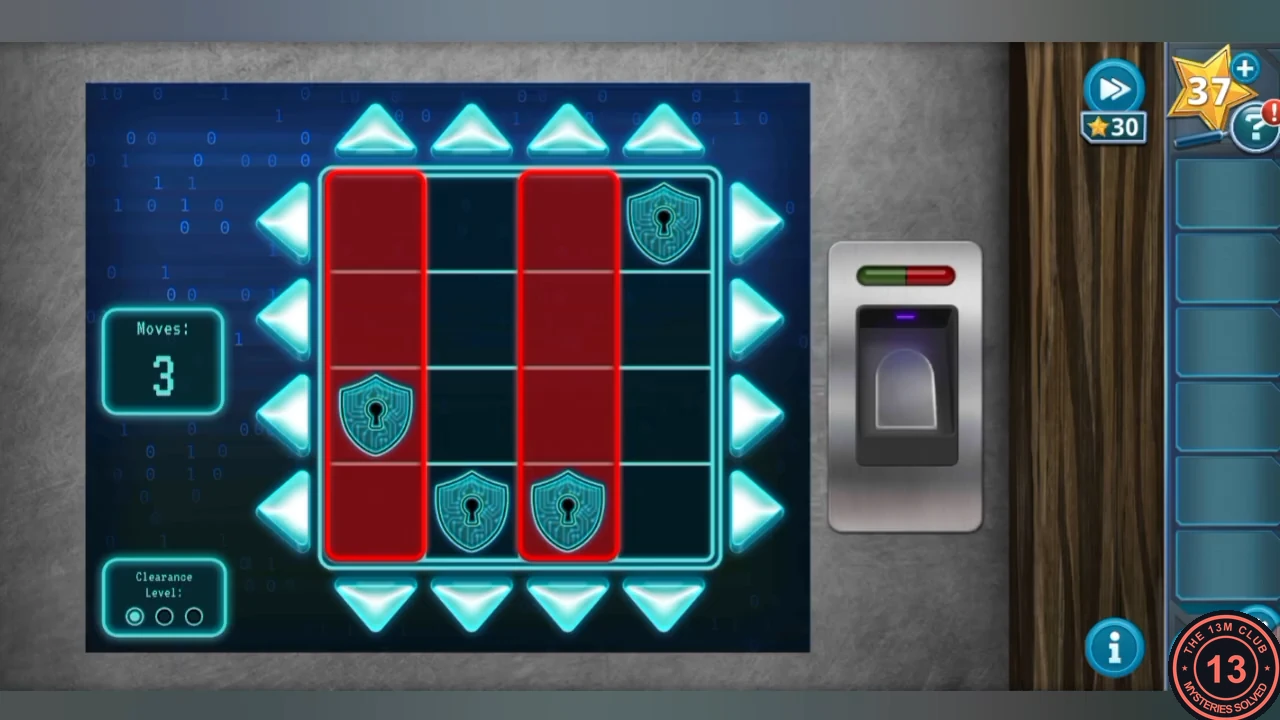
Use the row and column arrows to move all shield icons into the red area within the move limit. Icons pushed off one edge reappear on the opposite side, and chained shields must end on a plus icon. Rows are counted from the top and columns from the left.
- Level 1 (4 moves): row 3 left, column 3 up, row 4 right, row 1 right.
- Level 2 (5 moves): row 3 right, row 4 right, column 1 down, column 3 up, row 3 right.
- Level 3 (5 moves): row 3 right, column 4 down, column 2 down, row 2 right, row 2 right.
- Breach the cabin and watch the scenes to finish Chapter 3.