PUZZLE
Projector Slides Scene
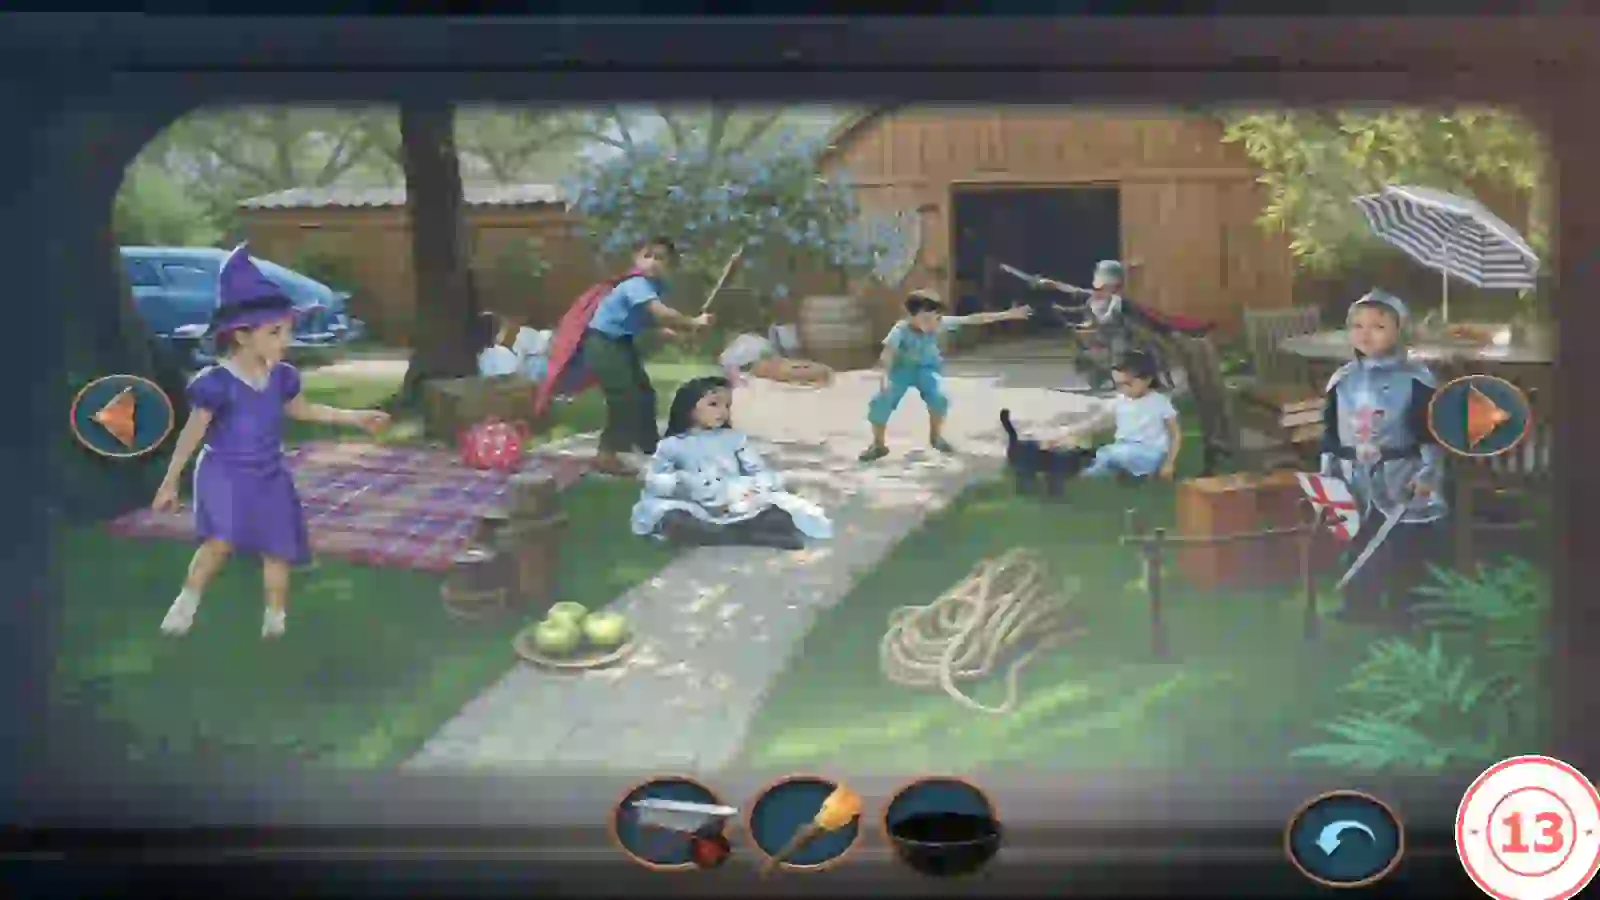
The classroom projector is waiting for its slides.
- Put all three SLIDES in the classroom projector. This earns the Remember achievement.
- Use the arrows to switch between three slides. Each time you place an item from the tray where it belongs, a new item appears. A wrong spot gives the message "There's something missing."; try another slide. Recording placements: cat by the boy on the grass (slide 1); cauldron on the hook by the knight (slide 1); wheelbarrow to the boy in brown (slide 2); fire on the log pile (slide 2); flowers in the empty pots (slide 3); apple on the plate (slide 1); broom in the witch girl's hand (slide 1); tyre on the tree rope (slide 3); bead chime on the tree (slide 2); pink chalk star on the pavement circle (slide 3); KEEP OUT sign on the shed door (slide 2); torch in the running boy's hand (slide 3).
- Take the SHELL BROOCH. Ghost Tracker unlocks for three hidden-object scenes without hints.
ORPHANAGE
Floor Hatch and Figurine
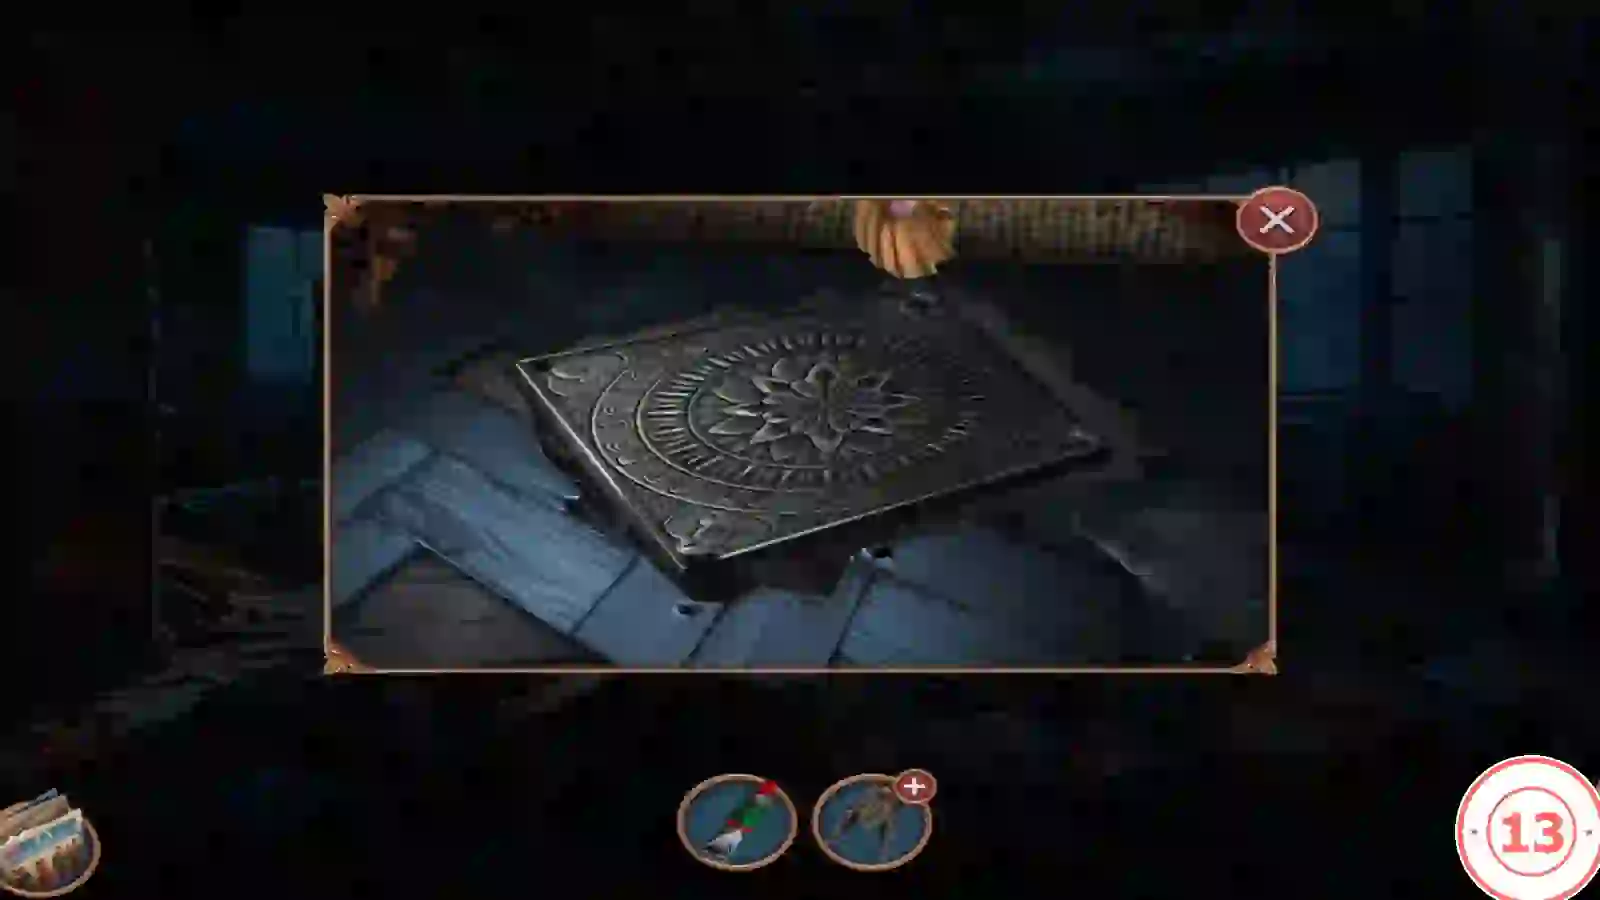
Use the brooch on the bolted hatch under the rug.
- Unscrew the four bolts of the classroom floor hatch with the SHELL BROOCH and take the FIGURINE UPPER HALF.
- Open the WINGED FIGURINE in the inventory, add the UPPER HALF and glue it with the GLUE TUBE.
- Place the FIGURINE on the box on the classroom desk.
PUZZLE
Figure Pose
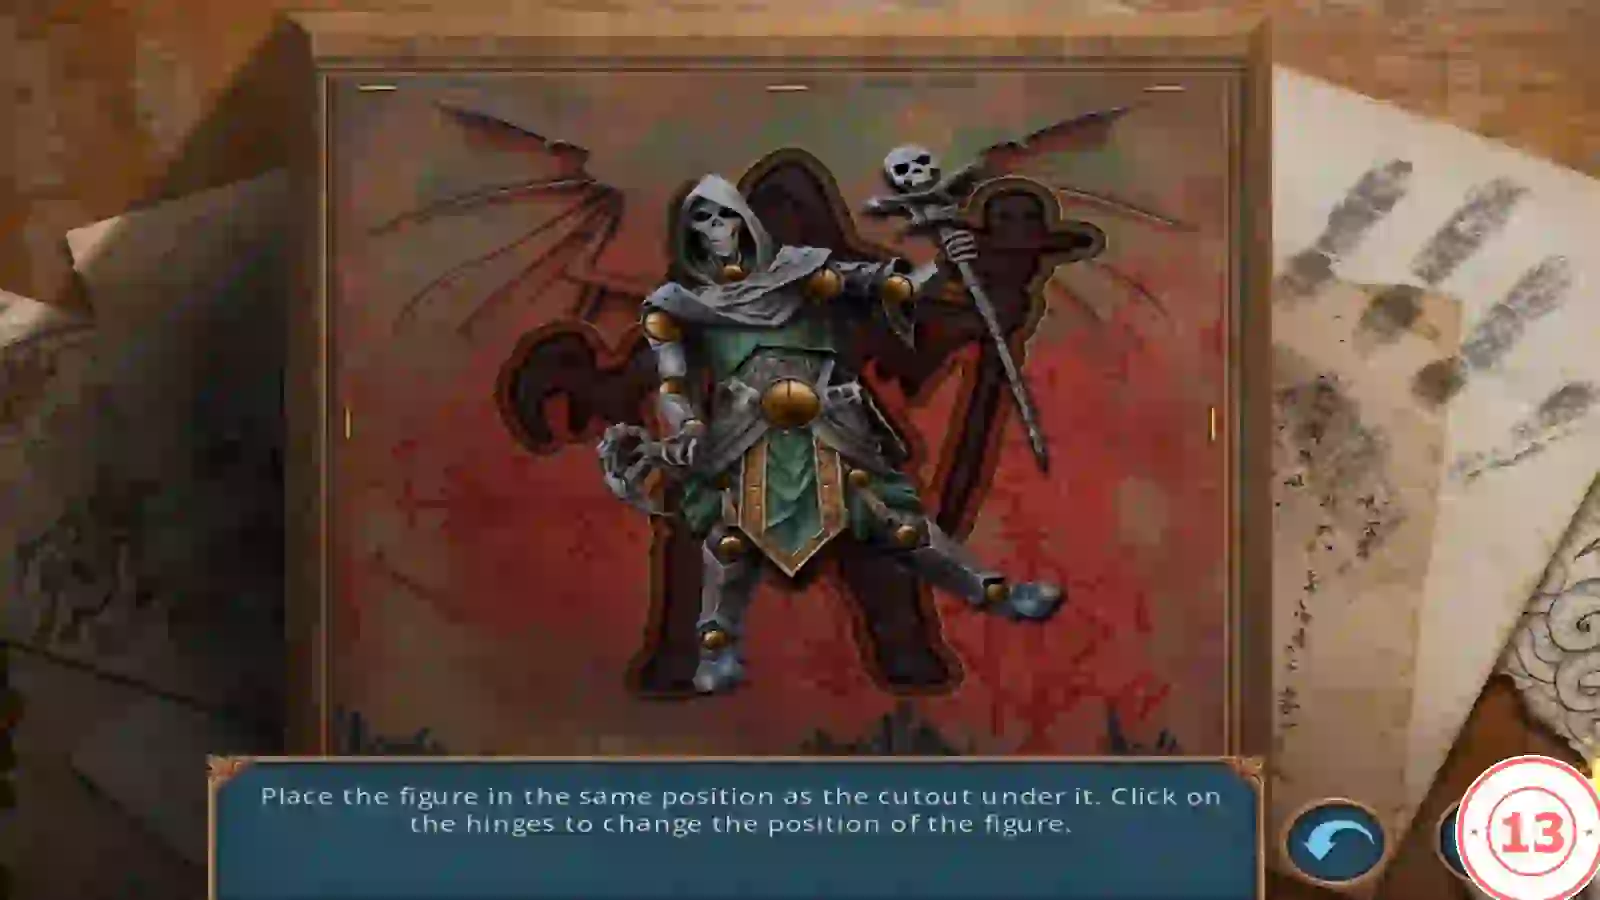
Task: "Place the figure in the same position as the cutout under it. Click on the hinges to change the position of the figure."
- Compare each limb with the red cutout and tap its hinge until it matches. Fix the body and upper joints first, then the hands and feet.
- Take the red rubber HOT-WATER BOTTLE.
PUZZLE
Bureau Flap and Second Slides Scene
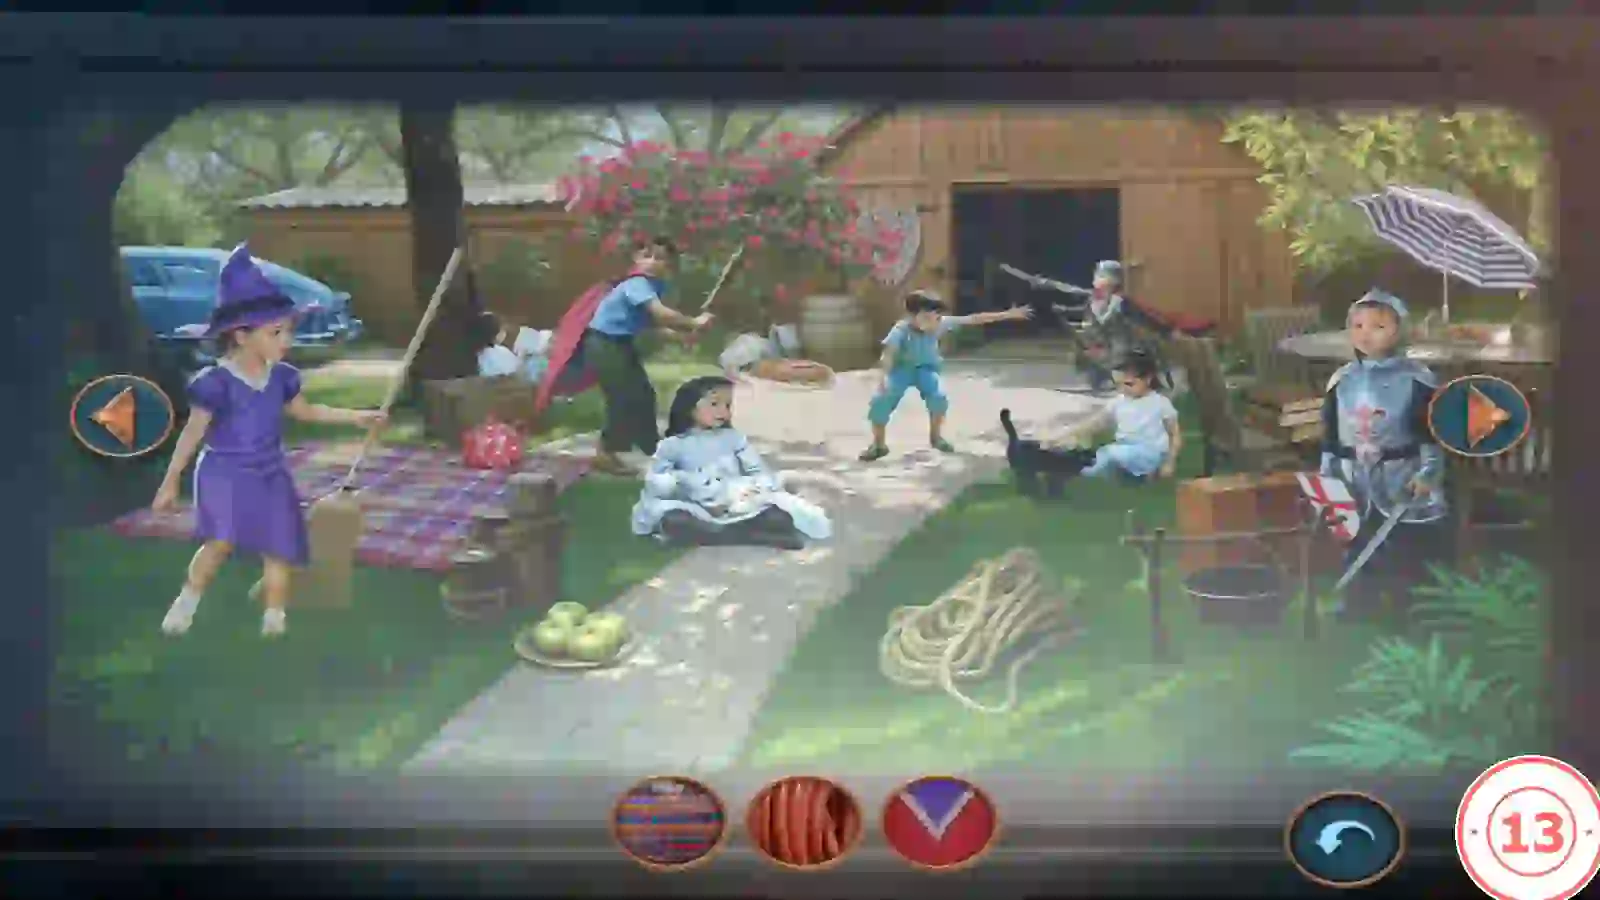
The hot-water bottle is what the hand pump needs.
- In the office, push the HOT-WATER BOTTLE into the bureau flap, connect the pump and pump until the flap opens. Take LABEL PLATE "6-F".
- Back in the classroom, the projector screen now shows a new picture. Tap the screen to start a second slide scene. This time the tray holds fabric and material swatches. Place each on the object in the slides with the same pattern or material, such as the green-striped cloth on the boy at the far left of slide 2 or the birdhouse on the tree in slide 3.
- Take the CURVED LAMP.
PUZZLE
Filing Cabinet Buttons
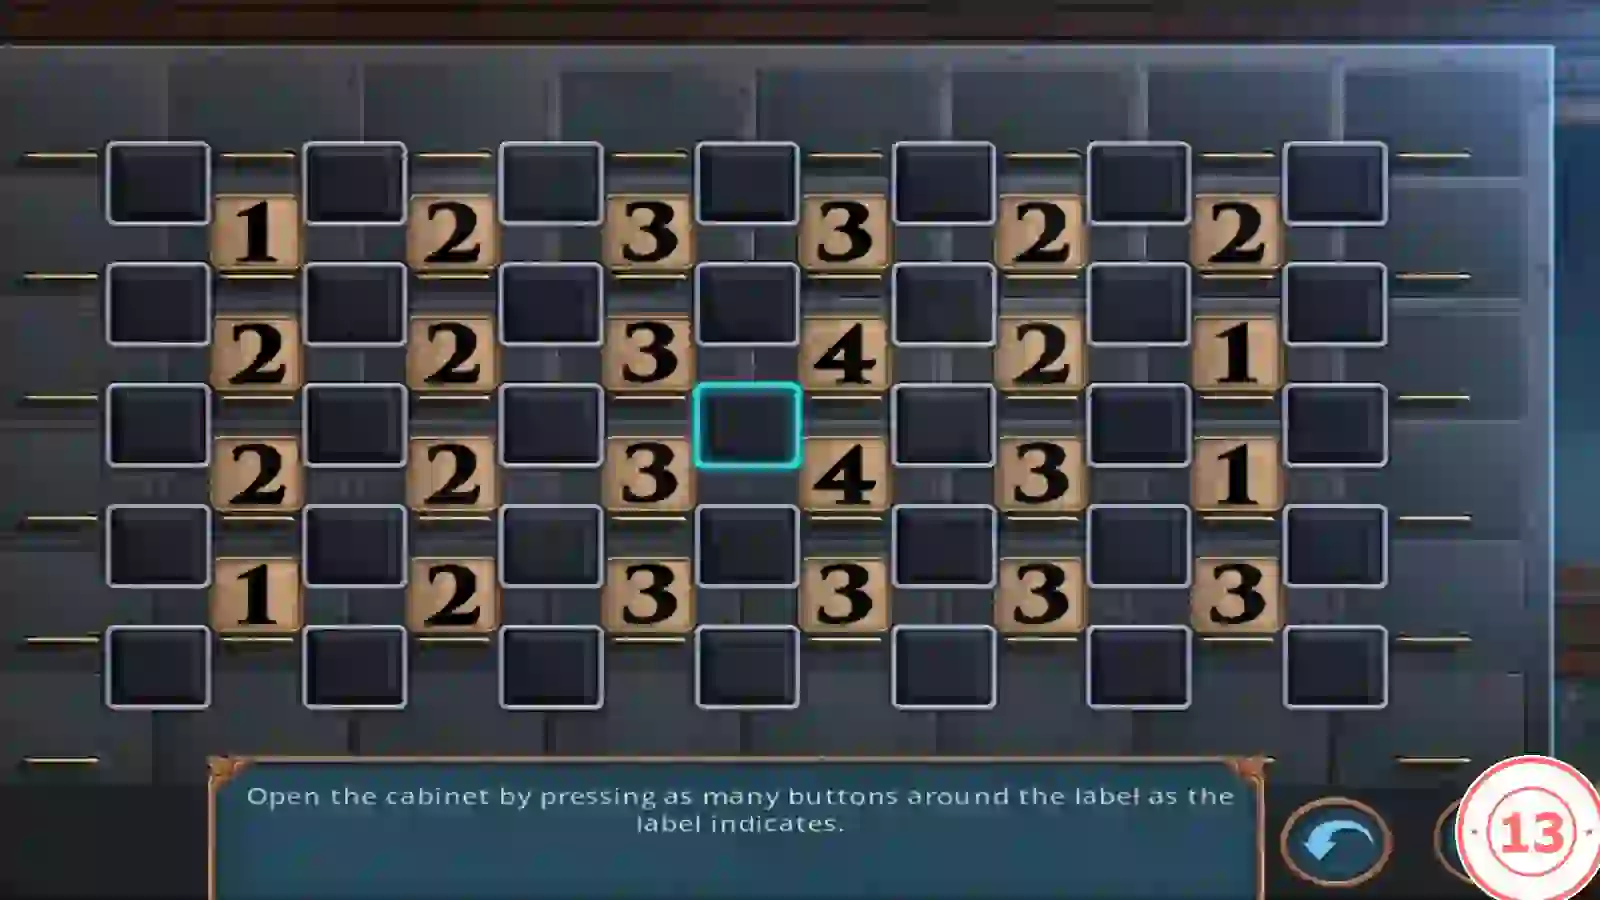
The office filing cabinet needs two label plates.
- Hook LABEL PLATE "10-J" out from under the classroom desk with the CURVED LAMP.
- Put "6-F" in the upper slot and "10-J" in the lower slot of the office filing cabinet.
- Task: "Open the cabinet by pressing as many buttons around the label as the label indicates." The buttons are in 5 rows of 7, and each number between four buttons says how many of them must be pressed. Recording solution (rows from the top, columns from the left): row 1 columns 4 and 6; row 2 columns 2, 3, 4, 5 and 7; row 3 columns 1, 4 and 5; row 4 columns 2, 3, 4, 5 and 6; row 5 columns 4, 6 and 7. The numbers were identical in both recordings checked: [1 2 3 3 2 2], [2 2 3 4 2 1], [2 2 3 4 3 1], [1 2 3 3 3 3].CODER1: 4,6 | R2: 2,3,4,5,7 | R3: 1,4,5 | R4: 2,3,4,5,6 | R5: 4,6,7
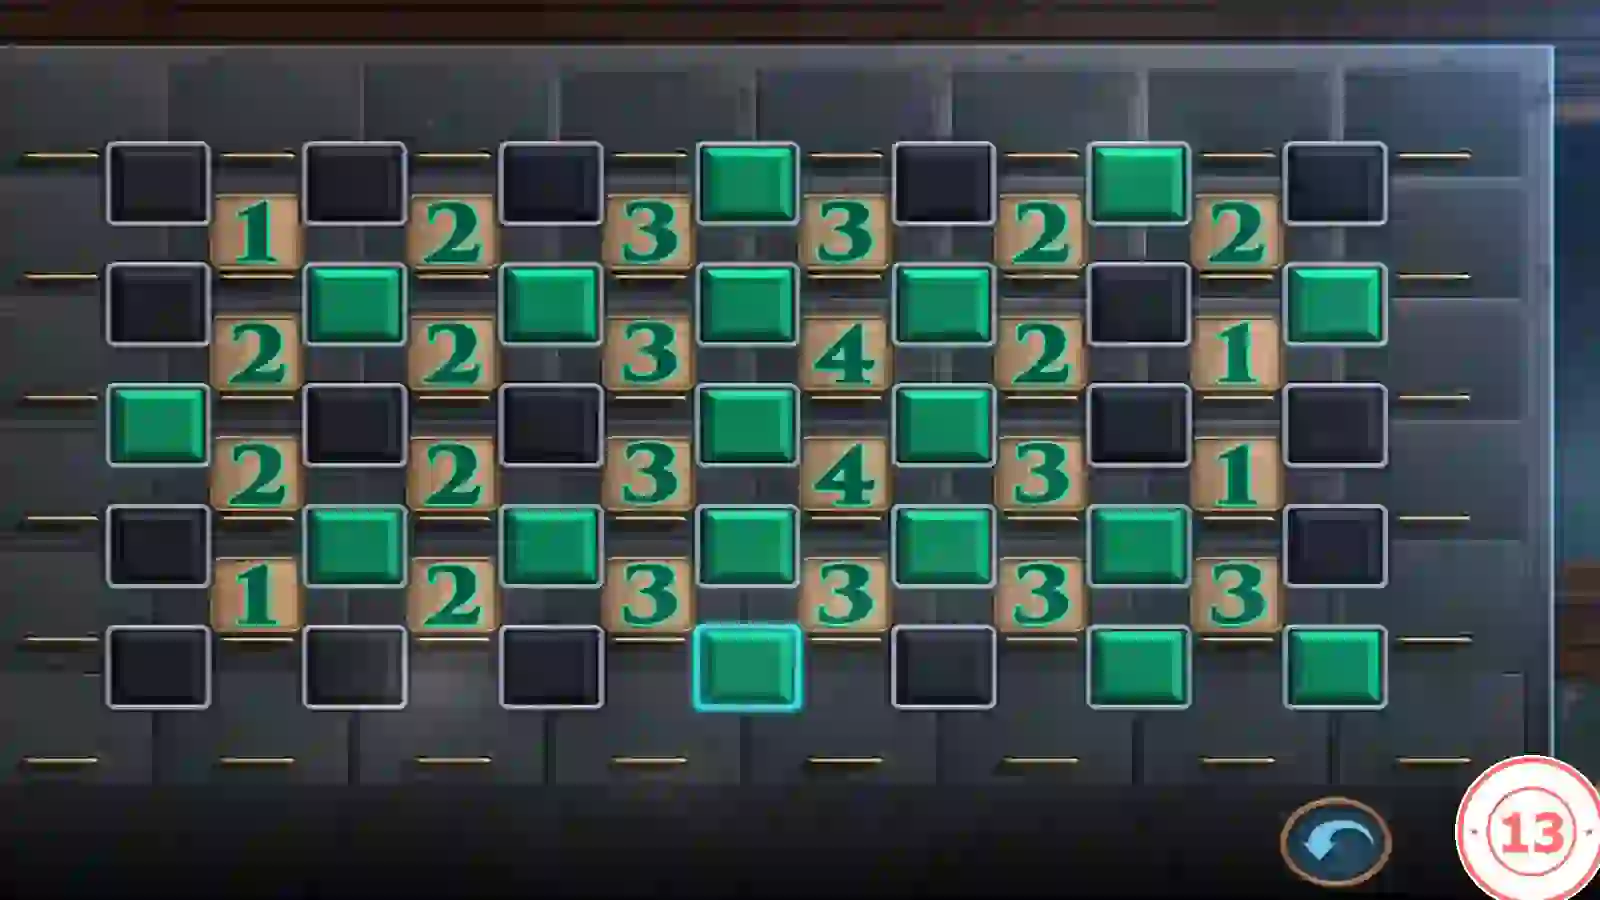
Recording solution with all 18 buttons pressed, matching step 3. - The drawer opens on a file about Nero Bayer, a boy whose father died and who wrote in his diary and played with a lighter. Read it and close it; Unfortunate Child unlocks. The killer confronts Sebille in the office, and a new task begins: "Stop the killer".
PUZZLE
Stop the Killer: Gear Chain
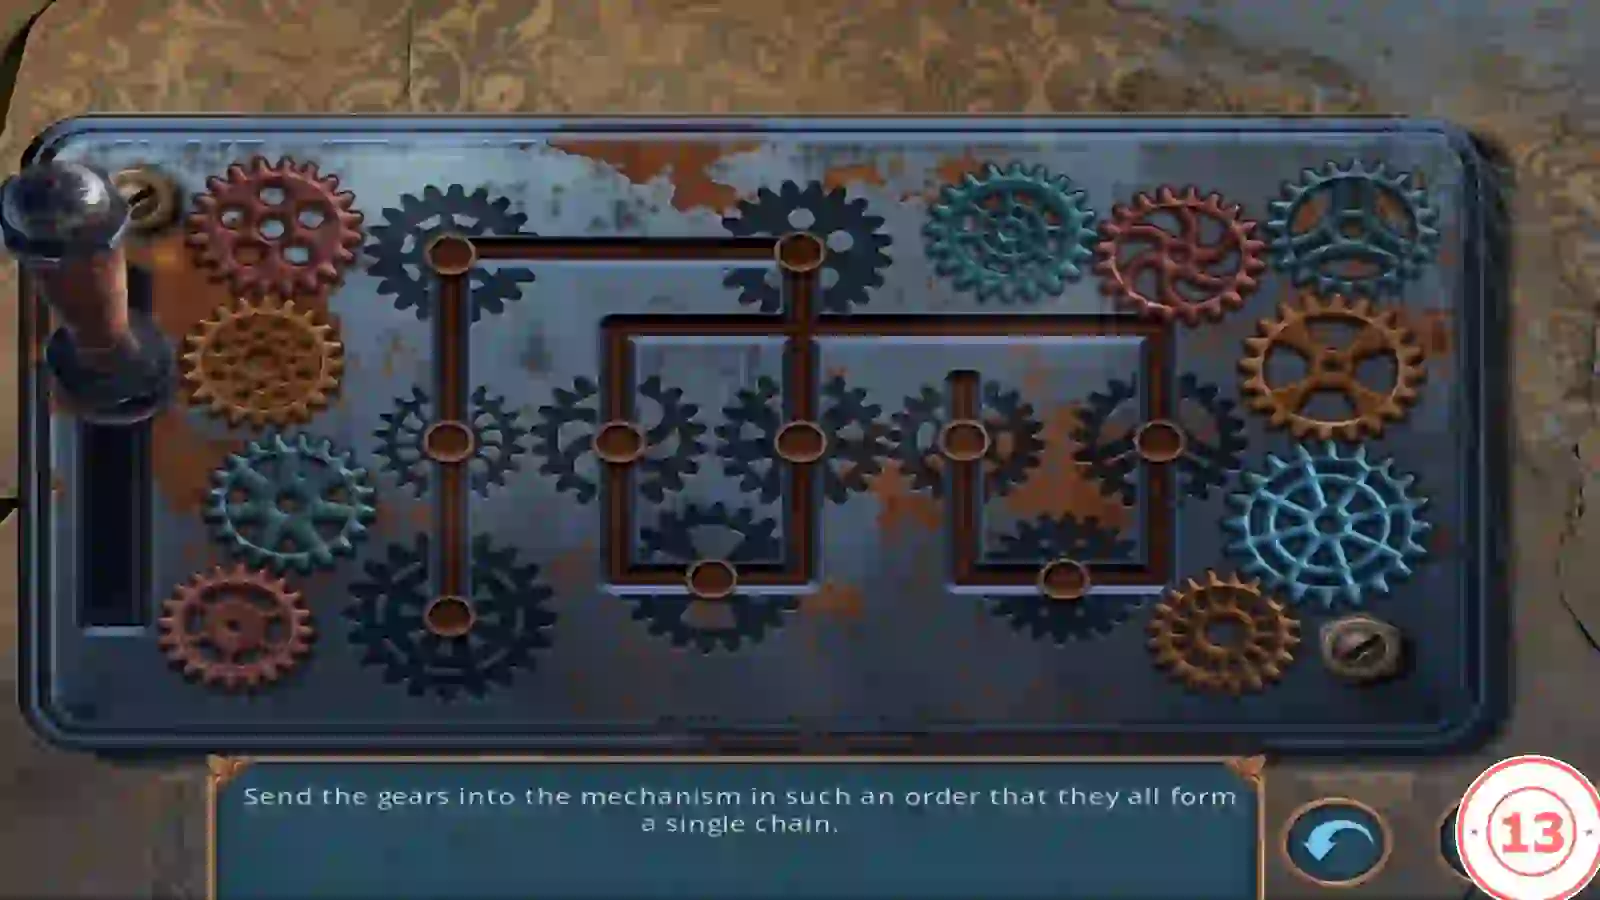
The killer has Sebille cornered in the office. The mechanism box on the central beam is your way to stop him, but its lever is missing.
- Check the mechanism on the central beam; its lever is missing.
- Take Sebille's orange SATCHEL from the floor, open it in the inventory and take the STILETTO.
- Insert the STILETTO in the lever socket to start the gear puzzle.
- Task: "Send the gears into the mechanism in such an order that they all form a single chain." Each peg shows a silhouette of its gear. Tapping a loose gear sends it to the entry peg at the lower left and pushes the gears already placed one peg further along. Send the gear for the far end of the track first and the lower-left gear last.
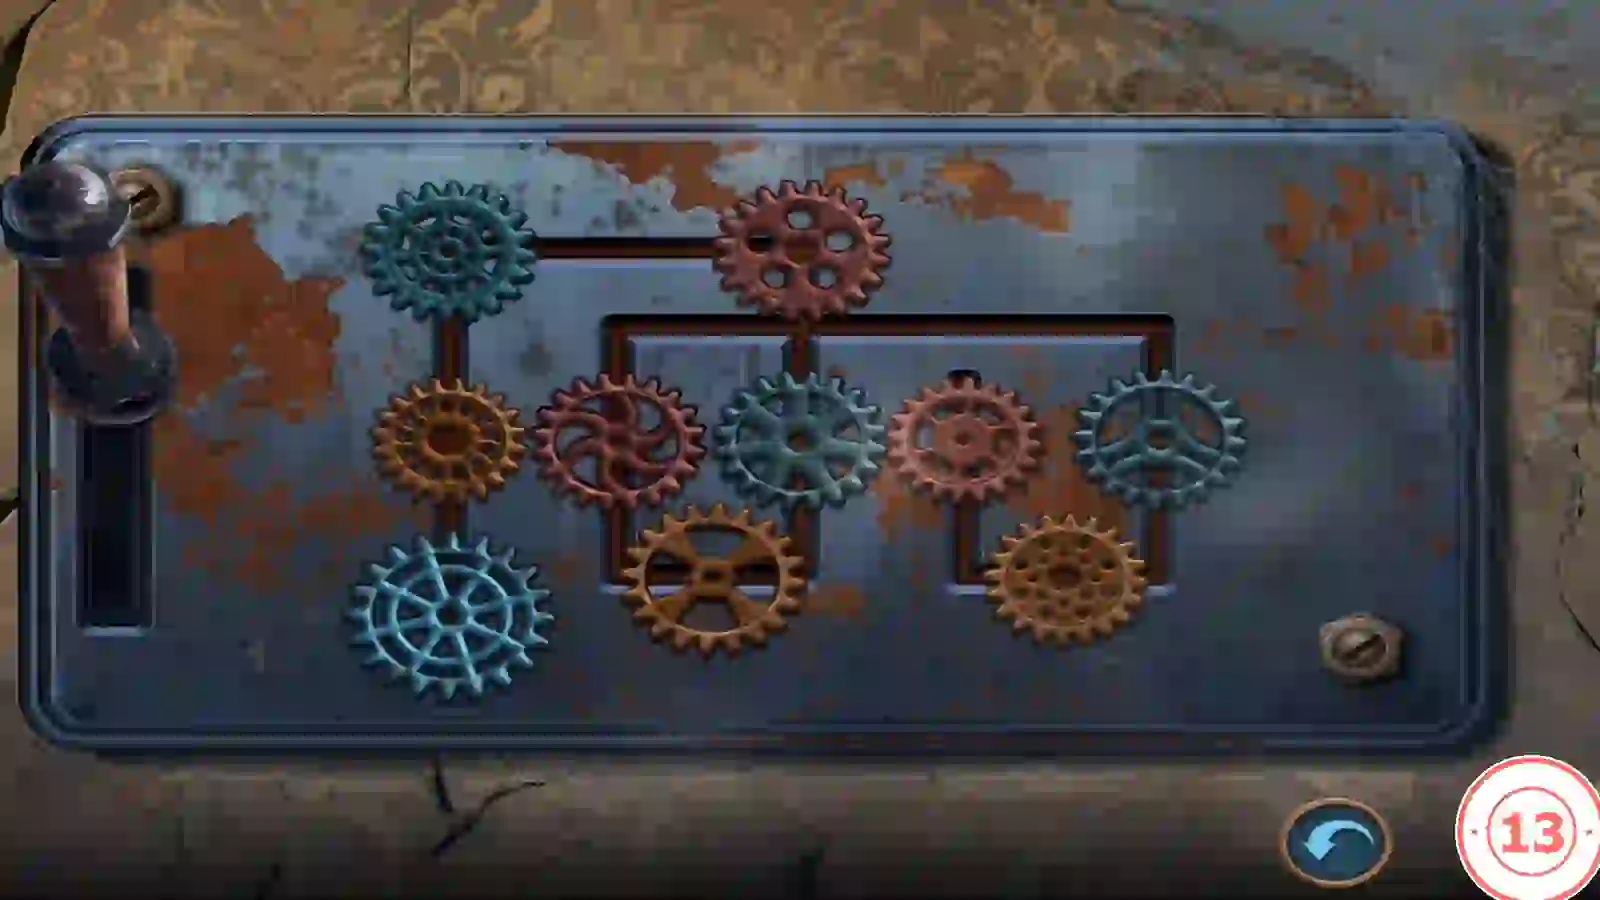
The finished chain in the recording. The large light-blue gear at the lower left was sent last.
ENDINGS
Decision Points and Endings
The episode has five decisions worth up to 13 points. After the final puzzle, a summary shows your picks and three ending panels marked 0, 4 and 10.
- After the gears, the decision summary shows your choices: Scold or Reassure Sebille (0/1); Do nothing, Push Sebille or Use magic (0/2/4); Leave the spirit or Ask about mother (0/1); Refuse to examine or Examine the Locked Room (0/6); Reflect on a lost moment or Stay confident (0/1).
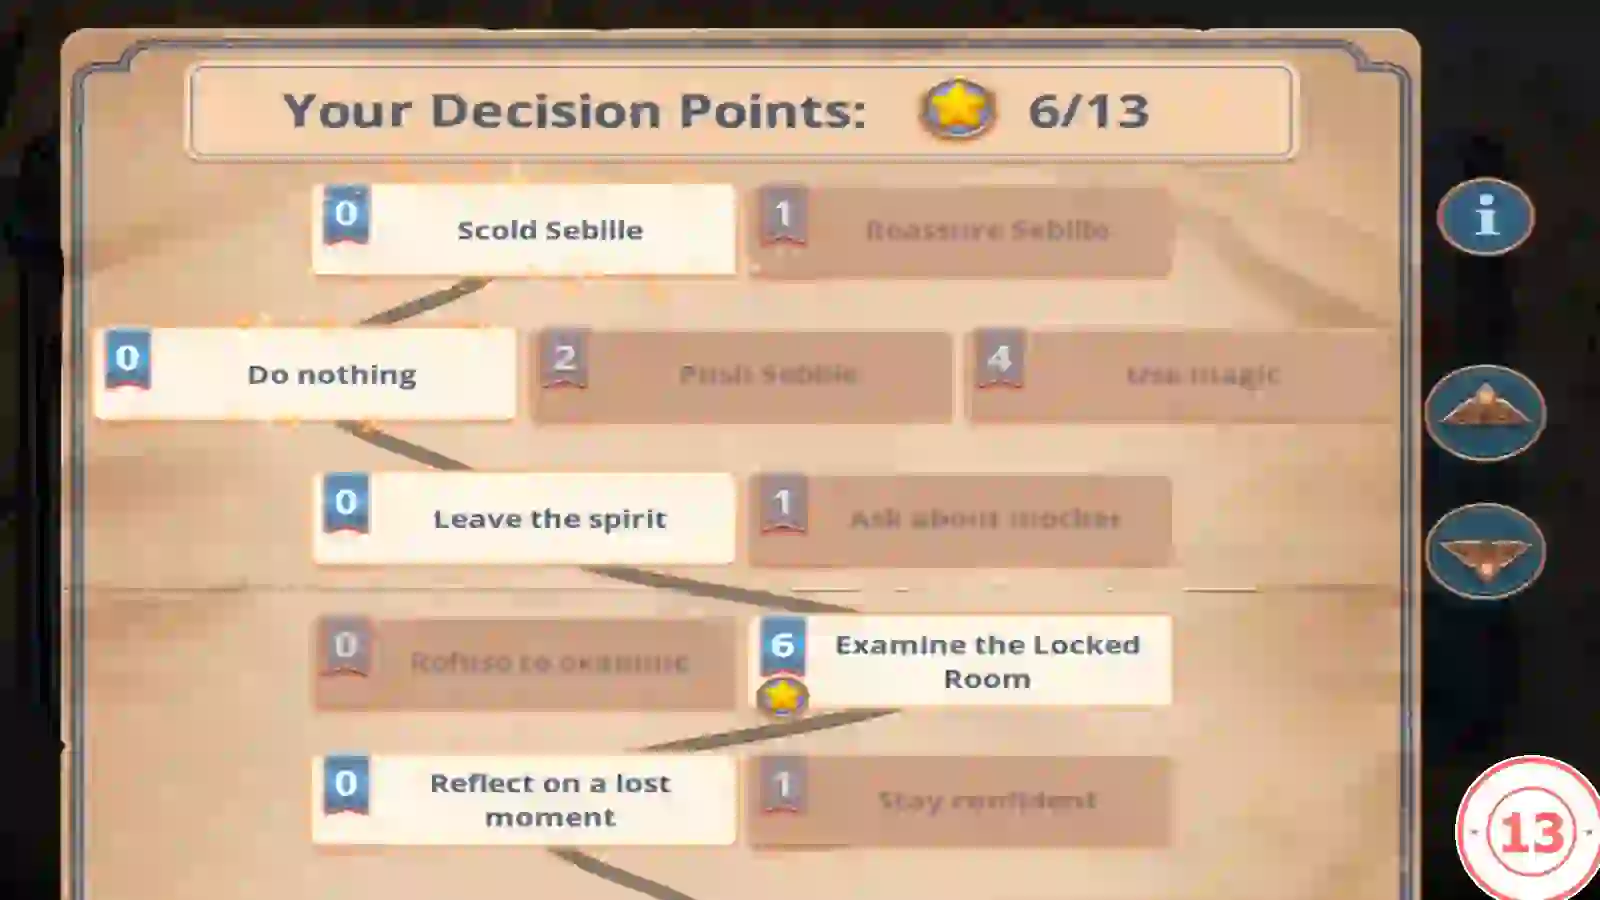
The main recording's summary: only the locked room was paid for, giving 6 of 13 points. - Ending marked 4: the main recording scored 6 points (it paid only for the locked room) and got this panel. The killer is stopped and tied up, Sebille has already called the police, and the two of you leave to meet them as a siren sounds. The episode closes on the Season 1: Episode 2 card.
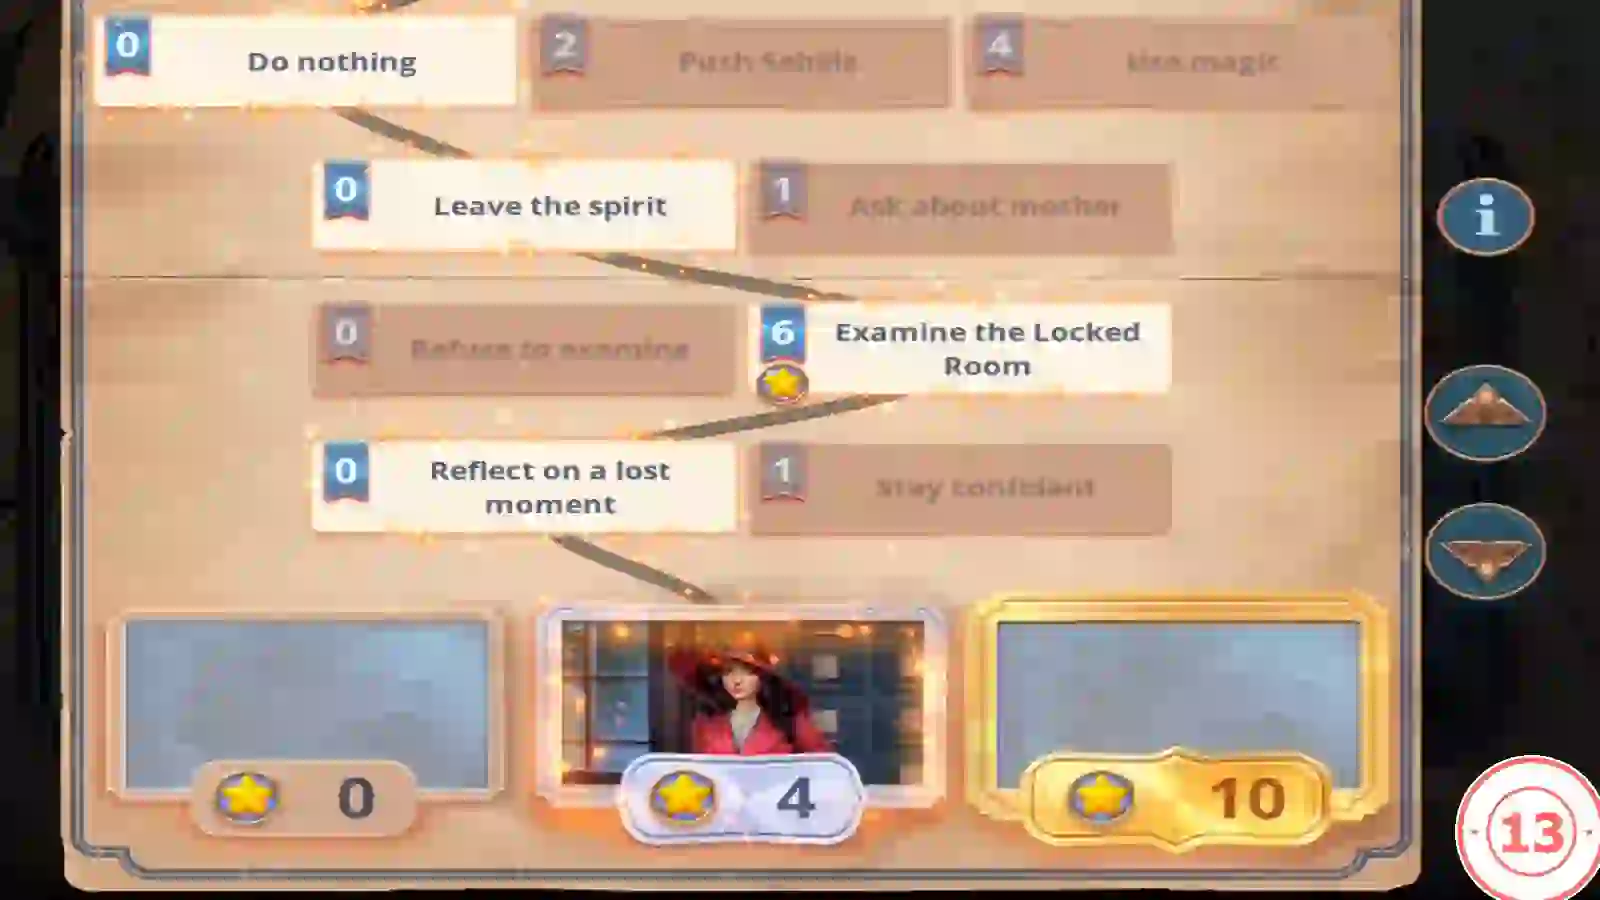
With 6 points the panel marked 4 is reached. The 0 and 10 panels stay frosted. - Ending marked 0 (expected, not observed): choosing every free option, including "No time for that." at Decision 4, should total 0 points, which is expected to lead to this panel. Neither recording made these choices or plays this ending, so its cutscene is not described here. The two recordings suggest that the marks are minimum totals (6 points gave the 4 panel and 13 gave the 10 panel), so totals of 1 to 3 would probably lead here too; that was not observed either.
- Ending marked 10: the second recording took every paid option (Reassure Sebille, Use magic, Ask about mother, Examine the Locked Room, Stay confident) for 13 points. The same finale plays, followed by an extra scene outside the shelter: a police officer says they searched the building but the culprit got away, and Sebille wonders how he freed himself from the ropes. If the marks are minimum totals, this ending needs at least 10 points, which is impossible without the locked room's 6.
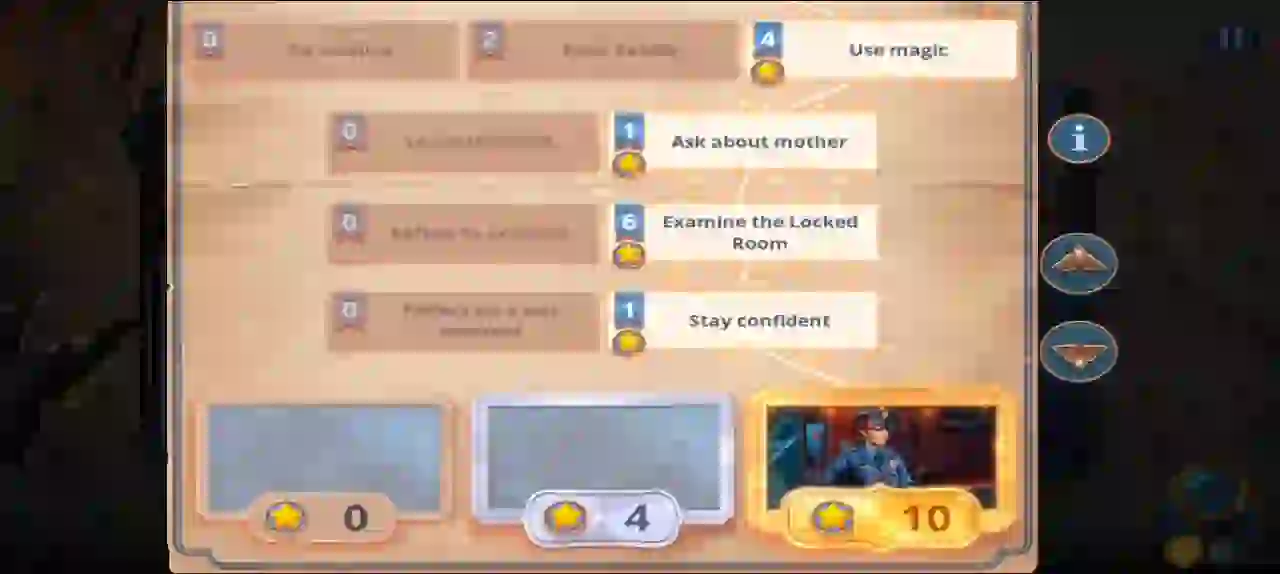
The second recording took every paid option for 13 points and unlocked the panel marked 10.
ACHIEVEMENTS
Achievements
Achievements seen during the episode, in the order they appear.
- Watchful Spirit (finish a hidden-object scene without hints), Phantom Epiphany (finish one in one minute), Magical Precision (no wrong taps in one), Instant Vision (find 3 hidden objects in 3 seconds), Flash Solution (complete a mini-game in one minute), You Can't Hide (follow the killer's trail), Trusted Guide (5 mini-games without skipping), Bang-Bang! (obtain an item with the toy gun), Stubborn Soul (10 mini-games without skipping), Lost Childhood (search the bonus location), Remember (view the slides), Ghost Tracker (3 hidden-object scenes without hints), Unfortunate Child (learn about the child's experiences). Another achievement during the differences puzzle was not fully readable.