Sebille's Parlour: First Finds
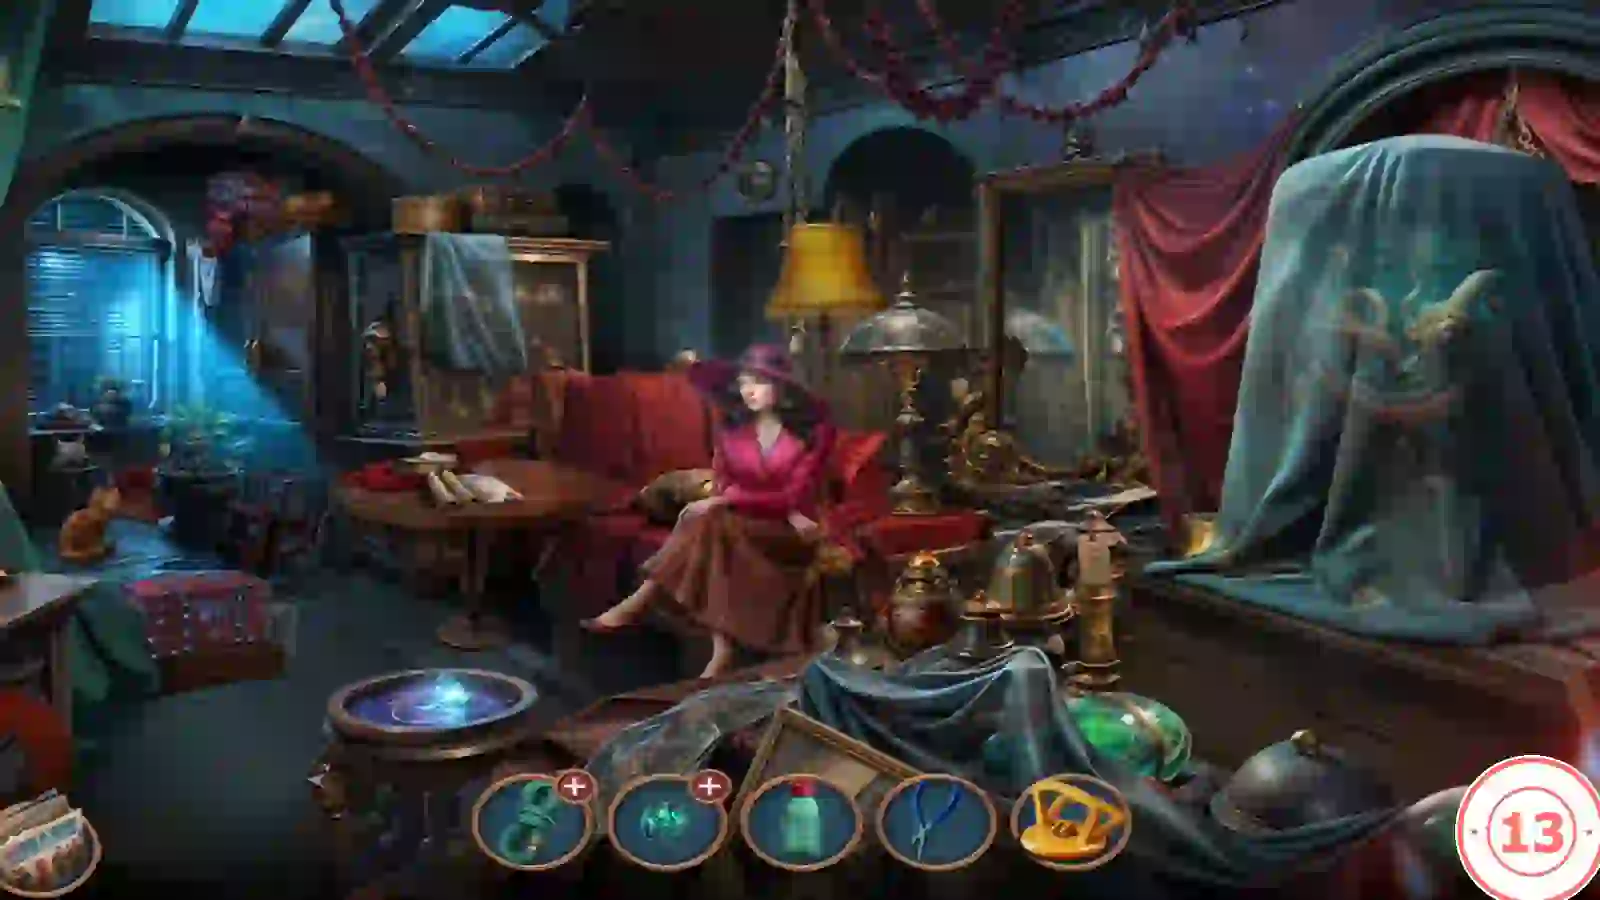
Episode 2 opens in Sebille's antique parlour. She managed to grab the killer's map, and your first task is "Find out where the killer went". Your inventory starts empty.
- Zoom into the tall mirror to the right of Sebille and take the coiled ROPE.
- Zoom into the cat bed on the floor at the left. Take the glowing green AMULET and the purple PERFUME atomizer.
- Zoom into the round table beside Sebille, where a map lies in front of a glass cabinet, and take the green glass BOTTLE.
- Zoom into the flower box in the front centre. Spray the PERFUME on the bees to drive them off, then take the PLIERS and the yellow SUCTION CUP. The box lid has a round socket and its latch will not open yet.
- Zoom into the round table again. Attach the SUCTION CUP to the cabinet glass, slide the pane aside and take the SKULL ORNAMENT.
- Return to the mirror and place the SKULL ORNAMENT in the round socket on its frame. A hidden-object scene opens.
Matching Items Hidden-Object Scene
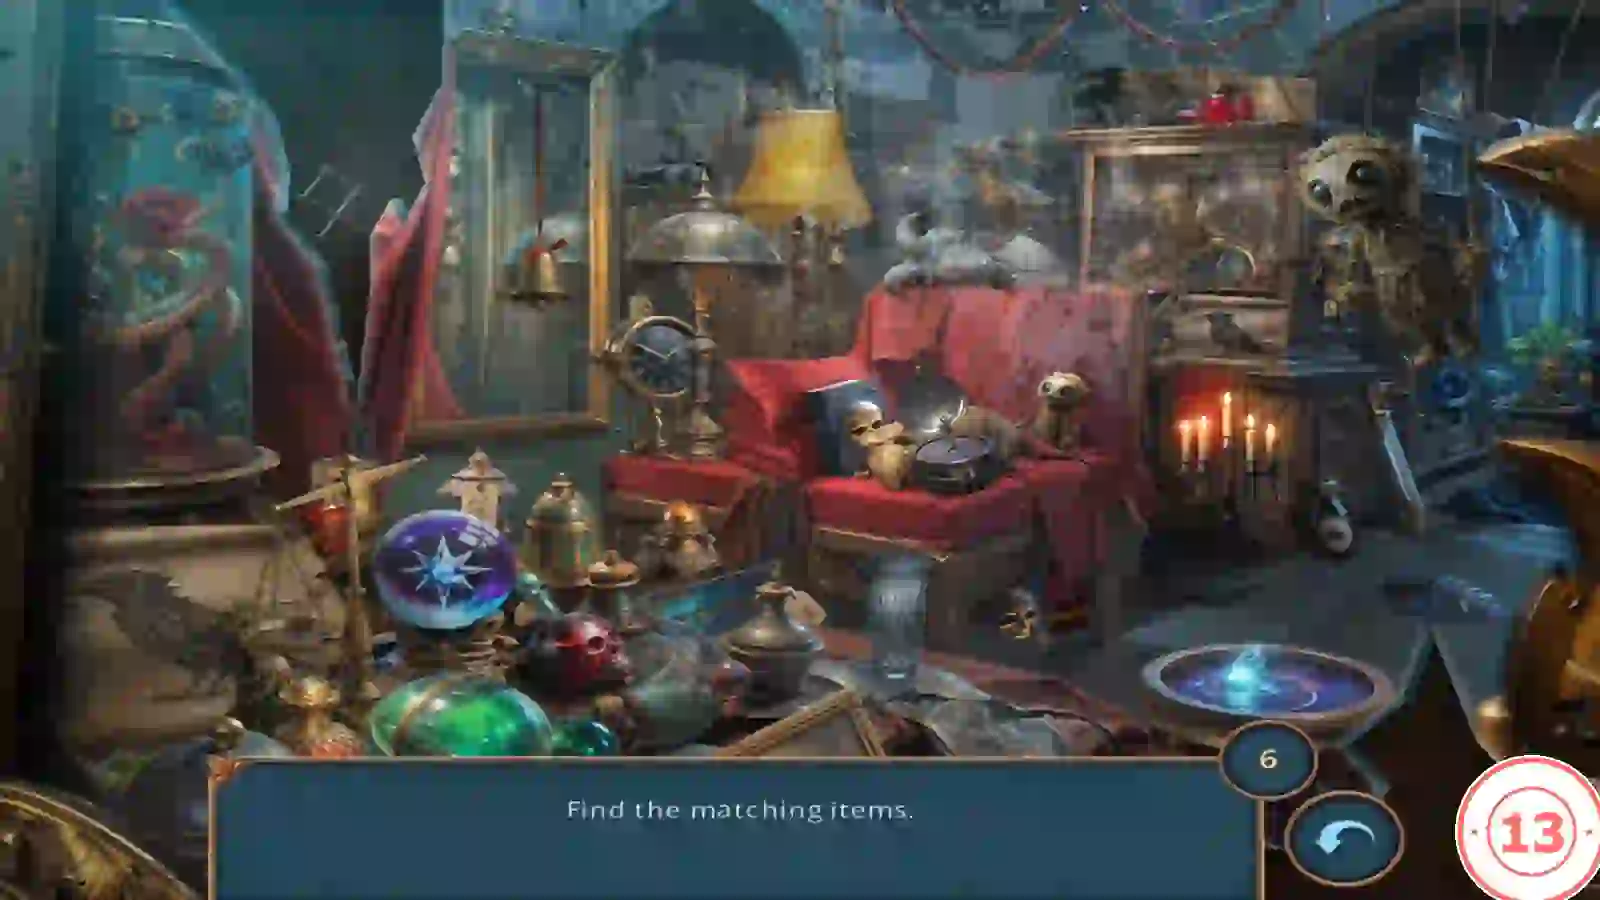
A hidden-object scene with the task "Find the matching items." Six pairs must be found; the counter shows how many remain.
- Each pair is an object and a second copy of it somewhere else in the scene. Tap both halves of a pair to clear it. The six pairs are: (1) the gold desk clock beside the lamp, left of the armchair, and the small gold clock on the lower shelf of the glass cabinet behind the armchair; (2) the puppet doll hanging at the upper right and the small doll sitting on the right side of the armchair; (3) the dark object with a round silver end lying on the shelf just left of the yellow lampshade, and the same object standing upright on the floor to the right of the candelabra; (4) the blue book with a gold skull on the armchair cushion and its smaller copy under the front of the armchair, behind the glass tumbler; (5) the large crystal ball at the lower left and the small crystal ball on a shelf of the blue cabinet at the right edge, beside the potted plant; (6) the large crow picture at the lower left and the small crow picture on top of the candle cabinet to the right of the armchair.
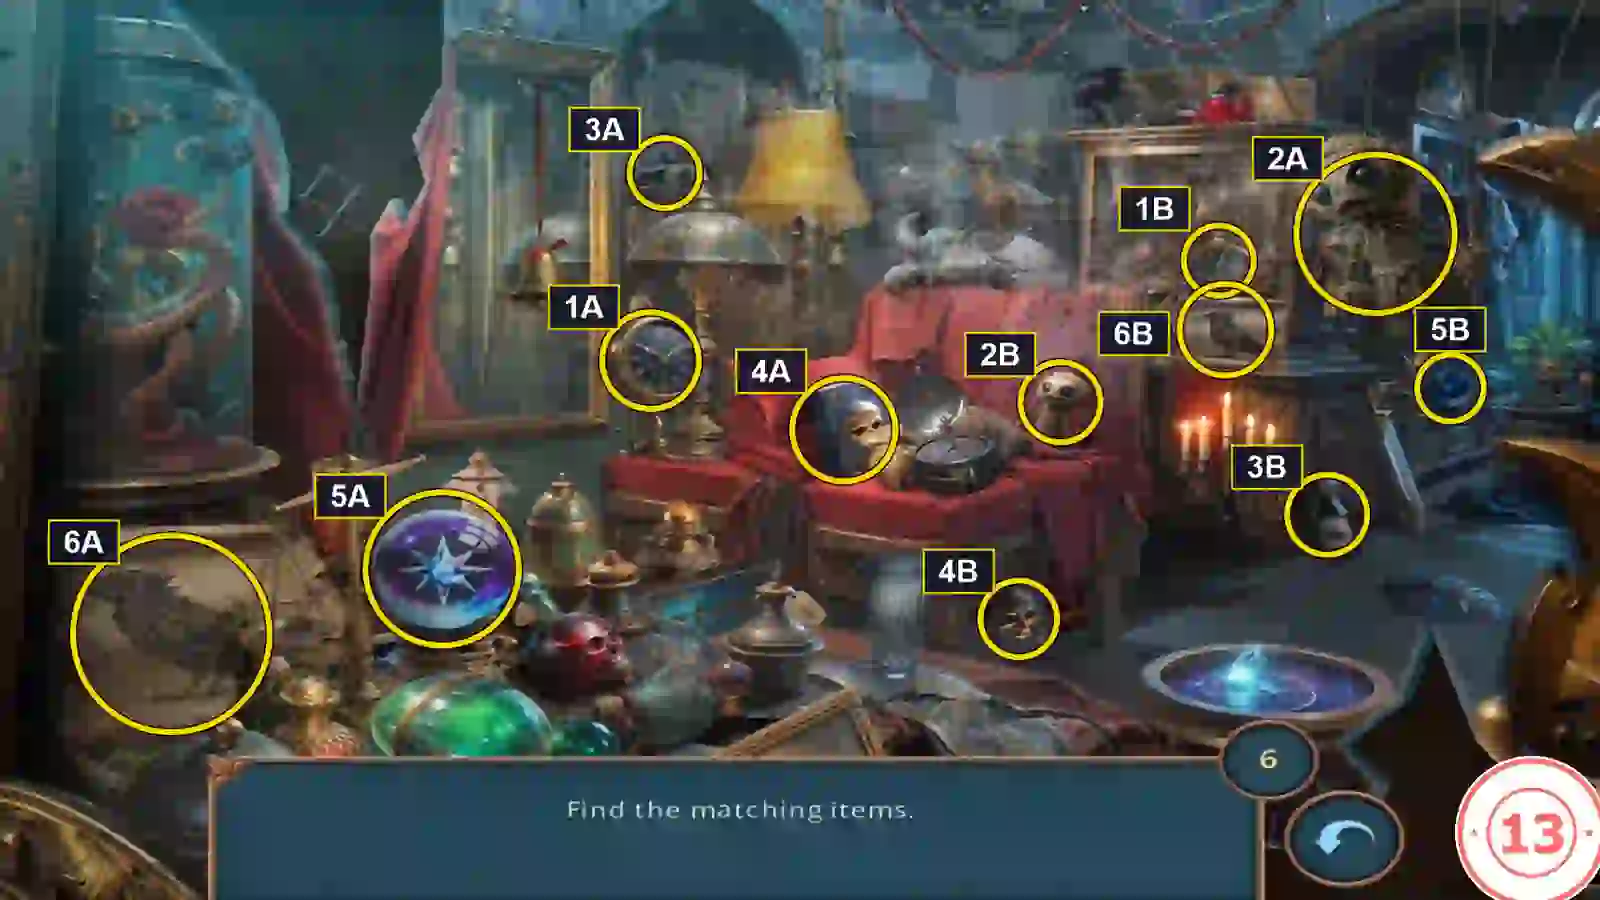
All six pairs marked: tap both objects with the same number to clear that pair. For example, 3A on the shelf beside the lamp matches 3B standing on the floor by the candelabra. - Collect the reward, a VELVET CUSHION. Finishing without hints, within one minute and without wrong taps earns the Watchful Spirit, Phantom Epiphany and Magical Precision achievements.
Cat Bed and Red Chest
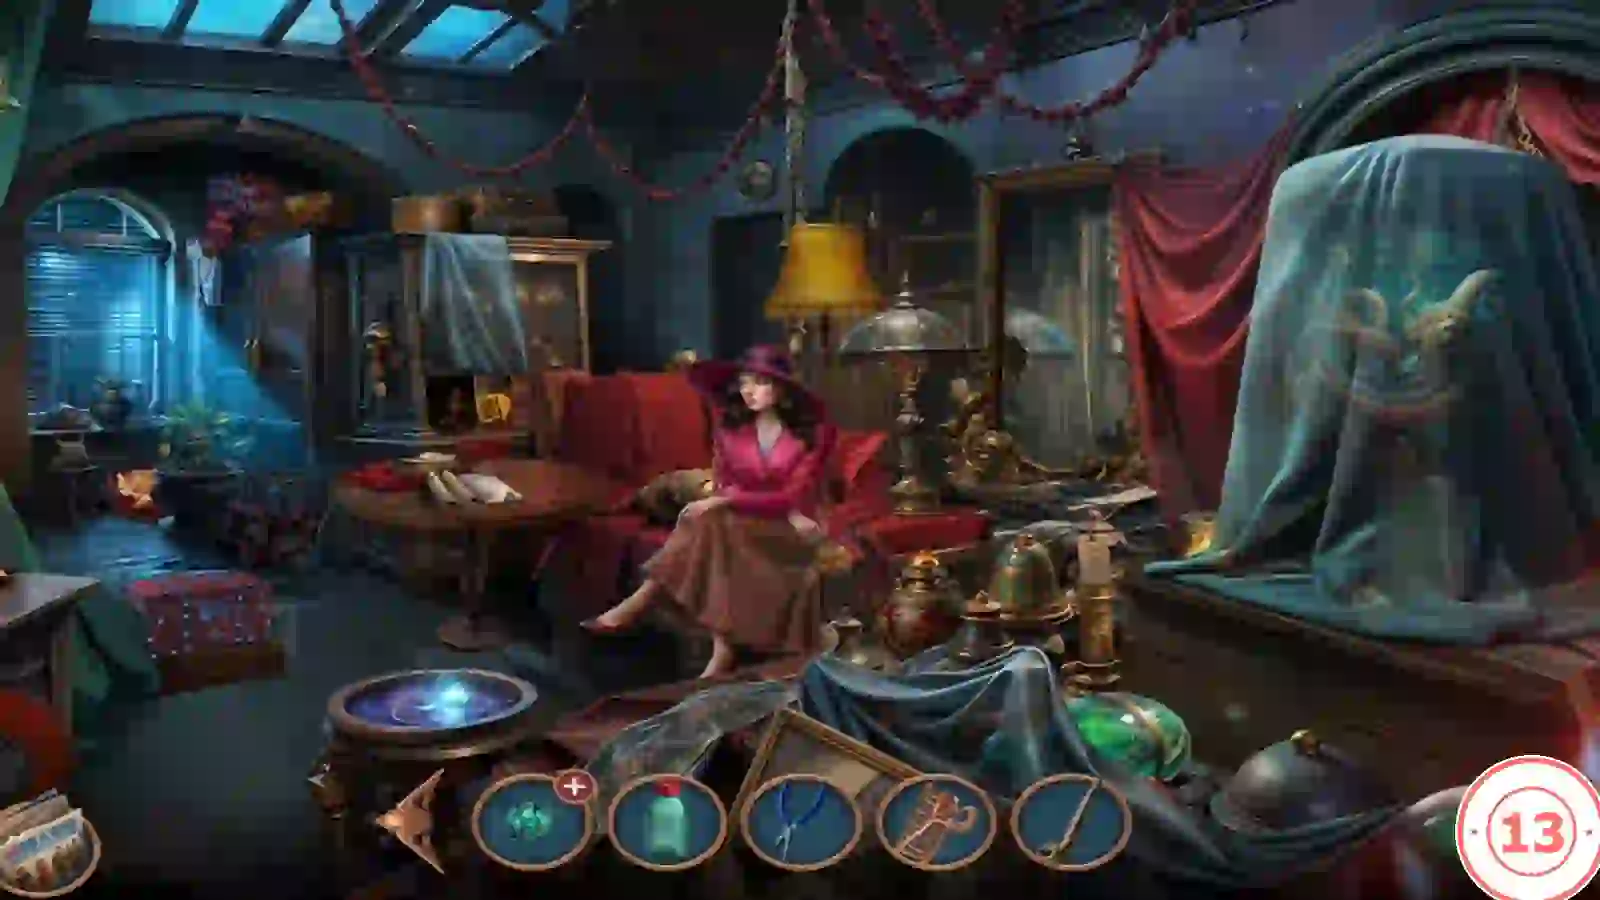
The cat is still lying in its bed and guards what is under it.
- Place the VELVET CUSHION in the cat bed. The cat moves over; take the PIPE KEY and the copper HAIR CLAW CLIP from the floor.
- Zoom into the red chest on the bench at the left. Use the PIPE KEY on the butterfly lock and take the BLOOD INK.
Mirror Differences
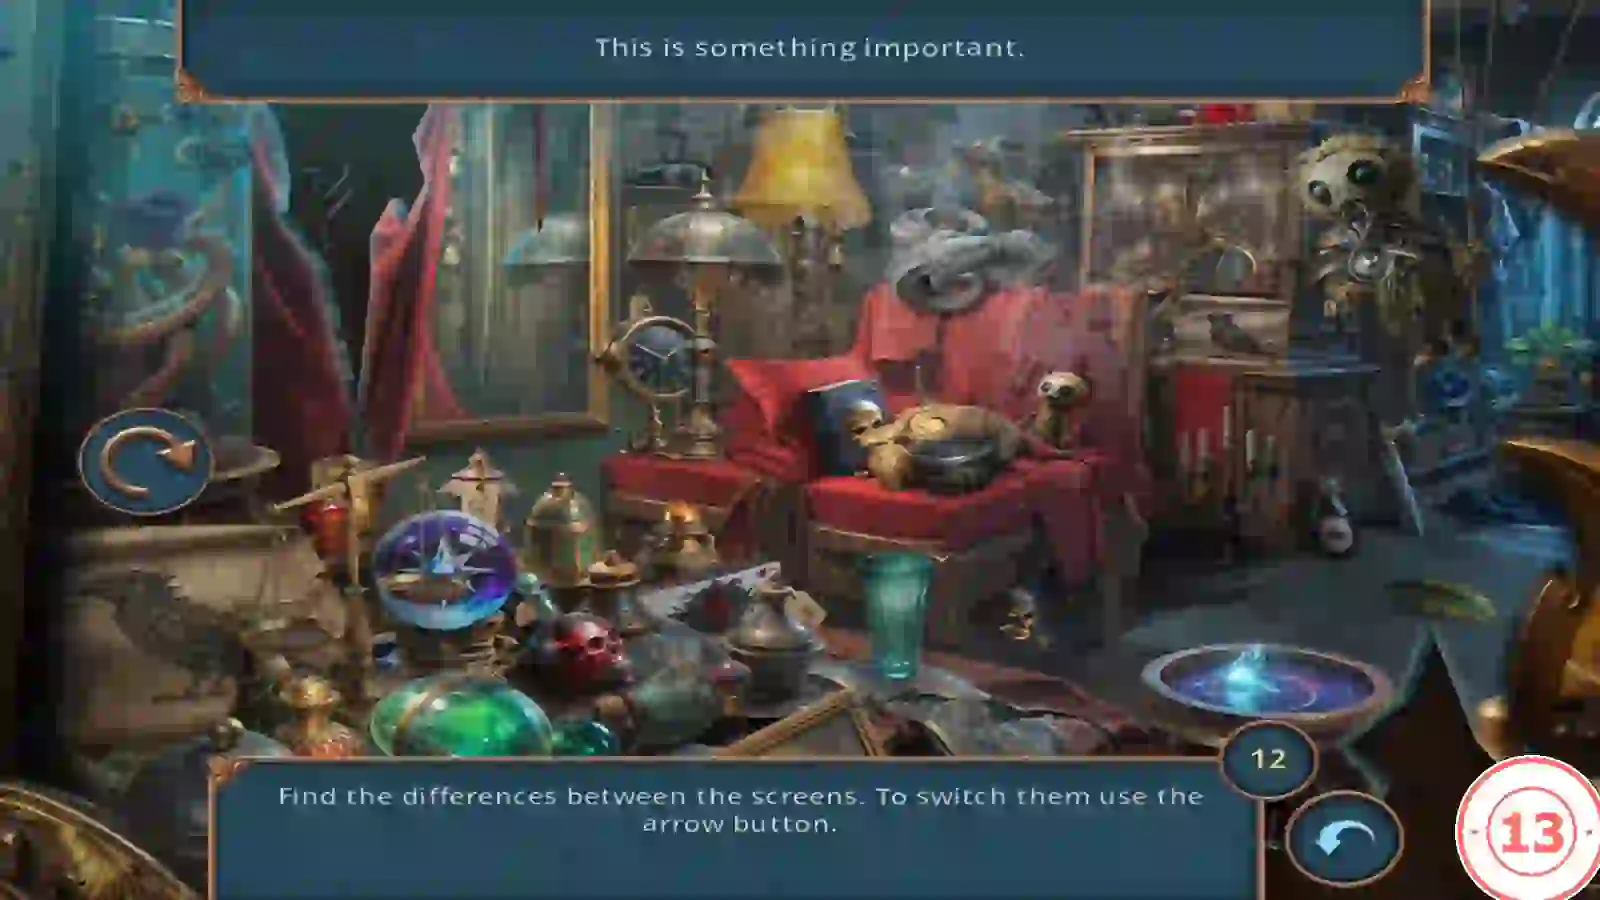
After the chest opens, Sebille says "This is something important." and the mirror glows blue.
- Tap the glowing mirror to start the puzzle: "Find the differences between the screens. To switch them use the arrow button."
- Find all 12 differences. Only one version of the room is shown at a time; use the round arrow button at the left to switch and compare, then tap each changed object. The 12 changes are: (1) the rose in the glass jar at the far left, blue or red; (2) the carved symbol on the dark wall left of the mirror, which changes shape; (3) the brass bell on a red cord in front of the mirror, missing in one version; (4) the grey horned figure lying on the back of the armchair, a different creature; (5) the chest ornament of the hanging puppet, silver or gold; (6) the round metal case on the armchair, lid closed or open; (7) the candles on the candelabra right of the armchair, unlit or lit; (8) the sword leaning against the cabinet at the right, plain or ornate hilt; (9) the brass scale pan in front of the crystal ball, missing in one version; (10) the flat box behind the bronze jars on the table, red round emblem or teal lid; (11) the glass tumbler in front of the armchair, green or clear; (12) the feather on the floor at the right, yellow-green or blue. In the recording, all 12 were tapped while the version with the blue rose was showing.
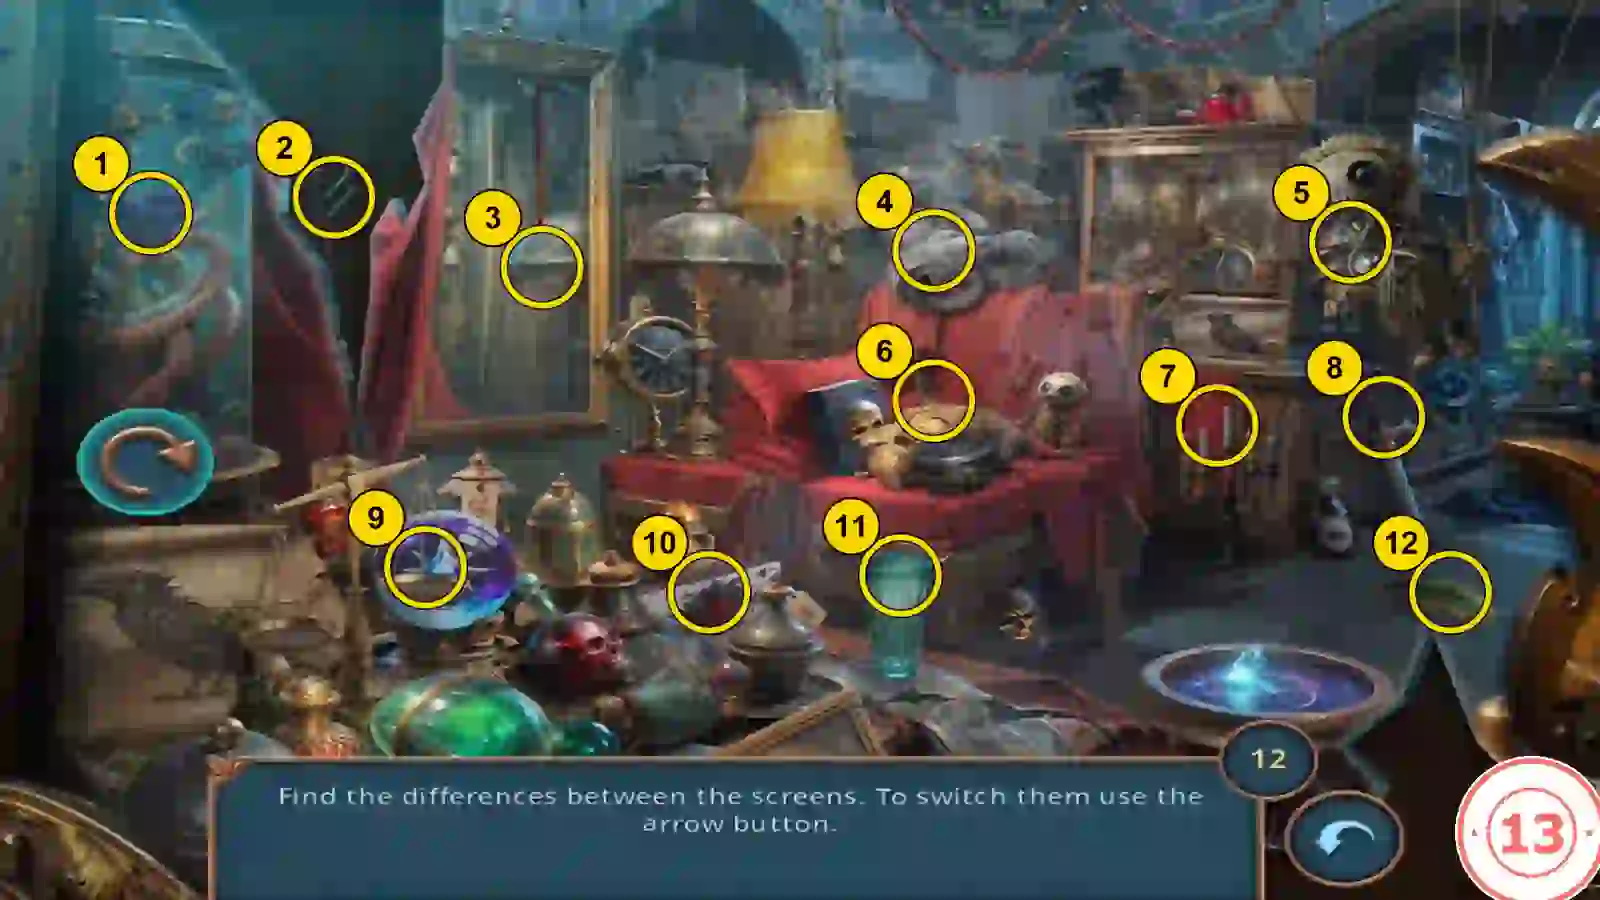
All 12 differences, numbered as in the list above, marked on the blue-rose version the recording tapped. Rings 3 and 9 mark where the bell and the scale pan appear in only one version. - Collect the CAT FIGURINE.
Crafting the Pendant
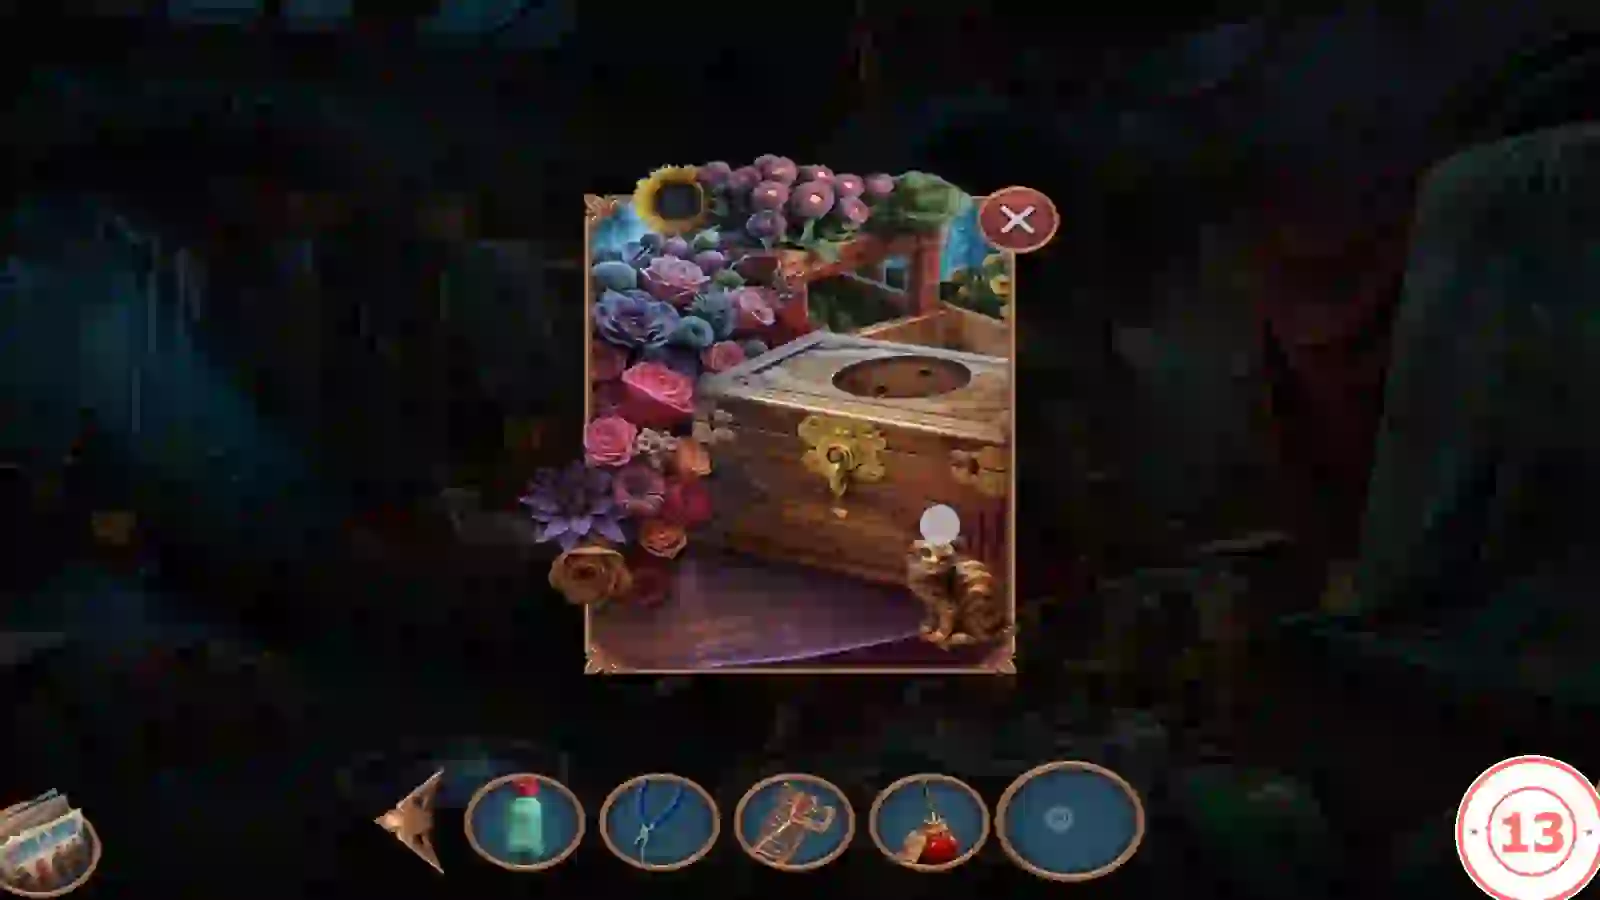
The cat figurine fits the flower box, and the map on the table needs ink and a pendant.
- Place the CAT FIGURINE in the socket on the flower-box lid. A drawer opens; take the CHAIN.
- Zoom into the round table and place the BLOOD INK beside the map.
- Open the AMULET in the inventory, attach the CHAIN and close the link with the PLIERS to make the PENDANT.
- Return to the round table and hang the PENDANT over the map.
Crystal Path Puzzle
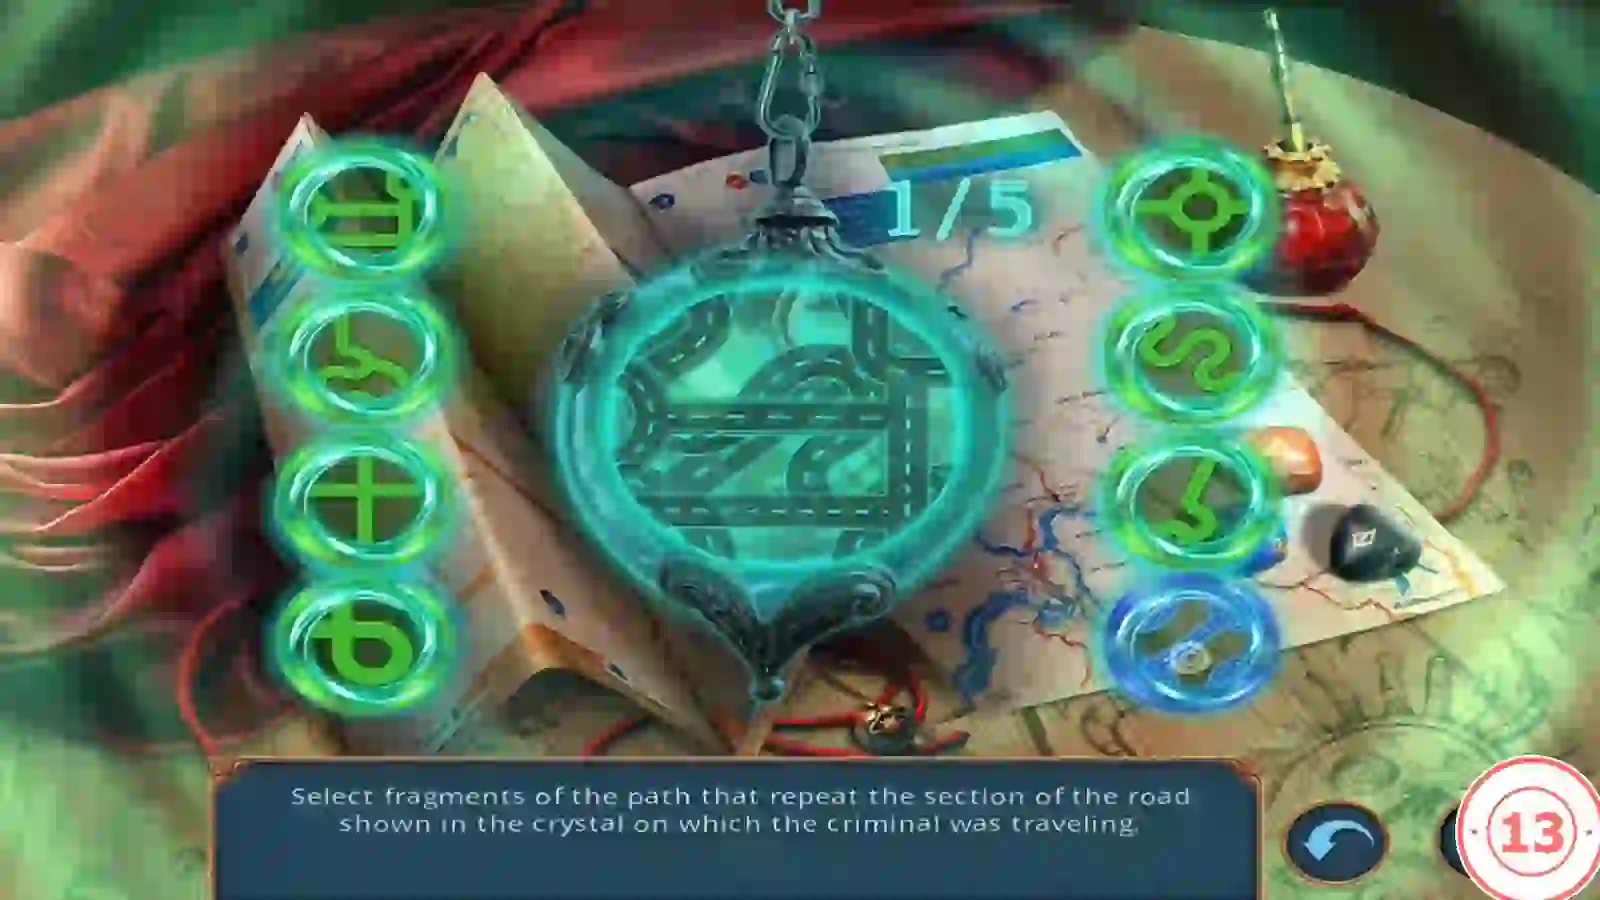
Task: "Select fragments of the path that repeat the section of the road shown in the crystal on which the criminal was traveling." There are five rounds.
- Eight glowing road fragments sit in two columns of four, left and right of the crystal. Each round the crystal shows a tangle of road. Pick every fragment whose shape appears in that tangle; when the set is complete the counter advances to the next round.
- The crystal patterns came up in a different order in the two recordings checked, so match shapes rather than copying round numbers. Main recording example, columns counted top to bottom: round 1 right 4 and right 2; round 2 left 1, left 2 and left 4; round 3 right 1 and right 4; round 4 left 1, right 2 and right 3; round 5 left 3 and right 2. Check each against your crystal before tapping.
- Finishing within one minute earns Flash Solution.
Comfort or Snap at Sebille
The map reveals the killer's trail. The first decision appears during the conversation.
- Decision 1: "Reassure Sebille" (35 coins, +1 decision point) or "Get frustrated" (free, 0 points; Scold Sebille on the final summary). Every decision has a free option; the paid ones add decision points, and your total decides which ending plays (see Decision Points and Endings in Part 4).
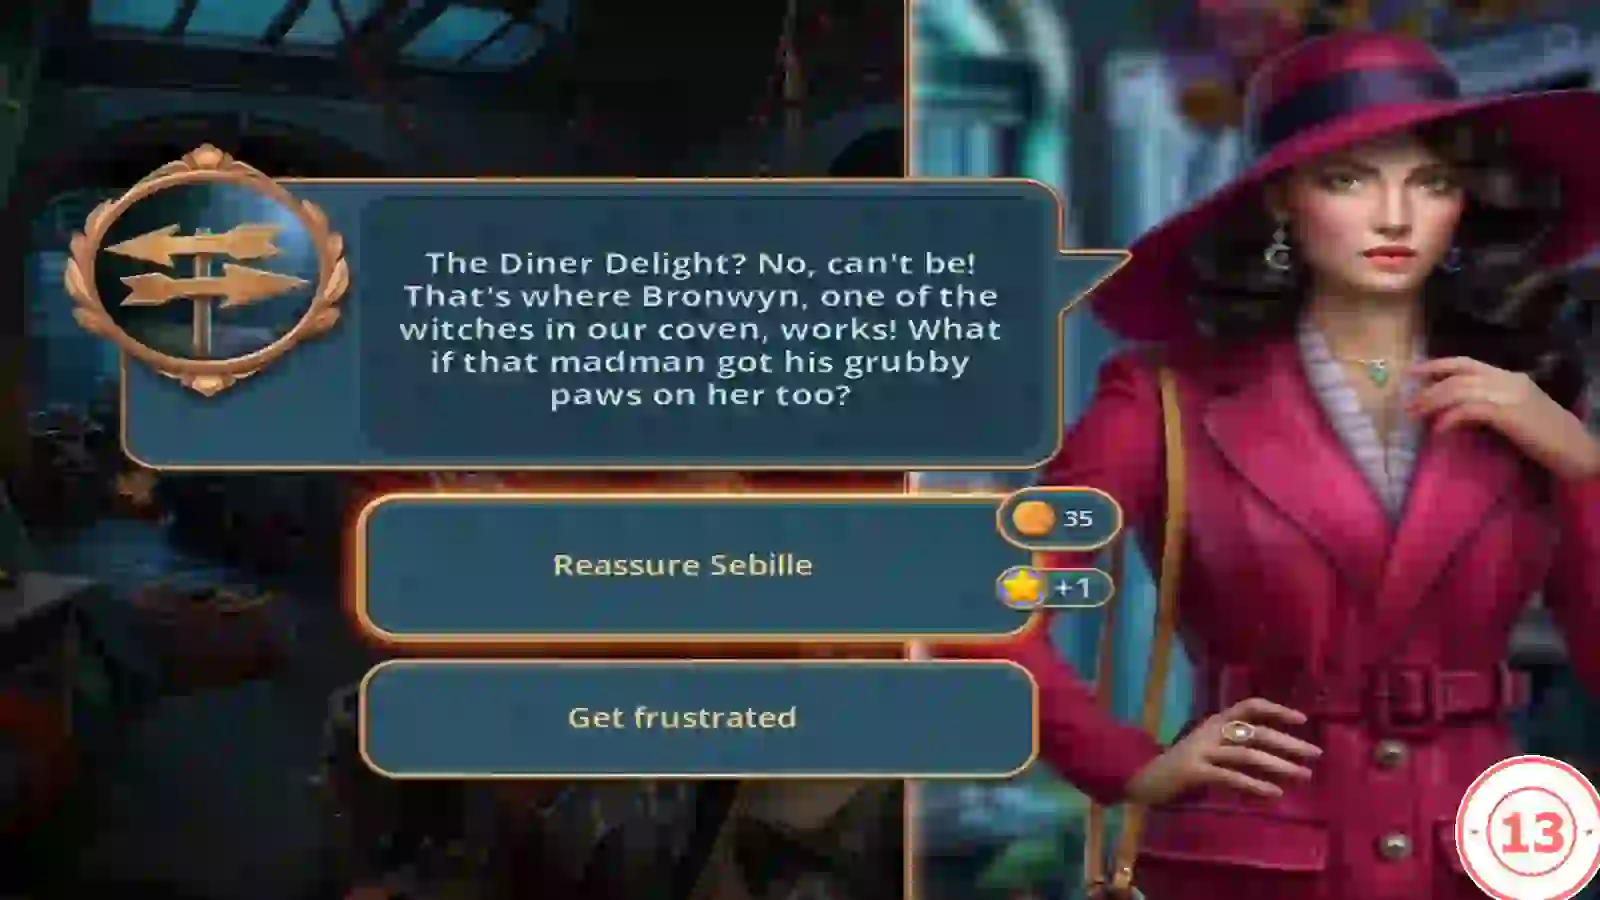
Decision 1: Reassure Sebille costs 35 coins and adds 1 point; Get frustrated is free. - The task completes and you arrive outside the Diner Delight with a new task, "Find Bronwyn". The You Can't Hide achievement unlocks.