Wake Up in the Holding Cell
You start locked in a police holding cell with only your notebook. Your first task is to get out of the cell.
- Tap the bag lying on the floor beside the table and stool. Take the paper sheet and the zodiac disc.
- Tap the small cabinet next to the bars. Take the purple case (it holds a welding mask) and the razor blade.
- Use the razor blade on the bag's stitching. The bag opens into a hidden-object scene.
Hidden-Object Scene: The Writer's Bag
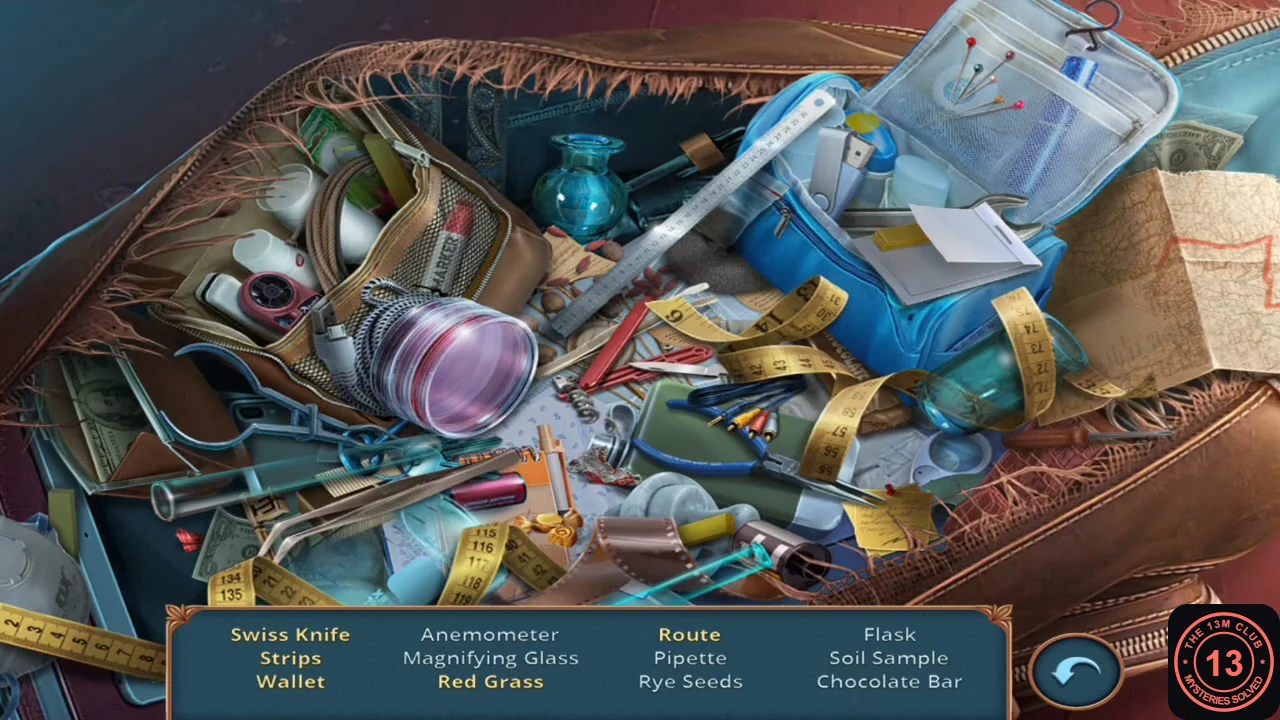
Find the 12 listed items: Swiss Knife, Strips, Wallet, Anemometer, Magnifying Glass, Red Grass, Route, Pipette, Rye Seeds, Flask, Soil Sample and Chocolate Bar. Highlighted names need an extra action before they can be collected. Some versions show a PLAY MATCH-3 switch on hidden-object scenes; it lets you play a match-3 board instead.
- Route: take the folded map paper at the right edge of the scene.
- Red Grass: tap the notepad with the pencil. A drawing of red grass appears on it; tap the drawing.
- Wallet: tap the dollar bill at the top right, beside the blue toiletry bag. It flies into the wallet at the left edge of the bag; then tap the wallet to collect it.
- Swiss Knife: the red pocket knife lies in the middle of the bag. Tap it to fold out its blade, then tap it again to collect it.
- Strips: take the yellow sticky strips from the notepad inside the open blue toiletry bag (top right of centre).
- Find the remaining plain items. When the list is complete you receive the Little Hammer.
Decision 1: Blackthorn's Offer
The Sheriff and Eldred Blackthorne offer to let you go if you agree to help them. This adventure has four story decisions. Each one has a free answer worth 0 decision points and one or more paid answers that cost coins or a key and award decision points. The total (out of 12) decides how much of the final epilogue you see; see Decision Points and Endings at the end of this guide. In the recordings checked, Decisions 1, 2 and 4 continue with the same gameplay whatever you choose; Decision 3 decides whether you visit the optional lecture hall.
- Choose "Agree to help" (free, 0 points) or "Refuse this sham" (35 coins, +1 decision point). Refusing only changes the dialogue: Blackthorne says Molly stays with them while you write. Either way you stay in the cell.
Break Out of the Cell
Use the Little Hammer to start working your way out.
- Tap the cracked wall above the table and use the Little Hammer. Take the flashlight and the piece of wire from behind the bricks.
- Tap the space under the bed and use the flashlight there. The rat runs away; take the rusty grabber.
- Tap the bag again. It opens a second hidden-object scene.
Hidden-Object Scene: Bag Pictures
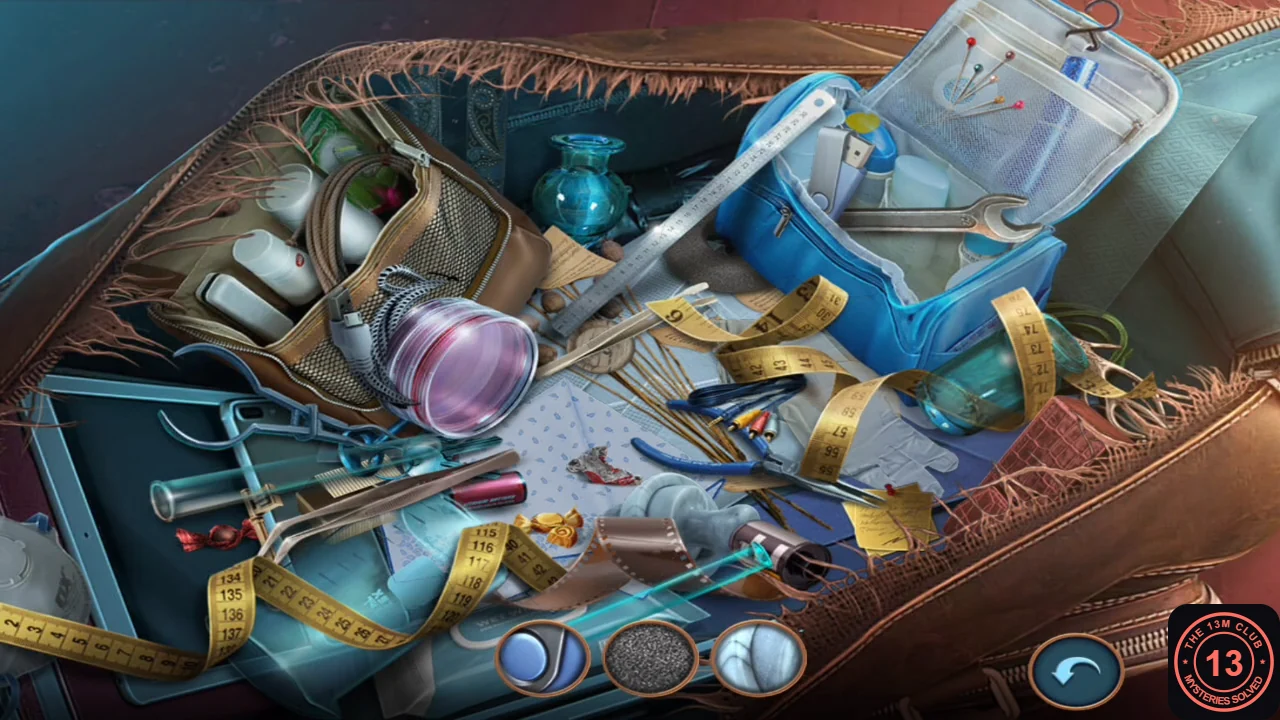
This time the items to find are shown as pictures along the bottom of the screen. The reward is the oil can you need for the rusty grabber.
- Find every pictured item. New pictures replace the found ones until the list is complete. You receive the Oil Can.
- Tap the small window in the cell door (right). Use the grabber and then the oil can. Stretch the oiled grabber through the window to the lock; the door opens to the police corridor.
Put the Guard to Sleep
New task: put the guard to sleep. The guard is dozing at his desk with a key card you need.
- Tap the broken plant pot next to the vacuum cleaner in the middle of the floor. Take the second piece of wire and the tape roll.
- Tap the MISSING notice board on the right wall (Andrew Matthews) and use the wires on it. Take the lockpick you bend from them.
- While the board is open, place the tape roll on its ledge beside the mug. In the recording it stays there until you come back to lift a fingerprint from the mug.
- Tap the mesh cabinet to the left of the desk. Open the lock with the lockpick and take the green sleeping-gas can. Leave the oxygen tank and mask for now.
- Tap the guard and use the sleeping gas on him. Once he falls asleep, take his key card.
- Tap the card reader by the back door and insert the key card. A light puzzle appears.
Card Reader Light Puzzle
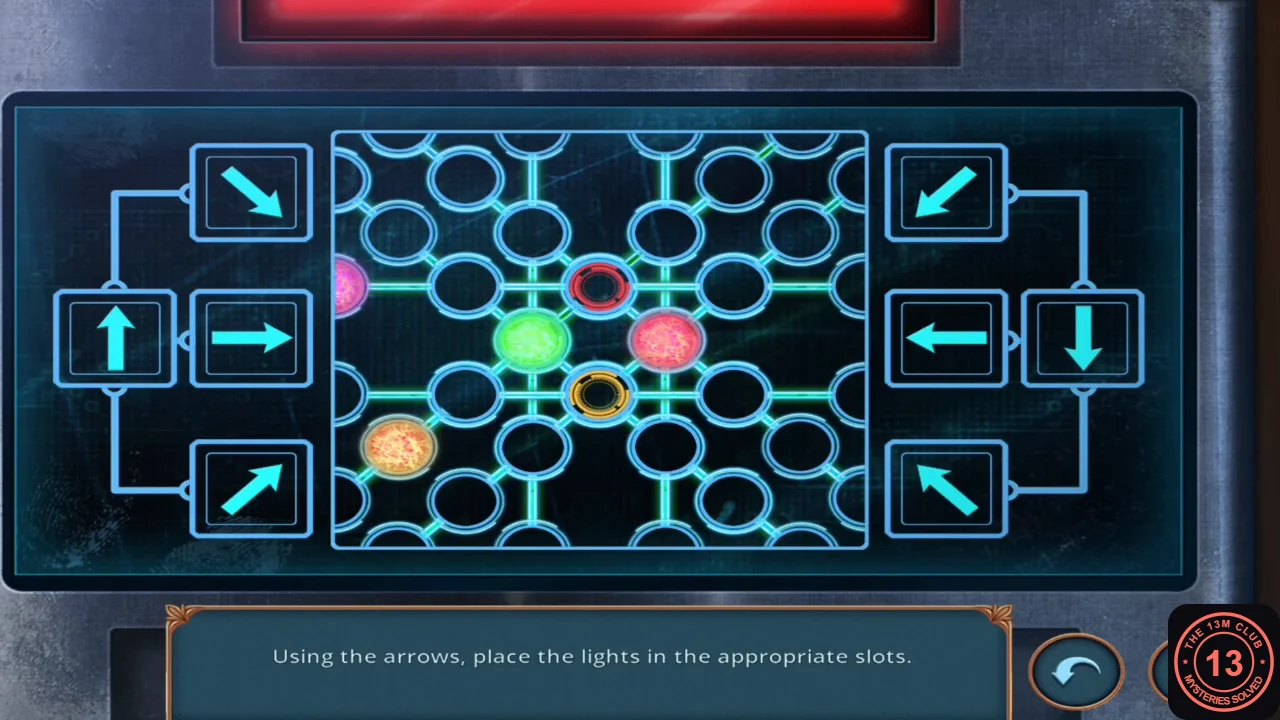
Four coloured lights (pink, green, red and orange) sit at the edge of a grid, and four rings of the same colours are in the centre. "Using the arrows, place the lights in the appropriate slots." Eight arrow buttons sit in two panels left and right of the grid. Each press moves all the lights at once in the arrow direction; a light stops where the track ends or another light blocks it. Bring every light onto the ring of its own colour.
- The starting layout was the same in both recordings checked, and this seven-press sequence solves it. Press: up-left (bottom of the right panel); right (left panel, beside the up arrow); up-right (bottom of the left panel); right again; down-right (top of the left panel) twice; and finally up-left again.
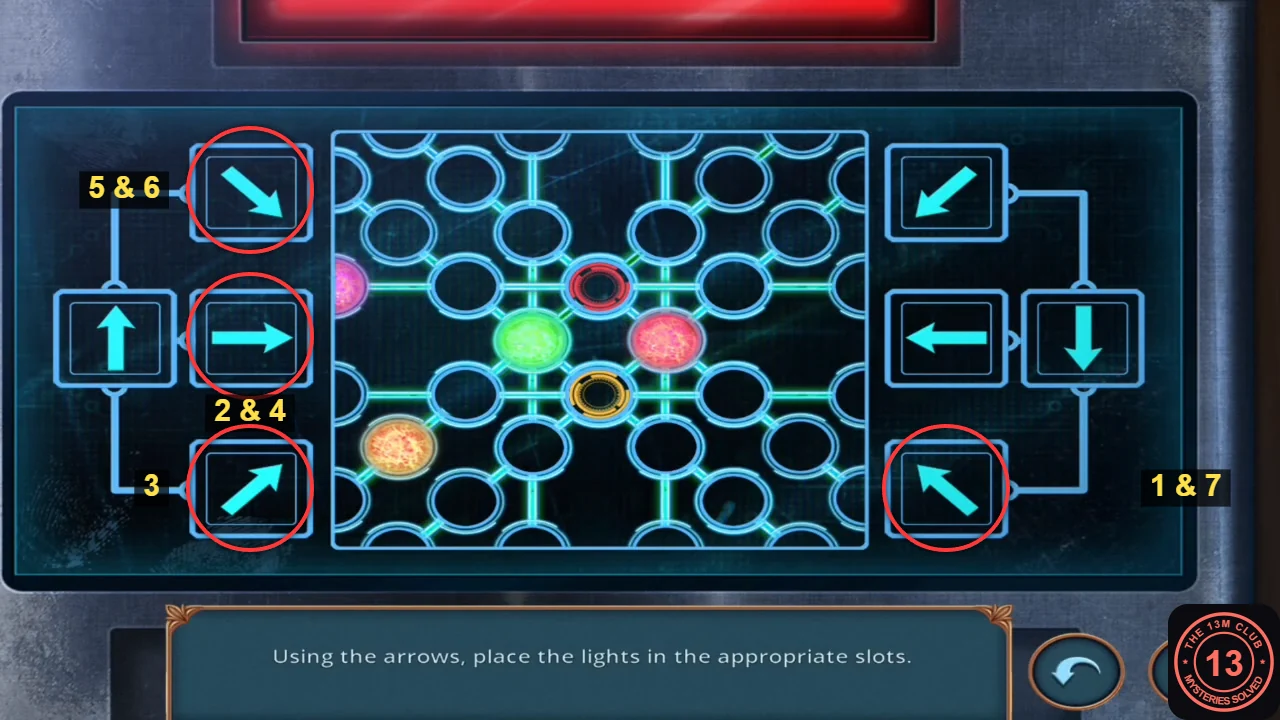
Press order: 1 and 7 up-left (right panel, bottom), 2 and 4 right, 3 up-right, 5 and 6 down-right. 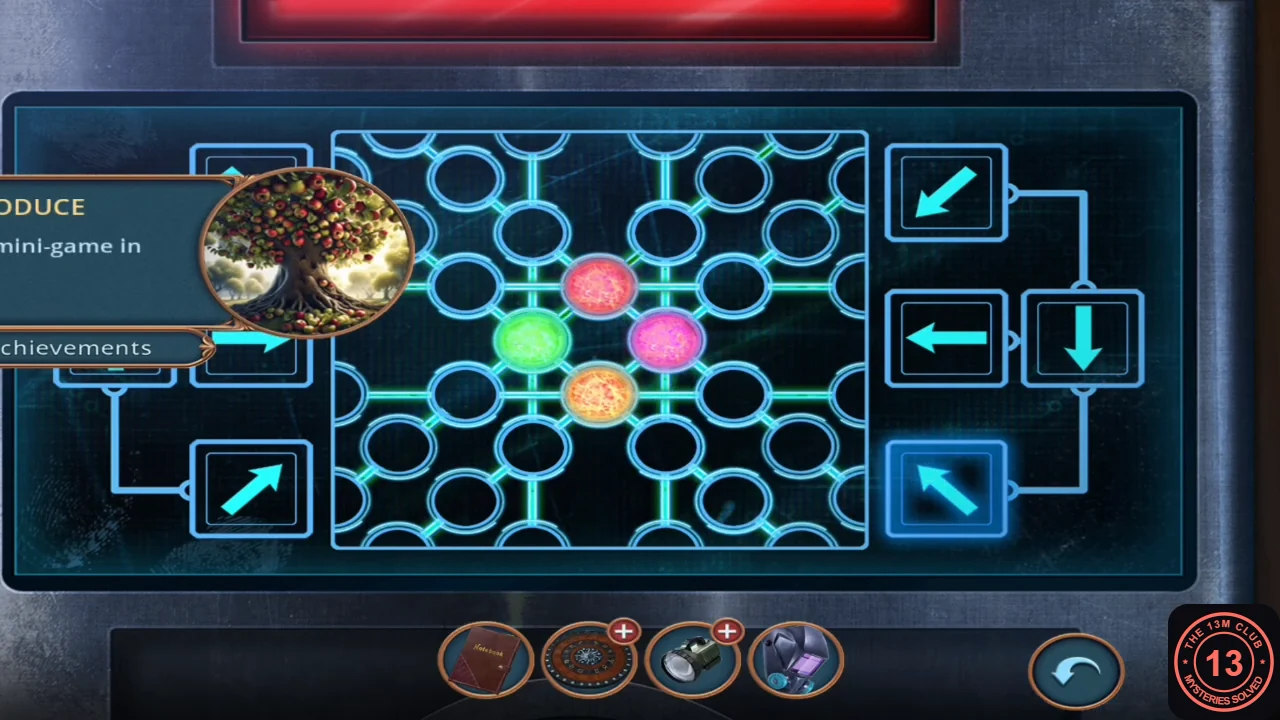
Solved: every light sits on its matching ring. - The door unlocks and you can enter the archive.
Archive: Spirit Board Symbols
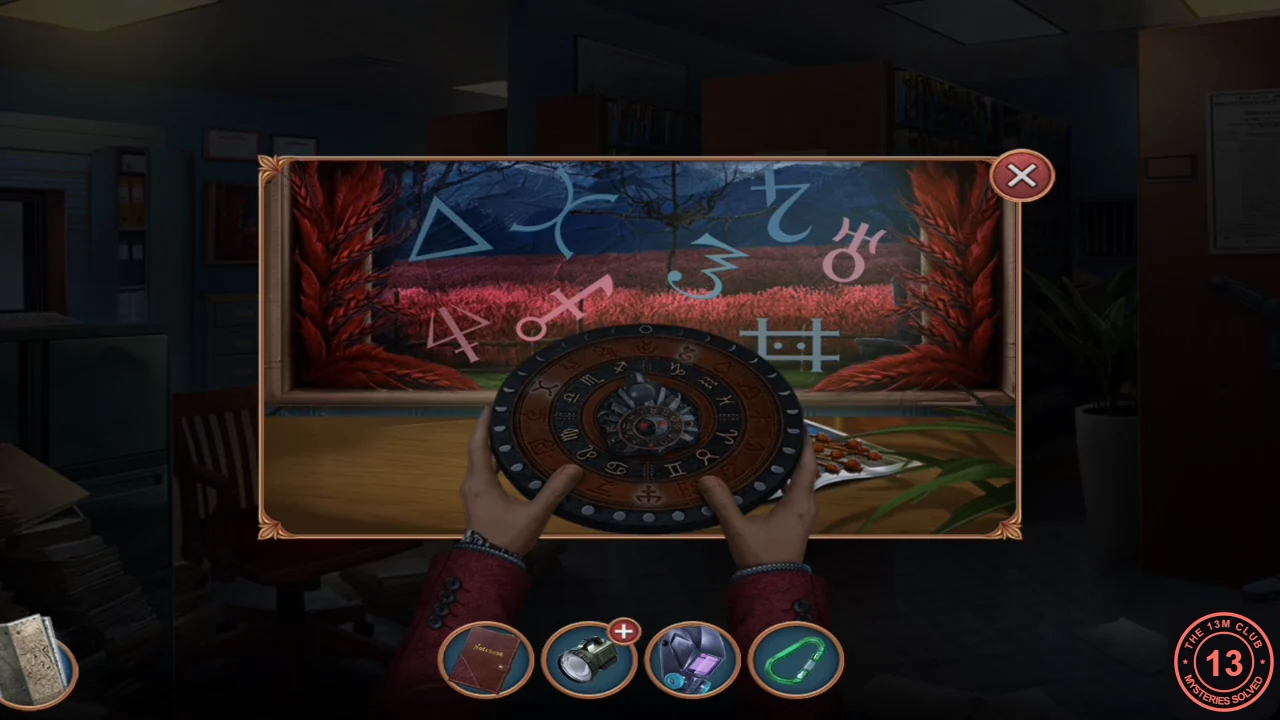
The archive is full of evidence boxes. A stained-glass mural of red rye covers the left wall.
- Tap the purple tote box on the cart in the middle of the room. Take the planchette (the pointer with a red gem) and the carabiner.
- In your inventory, combine the zodiac disc with the planchette to make a spirit board.
- Tap the red rye mural on the left wall and use the spirit board on it. Three symbols light up on the board's rim.
- Tap the same three symbols in the window: the pink symbol shaped like a 4 in the lower left, the curved cross second from the left in the top row, and the hooked symbol at the top right. If your board shows other symbols, tap the window symbols that match them.
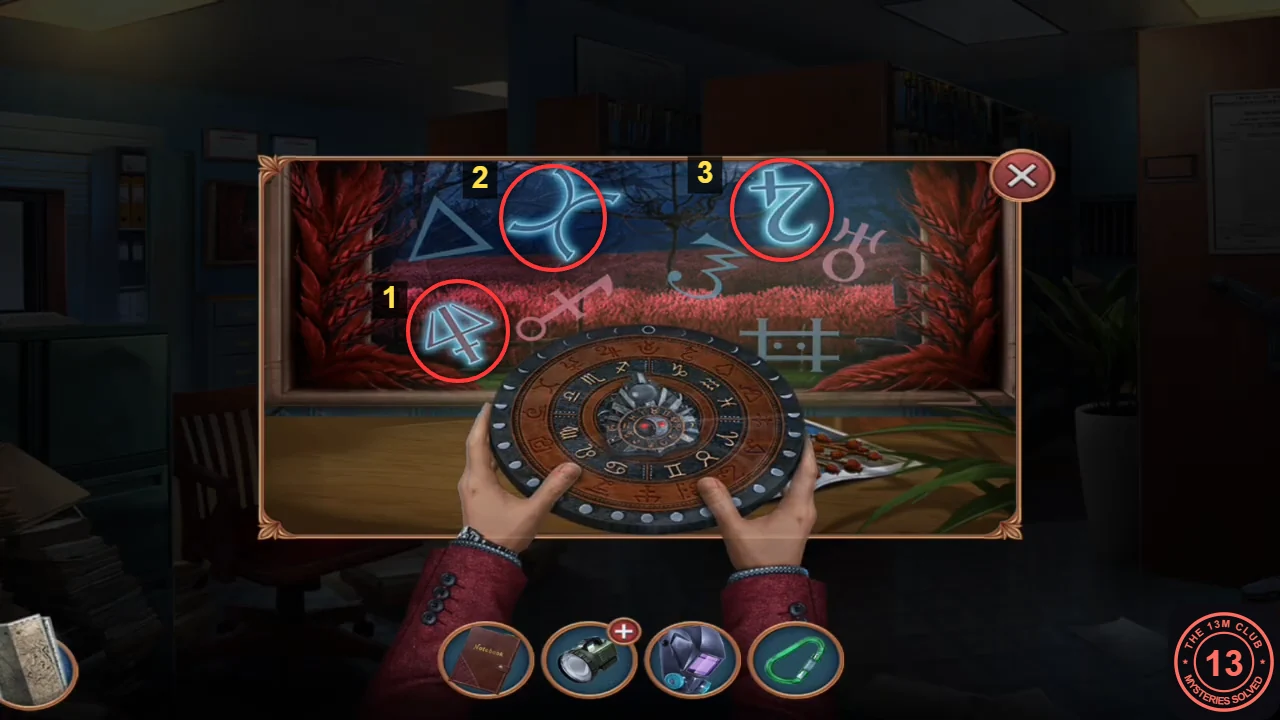
Tap 1 the pink 4-shaped symbol, 2 the curved cross, 3 the hooked symbol. - The mural slides away and reveals a wall safe with a fingerprint scanner. Take the screwdriver lying beside it (a thin dark-handled tool with two prongs). You need the owner's fingerprint for the scanner later.
- Use the screwdriver on the screw of the tote box. Read evidence No. 538 (someone used a burner on barn doors to steal rye) and take the gas burner.
Welding Puzzle: Cut the Grate
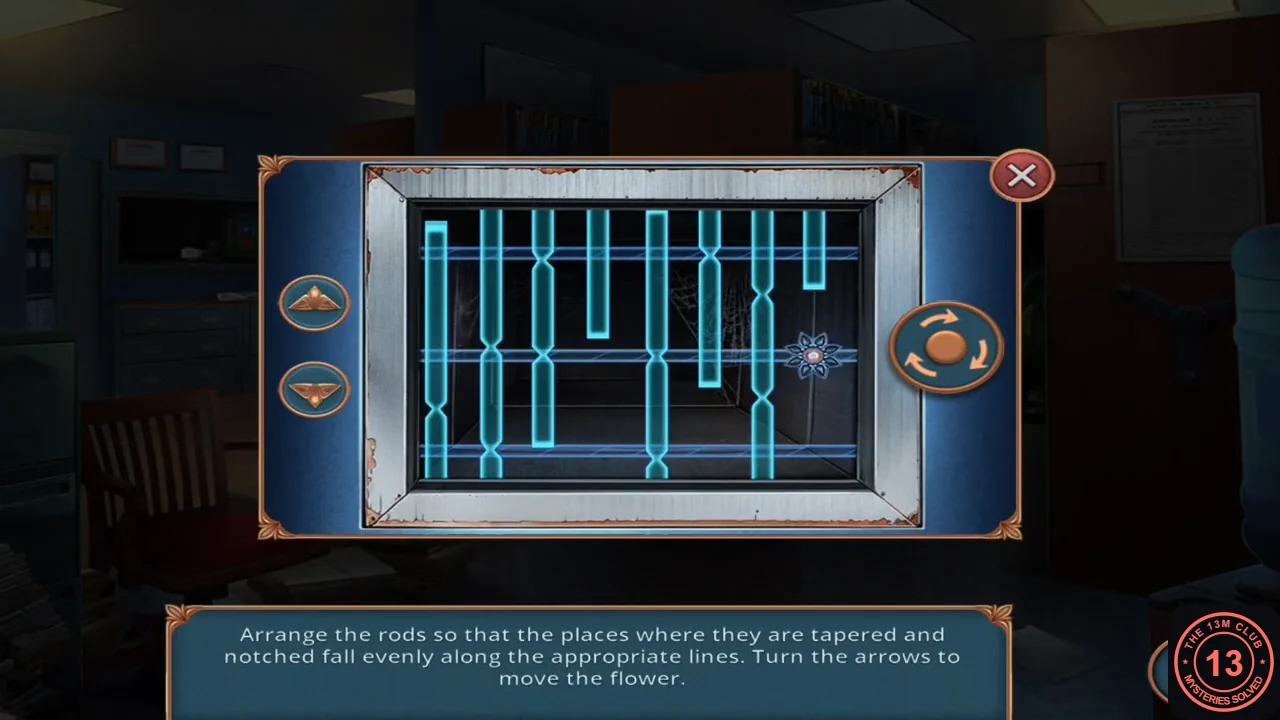
A low barred grate sits between the shelves on the right side of the archive. You need the burner and the welding mask.
- Tap the barred grate and place the gas burner. Then use the welding mask to protect your eyes. The welding puzzle starts.
- "Arrange the rods so that the places where they are tapered and notched fall evenly along the appropriate lines." Eight vertical rods cross three horizontal lines, and each rod has narrow tapered points. A flower marker shows which rod is selected. Press the round arrow button on the right to move the flower to another rod; press the up and down buttons on the left to slide only the selected rod. In the finished grate the narrow (tapered and notched) points of every rod sit exactly on the horizontal lines, forming straight rows. Some rods have a capped end that stops inside the frame; that is normal, and only the narrow points need to line up. This is a lengthy rearrangement, so the guide gives the method rather than every press: select each rod in turn and slide it until its narrow points meet the lines, then move on. Rods you have finished stay where they are.
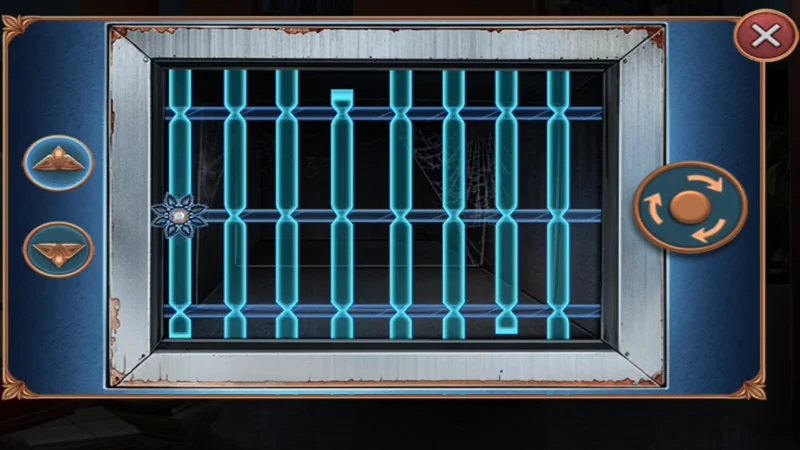
Target: every rod's narrow points sit on the lines. - The burner cuts through the bars. Take the red crowbar and the wrench from behind the grate.
Vacuum Cleaner Clock Puzzle
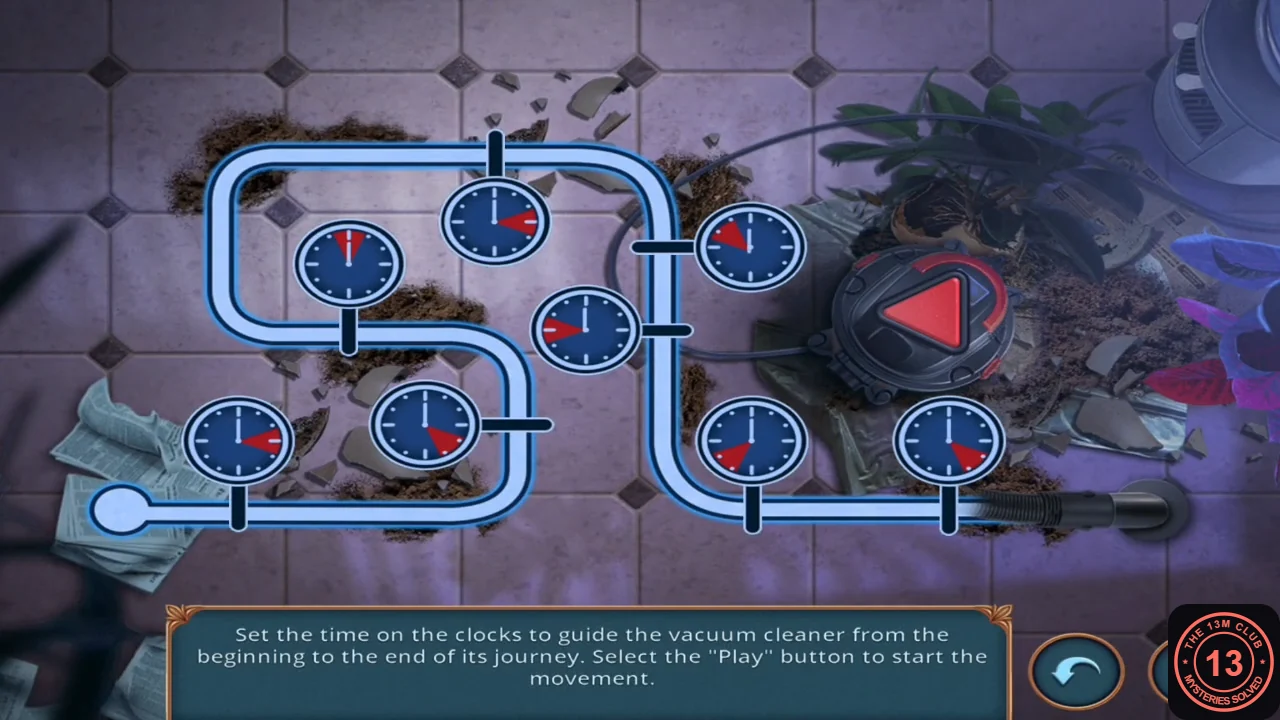
Back in the corridor, the old vacuum cleaner needs a hose before it can clean up the spilled soil.
- Tap the mesh cabinet with the oxygen tank. Use the wrench on the mask's hose fitting and take the black hose.
- Tap the vacuum cleaner and attach the hose. The clock puzzle opens.
- Eight clocks sit along the pipe. Tap a clock to turn its red wedge one step. The target arrangement was the same in both recordings checked, so these settings should work for you too. Set the wedges like this: bottom right next to the hose, 12; bottom middle, between 1 and 2; the clock left of the vertical pipe in the middle, between 3 and 4; the clock right of the vertical pipe higher up, between 2 and 3; the top clock, between 4 and 5; the upper-left clock of the S, between 7 and 8; the lower clock in the S, between 9 and 10; bottom left, between 10 and 11. Then press Play. Pressing Play with wrong settings just stops the nozzle; adjust and try again.
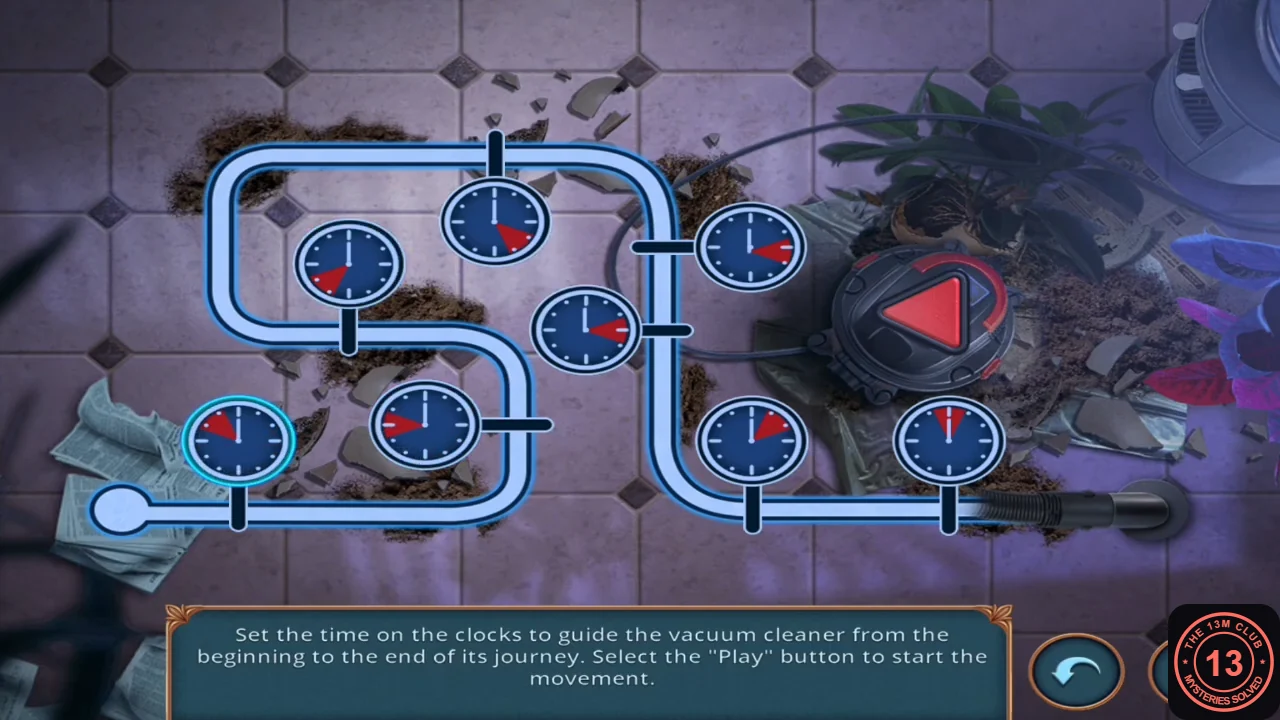
Wedge settings from the recording, ready for Play. - The vacuum sucks up the soil. Take the batteries and the red cord from the floor.
- Combine the flashlight with the batteries to get a UV flashlight.
Hidden-Object Scene: Missing Person Posters
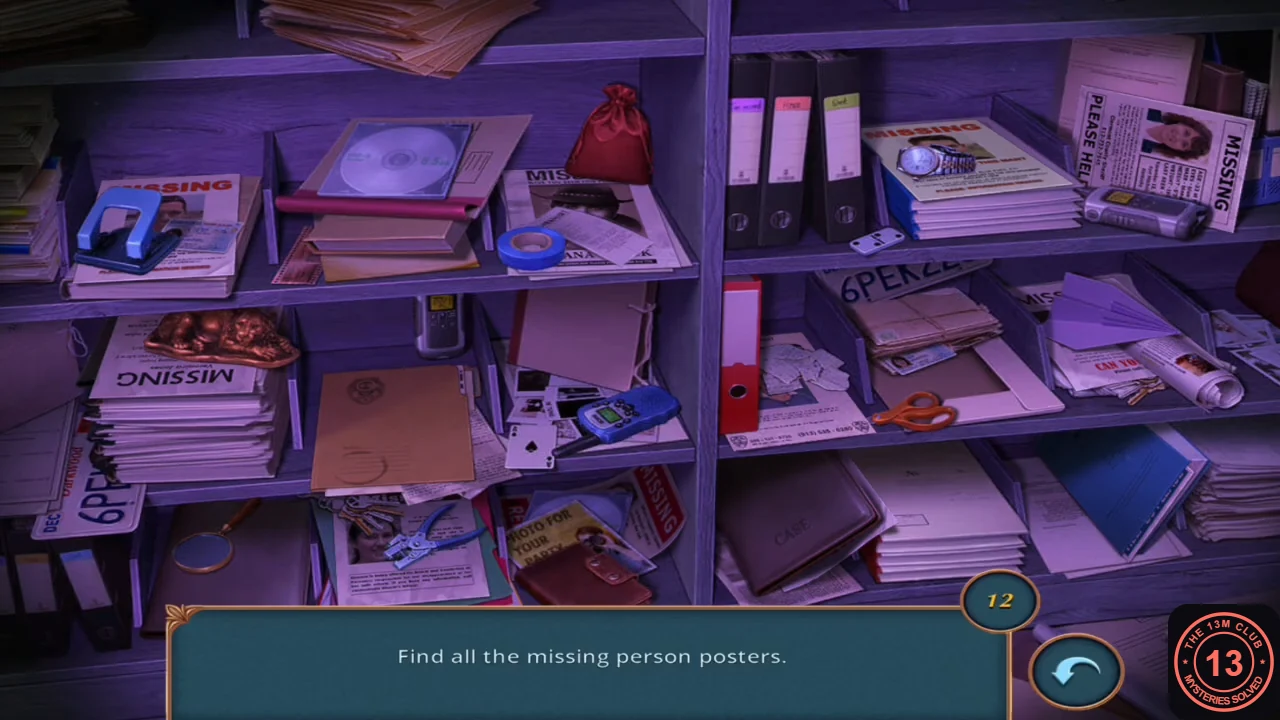
The dark corner of the archive hides something only UV light can show.
- In the archive, use the UV flashlight on the dark area. A hidden-object scene opens: "Find all the missing person posters".
- Find all 12 posters lit by the UV light. When the counter reaches zero you read a note about Professor Malcolm Sterling and receive the fingerprinting powder.
Fingerprint Safe and Find the Pairs
Now you can lift the fingerprint the wall safe needs.
- Return to the MISSING board in the corridor. Use the fingerprinting powder on the mug on the ledge, then let the tape lift the print. Take the tape with the fingerprint.
- Go to the wall safe behind the mural in the archive and use the fingerprint tape on the scanner. Read Timmy's note and look at Molly's earring in the red box.
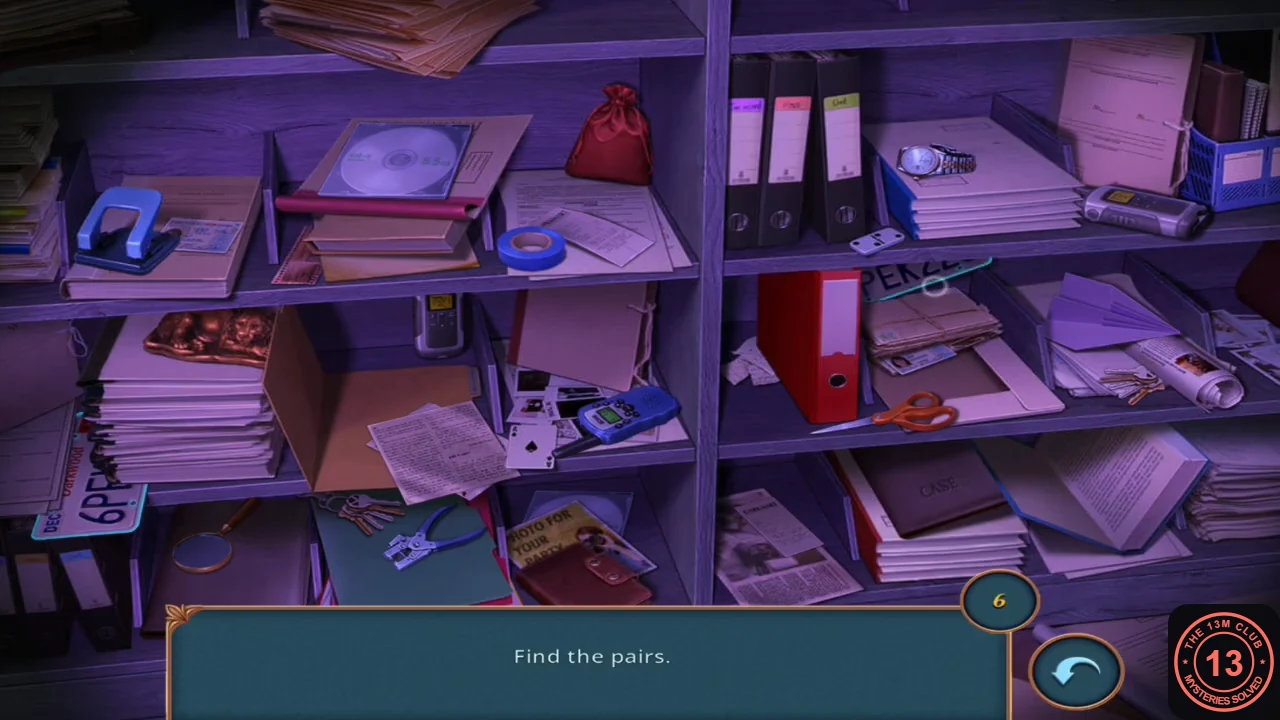
- Tap the archive shelves to open the "Find the pairs" hidden-object scene. Find all six matching pairs of objects.
- Read the Sheriff's note: Eldred forbade harming the writer, but Frederick is coming for Molly.
Decision 2: Molly
You escape with Molly, but she is hurt and a professor threatens her at knifepoint. She urges you to leave her and find Professor Sterling.
- Choose "Leave Molly" (free, 0 points), "Get to the Port" (25 coins, +2 points) or "Put Molly on the barge" (35 coins, +4 points). "Put Molly on the barge" adds a short scene of Molly escaping on a barge (seen in a second recording). The checked recordings do not show "Get to the Port", so its scene is not described here. The game then continues in the town square.