The artifact room and the mistress
A rent receipt in Noel's desk leads to his mistress in Green Park Square.
- In the artifact room, open the desk drawer: read the rent receipt for Francesca Fairchild (evidence) and take a small board. Take a board from the left sleeve of the samurai armour and pry one from the tile left of the pharaoh bust with the knife. Put the katana in the samurai's hands to reveal a safe; it needs a stethoscope.
- Go to door 5C at the end of the corridor in the building on the left of the square and talk to Francesca. Open the drawer at the bottom of her cabinet and take a blue case and an airship fragment. Open the birdcage and move the items on its floor to find a butterfly.
- Add the three fragments to the toy airship to complete it. Fit it to the lock of the suitcase on the airship sofa and take the stethoscope and a part.
The safe, the hexagonal box and Harvey's room
The safe and the box on the desk open the way back to the butler, who hands over Harvey's key.
- Fit the stethoscope to the safe behind the samurai. Turn each of the five dials slowly until it clicks and shows a sign. The dials are staggered in a zigzag; read from left to right, they stop at 2, 7, 2, 9, 5 in two recordings, each number under the red pointer. Read the will (evidence).CODE27295
- Put the part on the gold orb below the safe and take the last small board and a butterfly. Put the four boards on the hexagonal box on the desk. Tap the six lid panels in the right order; a wrong tap resets them. Both recordings use the same order: left, right, upper left, upper right, lower left, lower right. Note the empty spot inside (evidence).
- Walk back through the maze to the butler. Show him the evidence for his testimony and take Harvey's room key.
- Unlock Harvey's room on the upper floor, left of the stairs. Take the magnifying glass from the drawing board on the left and a fleur-de-lis from the bottom drawer of the tall cabinet. Knock the second wolf off the green curtains with the cane.
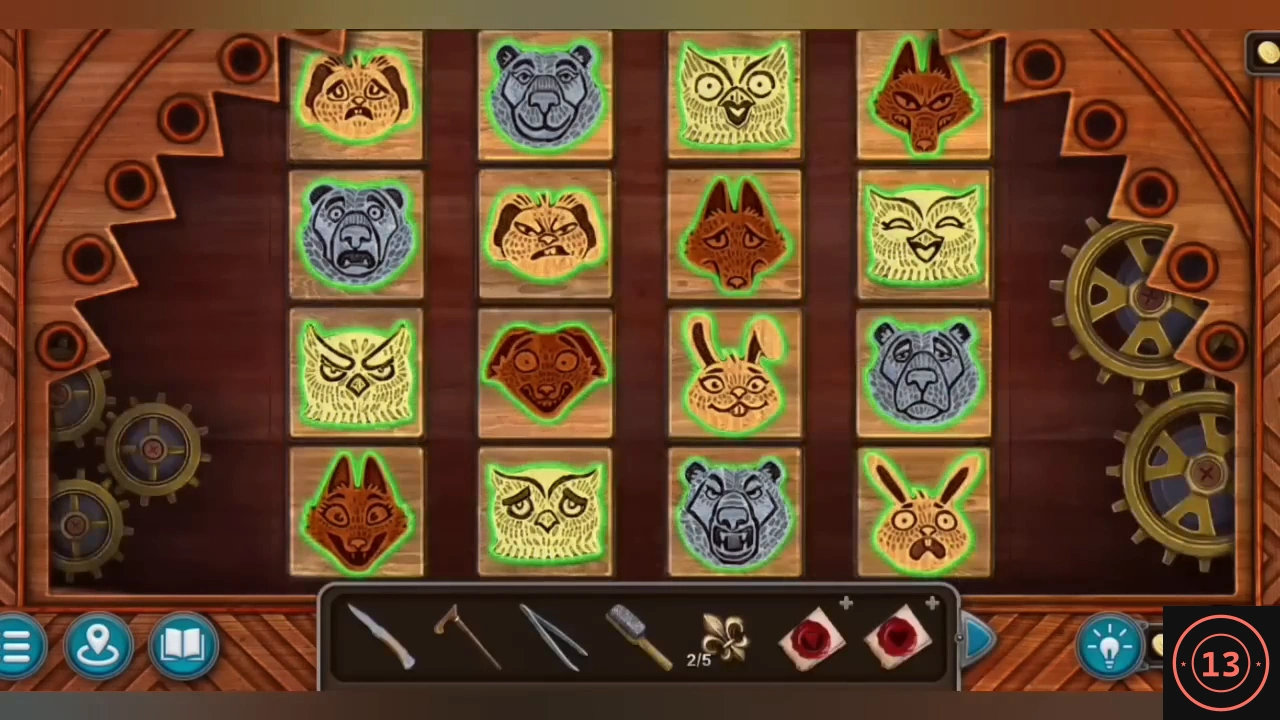
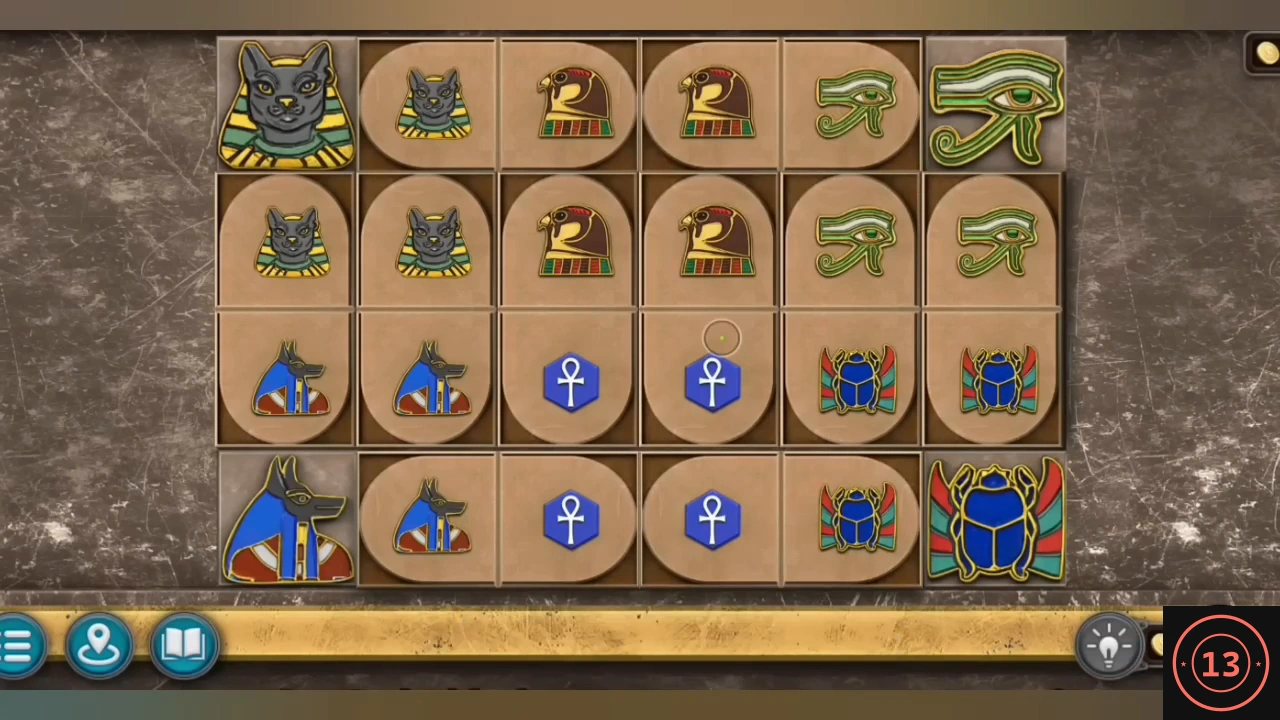
- Put both wolves on the tall cabinet doors. Swap pairs of animal faces until every row and column has four different animals and four different expressions. Read the profit and loss statement (evidence) and take a fleur-de-lis.
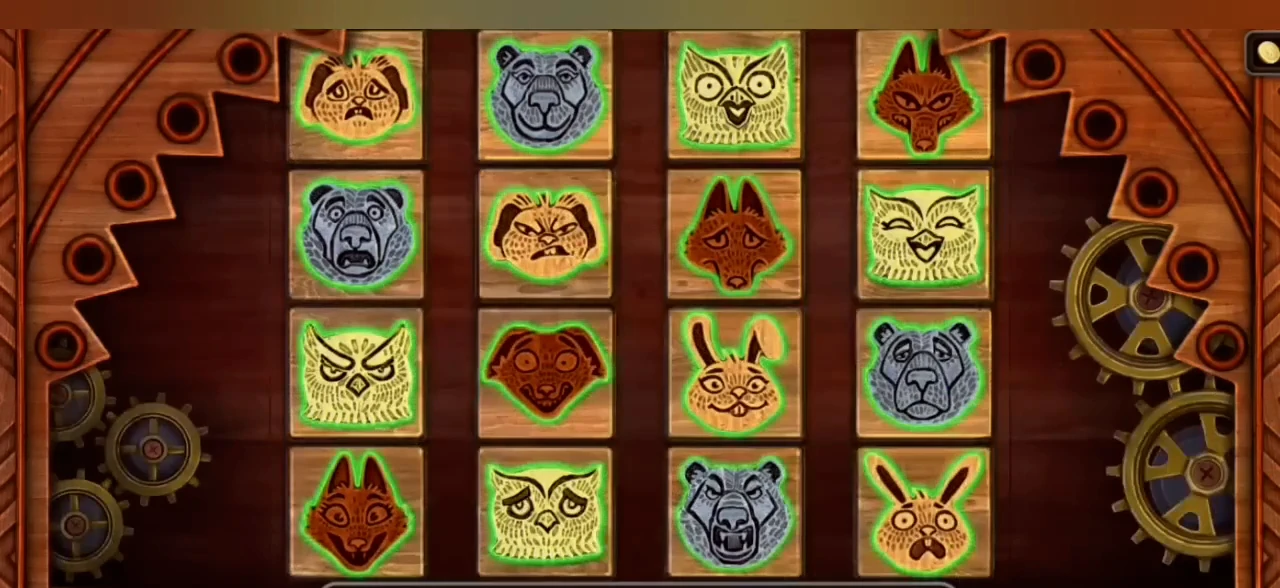
Wolves cabinet: one finished arrangement.
The office safe and the butterfly box
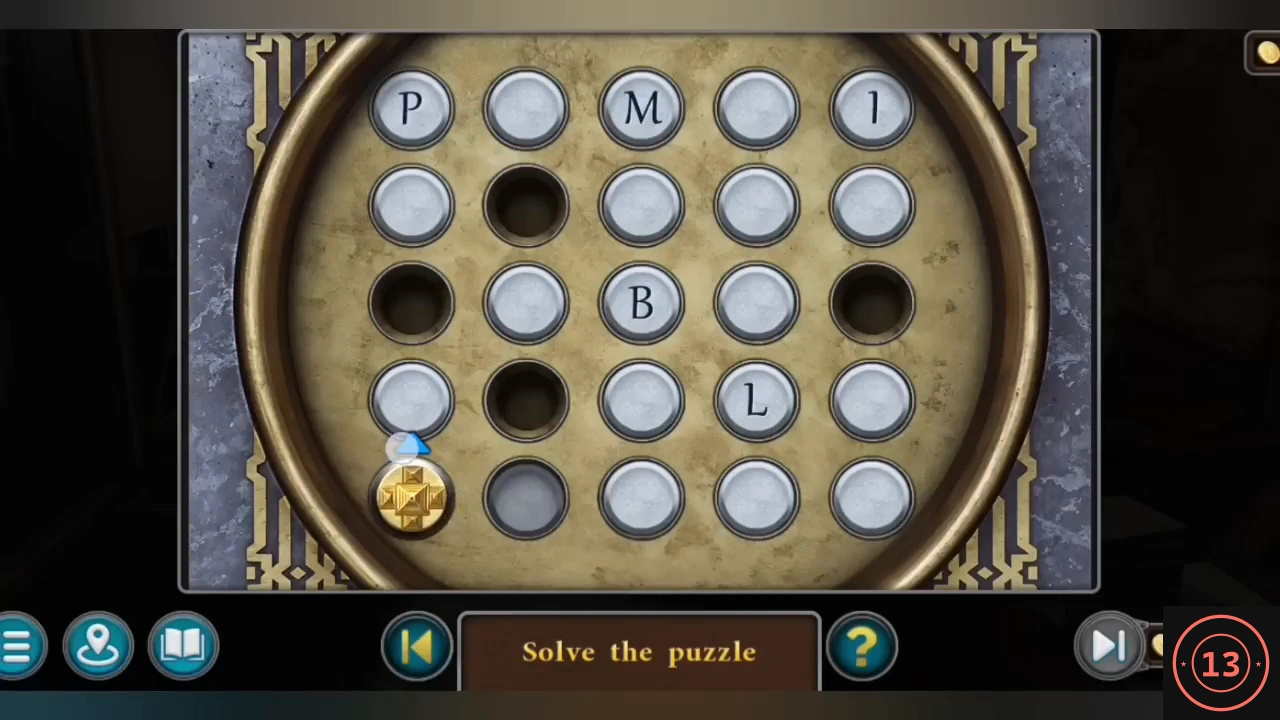
A word on Noel's map opens the large safe in his office.
- Look at the map on the right wall of Noel's office through the magnifying glass to read UBLIMP. Open the round panel on the back wall. The gold cross starts in the bottom row, next to U. It moves one circle at a time in any direction, including diagonally, and turns each circle grey; it cannot return to a grey circle. Visit every white circle, reaching the letters in the order U, B, L, I, M, P. Counting rows from the top and columns from the left, one route is: U (row 5, column 1), row 4 column 1, row 3 column 2, row 2 column 3, row 2 column 4, B, row 4 column 3, L, row 5 column 3, row 5 column 4, row 5 column 5, row 4 column 5, row 3 column 4, row 2 column 5, I, row 1 column 4, M, row 1 column 2, row 2 column 1, and finally P. Read the assessment of value (evidence) and take a key.
- Open the large box at the foot of Harvey's bed with the key and take a handle and a bee. Put the four keys and the handle on the cash register on Noel's desk and turn the handle to take a horse.
- Open the chessboard box on the small table behind Harvey's bed with the horse and take the cat and the lockpick. Put the bee on the box beside the green chair in the lobby and take a butterfly and a figurine.
- Put the figurine on top of the tall cabinet in Francesca's room and take the alcohol and the last butterfly. Put the four butterflies on the butterfly box. Pick a direction to draw the line from the butterfly on the left. Thorn walls appear as you go, so read each new layout before choosing. Reach any flower on the right. Take the powder, the mirror and the clover.
- Open the blue case with the clover and read the note about an expensive gift (evidence).
The typewriter, the fleurs-de-lis and the clef cabinet
Harvey's room gives up the last fleurs-de-lis and the treble clef.
- Dust the drawing board in Harvey's room with the powder to reveal R34qws18. Put the cat on the typewriter and type the code exactly: lower the Shift key for the capital R, then raise it for the rest. Take a fleur-de-lis and a screwdriver from the drawer.CODER34qws18
- Unscrew the grate below the mansion's front steps and hook out the amphora with the cane. Put it in the basket of the statue by the steps and take the fifth fleur-de-lis.
- Put the five fleurs-de-lis on the headboard of Harvey's bed and tap them. Read the transactions (evidence) and take the treble clef.
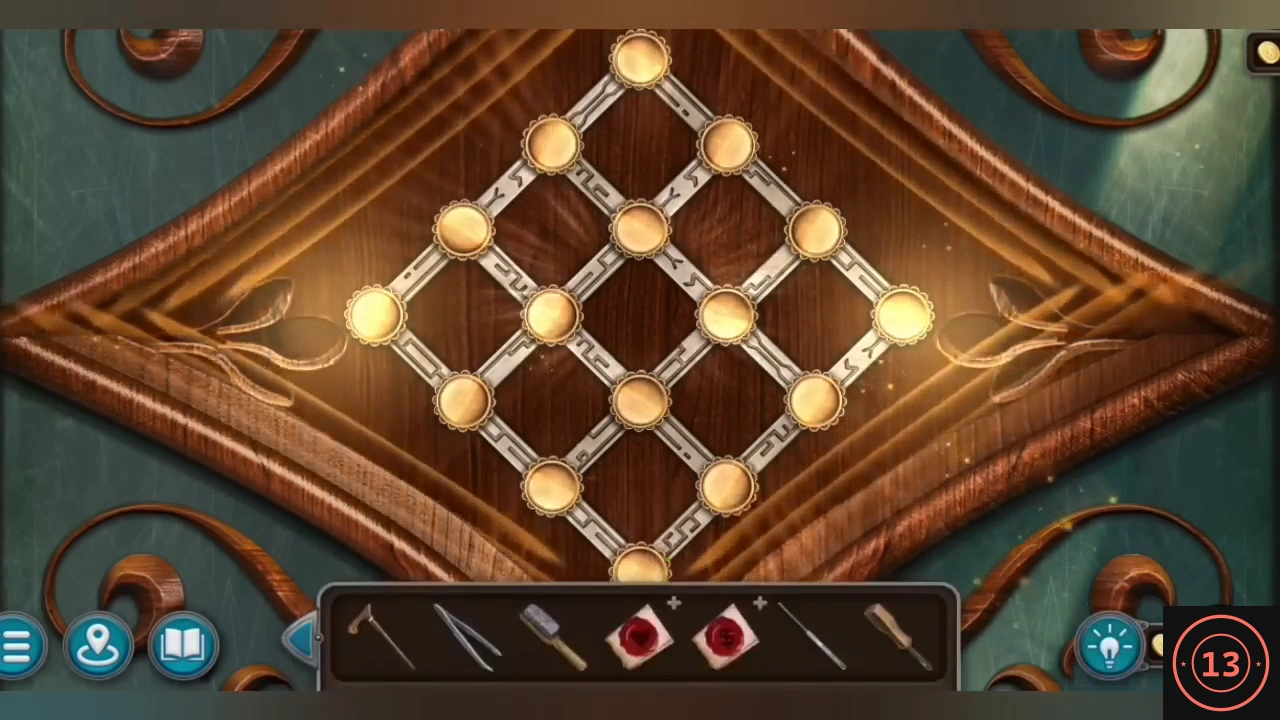
- Clean the dirty glass of the cabinet on the right of the artifact room with the alcohol to see a scroll with a line pattern. Put both clefs on the cabinet on the left. Tapping a node turns its lines; copy the scroll's pattern. Read the bill of sale (evidence) and take the bow and the book.
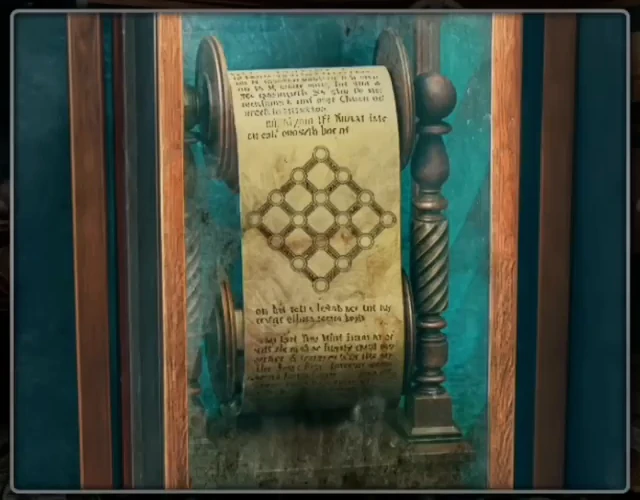
The clue behind the cleaned glass. 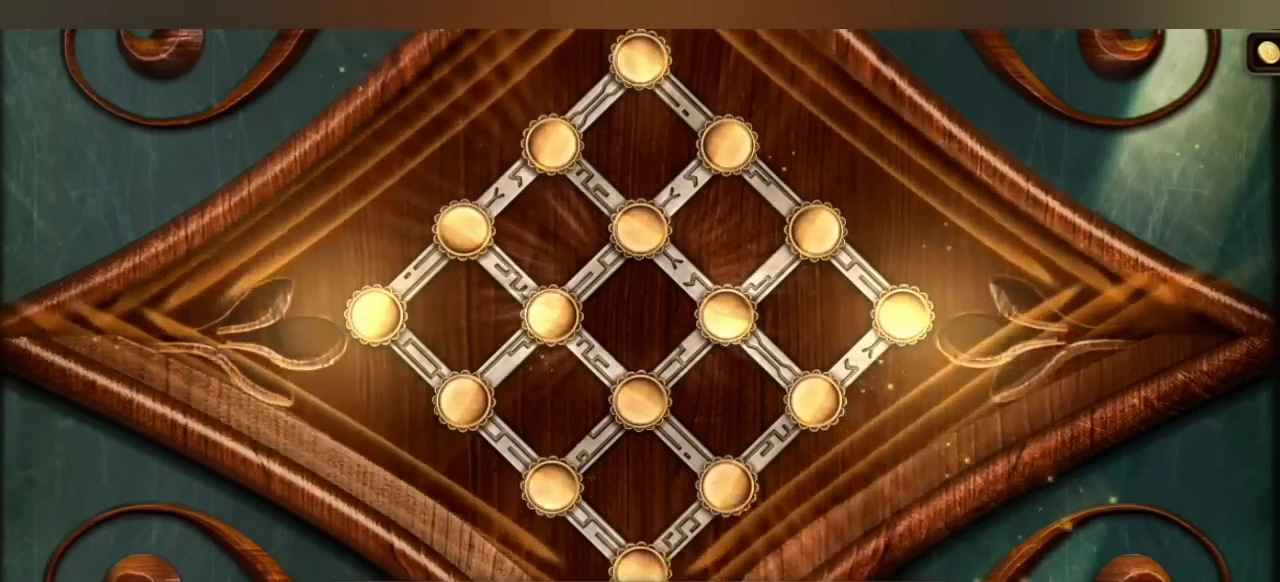
The cabinet set to match the scroll.
The cello and the excavation chamber
Edith reads the book for you, Noel's letter brings a lamp, and the excavation gate finally opens.
- Knock on Edith's door, give her the book and talk to her. She gives you her calling card.
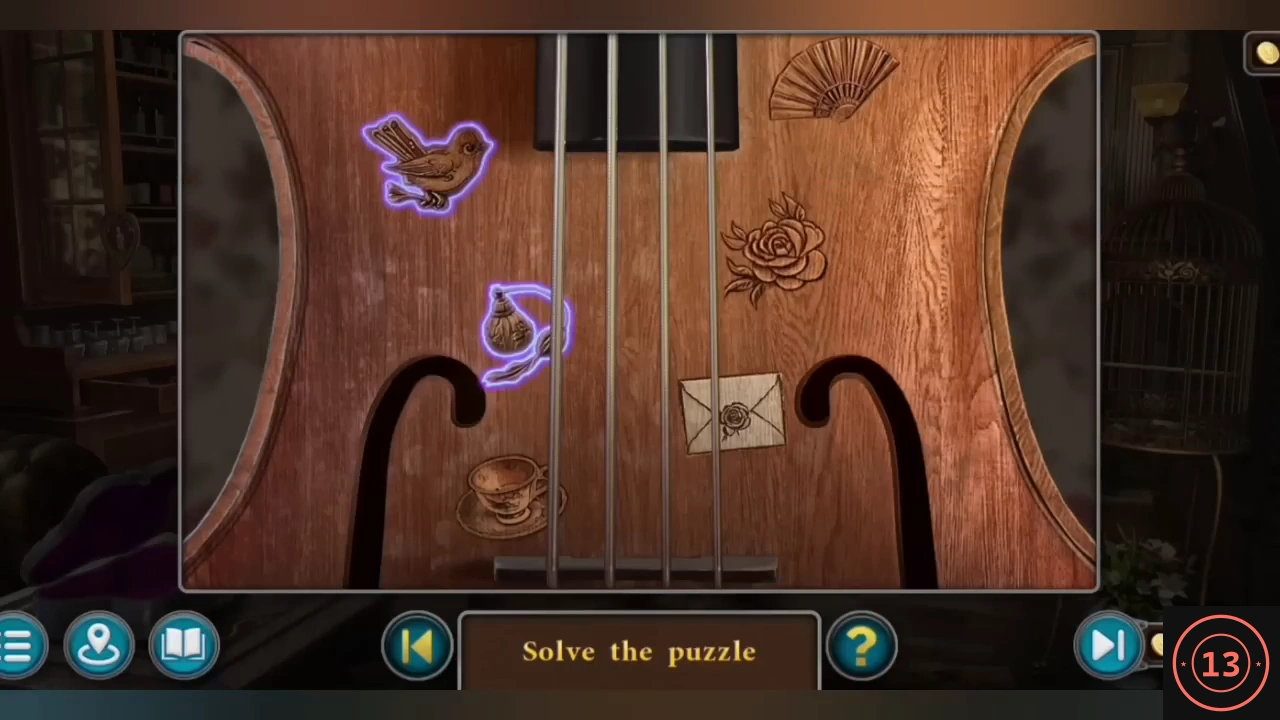
- Place the mirror on the decorative plate on the shelf in Francesca's room. The reflection lists six pictures from top to bottom. Play the cello with the bow by tapping the same carvings in that order: perfume bottle, bird, envelope, rose, fan, teacup. Read Noel's letter (evidence) and take the lamp.
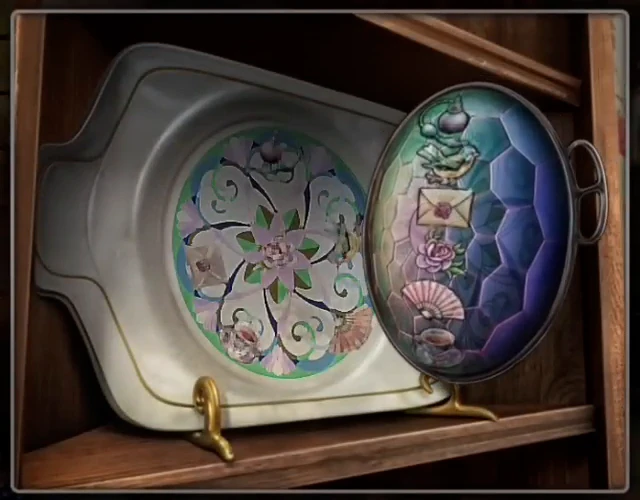
The plate's reflection gives the order, top to bottom. The teacup comes last. - Light the square pit on the left of the excavation site with the lamp and take the axe. Put the axe, the sword and the mace on the gate at the back of the site and go in.
- The chamber is an item hunt; the outlines at the bottom show what is needed. Take the pruner from the floor and cut the net under the shelf rack for a lever. On the table, gather five red gems from the notebook and under the glove, bell, book and hat, then open the box with them for the ancient charm. Take the paper and graphite too. Fit a stick from beside the wall into the pickaxe head in the wall and break the floor grate with the pickaxe. Brush the gravestone below, copy its symbols onto the paper and take the hose.
- Turn the cylinder lock on the box at the top of the rack to copy the rubbing and take the bronze mirror. Fit it to the ceiling fitting in the alcove on the back left. Attach the lever and hose to the red pump and start it to drain the lower chamber. Take the crown from its pedestal, put it on the shield on the right wall and place the charm in the opening. Take the handle, fit it to the winch on the left and take the backpack.
- Open the backpack and take the infantry shovel, a token and a scarab. Unscrew the crank handle from the crane on the right of the excavation site with the screwdriver.
Edith's house and the secret passage
Edith invites John in once he calls her. Her office hides the figure that opens a passage in the airship.
- Open the blue box beside the passage in the square to reach the payphone. Insert the calling card and the token and dial the number on the card, 823415.CODE823415
- In Edith's house, hook a wing out of the tall blue vase with the cane, then smash the glass display case with the crank and take the second wing. Add the wings to the scarab and put it on the box on the large table. Swap pairs of tiles until every touching edge shows the same symbol, then take the key.
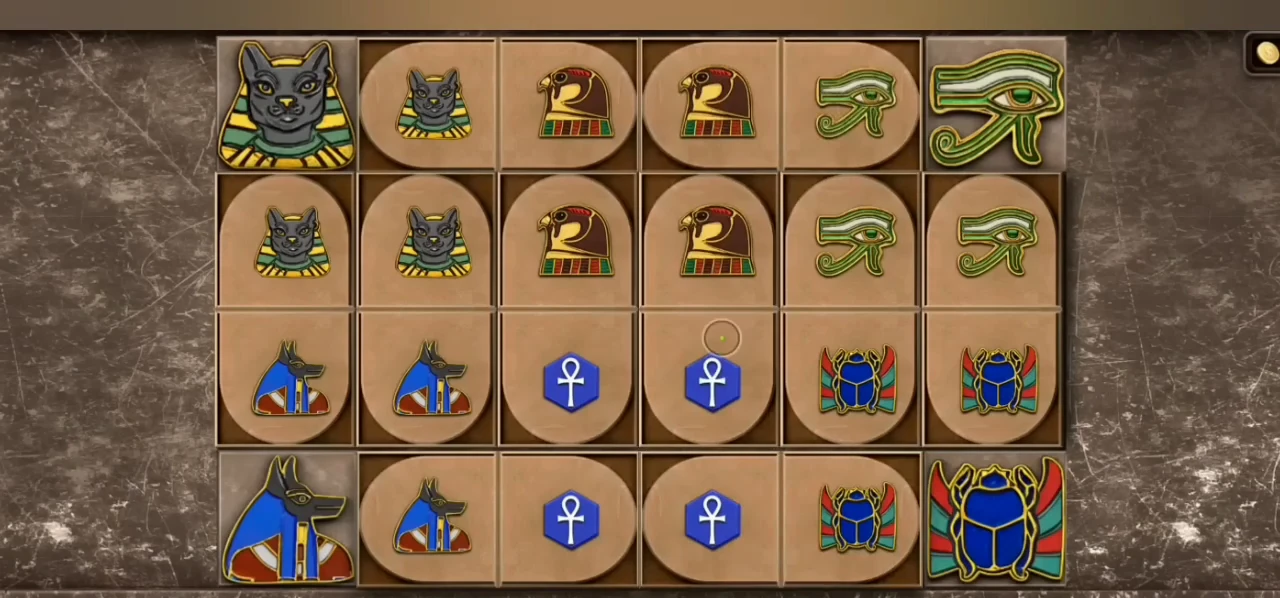
Scarab box solved. - Unlock the office on the left. Note the eagle painting at the top right, which is needed later. Take the Anubis figure from the desk (evidence). Put it in the empty slot of the box with three figures in the airship to open the secret passage (evidence) and take an ankh.
The hunter's field and the bunker
The passage leads to a field and a hidden bunker. The case file counts seven pieces of staging evidence.
- Follow the trail and talk to the hunter. Clear the ferns at the small shack on the left and dig the earth away with the infantry shovel. Light the bunker with the lamp.
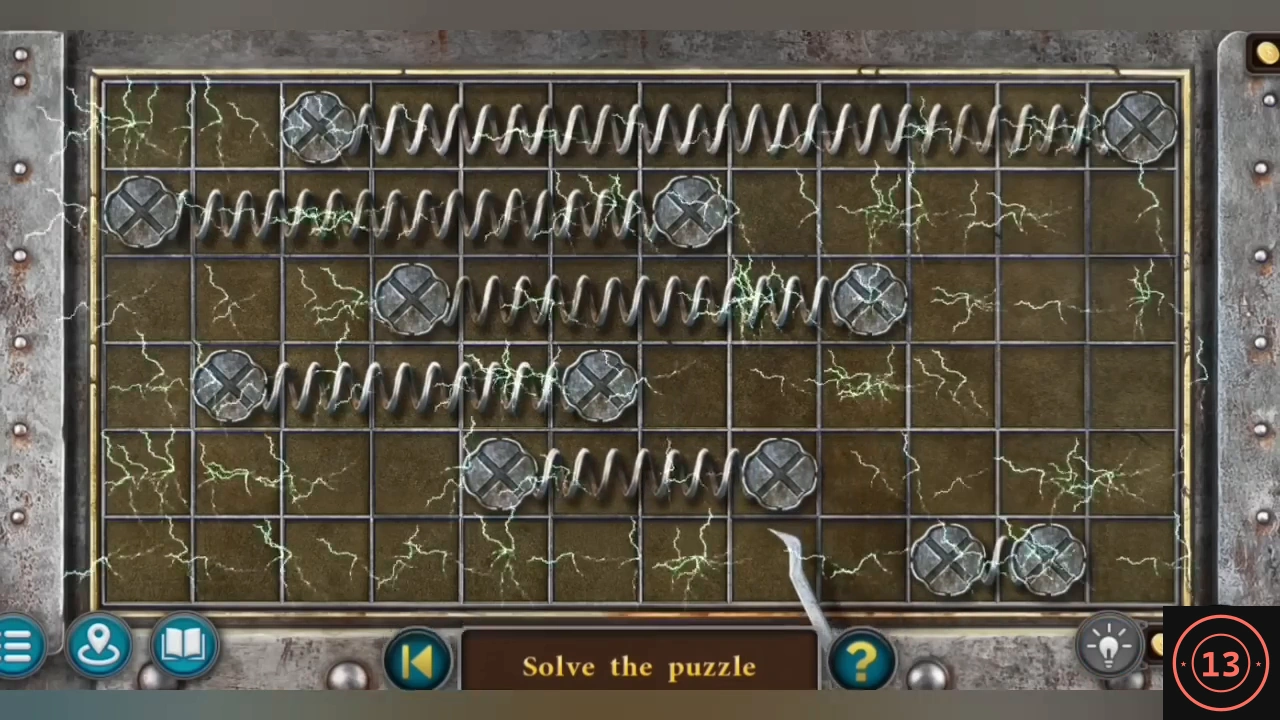
- Use the lockpick on the locked box on the left shelf. Slide the six spring bars left and right until each of the twelve columns holds exactly one end cap. Note the jar inside (evidence) and take the light fitting.
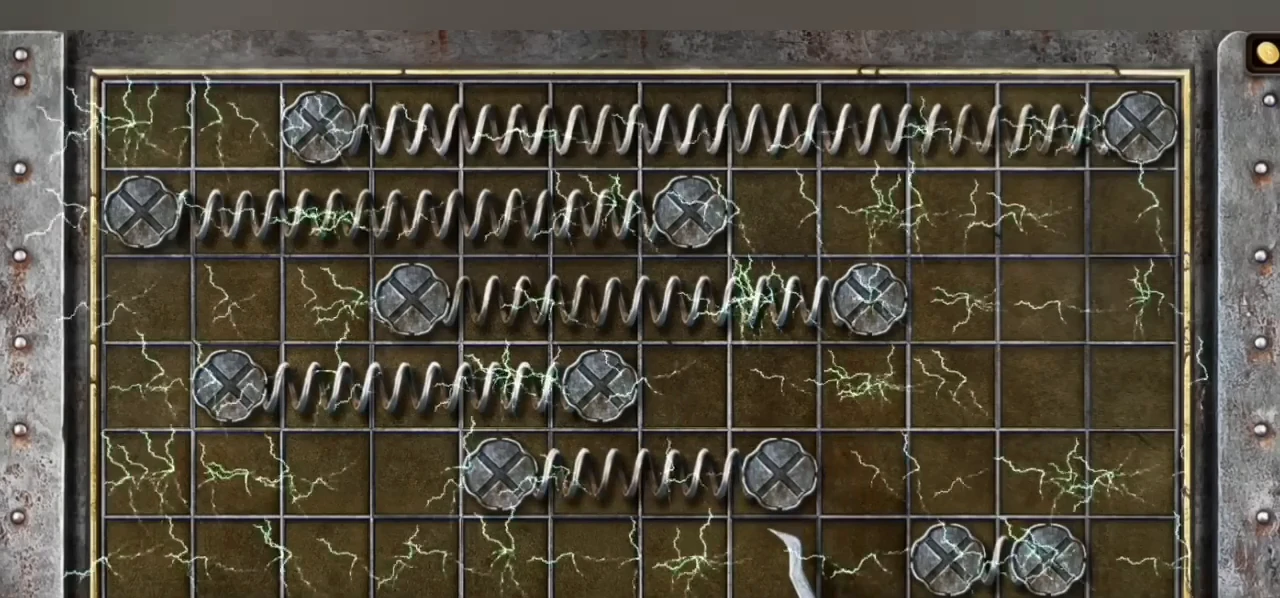
Bunker box solved: one end cap per column. - Brush the red gas cylinders on the floor to read the code 2947 (evidence). Tap the jar of beetles on the table (evidence). Open the padlocked box on the table with 2947. Note the chloroform (evidence) and take the second ankh. Put both ankhs on the sarcophagus on the left. Tap the bandages (evidence) and take a spider.CODE2947
- Take the planks from the big crate in the factory yard and lay them over the water at the back of the bunker. Cut open the sack on the other side with the knife. Note the magnetic sand (evidence) and take the second spider.
The eagle, the basement flat and Noel
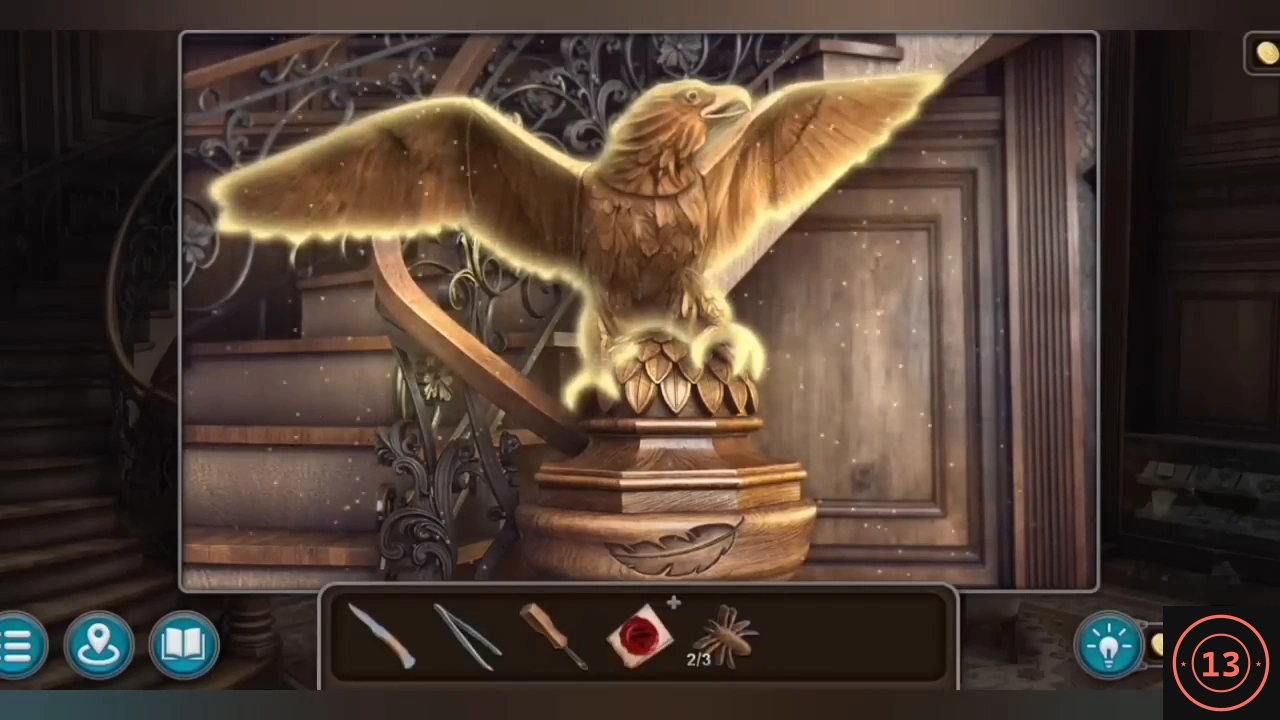
Edith's eagle gives an address in the square, where the last spider and the truth about Noel wait.
- Fit the light fitting above the fireplace in Edith's house and take the feather. Put it on the wooden eagle at the foot of the stairs. Tap the head and each wing to set the pose from the painting in her office. Read the red diary for the address and the door code 14253 (evidence).CODE14253
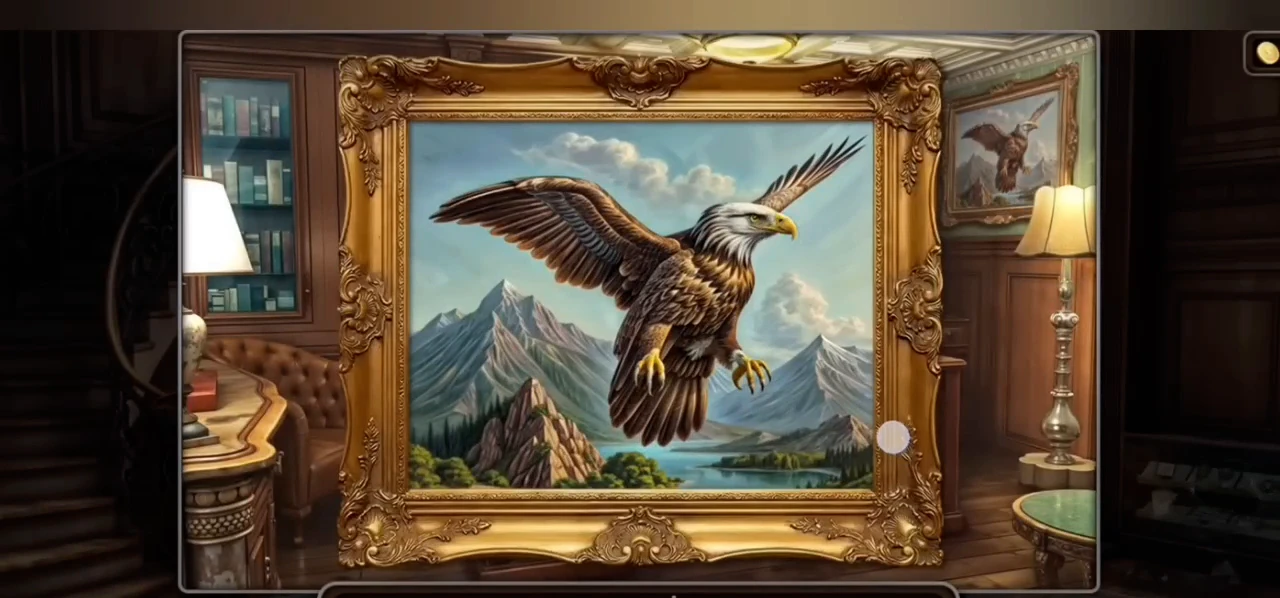
The eagle painting in Edith's office. 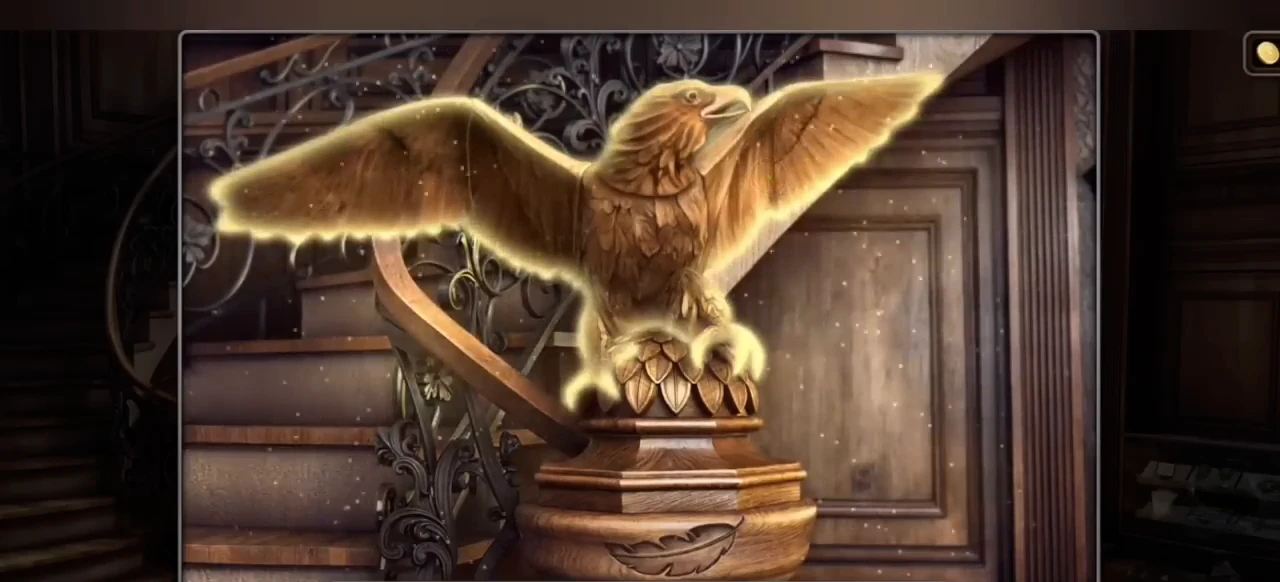
The wooden eagle set to match. - Go through the passage on the left of the square to the boarded-up building and enter 14253 on the door at the bottom of the steps. In the flat, lift a burner cover on the stove with the knife and pick out the contract termination (evidence) with the tweezers. Remove the green locker hinge with the screwdriver and take the plunger. Clear the shower drain for a key and open the suitcase in front of the fireplace. Read the new will (evidence) and take the third spider.
- Put the three spiders on the floor hatch. Slide the planks until the large spider block reaches the exit on the right. Square planks move in any direction; long ones only along their length. This takes many moves and is easiest if you first clear the column beside the exit. Take the key and open the red door to find Noel (evidence).
The "Play With Me" puzzle box
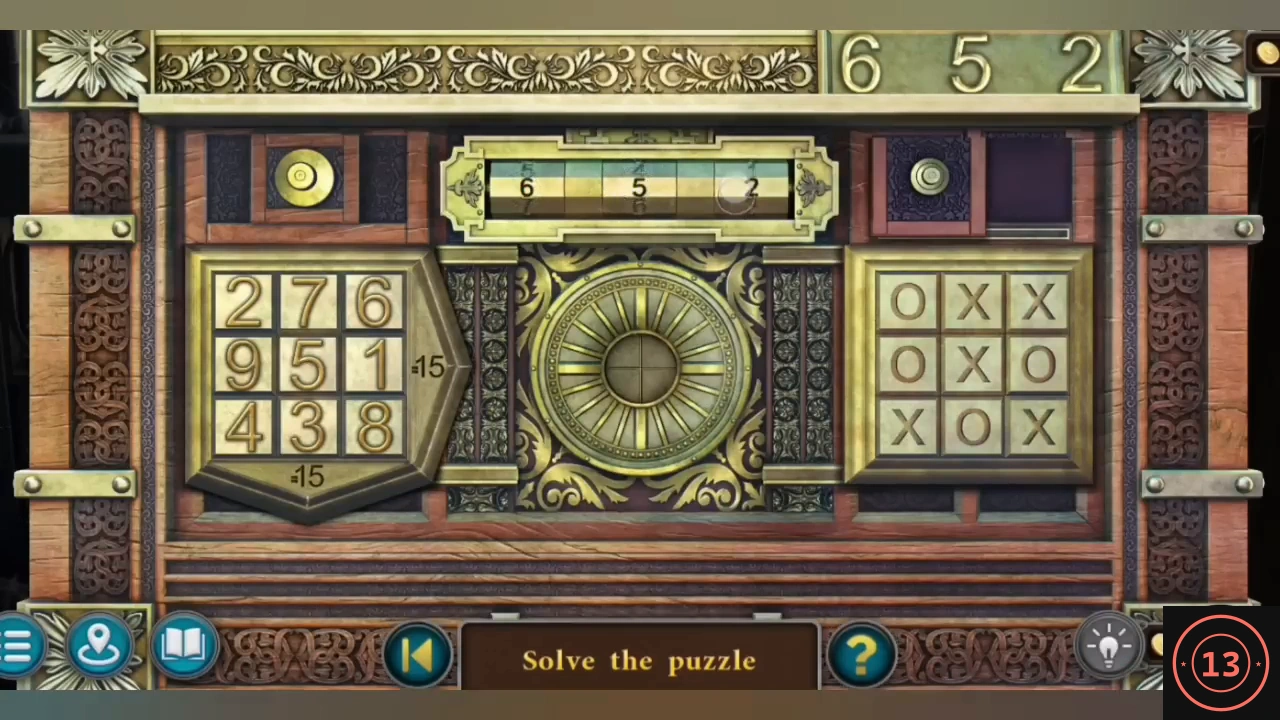
After the cutscene the culprit leaves a four-sided puzzle box. The arrows at the sides turn it.
- Side 1: slide the number tiles into order 1 to 8 and take the button. Side 2: put the button in the round slot and turn the three rings until the tiger's face is whole; take the monogram. On the panel with four buttons, watch the sequence and repeat it for the cross.
- Side 3: put the monogram in the slot at the top left and take the crescent. Slide down the switch at the top, place the crescent and swap moons until they run in phase order around the arc. Take the magnet, and the mouse from the panel on the right. Side 4: press the bottom-left button for the owl. Drag the ball through the small maze with the magnet to win the number 9.
- Side 1: add the 9 and swap numbers until each row, column and diagonal adds up to 15, for example 2 7 6 / 9 5 1 / 4 3 8. Place the cross on the noughts-and-crosses board that appears and take the wheat ear.CODE276951438
- Side 4: put the owl, mouse and wheat ear on the top-right panel in food-chain order, predator to prey: owl, mouse, wheat. This reveals 6 5 2. Set the dials at the top of side 1 to 652 to read the message and end the chapter.CODE652
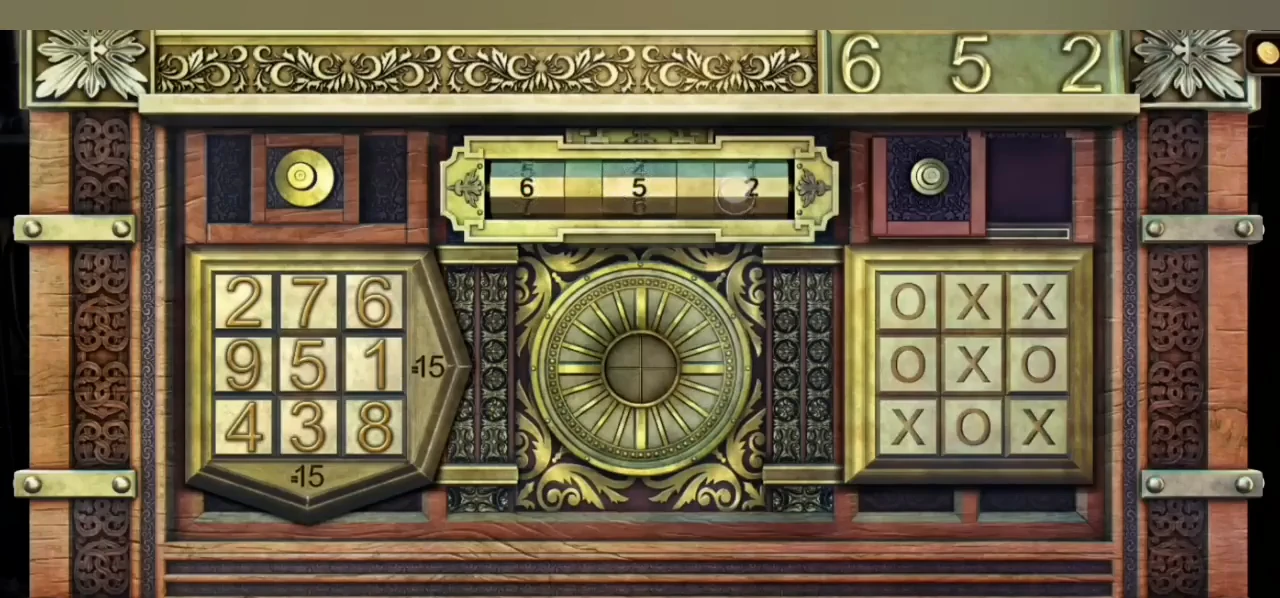
The finished box side: magic square, noughts and crosses, and the dials set to the code 6 5 2 shown at the top right.
Chapter 2 collectibles and morphing objects
Chapter 2 has 18 morphing objects, 9 hourglasses and 9 perfume bottles. The recording collects the last few just before opening the floor hatch in the basement flat.
- Hourglasses (9): square, on the right chair of the seating area; factory, on the floor right of the director's desk; airship, at the end of the red sofa; Noel's office, on the shelf right of the coat; secret closet in the mansion, on the left shelf; outside Edith's house, in the leaf pile on the lower right; hunter's field, in the bushes above the stone wall; bunker, behind the sacks across the planks; artifact room, on the desk. All nine earn the Keeper achievement.
- Perfume bottles (9): excavation tent, on the crate on the left; factory yard, inside the big crate; small park building, on the floor on the right under leaves; garage, on the floor on the right; butler's room, in the small box on the chest of drawers; Francesca's room, in the cabinet drawer; Harvey's room, on the desk; Edith's office, on the table on the far left; basement flat, inside the green locker. All nine earn the Perfumer achievement.
- Morphing objects (18): the stone relief on the tall building right of the clock post in the square; a stone by the park path; the tree on the hill above the excavation site; the box on the red wagon in the factory yard; a bucket hanging behind the factory stairs; the rope hanging in the middle of the airship window; a drawing on the paper stack in Noel's office; the figure on the lamp post outside Edith's house; the decoration at the top right of the mansion; the small clock on the lobby table; the pot on the stove in the butler's room; the helmet on the glass case in the artifact room; the fire tool by Francesca's fireplace; the portrait at the top right of Harvey's room; the cushion on Edith's armchair; the small mound in the distance just left of the big bush in the hunter's field; the cloth hanging at the top right of the bunker; and the bellows by the fireplace in the basement flat.