The mystic's house
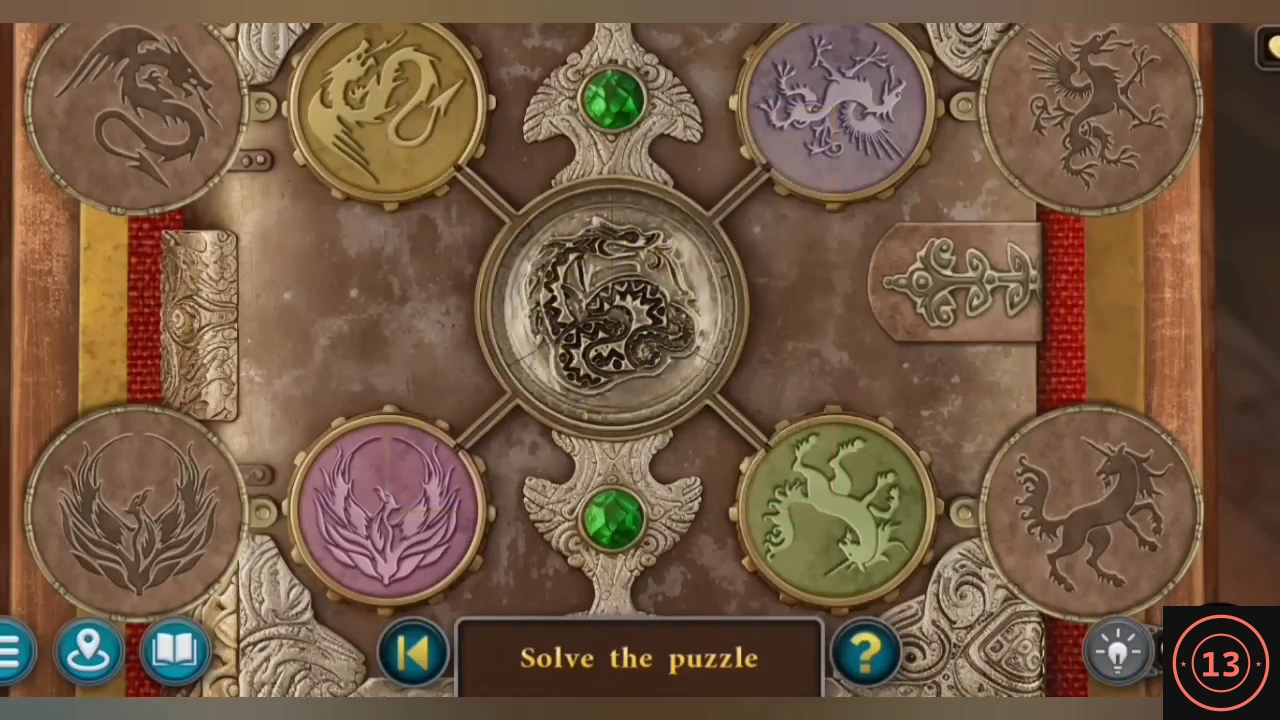
Collect the three parts of the token while the mystic stays hidden upstairs.
- On the small shelves on the right, read the purple science journal (evidence) and take a token part. Take the symbol plate from the table with the green cloth and another from the bull's head on the balcony on the left. Put all three plates on the gold globe beside the stairs and take the lotus. Put the lotus in the slot on the bull's head and take the second token part and a seashell.
- Put both seashells on the mermaid in the middle of the hotel lobby. Take the bird and the lion-head handle.
- Fit the handle to the panel in the middle of the balcony. Unlock the six small doors in this order: top middle, top left, bottom left, top right, bottom middle, bottom right. A wrong door resets the order. Read the scroll (evidence) and take the last token part.
- Put the three token parts on the book on the stand left of the stairs. Rebuild the four creatures, each upright like the outline in its outer corner: gold dragon top left, purple griffin top right, pink phoenix bottom left and green unicorn bottom right. The quarters start mixed and the moves depend on how they are mixed, so here is a method rather than a move list. Tapping a circle turns it. Tapping the centre sends the quarter facing the centre out of every circle at once, one circle clockwise: top left to top right, to bottom right, to bottom left. Before each centre tap, turn every circle so that the quarter facing the centre is one that should move on. Because each centre tap takes a quarter from every circle, you cannot finish one circle and keep it finished. Instead, build each circle up to three of its own quarters in their correct places, with its fourth slot facing the centre and holding a quarter of the next circle clockwise. One last centre tap then completes all four. Fewer than 70 moves earns the Connoisseur achievement. Read the bestiary (evidence).
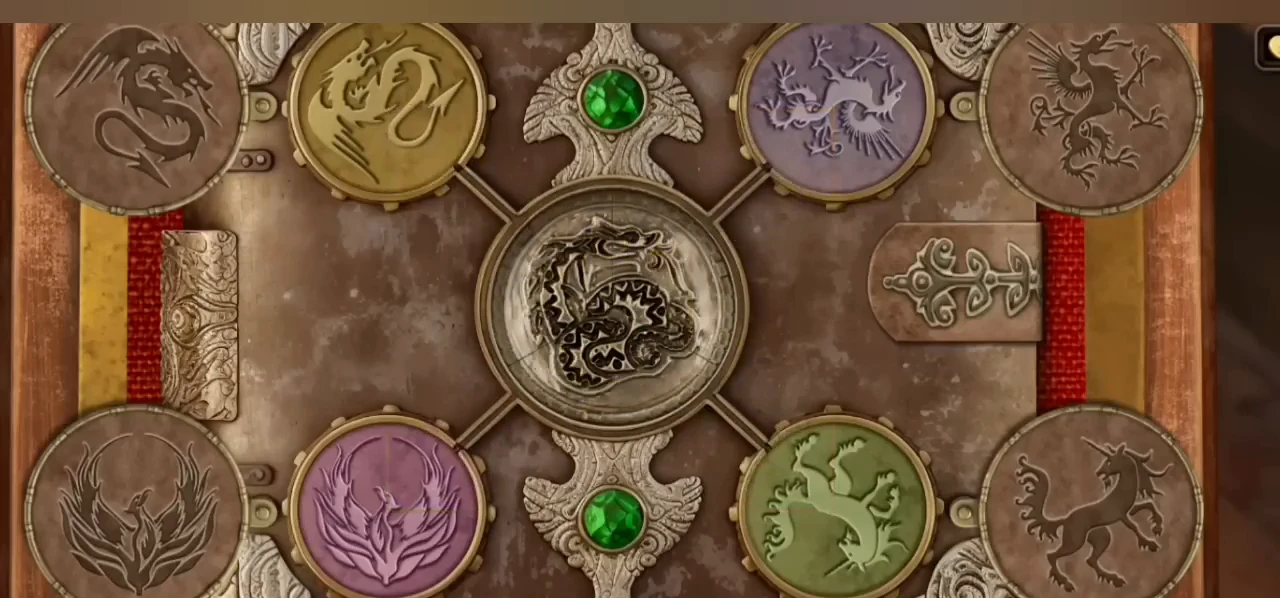
Token book solved: one creature and one colour in each corner.
The forest path to the scientist's mansion
Walker gives John the figurine for the back-alley gate. Beyond it, a small forest hides seven medallions for the mansion gate.
- Talk to Walker at the police station and take the figurine. Clear the snow in front of the large back-alley gate with the shovel and put the figurine on the lock.
- The forest starts at a signpost. Take a medallion there. On the left-hand paths, find medallions in the hollow tree, under the cloth on the bench and by the fallen log, where you also take the axe. Chop the tree that blocks the right-hand path. Take the horn and a medallion from the bicycle. Find another medallion under the snow on a rock. Blow the horn to scare off the boar, take the oar and fit it to the boat. Row across for the seventh medallion under the branches, then take the hook from under the branches on the other bank.
- Repair the rope bridge with the hook, cross it and put the seven medallions in the gate. Remove the mailbox cover with the screwdriver and take the punch card and a goblet. Cut the padlock on the shutters left of the door with the hacksaw and climb in.
The scientist's living room
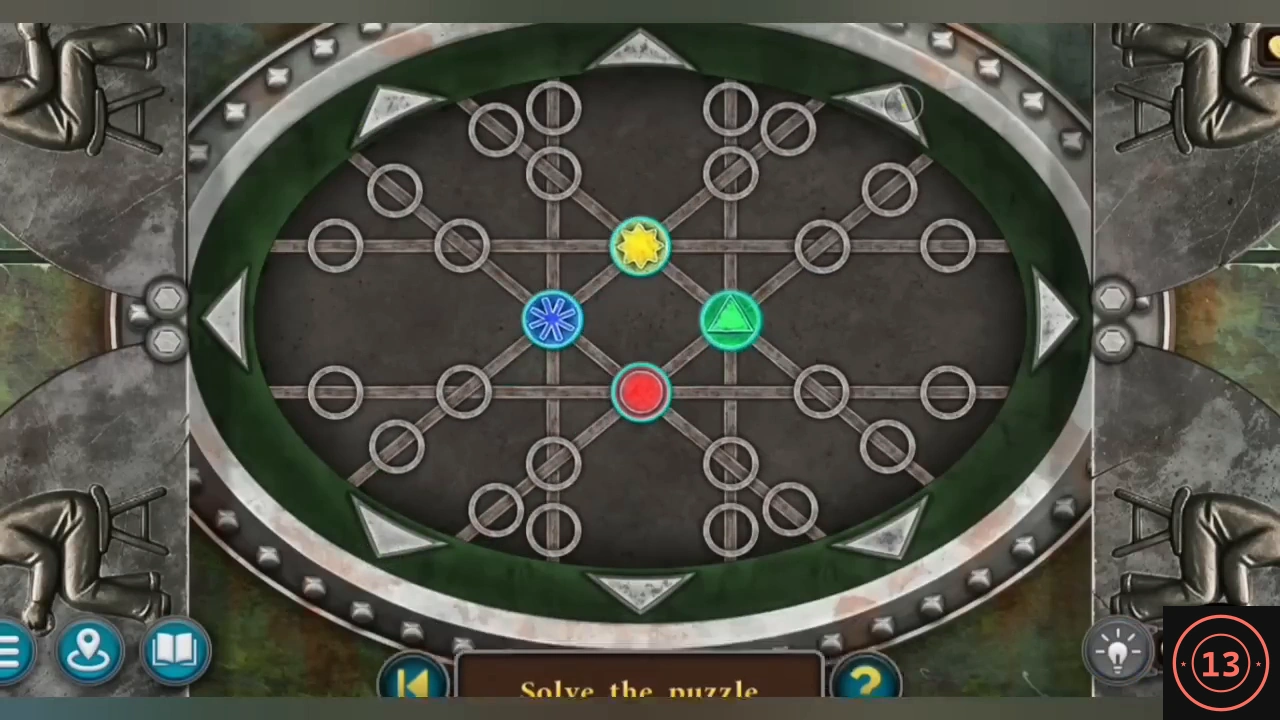
Search the living room and open the way to the laboratory below the garden.
- Take the pistol from the books left of the green chair and the one under the papers on the floor at the bottom left. Use the umbrella on the balloon in the top-left window for the second goblet. Feed the punch card into the machine on the coffee table to read its message. Put both goblets on the mounted fish and take the broken wire cutters and a round key. Take the fisherman figure from the sofa, open the projector box with the round key and take the hint card.
- Fit the fisherman to the green case in the beach shed. Use the arrows to move the four coloured tokens along the tracks until each sits on the centre slot of the same colour and symbol. Take the fish food.
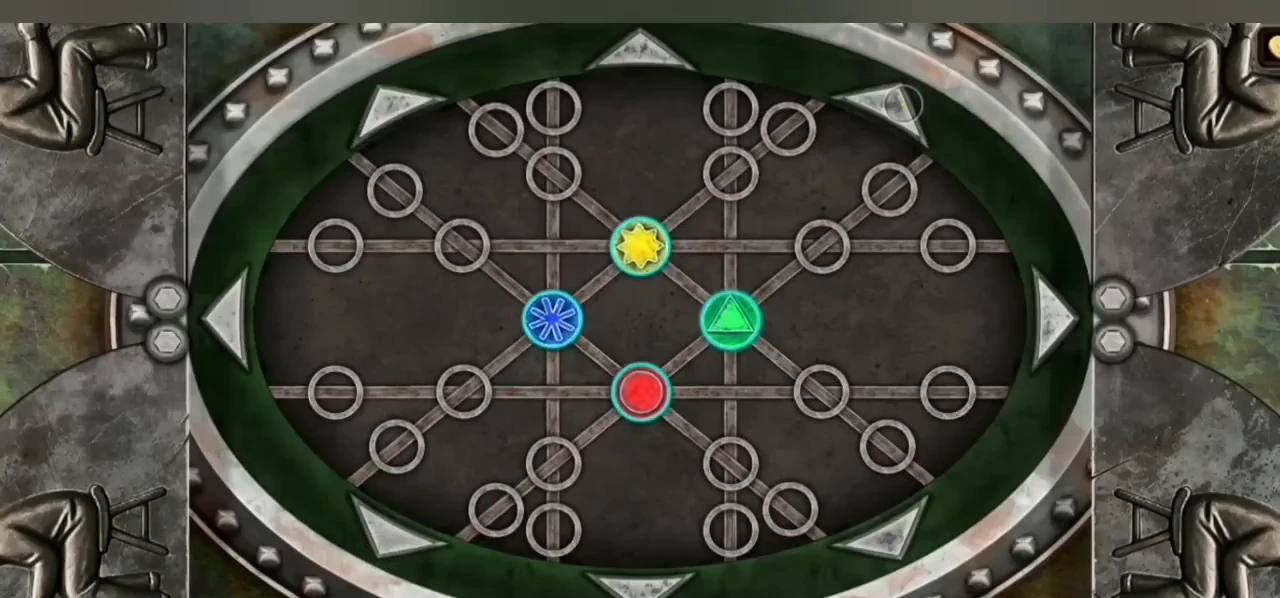
Fisherman box solved. - Sprinkle the fish food into the tank in Marjorie's living room and take the fish-tail key. Unlock the tall clock cabinet in the scientist's living room. Turn the three rings so that all their gaps line up on the left by the hinge; one ring can drag its neighbour. Take the handle.
- Fit the handle to the small building on the left of the garden and add the hint card. Tapping a gear turns the six gears around it clockwise. Arrange the gold and silver gears to match the card. Ride the lift down to the laboratory.
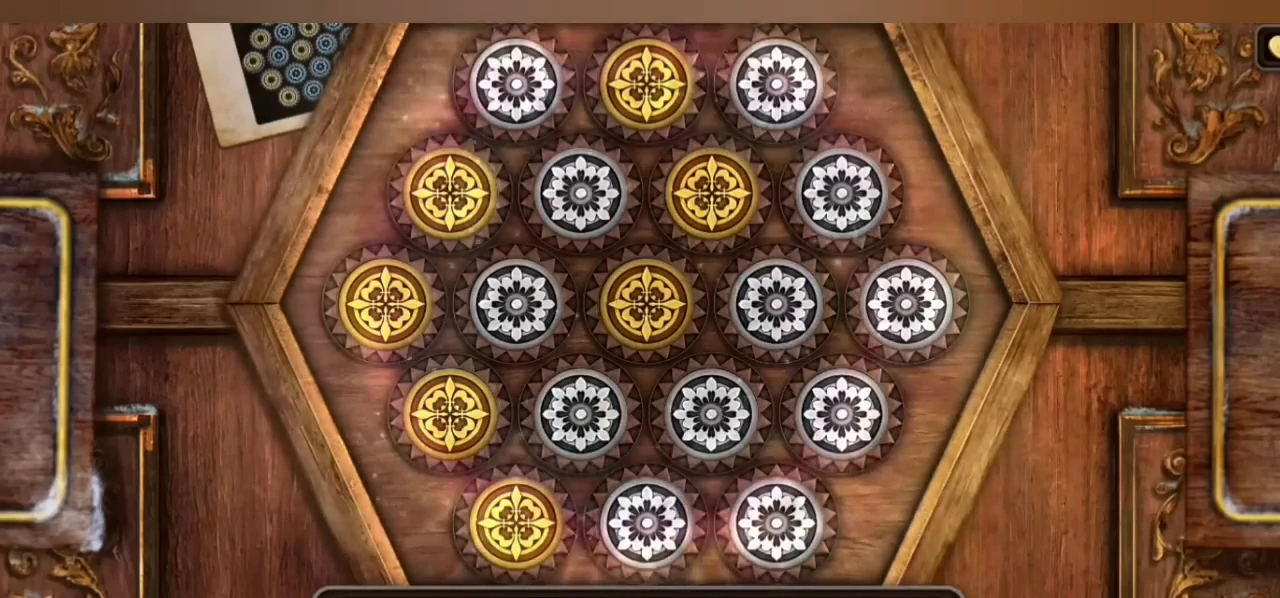
The solved gear pattern, matching the hint card at the top left.
The laboratory and the garden chest
Examine the scientist's body and the laboratory evidence. The case file counts six laboratory clues.
- Tap the scientist's body (evidence) and take the part next to it. On the desk on the right, read the open book, then open the closed book and take a pistol. From the small tray behind the table, take the cutter part; open the small case with the part and take the amulet. Combine the cutter part with the broken wire cutters. Take the magnet from the white box on the left and the fish emblem from the sewer passage at the back.
- Open the small panel of the glass cabinet in the living room and pull out the gear with the magnet. Put the gear on the greenhouse door on the right of the garden and take the pruning shears and the shovel. Dig in the snow by the dead tree on the left and put the amulet on the chest.
- Slide the rows of stones so that each small fish falls into the mouth of the big fish with the same pattern. Read the contract (evidence) and take the lever.
- Cut the wire on the bench in the round gazebo with the wire cutters and take the last pistol. Hang all four pistols on the gun display on the left wall of the living room. Take the valve and the handle.
- Open the white box in the laboratory with the handle and tap the pills (evidence). Fit the valve to the machine by the red door and start it. Tap the jars inside (evidence) and assemble the diving suit.
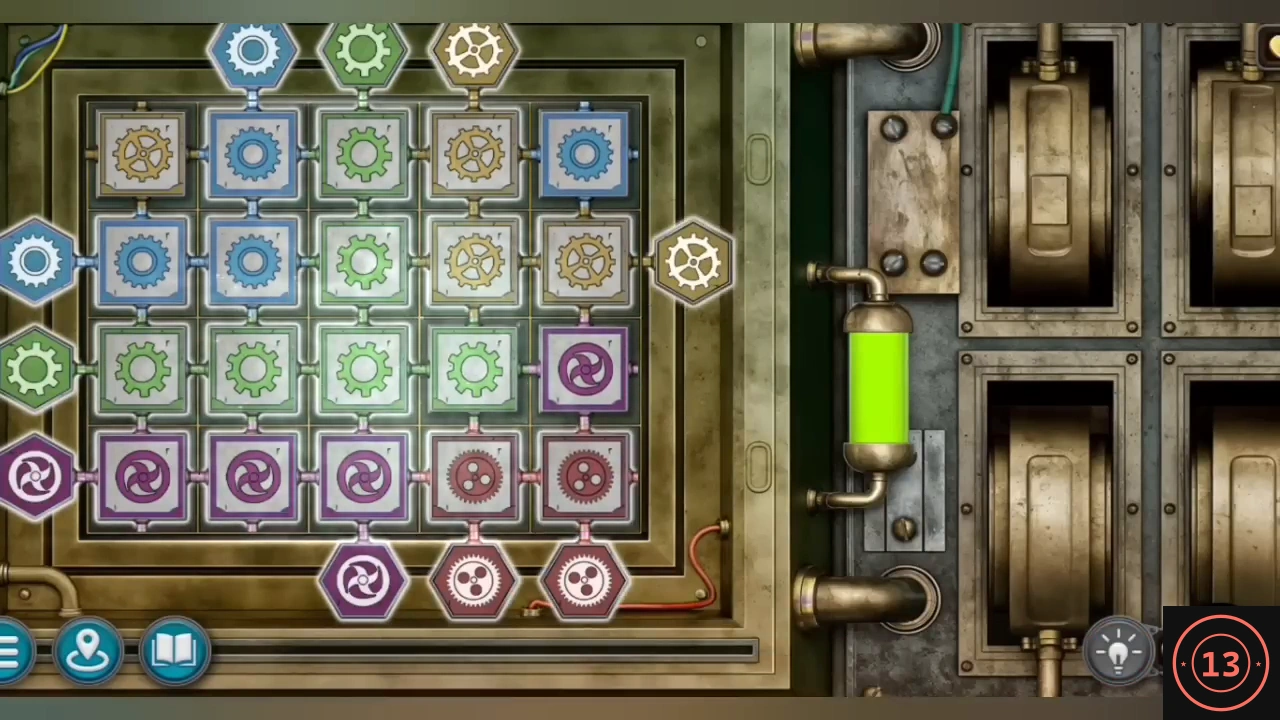
- Remove the cloth from the machine on the back wall and fit the lever to its panel. Slide the rows and columns of gears so that each colour forms a path between its two matching end gears. Watch the creature appear in the tank (evidence).
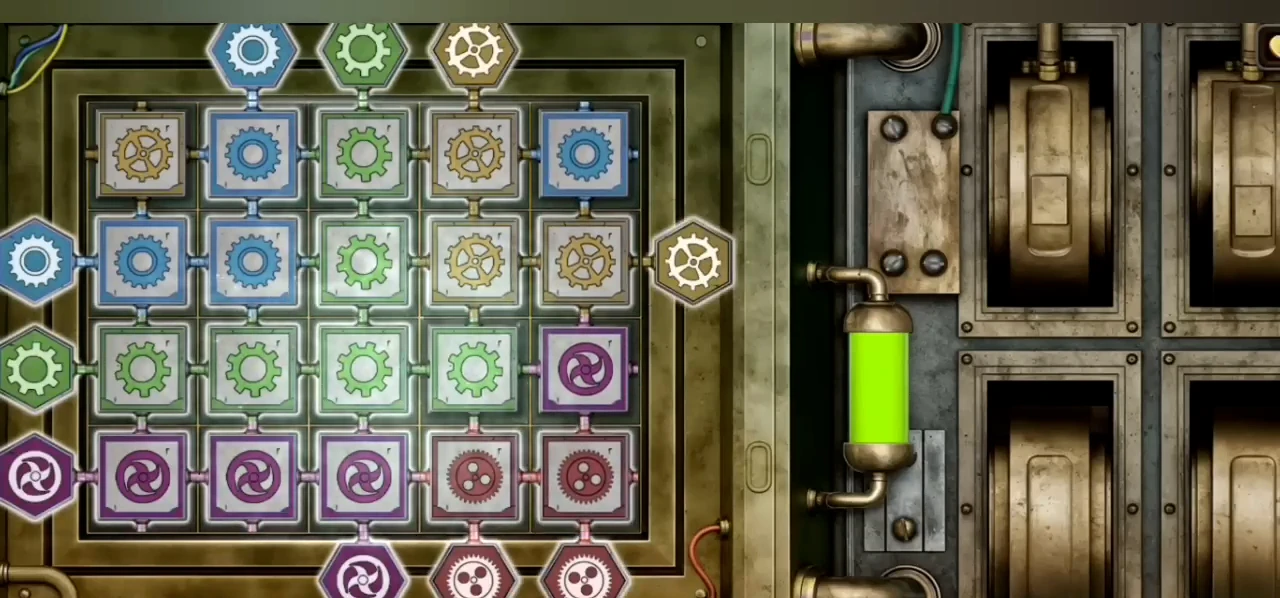
Tank machine solved: each colour links its two end gears. - Put the fish emblem on the compartment of the wrecked boat at the shack. Each number on the edge pushes an arm that many squares and shoves any token in its way. Use them to bring the four fish tokens into the four middle squares. Take the kerosene and fill the lamp with it.
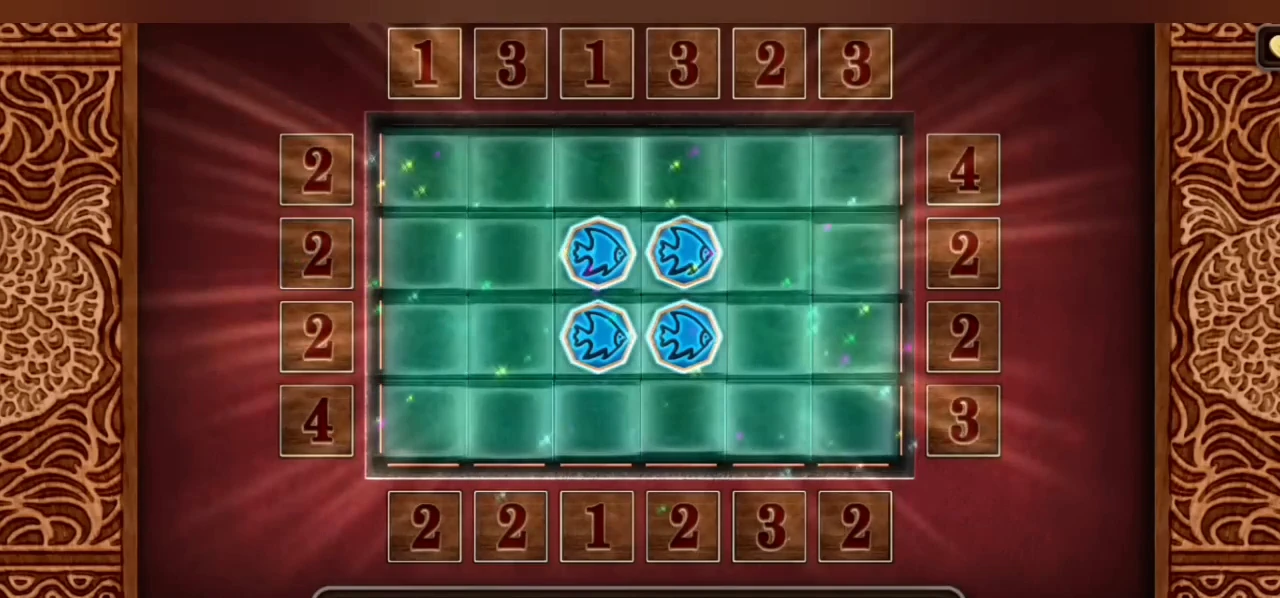
Wrecked boat solved: four fish in the middle squares.
The underwater cave
Dive below the shack to find what remained of Frances's belongings.
- Place the diving suit at the far end of the shack beach and dive. Take the seashell from the water on the left and move the pots to reach the tongs. Cut the vine on the left with the seashell and take it. Pull a stone half from the water by the anchor case with the tongs, and take the other half from the ship's deck.
- Hang the vine on the rocks on the left and climb to the chest. Put both stone halves on it and take the flare, the brush and a part. Drop the flare into the deep hole near the rocks and take the wheel handle. Scrub the rusty cylinder on the right with the brush and take the carabiner. Clip it between the chain and the anchor, fit the wheel handle to the winch on the deck and wind it.
- Fit the part to the lock on the left of the anchor case. Read the folder (evidence) and take the matches. Light the lamp with them.
- Cut through the branches over the doorway on the far right of the back alley with the pruning shears. Light the dark room with the lamp. Take the poker, the violin from the barrel and the coin beside the barrel. Rake coal from the pub fireplace with the poker. Rub the coal over the blank page of the laboratory diary to read the torn-out text (the last laboratory clue).
The mystic's attic
The mystic finally talks, and his attic holds most of the ritual ingredients.
- Take the key from the bag on the table in the mystic's house. Pull down the attic ladder from the ceiling hatch with the umbrella, unlock the attic door and talk to the mystic (evidence). He gives you a key.
- Unlock the glass bookcase on the balcony downstairs. Find the 15 books marked with a star; open boxes, move objects and use found keys to reach the hidden ones. Give the books to the mystic and keep the ritual book.
- In the attic, take the dried jimsonweed above the desk. Open the birdcage with the bird and take the coin. Take the sun from the floor by the violin case, open the case with the violin and take a lever and a ram head. Take the weights from the printing press base, fit the lever, raise the press and take the second sun. Open the red case on the beam above for a pestle and the second ram head. Put both heads on the ram statue on the bookcase and take the fly agaric.
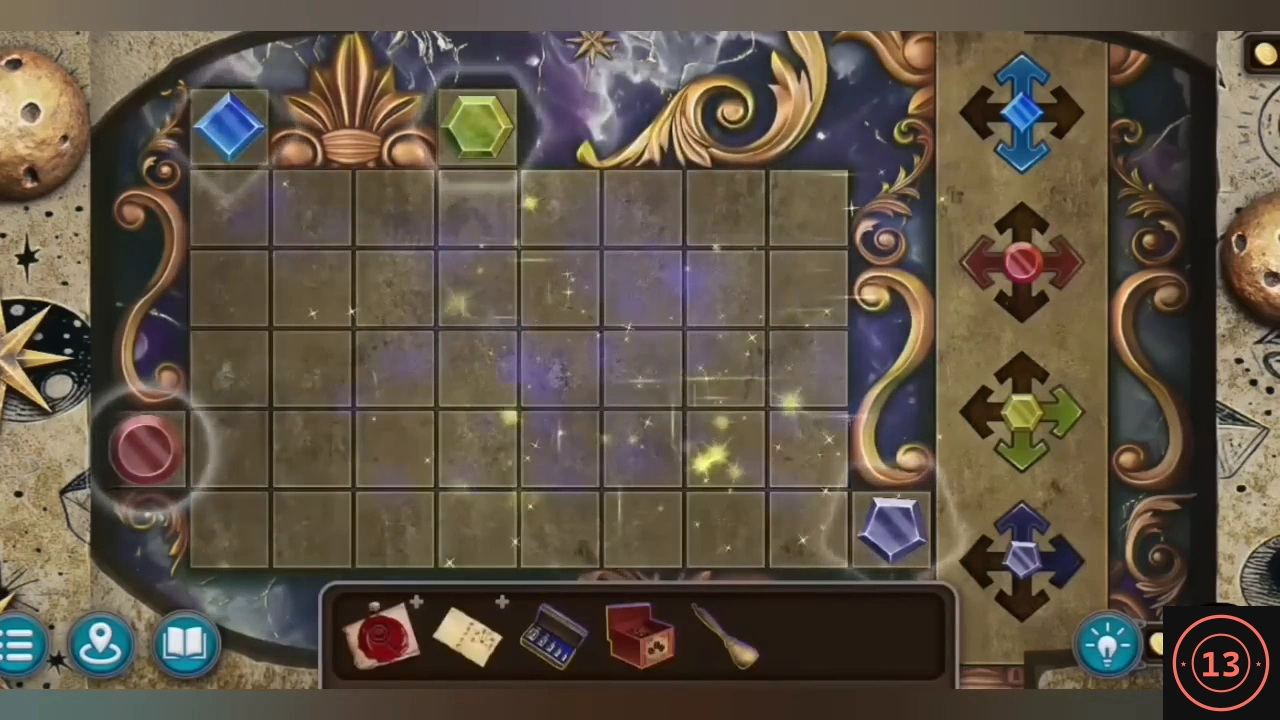
- Put both suns on the chest on the left. Bring each token to the notch of its shape: blue diamond top left, green hexagon in the top edge, red circle in the left edge and purple pentagon in the right edge at the bottom. The buttons on the right move one token a square at a time, only in its coloured arrow directions: the diamond up and down, the circle left and right, the hexagon right and down, the pentagon up and right. A moving token pushes the token in its way, so every other direction has to come from pushing. This takes many moves, so here is the method rather than a move list. Early on, push the pentagon down into the bottom row with the diamond; it cannot move down by itself. Get the hexagon into the fourth column, under the top notch (push it left with the circle if needed), put the diamond directly below it and raise the diamond to push the hexagon into the notch. Then line up the diamond and the circle in the fourth row, with the circle on the right, and move the circle left to push the diamond to the left edge. Raise the diamond into the top-left notch, slide the circle left into its notch and slide the pentagon right into its notch. Take the ritual items.
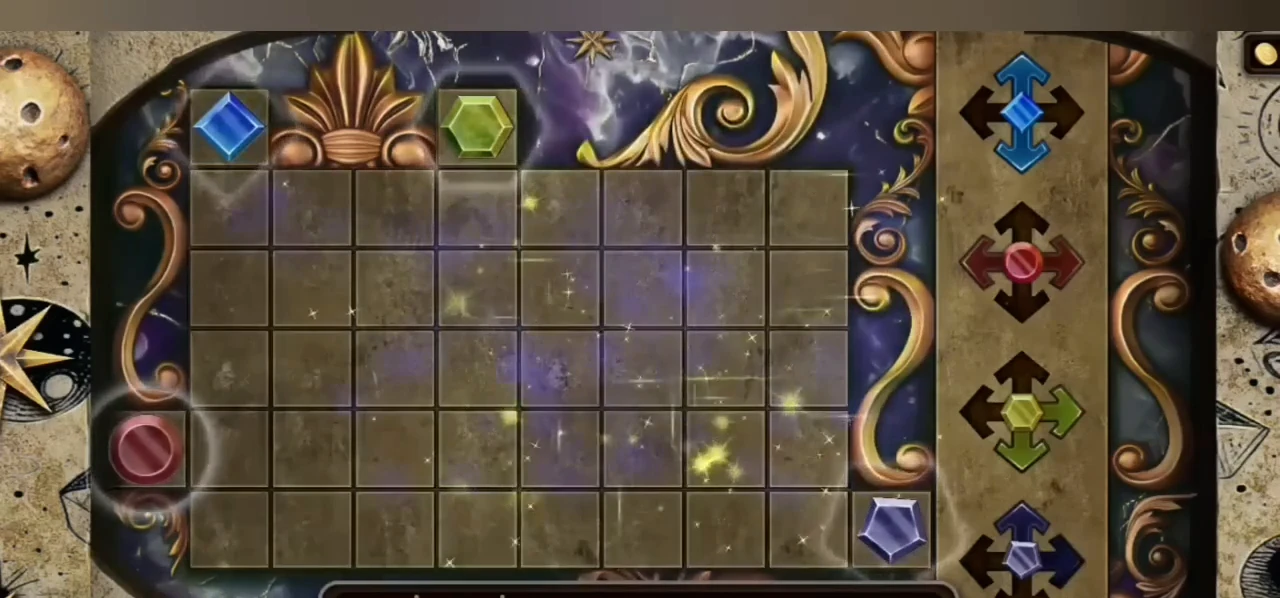
Sun chest solved: every token sits in its matching notch.
The potion and Frances
Brew the potion from the recipe and meet Frances on the astral plane.
- Ask the bartender for absinthe; he gives you a key and a list. Unlock the storeroom door on the right of the pub and find the 15 listed items. Some are in boxes, behind the window blind or under the cloth over the painting. Hand them over for the absinthe. Take the tin of coffee from the coffee stand.
- Give the five coins to the receptionist for a token. Put it in the cigar machine above the left of the reception desk, then unroll the cigar for the tobacco leaves.
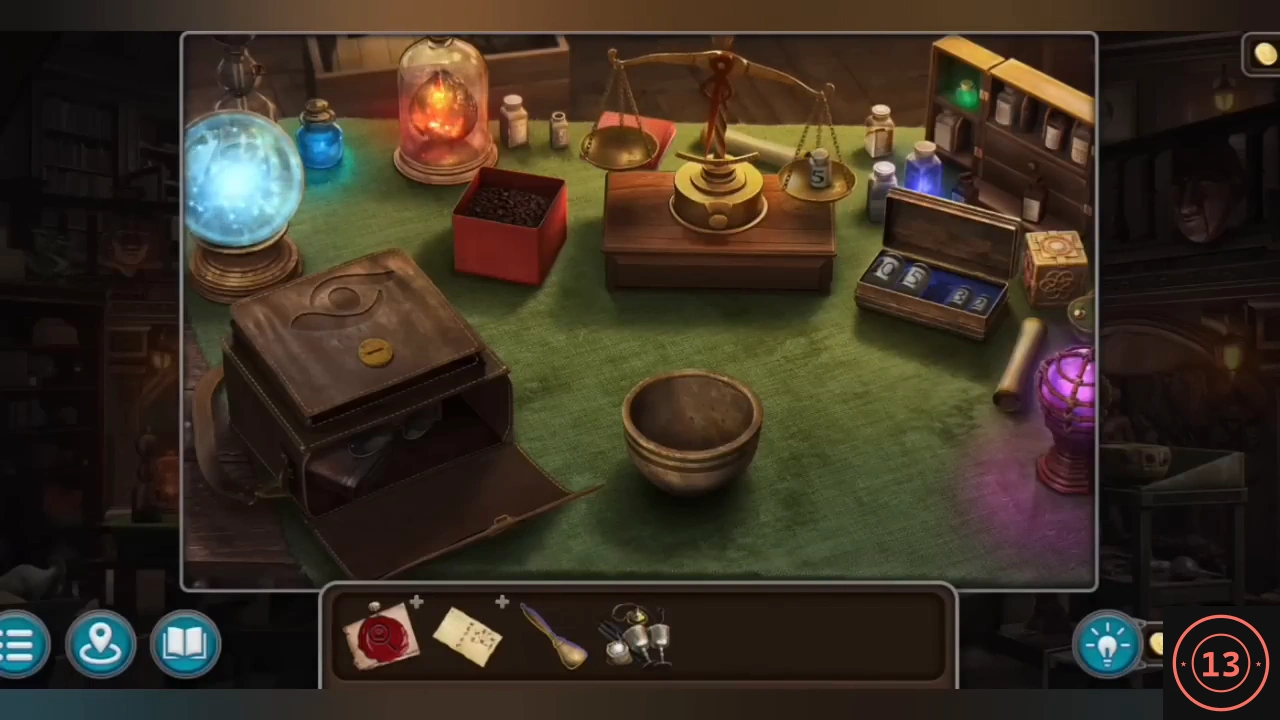
- At the table with the green cloth in the mystic's house, put the weights, the pestle and the coffee down. Put weights totalling 10 grams on the scales (for example 5, 3 and 2 grams), then add coffee beans to balance them. Add the beans, tobacco leaves, fly agaric, absinthe and jimsonweed to the recipe. Tip each ingredient into the mortar and grind them with the pestle for the potion.
- Give the potion to Penelope at the shack. On the astral plane, tidy the library by returning 12 objects to their places: the armchair, globe, gramophone horn, window decoration, telescope, bust's head, flower pot, clock face, railing, shield, rug and lampshade. Talk to Frances. His request (evidence) completes the case and the chapter.
Chapter 1 collectibles and morphing objects
Chapter 1 has 15 morphing objects, 7 glass balls and 8 stamps. A morphing object keeps changing shape; tap it while it changes. Tapping an item adds it to the counter. The recording picks up the last few just before the ritual; Chapter 3 shows that you can also look for missed items after the story ends.
- Glass balls (7): hotel room, on the marble shelf unit in the right corner; Penelope's room, on the high shelf at the top left; beach, in the snow on the left; Marjorie's living room, inside the dish cabinet after the piano puzzle; Frances's room, on top of the cabinet; fisherman's shack, on the metal ladder at the bottom right; scientist's living room, on the floor between two stacks of books. All seven earn the Seeker achievement.
- Stamps (8): hotel lobby, on the green suitcase on the luggage trolley; street, in the fountain; pub, beside the opened coffee stand; back alley, on the lamp post; mystic's house, on the wood panel by the gold globe; mansion mailbox, behind the goblet; laboratory, on top of the white box; attic, on the post at the top left. All eight earn the Philatelist achievement.
- Morphing objects (15): the hat on the coat stand in the hotel room; the flower basket on the lobby wall by the door; the weather vane on the police station roof; the middle of the curtain pelmet in Marjorie's living room; the pendant on the bedpost in Penelope's room; the cloth on the beach railing; a picture above the policeman's table in the pub; the decoration on top of the back-alley gate; an object hanging at the top left of Frances's room; a small object in the snow at the bottom left of the shack beach; the post on the right of the mystic's balcony; the windmill in the distance outside the mansion; the carving at the top right of the living room; the cotton reel on the cylinder in the laboratory; and the vase on the attic floor.