Bunker Circuit Panel
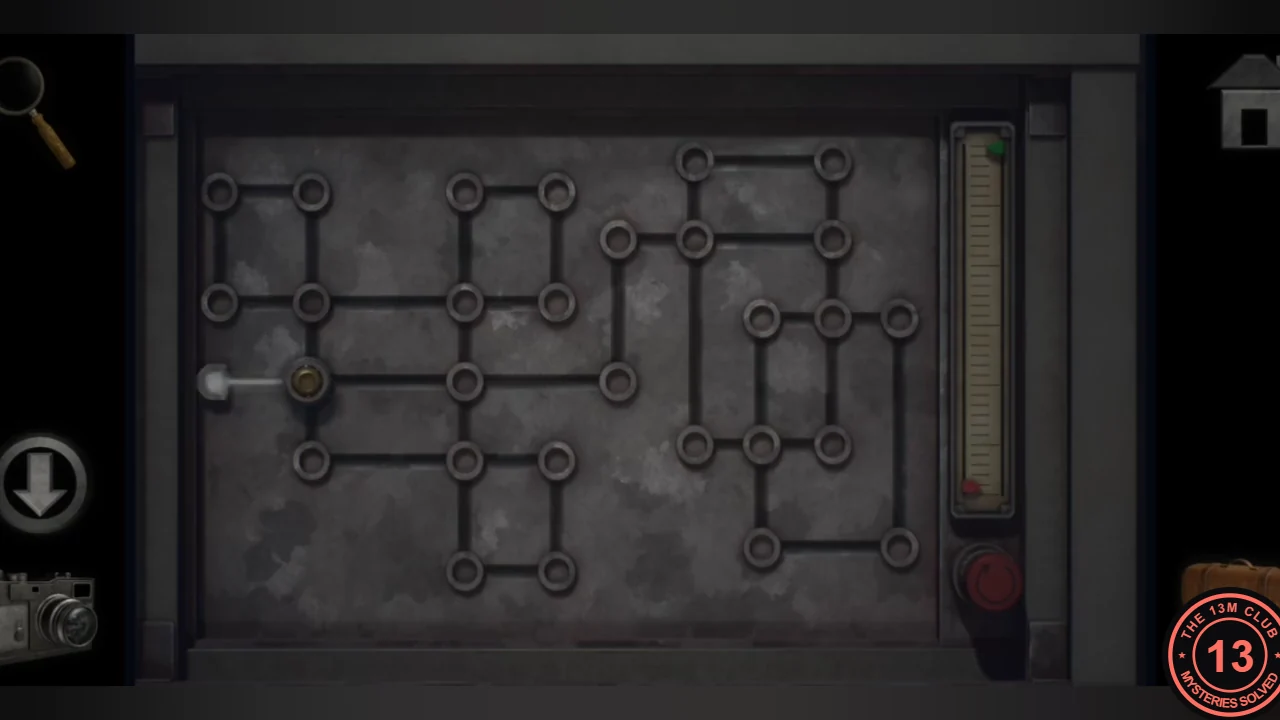
Open the panel beside the bunker door and trace every circuit line exactly once.
- Follow the snowy path to the fence. Photograph the symbol carved into the tree beside it.
- At the heavy bunker door, use the hex key on the wall panel to its left.
- The marker starts on the short stub at the far left of the middle row. Tap a neighbouring node to move; each line you travel lights up, and you must light every line exactly once. Plan so the route finishes at the T-junction in the top-right block, the only other node with an odd number of lines. The meter fills and the door opens.
Medical Room
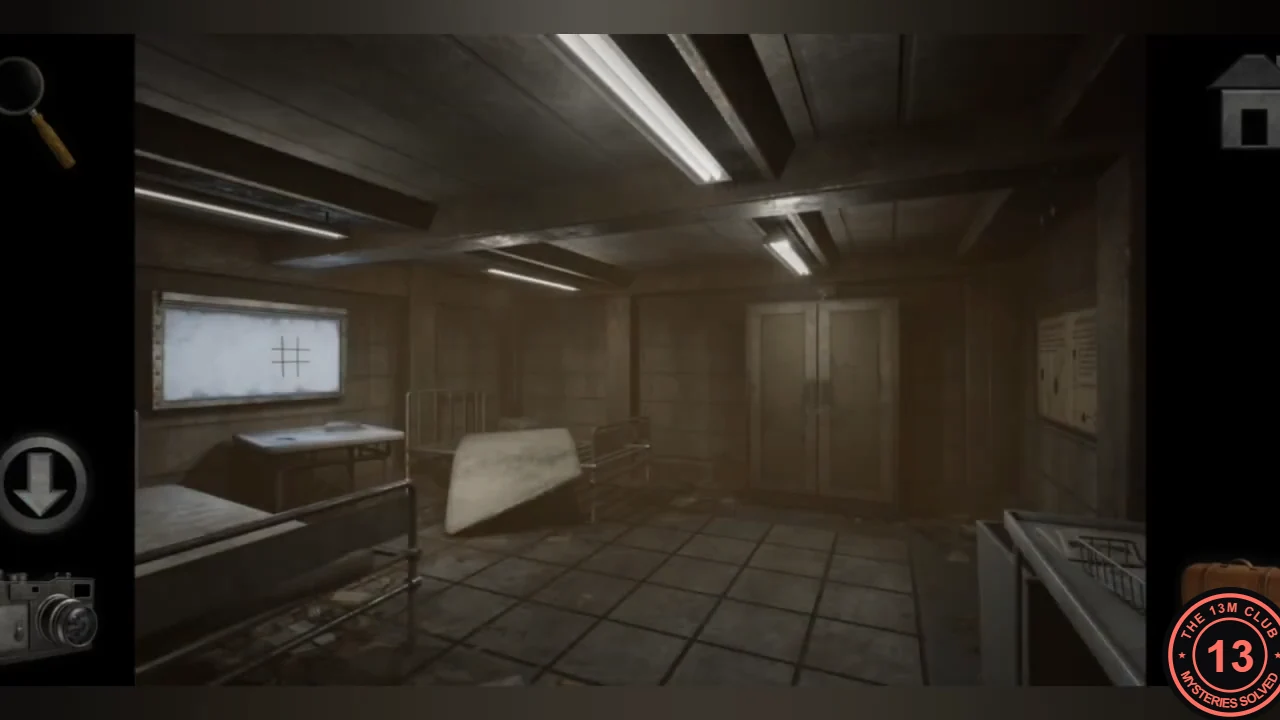
Inside the bunker, note two locks for later and collect a key.
- Note the inner corridor door's round lock with six pentagon tiles. In the medical room, note the tall locker with a four-wheel number lock and photograph the AGENT TRANSMISSIBILITY poster.
- Take the key from the desk under the x-ray light box. The light box has a hand-drawn 3 by 3 grid.
Trench Hatch Symbol Tokens
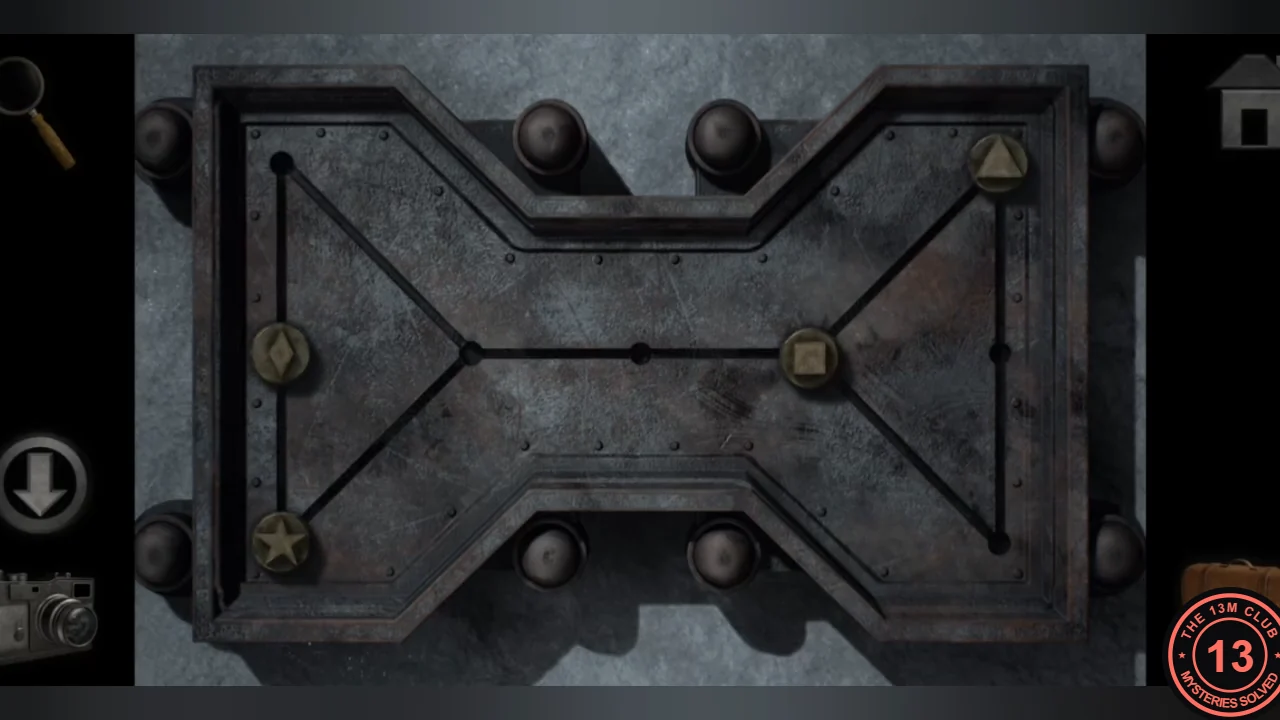
The trench hatch has four symbol tokens (square, diamond, star and triangle) that slide along a mirrored track.
- Slide the tokens along the lines to empty nodes until the square is in the top-left corner, the star in the top-right corner, the triangle on the left junction and the diamond on the right junction, with all other nodes empty. The hatch opens.
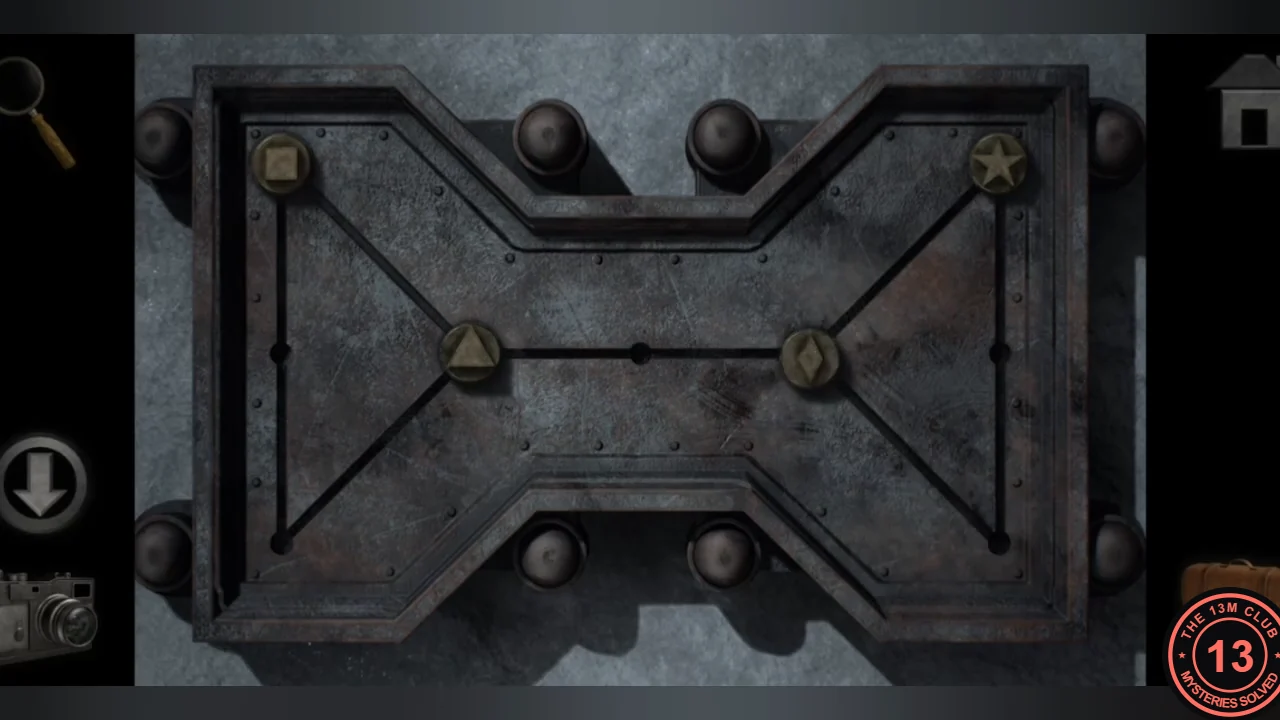
Tokens in place: square top-left, star top-right, triangle on the left junction, diamond on the right junction. - In the cold storage room below, take the crossbow and photograph the two chalk figures on the wall.
Hunter's Box and the Hanging Bag
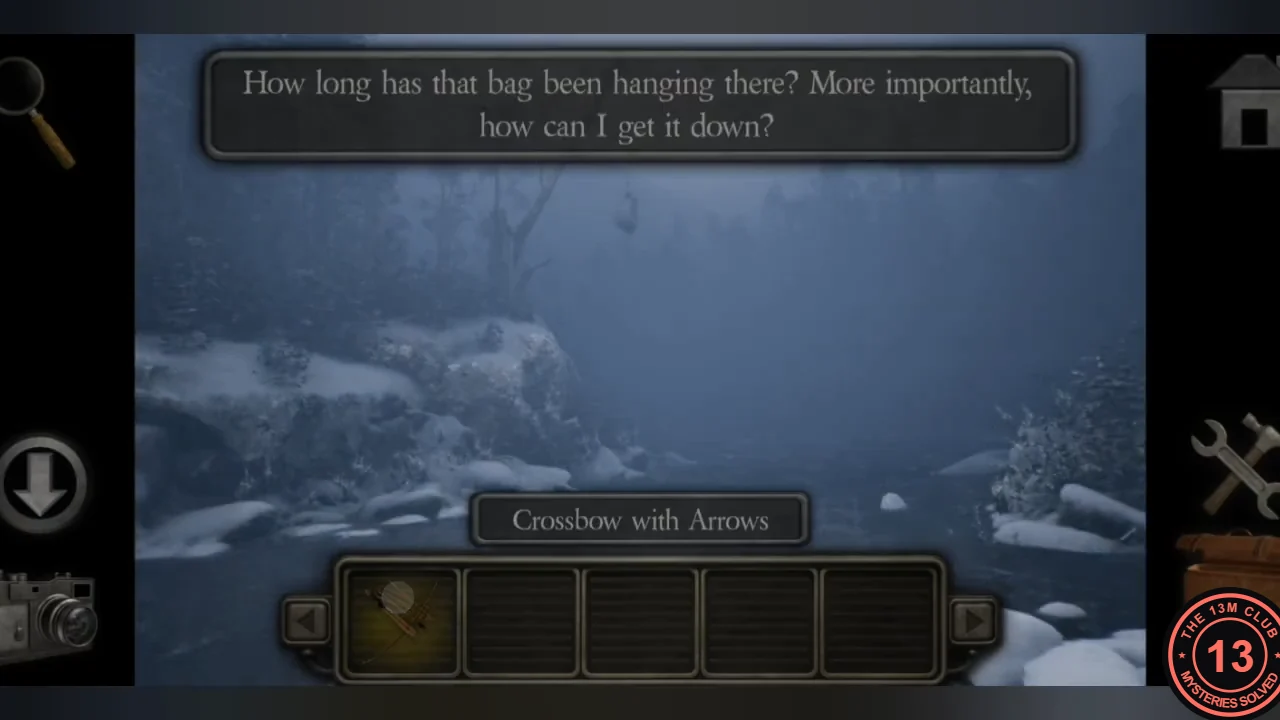
Arm the crossbow and shoot down the bag hanging over the frozen river.
- Unlock the hunter's box (the green metal box in the snow) with the medical room key. Take the arrows and the string.
- In the build menu, combine the crossbow, arrows and string.
- At the river bank, use the crossbow on the hanging bag. Drag to aim until the crosshair sits on the rope just below the branch, then tap to shoot. Open the fallen bag and photograph the note: 3914.
Medical Locker
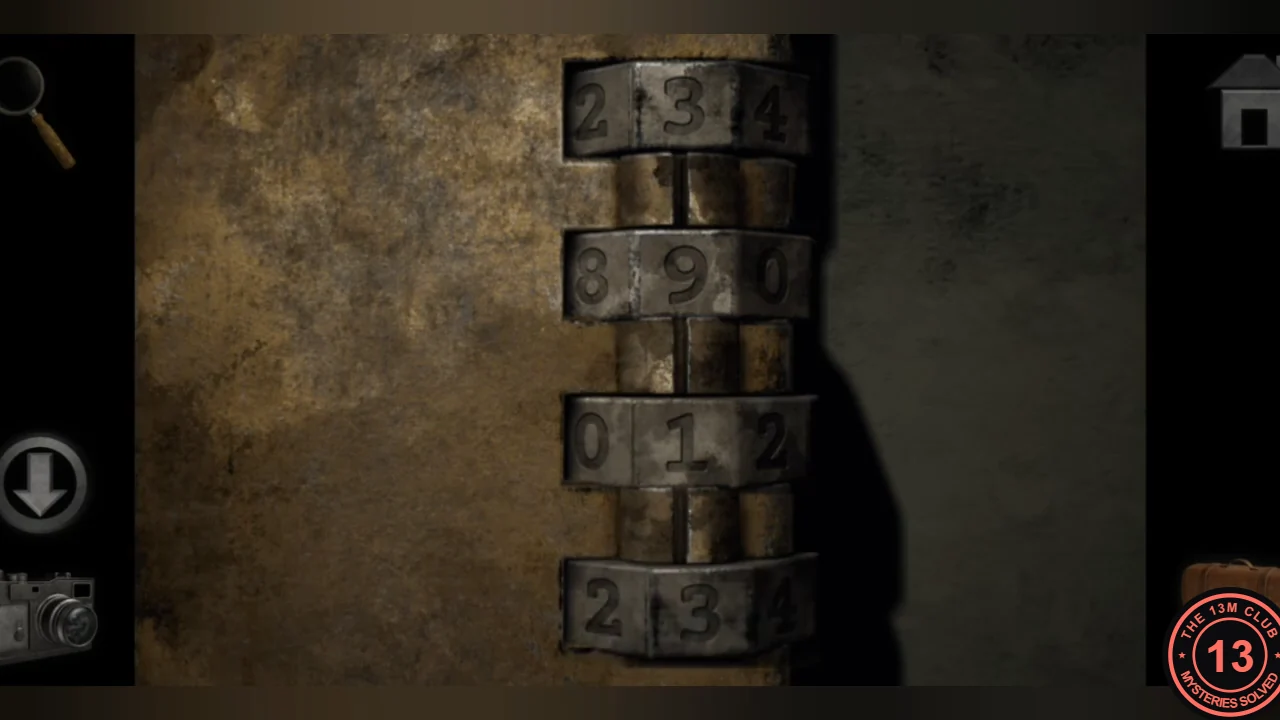
Open the medical room locker with the code from the bag.
- Set the medical locker wheels to 3914. Take the see-through paper with markings, and photograph the drawings on the inside of both locker doors.CODE3914
Constellation Pentagon Door
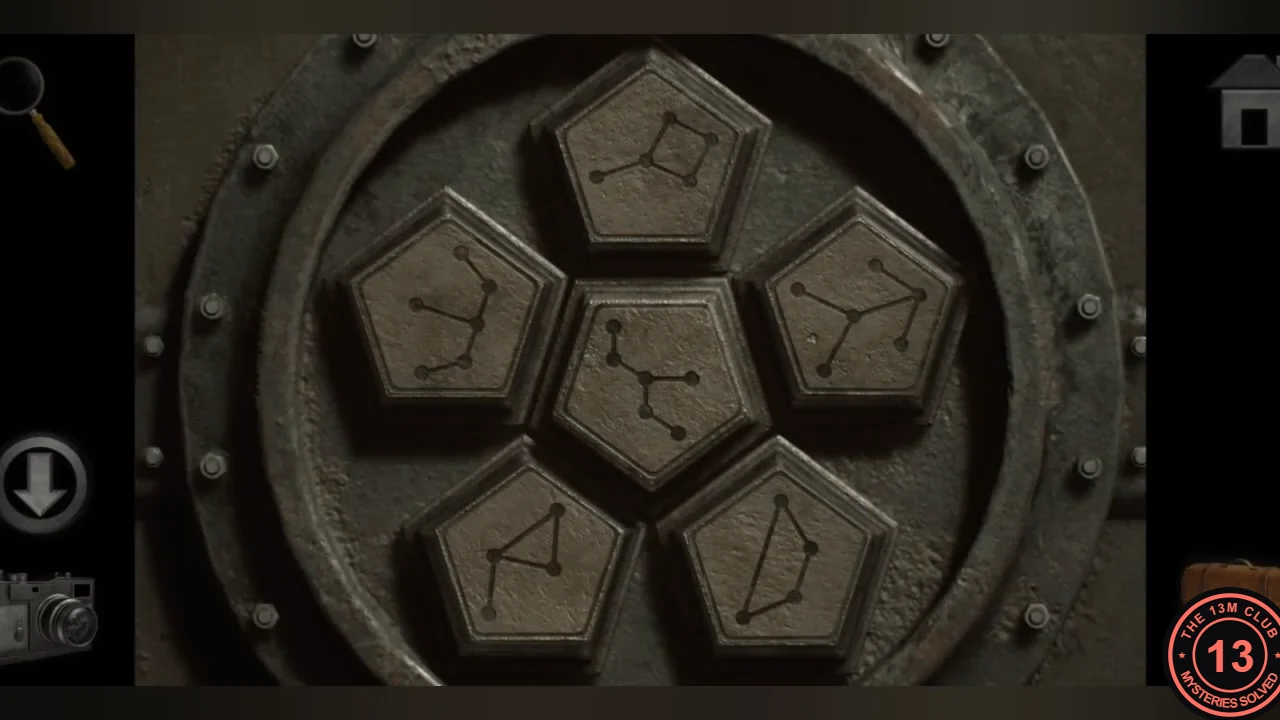
Each of the six pentagon tiles on the corridor door shows a dot-and-line figure. Tap a tile to rotate it until its figure matches one of your photographed drawings, upright.
- Rotate the tiles as follows. Top: the kite with its tail pointing straight down (left locker door). Bottom-right: the flat upside-down trapezoid, wide edge on top (trench wall carving). Bottom-left: the triangle with its tail line to the upper left (tree carving). Left and centre: these tiles carry the two bent, branching chalk figures from the cold storage wall; turn each until it stands the same way up as its drawing in your photo. Right: the Y-shaped figure with a hanging triangle from the right locker door. Each tile's figure is fixed and only rotates, so match the drawing it resembles. When all six stand upright the lock releases.
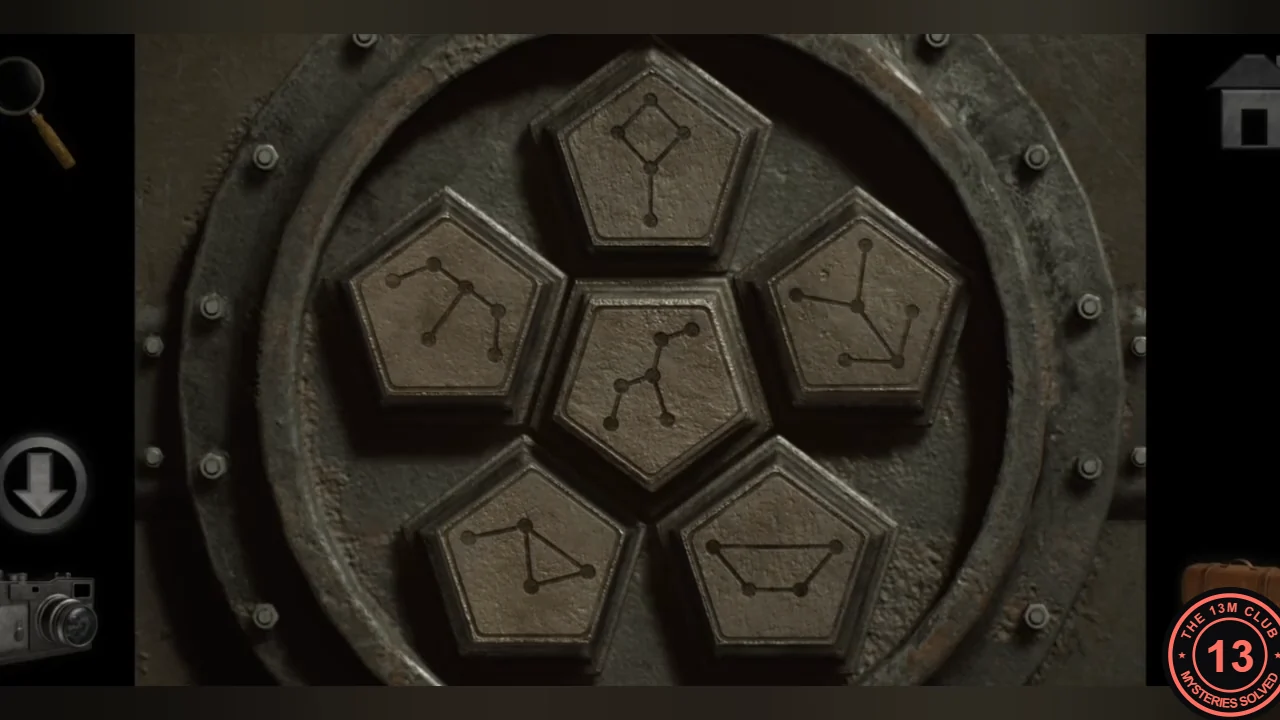
All six constellation tiles turned to their correct orientation.
Garage, Red-Cross Tent and Light Box
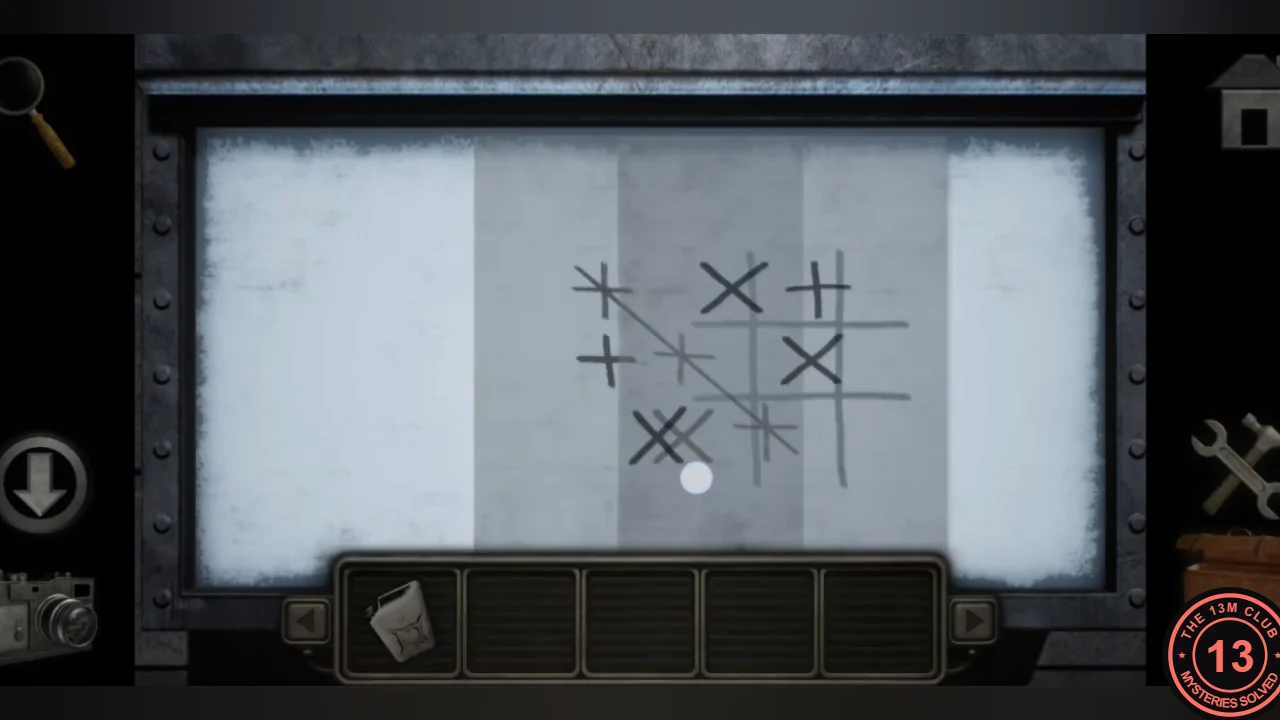
Collect a second see-through paper and a gas canister, then combine both papers on the x-ray light box.
- Go down into the garage. Note the wall panel with the numbers 2 6 12 15 17 25 28 above seven sliders; the car is locked.
- Leave through the side door to the snowy road. In the red-cross tent, take the second see-through paper and the gas canister.
- Further along, the sign reads 'Facility Lambda - 6km'. The guard shack door is locked by a keypad of nine dials, each showing a line.
- Return to the medical room and place both see-through papers on the x-ray light box. Drag them over the drawn grid until a 3 by 3 pattern of X and + marks appears, crossed by one diagonal line from top-left to bottom-right. Photograph it.
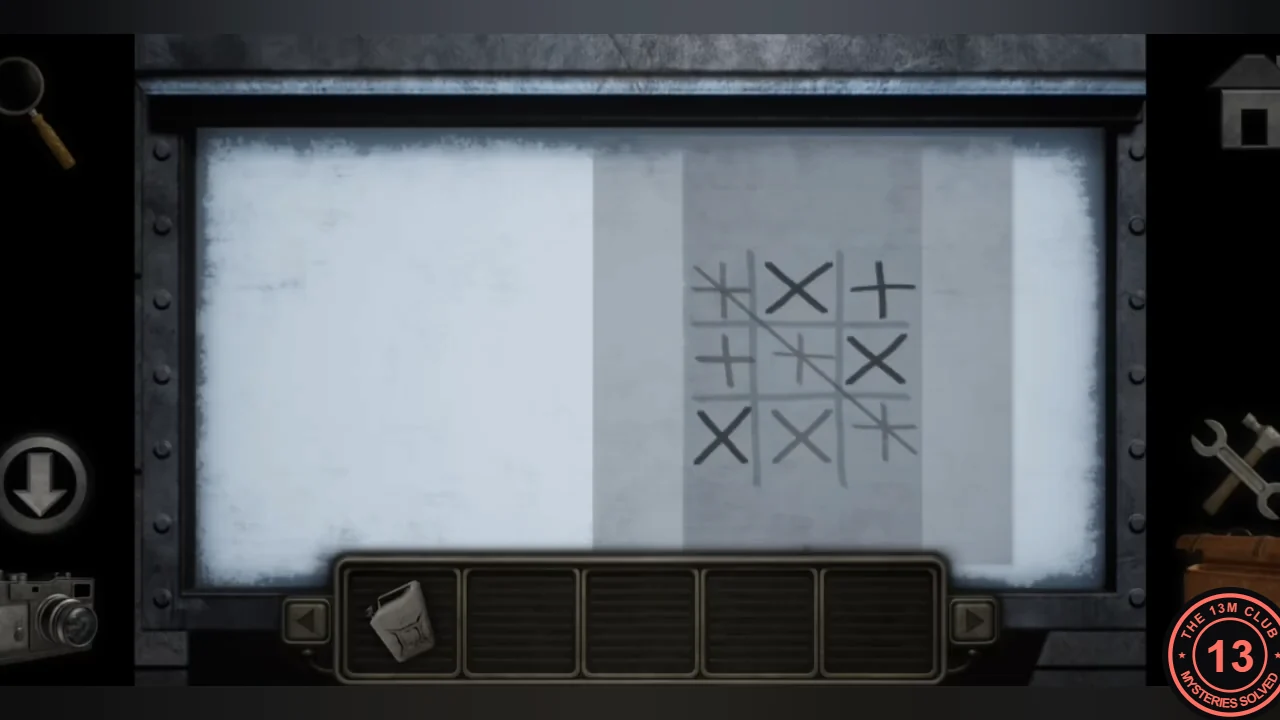
Both see-through papers aligned on the light box: a 3 by 3 pattern of X and + marks crossed by one diagonal.
Guard Shack Dial Keypad
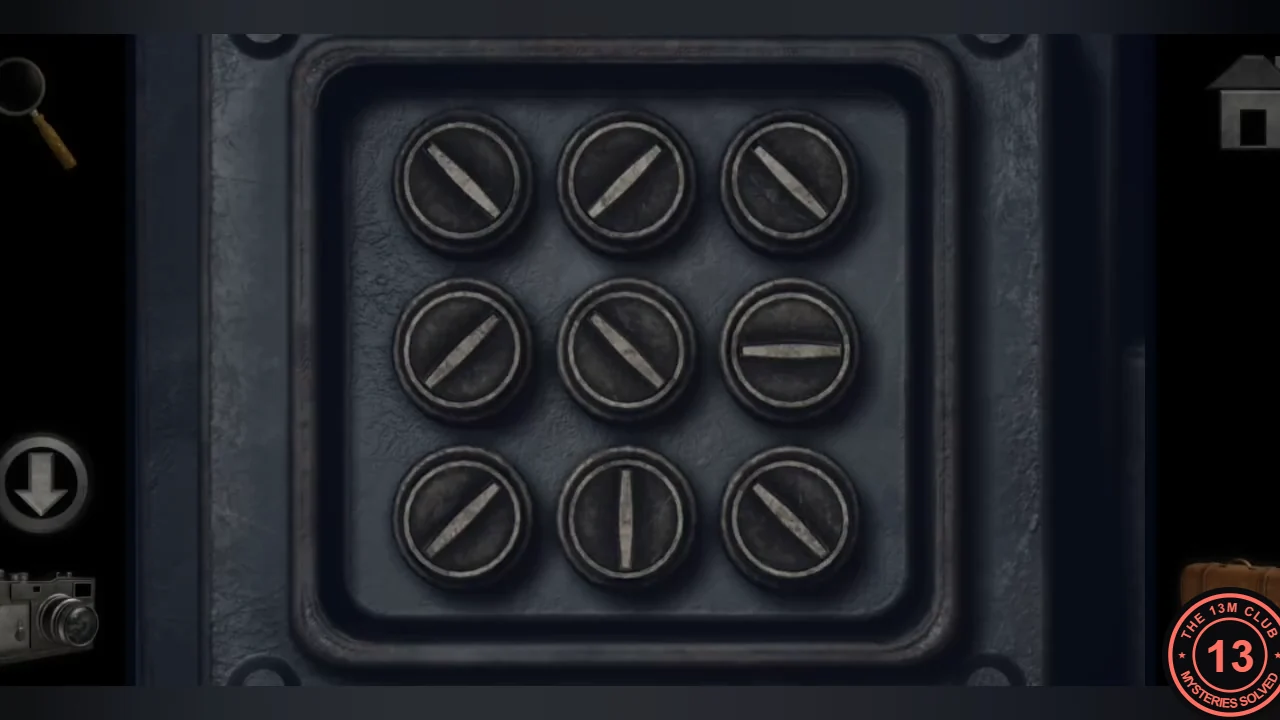
Turn each of the nine dials to a line that matches the light-box pattern: the diagonal line sets the three cells it crosses, + cells need a straight line and X cells a slanted line. The pattern does not make clear which straight or slanted stroke every cell takes, so the setting that opened the door in the recording is listed below.
- Set the dials, reading rows from top to bottom and left to right: top row \ / |, middle row — \ \, bottom row / \ \. The shack door opens.CODE\ / | — \ \ / \ \
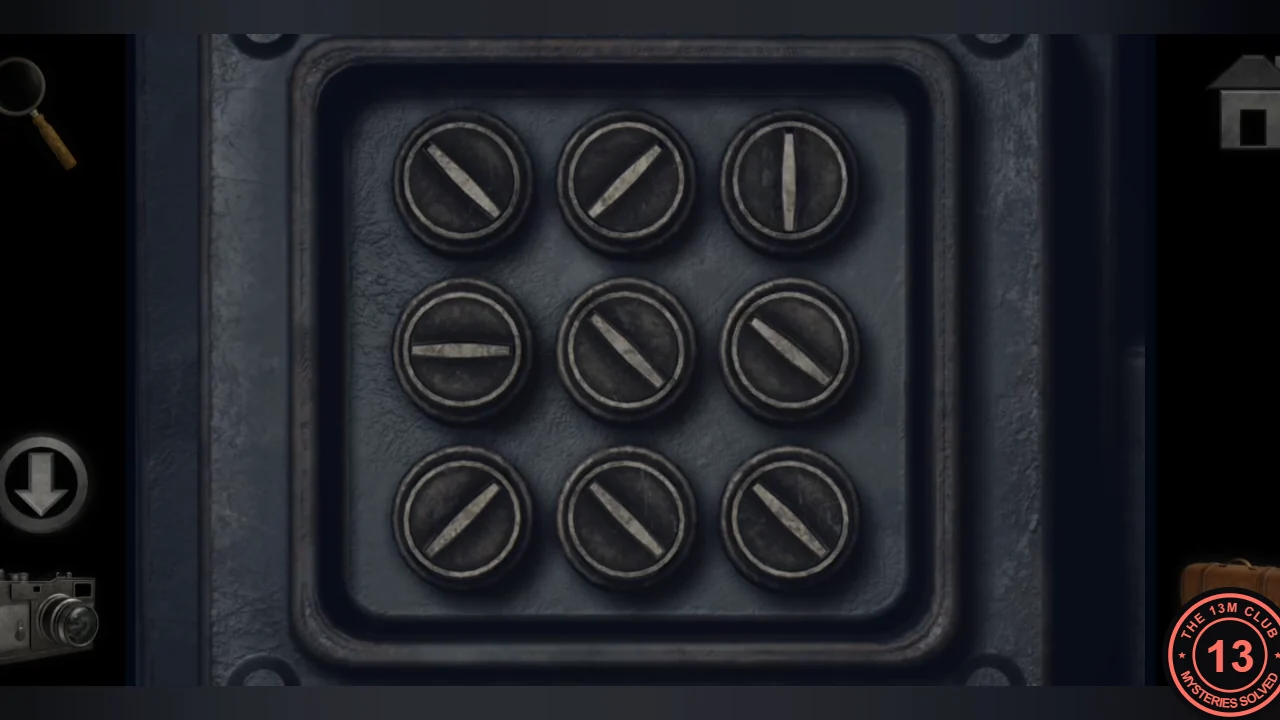
Guard shack keypad set: top \ / |, middle — \ \, bottom / \ \. - Inside, pick up the car keys and photograph the April 1997 wall calendar.
Garage Date Sliders
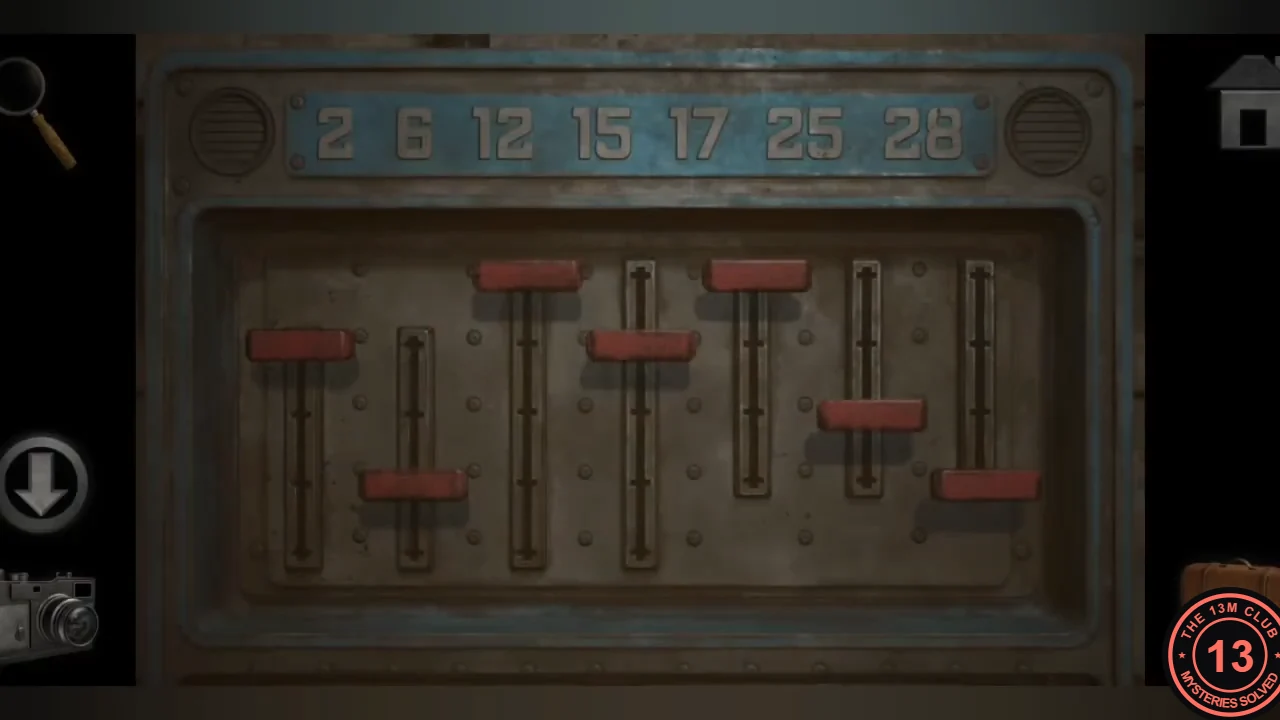
The slider panel is a small copy of the April 1997 calendar. The seven sliders are the weekday columns, Sunday to Saturday from left to right, and each slider's height marks the week row of the listed date in that column.
- On the calendar: 6 is a Sunday in week 2, 28 a Monday in week 5, 15 a Tuesday in week 3, 2 a Wednesday in week 1, 17 a Thursday in week 3, 25 a Friday in week 4 and 12 a Saturday in week 2. Counting the five slider stops from the top, set the sliders from left to right to stops 2, 5, 3, 1, 3, 4 and 2. The panel accepts the setting.CODE2 5 3 1 3 4 2
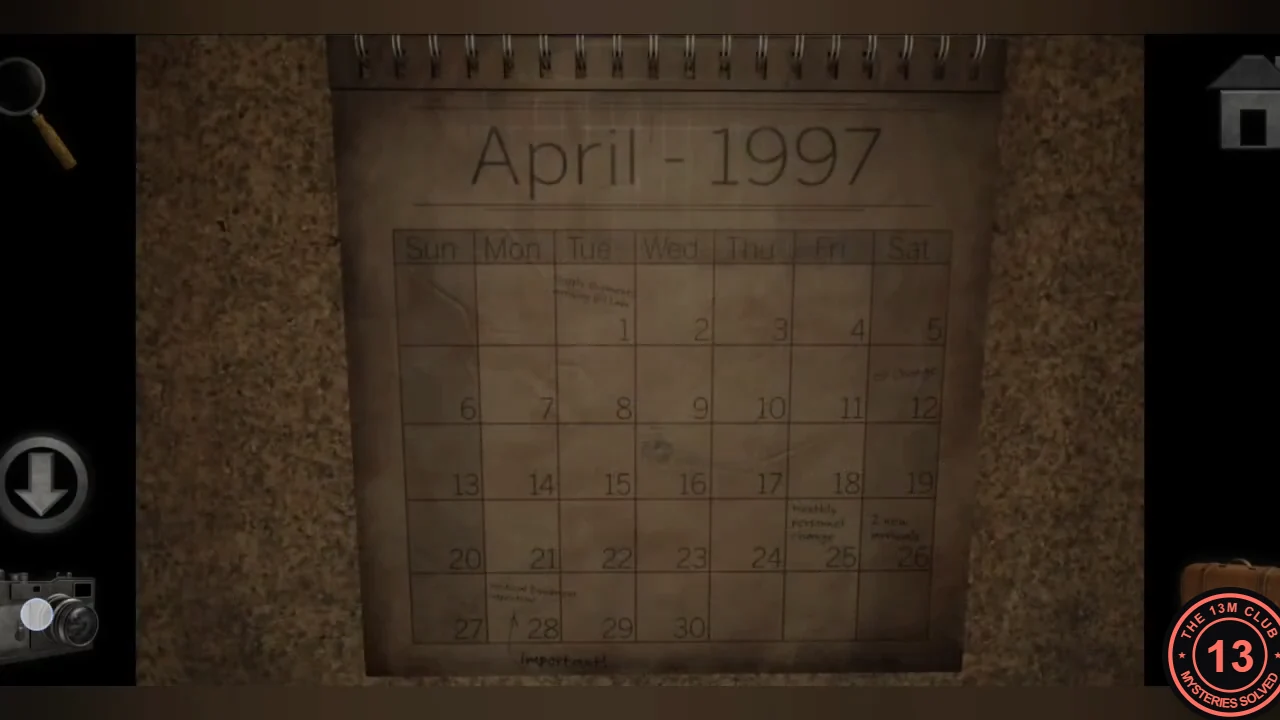
The April 1997 wall calendar from the guard shack; the 1st falls on a Tuesday. 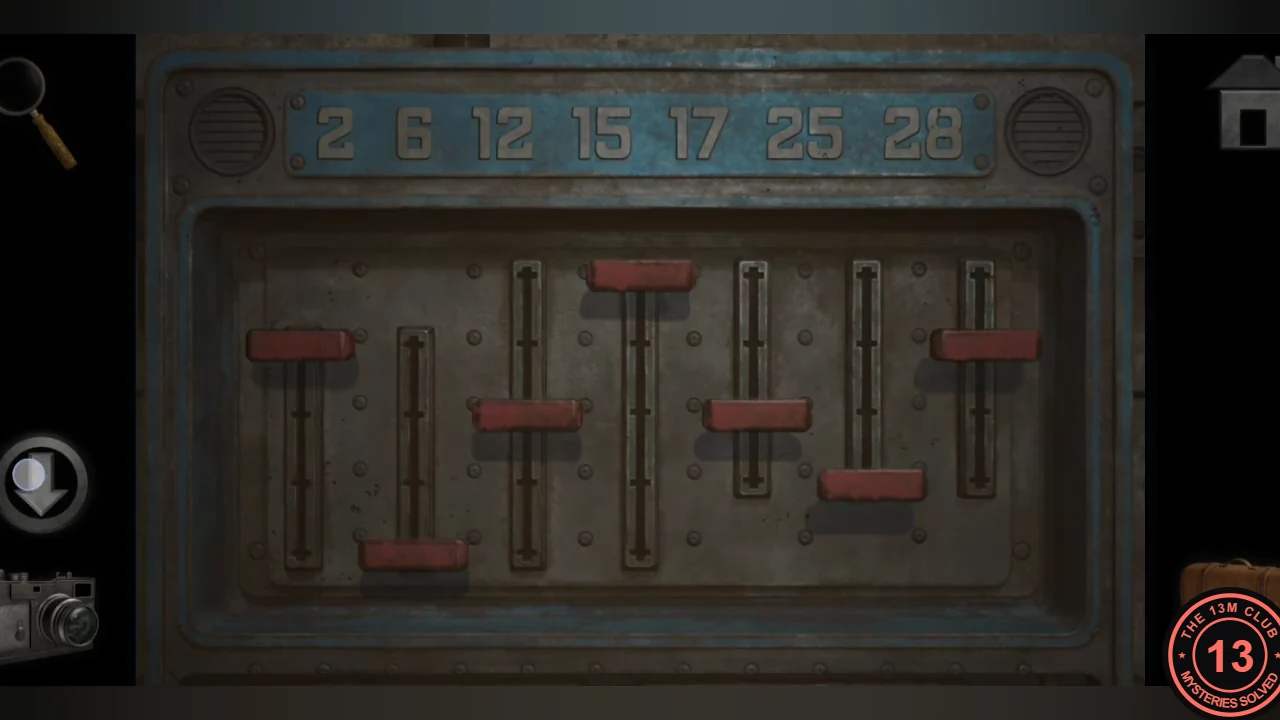
Sliders set to stops 2, 5, 3, 1, 3, 4 and 2 from left to right, counting from the top.
Fuel Up and Drive to Facility Lambda
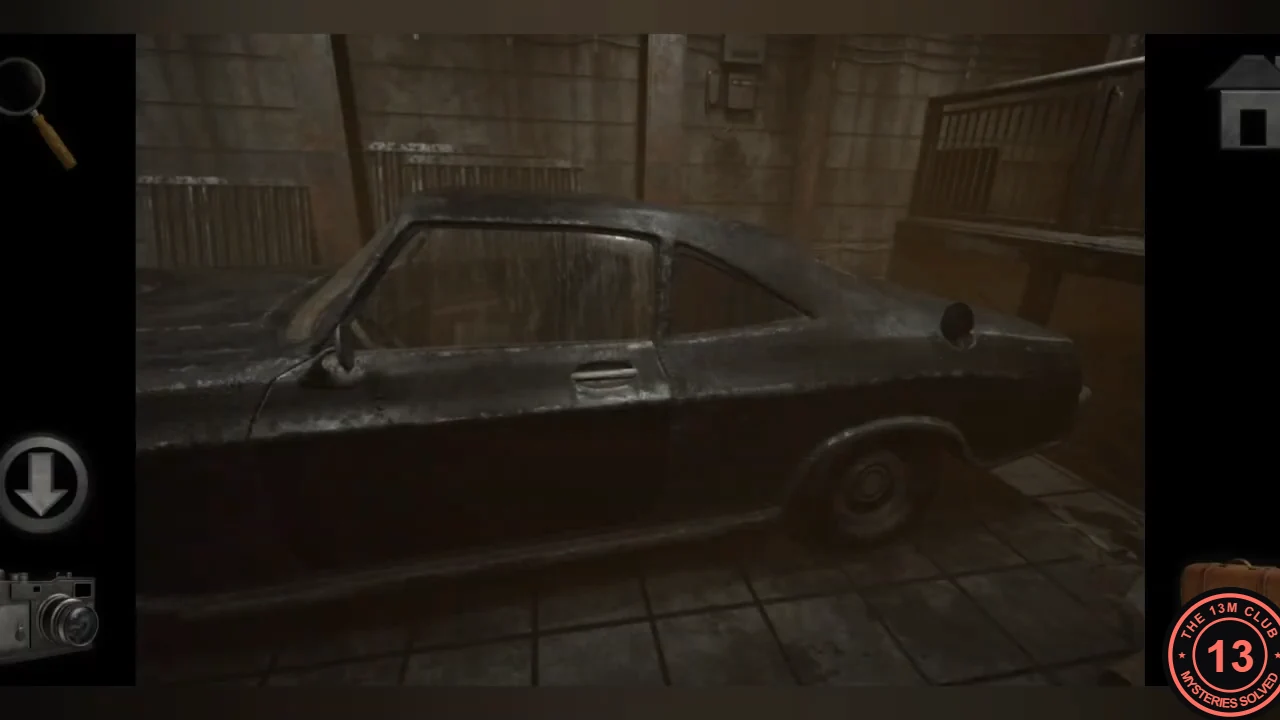
Fuel the car and drive away to finish Chapter 2.
- Open the car's fuel cap and use the gas canister on it. There is enough gas to fill the car part of the way.
- Use the car keys on the driver's door, then tap the steering wheel. The ending plays as you drive through the snowy canyon to the damaged LAMBDA door, followed by 'To Be Concluded...'.