Escape the Derailed Train Car
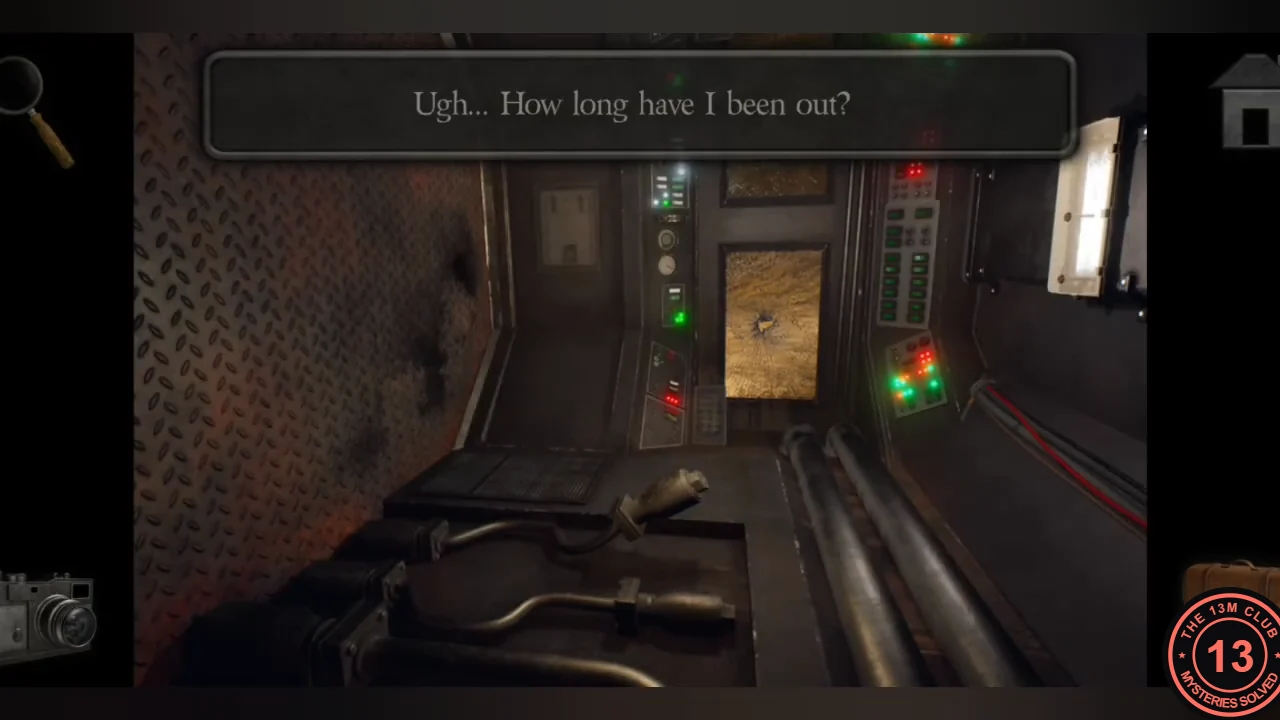
You wake up inside a tilted, derailed train car. Find a tool, free a pipe and break out through the cracked window.
- Slide the wall panel with the up arrows open and open the red first-aid box behind it. Take the medical bandage and the hand saw.
- Use the hand saw on the loose pipe on the floor to cut free a metal pipe. The saw is used up.
- Use the metal pipe on the cracked window to smash it, then crawl out into the mine tunnel.
Mine Power Cabinet
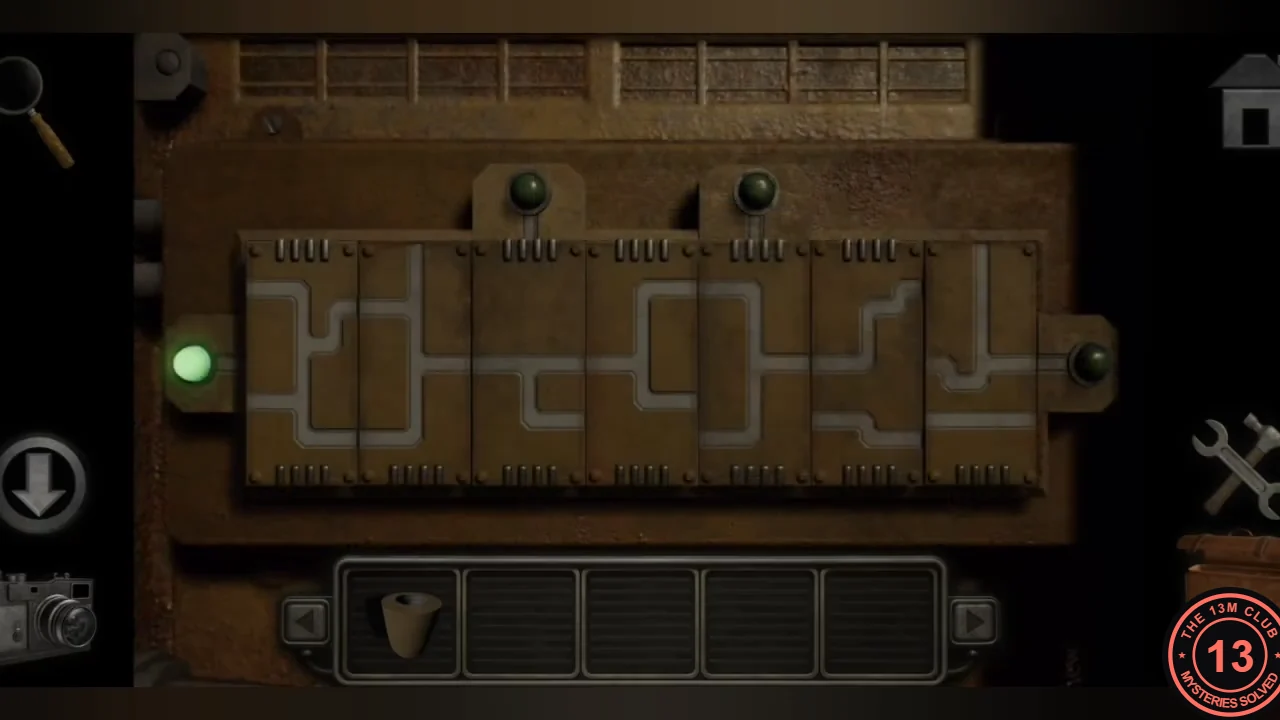
A metal electrical cabinet on the tunnel wall restores the mine lights. Inside is a conduit puzzle with six swappable columns and four lamps.
- Open the metal electrical cabinet on the tunnel wall to reach the six-column conduit panel.
- Tap one column and then another to lift both out and swap their places. Keep swapping columns until one continuous conduit runs from the left lamp, through both top lamps, to the right lamp. The puzzle is solved when all four lamps are green.
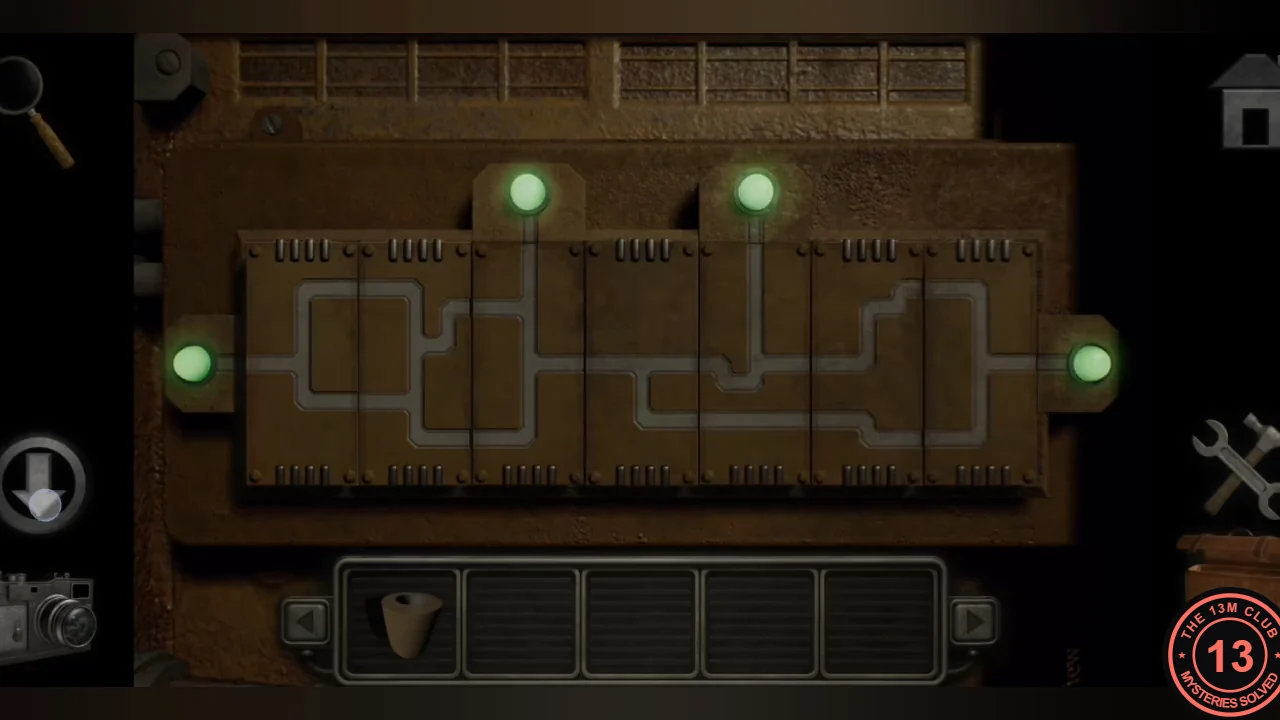
Solved conduit panel: one continuous conduit links the left lamp, both top lamps and the right lamp, and all four lamps glow green. - With the tunnel lights on, examine the large gear: someone etched two markings into it. Photograph them; they are part of a locker code later.
Explore the Mine and the Office
Look around the mine hub. Several obstacles here can only be solved later, so note them and collect what you can.
- Down the stairs, noxious gas blocks a passage (you need a gas mask later). Chains hold the nearby mine cart in place. A fuel tank with a coloured hexagon panel and a teal electric box (needs a tool) are also in the cavern.
- In the small storage side room, take the wooden stick from the open container. The other container is locked with a bar-grid lock.
- Under the wooden scaffold in the cavern, pick up the old mining pickaxe. The wooden chest next to it has a hexagon token lock.
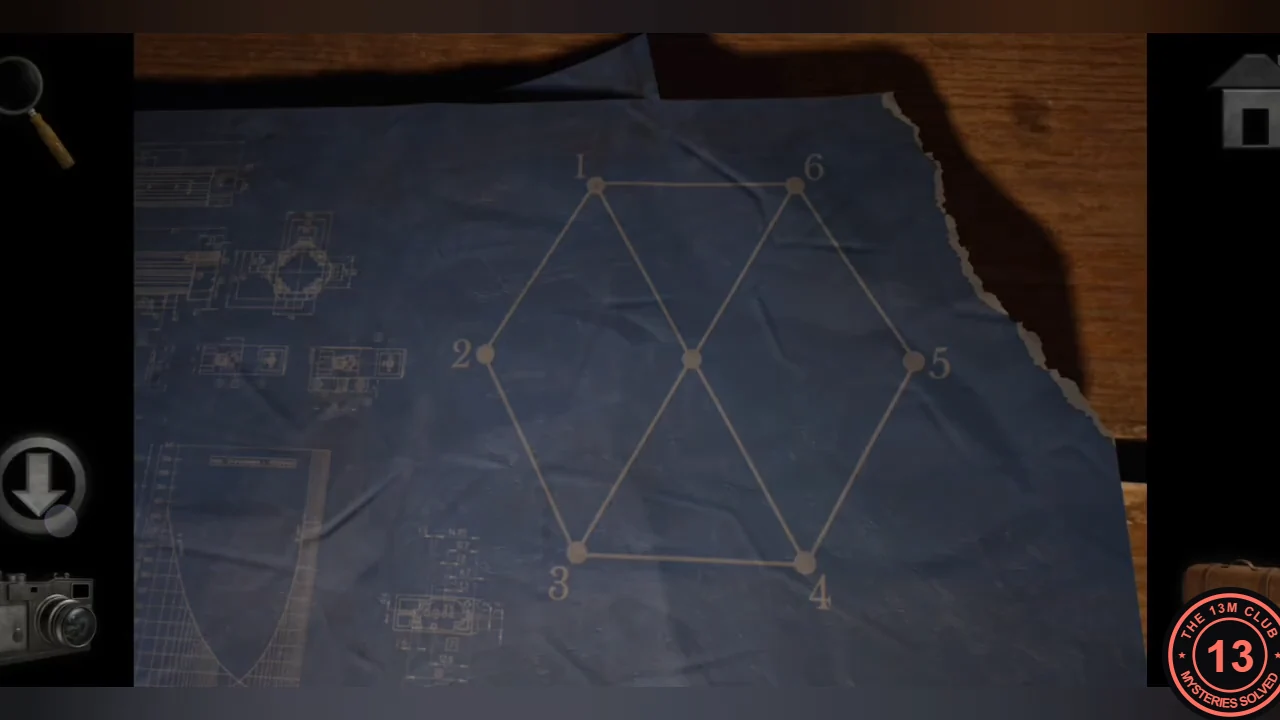
- Enter the mine office. Lift the top sheet of the blueprint on the desk to reveal a numbered hexagon diagram. Also note the maze board on the table and the locker with a symbol lock.
Hexagon Token Chest
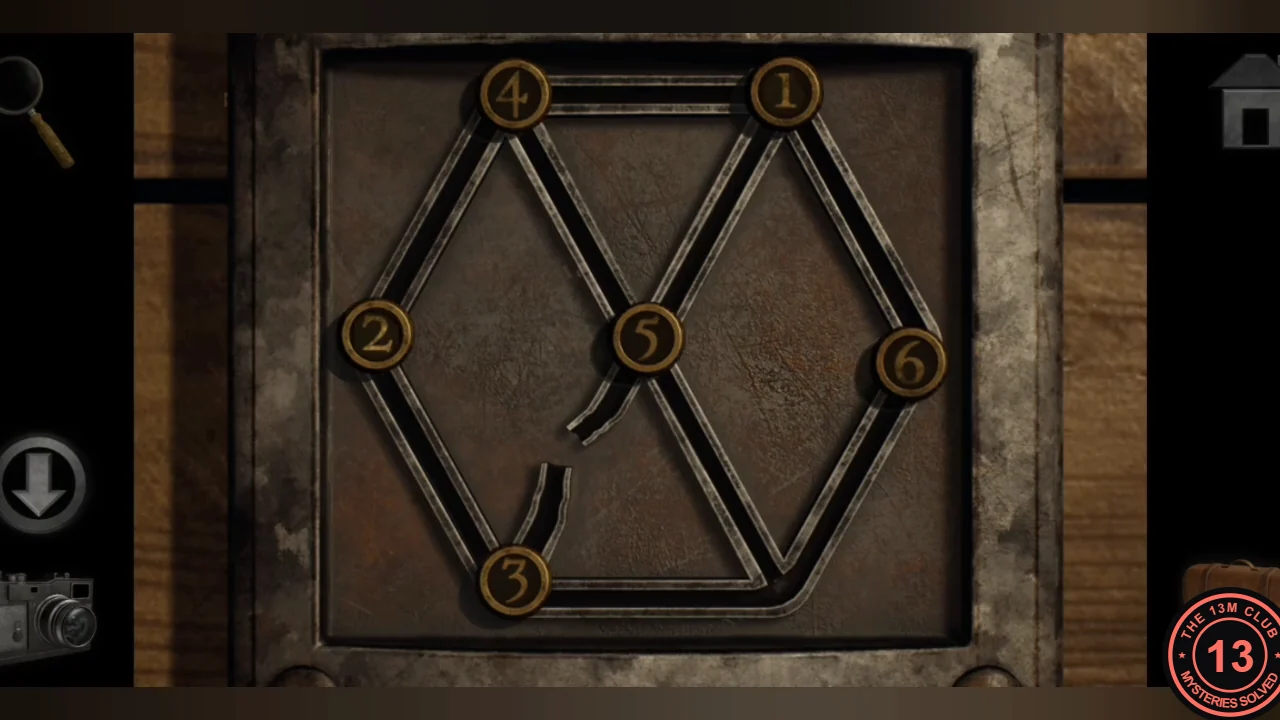
The wooden chest by the scaffold has six numbered tokens on a hexagon track. Arrange them as on the office blueprint.
- Slide the tokens along the track until they match the blueprint: 1 top-left, 6 top-right, 2 left, 5 right, 3 bottom-left and 4 bottom-right, with the centre empty.
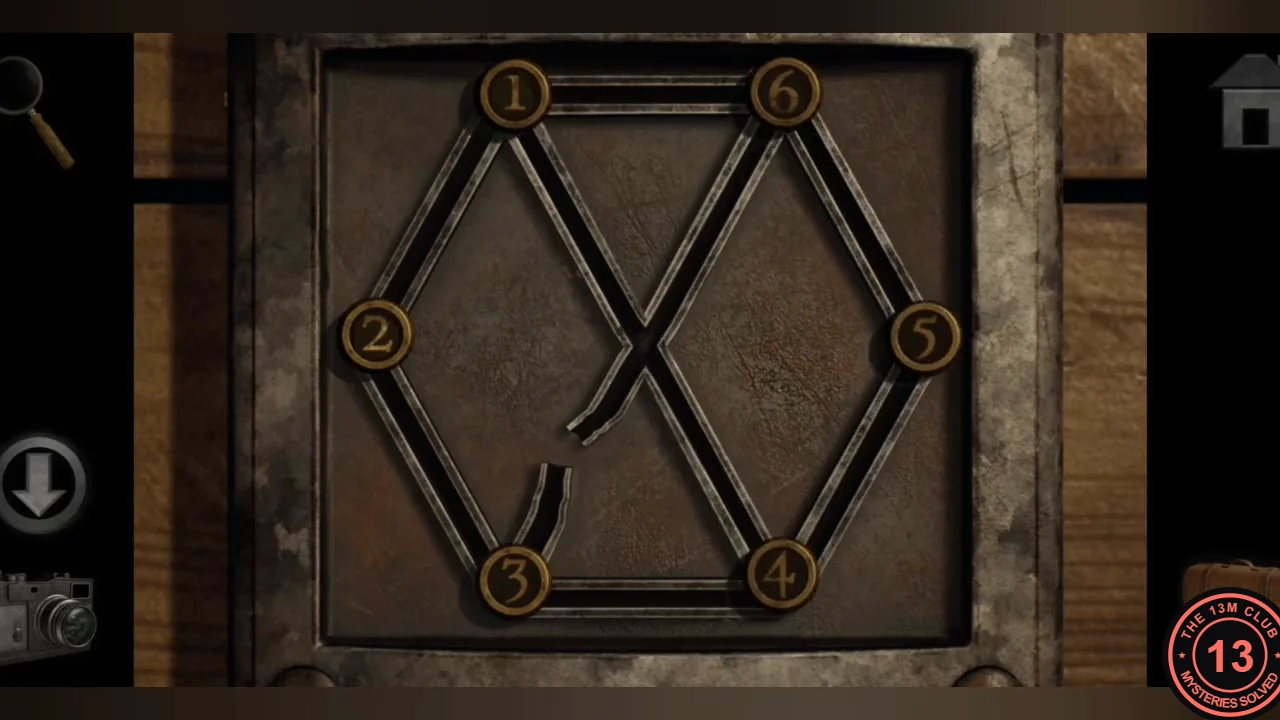
Tokens in the blueprint positions: 1 top-left, 6 top-right, 2 left, 5 right, 3 bottom-left, 4 bottom-right. - Take the key and the padlock from the chest.
Storage 1 and the Trapdoor
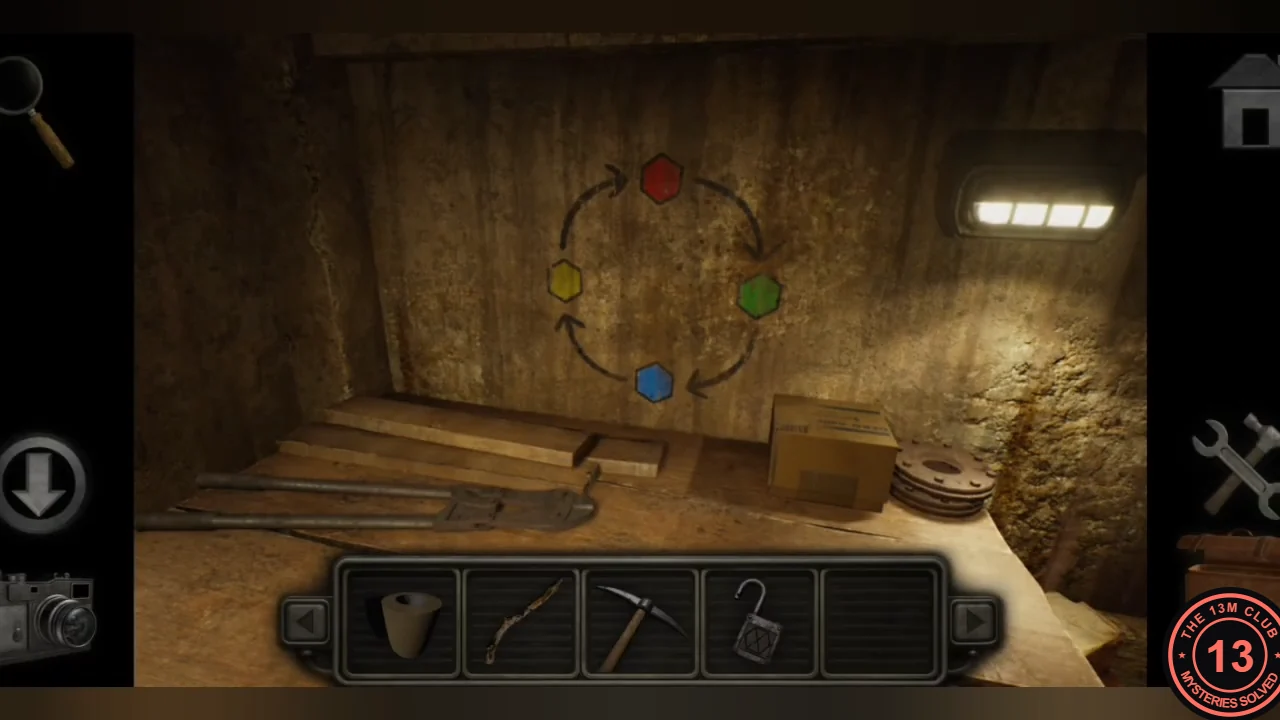
Open Storage 1, free the chain from the mine cart and use the winch to lift the trapdoor.
- Unlock the STORAGE 1 door with the key. Photograph the colour cycle on the wall (red at the top, green right, blue bottom, yellow left, with arrows running clockwise). Take the bolt cutters.
- Turning the winch wheel shows it is stuck, and the hook hangs too far from the trapdoor handle.
- Return to the chained mine cart and cut the chains with the bolt cutters. Take the crowbar from the cart and the loose chain.
- In Storage 1, use the chain on the winch hook, then use the padlock to lock the chain to the trapdoor handle.
- Turn the winch wheel to lift the trapdoor and climb down. Take the lever from the desk and note the grandfather clock stopped at 10 o'clock.
Scaffold Office Clues
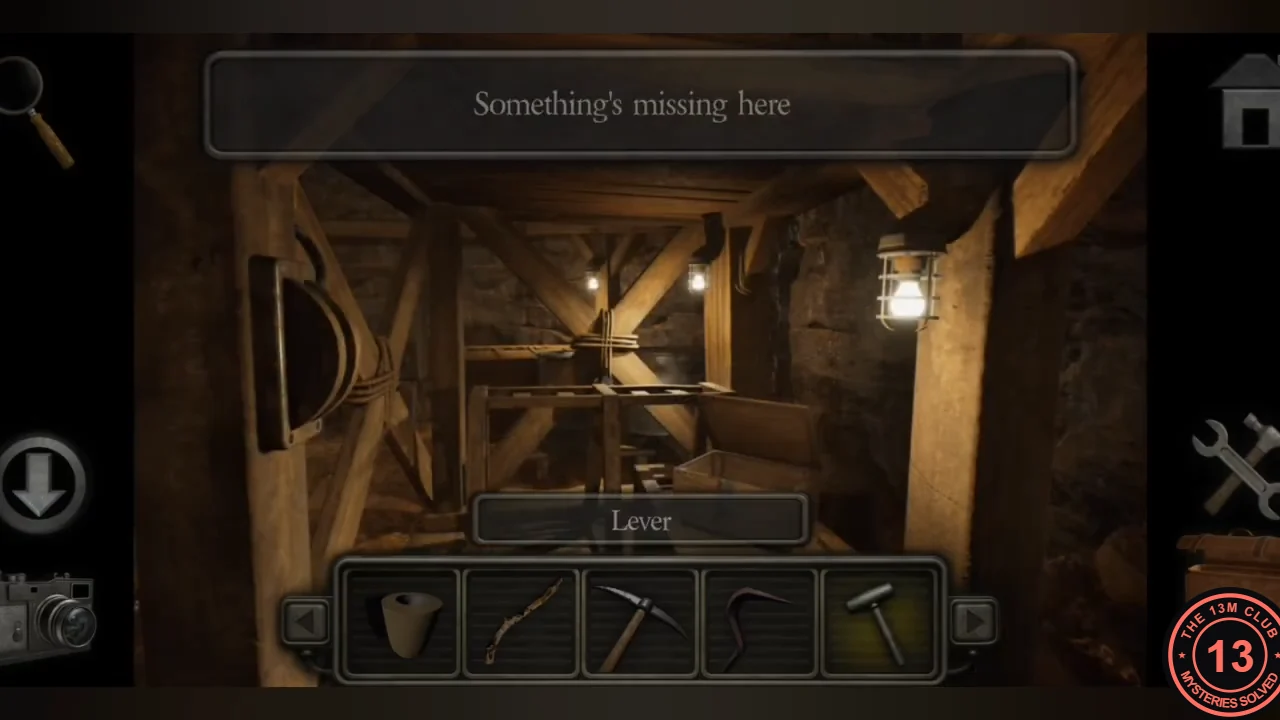
The missing lever lowers a ladder to the office on top of the scaffold, where two important charts and a see-through card wait.
- At the mechanism on the scaffold base ('Something's missing here'), insert the lever and pull it to lower a ladder. Climb up.
- Photograph the lunar chart (moon phases numbered 1 to 7) and the Babylonian numerals 1 to 25 chart.
- Take the see-through card with strange markings from the journal.
Maze Overlay and Bar-Grid Container
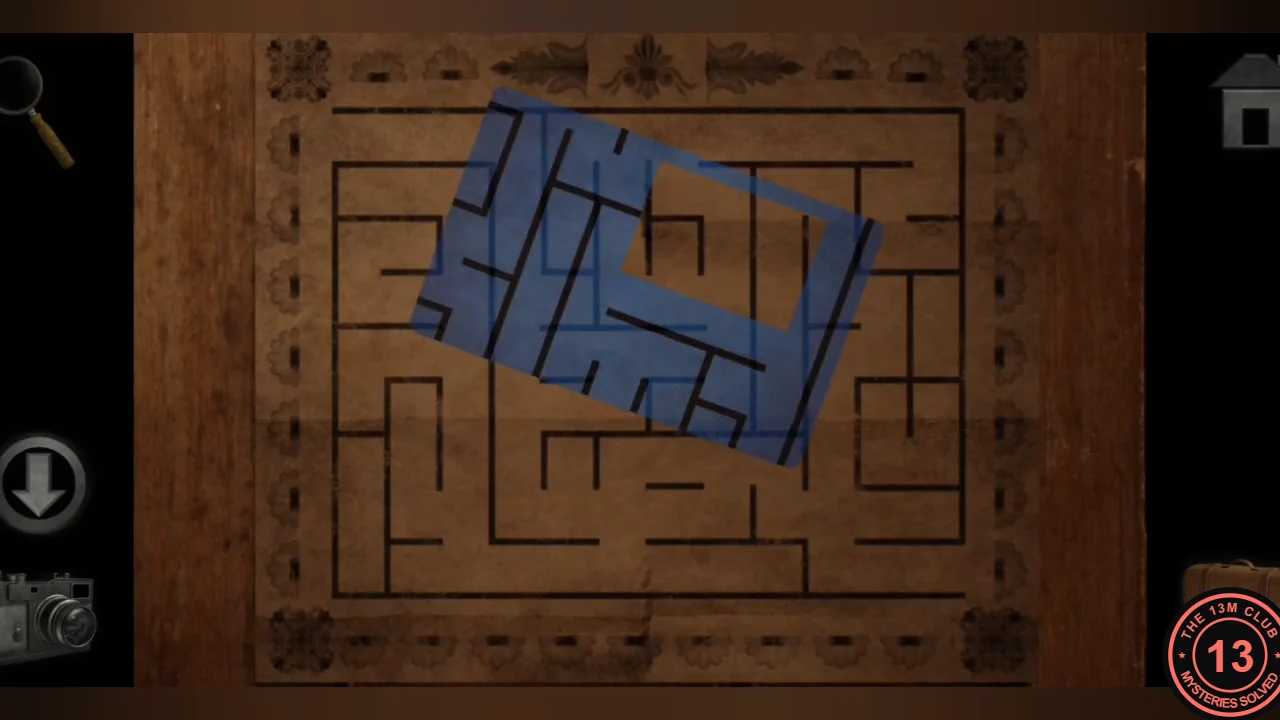
Lay the see-through card on the maze board to reveal a pattern, then copy it on the locked container in the storage side room.
- In the mine office, use the see-through card on the maze board. Drag and rotate it until it sits squarely in the centre of the maze, then photograph the line pattern it shows.
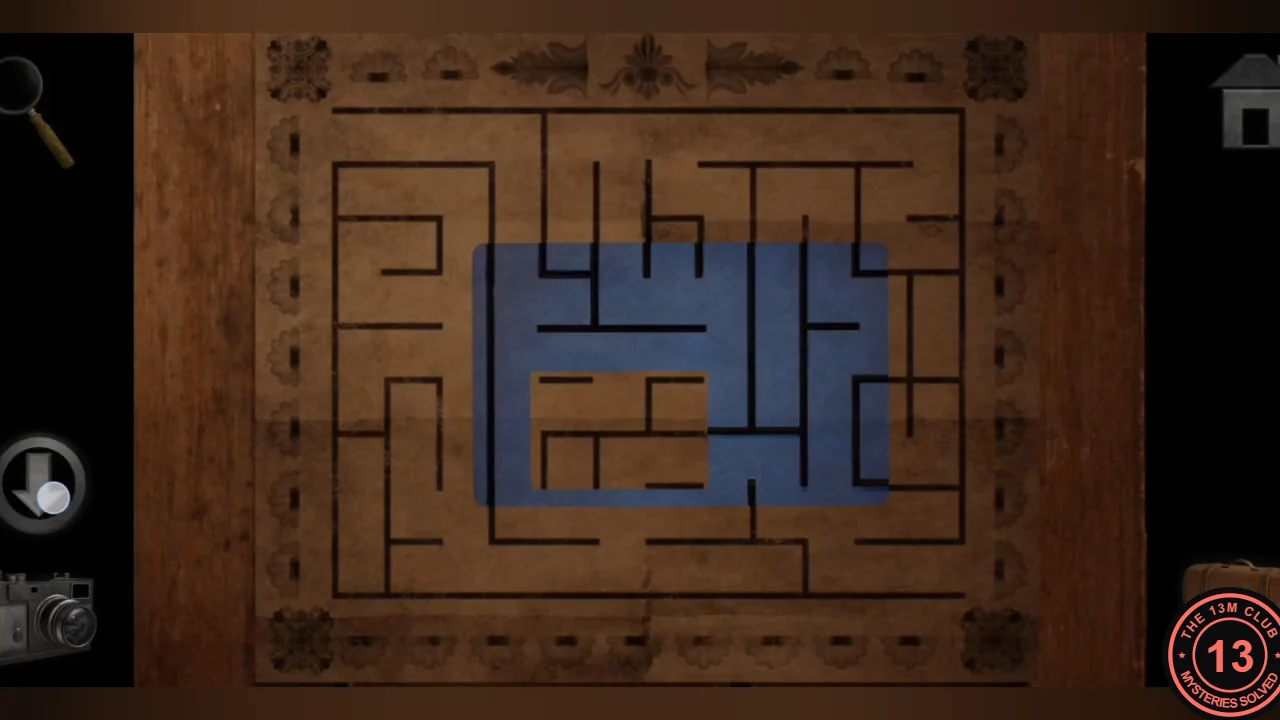
The see-through card squared up in the centre of the maze board; photograph the line pattern it frames. - Go to the locked container in the storage side room. Tap the nodes and bars to rotate the bars until they match the pattern: the top edges of the left and right top cells, the divider between the middle and right top cells, the full middle horizontal line, the outer left edge of the bottom-left cell, the divider between the left and middle bottom cells, and the bottom edge of the bottom-right cell.
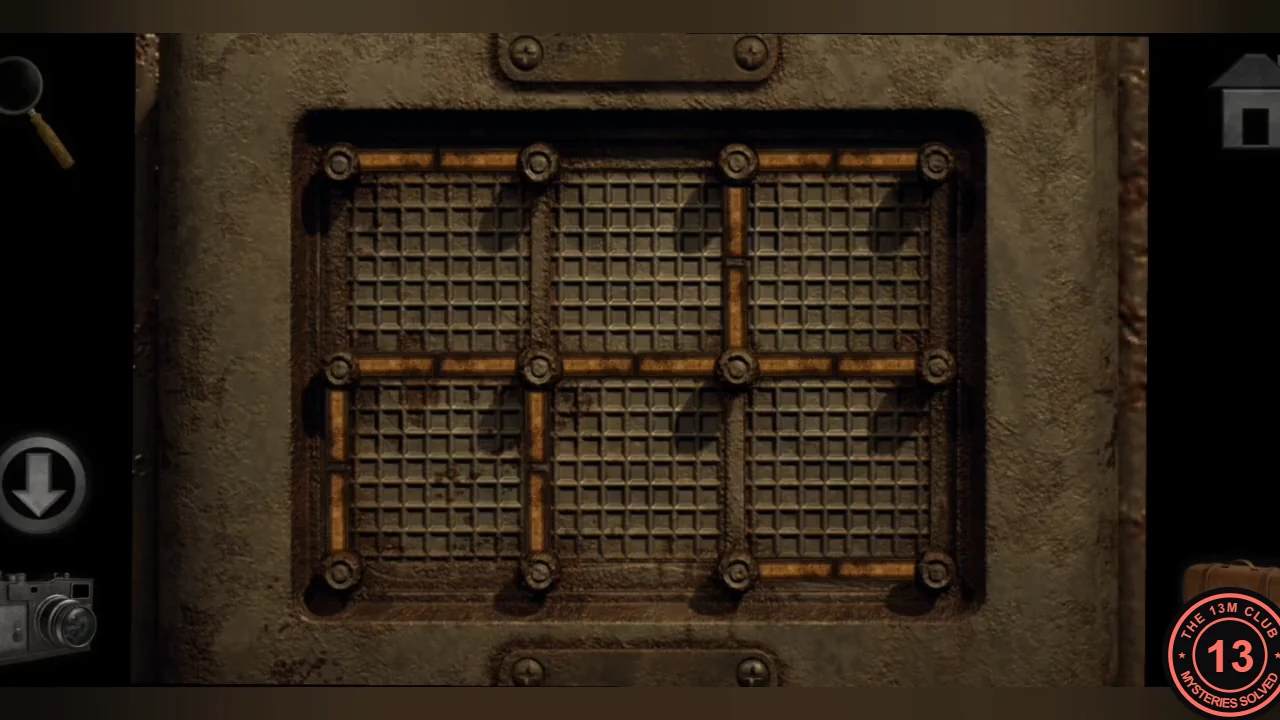
Bar-grid container with the bars rotated into the pattern from the maze card. - Take the old screwdriver from the container.
Torch and Fuel Tank Colour Path
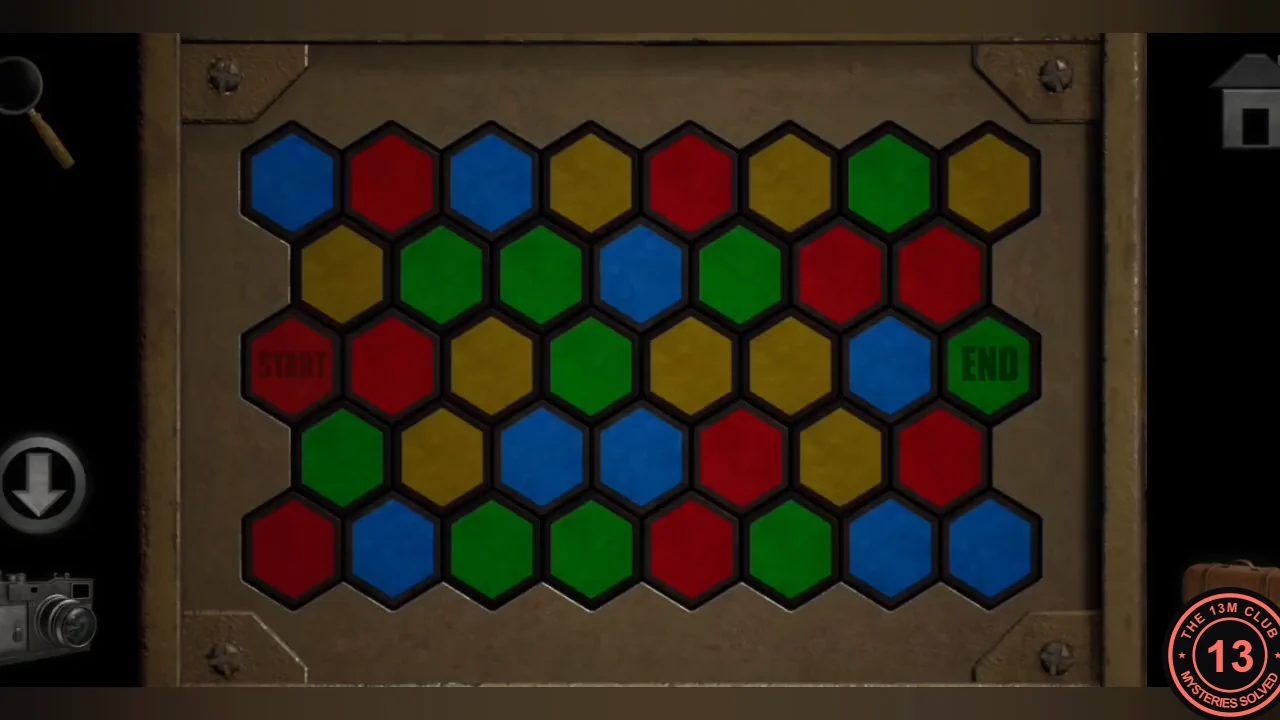
Build a torch, then open the fuel tank with the colour path puzzle and soak the torch in gasoline. A tile-by-tile example from the recording is given below; if your board's colours differ, follow the colour rule instead.
- Open the build menu and combine the medical bandage from the train's first-aid box with the wooden stick to make an unlit torch.
- At the fuel tank panel, tap a path of adjacent hexagon tiles from START (red, left) to END (green, right). Each next tile must follow the Storage 1 colour cycle: red, green, blue, yellow, then red again. A wrong tap resets the trail. Recording example (rows counted from the top, tiles from the left; rows 2 and 4 have seven tiles and sit half a tile to the right): START, row 4 tile 1, row 5 tile 2, row 4 tile 2, row 3 tile 2, row 2 tile 2, row 1 tile 3, row 1 tile 4, row 1 tile 5, row 2 tile 5, row 2 tile 4, row 3 tile 5, row 4 tile 5, row 5 tile 6, row 5 tile 7, row 4 tile 6, row 4 tile 7, END. Check each tile's colour against the cycle before you tap it.
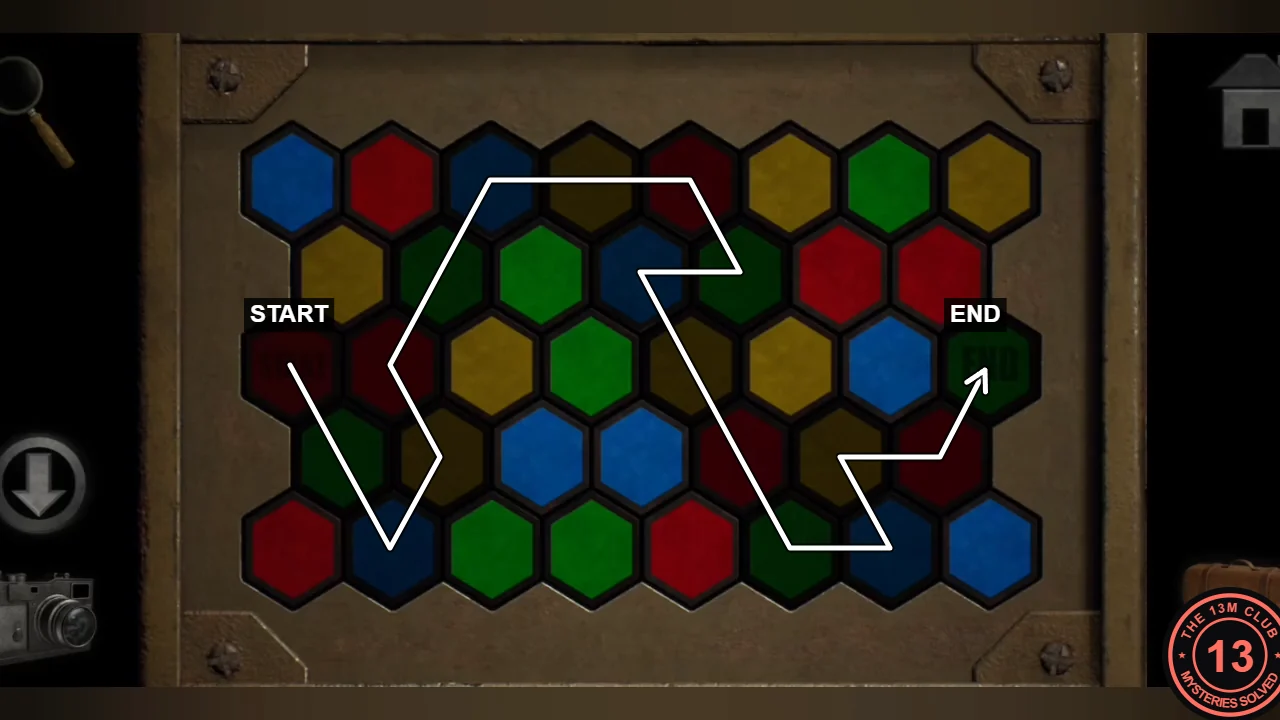
The recorded colour path from START to END (white line added by 13M Club). Each tile follows red, green, blue, yellow, then red again. - Inside the opened panel, rotate the pipe pieces to connect the inlet to the outlet. Gasoline pours out and pools on the floor.
- Use the torch on the gasoline puddle to soak it.
Light the Torch and Open the Explosives Room
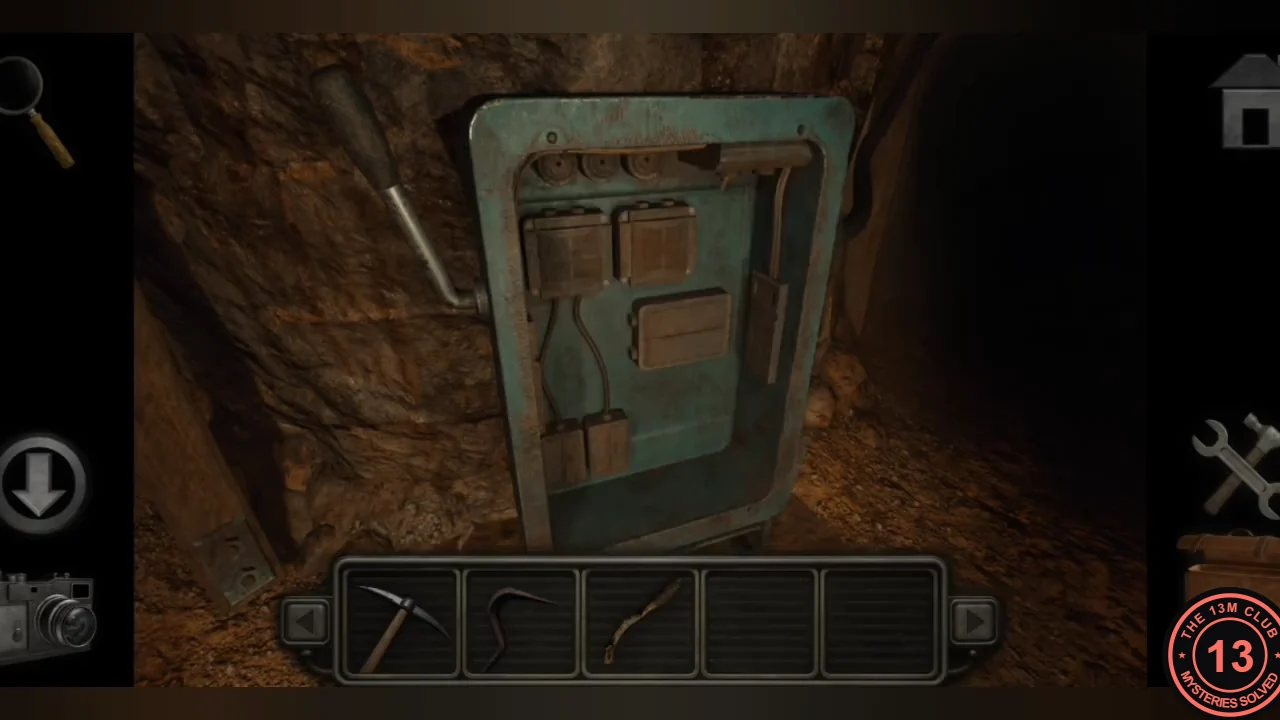
Spark the torch on the electric box, explore the dark tunnel and pry open the explosives room.
- Open the teal electric box with the screwdriver. Place the gas-soaked torch at the bottom of the open box, then pull down the lever on the left side of the box. Its sparks set the torch alight. Tap the burning torch to take it back.
- Walk into the dark tunnel, now lit by the torch, and take the explosive fuse in the equipment room.
- Use the crowbar on the boarded EXPLOSIVES door. Keep the crowbar; you need it again later. Inside, photograph the ROUTE 33 sign on the left shelf. The wooden board on the crate is missing its pieces.
Mine Office Locker Code
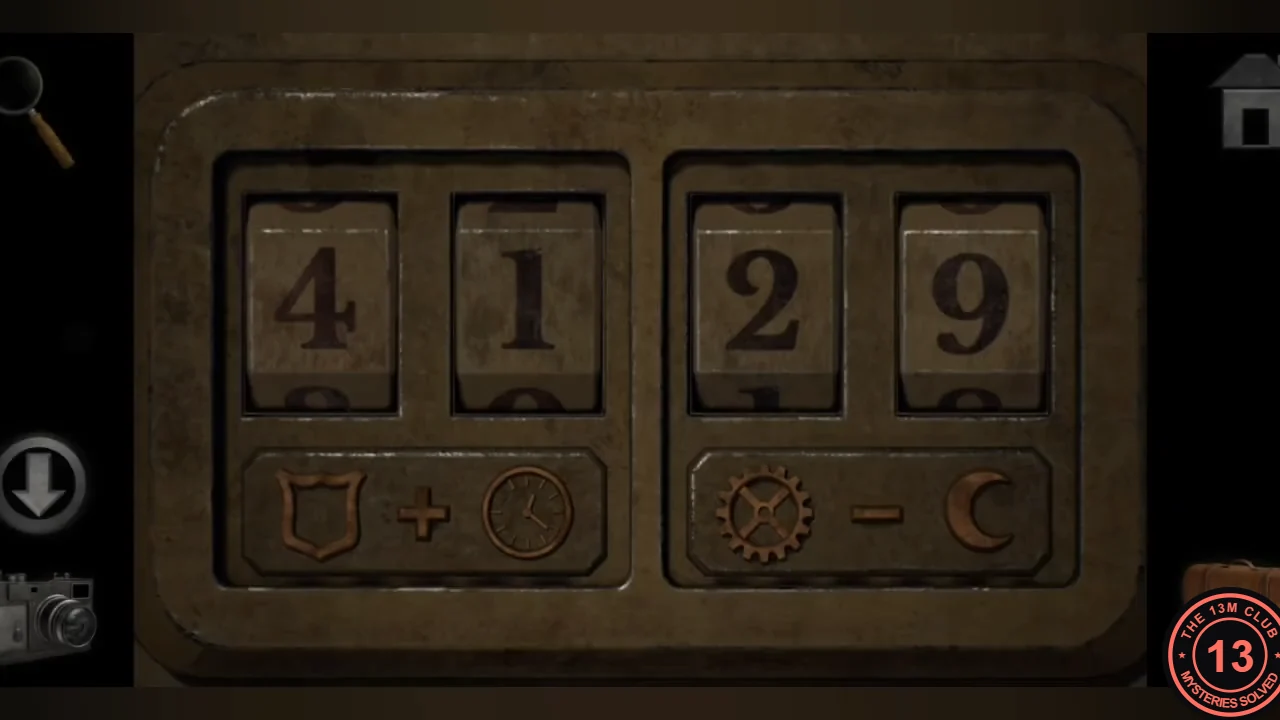
The office locker shows a sum and a difference made of symbols. Each symbol points to a clue you have already found.
- Top pair, shield + clock: the shield is the ROUTE 33 sign (33) and the clock is the grandfather clock stopped at 10. 33 + 10 = 43. Bottom pair, gear − moon: read the gear's etched markings with the Babylonian numerals chart (10, 8 and 5, totalling 23), and the crescent moon is number 7 on the lunar chart. 23 − 7 = 16.
- Enter 4316 on the locker and take the ornamental wooden pieces.CODE4316
Ornamental Wooden Pieces Crate
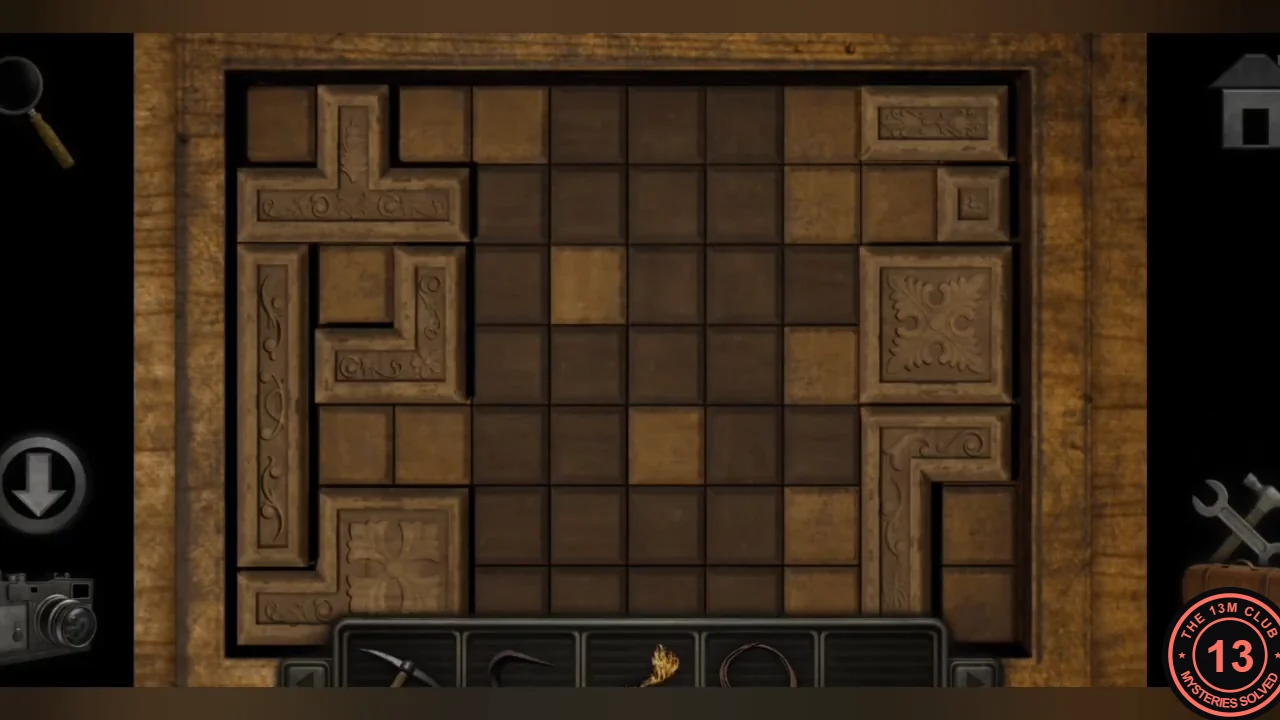
The DANGER HIGH EXPLOSIVES crate has a board with a darker silhouette. Cover it with the six carved wooden pieces.
- Use the ornamental wooden pieces on the board. Drag the six pieces (a cross, L shapes, a long bar and square plates) so that together they cover every darker tile exactly, forming one compact block in the middle.
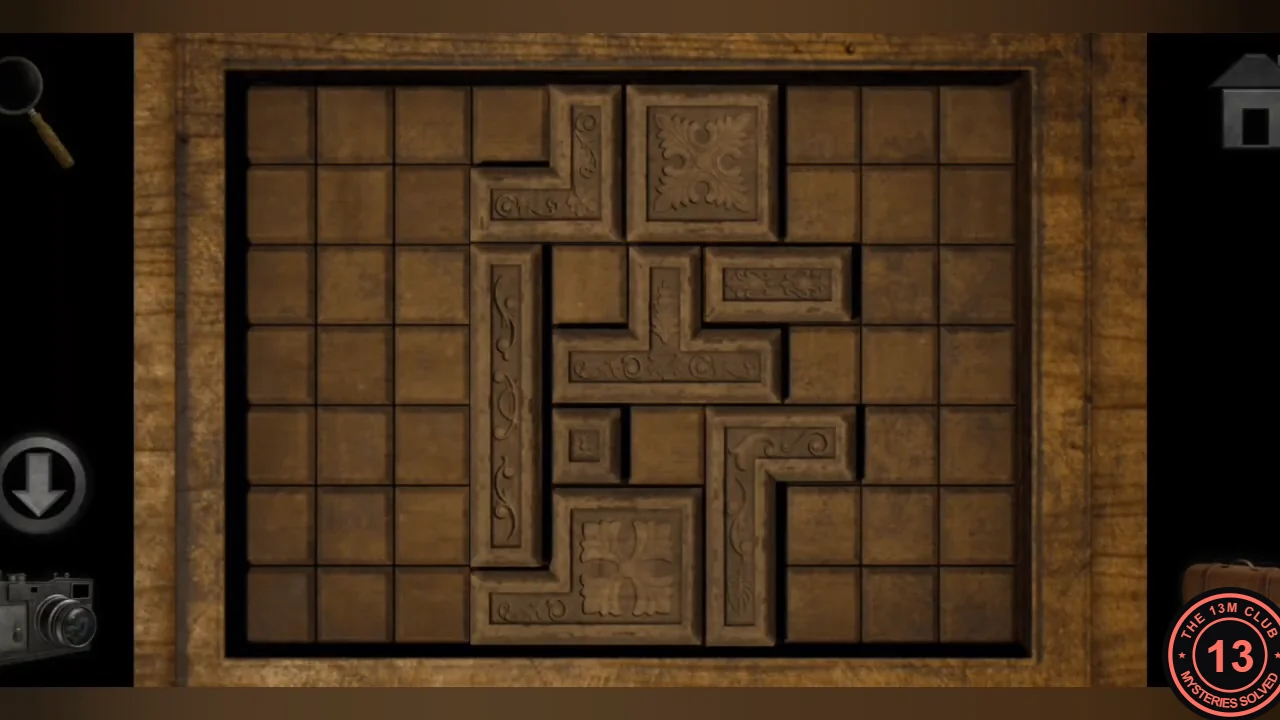
All six ornamental pieces fitted together as one compact block covering the darker tiles. - Take the barrel of TNT from the crate.
Blast the Barricade and Find the Gas Mask
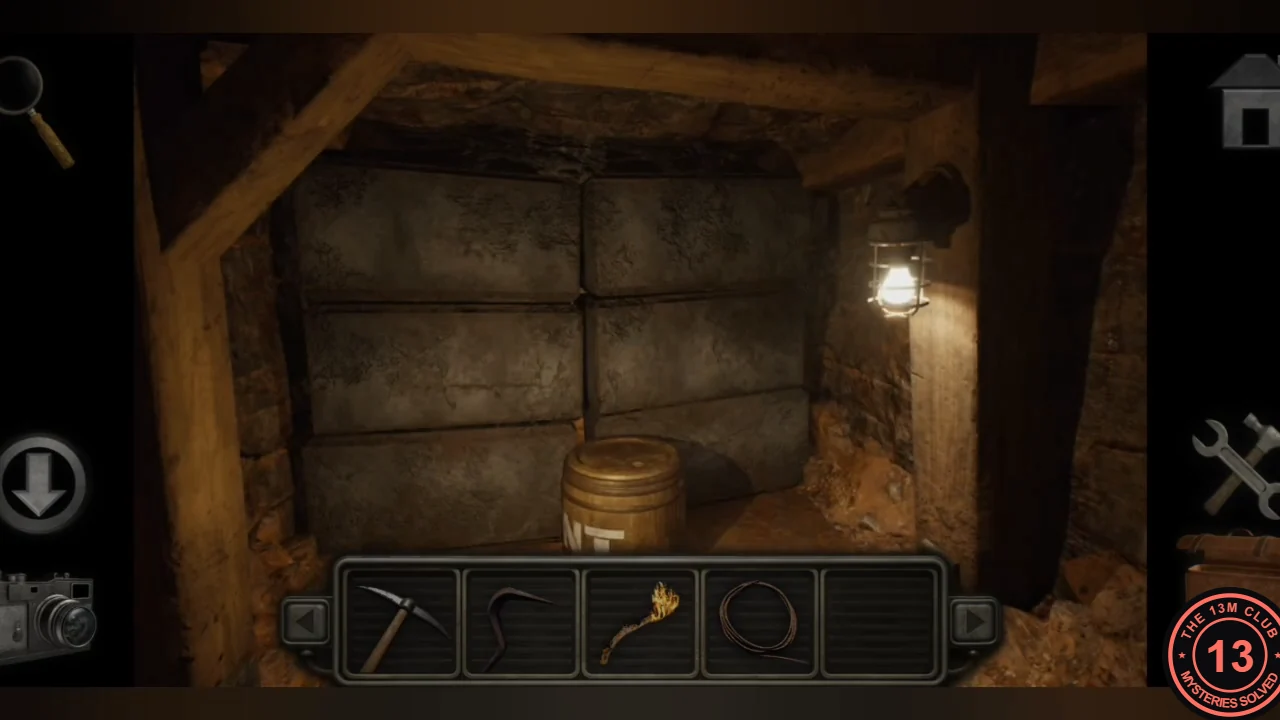
Blow open the metal barricade, dig out the gas mask and leave the mine through the gas-filled passage.
- Follow the tunnel to the metal-plated barricade. Place the TNT barrel against it and attach the explosive fuse.
- Follow the fuse back to the junction and light it with the burning torch. Wait for the explosion.
- Go through the blasted passage to the rock-filled niche and dig it out with the pickaxe to find an old gas mask.
- Return to the gas-filled passage down the stairs, use the gas mask and walk through into a modern facility corridor.