Egil's house and the carved flowers
Anum, one of the Ancients, arrives at the druid Egil's forest home. To reach the city of Al Karankah on the Southern Isle he needs a ship, and a disguise so that nobody at the port recognises him. The map now covers the Forest (Egil's house, the forest road and the port), the Isle and the City.
- Talk to Egil inside the house. Take the ladder leaning beside the bed.
- Go outside. Take the pot hook hanging on the outdoor stove, then set the ladder against the house and take carved flower 1 of 4 from the roof.
- Inside, use the pot hook under the bed and pull out carved flower 2 of 4.
- Follow the forest road. Take carved flower 3 of 4 beside the broken well, then go further down the road towards the port and take carved flower 4 of 4 from the left side of the path.
- Back in the house, put the four carved flowers on the wardrobe. A wooden disc with three rings of curved symbols appears, with four animals (rabbit, horse, cat and goose) shown on the sides. Turn the rings so that the symbols in the highlighted circles complete the outline of the animal in the centre; when one animal is finished the next one appears. Take the hooded robe (Anum now wears it) and wooden leaf 1 of 2. The new task is "Travel to the isle".
The captain's request
The ship's captain at the port will only sail if his daughter, who has a fever and burning hands, is cured. Egil's house holds a book on children's ailments.
- At the port, talk to the captain. Then take wooden leaf 2 of 2 from beside the chest with the octopus lock.
- Outside Egil's house, put both wooden leaves on the small box on the bench. Take the key and the matches.
- Inside, open the bookcase cupboard with the key. Take the trapdoor handle and the green book, "Children's Ailments Handbook". Its remedy for purple rot needs crushed sloes, fish oil, boletus mushrooms and lemon balm.
- Fit the handle to the trapdoor in the floor and open it. Take the Historical Manuscript (1 of 4 in this chapter), the basket, the cabbage and the axe.
- Outside, give the cabbage to the goat. Search the bushes it was guarding: pick the lemon balm and take the steering wheel handle.
- Get the outdoor stove ready for the remedy now. Open its firebox and put in the kindling and the logs lying beside the stove. Take the cauldron off the stove, fill it with water from the barrel and put it back. Then light the fire with the matches. Fill the cauldron before lighting: if you try the matches while the empty cauldron is still on the stove, Anum says heating the stove now could damage the cauldron, and the fire is not lit.
- On the forest road, chop the tangled roots at the base of the big tree with the axe and take the fox figure. Put it on the fox totem on the right. Six columns each hold a bar from the top and a bar from the bottom, with a one-row gap between them. Tapping a bar slides it one row the way its arrow points, which moves that column's gap one row the same way. Line up the gaps of all six columns in the same row, then press that row's red button on the left: a rod slides through the gaps to the right and the row's light turns bright green. It stays lit when you move the bars again. Open all four rows this way, one after another; the recording opened row 2, then rows 1, 3 and 4. Take the machete.
- Use the basket on the mushroom patch beside the forest road and find the 10 boletus mushrooms (the brown-capped ones shown in the handbook). They hide among other mushrooms, under ferns and behind sticks.
The port, the well and the fish storage
The fish oil is locked away in the port's storage room.
- At the port, pull the tarp off the coil of rope on the ground and cut the rope free with the machete.
- Fit the steering wheel handle to the green lantern on the right and take the gear from inside.
- Fit the gear to the winch on the left and turn it to lower the hook, then take the hook. Combine the rope and the hook.
- Lower the rope and hook into the broken well on the forest road and pull up the octopus figure.
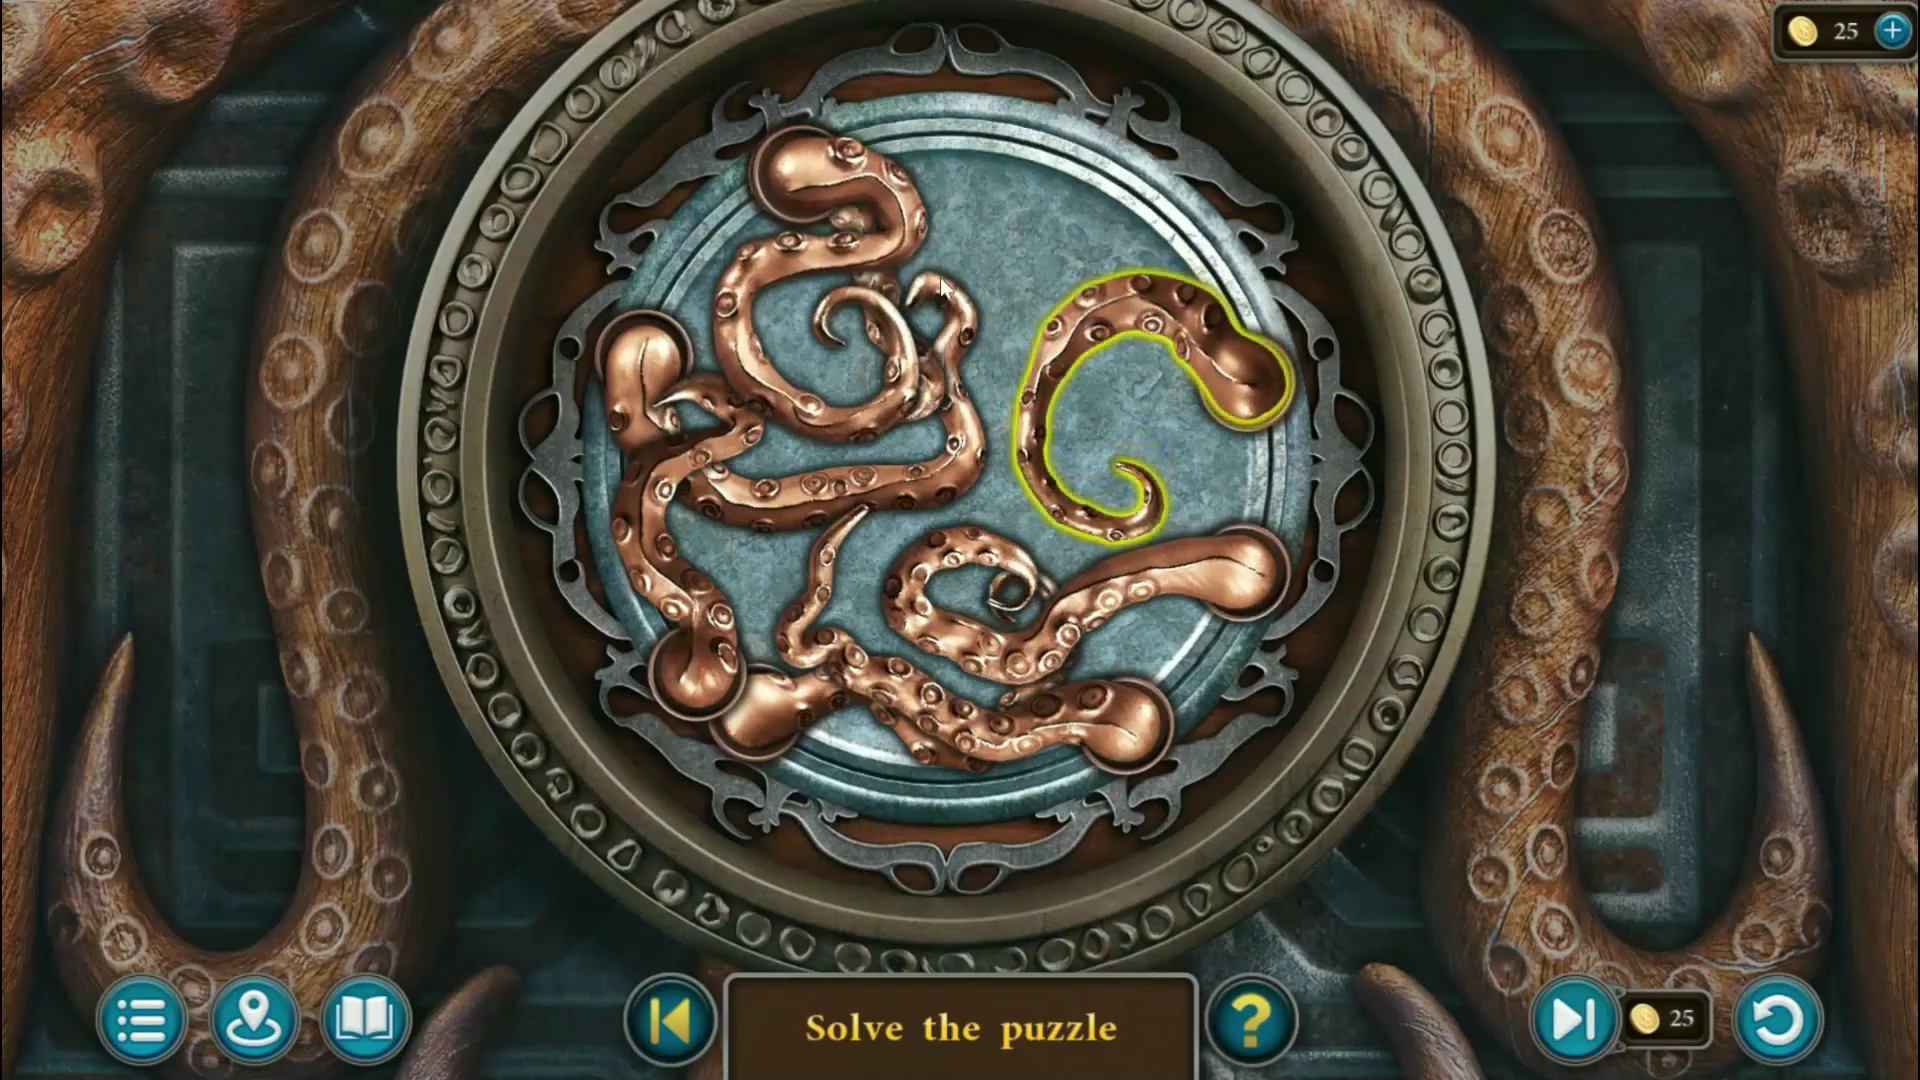
Tentacle lock - puzzle overview. - Put the octopus on the port chest. Drag the tentacle tips to new positions until no tentacle crosses another; a tentacle is outlined in gold when it is clear (see the picture). Take the glove and the fisherman's token.
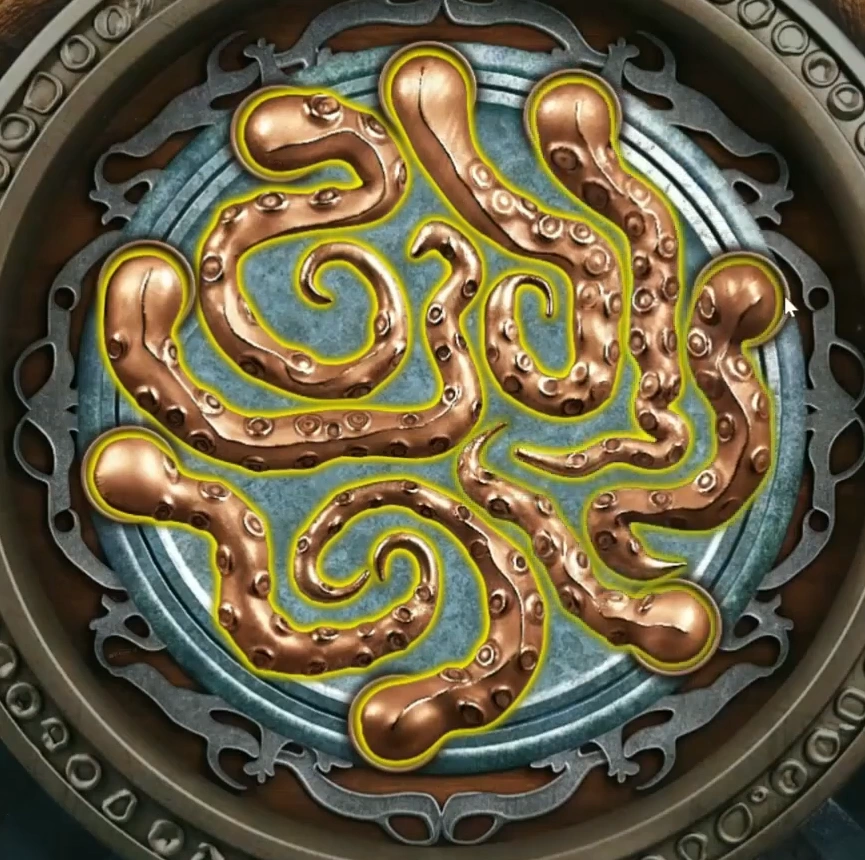
Port chest solved: no tentacle crosses another. - Put the token on the storage room door and go in. This room is an interactive hidden-object scene. Take the fork from the top of the chest and use it on the clam among the fish on the right; take the pearl. Put the pearl in the hexagonal box inside the crate and take the compass.
- Lift the furs on the far left to uncover a map and lay the compass on it. The compass reads 30° 15°; on the map grid that point holds the note 3:45. Take the spoke.
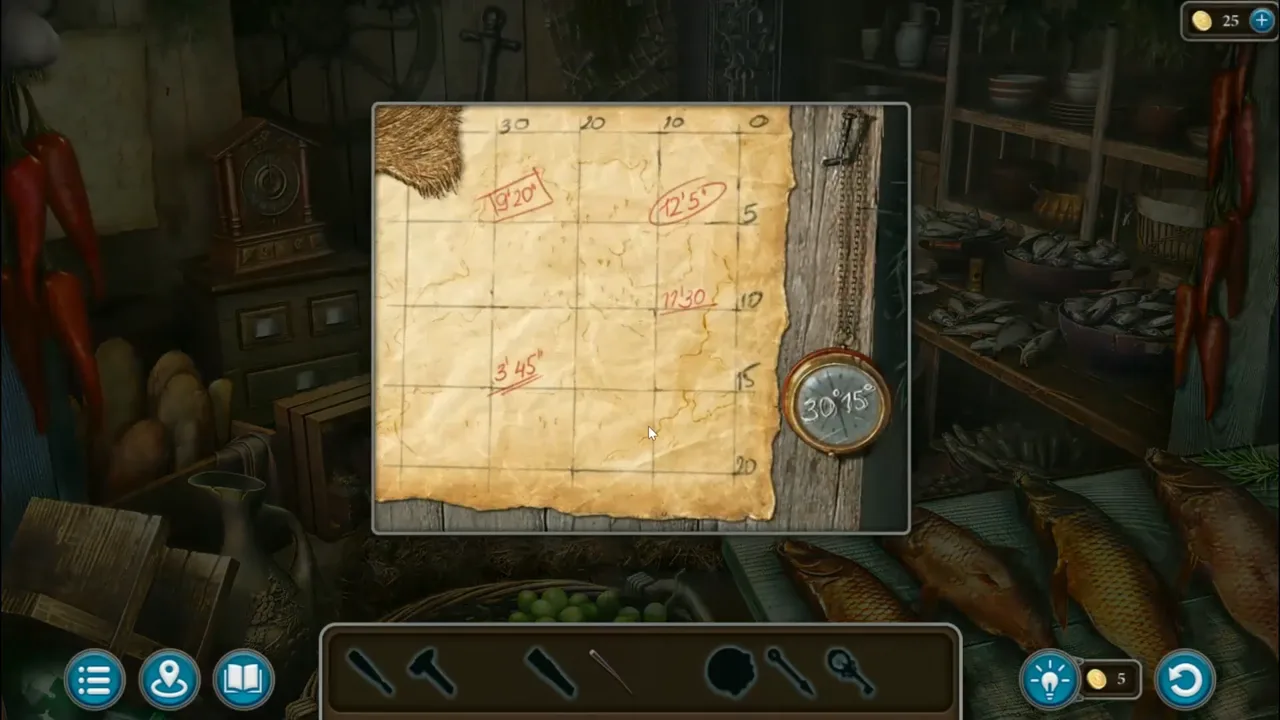
Port storage map: the compass coordinates point to the note 3:45. - Fit the spoke to the wooden fish-table mechanism and take the key. Open the box under the crate with it and take the knob. Fit the knob to the stove and open it; take the handle and the bellows, and use the bellows on the ashes to uncover the clock hand. Find the matching head for the handle under the fish table and combine them into a hammer.
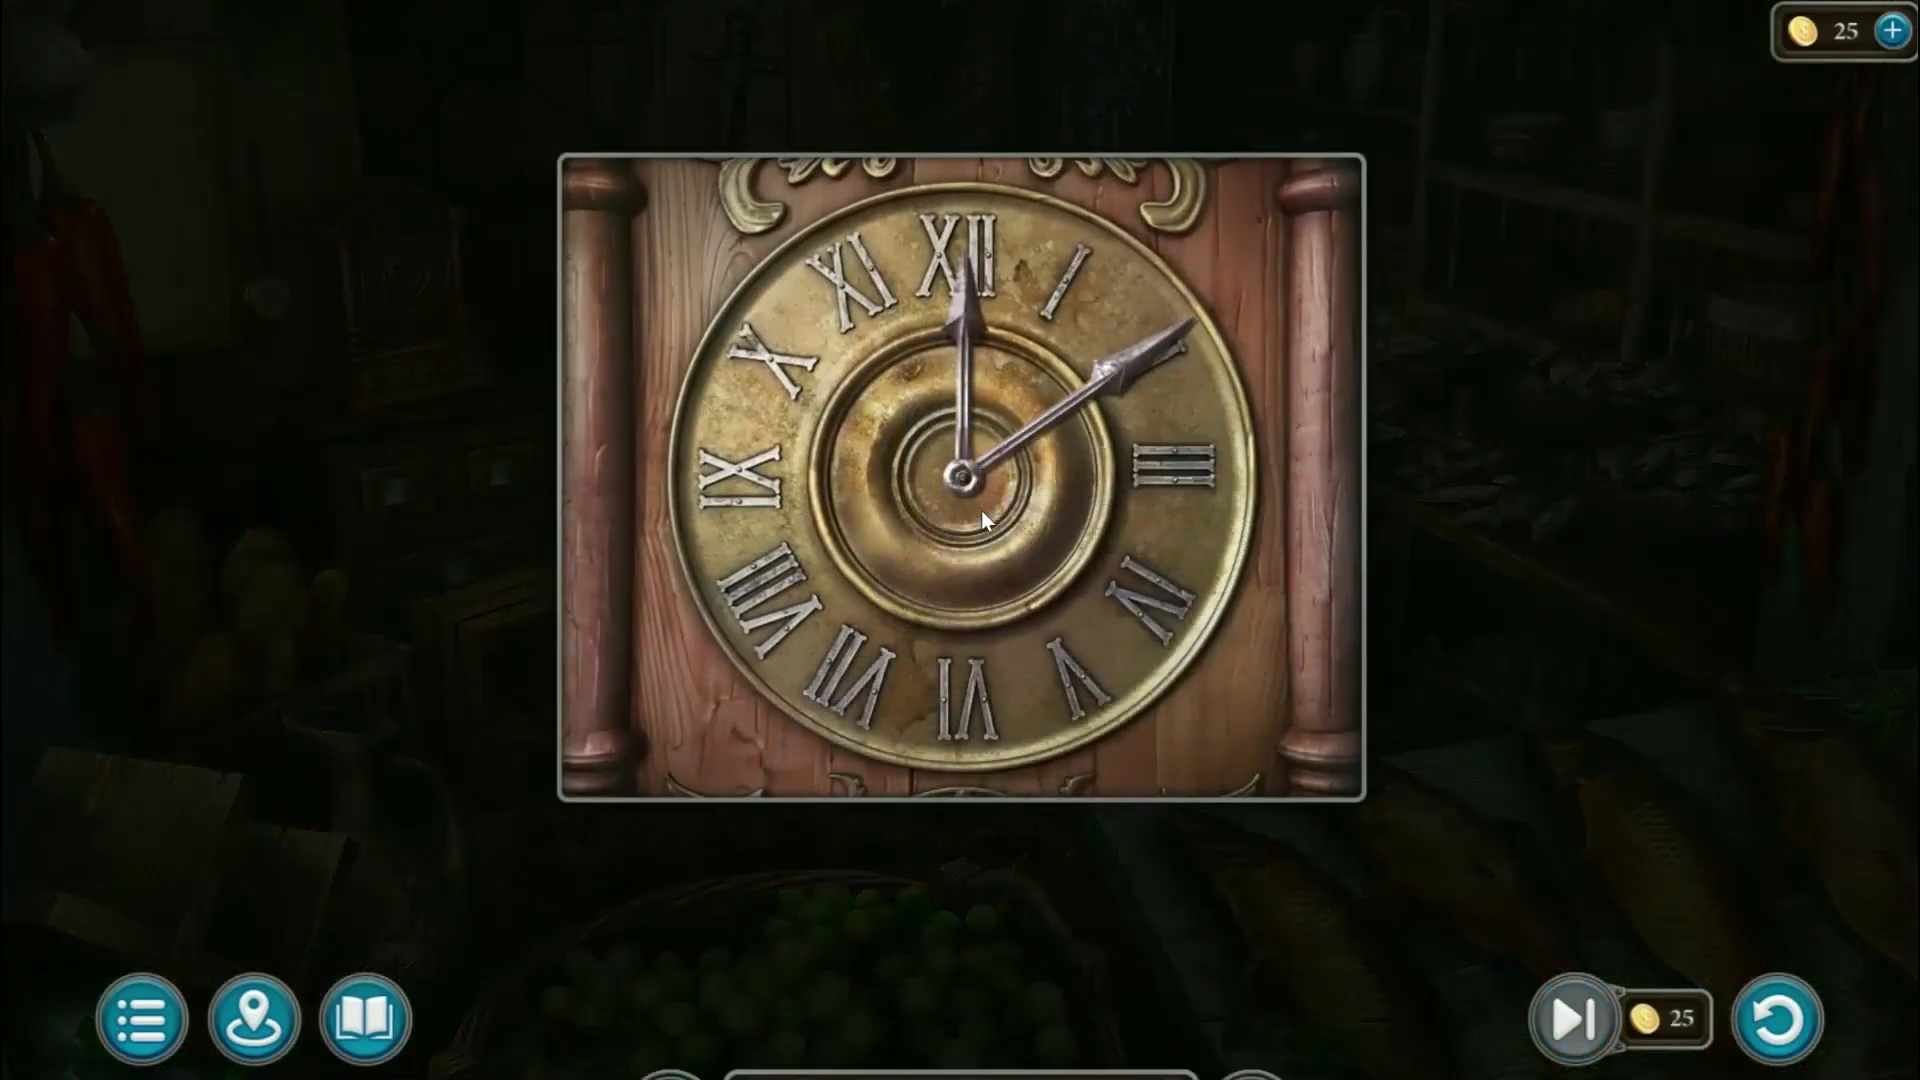
Clock puzzle - puzzle overview. - Put the hand on the wall clock and set it to 3:45: short hand on the 3 (III), long hand on the 9 (IX). Take the chisel from the drawer below.CODE3:45
- Open the locked chest with the chisel and the hammer and take the fish oil.
Brewing the remedy and sailing to the isle
Everything for the remedy is now within reach of Egil's house.
- Outside Egil's house, use the glove to pick sloes from the thorny bush near the goat. Inside, crush them with the pestle and mortar on the table on the right.
- Add the crushed sloes, fish oil, boletus mushrooms and lemon balm to the remedy page in the handbook; they combine into the ingredients. Outside, put the ingredients into the boiling cauldron on the stove you lit earlier. The remedy is ladled into a jar; take it.
- Give the remedy to the captain at the port. He agrees to take Anum to the Southern Isle and to return for him in a day.
The beach hut and the cliff
The ship drops Anum on a beach with a locked hut, a rock wall full of holes, and a cliff.
- Take the button lying on the rock nearest the shore, then clear the rock with the machete to reveal a carved shell.
- Put the button on the lock of the hut at the back. Turn the two wheels to bring shells into the centre; open the door by choosing the shell that matches the carving on the rock (green with a star pattern in the recording).
- Inside the hut, take the Historical Manuscript (2 of 4 in this chapter), the poker, the shovel and the cast-iron ball (an empty bomb casing).
- Push the poker into the holes of the sandy rock wall on the left (the upper middle hole holds it) and take the key.
- Dig up the buried chest in the sand with the shovel and open it with the key. Take the gunpowder and the climbing picks. Put the gunpowder in the cast-iron ball.
- Use the climbing picks on the cliff above the barrel. The picks only bite into the blue stones that jut out of the rock face: tap a blue stone above the upper pick and within its reach to move the lower pick there, and the view scrolls up as you climb. Keep alternating the picks from stone to stone until Anum pulls himself over the top into the jungle; the recording needed about fifteen placements. This is a short traversal, so the guide gives the method rather than every stone.
The jungle, the Kainbekh and the city gates
The jungle crossroads leads up the stairs to the city gates, left to the Kainbekh (an old hall with a pond and two stone hands) and right to a courtyard with a manor, a well and a red banner. A lemur sits on a chest at the crossroads.
- At the crossroads, dig the mound of loose earth with the shovel and take the stone head. Cut the vines over the stone gates with the machete.
- Visit the Kainbekh and look at both round tables under the stone arms. Each spiral holds small square, triangle, circle and half-filled circle symbols.
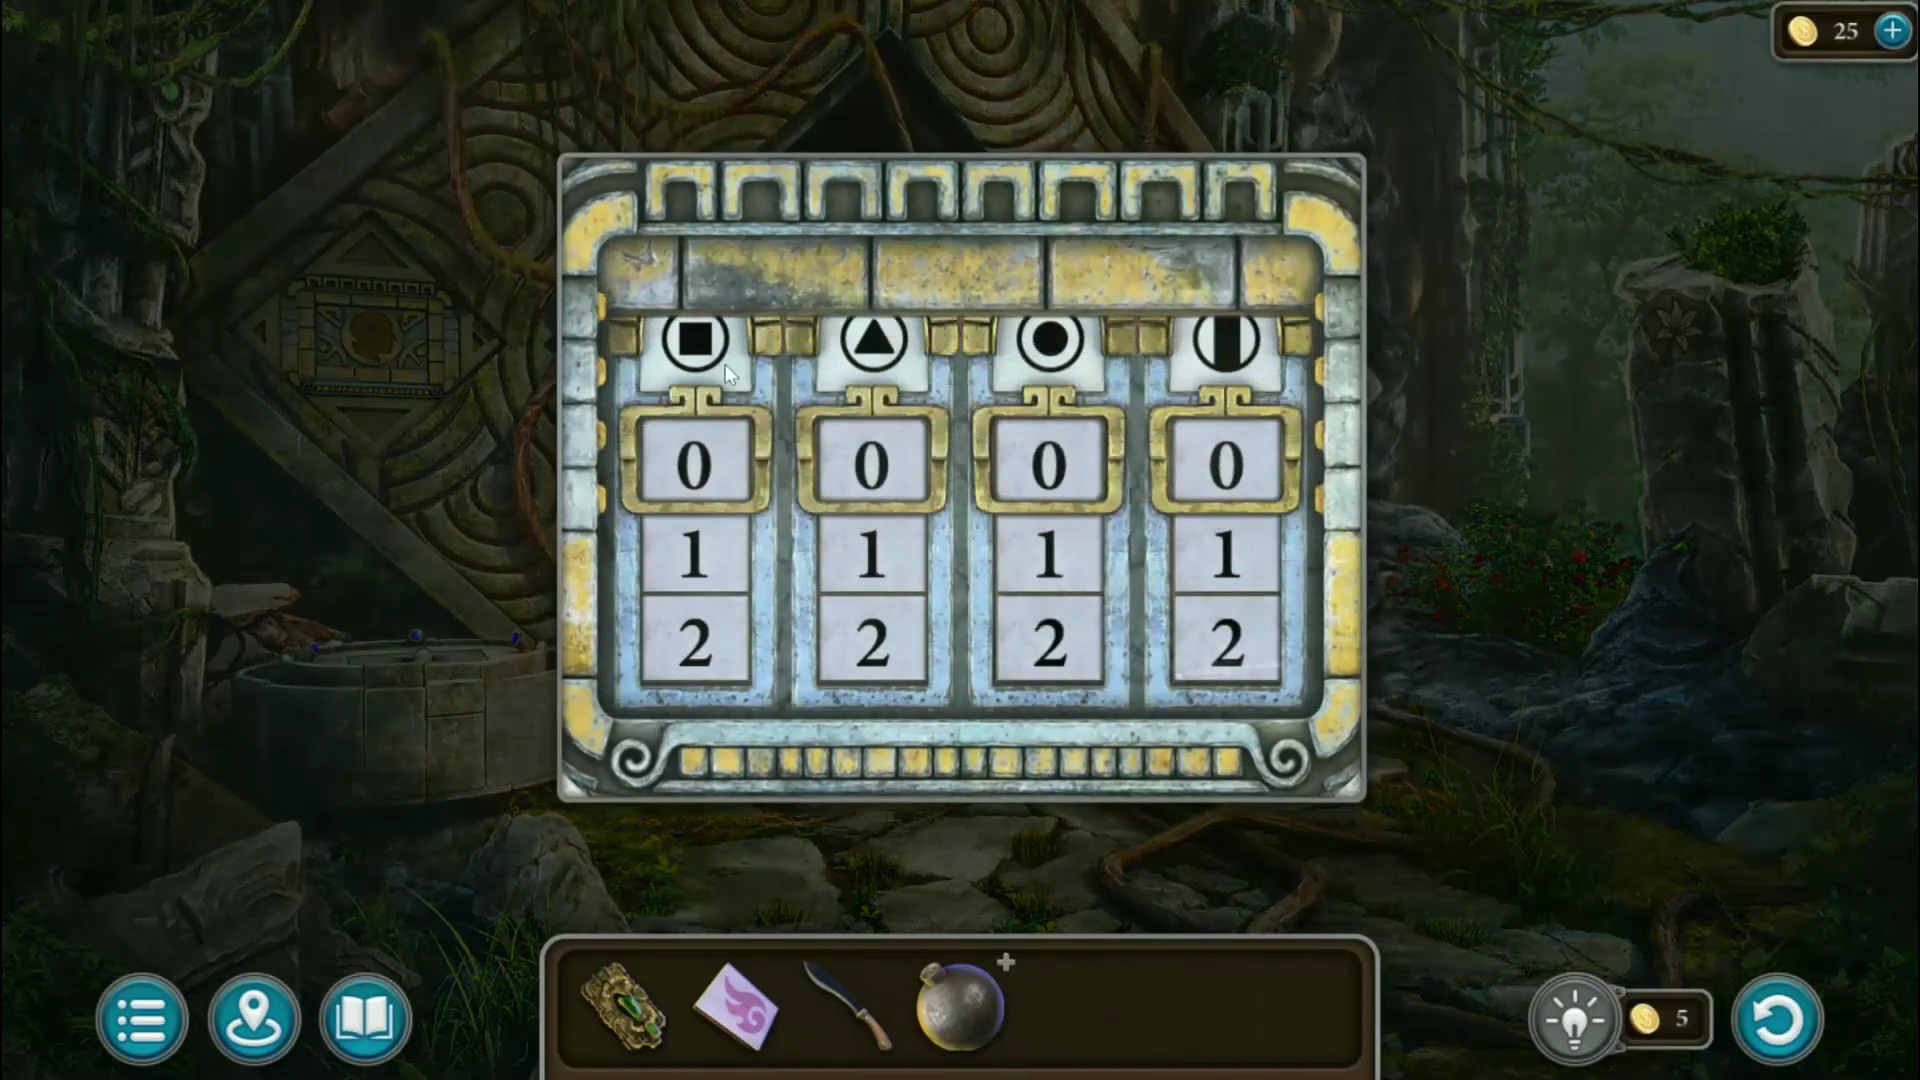
City gate code - puzzle overview. 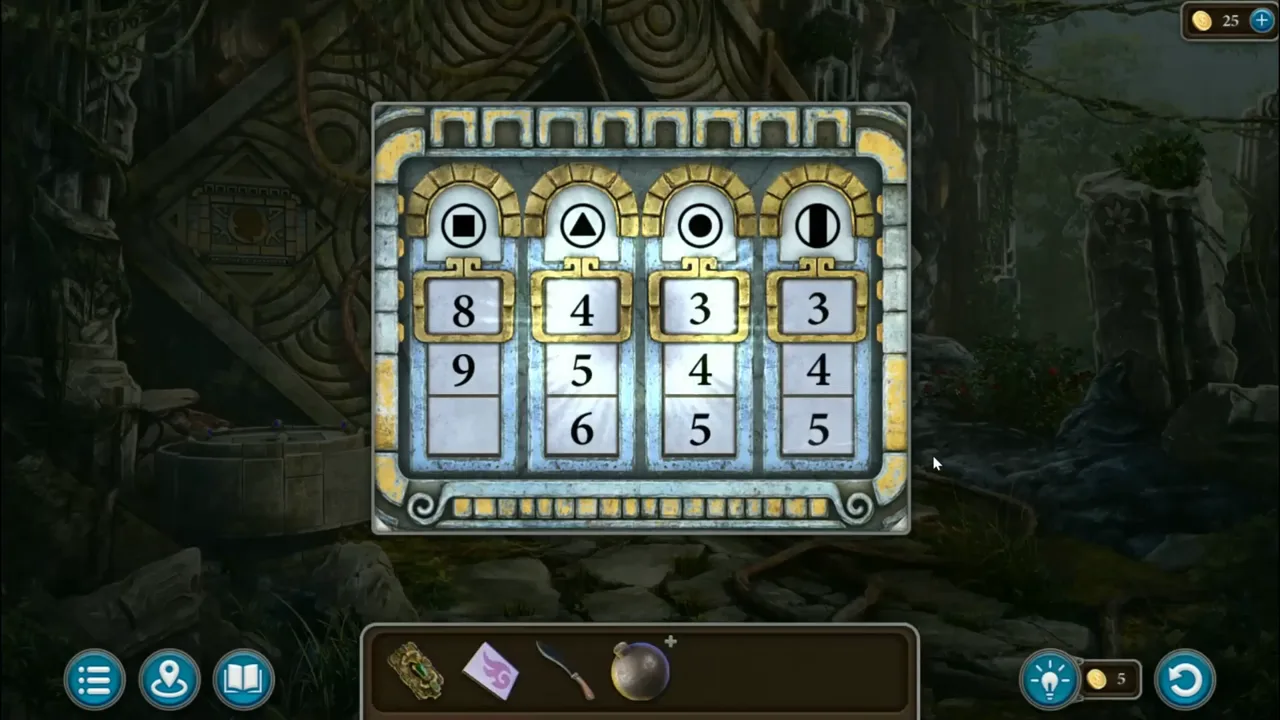
Right gate panel: count each symbol on the two Kainbekh tables. - Put the head on the right side of the city gates. Count each symbol across both Kainbekh tables together and dial the totals under the matching symbols. In the recording (and in written guides) the result is square 8, triangle 4, circle 3, half-circle 3. Take the second head, emerald leaf 1 of 4 and planet 1 of 4.CODE8433
- In the courtyard, look at the red banner and the second banner beside the manor. They show triangles divided in four different ways.
- Put the second head on the left side of the gates. Count each kind of triangle across both banners and dial the totals: 6, 6, 2, 4 in the recording. Take the swords and the valve, and note the symbols painted on the back of the compartment (square, circle, triangle).CODE6624
- Light the room inside the gates with the matches. In the courtyard, cut the vines off the big stone head on the right with the machete, fit the valve and turn it. Take the stone ring from its mouth.
- Inside the city gates, put the stone ring in the round socket in the floor. The maze has two halves. The two curved green arrows beside the round play button add turns to the strip at the bottom: the upper arrow adds a turn shown as an arrow bending up to the left, and the lower arrow adds a turn bending up to the right. The play button runs the strip from left to right, turning the maze section that holds the ball, so the ball rolls through it. For the first half press: upper, lower, lower, lower, upper, upper, lower, upper, upper, lower, then play; the ball stops in the gap between the halves. For the second half press: lower, lower, upper, upper, lower, then play; the ball rolls out on the right. Take the pickaxe and the bracelet. The bracelet contains NUR, a navigation system that explains the city: the reactor and the foundry workshop are without power, and the way into the city is blocked. Then take seahorse 1 of 2 from among the leaves beside the socket, and seahorse 2 of 2 from the collapsed wall at the back of the room.
The manor door, the beach totem and the bomb
A collapsed wall inside the city gates blocks the way. Anum needs a bomb.
- At the manor in the courtyard, open the door covered in chains. Six upright bars and six cross bars are linked through each other's rings; a bar can only be pulled out once the bars holding it are gone. Counting upright bars from the left and cross bars from the top, pull them in this order: upright 6, cross 6, upright 4, cross 5, upright 1, cross 1, upright 2, cross 3, upright 5, cross 2, upright 3, cross 4. Take the cord from inside.
- On the beach, put both seahorses on the totem in the water. Press the geometric symbols in the order painted on the back of the gate compartment: square, circle, triangle. Take the oil and the gorilla medallion.CODEsquare, circle, triangle
- Soak the cord in the oil to make a fuse and fit it to the gunpowder-filled ball to complete the bomb.
- At the crossroads, break the black rock on the stone pillar on the right with the pickaxe and take emerald leaf 2 of 4.
- Inside the city gates, put the bomb against the collapsed wall at the back and light it with the matches. The wall is blown open; go through to the Southern Square. The new task is "Restore the Energy Supply".
The Southern Square and the energy crystal
The Southern Square has a statue holding a shield, a gear door at the foot of the stairs, a large sun-lock door for the reactor and a stone globe. The solar energy device is on the Alley of Light at the top of the stairs.
- Put the swords into the statue's shield and take emerald leaf 3 of 4. Take the gear from the door on the left.
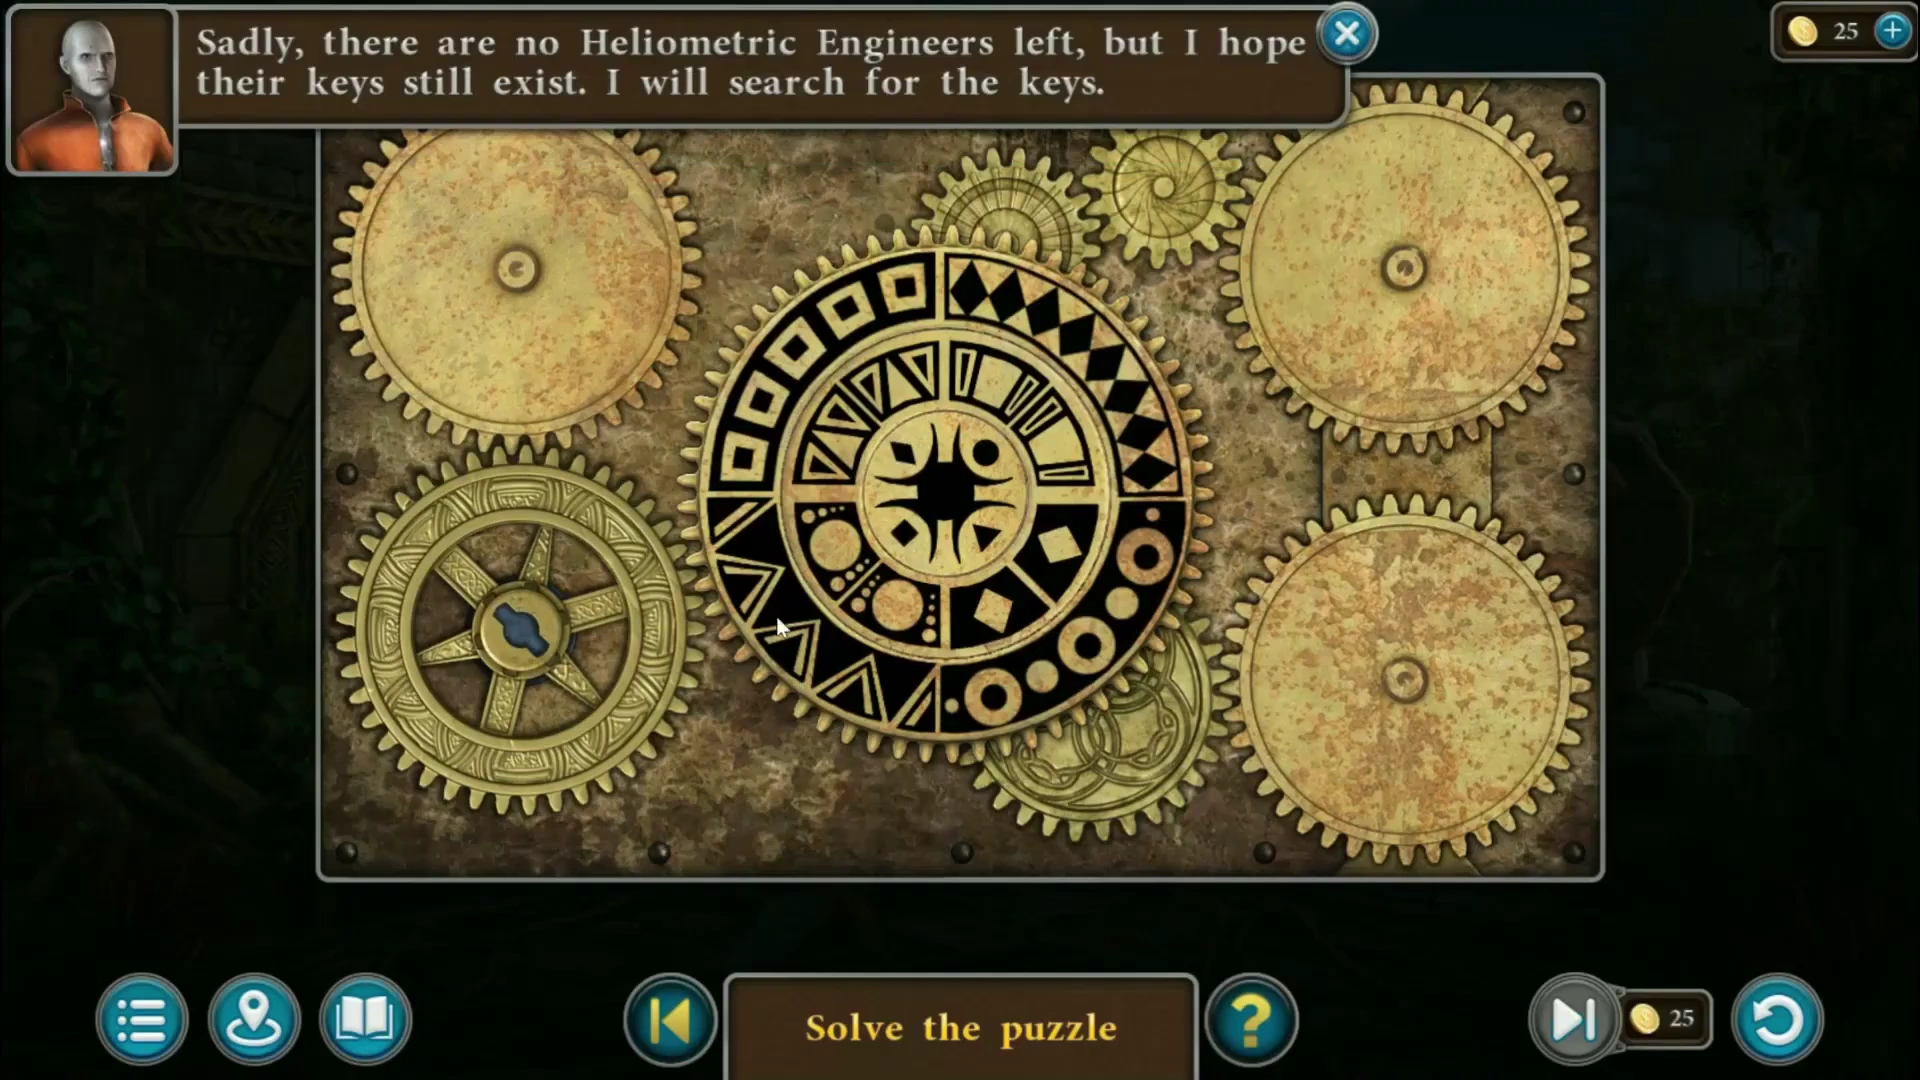
Gear gate - puzzle overview. - Go up to the gate at the top of the stairs and fit the gear. The clue is on the door at the foot of the stairs: a round carving split into quarters with a triangle at the top left, a square at the top right, a circle at the bottom left and a diamond at the bottom right. Tap the gears around the patterned disc to turn its three rings until each quarter of the disc shows only that shape: triangles top left, squares top right, circles bottom left and diamonds bottom right (see the pictures). The gate opens onto the Alley of Light.
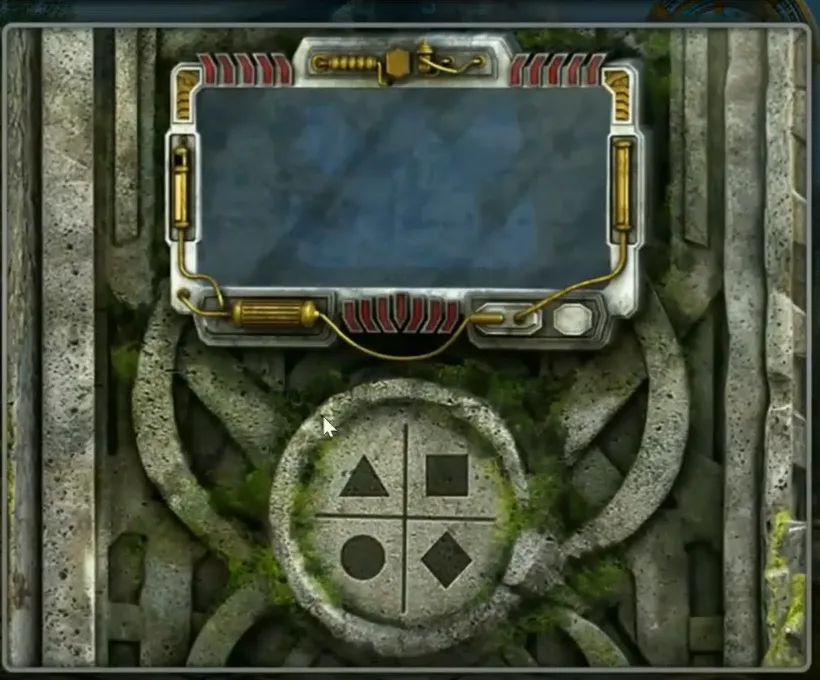
The clue on the door at the foot of the stairs. 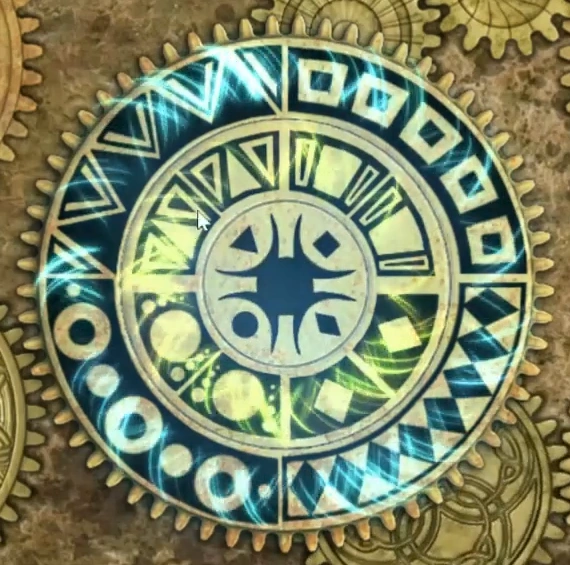
Gear lock solved to match the clue. - On the Alley of Light, take the bear medallion from the stone totem between the stairs and the arch. Cut the weeds at the top of the stairs with the machete to reach the energy device; take the blue eye and remove the broken crystal.
- Go through the arch to the city street with the balloon. Take the orange eye and the net, the puma medallion from the vase, and the grapes from the gate with the code panel.
- At the Kainbekh, the two raised stone hands each need an eye. Solve the left board, then the right, to light both flames and lower the crystal. If one flame goes out before you finish, reopen that hand and repeat its puzzle. Put the orange eye in the left hand. A honeycomb of 39 hexes appears; the face chips start dark, and tapping a face chip switches it and every face chip touching it between dark and lit (plain hexes do nothing). Light every face chip. Tapping each of these 18 chips once, in any order, lights them all: in the top row (7 chips), the 5th and 6th; in the second row, every face chip except the rightmost (3 chips); in the middle row (9 chips), all except the rightmost; in the fourth row, all four face chips; in the bottom row, only the middle face chip. A chip tapped twice cancels itself out, so if you lose track, tap the reset button and start again.
- Go straight to the right hand and put the blue eye in it. Twelve round sockets form a triangle: number the top row 1 to 6 from the left, the next row 7 to 9, the third row 10 and 11, and the single bottom socket 12. Chips start in sockets 3, 6, 7, 8, 10, 11 and 12. Drag a chip over a neighbouring chip into the empty socket straight beyond it; the jumped chip is removed. Leave only one chip: 12 over 11 to 9; 6 over 9 to 11; 7 over 8 to 9; 9 over 11 to 12; 12 over 10 to 7; 3 over 7 to 10. The energy crystal is lowered; take it.CODE12>9, 6>11, 7>9, 9>12, 12>7, 3>10
- Put the crystal in the device on the Alley of Light. First set the broken pillar back on its round base, then fit the fallen top piece and the mirror frame onto it so it becomes a third mirror stand. Tap a mirror to turn it. Turn all three mirrors until each one sends its own beam of light onto the crystal; the recording set the left mirror first, then the right, then the central mirror above. When all three beams meet on the crystal, it sends power to the city. The new task is "Replace the Crystal in the Artifact", and the workshop lock gains power.
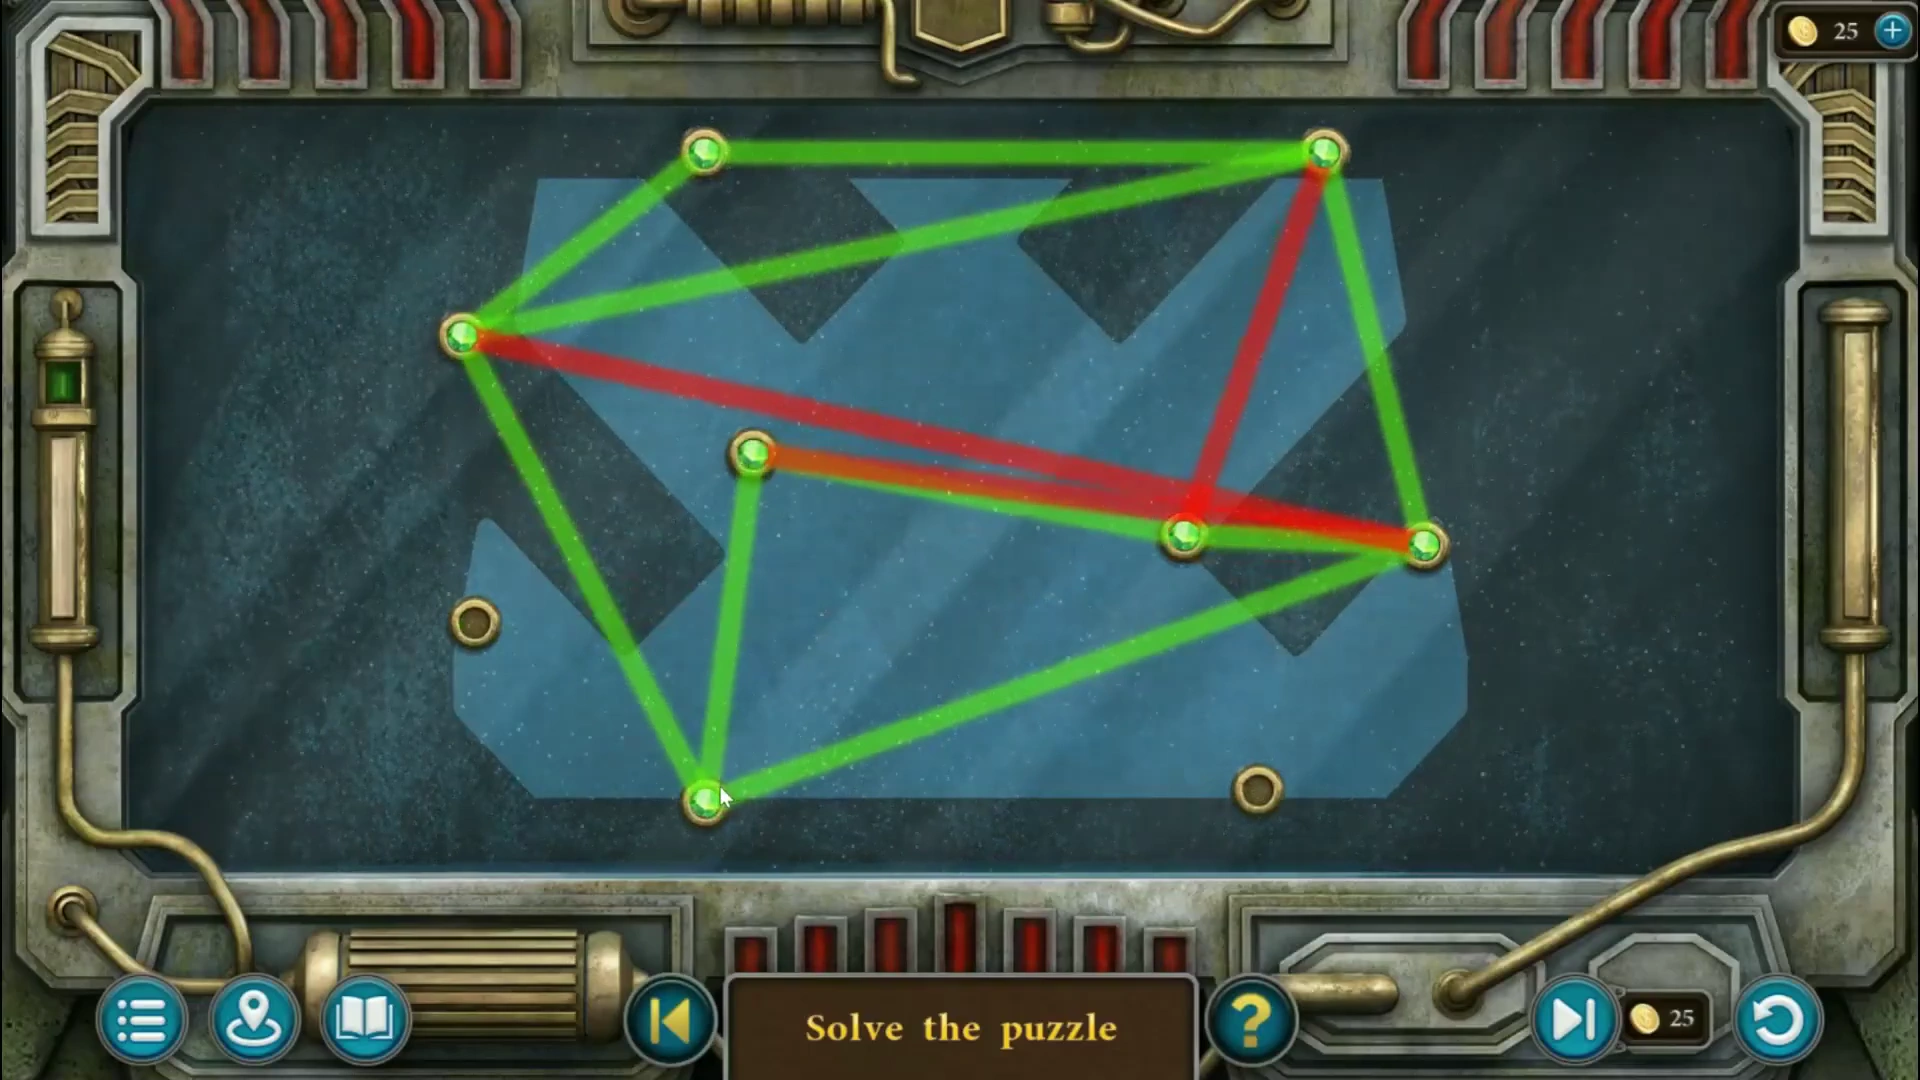
Line puzzle - puzzle overview. - In the Southern Square, open the door next to the stairs. Drag the glowing nodes until no two lines cross; all lines turn green (see the picture) and the workshop opens.
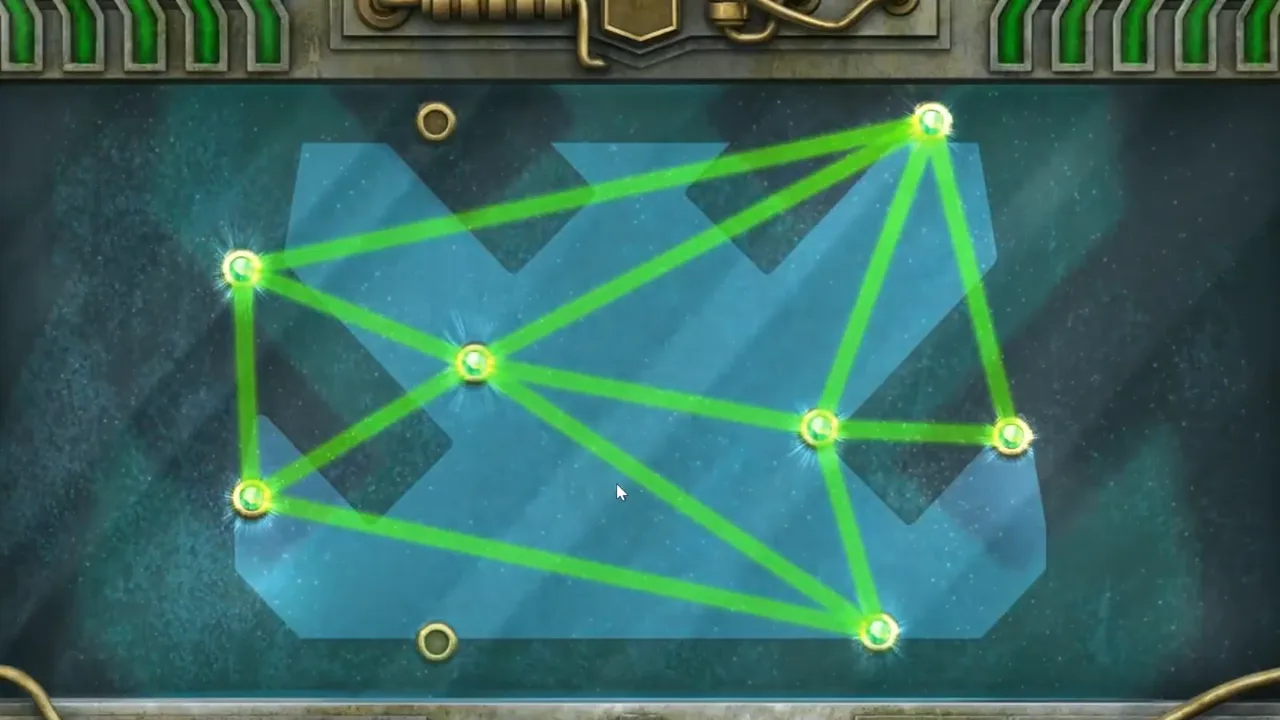
Square door solved: no lines cross.
The workshop
The workshop machine can repair the artifact, but it needs a new crystal and a working flask.
- Inside the city gates, clean the pond of leaves with the net and remember the three angular symbols on its floor.
- In the workshop, look at the three-tile panel. Slide the tiles until they show the three symbols from the pond, in the same order. Take the crystal.
- At the machine on the left, take small sun key 1 of 4 and the small scissors. Put the artifact in the machine and the crystal in the hatch on the left. The flask in the machine is broken.
- In front of the city gates, cut the red flowers growing from the pavement with the small scissors and take emerald leaf 4 of 4.
- Give the grapes to the lemur on the chest at the jungle crossroads. Open the chest and take the wine (it has turned to vinegar).
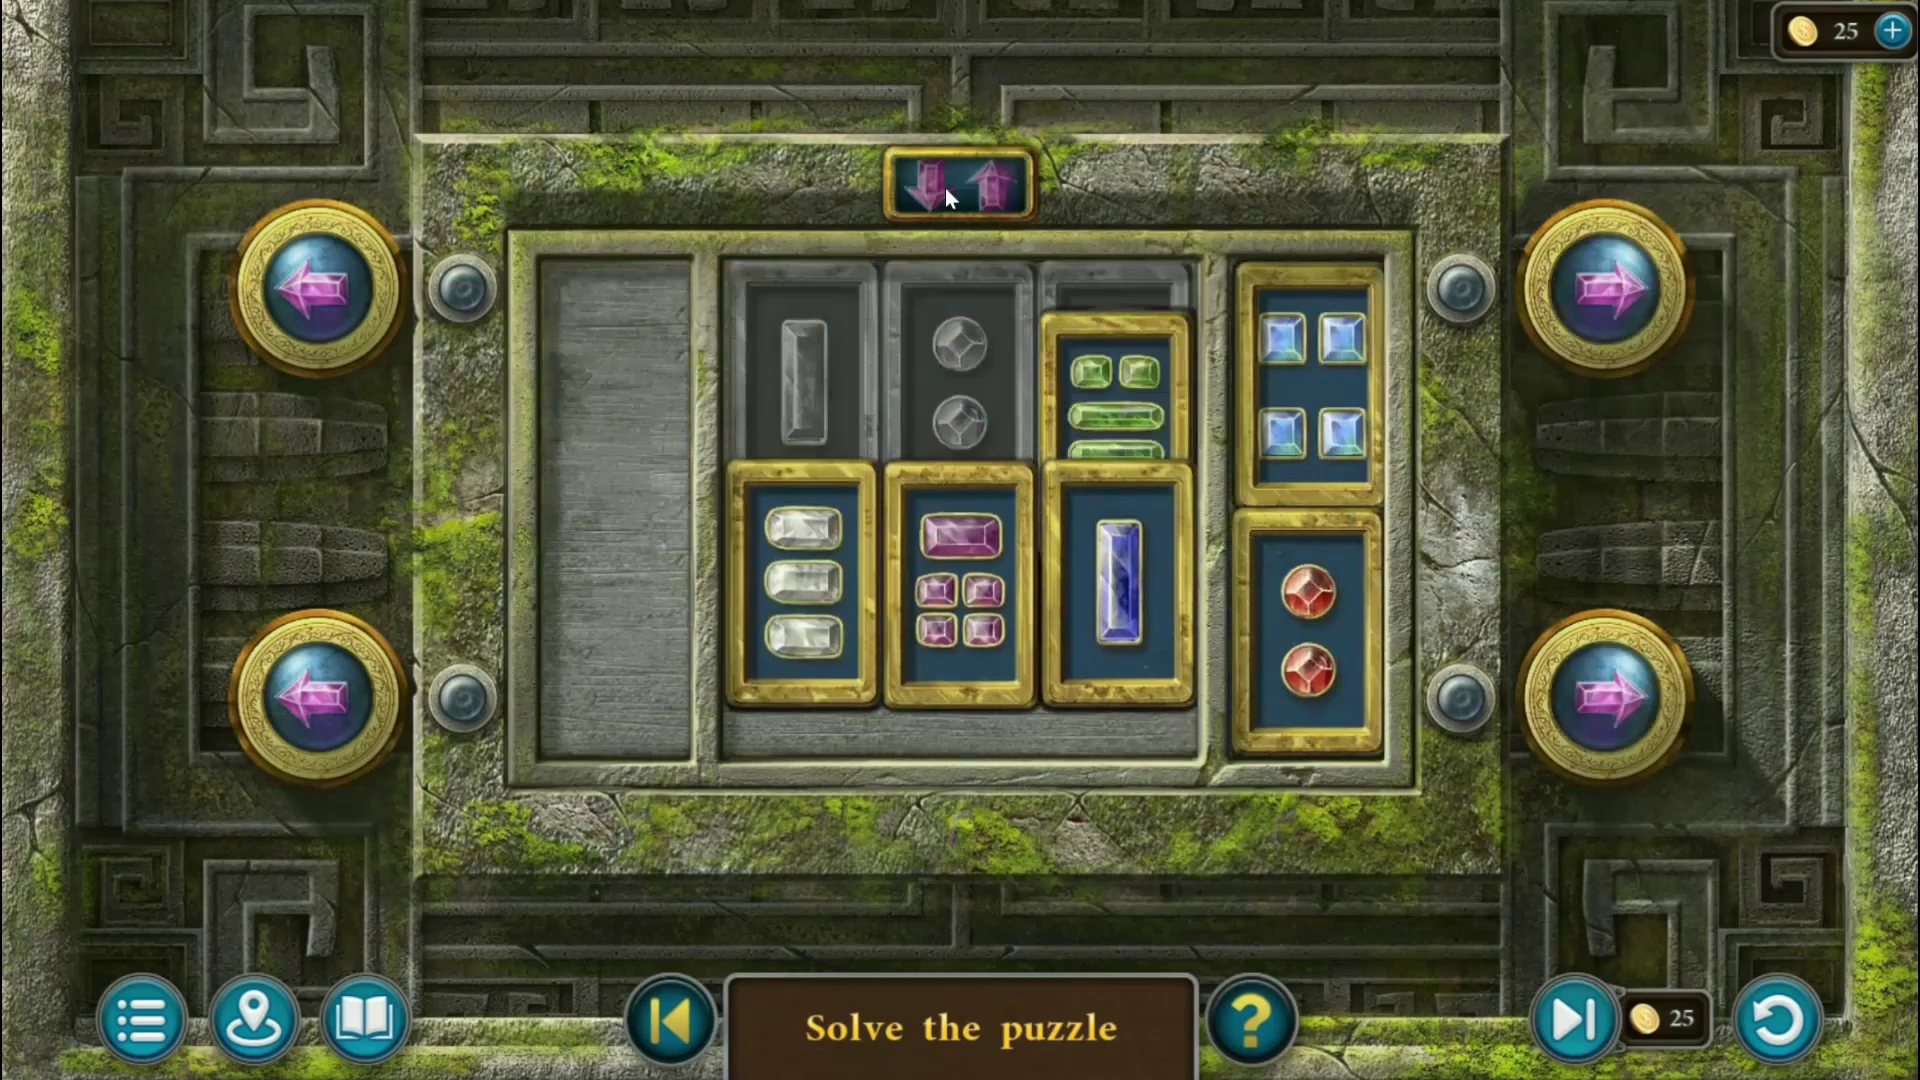
Railing puzzle - puzzle overview. - Put the four emerald leaves on the railing at the bottom of the jungle stairs. Use the arrow buttons to slide the tiles and the up-and-down button to move tiles between the rows. Order the six gem tiles by how many gems each holds: 1, 2 and 3 along the top row and 4, 5 and 6 along the bottom row, in the middle three columns (see the picture). Take the stone key.
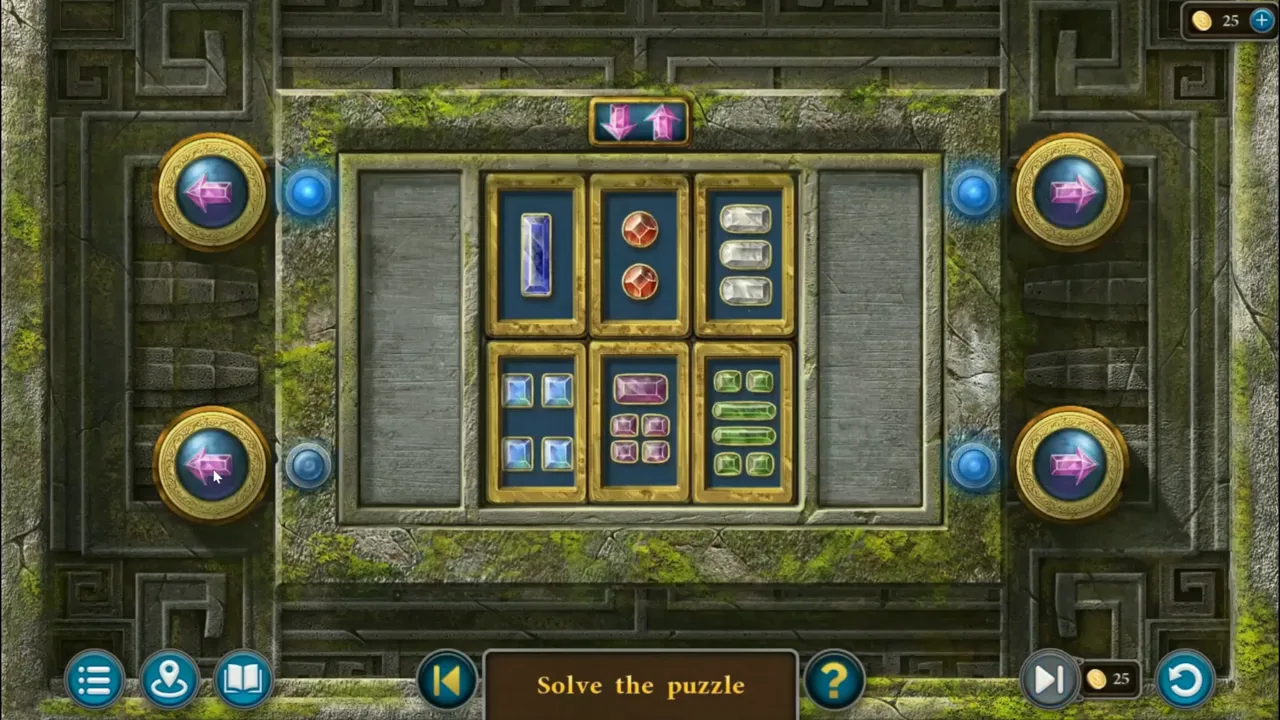
Jungle railing solved: gem tiles in order from 1 to 6.
The rusted plate, the pond and the neocube
This code is different in different games. Read your own plate.
- On the Alley of Light, pour the vinegar on the rusted plate on the totem and wipe it. It lists three symbols, each with a number. These numbers are not the same in every game: the recording showed cross 5, diamond 4 and M-sign 2, while other players report 2, 8 and 4.
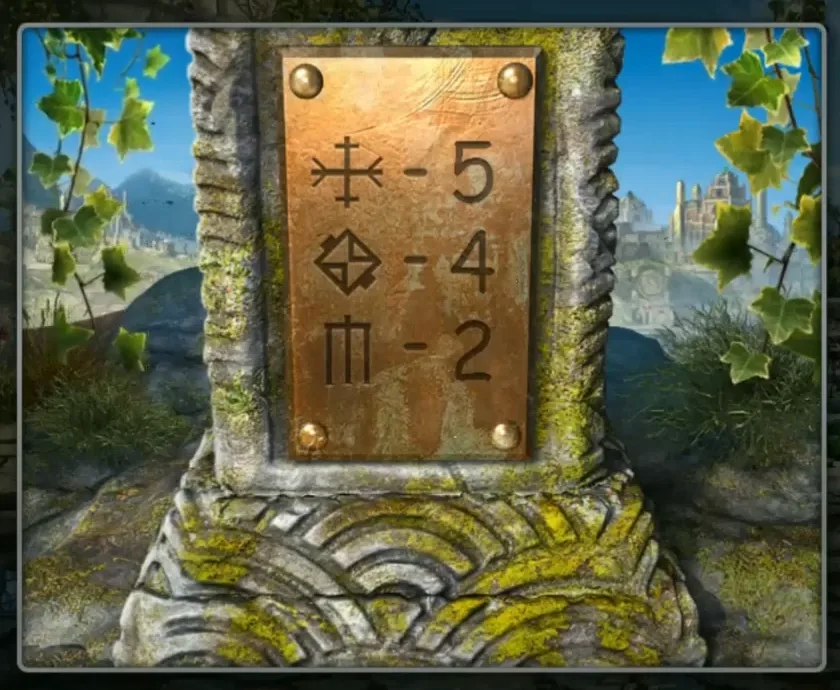
The recording's plate: cross 5, diamond 4, M-sign 2. Your numbers may differ. - At the gate on the city street, set each symbol's wheel to the number your plate gives for that symbol (542 in the recording). Take iron petal 1 of 4.CODE542 (recording only; use your plate)
- In the manor courtyard, open the stone mechanism behind the gate with the stone key. Take the diving helmet, planet 2 of 4 and the lever.
- Use the diving helmet on the courtyard pond. Find all 15 triangles before the air runs out (restart if it does). The gate at the bottom opens; take the neocube.
- Put the neocube on the stone table inside the city gates. This is a long puzzle, so the guide gives the method rather than every placement. The cube shows one hollow face at a time, with that face's set of flat block pieces floating around it. Drag each piece into the hollow; pieces keep the orientation they are shown in and can be dragged out again. When every square of the hollow is filled, the cube turns to the next face, six faces in all, each with new pieces. Tips: place the largest and oddest-shaped pieces first, fitting them against the notches and corners of the frame, and keep the single squares and small pieces for the last gaps; if the final gaps cannot be filled, pull out the most recent large piece and try it elsewhere. The sixth face took longest in the recording. Take planet 3 of 4 and the flask.
- Fit the lever into the slot on the left wall inside the city gates and push it. The platform lowers; take iron petal 2 of 4 from it.
Repairing the artifact and the four medallions
The workshop machine now has everything except the right amount of liquid.
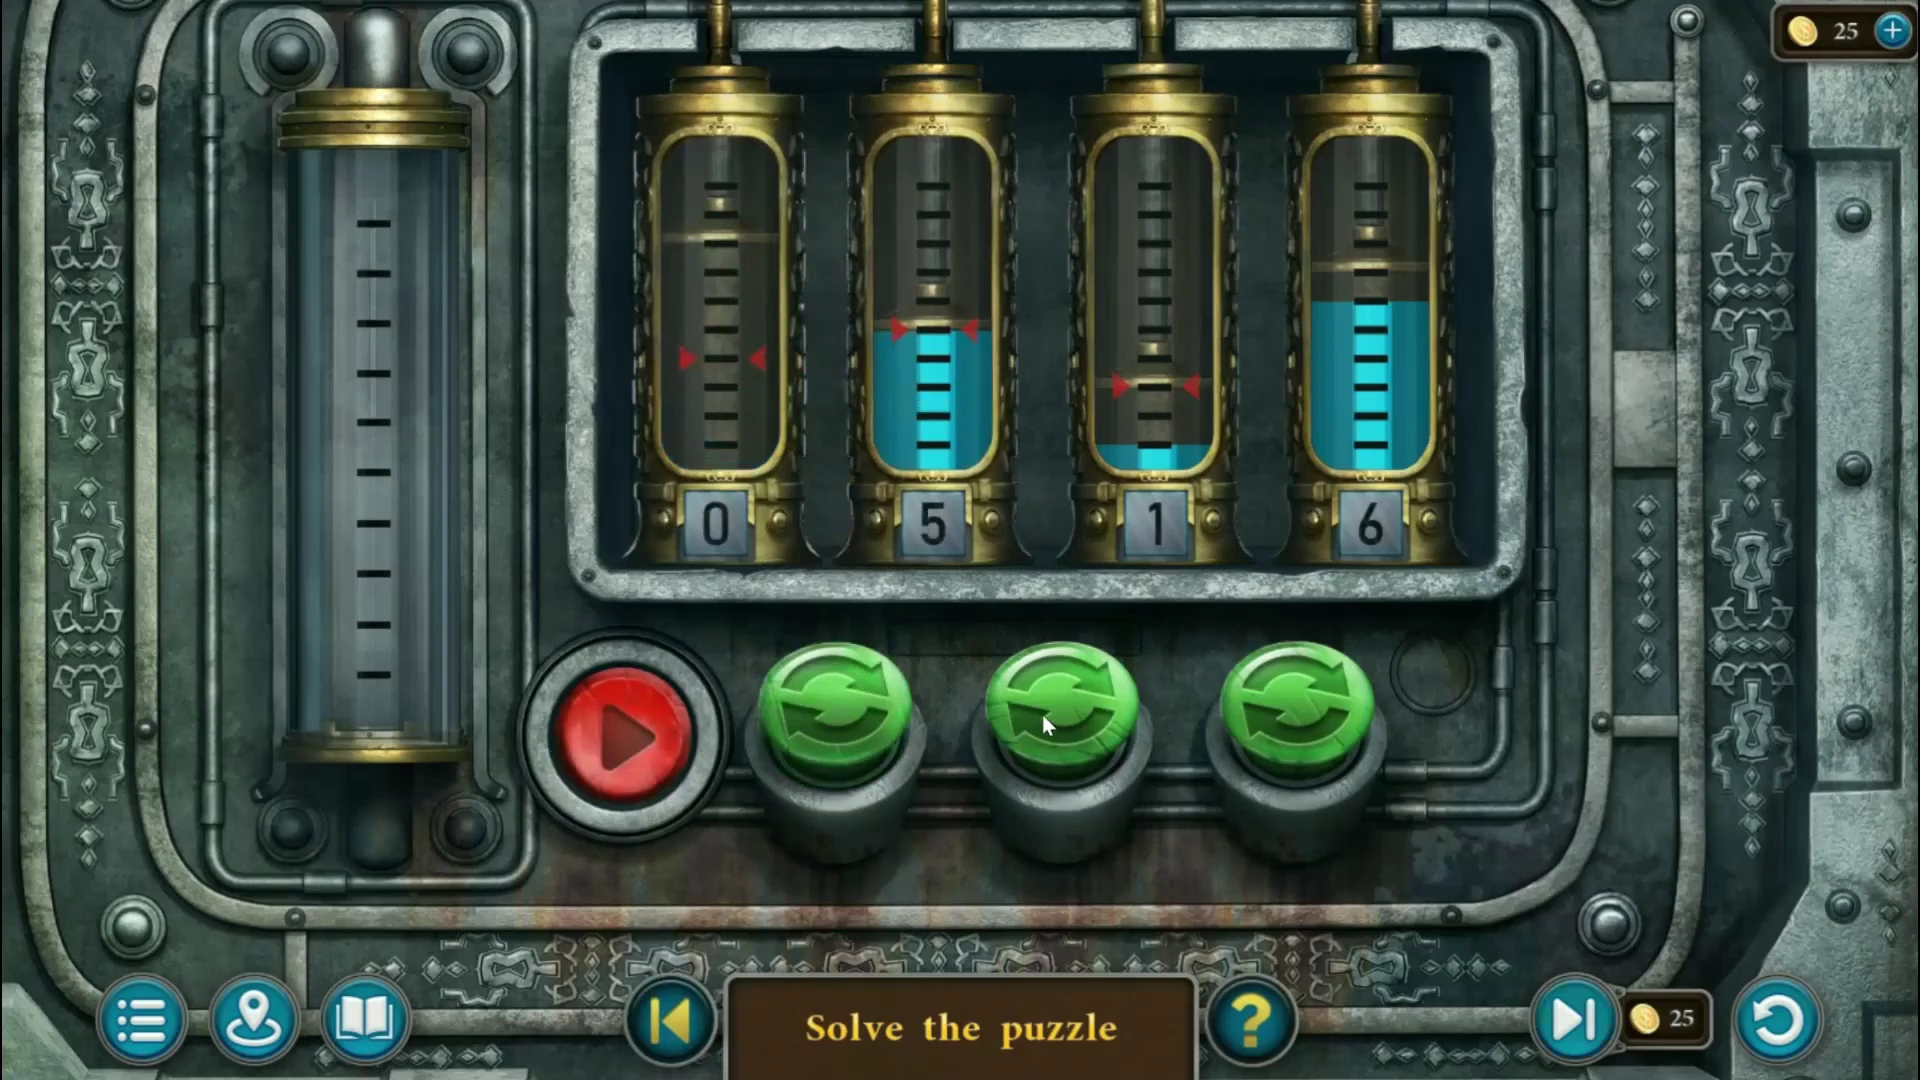
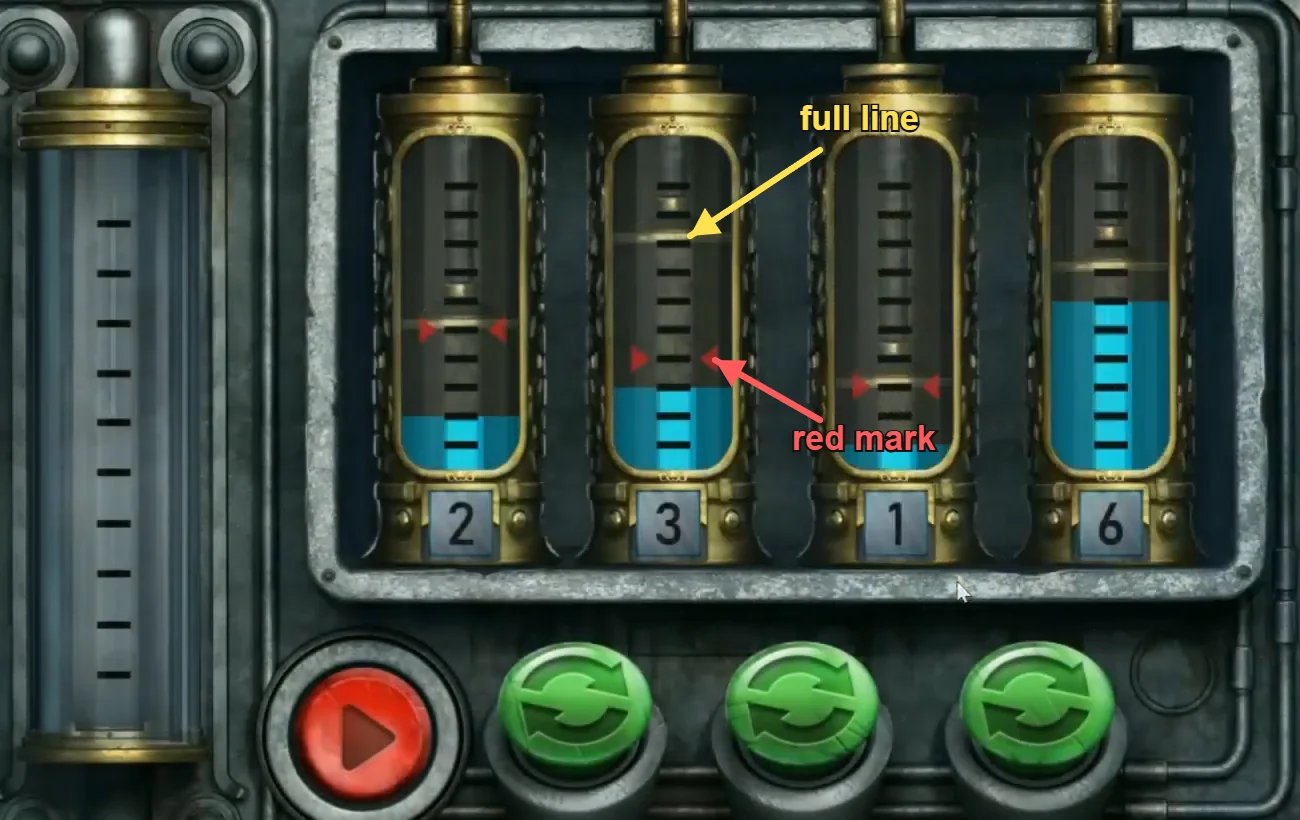
- In the workshop, replace the cracked third flask with yours. Each flask has a number showing its contents, a thin gold line showing the most it can hold, and red triangles showing the level it must end at (the flask with no triangles must end empty). The three green buttons sit between the flasks and swap the two flasks on either side; flasks keep their own lines and marks when they move. The red button pours the first flask into the second until the second reaches its gold line or the first is empty. The flasks start at 2, 3, 1 and 6. A working order: green button between flasks 2 and 3; red; green between 2 and 3; green between 3 and 4; green between 2 and 3; green between 1 and 2; red; green between 2 and 3; red. The flasks then read 0, 4, 5 and 3, each at its own mark, and the liquid drains into the machine. Use the replay button to restart if you go wrong.
- Press the machine button to repair the artifact and take it, along with the snake medallion. The new task is "Charge the Crystal".
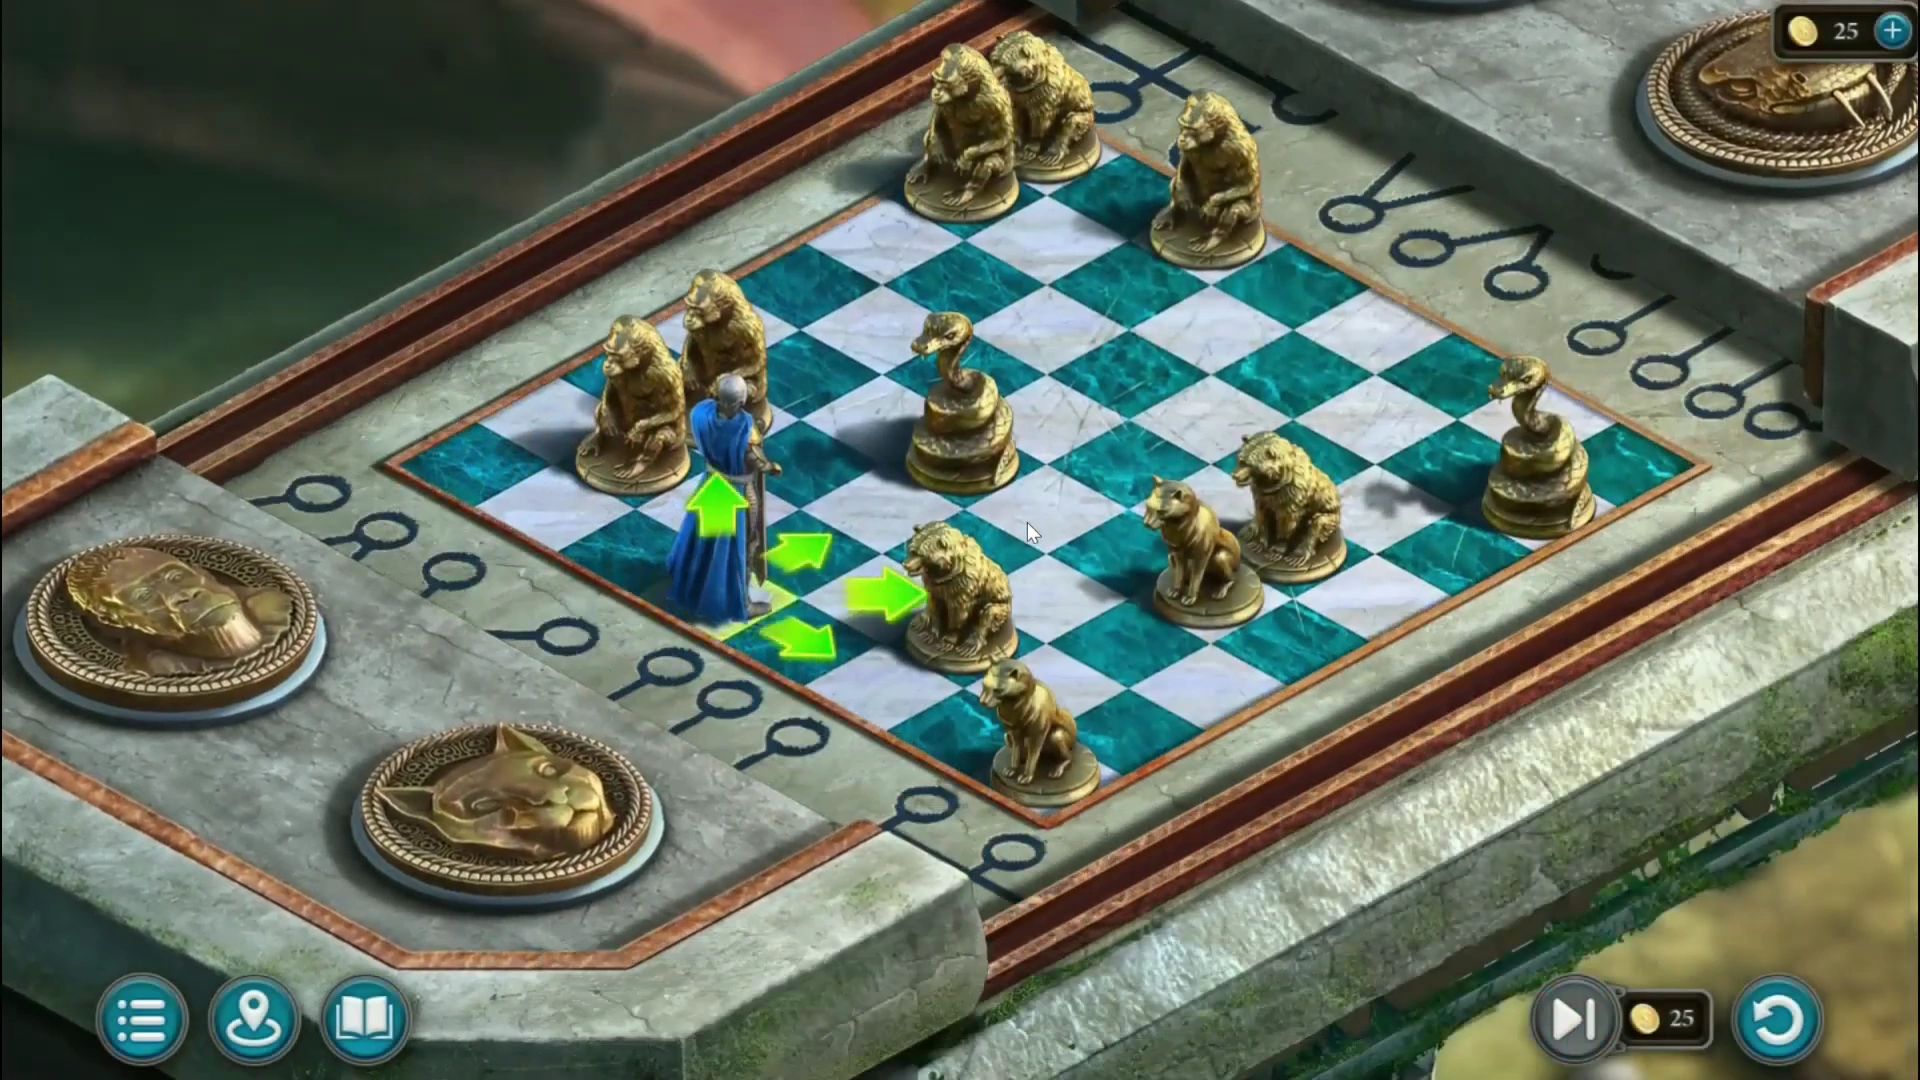
Warrior board - puzzle overview. 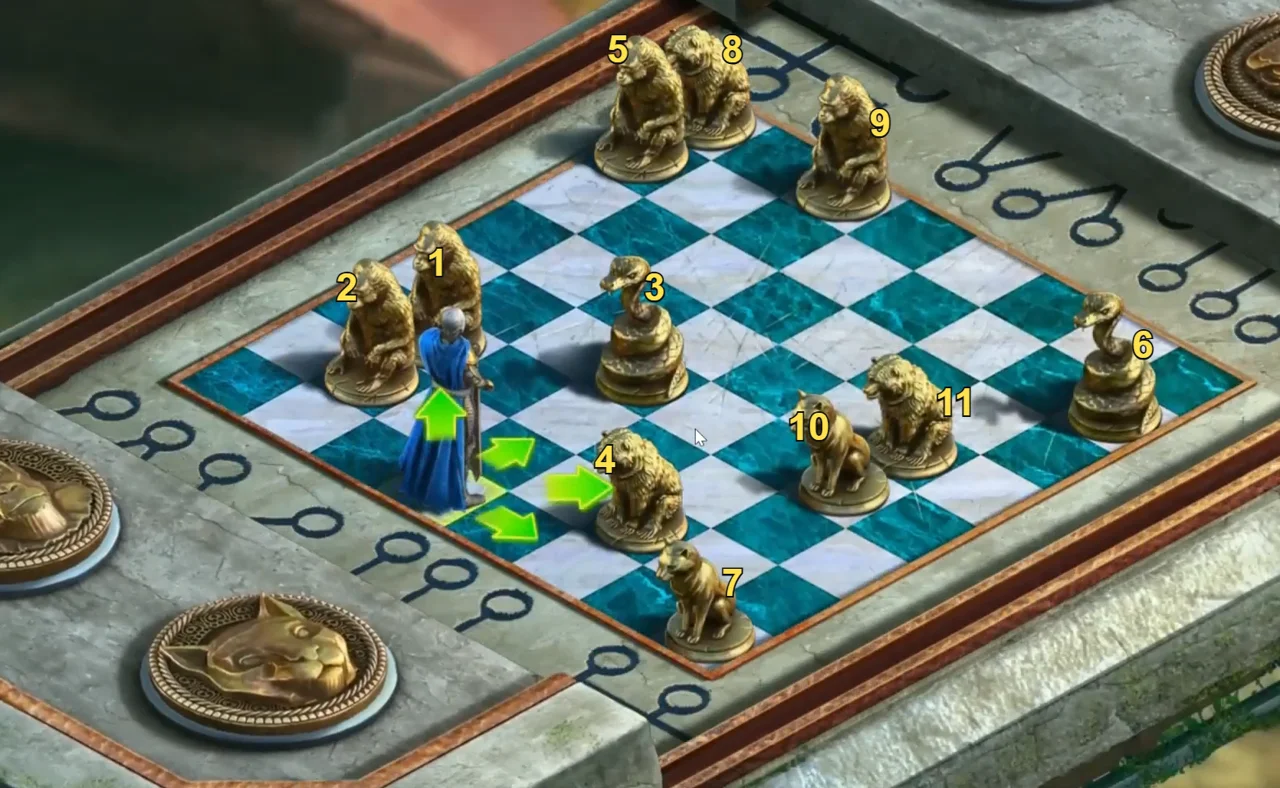
Medallion board: knock the animals off in the numbered order. - At the stone table in the manor courtyard, place the gorilla, bear, puma and snake medallions. Green arrows around the warrior point at animal figures he can reach in a straight line; tap an arrow and he moves to that animal and knocks it off the board. Clear all 11 animals; if he is left with no arrow, use the replay button. The picture numbers the animals in the order the recording knocked them off from this starting layout: tap the arrow pointing at animal 1, then 2, and so on to 11. Take iron petal 3 of 4 and planet 4 of 4.
- On the Alley of Light, put all four planets on the armillary sphere on the left. Read the "Decree of the Cognitarium" in the drawer: the reactor opens only with the sun-keys. Take the wire, small sun key 2 of 4 and the palm-tree token.
- On the city street, fix the chain of the broken hanging bowl with the wire, take the stick behind it and push the other bowl over the edge. Take the winch handle. Fit it to the balloon winch, pull the balloon down and take small sun key 3 of 4.
- Put the palm token on the pavilion gate. Take the casting mold and iron petal 4 of 4. Look under the vase on the left and take the fish figure. Put the four iron petals on the vase on the right and memorise the line shape that lights up inside it.
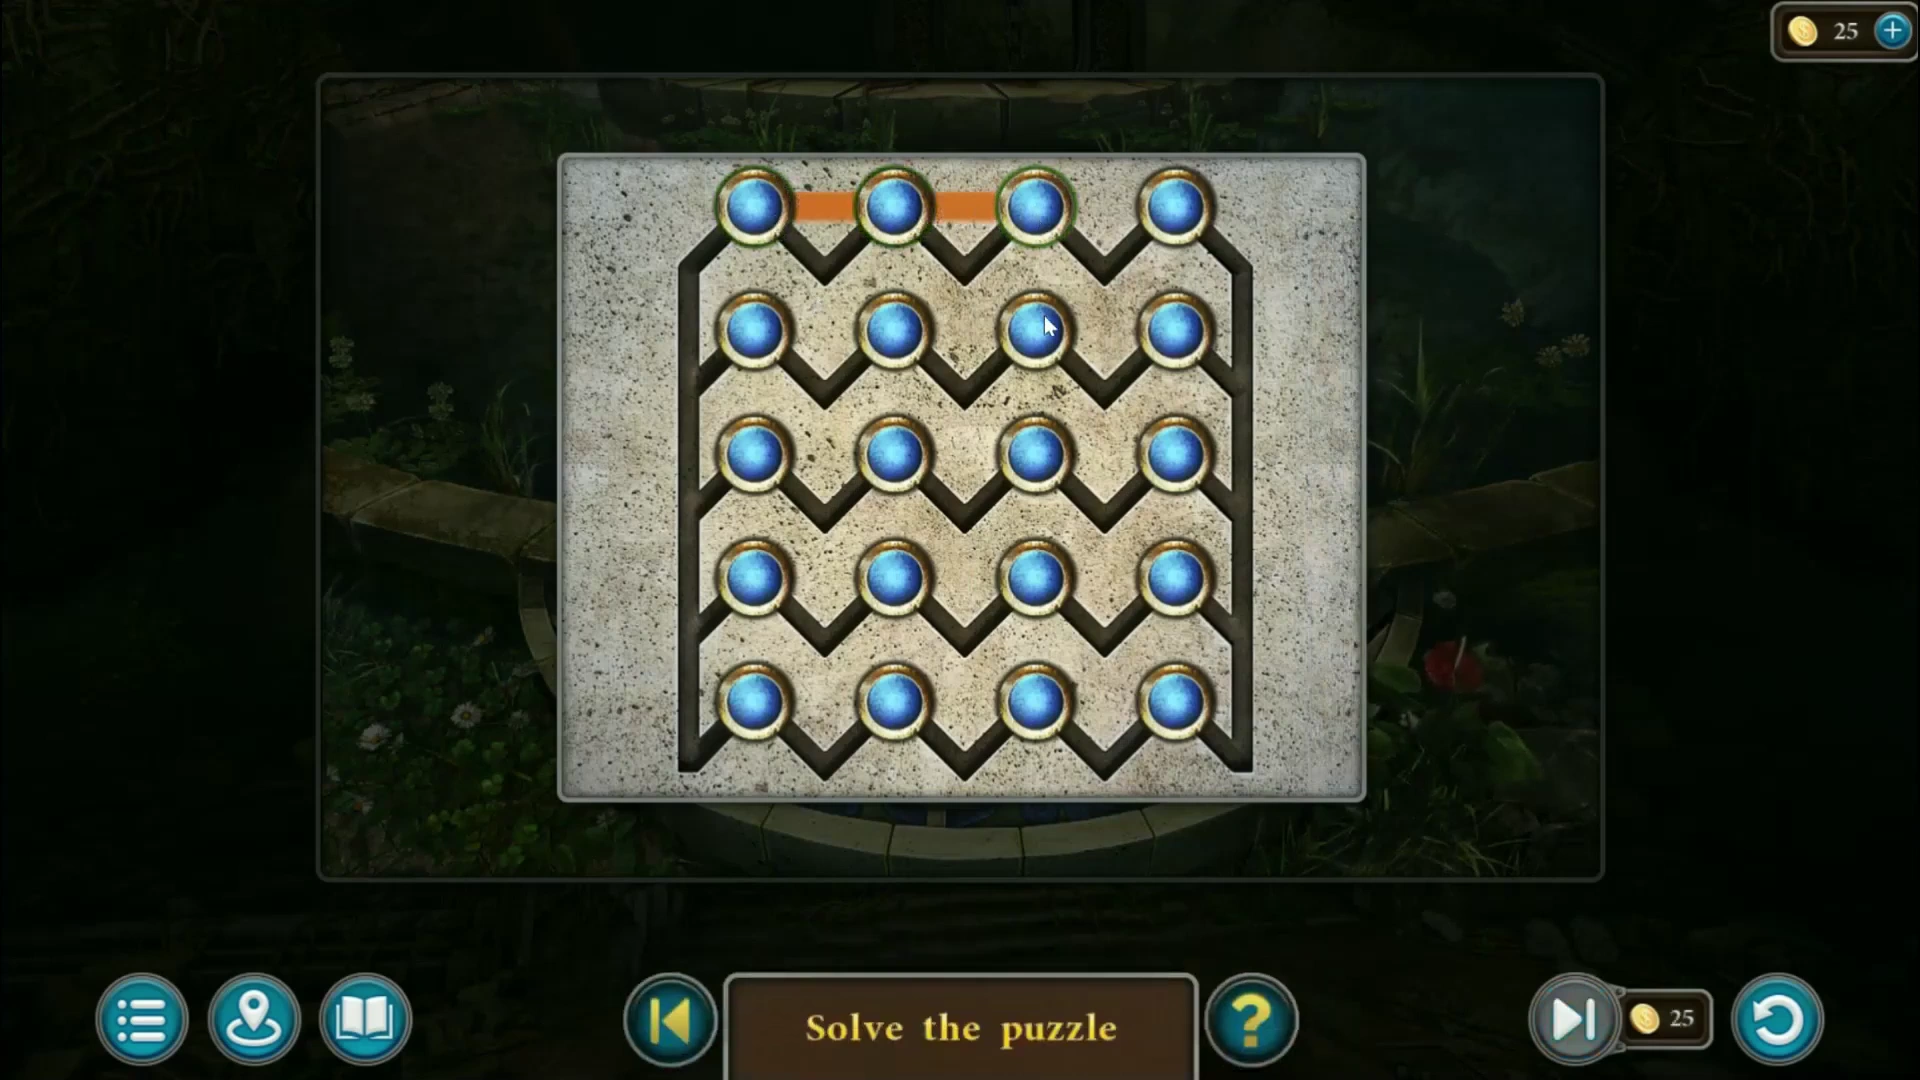
Dot puzzle - puzzle overview. - At the Kainbekh, put the fish figure in its slot in front of the pond. Tap the dots to draw the shape you saw inside the vase. In the recording it ran along the top row, then down and across the middle, and down to the right (see the picture). Stepping stones rise over the pond.
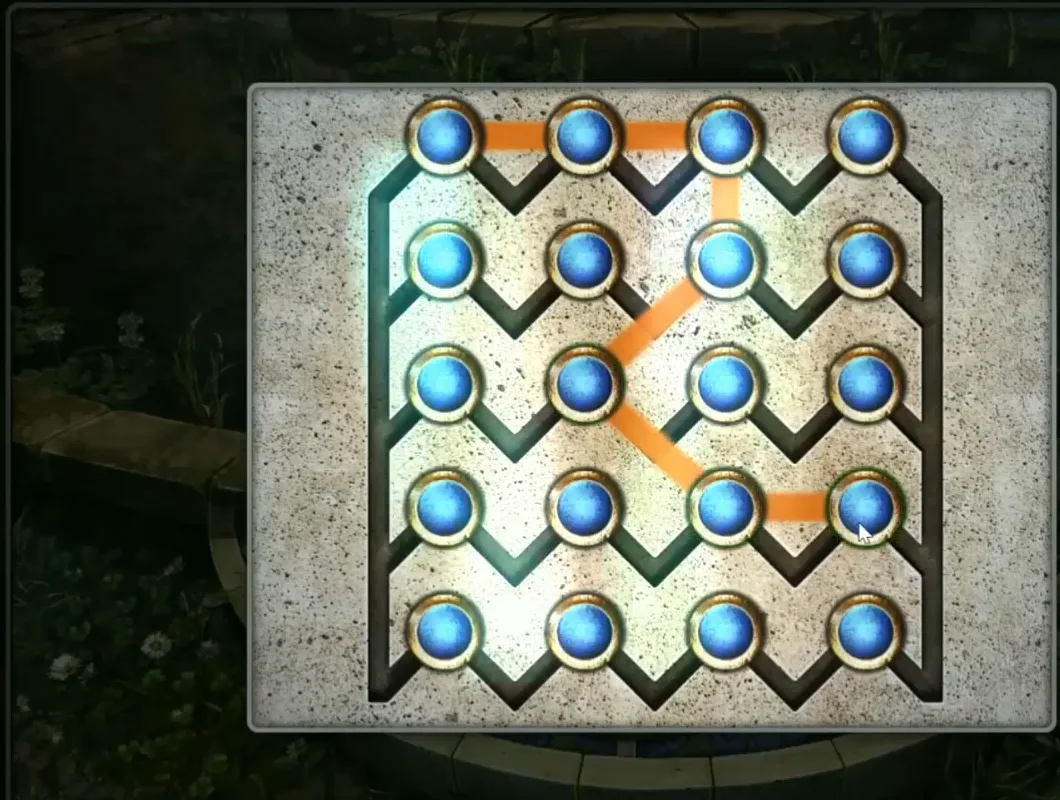
The vase shape drawn on the dot board in the recording. - Cross to the table and press the red button. The four flowers can start in different places; use this pushing method on your own board. Count the 6 columns from the left and the 7 rows from the top. The destinations are yellow above column 1, red above column 4, blue left of row 6 and green right of row 7. Each flower has restricted controls: yellow moves up or down, red left or right, green up or right, and blue up or left. Each arrow press moves one square and pushes flowers in the way, including in directions those flowers cannot move by themselves. Work backwards from a destination: red needs another flower below it to push it up column 4; green needs a flower above it to push it down to row 7; yellow needs a flower on its right to push it into column 1; blue needs a flower above it to push it down to row 6. Move a helper into the required row or column, then use a push to line up the target flower before using its own arrows for the final approach. For example, yellow can push green down and blue or red can push yellow left. Keep helpers available until the remaining flowers have a way to reach their exit lanes; do not send a useful helper home too early. Take the Historical Manuscript (3 of 4 in this chapter), small sun key 4 of 4 and the fire symbol.
The big sun key and the Reactor Hall
The furnace in the workshop casts the big sun key that opens the reactor.
- In the workshop, put the fire symbol in the furnace slot to light it. Place the casting mold on the table below and press the wall button. Break the mold and use the tongs beside the machine to take the big sun key.
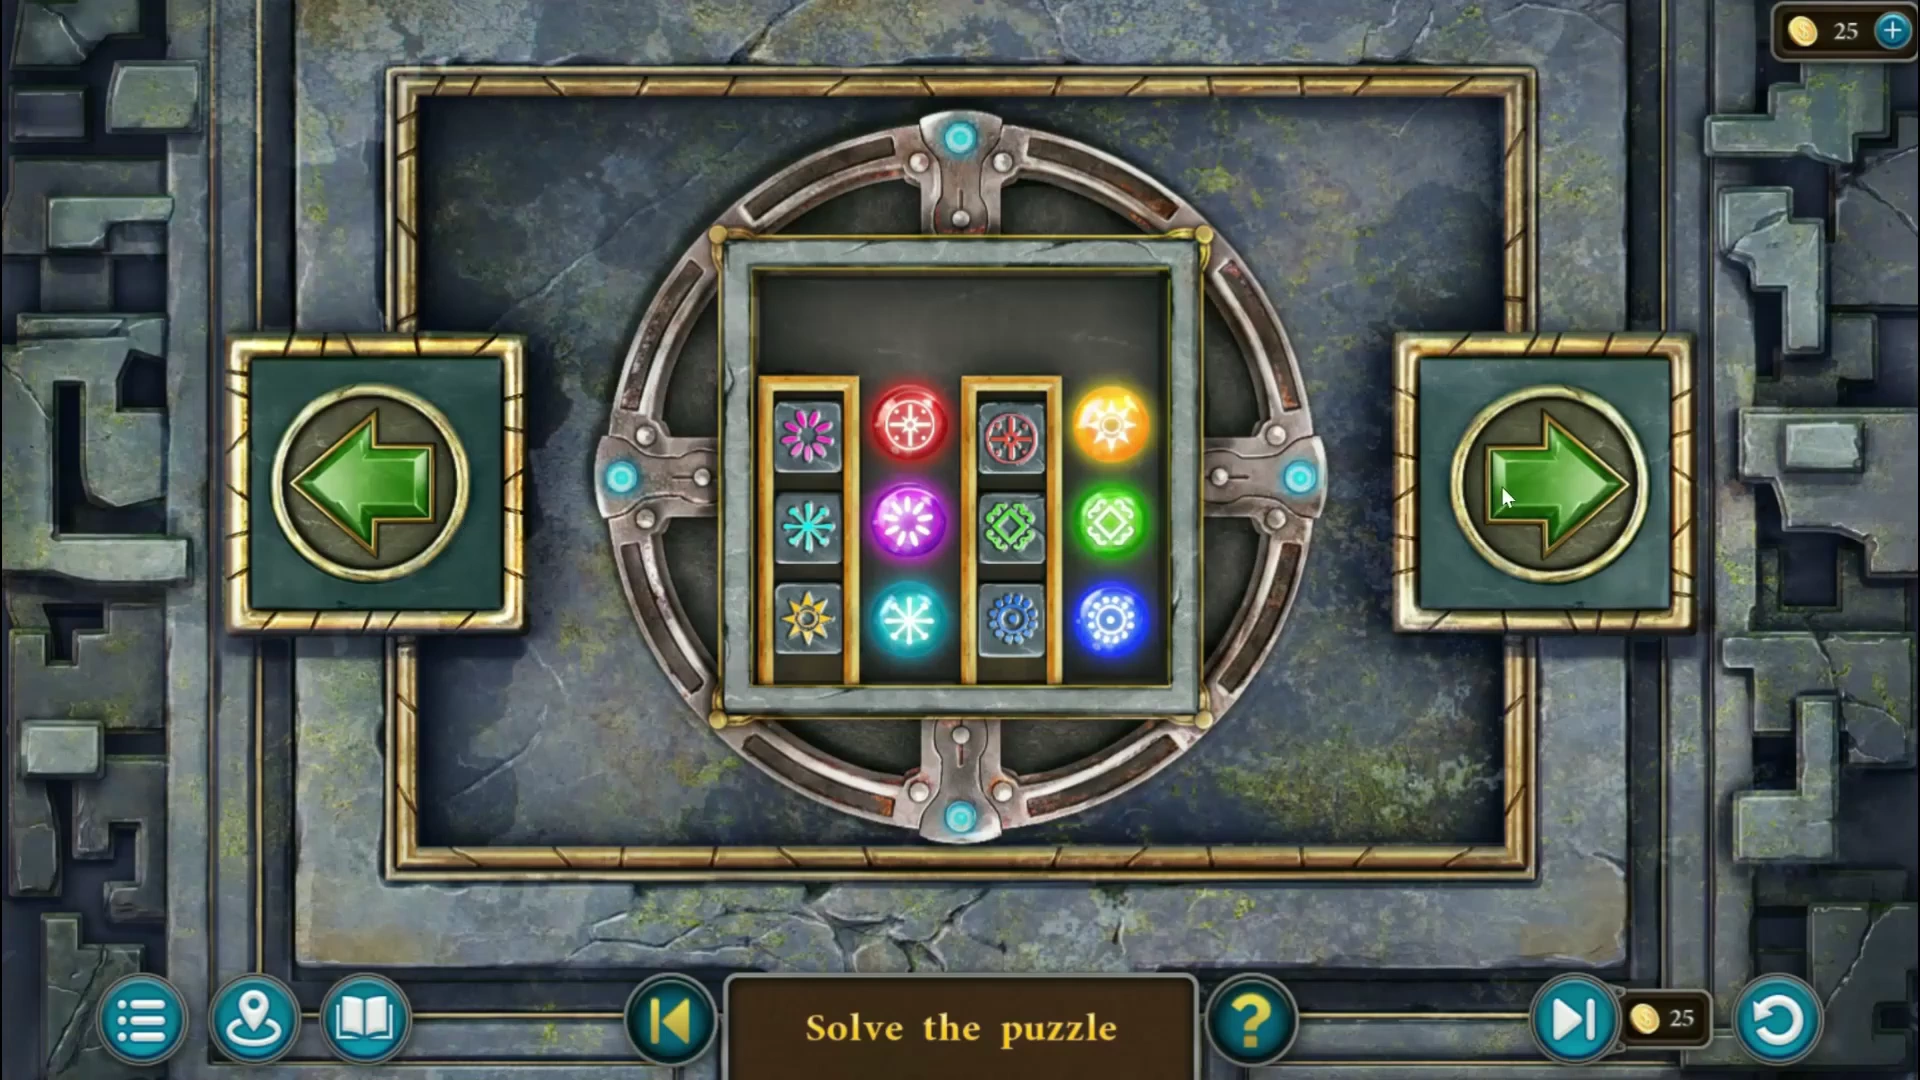
Sun door - puzzle overview. - In the Southern Square, place the big sun key and the four small sun keys on the large door. Turn the frame with the left and right arrows; each turn tips it a quarter, and the loose coloured orbs fall to the new bottom. Keep turning until every orb rests next to the symbol chip of its own colour (see the picture). This is a long puzzle, and the recording needed about 40 turns, so the guide gives the method: get one orb into place and then move the others around it, turning back if an orb drops into the wrong slot. The door opens into the Reactor Hall.
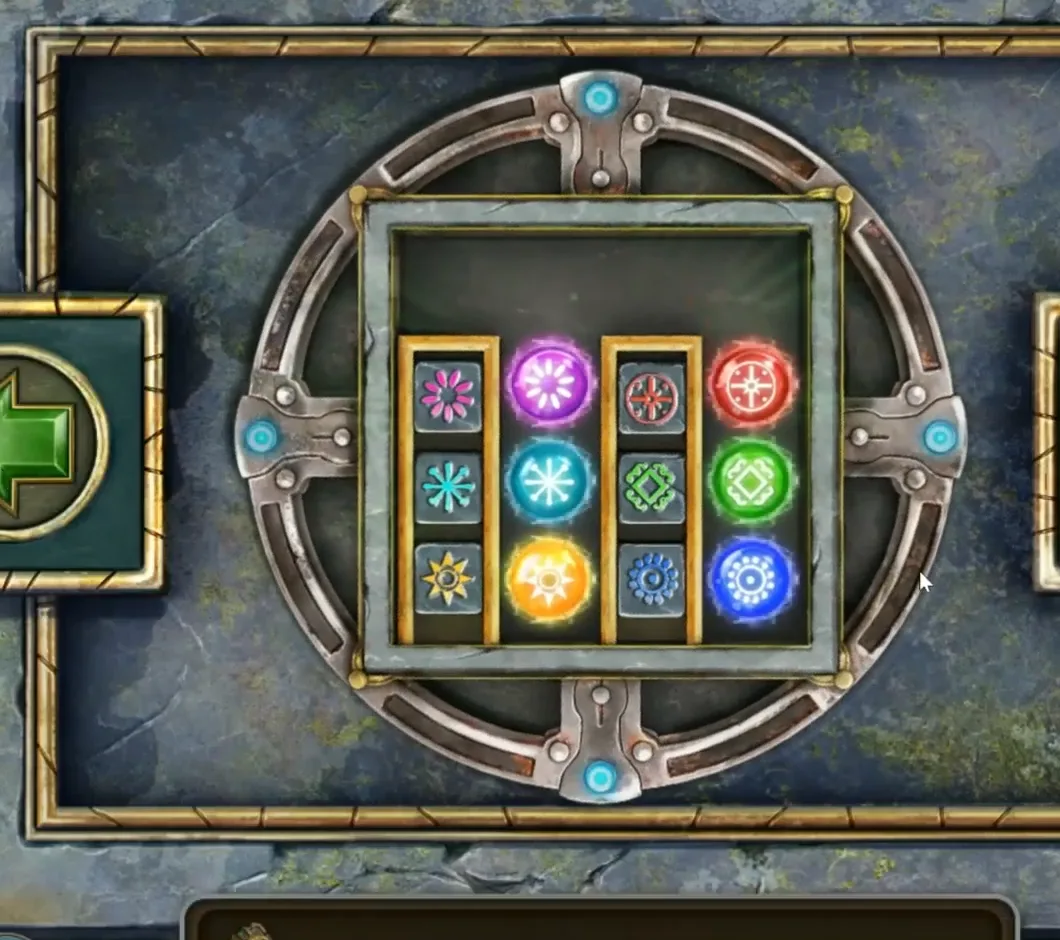
Reactor door solved: every orb sits beside the chip of its own colour. - Put the artifact on the device on the left. Pull the levers on the right: a fuse blows. Take the control glove from the skeleton lying by the fuse box.
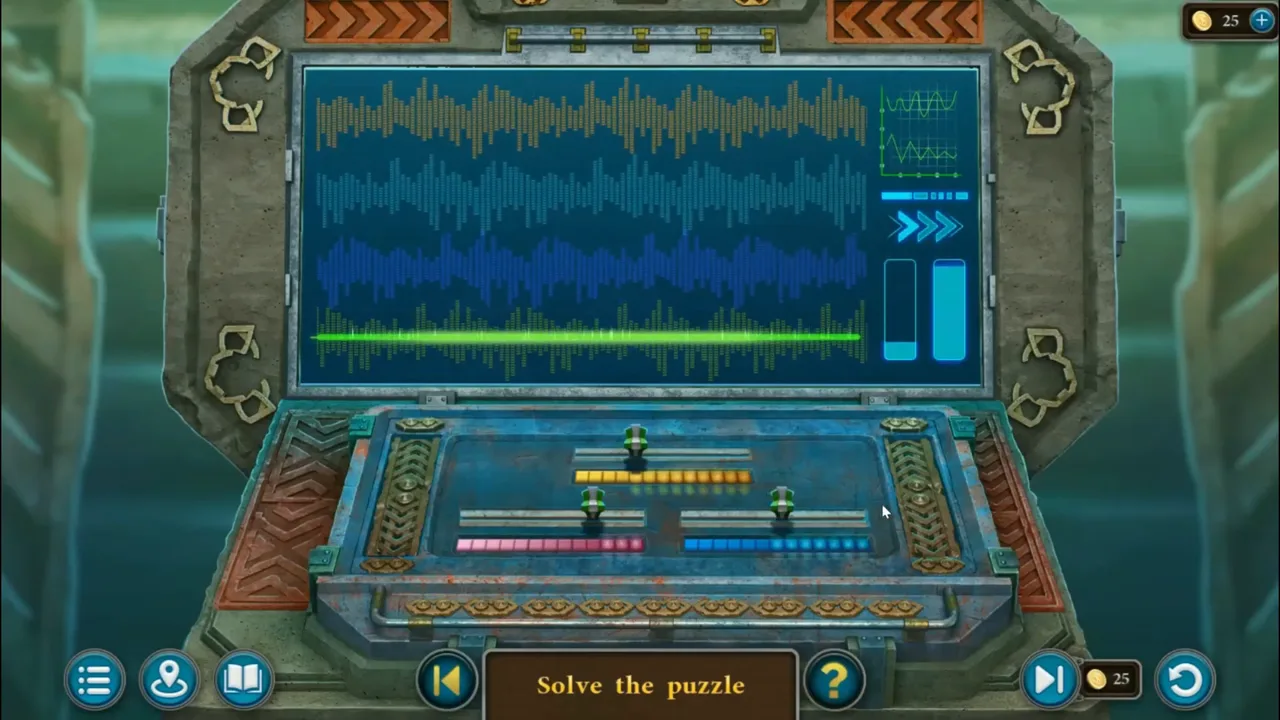
Reactor control: flatten each wave with the three sliders. - In the Southern Square, put the control glove on the stone globe and take the lightning symbol. In the Reactor Hall, fit it into the right wall. Take the Historical Manuscript "Ancients" (4 of 4 in this chapter) and the spare fuse.
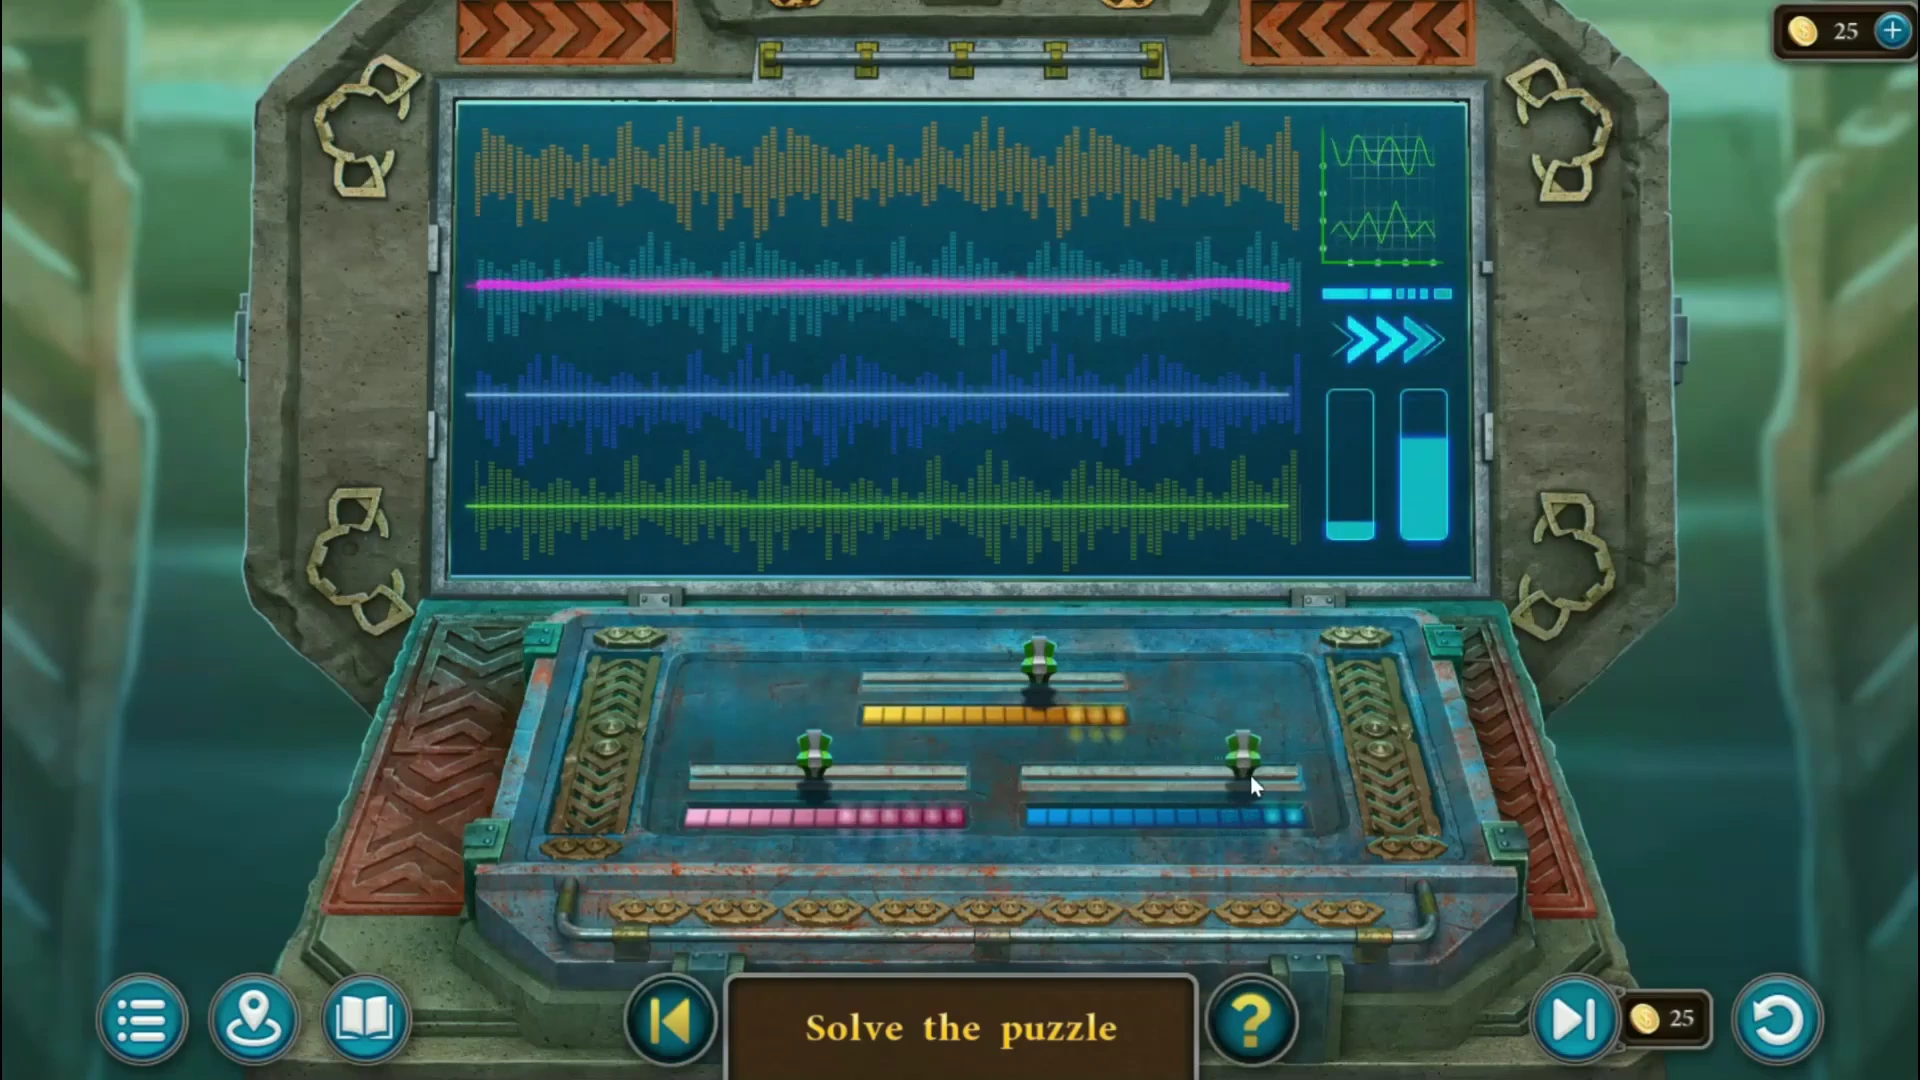
Wave puzzle - puzzle overview. - Replace the fuse and pull the levers again. The monitor shows four waves, which you flatten one at a time: yellow, pink, blue, then green. The three sliders over the yellow, pink and blue light bars change the shape of the current wave, and each wave needs a different setting. Exact slider positions are hard to judge, so let the line guide you: move one slider a little at a time, leave it where the line looks smoothest, then do the same with the next slider. Go back over the sliders until the line is completely flat; the wave is then accepted and the next one starts. After the fourth wave the artifact charges and the chapter ends.
Chapter 2 collectibles and morphing objects
Chapter 2 has 9 runes, 6 lilies, 4 Historical Manuscripts and 15 morphing objects. The manuscripts are in the walkthrough above (Egil's trapdoor, the beach hut, the Kainbekh flower puzzle and the Reactor Hall wall).
- Runes (9): Egil's house, in the grass in the middle of the room; the forest road, on the ground on the left; the port, on the planks near the stone corner; the isle beach, on the sand at the bottom left; the Kainbekh, among the vines of the head on the left; the manor courtyard, on the ground at the bottom right; inside the city gates, in the pond; the workshop, above the symbol panel; the Reactor Hall, on the right by the lever box.
- Lilies (6): on the chimney of the outdoor stove at Egil's house; at the jungle crossroads, on the rock wall above the lemur's chest; on the stone on the right at the city gates; on the wall at the top left of the Southern Square; on the pavement in the middle of the Alley of Light; on the city street, beside the statue on the left.
- Morphing objects (15): a kettle beside Egil's house; a boot under the table on the right inside the house; a nest on the fallen tree on the left of the forest road; a cage on the crates on the left at the port; the tiny boat far out on the sea from the isle beach; a symbol at the base of the roots on the right at the jungle crossroads; the forehead of the giant stone head at the Kainbekh; the balcony on the left of the manor; a spring among the vines around the city gates; a small object on the ground on the left inside the city gates; a vase on the left of the Alley of Light; the roof of the pavilion on the city street; a horseshoe hanging in the top-left corner of the workshop; next to the stairs in the Reactor Hall; and in the Southern Square, in the foliage beside the head of the statue holding the shield.