LABORATORY
The Laboratory: cats, chameleon and flies
Choose the Laboratory. You arrive in the computer room. The office, with a sleeping scientist, is to the right. To the left is a room with a white cat on a table; its blue door leads to a room with a brown cat sitting among plant pots. Four cats hide the first code.
- In the computer room, open the middle drawer of the nightstand and take the light switch.
- Hidden shadow 6 of 9: look into the microscope in the computer room and choose the 100X lens. A shadow appears under the lens.
- Go left into the white-cat room. Open the right-hand door of the wooden wall cabinet and take the voodoo doll. The left-hand door has a dice lock.
- Lost soul, Daniel: play his mini-game and find rocket (top left, on the cable spool), sunglasses (left, by the desk clock), pipe (top-left shelf, on the books), toy robot (top shelf, centre), horseshoe magnet (poster on the right wall), drawing compass (top-right shelf, in the tray), oil can (beside the lamp, right), magnifying glass (on the notebook), wrench (right of the notebook) and tube (small box, lower left).
- Fit the light switch to the empty switch plate on the wall of the white-cat room, near the doorway. You will turn the light off later.
- Go through the blue door into the brown-cat room. Hidden shadow 7 of 9: open the window on the left and tap the red bush outside.
- Read the papers in the folders on the table: a sketch shows where each of the four cats belongs in a square: the black-and-white cat top left, the white cat top right, the brown cat bottom left and the ginger cat bottom right.
- Count the clue around each cat. The black-and-white cat on the computer-room shelves has 4 filled flasks around it; the white cat has 7 lit candles; the brown cat sits among 3 potted plants with leaves; the ginger cat in the office sits by a clock showing 5:00.
- Open the left-hand door of the wall cabinet in the white-cat room: set the four dice to top left 4, top right 7, bottom left 3, bottom right 5. Take the can of sardines and the video recorder.CODE4-7-3-5
- Put the video recorder on the tripod at the front left of the white-cat room. It still needs a night-vision lens.
- In the brown-cat room, take the martini glass from the table.
- In the office, search the garbage bags and take the caterpillar.
- In the computer room, put the caterpillar on a lower branch of the plant in the left corner. A chameleon climbs down to eat it: take the chameleon.
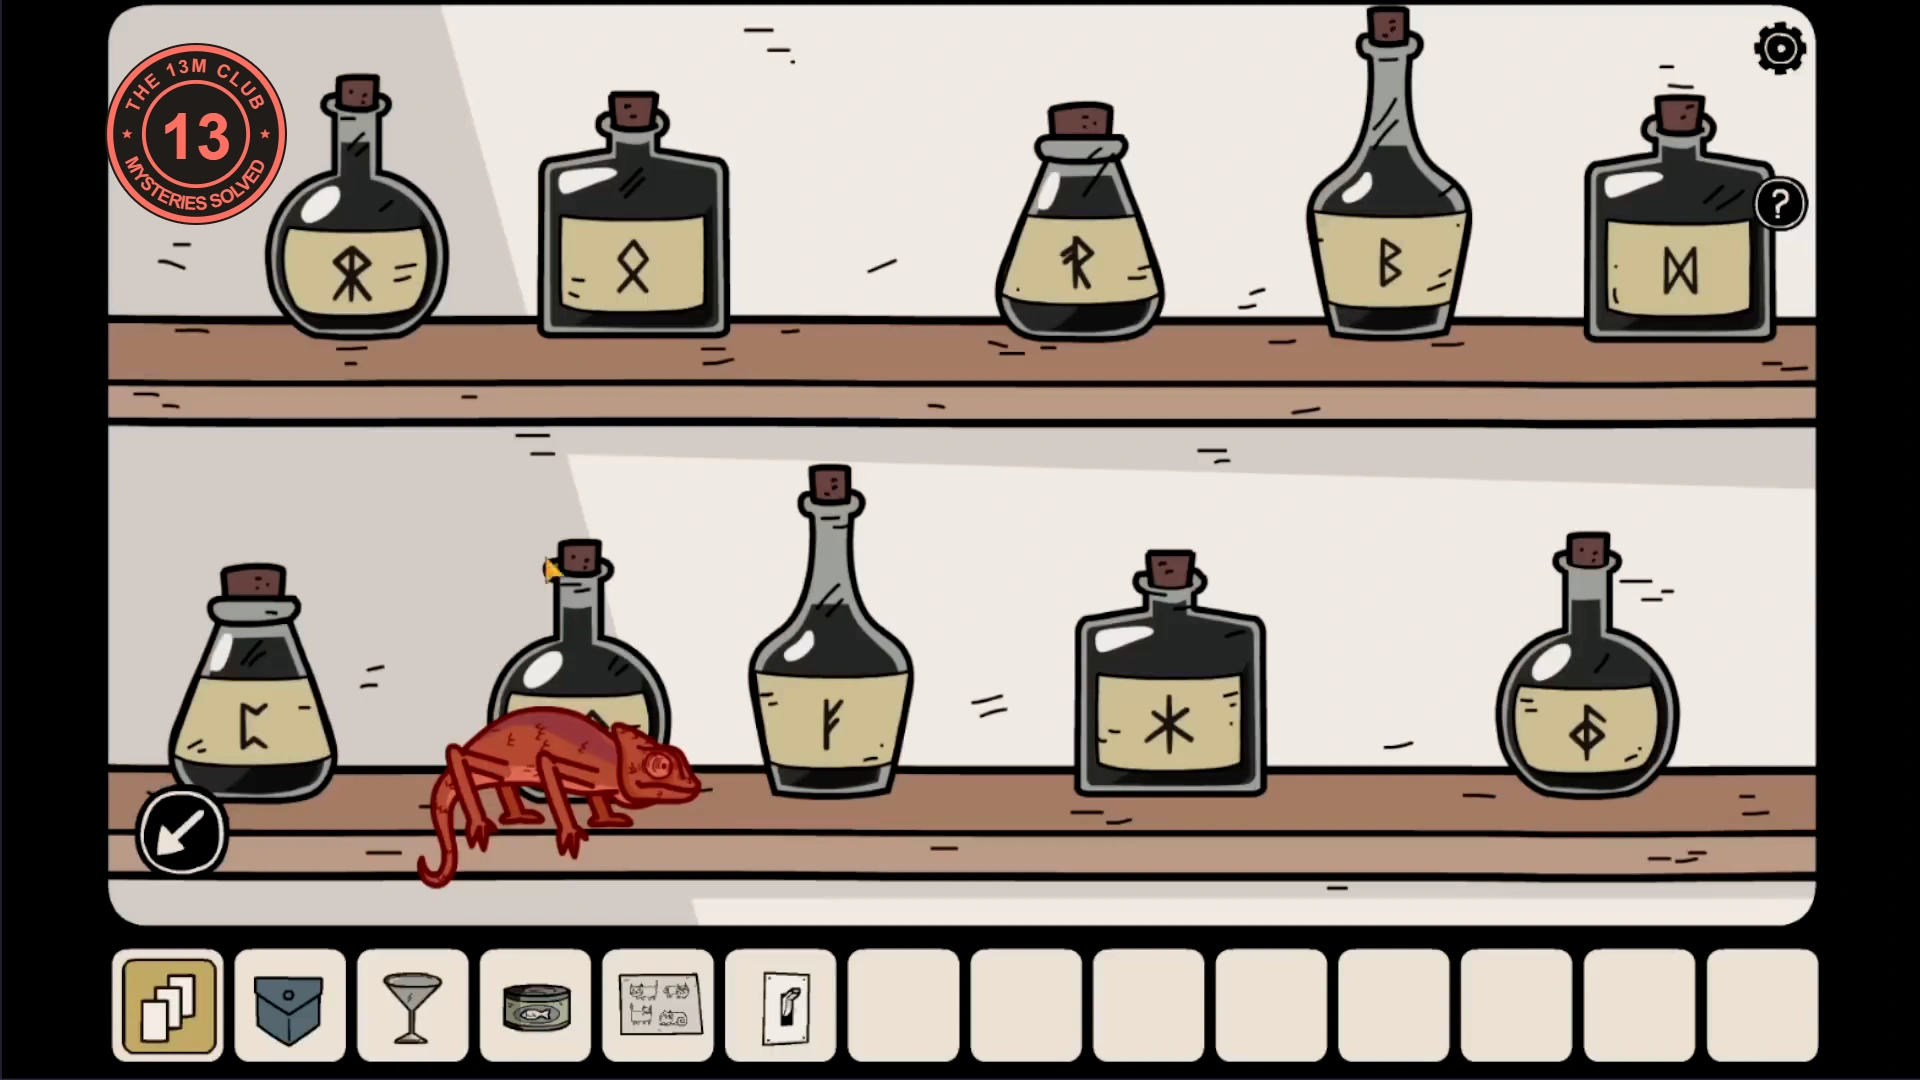
- In the office, open the book next to the ginger cat. It shows four runes in a row.
- Hold the chameleon in front of each bottle on the office shelves that carries one of the book's runes. It changes colour each time: in the book's order the colours are red, purple, yellow and blue.
- In the brown-cat room, open the red box on the left shelf with the colours red, purple, yellow, blue. Take the radio knob, the small key and the wire note.
- In the white-cat room, attach the knob to the radio on the table.
- In the computer room, unlock the top drawer of the nightstand with the small key. Take the pliers and the fly tapes.
- In the office, stick the fly tapes on the wall below the shelves. Flies land on them: from left to right there are 7, 4, 2 and 5.
- Open the red chest in the white-cat room: tap each of its four panels until its flies match the tapes, 7, 4, 2, 5 from left to right. Take the egg, the night-vision lens and the scientist's access card.CODE7-4-2-5
EVIDENCECan of sardines · Martini glass · Pliers · Egg · Access card
LABORATORY
The Laboratory: camera, cables and ducks
A night-vision camera, a cloned fingerprint and a hungry crab get you past the secure door in the brown-cat room. Three ducks behind it hold the last code of the laboratory.
- In the white-cat room, attach the night-vision lens to the video recorder, switch the light off with your new switch and look at the recorder's screen. Two dark figures appear: tap each one and a rune shows on each raised hand. From left to right: a ladder, an X with dots, a double cross and a downward trident.
- In the brown-cat room, open the yellow box on the table with those four runes in that order (see the picture). Take the USB drive and the tweezers.
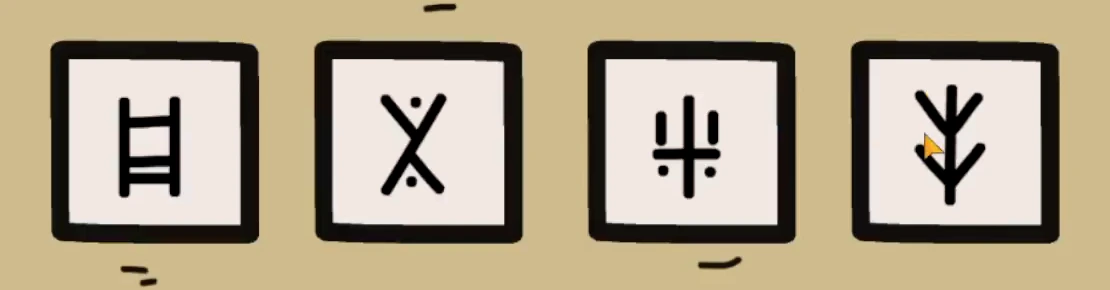
Yellow box set to the runes from the night-vision recording. - In the computer room, plug the USB drive into the computer and open the Cloning folder. For the password, tap the access card in your inventory, choose Look and read its number. Open the image file and tap Print.CODE532009
- Take the replica of the scientist's finger from the 3D printer.
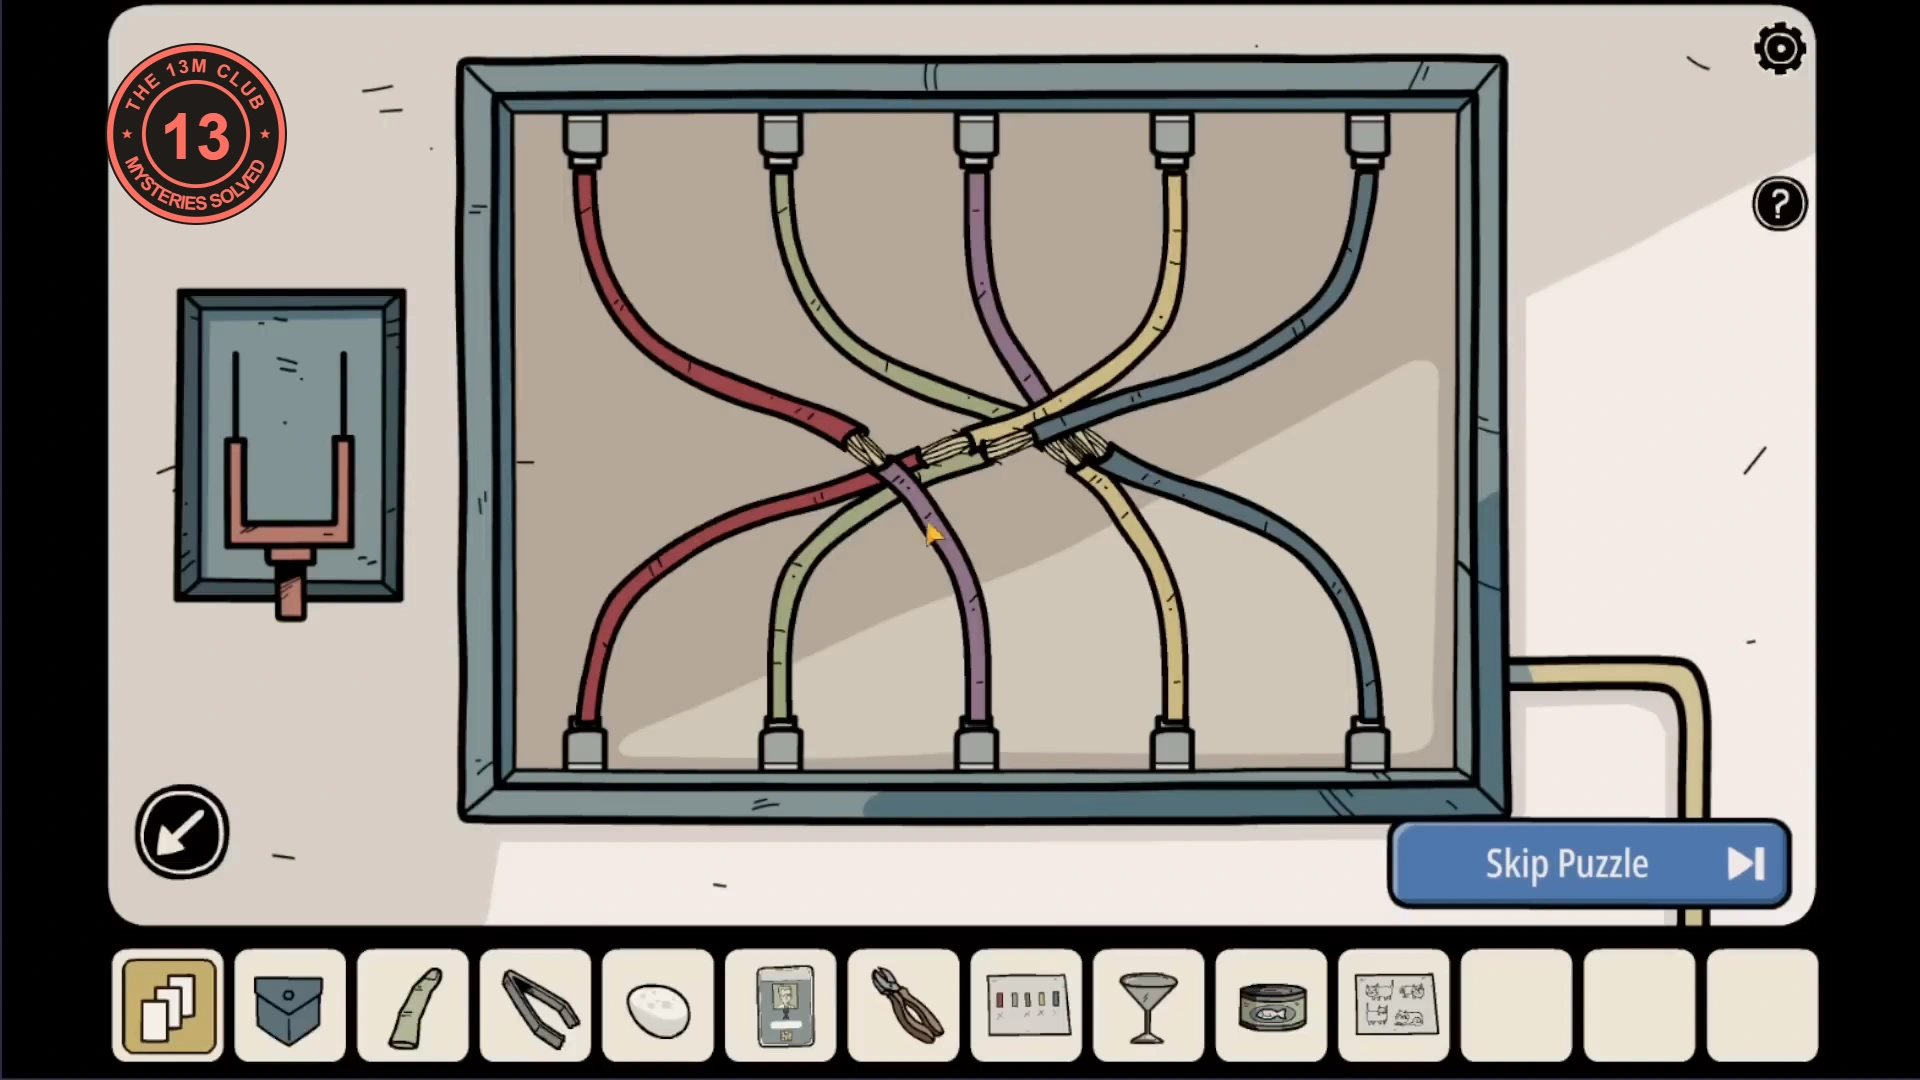
- In the brown-cat room, open the cable box on the left wall. Cut all five cables with the pliers. Following the wire note, connect each top cable to the bottom cable of the colour marked under it: red to purple, green to yellow, purple to blue, yellow to red, blue to green (see the picture). Raise the lever on the left: power runs to the secure door.
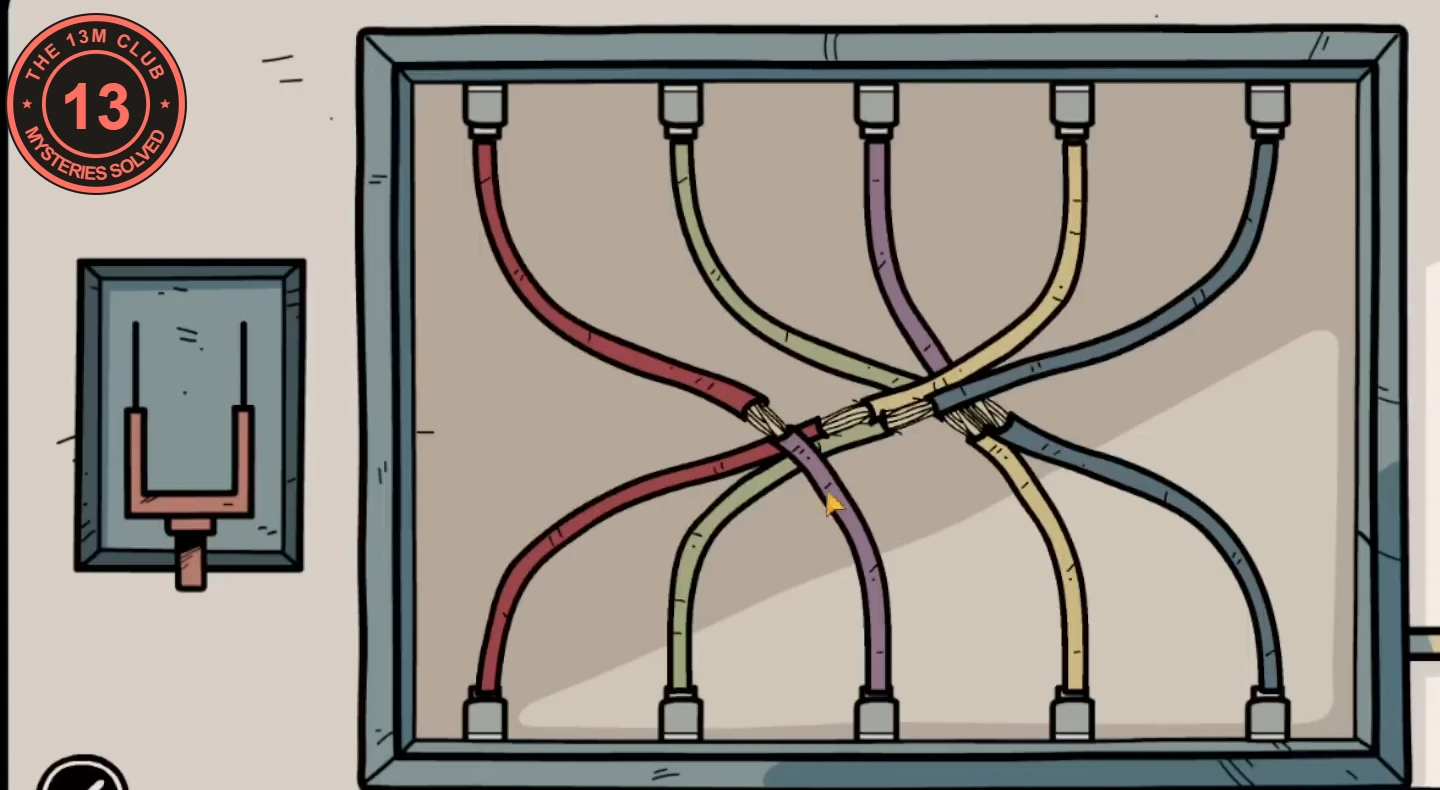
Cables reconnected. Raise the lever on the left next. - Tap the access card in your inventory, choose Grab and slide it into the reader beside the secure door. Press the replica finger onto the scanner. The door opens on the duck room.
- Take the voodoo doll peeking out from behind the crates on the right of the duck room.
- Lost soul, Elena: play her mini-game and find rag doll (on the floor, bottom centre), sock (sticking out of the drawer, bottom right), crayon (by the pencil cup, right), beach ball (in the box, top right), puzzle piece (top shelf, centre), handkerchief (right edge, on the books), rocking horse (drawn in the open colouring book), toy soldier's head (in the backpack, bottom left), marble (left, by the scissors) and toy plane (top left, beside the teddy bear).
- Open the box on the left of the duck room. Take the can opener and the small cocktail umbrella. The inside of the lid shows a sum: red duck + green duck - blue duck.
- Combine the can opener with the can of sardines to open it.
- In the office, put the open sardines in the glass tank. When the crab comes out, pick it up with the tweezers.
- Put the crab next to the coconut on the office floor. It slices the coconut open: take the coconut.
- Combine the martini glass, the small umbrella and the coconut in your inventory to make a decorated coconut drink. Give it to the scientist in the deck chair; he hands you a cloth chicken.
- In the duck room, put the egg in the empty nest on the right and set the cloth chicken on it. A blue duckling hatches.
- Tap each duck to make it quack; its quack shows as a wave in a speech bubble. The red duck's wave is a dense burst, the green duck's is a tangled double line and the blue duck's is a smooth, even wave.
- In the white-cat room, turn the radio's tuning knob to move the red needle over the station numbers (117, 270, 892, 729, 663, 481) and compare the wave on the screen with each quack. Red is 663, green is 892 and blue is 117, so red + green - blue = 663 + 892 - 117 = 1438.
- Open the briefcase on the floor under the ducks with the result and take the paper inside: it shows four tiles with notched outlines. Open the memories menu and return to the Unknown Place.CODE1438
EVIDENCENotched-tiles paper
UNKNOWN PLACE
Back home: the symbol machine
The briefcase paper opens the teal chest in the phonograph room. A battery and a paper plane then bring the symbol machine on top of the bookcase to life.
- In the phonograph room, rotate the four tiles on the teal chest's padlock to match the briefcase paper: top left, a diamond with its notch on the lower-right side; top right, a diamond notched on the lower-left side; bottom left, a square notched at the bottom; bottom right, a square notched on the right (see the picture). Take the skull, the third relic, and the red lever. The inside of the lid shows a 3 x 3 grid with groups of 1 to 4 dots.
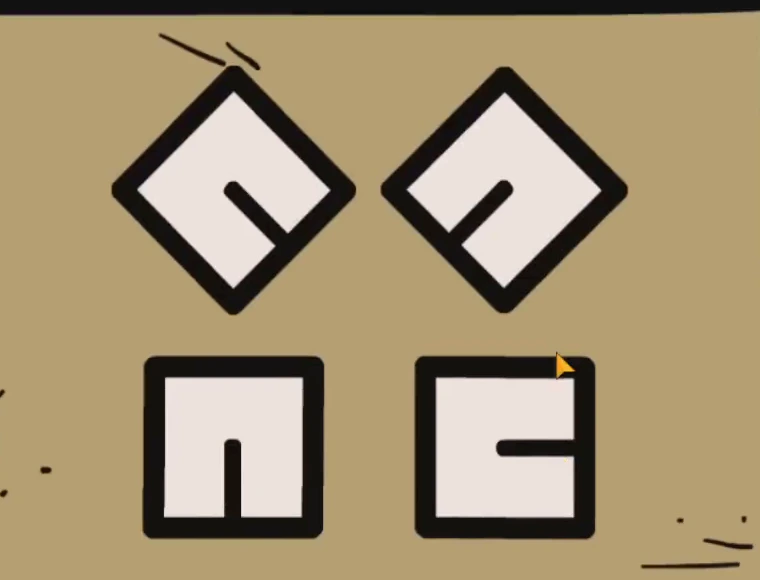
Padlock tiles turned to match the briefcase paper. - In the exit room, open the right-hand door of the red sideboard: press its 3 x 3 buttons in the order of the dot groups (1 bottom left, 2 centre, 3 top left, 4 bottom right), then OK. Take the battery.
- In the phonograph room, put the battery on the machine on top of the bookcase to power it.
- Fit the red lever into the slot beside the round fan grille high on the wall, then pull it. The fan blows out a paper plane: take it. Its four drawings are the shapes the machine wants.
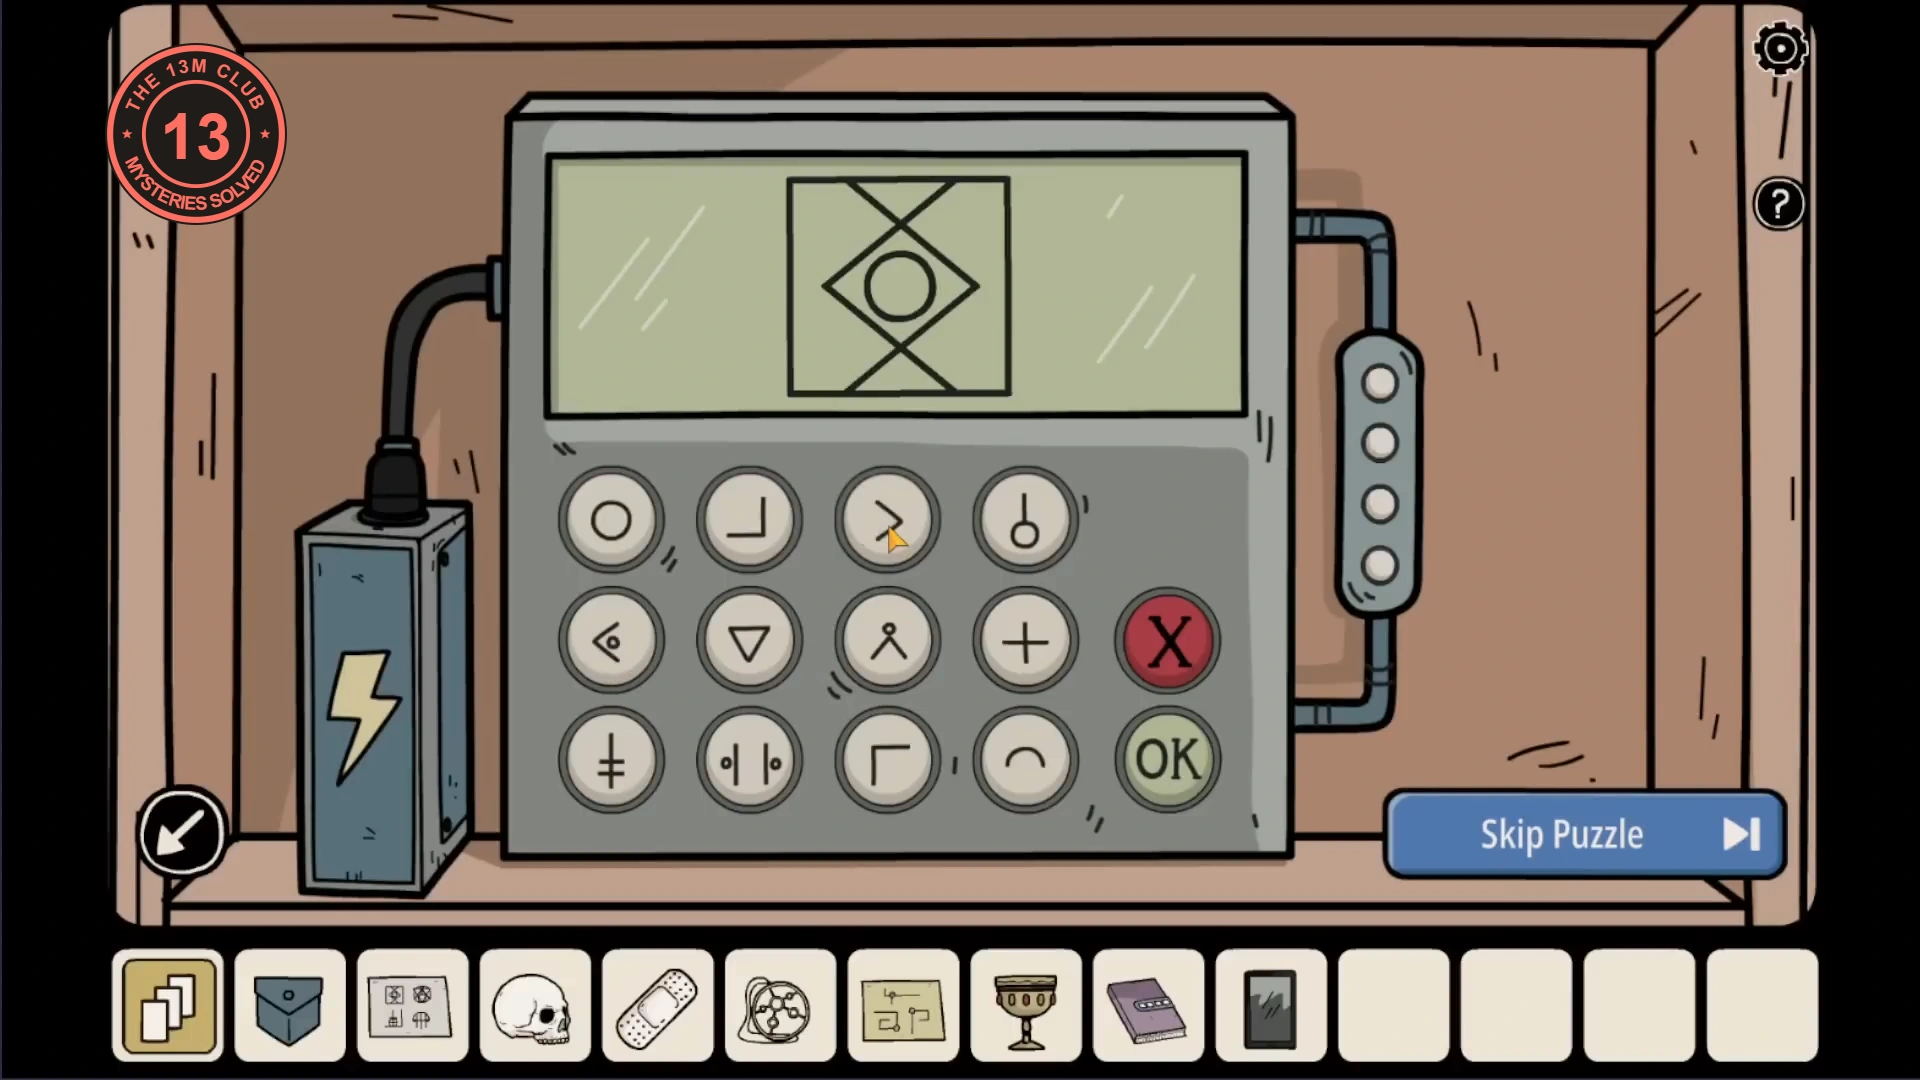
- On the machine (see the picture), each button adds a piece to the screen, X clears it and OK submits. Number the buttons left to right in each row: row 1 big circle, corner, right chevron, circle on a stick; row 2 left chevron with a circle, downward triangle, stick figure, plus sign; row 3 double cross, two lines with dots, corner, dome. Build and submit the drawings in this order. Top left: row 1 button 2, row 3 button 3, row 2 button 1, row 1 button 3, OK. Top right: row 1 button 4, row 1 button 1, row 2 button 2, row 2 button 3, OK. Bottom left: row 1 button 2, row 1 button 4, row 3 button 1, OK. Bottom right: row 3 button 2, row 3 button 4, row 2 button 4, OK.
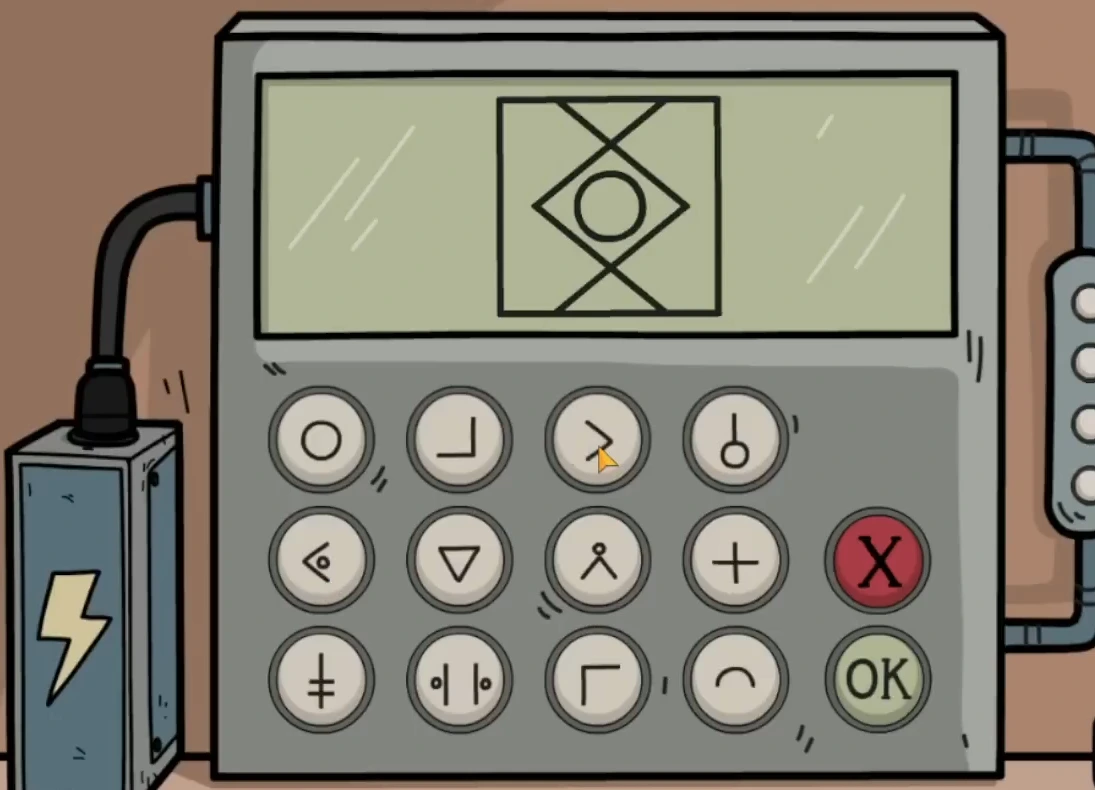
Keypad layout for the button numbers in step 5. The screen shows the first drawing built. - After the fourth drawing the screen shows four circled symbols: a triangle, a horizontal bar, a capped vertical line and three vertical lines.
- In the exit room, set the four tiles on the blue roller shutter at the foot of the grey bookcase to those symbols in the same order. Open the red book inside and take the photo of a mansion. The Mansion joins the memories menu.
EVIDENCEGolden goblet · Medallion · Skull