GARDEN
The Garden: frogs, fountain and the masked musician
Choose the Garden in the memories menu. You arrive at a dry fountain. The frog pond is to the left; the bench is to the right, with a locked gate behind it that leads to the shed yard.
- Read the note in the tree stump at the back left of the fountain area: a child remembers a night trip to the mountains, a spooky bridge and a lighthouse.
- Go left to the frog pond. Hidden shadow 4 of 9: tap the red-leaved tree at the back, behind the signpost, and look up into it.
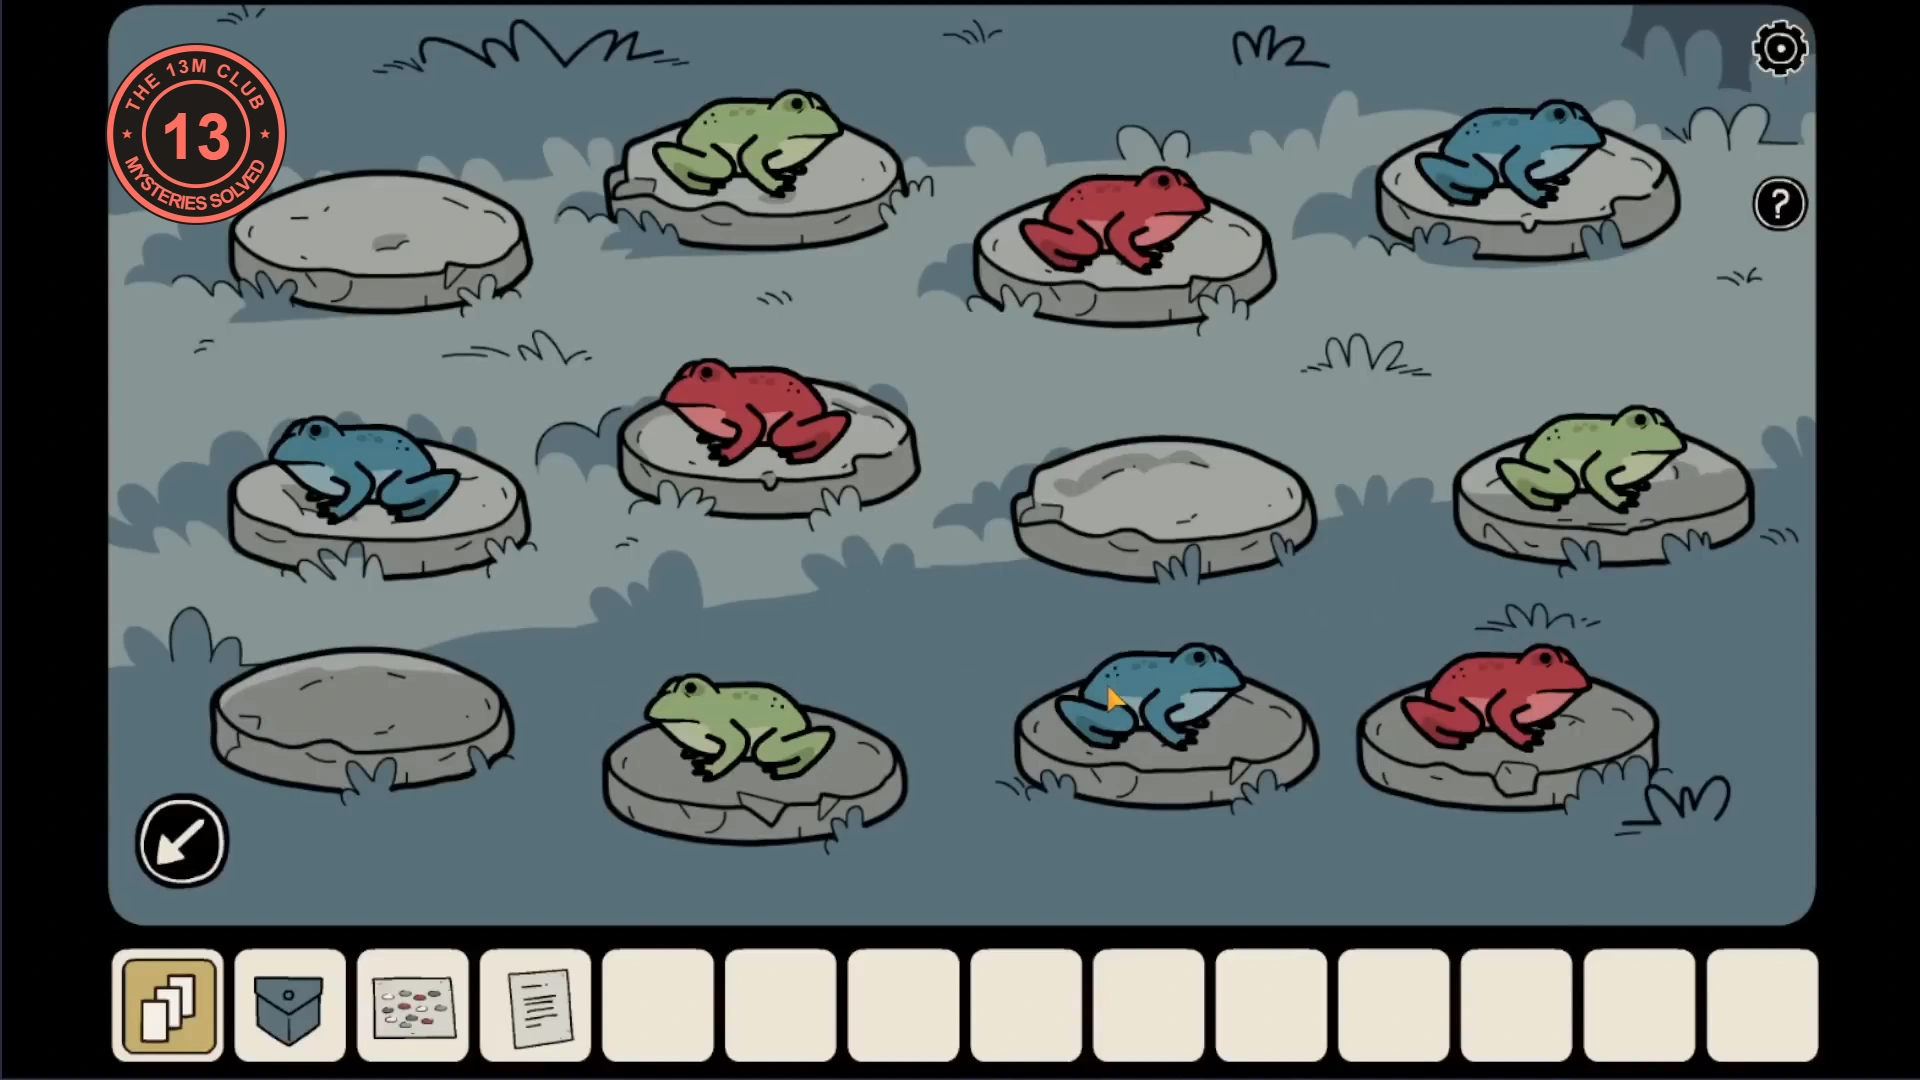
- Take the note hidden behind the red mushrooms. It shows which stones need a frog and which colour goes where.
- Swipe a frog to move it onto a neighbouring empty stone. Arrange them as on the note, row by row from the back and left to right: empty, green, red, blue; blue, red, empty, green; empty, green, blue, red. The frog statue opens its mouth: take the red valve and the pencil.
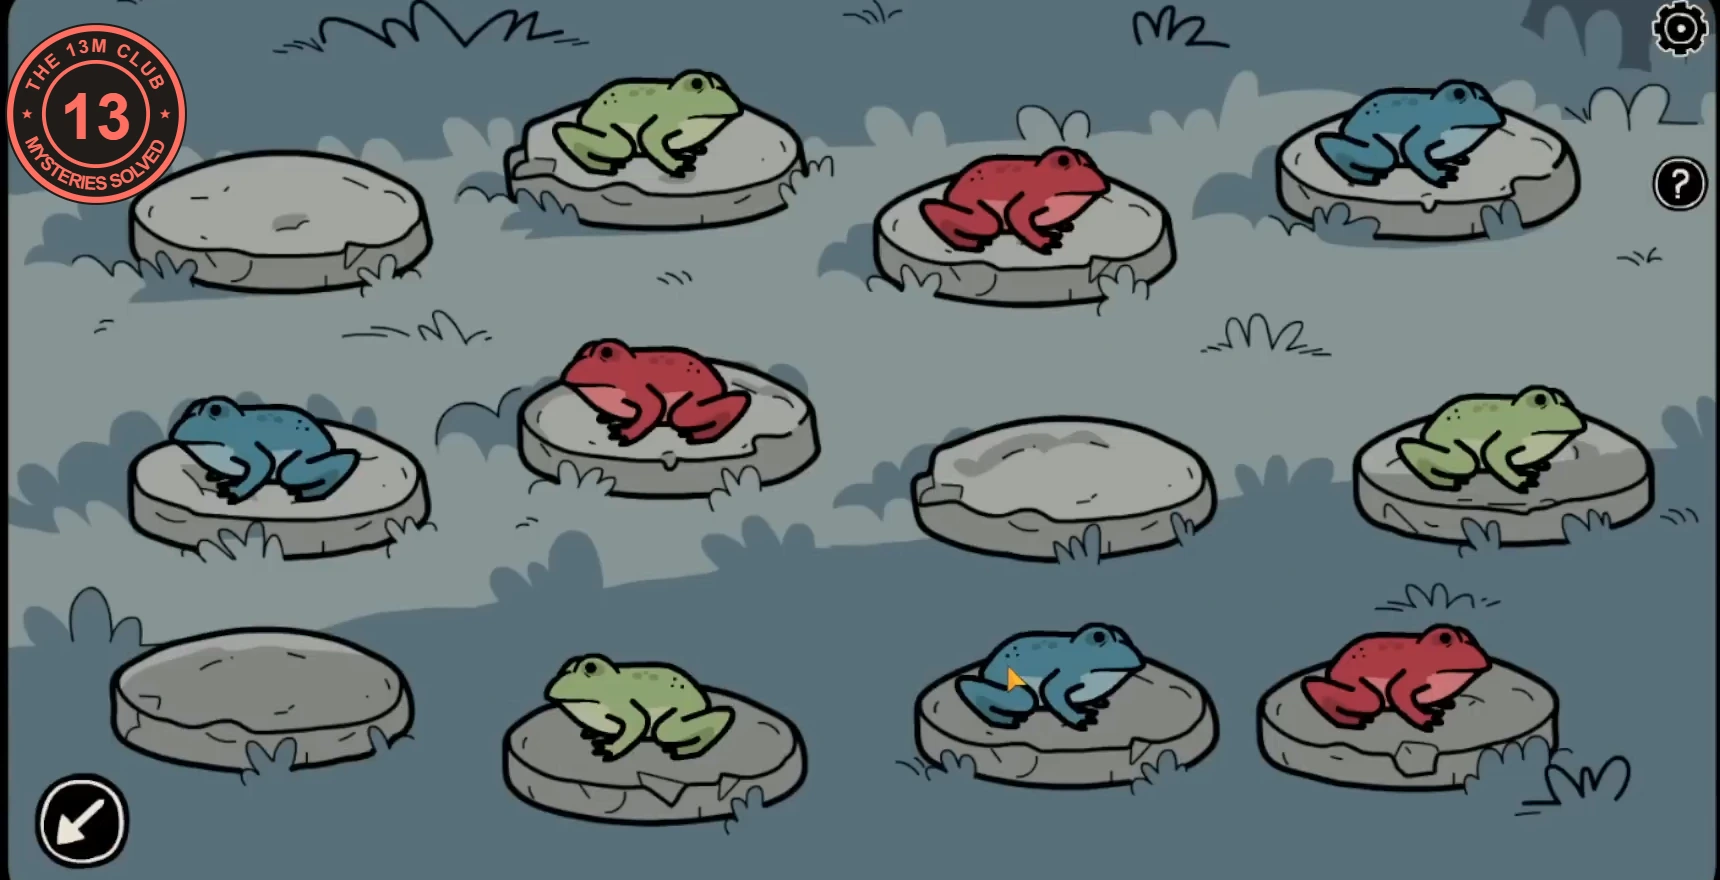
Frog stones solved. - Go right past the fountain to the bench. Take the key lying on the bench and the voodoo doll beside it.
- Lost soul, Joe: play his mini-game and find cork (at the foot of the wooden mannequin), paint rag (hanging over the right edge of the table), fish tin (left shelf), roll of tape (pegged to the line, top left), wrapped sweet (front of the table by the paint tubes), teacup (right shelf beside the mannequin), loaf of bread (on the stacked canvases, left), salt shaker (beside the brush pot), battery (right edge of the table) and spinning top (top-right shelf among the books).
- Open the right-hand door of the white cabinet on the wall by the bench and take the bag of cement. The left-hand door has a symbol lock for later.
- Back at the fountain, unlock the small green box beside it with the bench key. Attach the red valve to the pipe inside and turn it. Water fills the fountain: take the cheese floating in it and note the four symbols on the basin, a slashed circle, an anchor shape with a cross, a six-pointed star and a triangle with a cross.
- At the frog pond, open the red box in the lower right with those four symbols in that order. Take the bird seed and the gate key.
- Put the bird seed in the bird house on the pole at the frog pond. A canary lands: look at the band on its leg and note its four symbols from top to bottom (shaped like G, Z, an upside-down hook and L).
- At the bench, set the vertical lock on the left-hand cabinet door to the four leg-band symbols, top to bottom. Take the flower and the ocarina.
- Unlock the gate behind the bench with the gate key and go through to the shed yard. A board by the mortar mixer shows how to make mortar.
- Give the ocarina to the masked musician sitting beside the music stand. He doesn't know what to play.
- Back at the fountain, put the cheese in front of the hollow log at the front left. Mice peek out of some of its holes; note which holes in each of its three rows have a mouse.
- At the music stand in the shed yard, use the pencil to fill in the notes that match the mice: top line, notes 1 and 3; middle line, notes 2 and 4; bottom line, note 2 (see the picture). Tap the musician: he plays, and a creature rises from the basket holding the shed key. Take it.
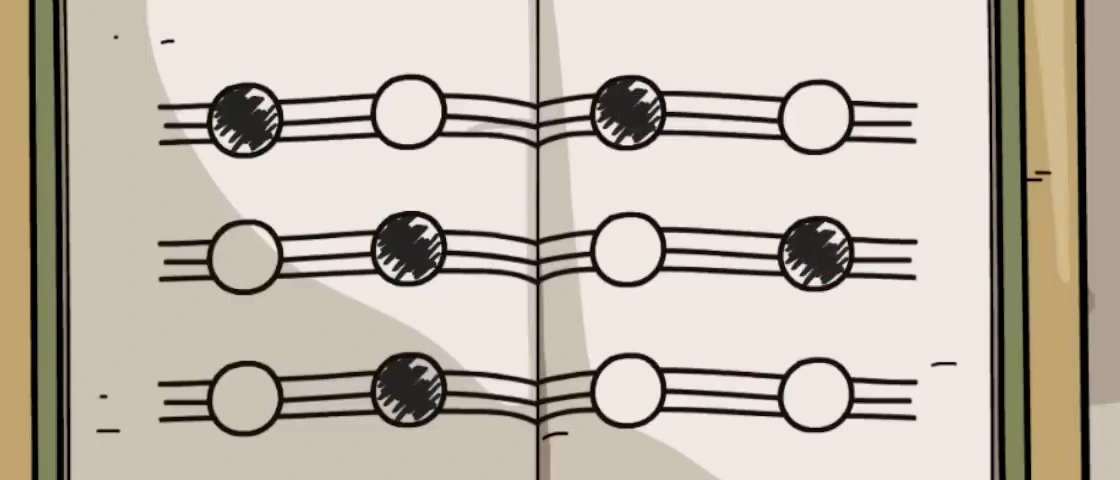
Notes filled in to match the mice in the hollow log.
EVIDENCEPencil · Cheese · Bag of cement · Shed key
GARDEN
The Garden: blackboard, cement and four flowers
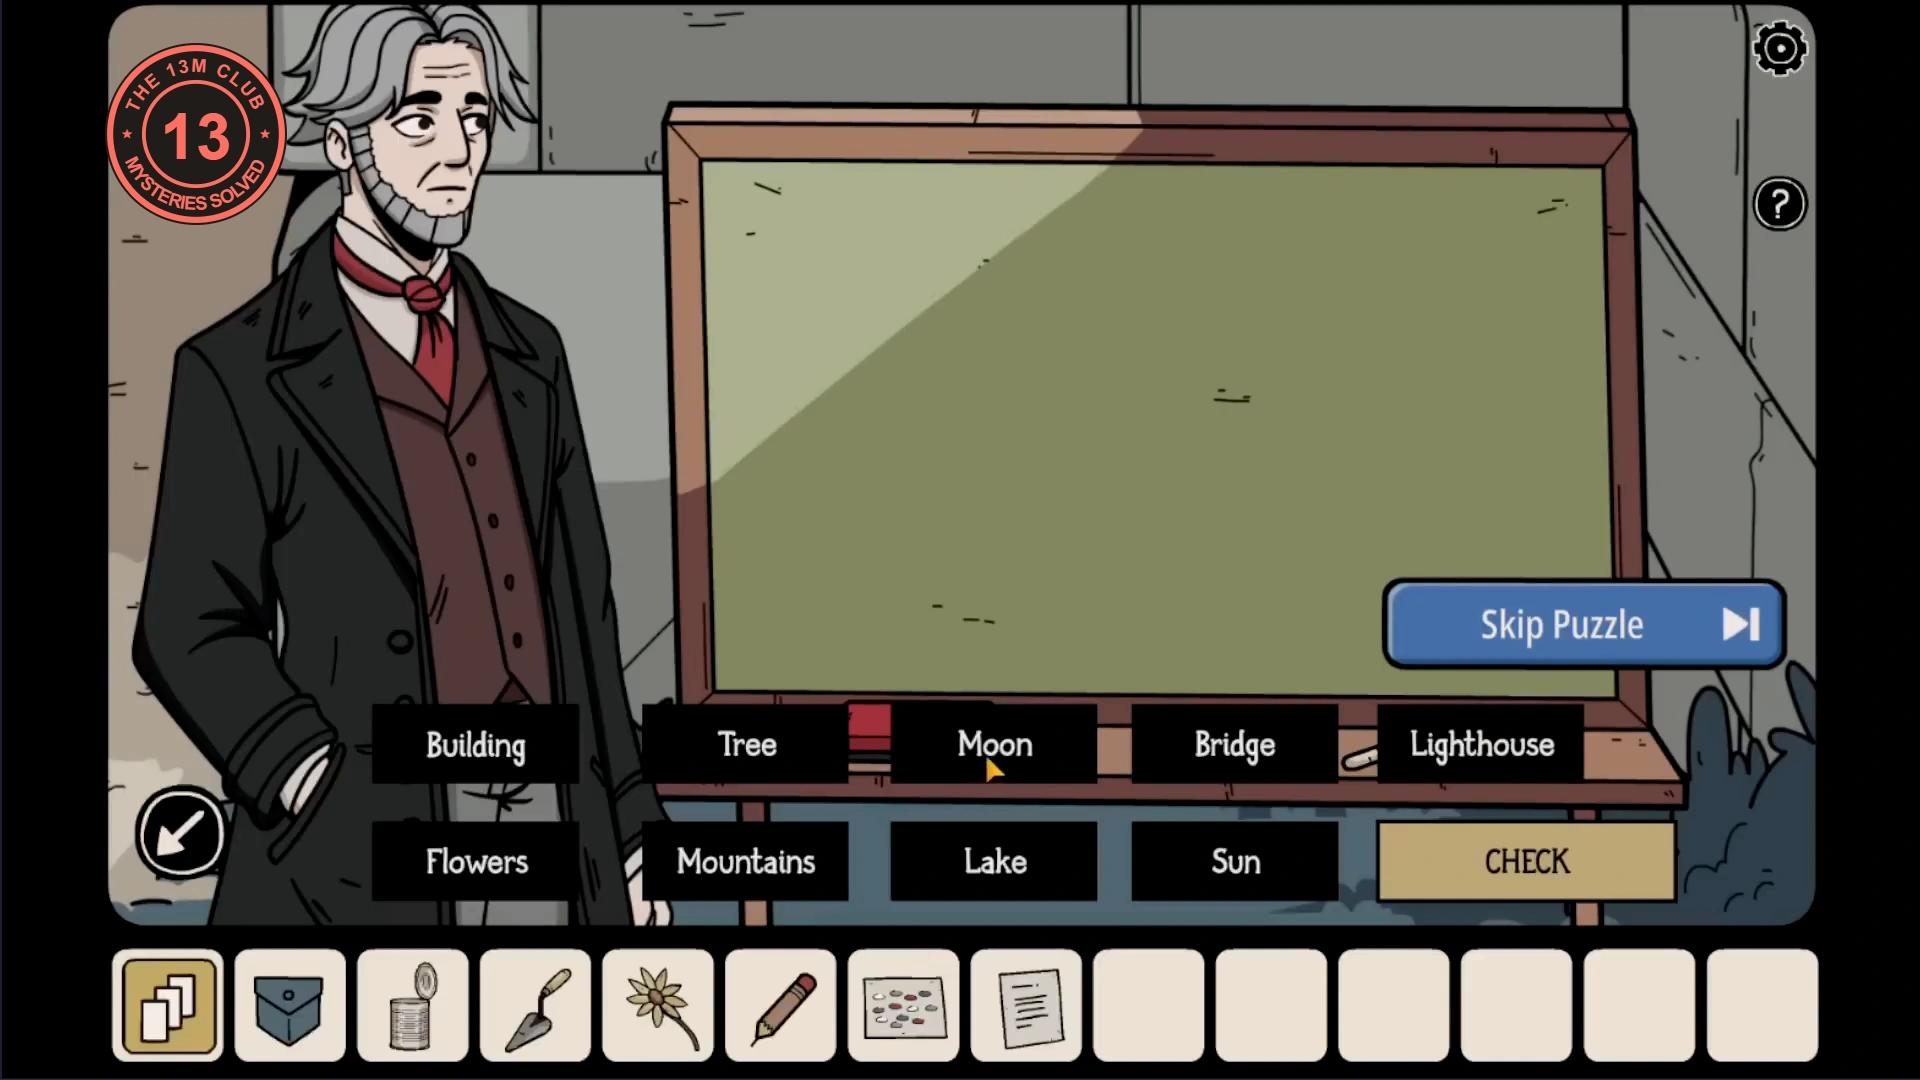
The shed is open. You need four flowers for the vase under the portrait in the shed, and a wheelbarrow of cement for a hole at the frog pond.
- Unlock the shed with the shed key and go in. Take the voodoo doll from the shelf on the left.
- Lost soul, Alex: play his mini-game and find screw (on the open book, left), glass flask (top-right shelf), coin (on the desk among the gears), screwdriver (left edge of the desk), magnifying glass (the lamp magnifier on the right), matchbox (lower-left corner of the desk), mouse (on top of the mantel clock, left), teacup (shelf right of centre, beside the alarm clocks), owl figurine (second shelf on the left, by the square clock) and glove (draped over the top-left shelf).
- In the shed, open the box on the right-hand table and take the metal spatula. Open the cabinet high on the right and take the empty tin can. Take the chalk from the pile of books on the upper-left shelf.
- In the shed yard, put the bag of cement into the mortar mixer.
- At the bench, use the chalk on the blackboard. The old gentleman asks you to draw the place from his childhood trip. Using the stump note, select Mountains, Moon (it was night), Bridge and Lighthouse, then tap Check. He thanks you and pays you with a key.
- Open the metal container beside the shed with that key. Take the bag of sand, the white lily and the black seed.
- Plant the black seed in the flowerpot behind the shed, by the fence on the right.
- Fill the empty can at the fountain, then water the seed. A tree grows with four hand-shaped branches, each with a symbol on its palm.
- Open the yellow chest at the top right of the fountain area: set its 2 x 2 tiles to the palm symbols in the same positions as the hands (upper left, upper right, lower left, lower right). Take the wheel and the red flower.
- Refill the can at the fountain. At the mortar mixer, pour in the water and add the bag of sand (the cement is already in), then pull the lever. Fresh cement pours into the wheelbarrow.
- Fit the wheel to the wheelbarrow and tap it again: Lucian pushes it to the frog pond and parks it beside a hole near the scarecrow.
- Tap the hole and use the metal spatula on it until it is full (three scoops), then tap the scarecrow's pole to stand it in the fresh cement. The crows fly off: take the yellow flower that was hidden behind them, near the scarecrow.
- In the shed, put all four flowers in the vase under the portrait. The portrait fades and four black-and-white tiles appear in it: note them in order, then open the memories menu and return to the Unknown Place.
EVIDENCEFour flowers · Painting tiles
UNKNOWN PLACE
Back home: the safe, the phonograph and the robot
The painting's tiles open the wall safe, whose blue key unlocks the starting room's left door. Behind it are the phonograph room and, further left, the exit room with the great wooden door.
- In the clock room, tap the four tiles of the wall safe (right of the maze painting) until they copy the tiles from the shed portrait, in the same order (see the first picture). The safe opens on a castle jigsaw of 12 pieces, four across and three down. Tap one piece and then another to swap them. The finished picture is shown below; rather than list every swap, use its landmarks: the white full moon fills the top-left corner, the castle towers run across the top centre, a mountain sits on the right, dark sea with white wave lines fills the bottom left and a large bat fills the bottom-right corner. Fix the four corners first, then swap in the pieces whose lines continue across their edges. If you get stuck, the puzzle has a Skip Puzzle button. Take the blue key and the medallion, the second relic.
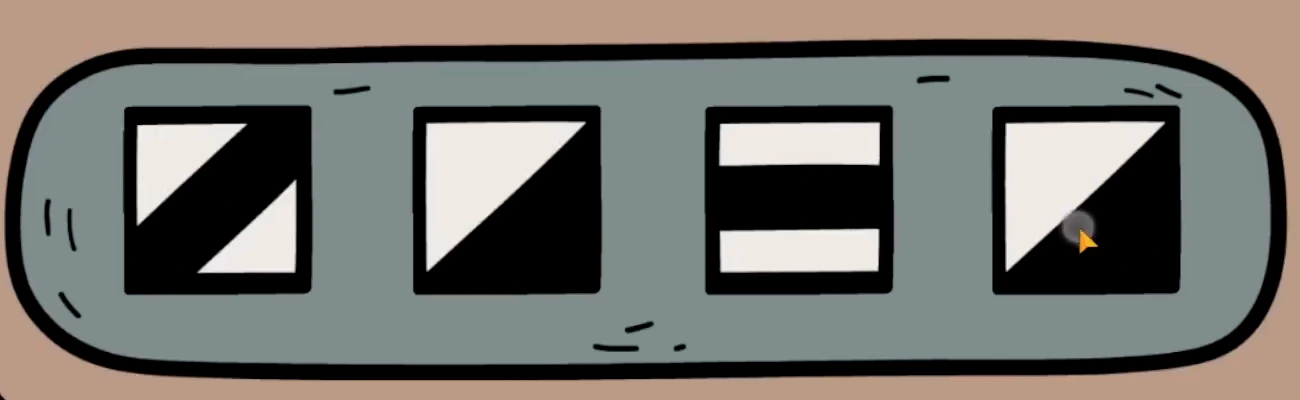
Wall safe tiles set to copy the shed portrait. 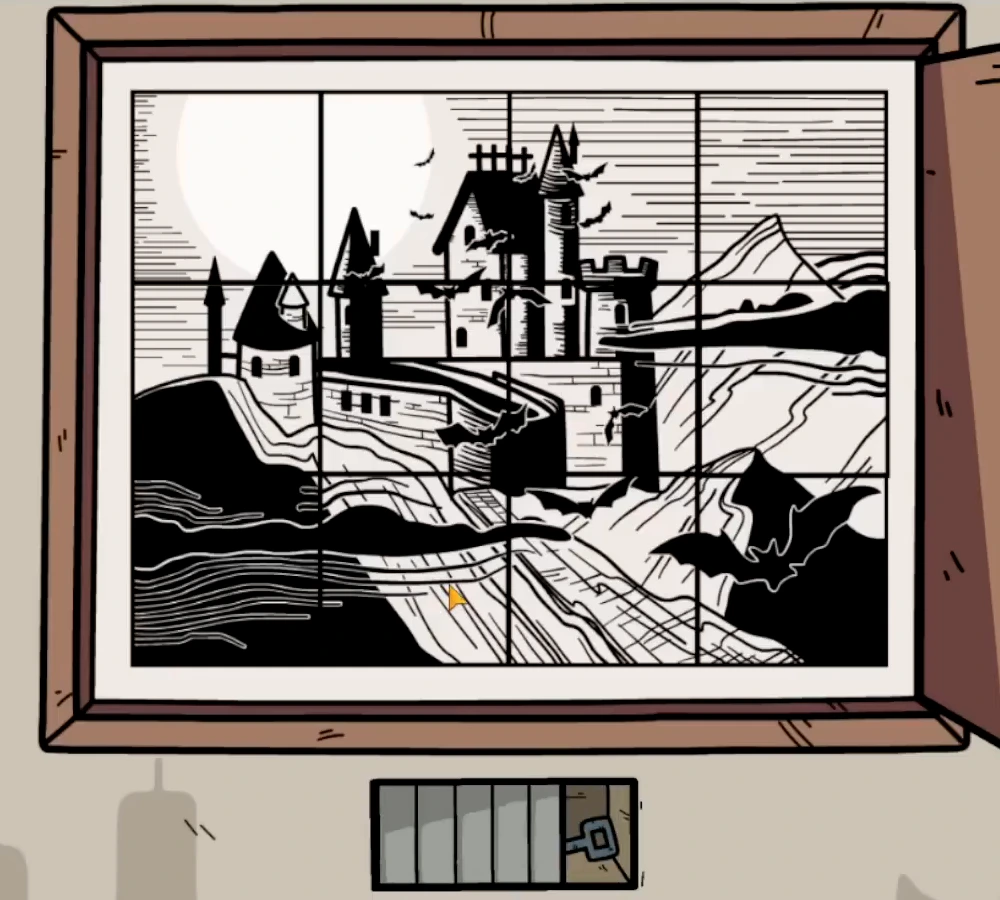
The finished castle picture: four columns by three rows of pieces. - Unlock the door on the left side of the starting room with the blue key and go through into the phonograph room.
- Open the left-hand door of the yellow sideboard and take the phonograph arm.
- Go left into the exit room, which holds the great wooden door. Hidden shadow 5 of 9: move the red cushion on the right-hand armchair.
- Open the left-hand door of the red sideboard on the left and take the toy robot. Open the white first-aid cabinet on the right wall and take the adhesive bandage.
- In the phonograph room, set the toy robot down in front of the small metal door at the foot of the bookcase (see the picture). It needs winding before it will move.
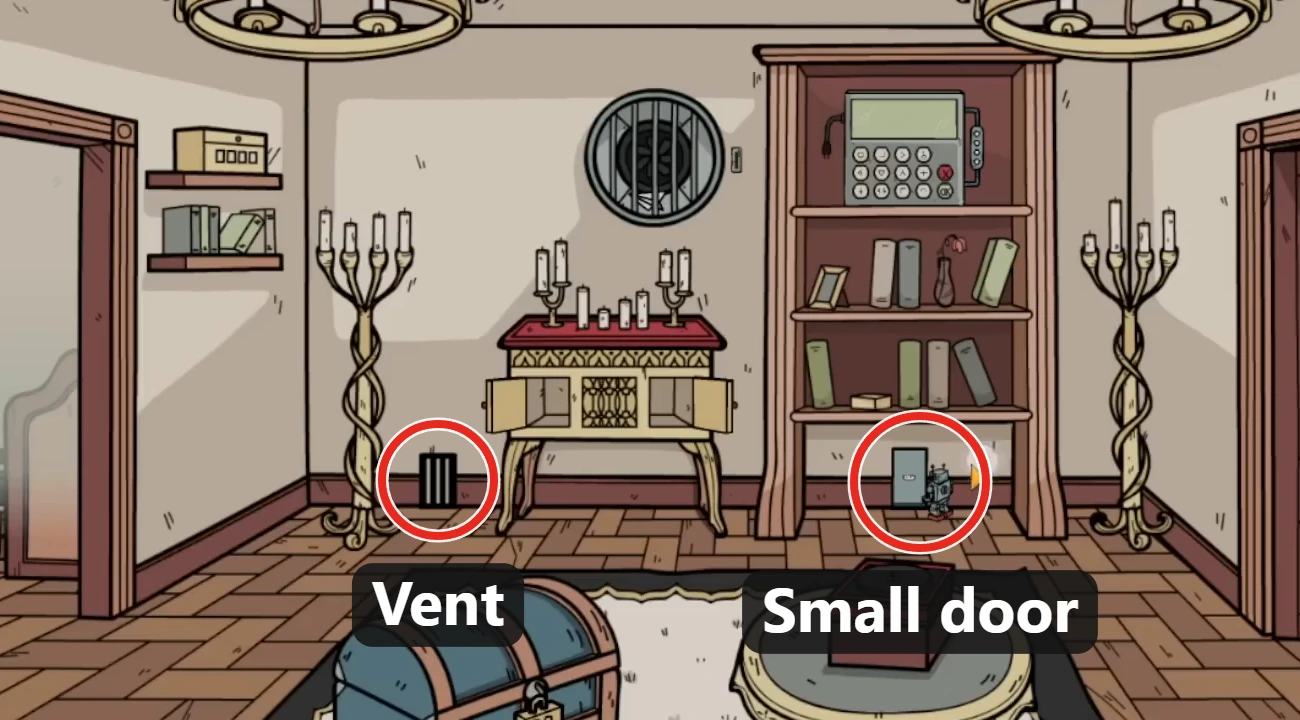
Set the robot at the small door. Once wound, it comes out behind the vent. - In the clock room, look at the records on the shelf under the red desk. Tap the red sleeves to tip them forward until a blue sleeve shows, then tap the blue one and take the vinyl record.
- Put the record on the phonograph, attach the arm and press play. Four music symbols float up: an eighth note, a half note, a natural sign and a rest.
- Open the small yellow box on the wall shelf at the upper left of the phonograph room with those four symbols in that order. Take the wind-up key.
- Use the wind-up key on the toy robot. It walks in through the small door and reappears behind the barred vent left of the sideboard, holding a red key: take it.
- In the exit room, unlock the drawer of the rolltop desk on the right with the red key. Take the test tube; a photo of a laboratory is rolled up inside, and the Laboratory joins the memories menu.
EVIDENCEGolden goblet · Medallion · Adhesive bandage