The Temple Hall
Vlad and Abraham are wrestling in the middle of the temple while Annabelle lies on the floor. There is a fountain at the back, a statue alcove on the right and a carved wall panel on the left.
- Take the broom leaning on the fountain. Place the red-and-grey battery box on the fountain's front step.
- Zoom in on the statue alcove on the right. Sweep the rubble off the pedestal with the broom and take the green patterned tile. Read the note: its author never solved the alcove, and it shows a drawing of hammers.
- Place the green tile on the wall panel on the left, behind Abraham, to start the domino puzzle.
Domino Panel
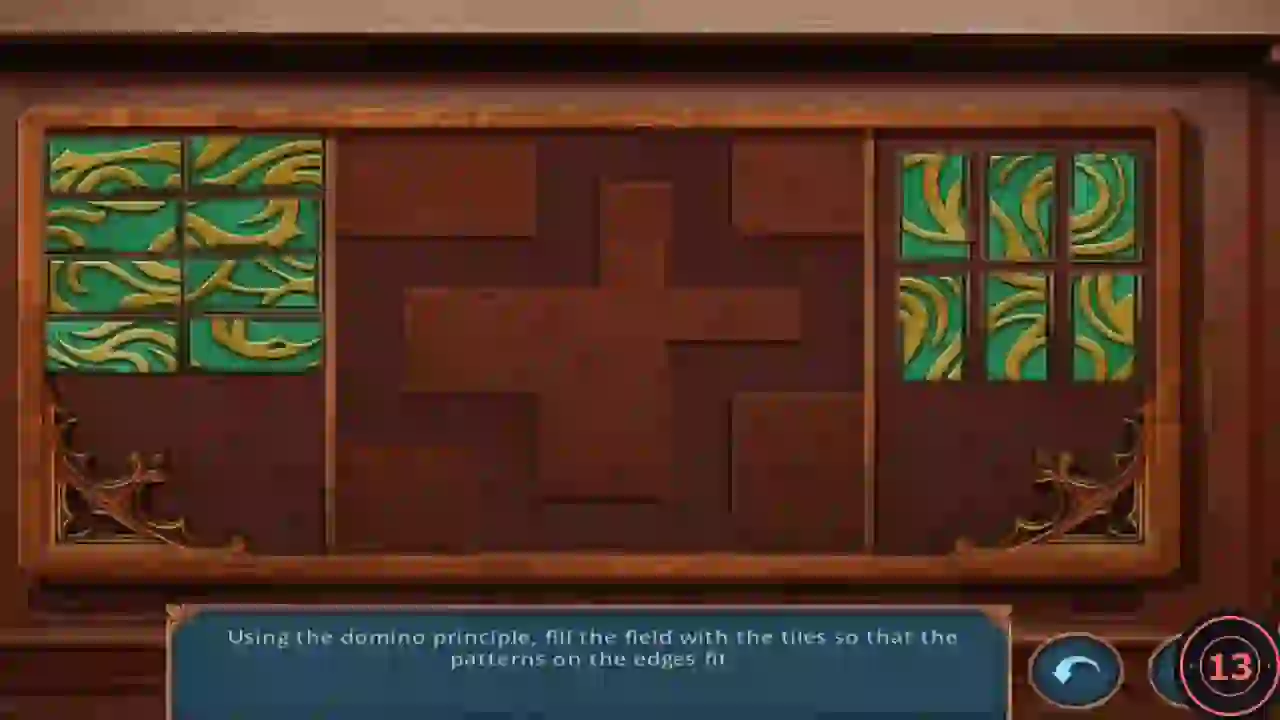
In-game hint: "Using the domino principle, fill the field with the tiles so that the patterns on the edges fit." The field is a cross-shaped band around a fixed wooden centre, and every tile carries part of a gold swirl.
- Drag tiles from the side racks into the band. Wherever two tiles touch, the gold swirl must continue without a break; no swirl may end at the edge of a neighbouring tile. Start in a corner of the band and work your way around it, checking each new tile against both neighbours. If the last tiles will not fit, recheck the swirls of the tiles around the gap. When the band is full, the panel opens.
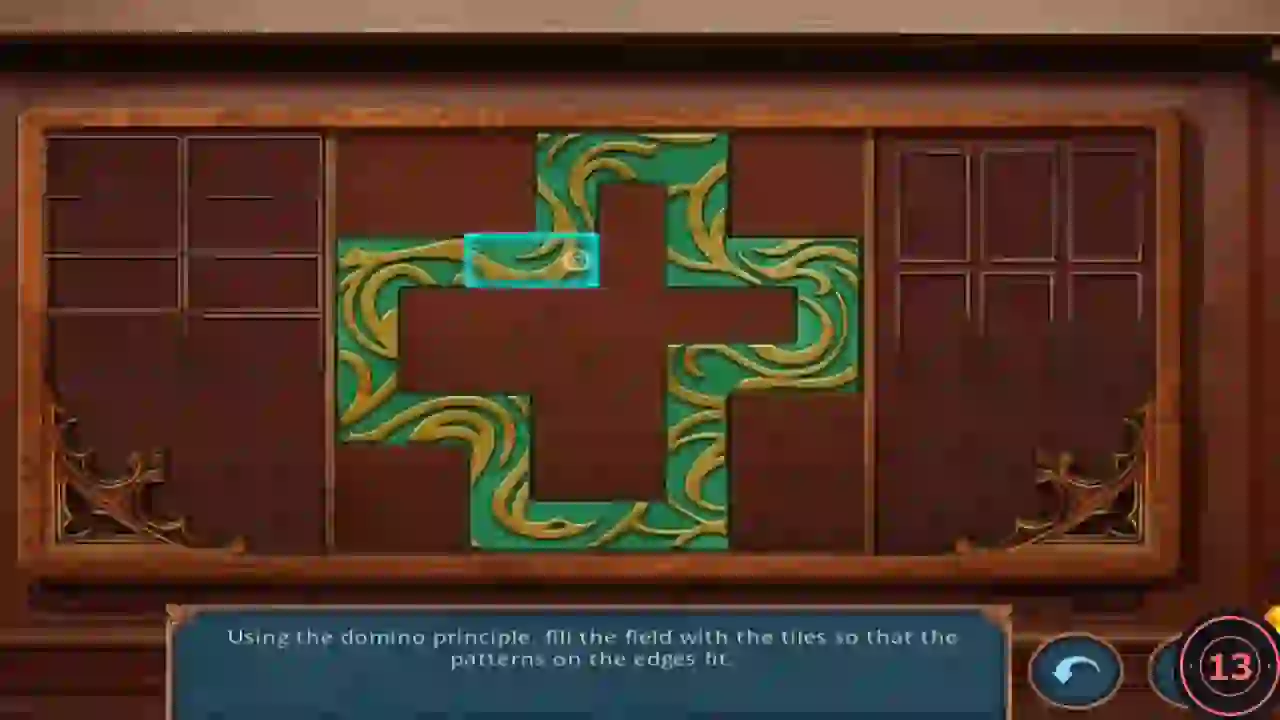
Completed field from the recording: the swirls join into one continuous pattern. - Take the red-and-blue magnet from the panel.
- Use the magnet on the slot in the top of the round red table in the right foreground. The latch slides and a compartment opens; take the pink-handled knife.
The Ghost's Binocular Scene
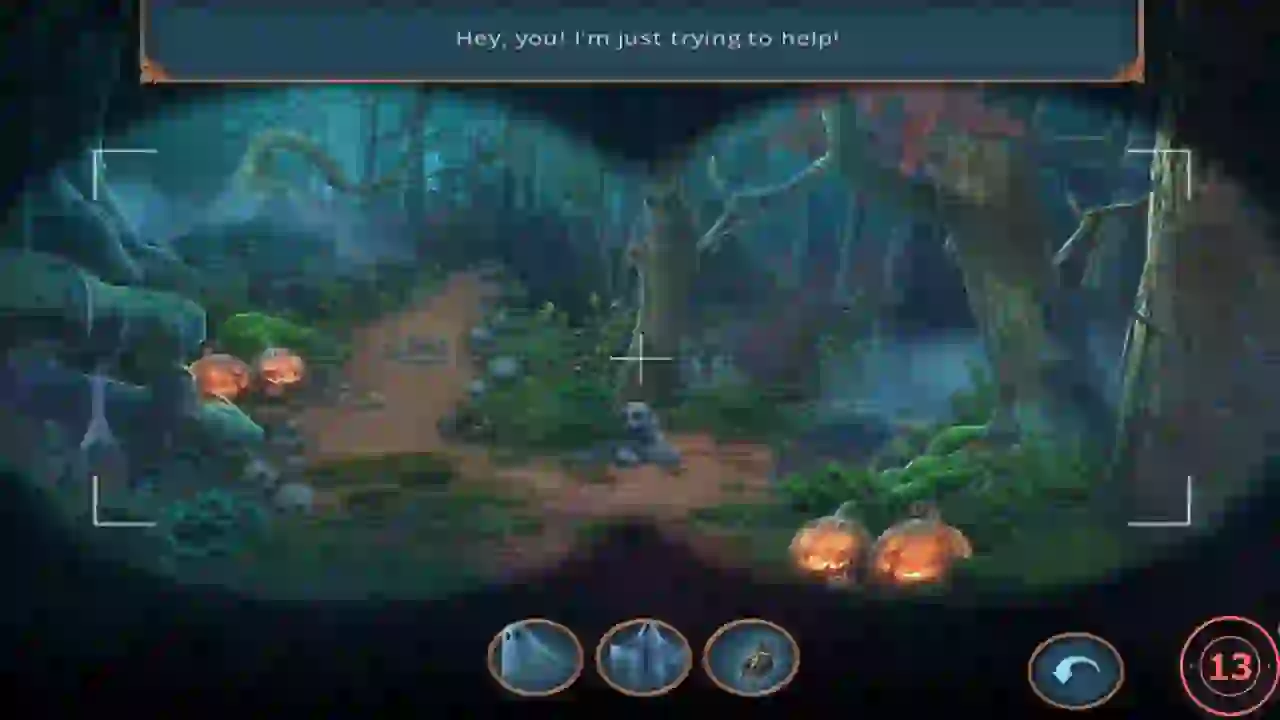
Open the treehouse toy box, then help a friendly ghost in the clearing.
- Climb to the treehouse and pry open the toy box lid with the knife. Take the garden hose.
- When you return to the clearing, a ghost rushes out ("I'm just trying to help!") and a binocular-view scene starts. Objects appear in a three-slot bar; drag each one to its place in the scene. Put the ghost sheets on the trees and bushes, the owl on the branch at the top centre-right, the bat at the top right, the snake on the path, the chains at the bottom left and the hand mirror beside the pumpkins. A wrong spot just says "That didn't work". When everything is placed you receive the brooch.
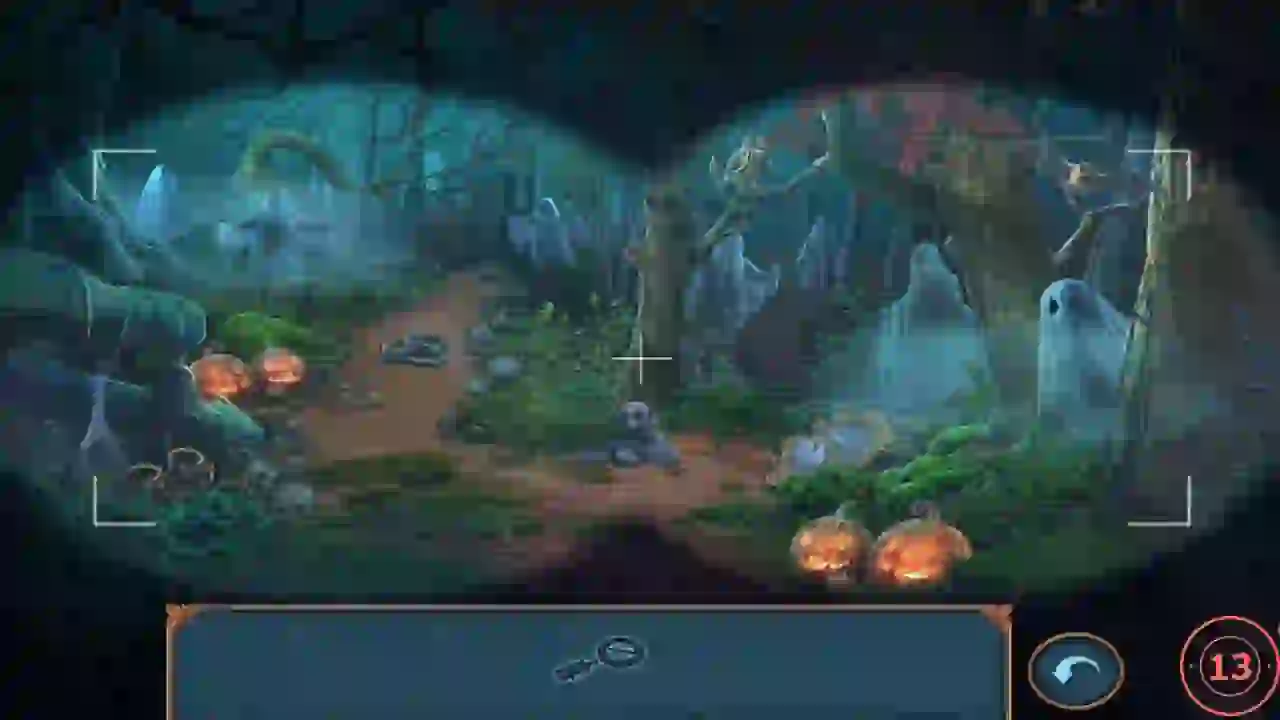
Completed scene with every object in place.
Gear, Pump and Fountain
Collect the second gear and drain the temple fountain.
- Attach the brooch to the cloak of the hooded skeleton statue in the clearing. Its eyes glow green and the lantern opens; take the gear (2/2).
- In the temple, place both gears in the gear slot at the bottom right of the open red-table compartment. The glass lifts; take the water pump.
- Place the pump on the battery box at the fountain and attach the garden hose. Once the basin is drained, take the gold medallion.
Well Rocks
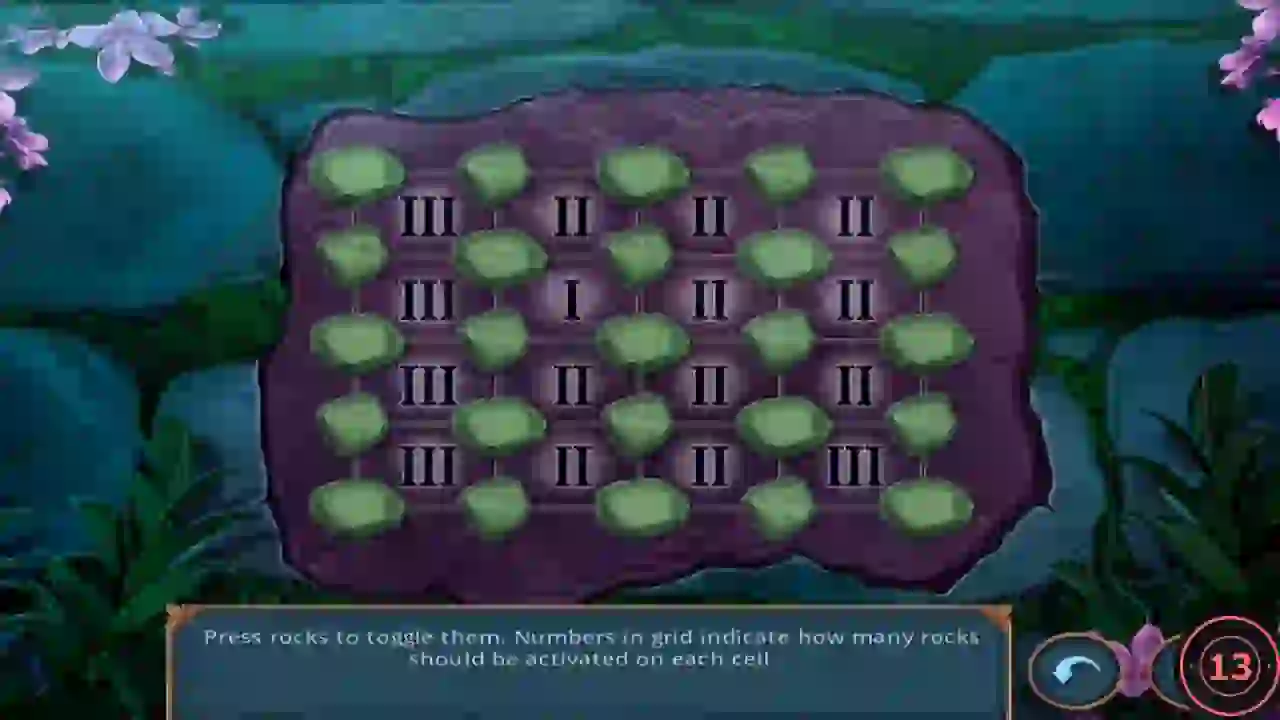
In-game hint: "Press rocks to toggle them. Numbers in grid indicate how many rocks should be activated on each cell." Rocks sit on the corners of a 4 × 4 grid of numbered cells (a 5 × 5 set of rocks); each number tells you how many of that cell's four corner rocks must be lit.
- At the ruins well, place the gold medallion on the empty gold skull stand on the right to start the puzzle. All rocks start unlit.
- Light these rocks, reading rows top to bottom and rocks left to right (1 = lit, 0 = unlit). Every numbered cell then has exactly the stated number of lit corners and the puzzle completes.CODERow 1: 1 0 1 0 1 · Row 2: 1 1 0 1 0 · Row 3: 1 0 0 1 0 · Row 4: 1 1 1 0 1 · Row 5: 1 0 0 1 1
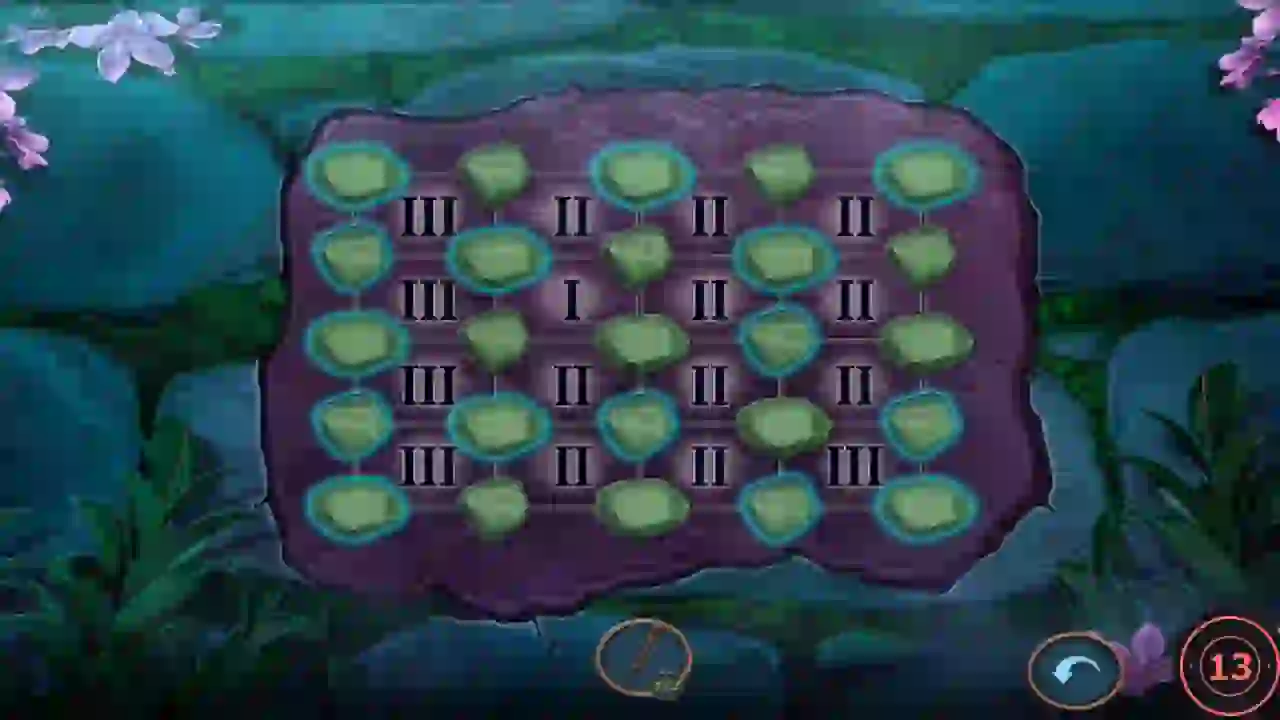
Solved: the lit rocks match the code in step 2. - A slot opens in the base of the well; take the wooden handle (2/2).
- In the temple statue alcove, fit both wooden handles onto the two hammer heads hanging under the statue's raised pistol. The statue lowers its arm; take the flintlock pistol.
- Use the pistol on Abraham to start the final duel.
Final Duel with Abraham
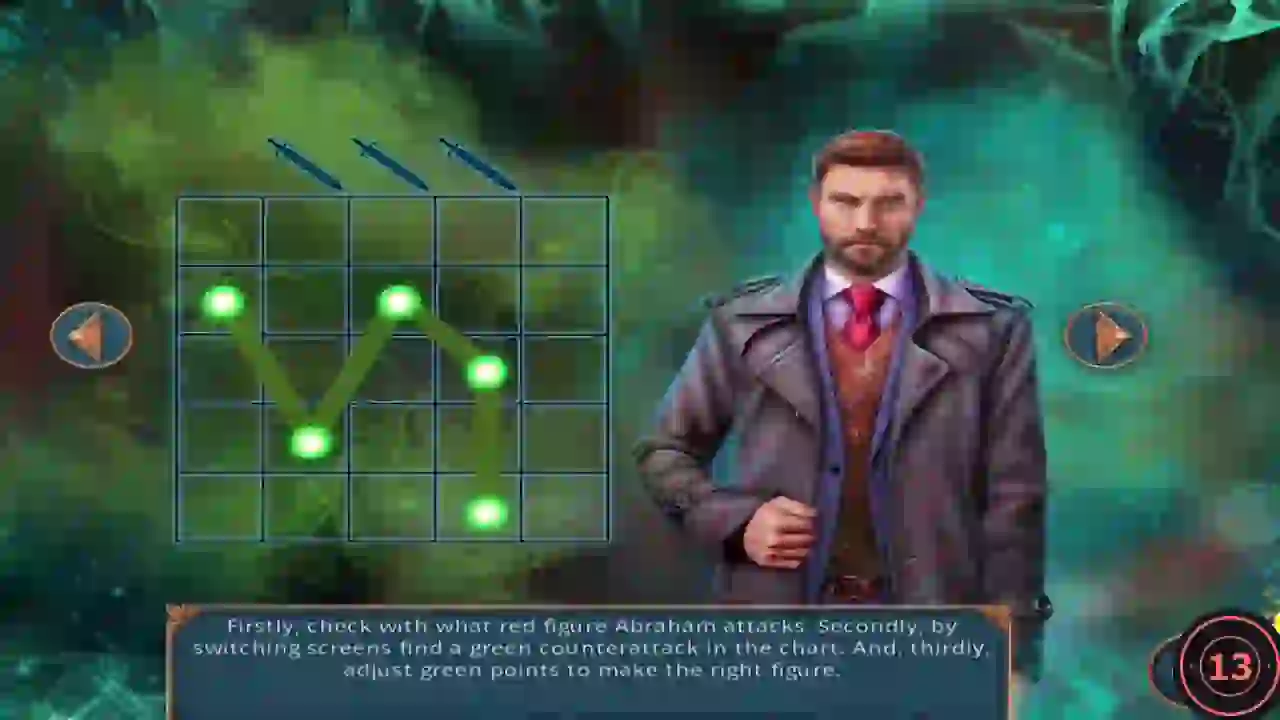
In-game hint: "Firstly, check with what red figure Abraham attacks. Secondly, by switching screens find a green counterattack in the chart. And, thirdly, adjust green points to make the right figure." You must counter three attacks.
- The duel has three screens. From your grid, press the right arrow to see Abraham's red attack figure, and the left arrow to open the chart. The chart has nine red figures, each followed by its green counter shape. Find the red figure Abraham is using and note the green shape beside it.
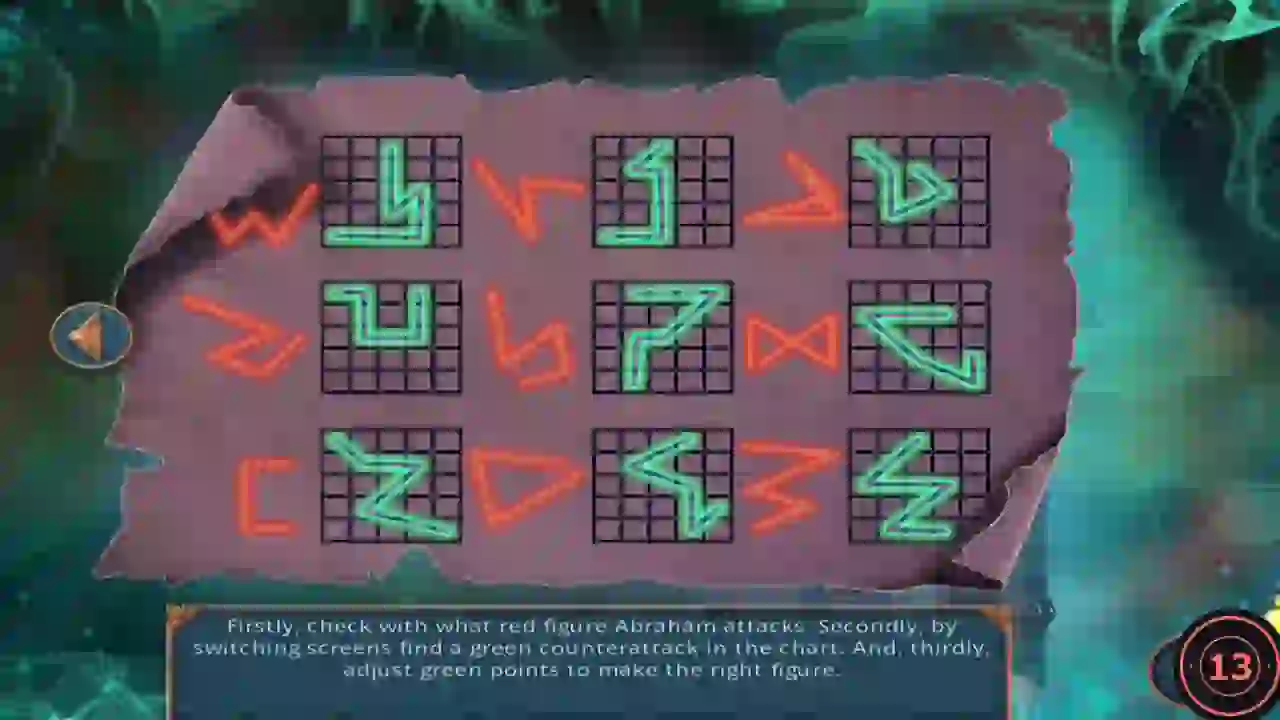
The counter chart (left arrow from your grid). Find Abraham's red figure; copy the green shape to its right. - On your grid, drag the five green points so the green line forms exactly that counter shape. A correct counter turns one of the three swords at the top orange and Abraham attacks again. In the recording the attacks came in this order: triangle, arrowhead, zigzag. Your order may differ, so always check the red figure first. When all three swords are orange, you win the duel.