Piano Notes
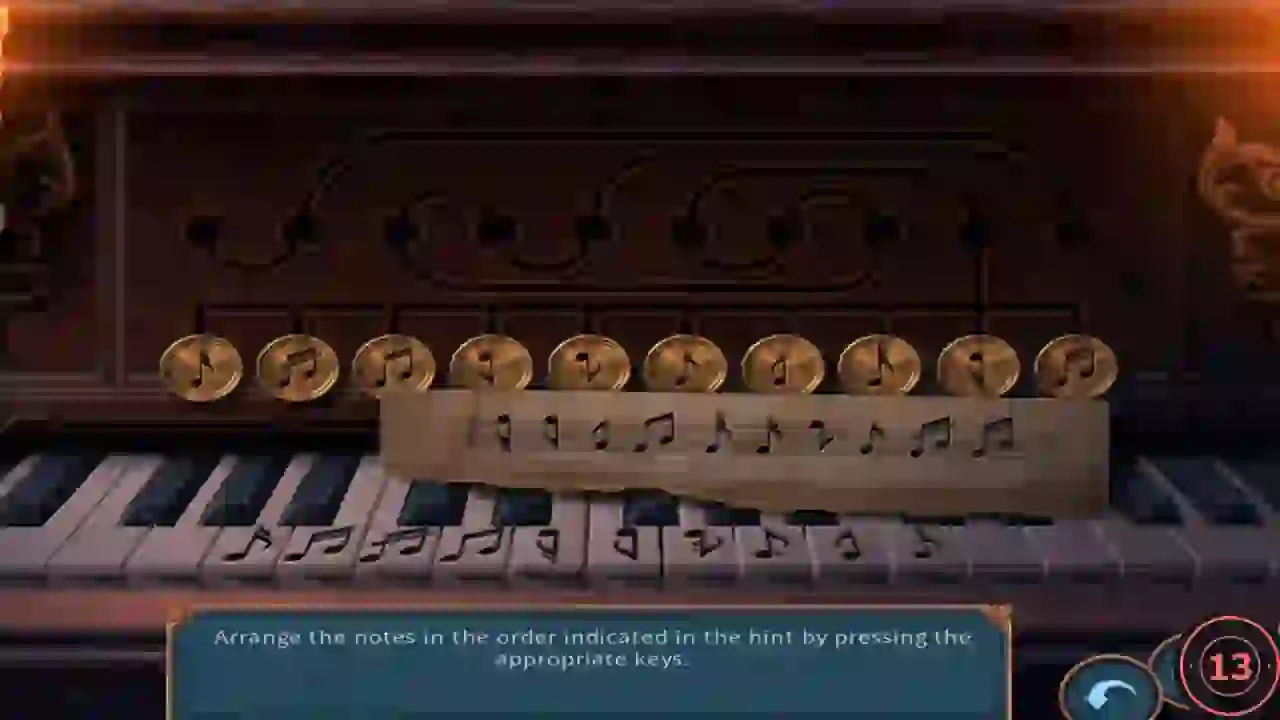
In-game hint: "Arrange the notes in the order indicated in the hint by pressing the appropriate keys." Ten note coins sit in the lower track, and each piano key is marked with a note symbol.
- In the library, put the pair of piano keys into the gap in the keyboard to start the puzzle.
- Read the ten symbols on the hint sheet from left to right. For each one, press the key showing the same symbol; the matching coin rises into the next slot of the upper track. Fill all ten slots in the hint order and the front of the piano opens.
- Take the red nail puller from the open piano.
- Open the wooden crate in your inventory and use the nail puller on its nailed lid. Move the clothes aside and take the water bottle and the sword.
Pumpkin Pairs
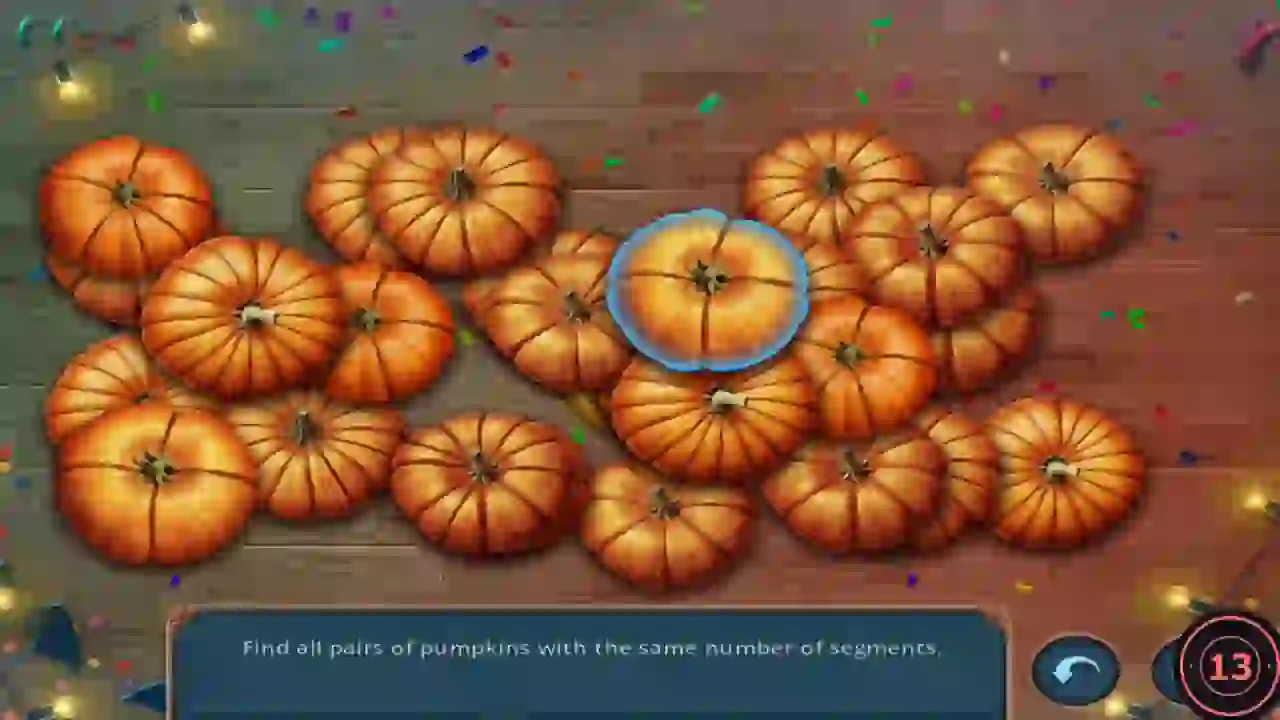
In-game hint: "Find all pairs of pumpkins with the same number of segments." The pumpkins are piled in layers, so removing a pair uncovers more.
- In the party hall, use the sword on the red-eyed jack-o'-lantern on the floor (the one that held the book). It cracks open and the pairs puzzle starts.
- Count the ribs on each fully visible pumpkin and click two with the same count; they disappear and show the pumpkins beneath. Clear the top layers first so that hidden pumpkins become available.
- When the pile is cleared, take the needle and the gold tacks from the split pumpkin.
Fixing the Staircase
Return to the library to repair the spiral staircase and reach the upper floor.
- Use the gold tacks on the staircase treads. The owl figurine flies away up the stairs.
- Use the green crawling hand on the staircase. It climbs up and hammers the treads secure.
- Go to the toy bat in the symbol case left of the piano and use the needle on its torn wing to sew it up.
- Climb the staircase to the upper library and talk to Mephisto, the hairless winged cat.
- Decision 2: Mephisto mentions a locked cabinet he cannot open and asks whether you can manage alone. "Sign me up!" costs 35 coins and gives +1 decision point; "Can't you help?" is free and gives no points. Both recordings chose "Sign me up!", and the next section follows that choice. What changes after the free option was not observed.
The Cabinet and the Ladder
Search the upper library gallery: a cabinet by the arched doorway, a rolling ladder in front of a chest of drawers and a bookshelf guarded by a small knight.
- Open the low cabinet on the left by the arched doorway. Take the purple case and the I-beam piece (2/3).
- Use the gold wedge at the foot of the rolling ladder; the ladder slides aside. Take the I-beam piece (3/3) from the top of the chest of drawers. The drawers have a strange lock that you cannot open yet.
- Place the completed I-beam on the knight's bookshelf as a bookend to start the book puzzle.
Knight's Bookshelf
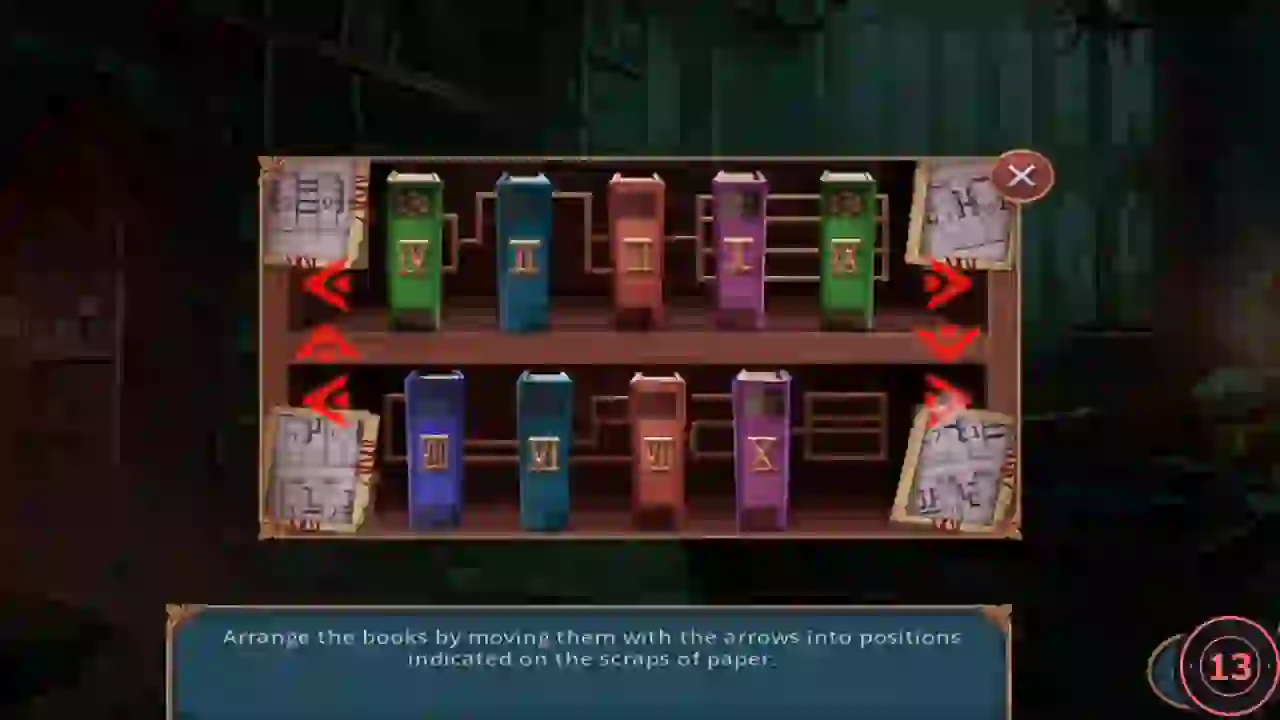
In-game hint: "Arrange the books by moving them with the arrows into positions indicated on the scraps of paper." Two shelves hold five numbered books each, and paper scraps in the corners show where the books belong.
- Use the arrows at the shelf ends to shift the books along each shelf until both rows match the paper scraps. The solved arrangement in the recording was: top shelf IV, V, VII, I, IX; bottom shelf VIII, II, X, III, VI. If your scraps show different numbers, follow the scraps.CODETop: IV V VII I IX · Bottom: VIII II X III VI
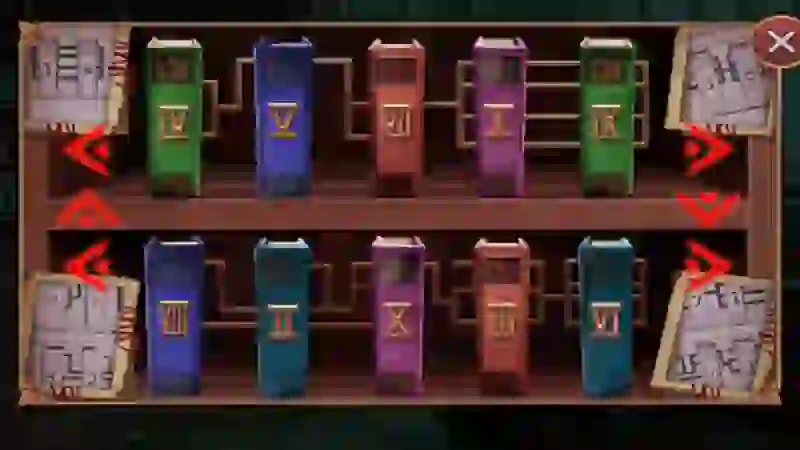
Solved arrangement from the recording: top IV, V, VII, I, IX; bottom VIII, II, X, III, VI. - A large book opens with a story about an endless war. Take the flashlight from the knight and the stack of orange skull chips beside him. The sticky blue goo at his feet cannot be removed yet.
- Place the skull chips in the token tray on the skeleton's board-game desk to start the chip game.
Skeleton's Chip Game
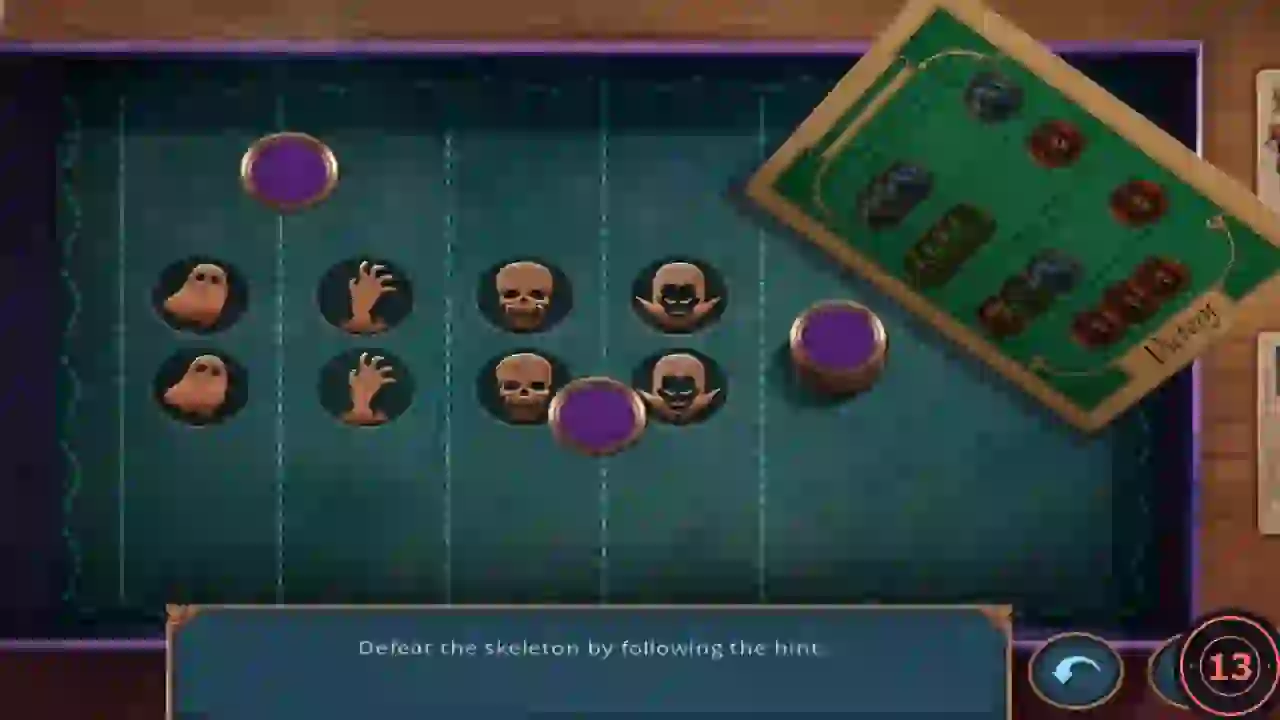
In-game hint: "Defeat the skeleton by following the hint." Chips are drawn at random, so there is no fixed move list; use the rules below.
- Rules from the rules card: three identical chips destroy the opponent's set of that chip; four identical chips, or one chip of each kind, make a king chip; three kings win. Draw chips and build towards kings. Use a triple whenever the skeleton is close to finishing a set, and finish one-of-each-kind kings when four of a kind is unlikely. An undo arrow sits at the bottom right. Collect three kings to win.
- The skeleton's hand lets go of a grey ball of yarn; take it.
Goo, Figurine and Pliers
Combine the items you have collected on both floors of the library and in the party hall.
- Give the ball of yarn to the toy bat in the symbol case on the lower floor. While it plays, take the blue brush that appears.
- At the knight's shelf upstairs, pour the water bottle on the sticky goo, then scrub it with the brush. Take the small gold skeleton figurine uncovered underneath.
- Place the figurine beside the matching one on top of the chest of drawers. The strange lock opens; take the gold pliers from the drawer.
- In the party hall, use the pliers on the werewolf's teeth. You pull out a ring of copper keys.
- Click the banquet table to start the list scene.
Banquet Item List
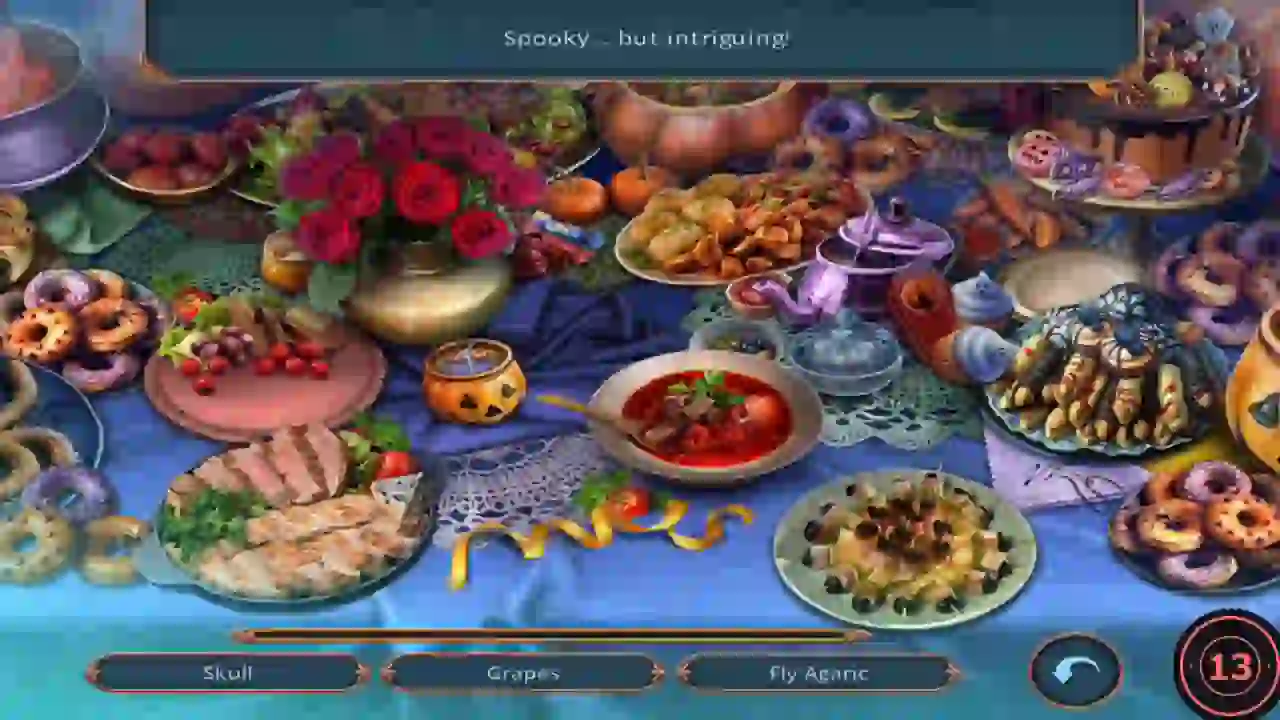
Find the listed items on the banquet table. Only three names show at a time; a new one appears whenever you find an item.
- Find the 12 items: grapes (upper left of the pink plate), coffin (right of the purple teapot by the small blue jug), carrot (top right, between the teapot and the cake), sugar (the glass bowl right of the soup), skull (right of the gold vase's base), lollipop (top right by the cake), initials (letters stitched on the purple napkin right of the cheese platter), oyster fork (at the lid of the purple teapot), fly agaric (on the right rim of the soup bowl), cheese (right edge of the meat platter), honey (left of the gold vase) and spicy sauce (left of the teapot, in front of the pastry plate). The positions are approximate areas. You receive a cupcake.
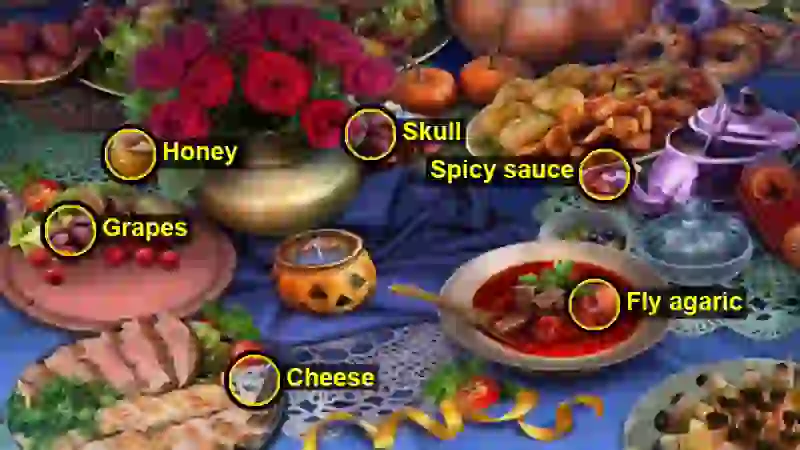
Left half: approximate spots of six list items, taken from where each item flashed when found. 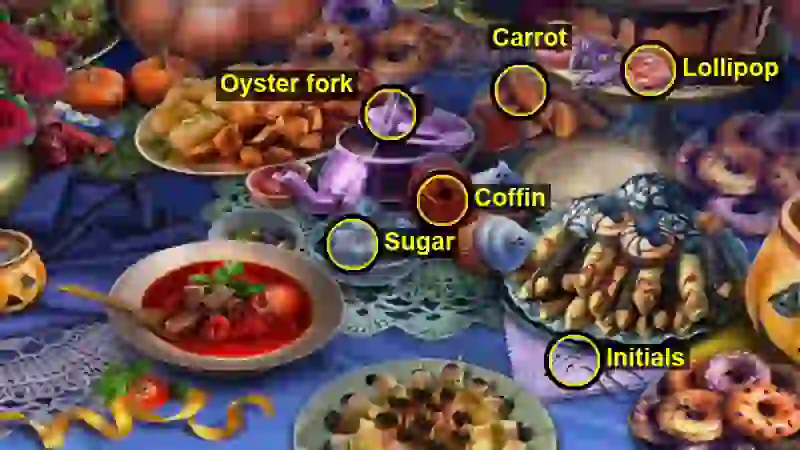
Right half: approximate spots of the other six list items.
Key Ring Lock
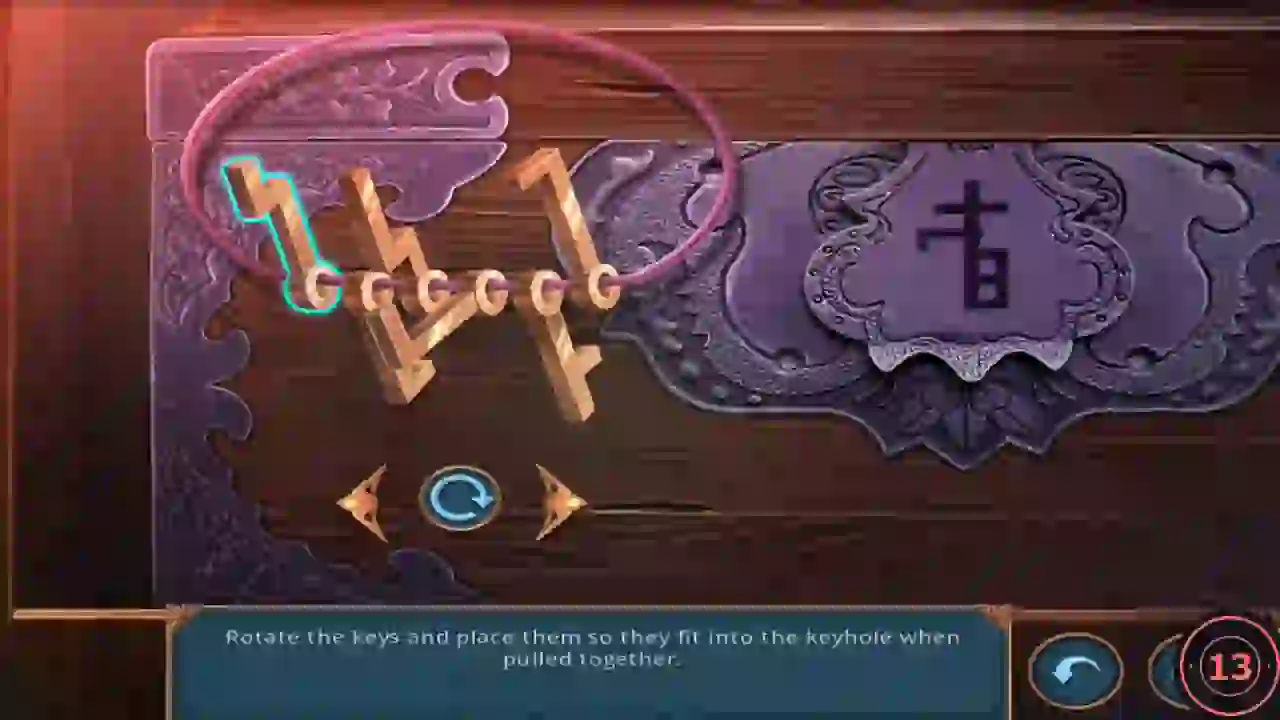
Feed the bat in the party hall, open the hidden lock in the upper-library cabinet and finish the first chapter.
- Give the cupcake to the bat on the red cushion left of the party-hall stairs. Take the silver fork it was guarding.
- In the open cabinet in the upper library, use the fork on the back panel. It lifts to reveal a purple lock box; use the ring of copper keys on it.
- In-game hint: "Rotate the keys and place them so they fit into the keyhole when pulled together." The lock plate shows the outline of the keyhole. Pick a key with the side arrows and flip it with the round button so its bit fills its own part of the outline. When every key matches its section of the outline, the keys come together in the keyhole and the lock opens.
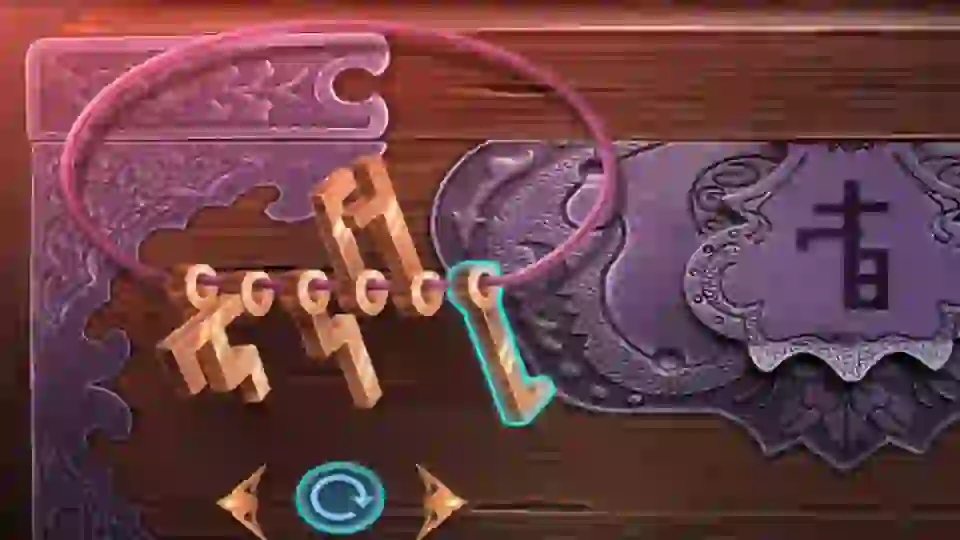
Key positions in the recording at the moment the lock accepted them (last key selected). - Read the scroll: the Key of Infinity opens a portal to another world, and anyone nearby is pulled in when it activates.
- Decision 3: Mephisto asks how you feel. "I feel confident." costs 35 coins and gives +1 decision point; "Me too..." is free and gives no points. Gameplay continues the same way.
- A padlock screen asks you to use a key to continue. Press Unlock to spend 1 adventure key and open the rest of the episode.