Terrace shelf and the axe
The gothic terrace has a shelf with a skull planter and a glass case on the left, a telescope in the centre and a ceiling hatch overhead.
- Tap the shelf on the left. Open the small box on it and take the map piece (1 of 2), the blue lighter, the orange clay and the red book.
- Tap the axe head held in the glass case ("I could've been a lumberjack! Just need the right tool.") and fit the axe shaft to it. Take the axe.
Cut the thorns and open the chest lock
The axe clears the thorns in the dead tree.
- Go back to the cemetery and climb into the dead tree's branches. Cut the thorns with the axe and take the horseshoe magnet.
- Use the magnet on the lock slot of the chest in the shutter niche. A ball-and-arrows puzzle starts.
Chest ball maze
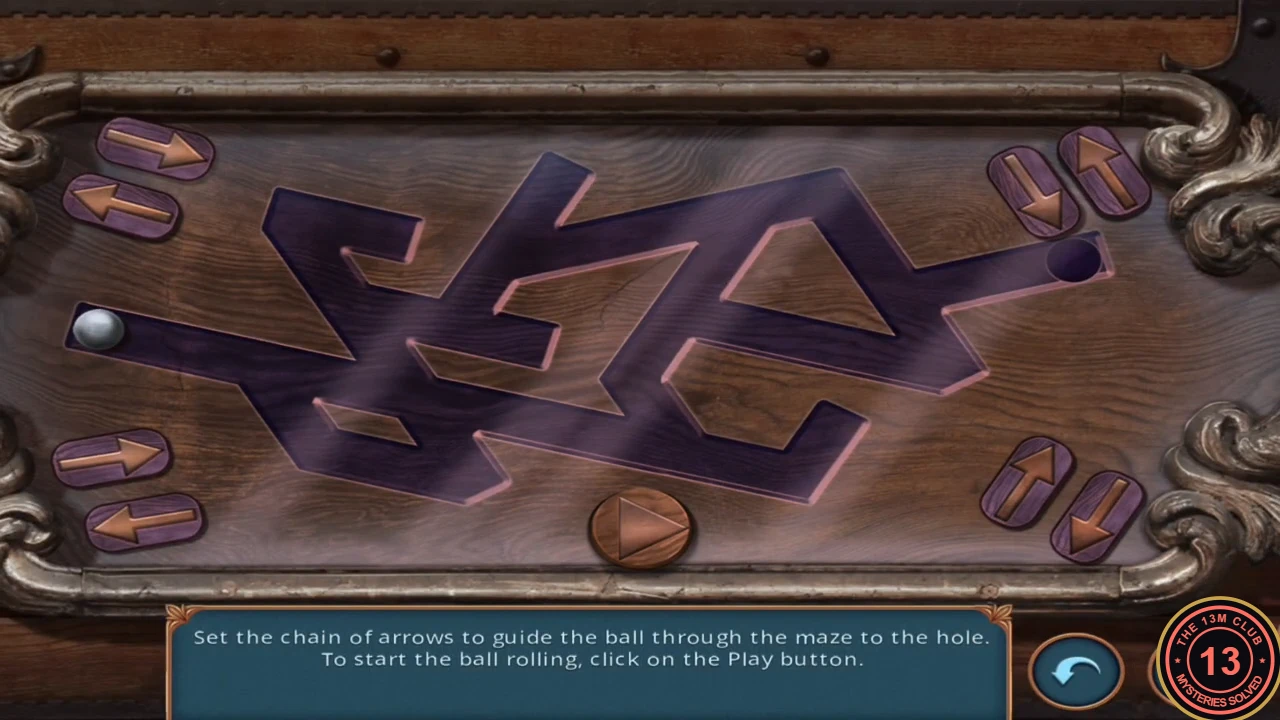
"Set the chain of arrows to guide the ball through the maze to the hole. To start the ball rolling, click on the Play button." Four pairs of arrow buttons sit in the corners. Top-left pair: right and left along the lines that slope gently down to the right. Bottom-left pair: right and left along the lines that slope gently up to the right. Top-right pair: down, and up along the steep line leaning up-left. Bottom-right pair: up along the steep line leaning up-right, and down. Each tap adds an arrow to the chain shown at the top; at every junction the ball follows the next arrow. The puzzle has three boards in a row. The chains below are from the recording; if your board differs, trace the route from the ball to the hole and add one arrow for each turn.
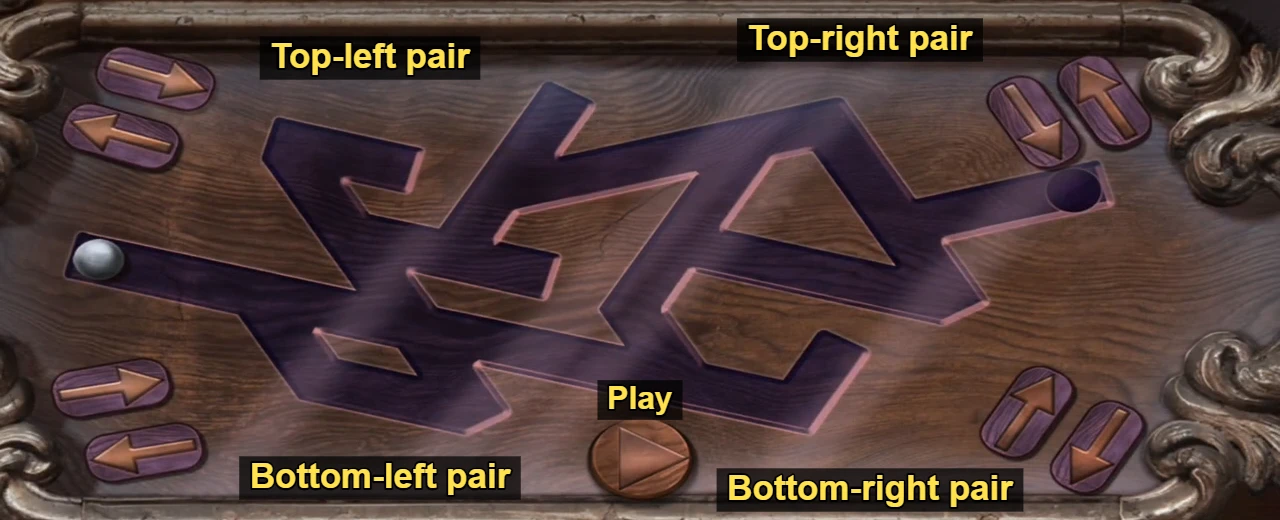
- Board 1: top-left right, top-left right, top-left right, top-right up-left, bottom-right up-right, top-left right, top-right up-left, bottom-left right. Press Play; the ball reaches the hole and the next board appears.
- Board 2: top-left right three times, bottom-left right twice, bottom-right up-right, top-left right. Press Play.
- Board 3: top-left right three times, bottom-left right three times, top-left right, bottom-left right. Press Play.
- The chest opens. Read the book about Vlad's family and the founding of the hotel. Explore the cemetery completes.
Coral Actinia pairs search
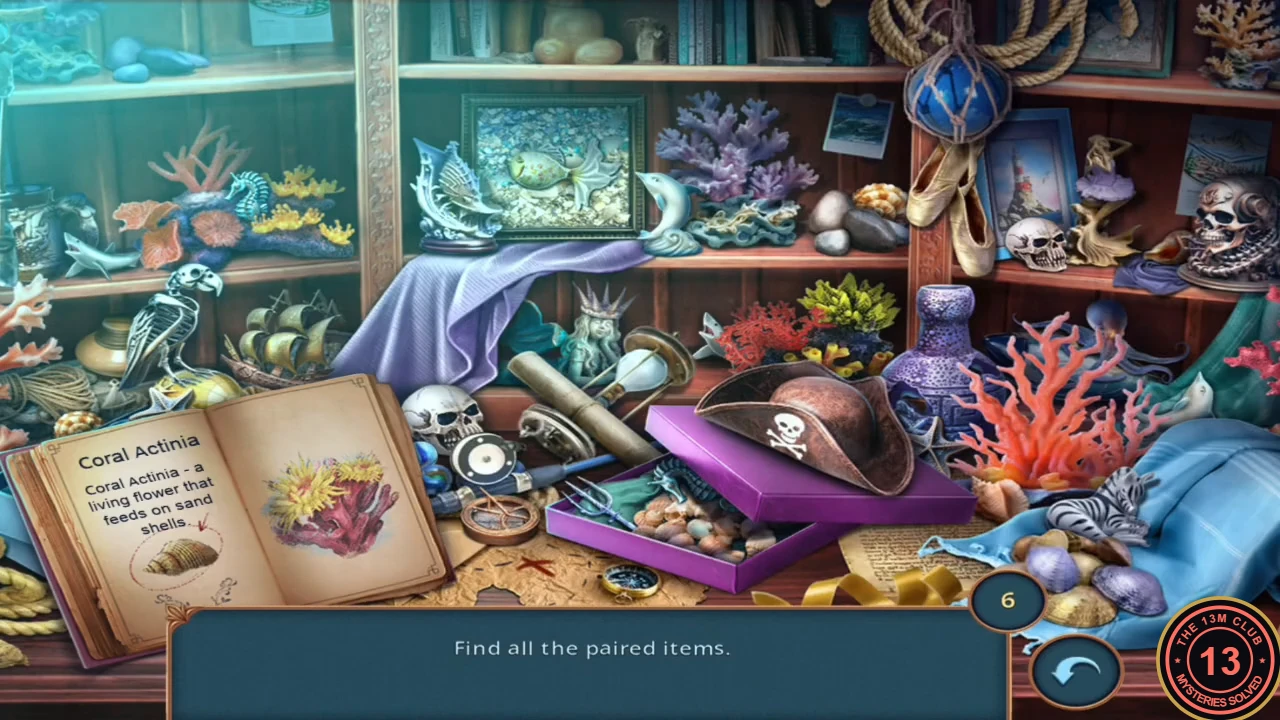
The red book belongs on the terrace curio shelf.
- On the terrace, place the red book on the curio shelf to the left of the entrance. It opens at "Coral Actinia - a living flower that feeds on sand shells." and a pairs search starts.
- "Find all the paired items." Tap both objects of a pair to remove them; the counter at the bottom right shows how many pairs are left (six at the start). Skulls: one on the desk in front of the brass telescope tube, one on the right-hand shelf beside the ballet shoes. Seahorses: one in the coral on the upper-left shelf, one lying in the open purple box. Dolphins: the dolphin figurine on the shelf right of the framed fish picture, and the small white dolphin beside the orange coral at the right.
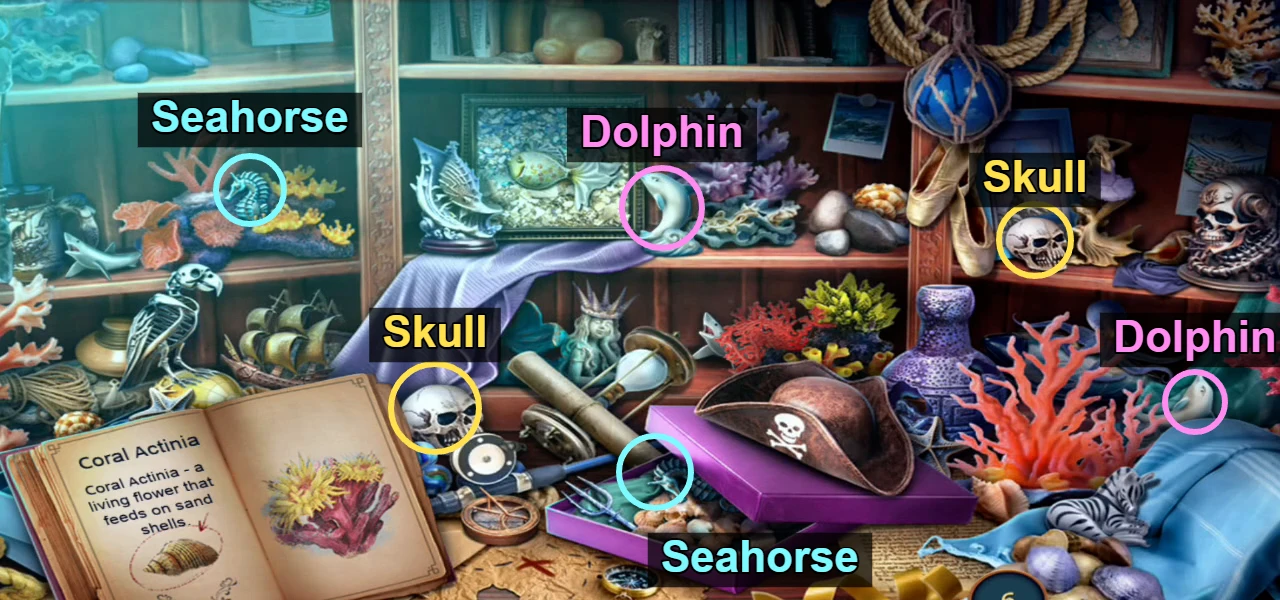
The skull, seahorse and dolphin pairs. Circles of the same colour are one pair. - Scallop shells: one on the shelf among the grey stones left of the ballet shoes, one at the far left edge just above the open book. Starfish: one beside the blue vase under the pirate hat's brim, one at the left just above the book. Sharks: one on the upper-left shelf below the coral, one small shark beside the red coral behind the telescope. When the last pair is gone, a Sand Shell appears in the purple box and you receive it.
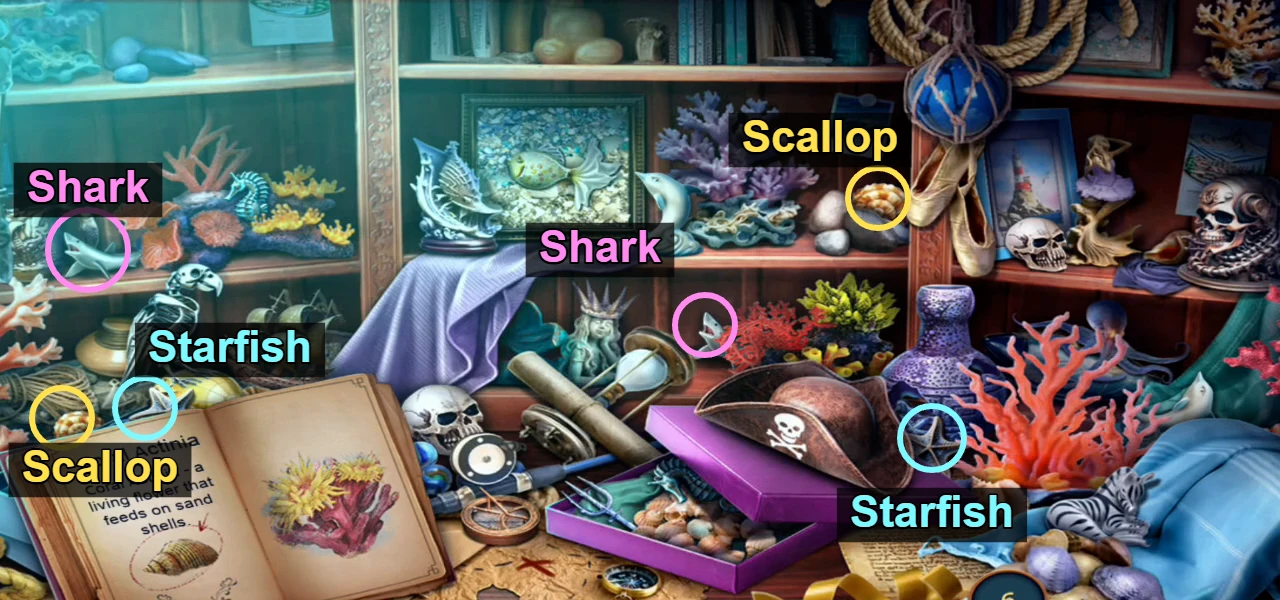
The scallop, starfish and shark pairs. Circles of the same colour are one pair.
Coral Actinia, telescope lens and the bat plan
The Coral Actinia is the flower growing out of the skull planter on the table.
- Feed the Sand Shell to the Coral Actinia skull planter on the table right of the glass case. The flower opens; take the anti-rust (a purple spray bottle) and the blue blueprint.
- Fit the green gem coil into the telescope in the centre as its lens.
- Open the bat emblem in the inventory (the screwdriver already waits beside it, on either Igor reply) and add the blueprint. The bat puzzle starts.
Bat on the blueprint
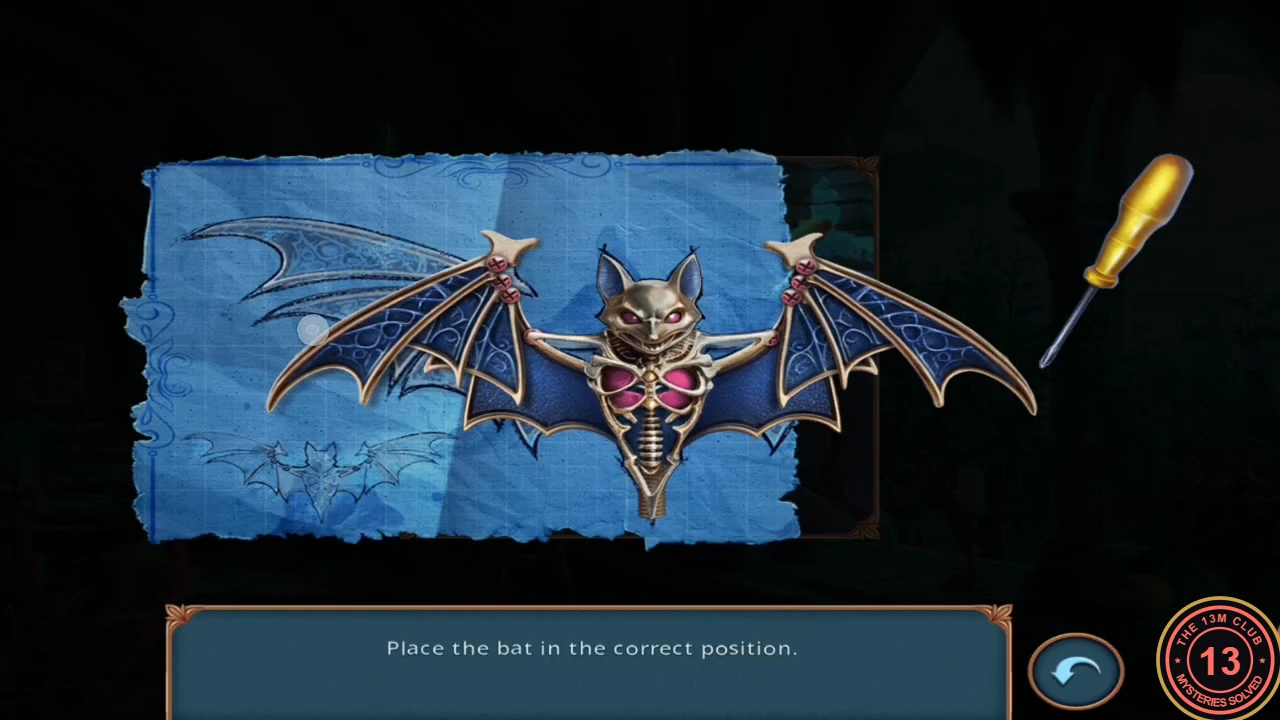
"Place the bat in the correct position." The faint outline on the blueprint shows how the bat should look. Each wing has an inner and an outer section; tapping a section turns it at its joint.
- Tap the wing sections until both wings are spread wide with their tips raised, matching the outline. The recording needed many taps, so no fixed count is given. The bat is repaired; take the bat emblem.
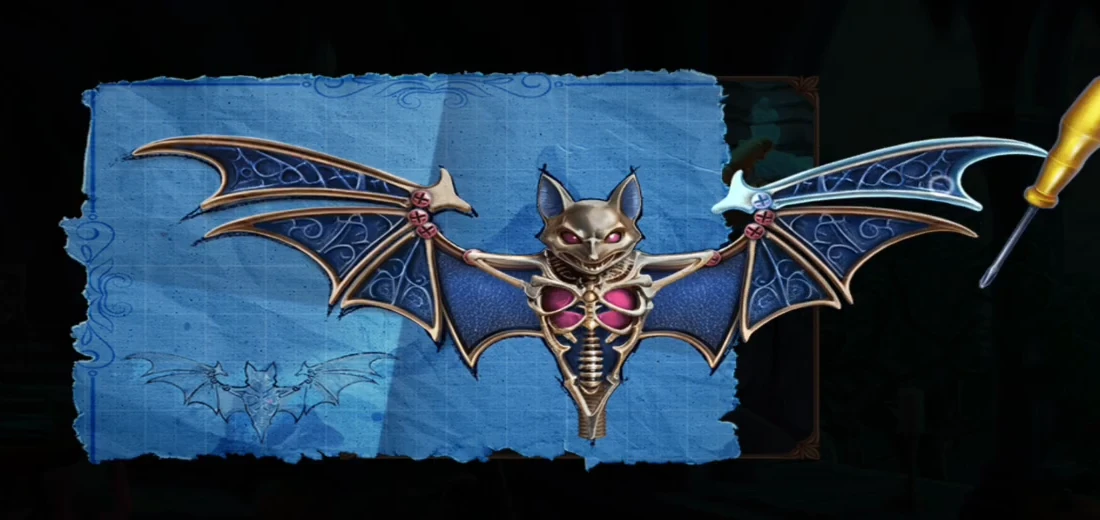
The solved bat position.
Umbrella hook and the rooftop
The folded pink umbrella beside the telescope is missing its top.
- Attach the repaired bat emblem to the umbrella beside the telescope and take the hooked umbrella.
- Use the hooked umbrella on the ceiling hatch at the upper left of the terrace to pull its ladder down, then climb up.
- If you skipped the cemetery with Igor's free reply, a warning appears before you climb: "If you complete this task, you won't be able to go back to previous locations and find the remaining items. Do you want to continue?" Choose Yes to go on to the rooftop. On the route followed here, with everything collected, the recording showed no warning.
- On the rooftop, Abraham struggles with Vlad. Choose "Do nothing" (free, 0 decision points; chosen in the recording), "Protect Vlad" (25 coins, 2 points) or "Stop Abraham" (35 coins, 4 points). Find Abraham completes and the task Stop Abraham begins.
Raven figurine and golden dagger
The rooftop has a lightning machine in the centre, a raven weather vane at the top right, a purple pouch on the roof tiles at the left and a gutter by the stairs.
- Tap the lightning machine and take the copper gear piece lying at its base.
- Tap the raven weather vane. Press the orange clay onto it to make a mould, put the silver figurine in the mould and melt it with the blue lighter. Take the silver raven.
- Tap the purple pouch on the roof tiles and put the silver raven in its lock. Take the blue hose and the bread.
- Tap the gutter at the bottom left by the stairs and crumble the bread there. The pigeon flies down to eat; take the thin golden rod from where it was sitting.
- Back at the pouch, use the golden rod to lever up the cracked roof tile beneath it. Take the golden dagger.
- Use the golden dagger on Abraham. A sword duel starts.
Sword duel
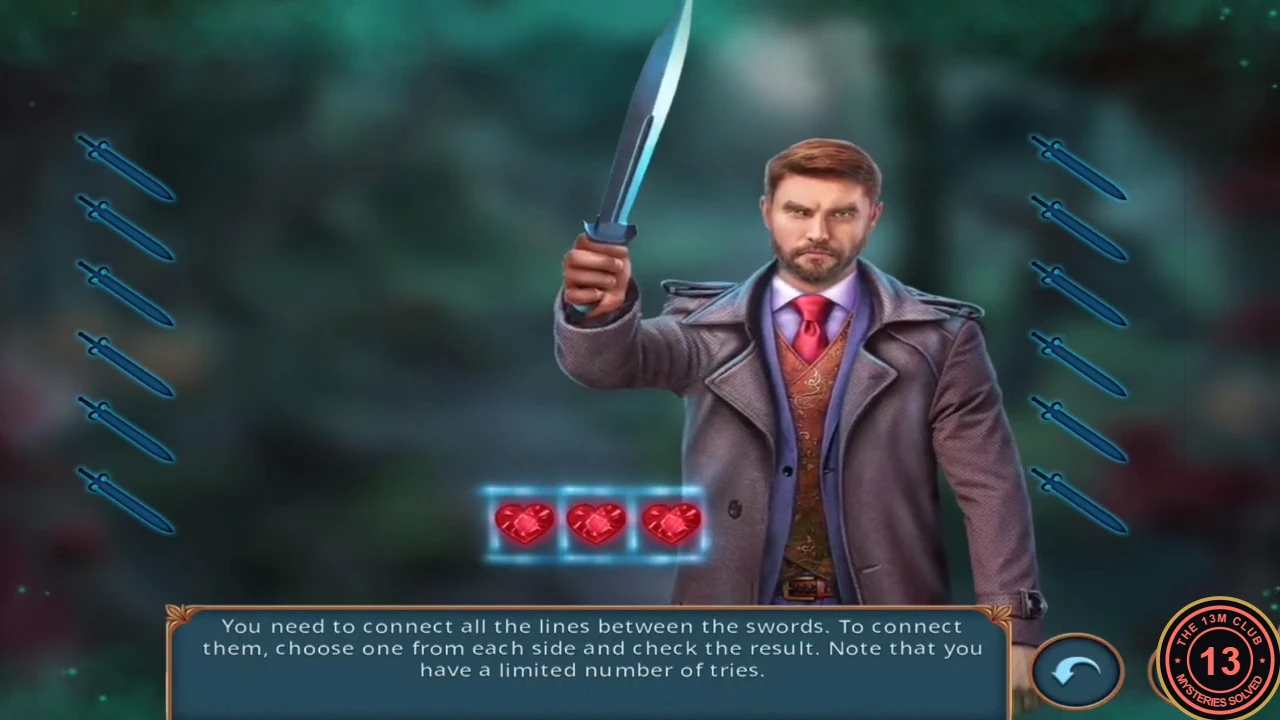
"You need to connect all the lines between the swords. To connect them, choose one from each side and check the result. Note that you have a limited number of tries." Tap a sword on the left, then one on the right. If they are linked, the hidden line lights up and both turn green; a wrong pair costs one of the three gem hearts. Number the swords 1 to 6 from top to bottom on each side.
- Connect left 1 with right 4, left 2 with right 5, left 3 with right 2, left 4 with right 6, left 5 with right 1 and left 6 with right 3. These are the links from the recording; if one of them fails in your game, your links differ, so try that sword with another partner, keeping track of hearts.
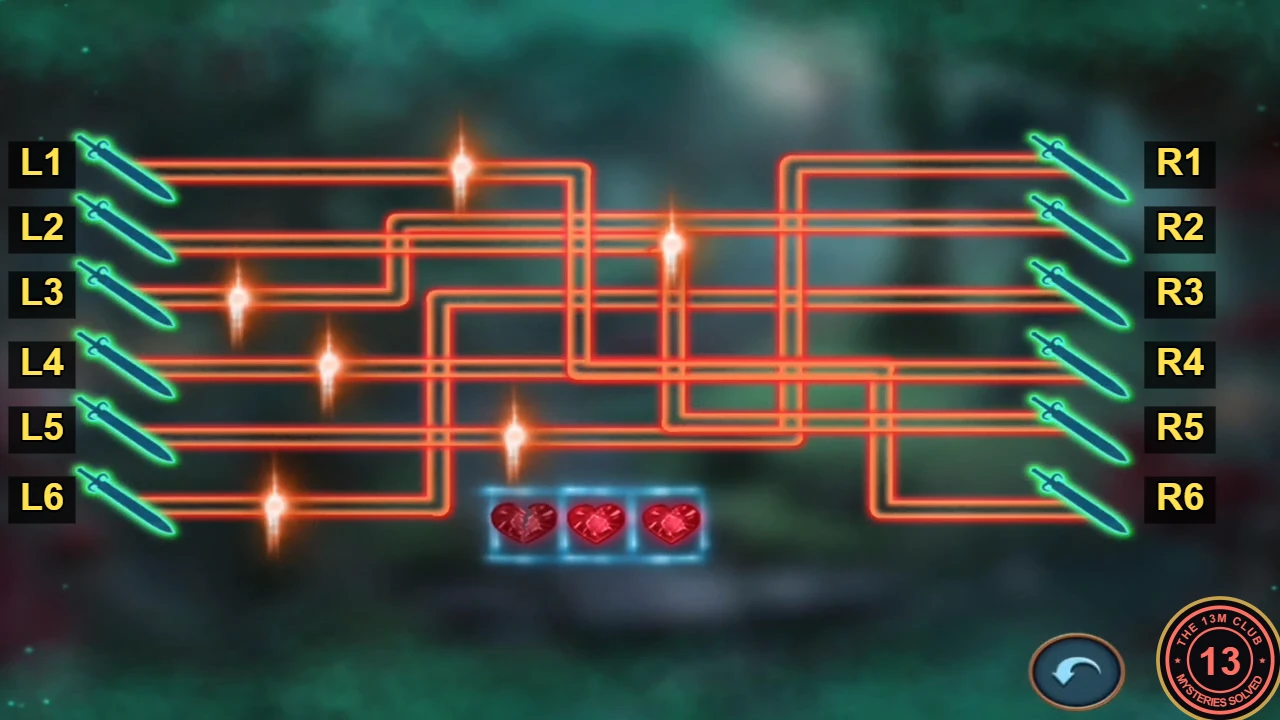
All six links found in the recording (one heart was lost to a wrong try). L1 to L6 and R1 to R6 match the numbering in the step. - Abraham is knocked unconscious.
Annabelle's call and the safe code
Annabelle calls with news from the library.
- Annabelle says she and Mephisto found that a Tesla coil will redirect the lightning onto itself. Reply "Good job, Annabelle!" (35 coins, 1 decision point) or "Are you sure?" (free, 0 points; chosen in the recording). She also gives you a code.CODE5346
- Go back through the terrace to the Aquamarine room, open the terrarium drawer and place the blue hose in it beside the murky tank.
Trapdoor safe code
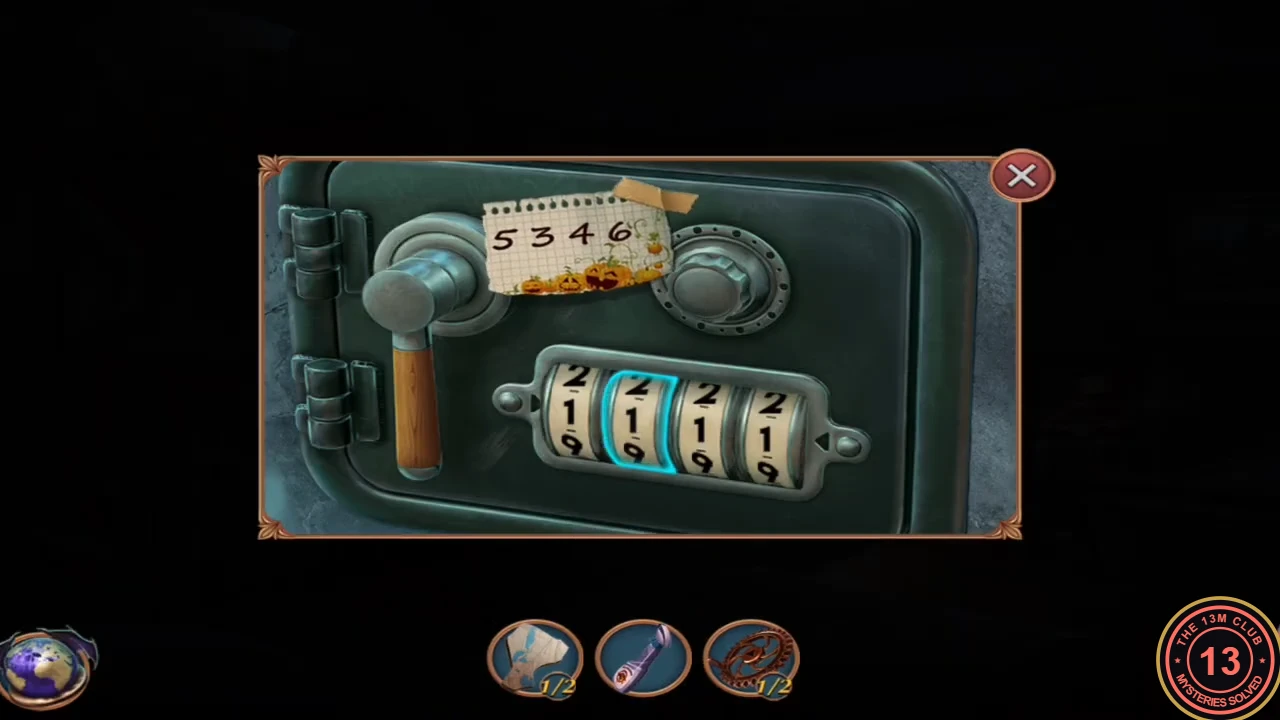
The wall safe below the parquet trapdoor in the upstairs hallway has four number wheels and a handle. The code Annabelle gave you on the phone, 5346, opens it.
- Go to the upstairs hallway, climb down the trapdoor and tap the wall safe. Turn the four wheels, from left to right, to 5, 3, 4 and 6. The safe opens as soon as the last wheel is set.CODE5346
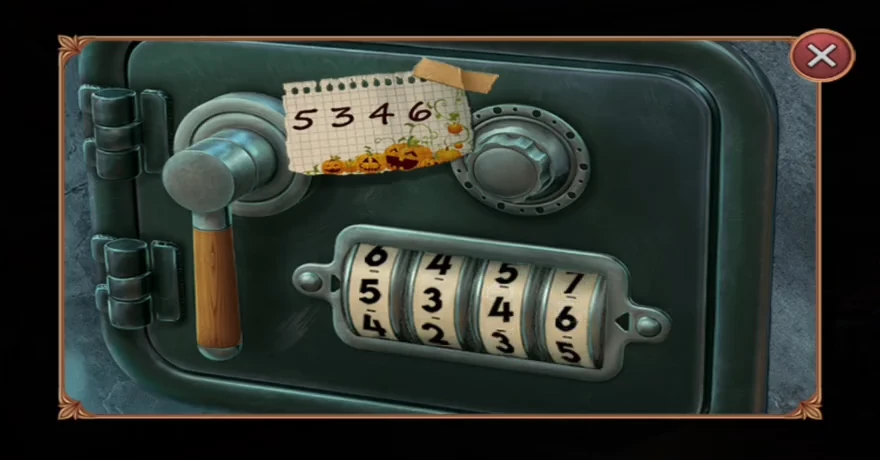
The safe wheels set to 5-3-4-6. - Take the Tesla coil base and the second map piece from inside the safe.
Globe flags
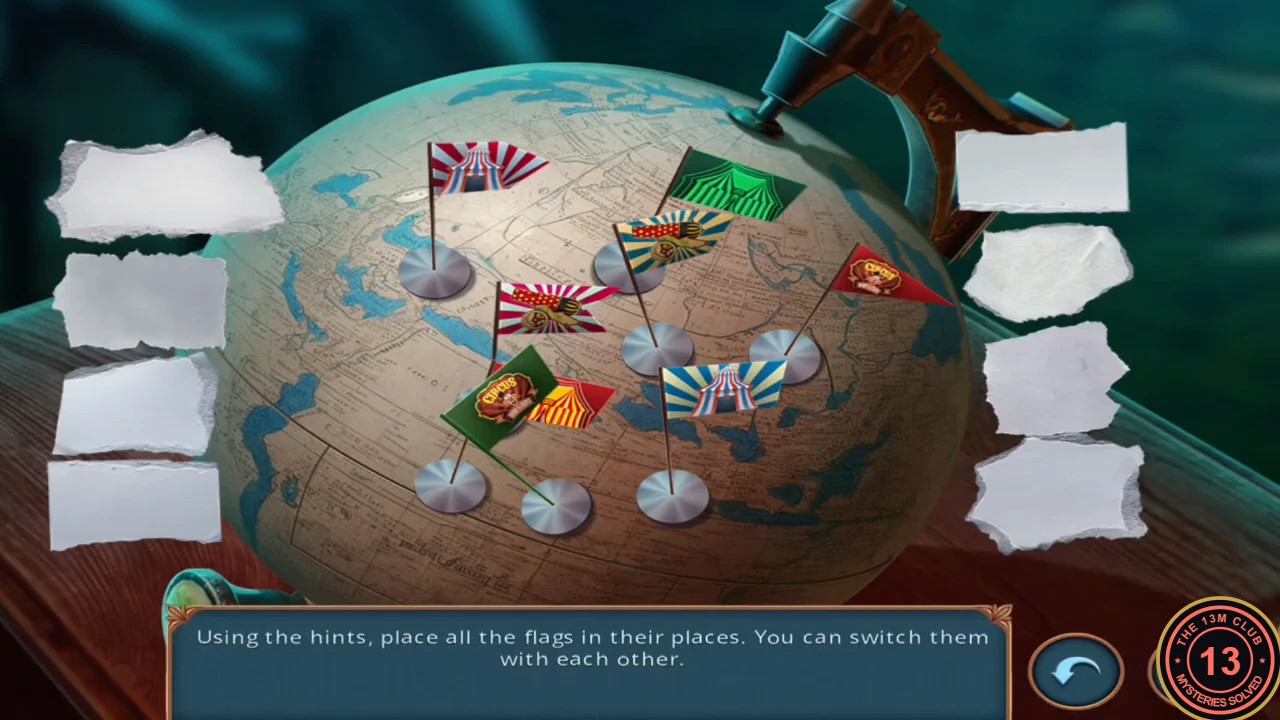
"Using the hints, place all the flags in their places. You can switch them with each other." Tap the paper hint slips at the left and right to read them. Tap one flag and then another to switch them.
- In the lobby, place both map pieces on the globe on the reception desk. The flag puzzle starts.
- Arrange the eight flags as follows: top left, the blue flag with yellow rays and a red banner; top centre, the blue-striped tent on blue rays; middle left, the blue-striped tent on red and white rays; centre, the red and yellow striped tent; right, the green tent; bottom left, the green CIRCUS pennant; bottom centre, the red and white rays with a banner; bottom right, the red CIRCUS pennant. The globe opens.
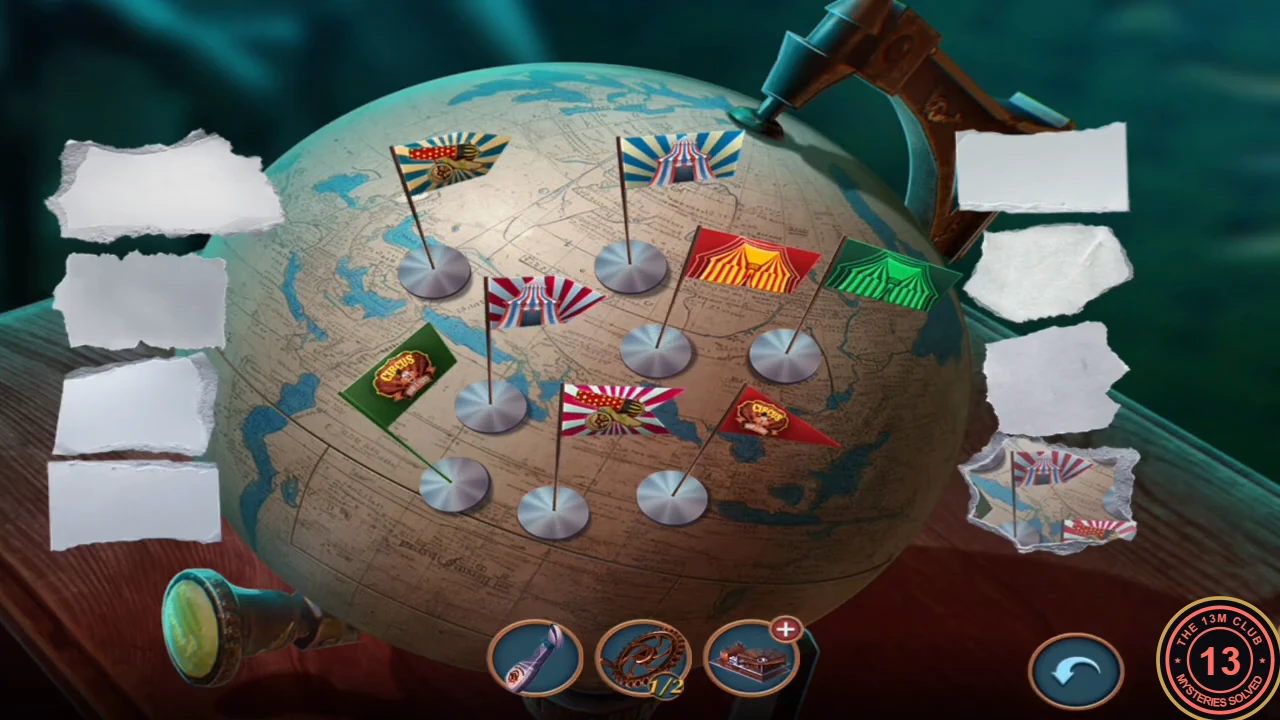
The solved flag layout. - Take the second copper gear piece from inside the globe.
Ghost's formula search
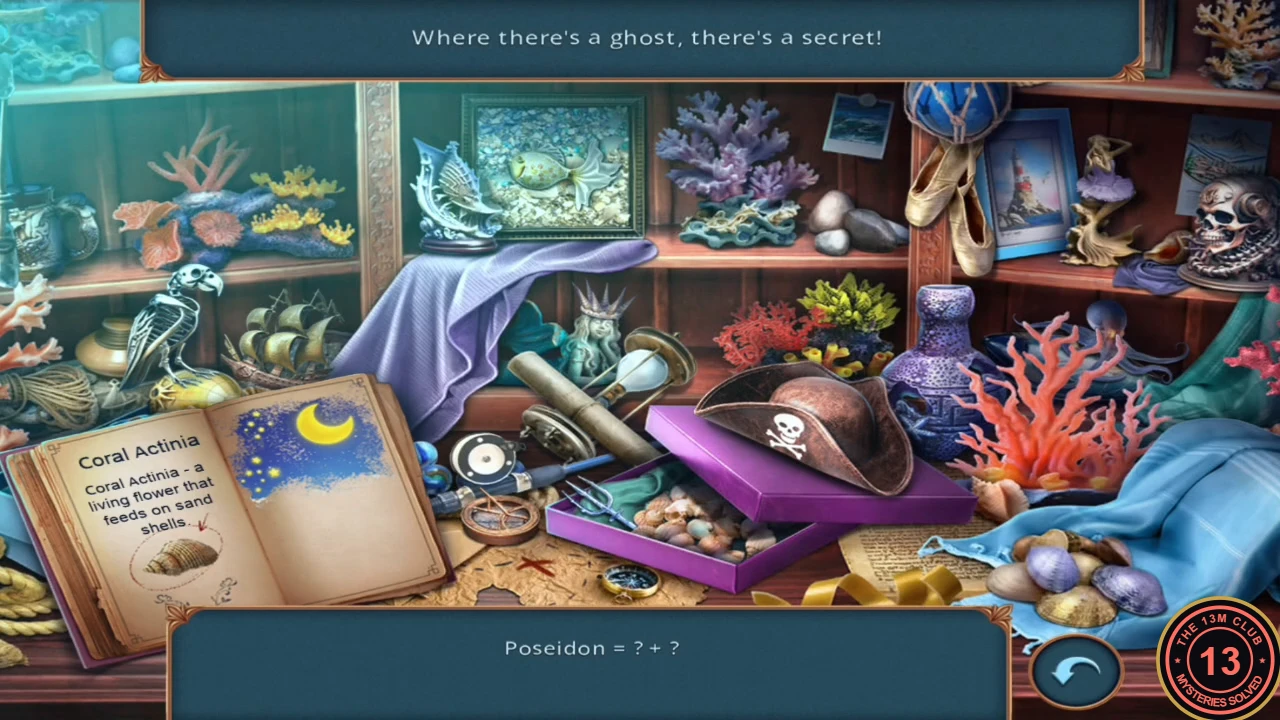
"Where there's a ghost, there's a secret!" This search asks you to build named objects from pairs of found items.
- Return to the terrace. A ghost flies across; tap the curio shelf to start the search.
- Complete each formula by finding its two parts: Poseidon = Shell Crown + Trident; Midnight = Hourglass + Moon with Stars; Angler Fish = Fishing Rod + Fish; Kraken = Octopus + Ship; Pirate = Pirate Hat + Parrot Skeleton; Ballerina = Tutu + Pointe Shoes. You receive the Telescope Handle.