Portal maze
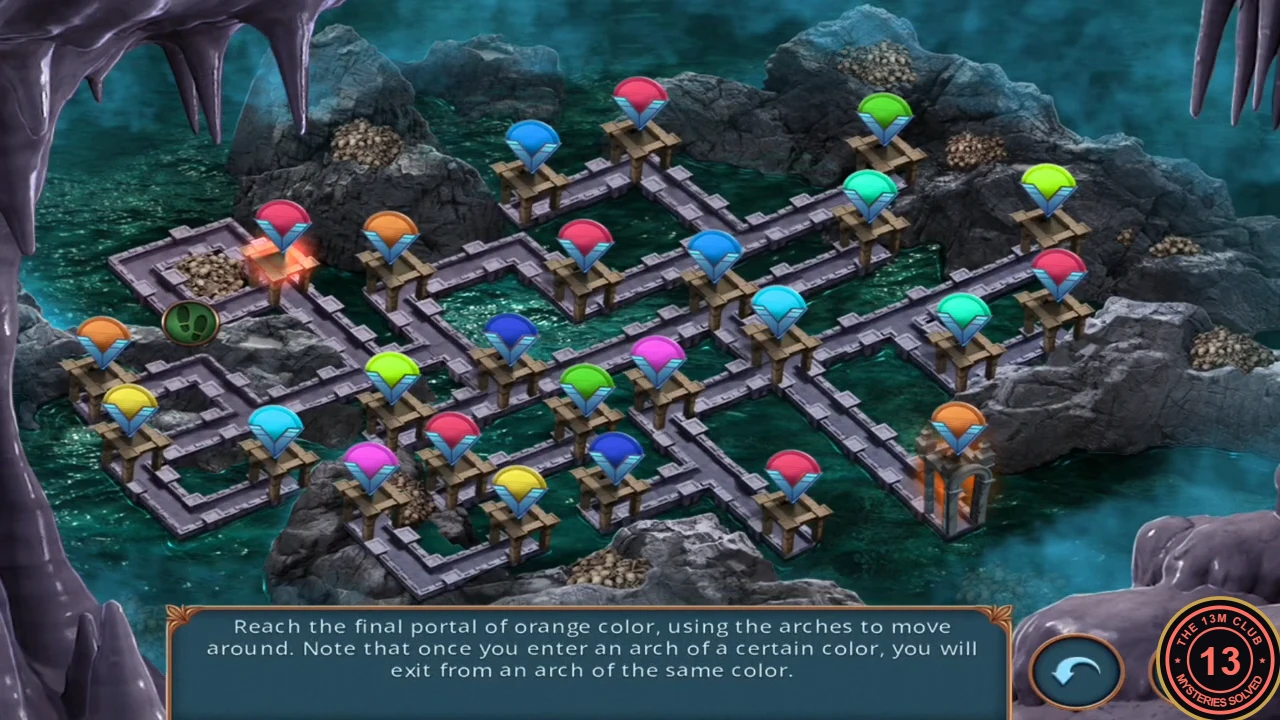
"Reach the final portal of orange color, using the arches to move around. Note that once you enter an arch of a certain color, you will exit from an arch of the same color." Your footprint token starts at the top left. Arches you can enter glow; tap one to walk in and reappear at the other arch of that colour.
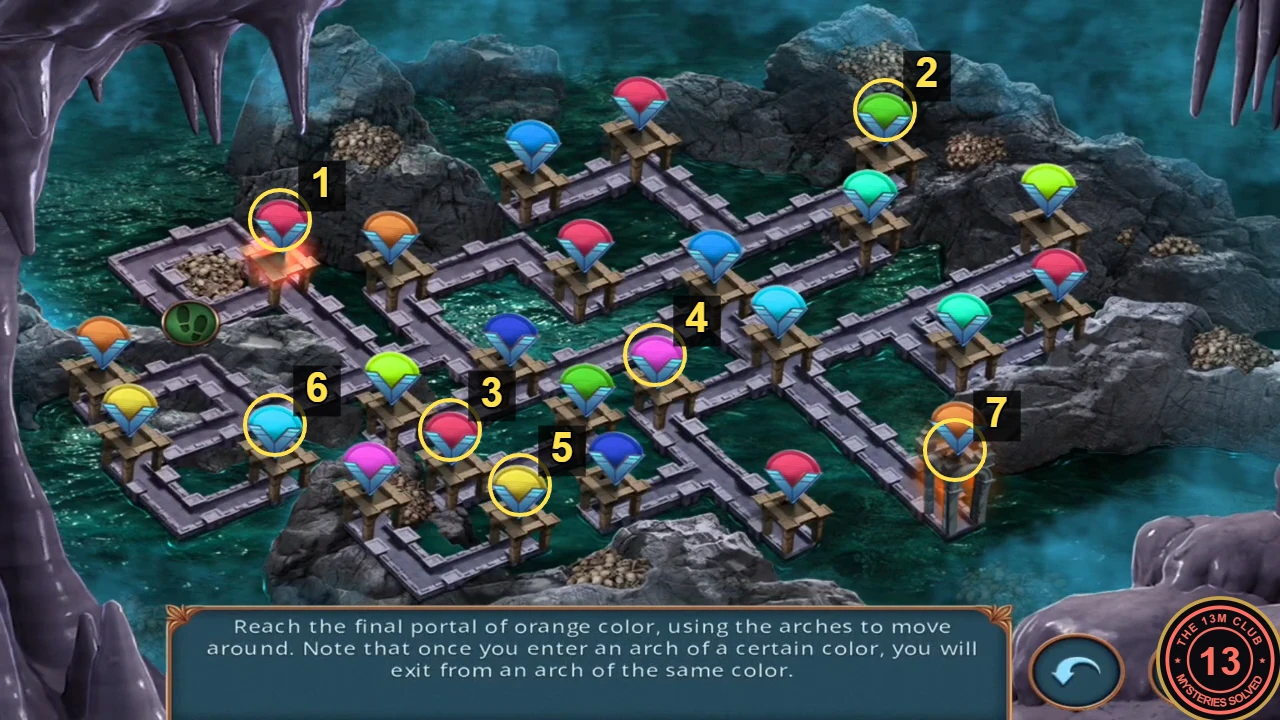
- Tap the red arch right next to the start. You come out of the red arch at the top centre.
- Tap the dark green arch at the top right. You come out of the green arch in the middle of the board.
- Tap the red arch at the lower left. You come out of the red arch near the bottom, right of centre.
- Tap the pink arch in the centre. You come out of the pink arch at the bottom left.
- Tap the yellow arch along the bottom edge. You come out of the yellow arch at the far left.
- Tap the light blue arch nearby. You come out of the light blue arch right of centre.
- Tap the orange portal gate on the right. The maze is solved and you arrive in the hotel lobby.
Hotel lobby
Vlad is free and wants to find Igor, who should know where Abraham is.
- Vlad asks whether Annabelle should hide in the library with Mephisto. "You're right. We should hide her." costs 35 coins and is worth 1 decision point; "That won't be necessary." is free and worth 0 (chosen in the recording). Get out of the jail cell completes and the task Find Igor begins.
- Tap the globe on the reception desk at the left. Take the golden angel figurine and the red plush toy, then take the round gramophone soundbox revealed underneath.
- Tap the gramophone on the centre table. Put the green record on it, then fit the soundbox. When the music plays, a drawer opens in the base: take the red-handled tuning key and the second angel figurine.
- Tap the lock of the luggage cage on the right and place both angel figurines on it. The cage opens; tap the luggage inside to start a hidden-object search.
Luggage cage search
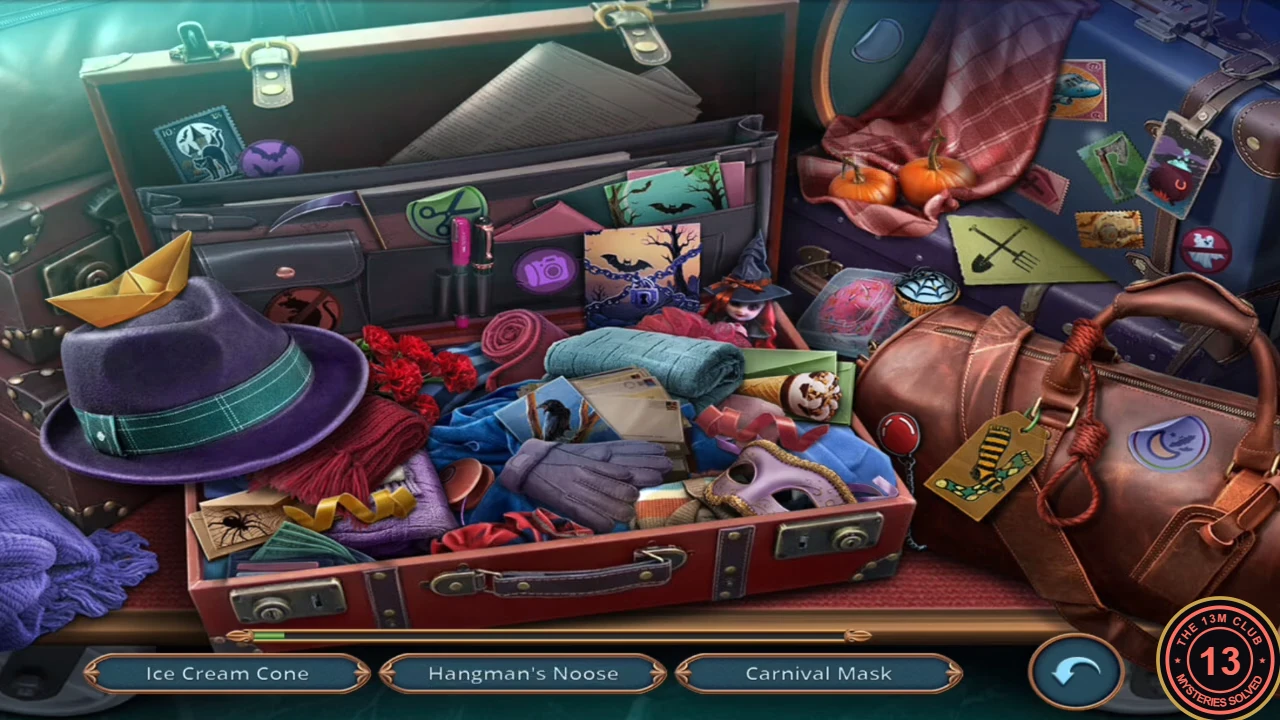
The list at the bottom shows three object names at a time and refills as you find them. Twelve objects are hidden among the suitcases. The steps below give each one's position; the recording's list showed them in this order.
- Halloween Pumpkin: the carved jack-o'-lantern on the plaid cloth at the top right. Hangman's Noose: the knotted rope hanging from the handle of the brown leather bag on the right. Carnival Mask: the lilac mask at the front of the open red suitcase, right of the purple gloves. Carnation Bouquet: the red flowers just right of the purple fedora. Ice Cream Cone: the cone with a scoop, right of the rolled teal towel. Ghost: the white ghost sticker on a red circle, on the blue suitcase at the top right.
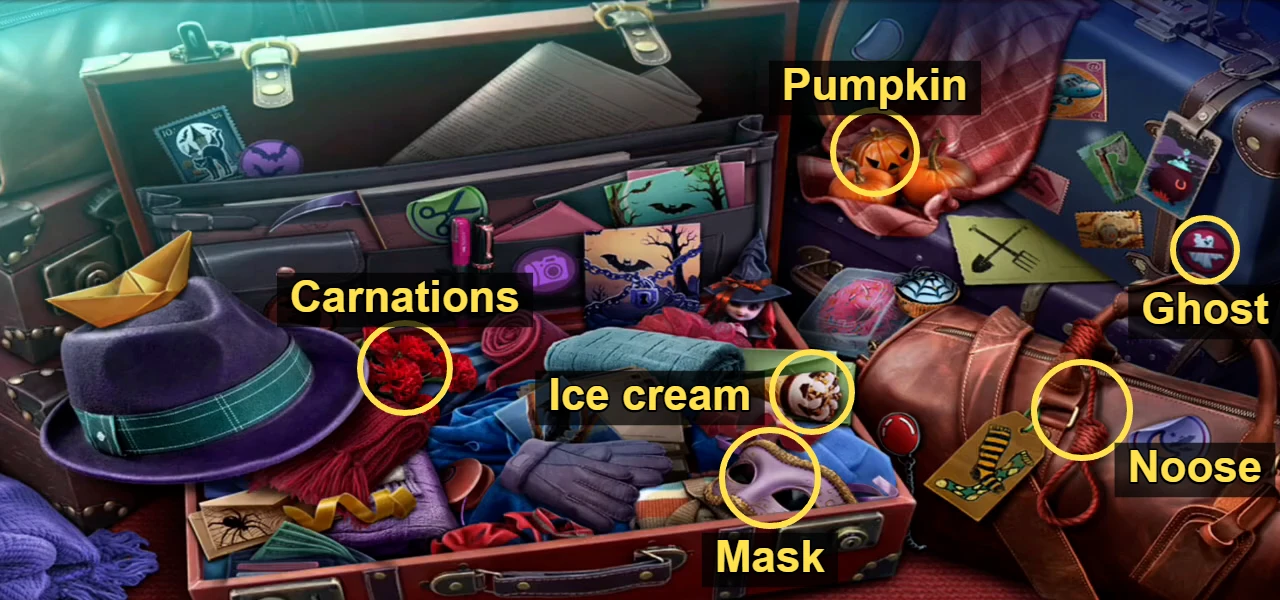
Locations of the first six objects. - Halloween Cake: the cupcake with cobweb icing beside the pink-gem box, in front of the pumpkins. Paper Boat: the yellow folded boat on top of the purple fedora. Red Balloon: the small red balloon on a chain between the red suitcase and the brown bag's yellow tag. Witch Hat: the pointed hat on the doll at the back of the suitcase. Scythe: the purple curved blade in the pocket of the open suitcase lid, upper left. Yo-yo: the brown yo-yo among the clothes, beside the yellow ribbon left of the gloves.
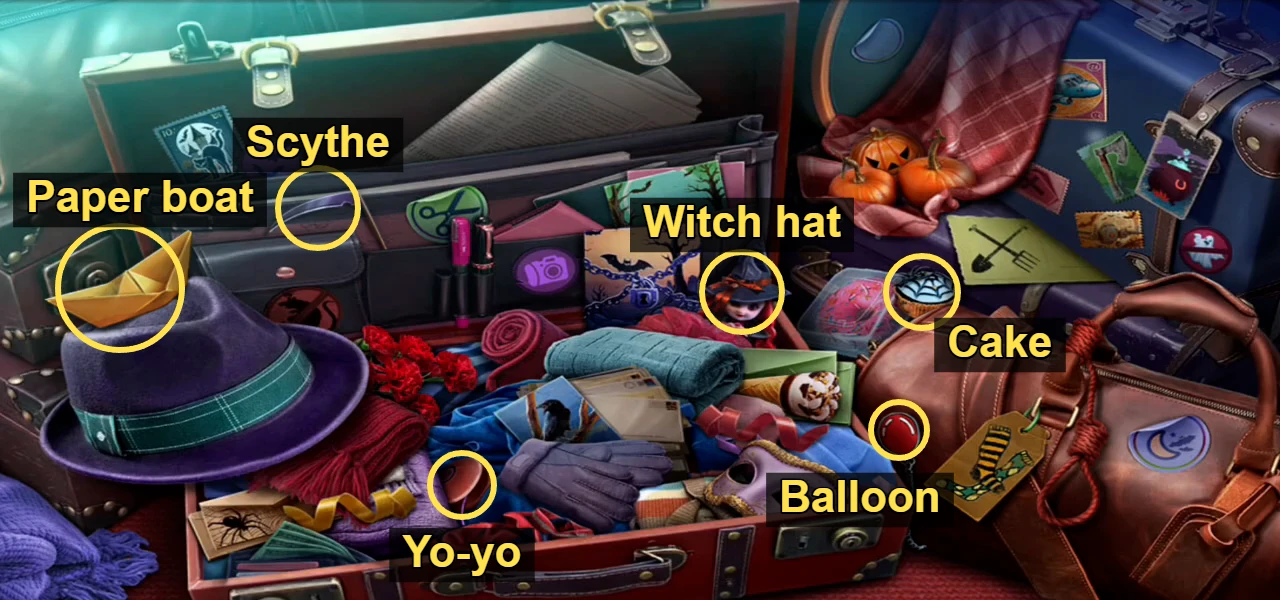
Locations of the other six objects. - When the list is empty, a Thermos with Tea pops out of the clothes in the middle of the suitcase and you receive it. Finishing the scene within one minute also earns an achievement.
Thaw the door and meet Igor
The door upstairs has a card reader and a gargoyle handle frozen in ice.
- Tap the upstairs door and pour the Thermos with Tea on the frozen handle. The ice melts, the card reader turns green and the door opens.
- Igor appears with a dagger and does not recognise you. Find Igor completes and the new task is Calm Igor down.
- In the upstairs hallway, the Aquamarine Mermaid door is covered in cobwebs; leave it for later. Tap the harp in the bottom-left foreground and take the blue portable monitor.
- Use the red-handled tuning key on the harp. The harp puzzle starts.
Harp strings
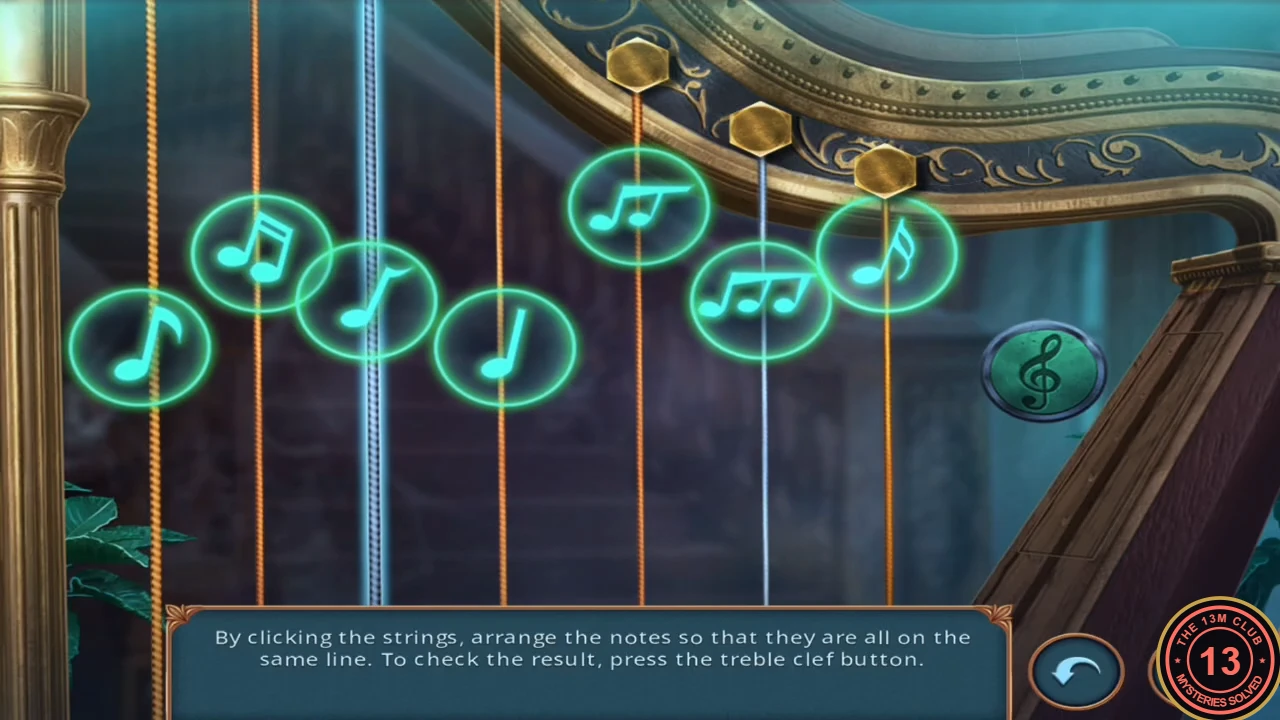
"By clicking the strings, arrange the notes so that they are all on the same line. To check the result, press the treble clef button." Tap one string (it glows blue), then tap another to swap the two strings. Number the strings 1 to 7 from left to right.
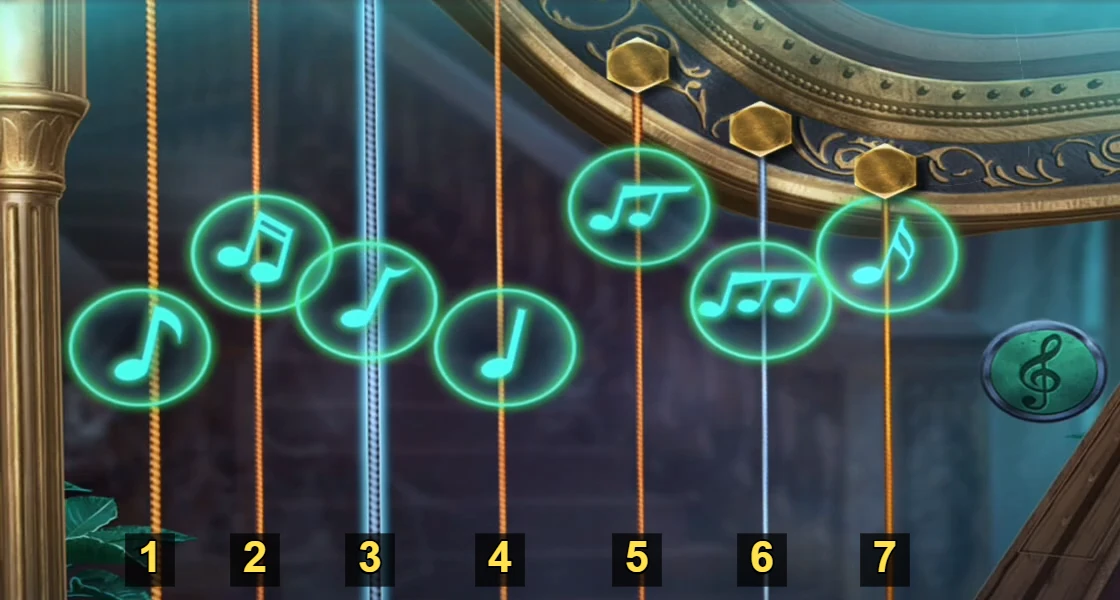
- Swap string 2 with string 3, string 7 with string 5, and string 4 with string 6. These are the swaps from the recording; if your notes still do not line up, your strings may start in a different order, so keep swapping before you check.
- Press the treble clef button. The notes slide onto one line and a compartment opens in the harp's base; take the wooden-handled knife.
Parquet floor and pumpkin key
An outlined square in the hallway parquet is a hidden trapdoor.
- Tap the outlined square in the centre of the parquet floor. Place the boot and the nails there; the nails stand up in the floor.
- Open the red plush toy in the inventory and cut its heart patch with the knife. Take the defibrillator paddle and the pumpkin-topped key from inside.
- Tap the small suitcase on the armchair on the right and use the pumpkin key on its lock. A tumbler puzzle starts.
Suitcase tumblers
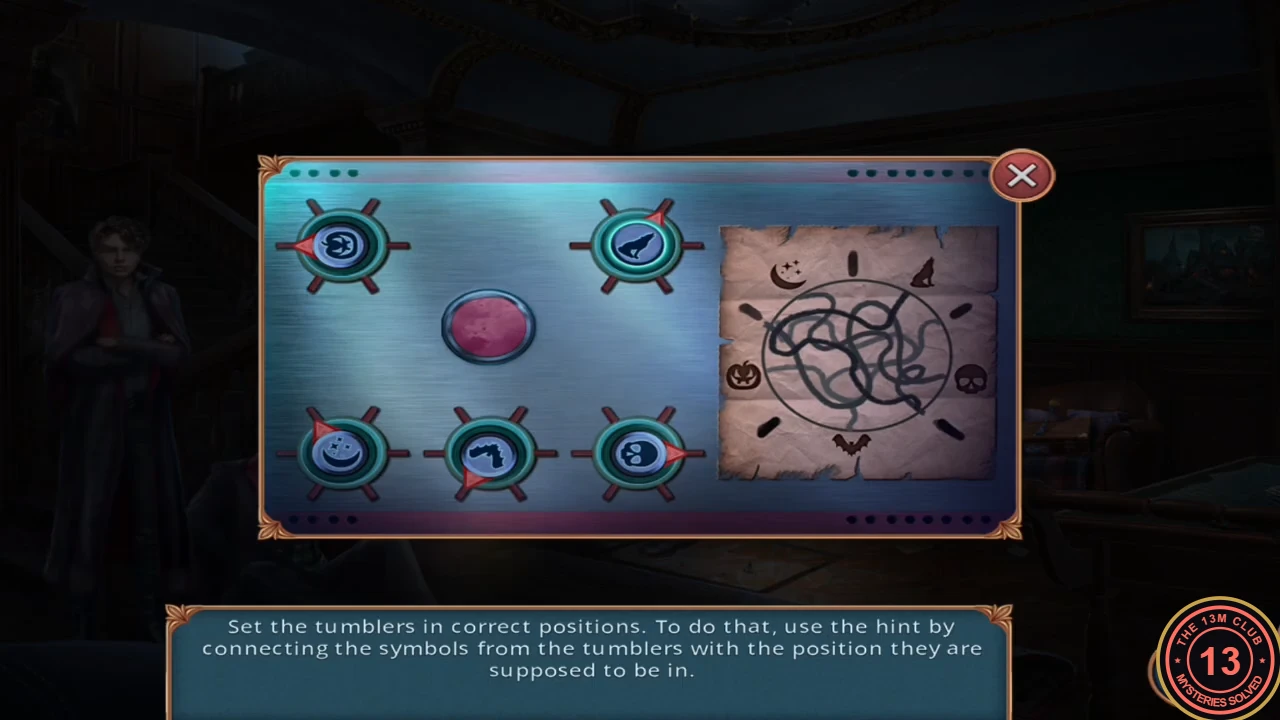
"Set the tumblers in correct positions. To do that, use the hint by connecting the symbols from the tumblers with the position they are supposed to be in." Five dials (pumpkin top left, wolf top right, moon bottom left, bat bottom centre, skull bottom right) each have a red pointer that can face up-left, up-right, left, right, down-left or down-right; tap a dial to turn it. The tangled lines on the parchment at the right link each symbol to its position.
- Set the pointers: pumpkin up-left, wolf down-right, moon down-right, bat up-right, skull up-left. If your parchment differs, follow each symbol's line to its position instead. The suitcase opens.
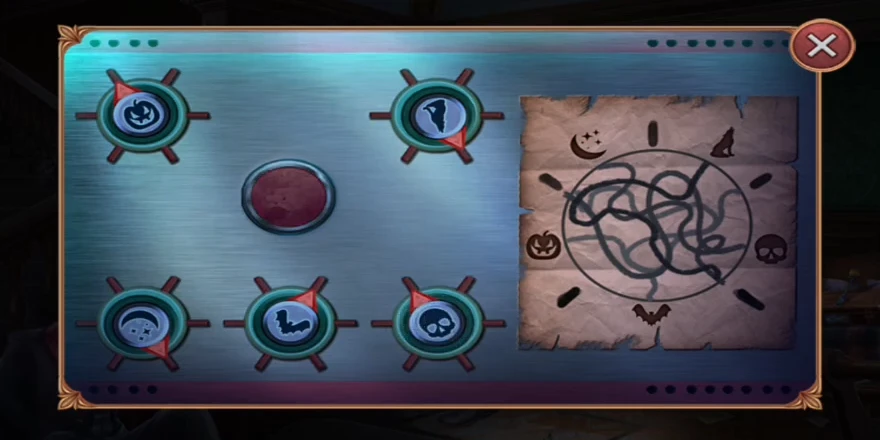
The solved pointer positions from the recording. - Take the copper octopus figurine piece and the red-handled handle.
Trapdoor safe
The handle completes the trapdoor in the parquet.
- At the parquet square, place the red-handled handle between the nails, then use the boot to hammer it in. The trapdoor opens.
- Look down at the wall safe. Take the second defibrillator paddle and the bat emblem hanging from its handle. The safe needs a four-digit code you do not have yet.
- In the inventory, combine the monitor with the paddles. The defibrillator is still missing a part.
- Go down to the lobby and tap the luggage cart to start another hidden-object search.
Luggage cart silhouettes
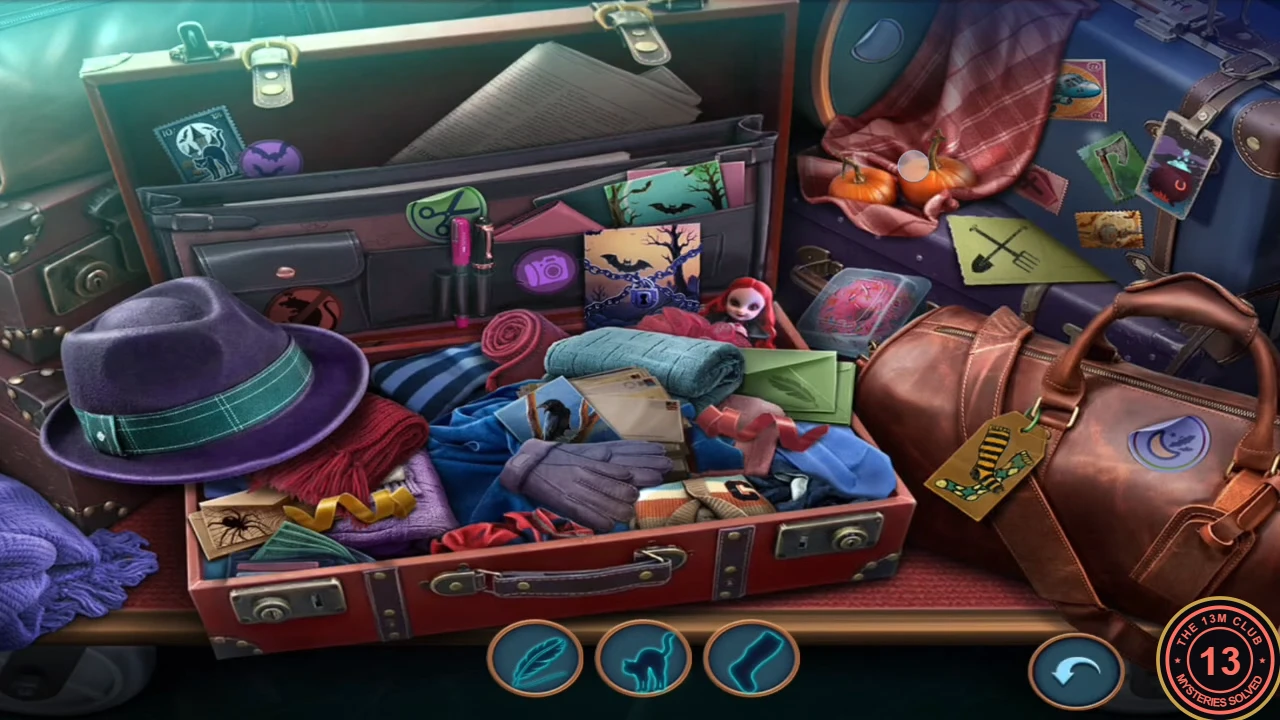
This search shows silhouettes instead of names: three outlines sit in the bar at the bottom and refill as you find objects. The scene looks like the earlier luggage search, but the twelve targets are different, and most of them are pictures on stickers, stamps and cards. They are listed below in the order the recording's bar showed them.
- Cat: the black cat on the stamp at the top left of the open lid. Spider: the spider drawn on the card at the bottom left of the red suitcase. Stocking: the striped stocking on the brown bag's yellow luggage tag. Pitchfork: the pitchfork crossed with a shovel on the yellow sign right of the pumpkins. Feather: the feather on the green envelope right of the rolled teal towel. Rat: the rat on the round red sticker below the black purse in the lid.
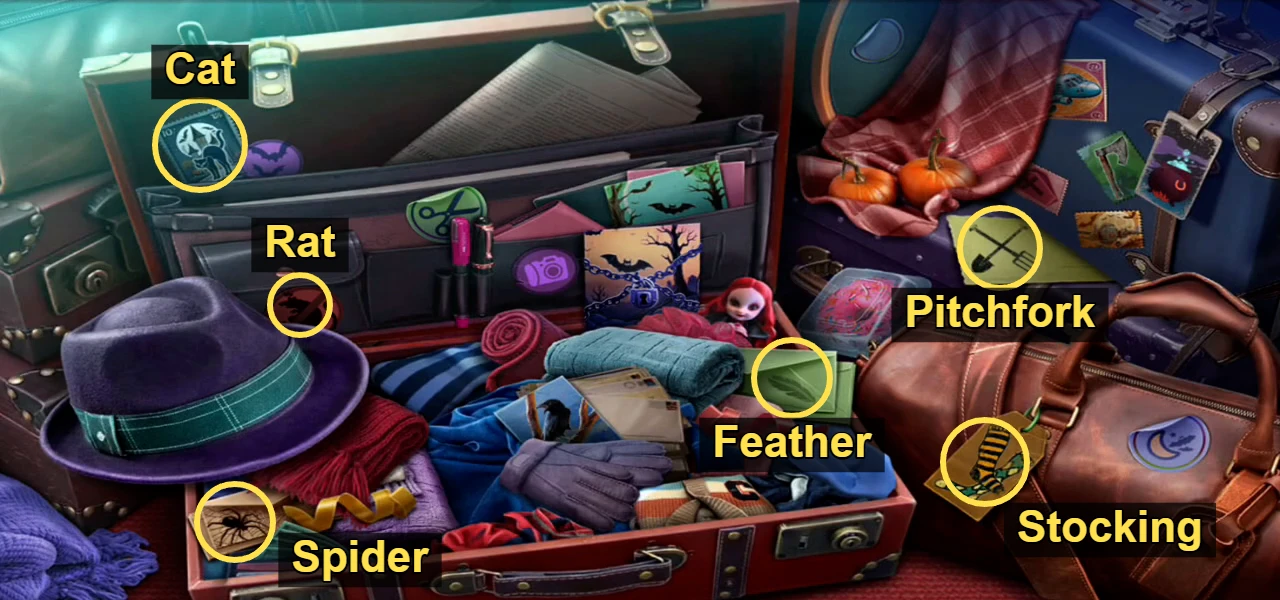
Locations of the first six silhouettes. - Padlock with chains: on the bat-and-tree card in the middle of the lid pocket. Scissors: the green scissors sticker at the top of the lid pocket. Cauldron: on the luggage tag hanging at the top right. Axe: the green stamp with an axe at the top right. Raven: the raven postcard among the clothes in the middle of the suitcase. The last outline, a tilted five-sided shape, is the small pink stamp tucked under the plaid cloth, left of the axe stamp. You receive the Defibrillator Button.
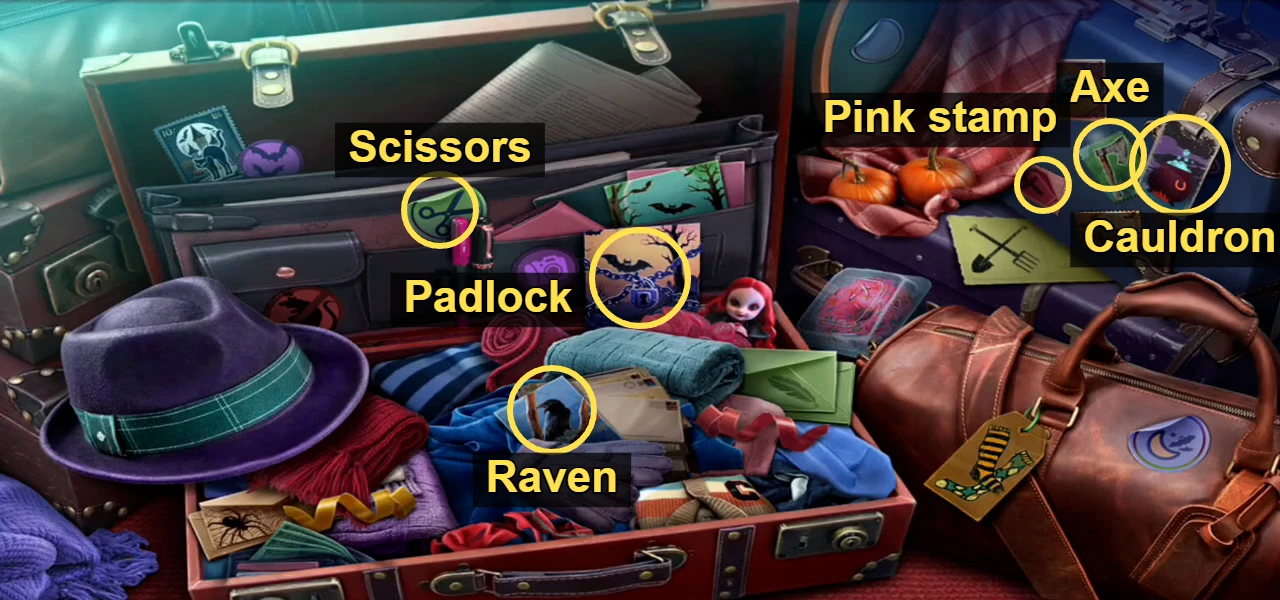
Locations of the other six silhouettes. The pink stamp is the tilted five-sided outline.
Calm Igor down
With the button the defibrillator is complete.
- Attach the button to the defibrillator in the inventory; its screen lights up.
- Go upstairs and use the defibrillator on Igor. He comes back to himself and tells how Abraham used an artifact on him.
- Igor mentions a passage to the old graveyard. Choose "It sounds fascinating!" (worth 6 decision points; it cost 1 key in this recording, while an older 2024 recording showed 45 coins for it). The rest of this guide follows that reply. The free reply, "We don't have time for this!", is worth 0 points and is described in the next step.
- If you choose "We don't have time for this!" instead, Igor answers "Are you not concerned that you'll miss something significant? Well... As you wish." and still hands you the Wonder Bag ("Don't scamper away without this. Good luck."). Calm Igor down completes and Find Abraham begins, but no portal to the cemetery opens. Open the Wonder Bag in the inventory to take the screwdriver and flashlight. Then open the bat emblem in the inventory and use the screwdriver on it; the screwdriver waits beside the bat until you find its plan. You must do this here, because on this route you skip the cemetery, where the main route repairs the bat. Follow the rest of this guide but skip everything that takes place in the cemetery: the sections First cemetery visit, Star emblem and the raccoon, Cut the thorns and open the chest lock, and the Chest ball maze puzzle (the chest stands in the cemetery). Also skip the red-hook step in the merman portrait niche and the axe step on the terrace. Nothing else on the route needs them.
- Igor gives you the Wonder Bag and a portal opens in the hallway. Calm Igor down completes and Explore the cemetery begins. Step through the portal into the cemetery.