Search the jail cell
Horror on Halloween is an episode inside the Mystery Files collection. You start locked in a dungeon cell; your first task is Get out of the jail cell.
- In the Mystery Files collection, open Gloomy Tales: Horror on Halloween (Episode 3) and press PLAY. After the opening scene, the task Get out of the jail cell appears.
- Tap the bag on the cot. Take the Bengal Fire packet, the telescopic rod, the green record and the red belt.
- Tap the broken arched window. Use the belt on the glass shards to clear them, then take the ladle, the boot and the wooden comb from the alcove.
- Tap the washbasin. Two nails hold a loose board on the cabinet below the basin: use the wooden comb on them to lever both nails out. Take the two nails; the cabinet opens and reveals a set of tubes and valves.
Washbasin valves
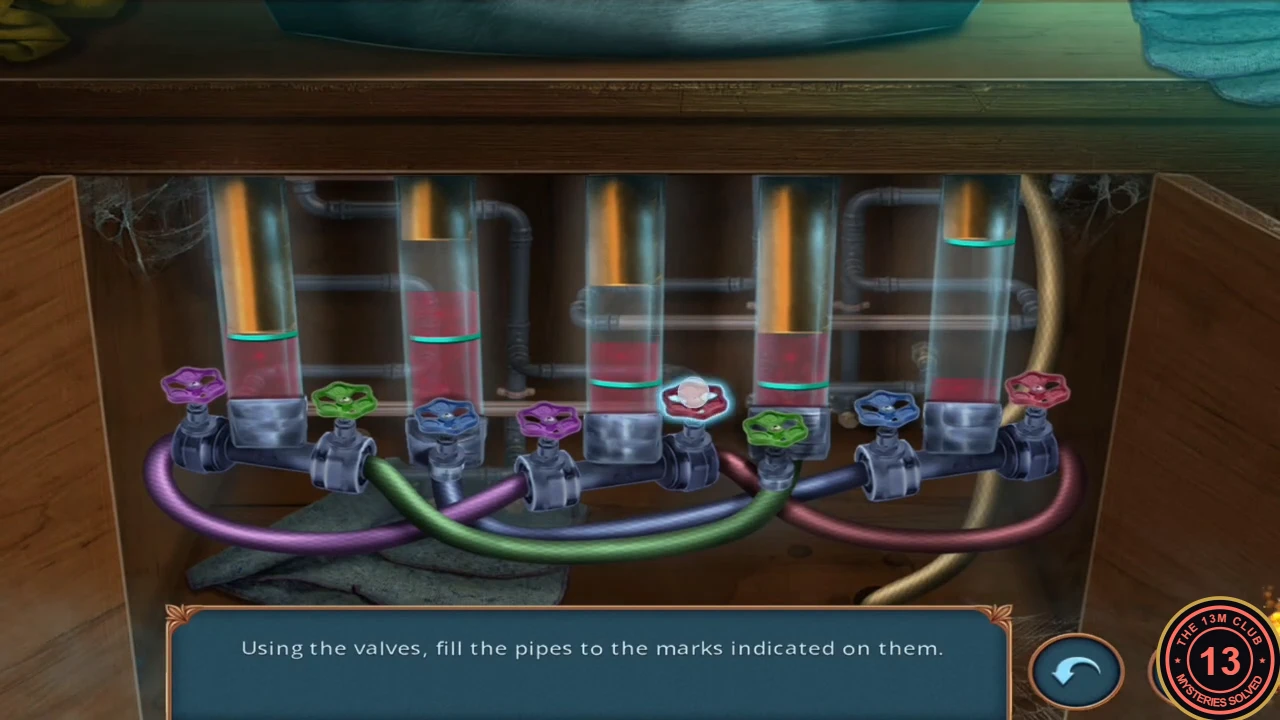
Five glass tubes (called 1 to 5 here, from left to right) must each end at the level marked on it. Coloured valves sit beside the tubes, and a hose joins the two valves of each colour: purple joins tubes 1 and 3, green joins 1 and 4, blue joins 2 and 5, and red joins 3 and 5. Tapping a valve pours liquid from the tube that valve belongs to into its partner tube, until the first tube is empty or the partner is full. In equal units the tubes hold 2, 4, 3, 2 and 4, start with 2, 3, 2, 2 and 1, and must finish with 2, 2, 1, 1 and 4. The seven presses below were worked out from that behaviour; the recorded player needed many more.
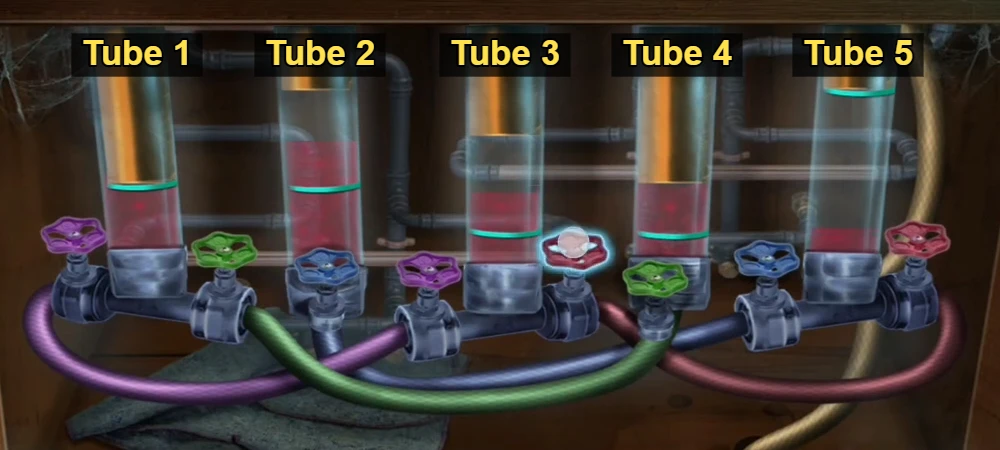
- Tap the purple valve at the far left (tube 1), then the green valve below tube 4, then the red valve to the right of tube 3.
- Tap the purple valve at the far left again, then the red valve at the far right (tube 5), then the purple valve to the left of tube 3, and finally the blue valve below tube 2. Every tube now sits on its mark and the puzzle closes.
- Tap the drained washbasin and take the green plant cord.
Hook down the pouch
Something is stuck in a high crevice above the cell, too far up to reach by hand.
- Tap the high crevice in the wall to the left of the cell door, near the top. The telescopic rod alone is too short.
- Open the telescopic rod in the inventory and add the ladle and the green plant cord to make a long hook.
- Use the long hook on the crevice. A red pouch drops to the floor. Its lock is broken, so leave the pouch for now, but take the golden scissor-shaped handle lying beside it.
- Tap the grate of the cell door and insert the golden handle. The rod puzzle starts.
Cell door rods
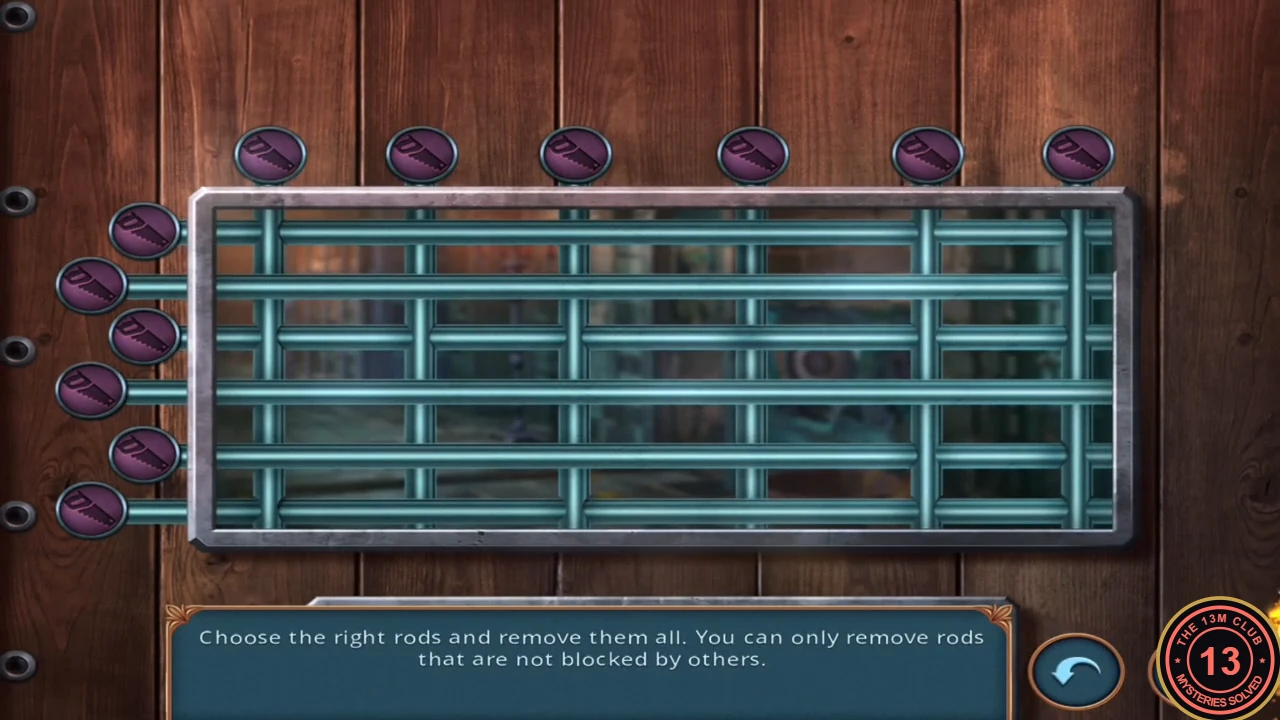
Six vertical rods (knobs along the top) and six horizontal rods (knobs along the left) are woven through the door. Tap a rod to pull it out. Number the vertical rods 1 to 6 from left to right and the horizontal rods 1 to 6 from top to bottom. The order below is the one that cleared the door in the recording.
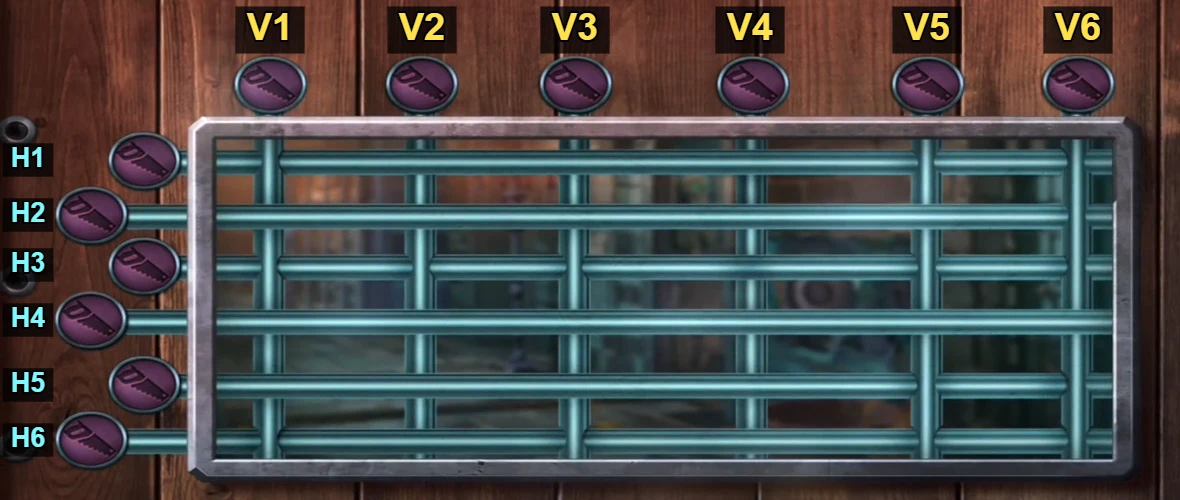
- Pull out vertical 4, horizontal 3, vertical 2, horizontal 6, vertical 3 and horizontal 1.
- Pull out vertical 1, horizontal 5, vertical 5, horizontal 2, vertical 6 and horizontal 4. The grate is clear, the Champion Fingers achievement appears and the cell door swings open. Go through it into the corridor.
The dungeon corridor
The corridor holds a skeleton in a wall niche, a candelabra beside a carved panel, a locked cell on the left and a cell filled with green gas on the right.
- Tap the skeleton niche. A stone beside the skeleton is loose; place the boot against it. The boot stays there for now.
- Tap the candelabra by the carved wall panel. Use the Bengal Fire on its candle (the packet stays in your inventory), then pull the candelabra arm. The panel opens; take the red-stoppered potion.
- Tap the lock of the cell on the left and take the medallion from it.
- Open the medallion in the inventory. Its tag reads "In blood unbound, secrets shroud". Pour the red potion on it: red hearts appear and a gem puzzle starts.
Medallion gems
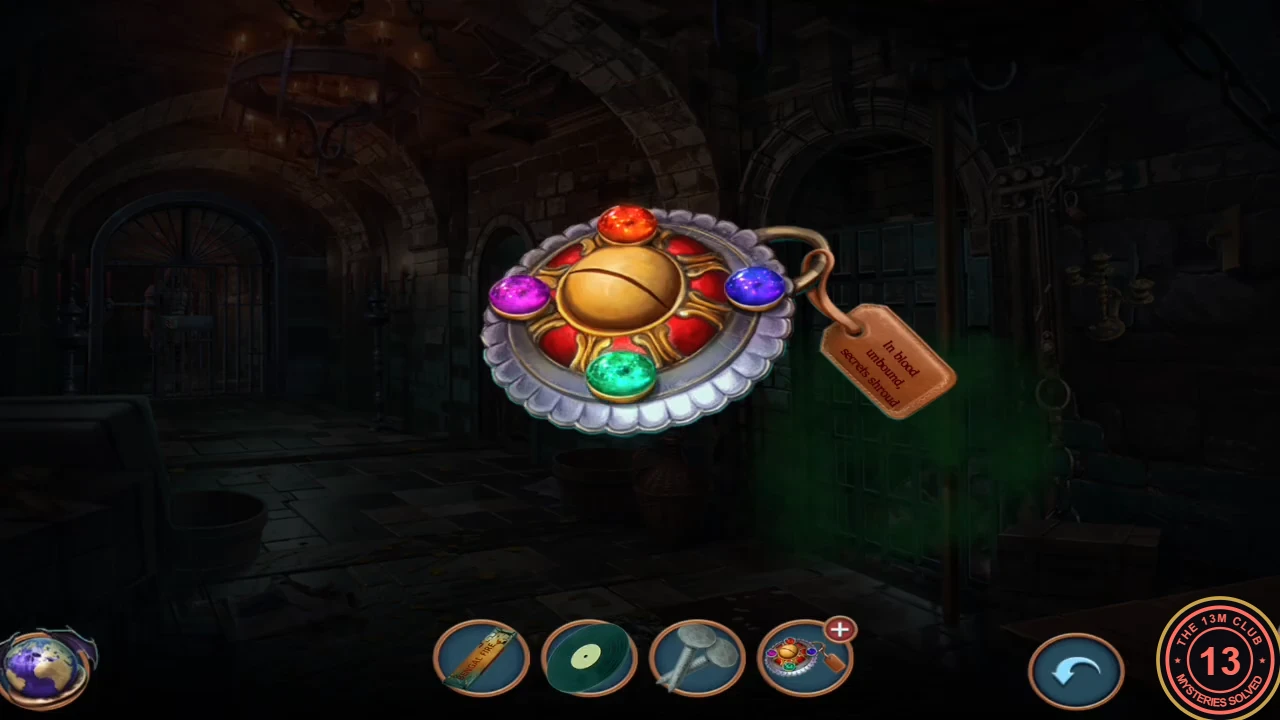
After the potion, four gems surround the medallion's closed eye: purple on the left, red at the top, blue on the right and green at the bottom.
- Press the gems clockwise starting on the left: purple, red, blue, green. This is the order used in the recording; the eye opens.
- In the corridor, tap the round socket in the carved bas-relief panel (centre of the wall, left of the gas-filled gate) and place the medallion in it. The disc puzzle starts.
Bas-relief disc
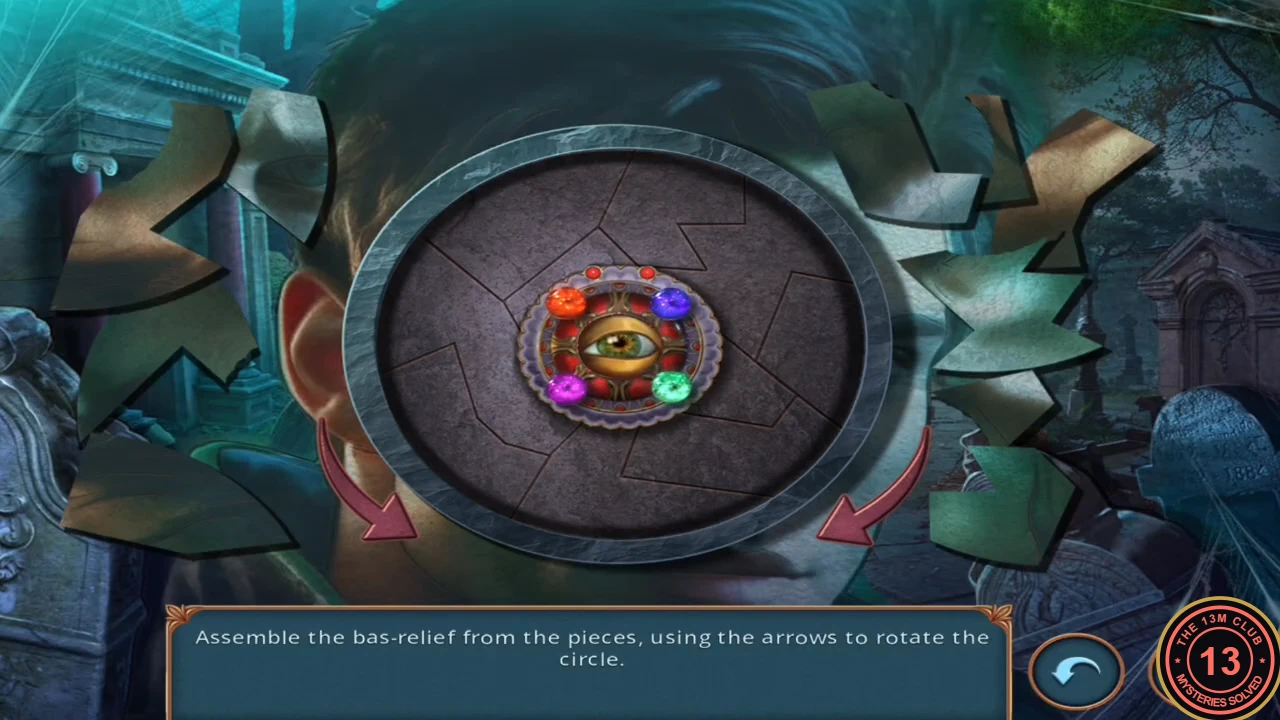
A carved face on a round disc is missing several pieces, and loose shards lie around its edge. The arrows at the bottom left and bottom right turn the disc.
- Turn the disc with the arrows until an empty gap faces a shard of the same shape, then drag that shard into the gap. Repeat until the face is complete.
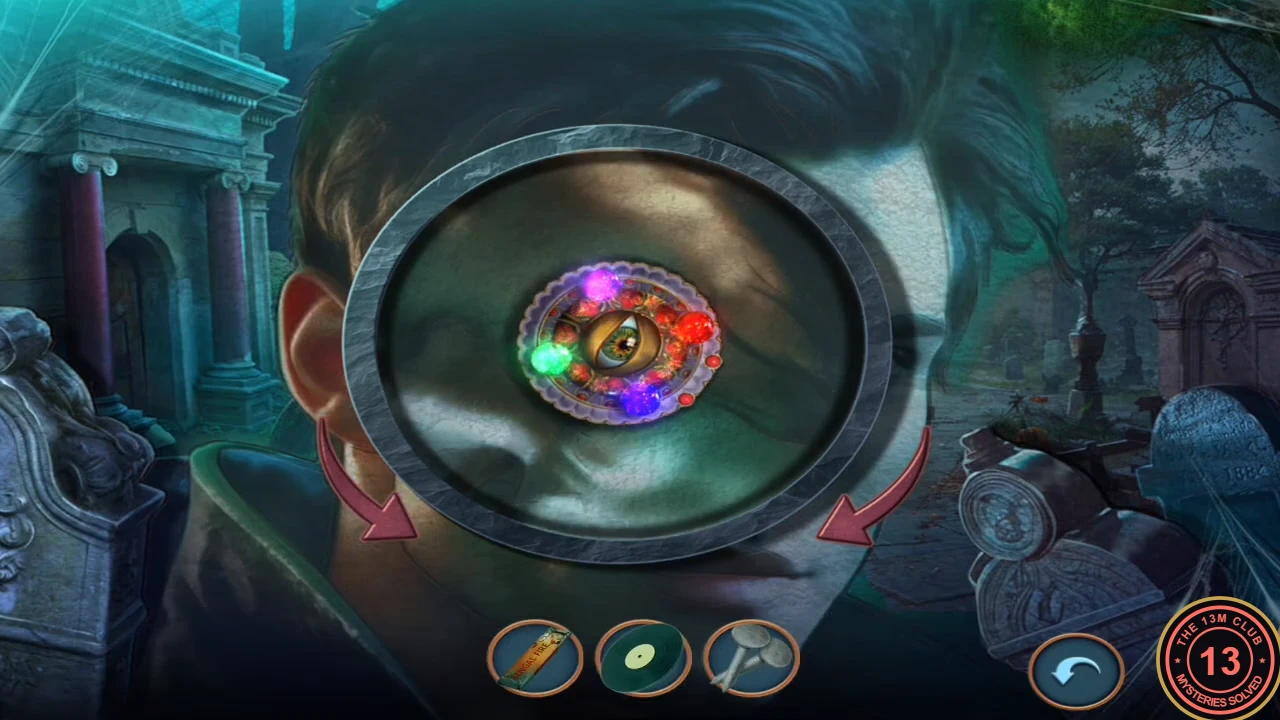
The completed disc just before it opens. - The disc opens. Read the scroll ("In Gorgon's gaze, a dreadful fate befalls...") and take the Gorgon head and the red bandana. The Weirdo! Meet the Gorgon achievement appears.
Clear the gas and find Vlad
Green gas fills the cell behind the right-hand gate.
- Tap the gas-filled gate on the right and use the red bandana on the gas. The gas clears.
- Tap Vlad, who is alive behind the bars, and continue the conversation. Three picture puzzles open one after another as he talks.
Picture tiles
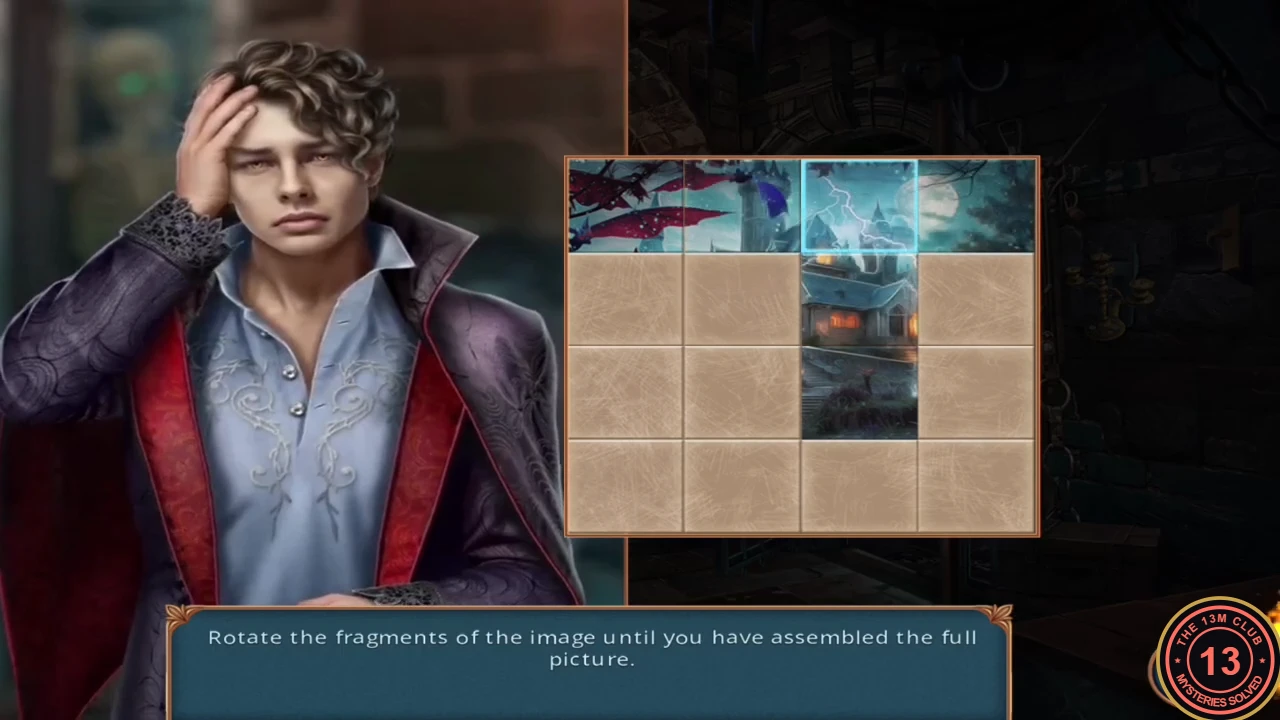
"Rotate the fragments of the image until you have assembled the full picture." The 4 x 4 grid shows each tile either picture side up or plain side up. Tapping a tile turns it over together with the tiles directly above, below, left and right of it. Tapping the same tile twice cancels out, so the order of taps does not matter.
- In the recording the plain backs started at row 2 columns 1, 2 and 4, row 3 columns 1, 2 and 4, and all of row 4 (rows counted from the top, columns from the left). For that start, tap row 1 column 4, row 2 column 3, row 2 column 4, row 3 column 1 and row 4 column 3. The whole picture appears. If your grid starts differently, choose taps so that every plain tile is turned an odd number of times and every picture tile an even number.
Linked lenses
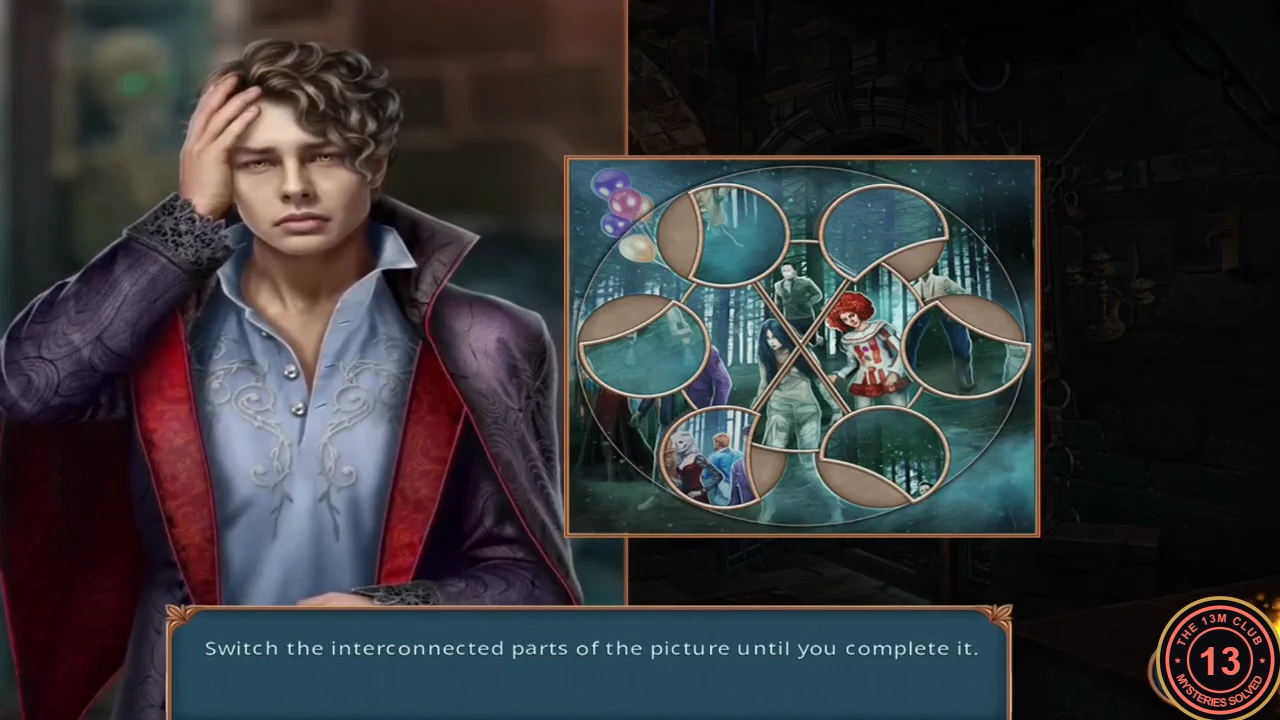
"Switch the interconnected parts of the picture until you complete it." Six round lens pieces sit around the picture: top left, top right, left, right, bottom left and bottom right. Two lines cross in the middle, joining top left with bottom right and top right with bottom left. A move is not a simple two-piece swap. Tap a piece and then the piece diagonally opposite it on one of those lines. The first piece travels to the second spot, and the three pieces on the route between them, which runs across the top of the circle and down the far side, each shift one place back toward where it started, so four pieces move at once. In the recording, moving top right to bottom left likewise shifted the top-left, left and bottom-left pieces. For example, moving top left to bottom right also moves the top-right piece to top left, the right piece to top right and the bottom-right piece to right.
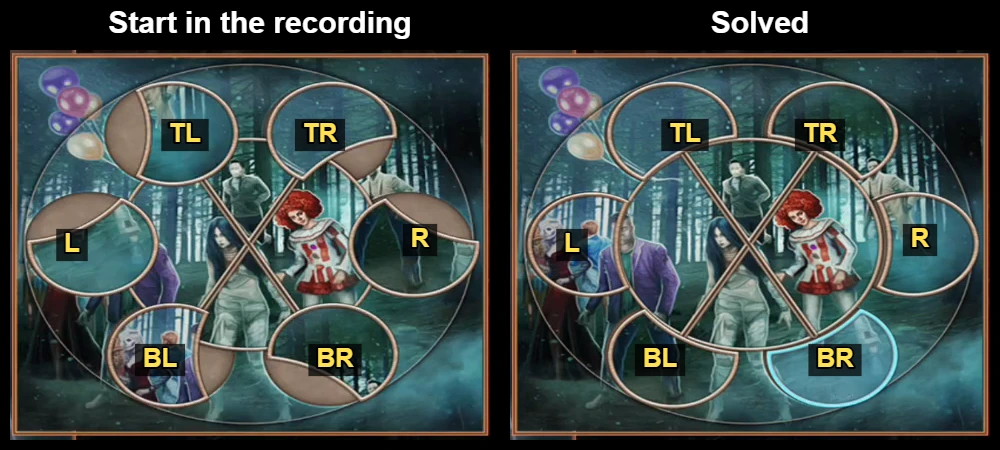
- The recording solved it in three moves: top left to bottom right, then top right to bottom left, then top left to bottom right again. Because each move turns four pieces, repeating the first move does not undo it. If your pieces start differently, use the finished picture as your target: the couple (a woman in red and a man in blue) belongs on the left, the trouser legs of the man in the purple jacket at bottom left, the dark treetops at top right and the pale mist at bottom right. Move one piece at a time toward its spot and check the four pieces that shift before the next move. When every piece fits, the lenses disappear and the Playing with Fire achievement appears (five mini-games without skipping).
Picture strips
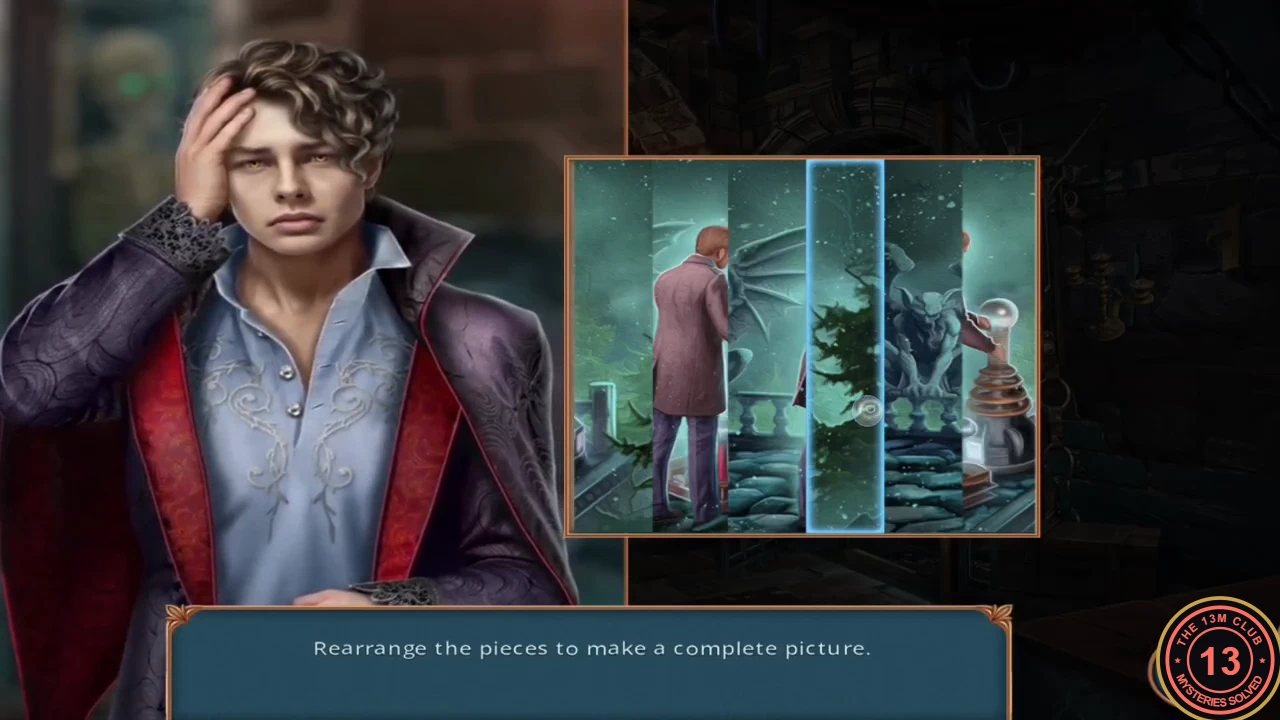
"Rearrange the pieces to make a complete picture." The picture is cut into six vertical strips. Tap two strips to swap them.
- Swap strips until the scene reads correctly: the gargoyle on the left, Abraham in the middle beside the glowing Tesla orb device, and the tree on the right.
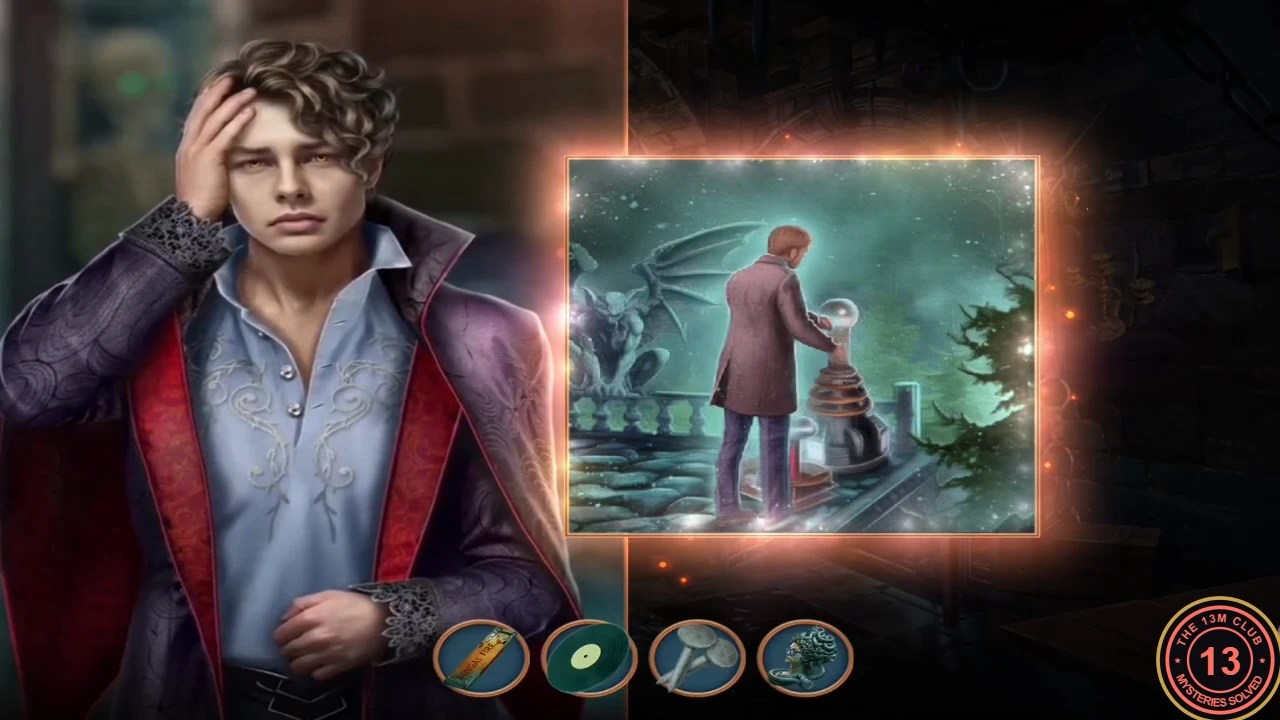
The completed strip picture.
Vlad's gift and the skeleton's key
Vlad explains that opening the portal needs the key and the energy of the Halloween lightning on the rooftop.
- Choose a reply. "We'll save everyone. I can feel it." costs 35 coins and is worth 1 decision point; "I'm not sure we can. Time's short." is free and worth 0. The recording took the free reply. Decision points decide the ending card (see the final section).
- Keep talking until Vlad says "Take this with you. I hope it will serve you well." and hands you a gem.
- In the corridor, place the gem in the skeleton's empty eye socket. Its eyes glow and its jaw drops; take the small golden key from its mouth.
- Go back into the jail cell and use the key on the red pouch on the floor. Take the wooden stick from inside.
Open the knight's cell
Back in the corridor, the loose stone in the skeleton niche and the candelabra both have more to give.
- Tap the skeleton niche and use the wooden stick on the loose stone beside the boot. The boot pops back into your inventory; take the green-handled wrench revealed behind it.
- Tap the candelabra and use the wrench on the nut at its base. Take the candelabra.
- Return to the jail cell, tap the cot and place the candelabra on the floor beneath it to light the dark space. Take the red signet ring.
- In the corridor, use the signet ring on the lock of the left cell, where an armoured knight stands. The gate opens.
- Use the Gorgon head on the knight. After a green glow the knight walks out of the cell and the Gorgon head drops to the floor; pick it up again, then tap the empty cell to start the portal maze.