CHAPTER 24
Prepare the ritual chamber
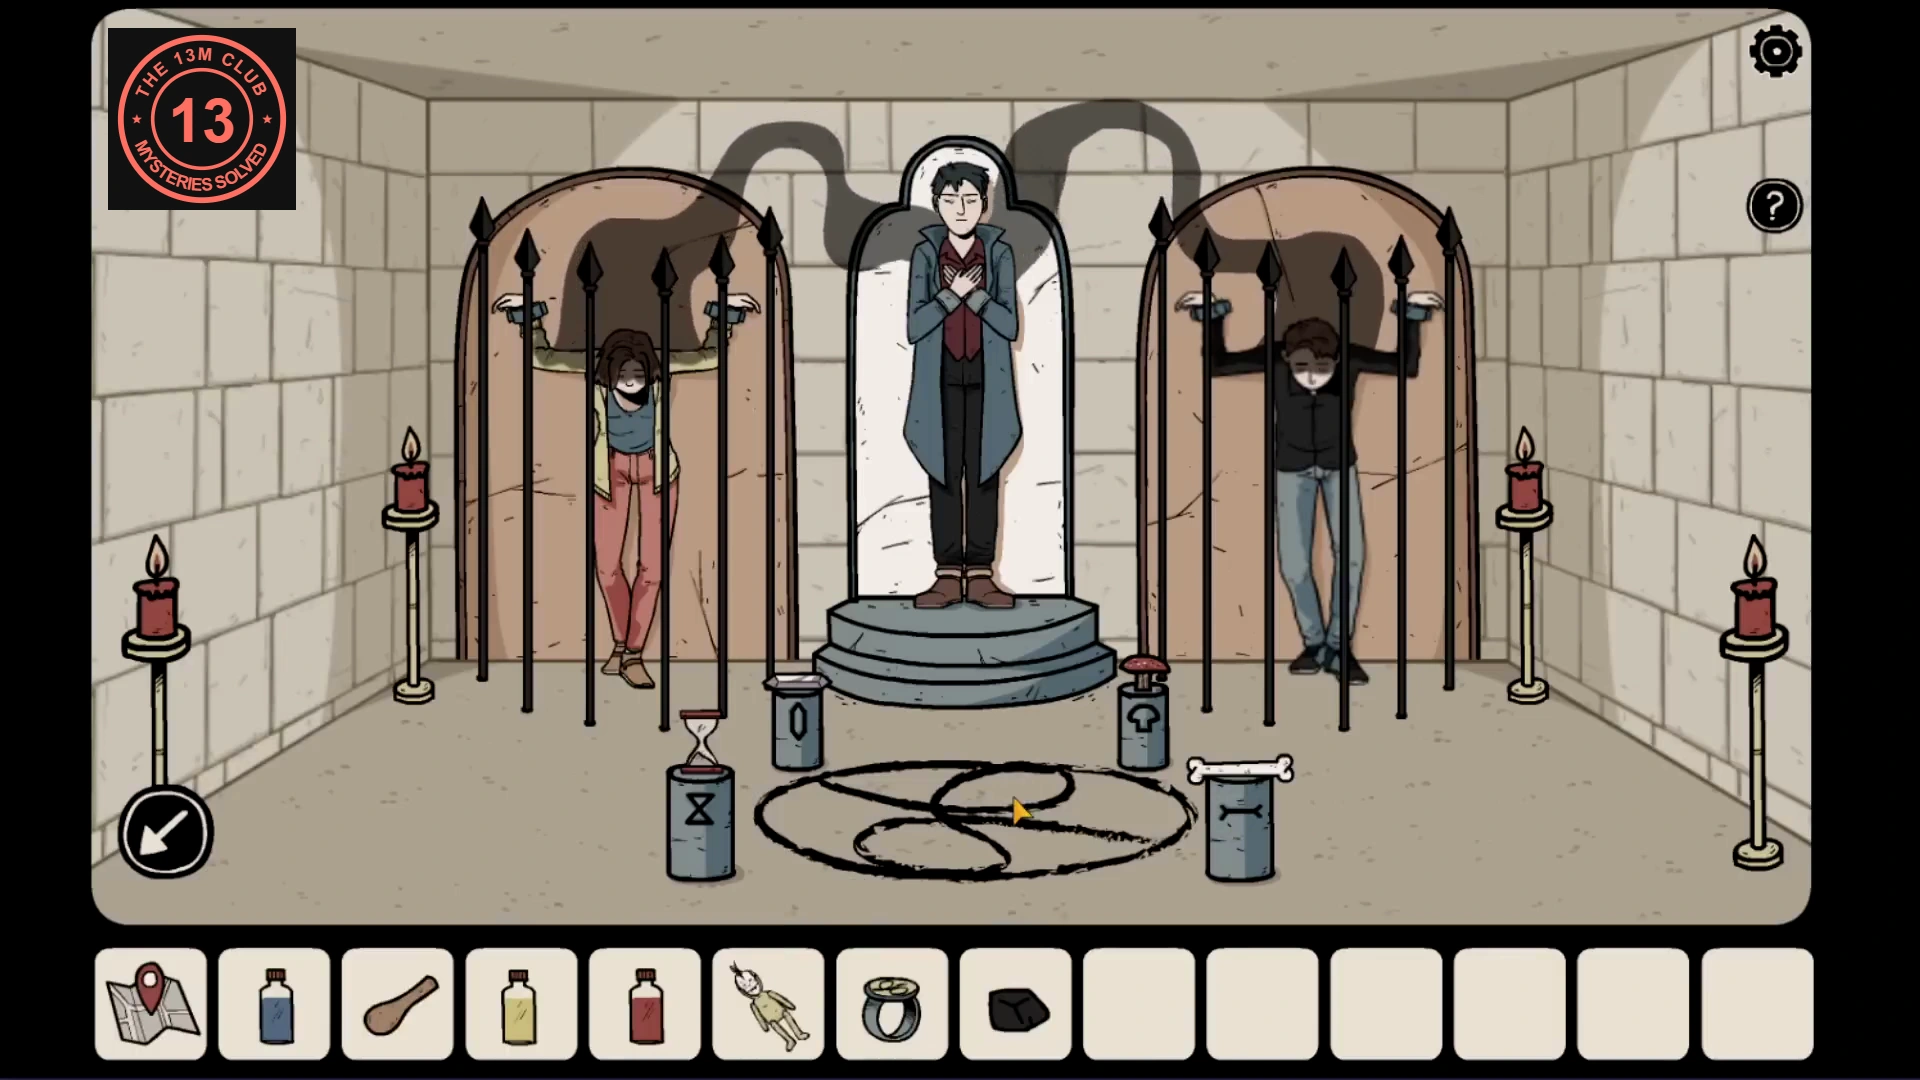
Read the next two sections before completing the guardians: the final confrontation needs a quick action.
- Enter the central doorway between the guardian statues. Place the hourglass, quartz crystal, red mushroom and old bone on the pedestals bearing their respective pictures. From the entrance: hourglass front left, quartz rear left, mushroom rear right and bone front right.
- Combine the ring and ritual doll now, before the confrontation begins. Keep the combined doll ready in your inventory.
- Select the charcoal and use it on the large floor symbol between the pedestals. Continue the scene as Ren redraws the symbol in reverse. Two guardian diagrams appear on the chamber walls.
CHAPTER 25
Match the guardians and stop Frederick
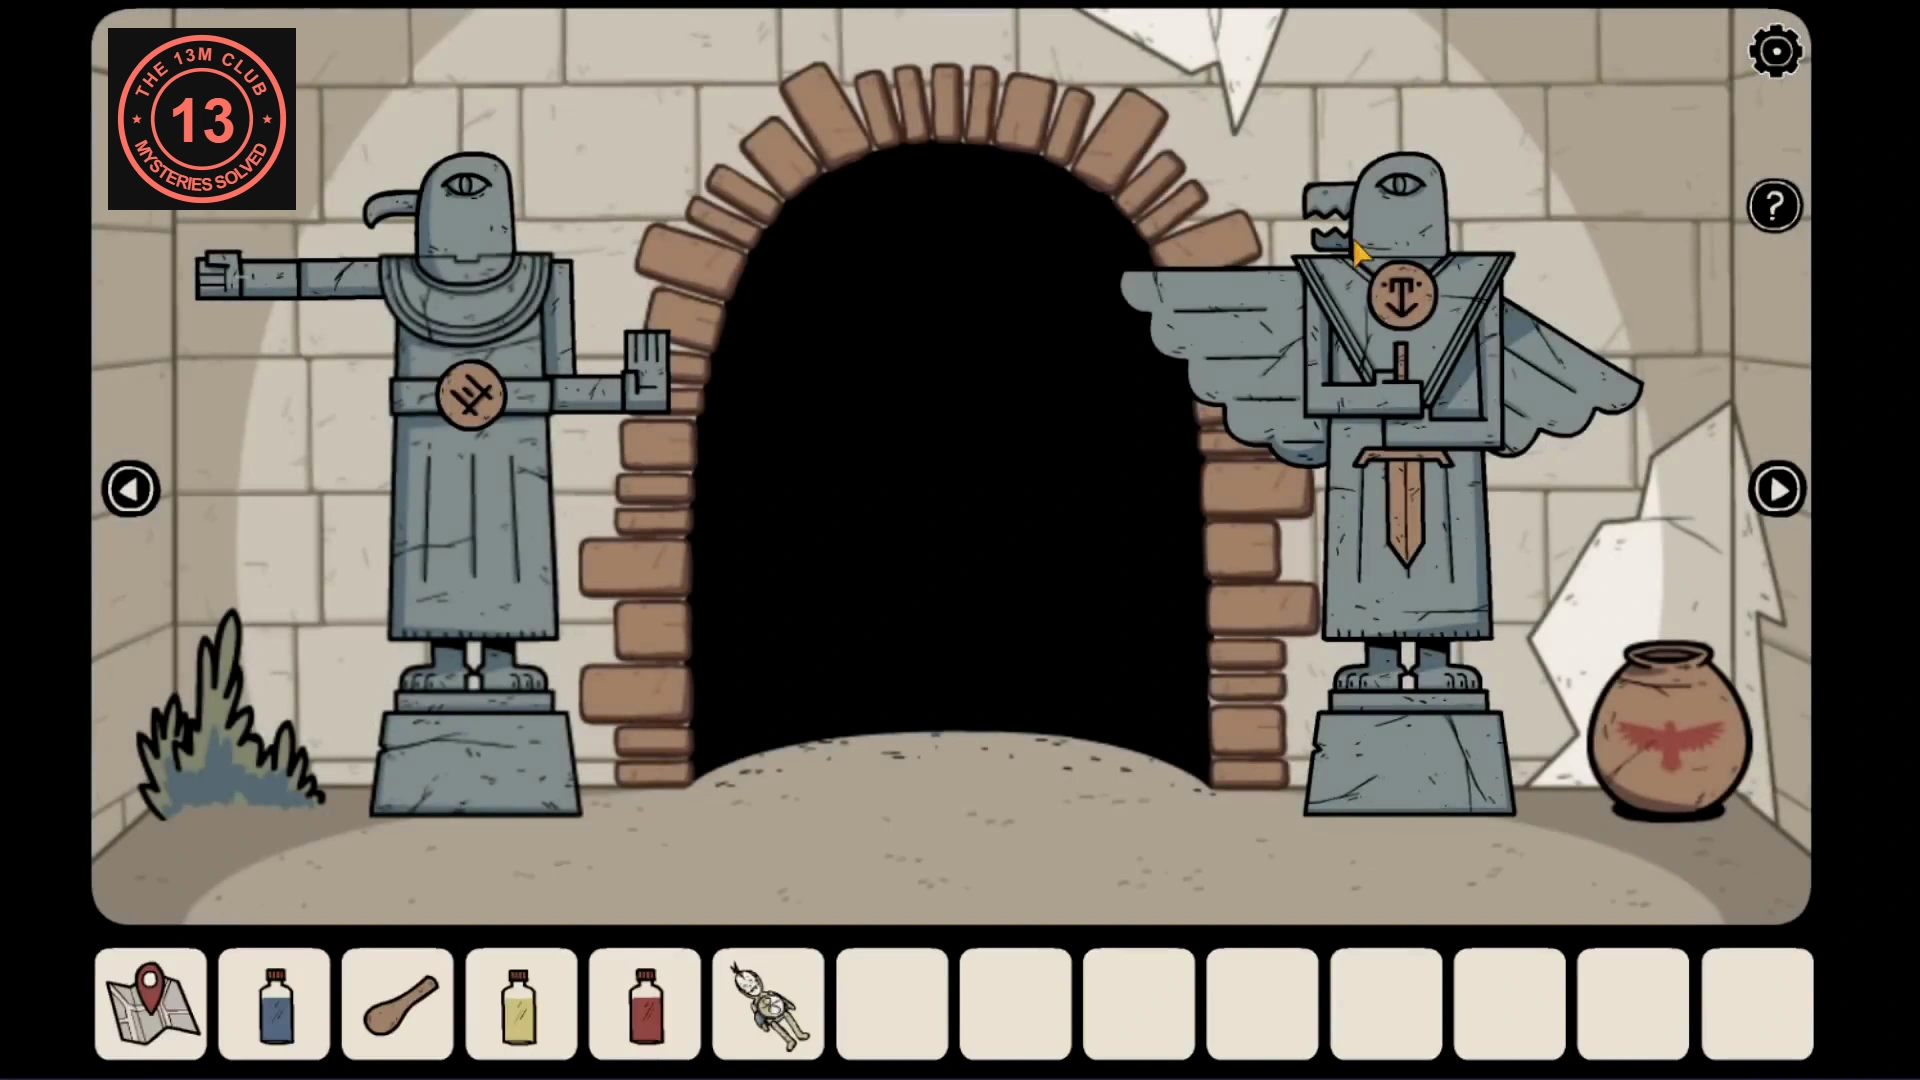
Use the wall diagrams inside the ritual chamber as the models for the statues outside.
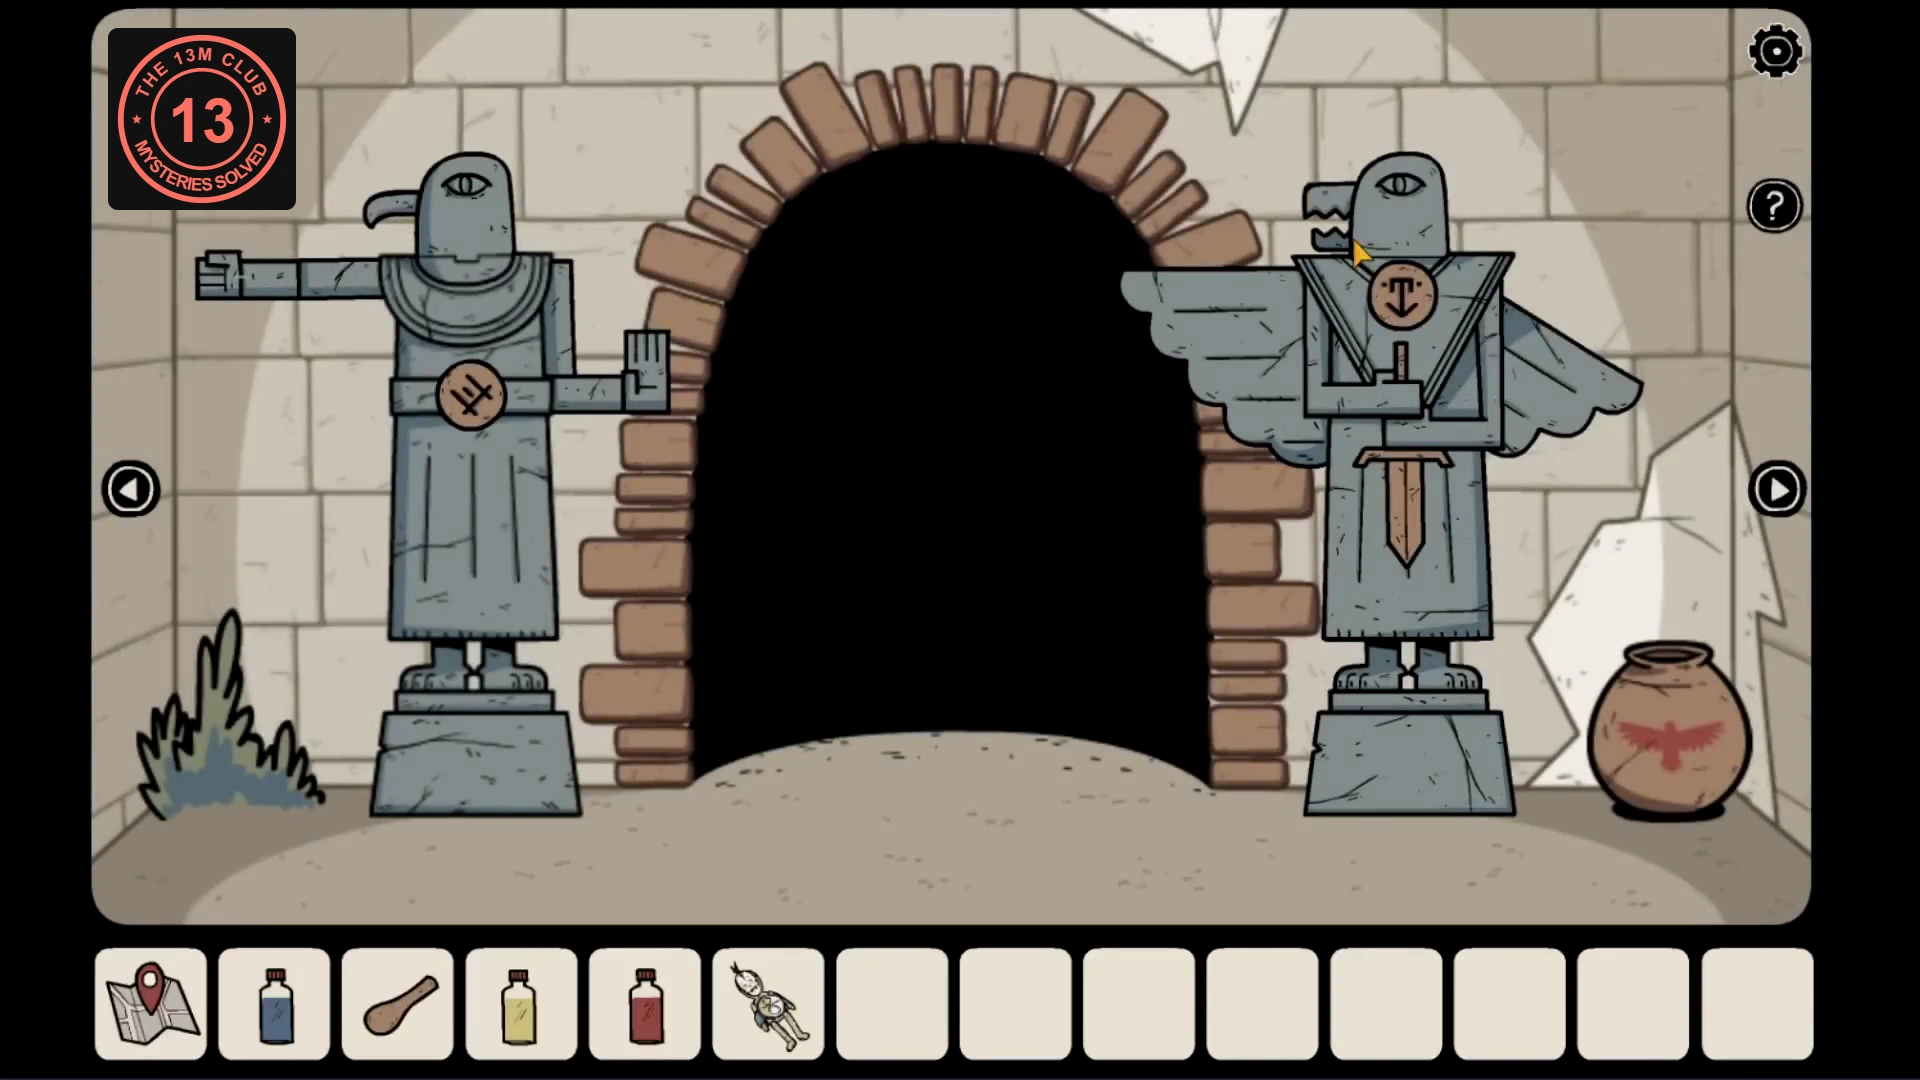
- Inspect the left wall diagram in the ritual chamber, then return to the left guardian outside. Adjust its head, arms and belt symbol to match the diagram exactly.
- Check the right wall diagram and set the right guardian’s beak, wings, sword and chest symbol to match. Completing both statues frees Anna and Lian and starts the confrontation.
- Continue the dialogue until the inventory returns and Frederick stands above the floor symbol with a shadow behind him. Immediately select the doll with the ring and use it on Frederick at the floor symbol by his feet. The doll lands on the symbol and traps him. Waiting instead of using the doll leads to the failure ending.
EXTRA 26
The owl reward and the final box
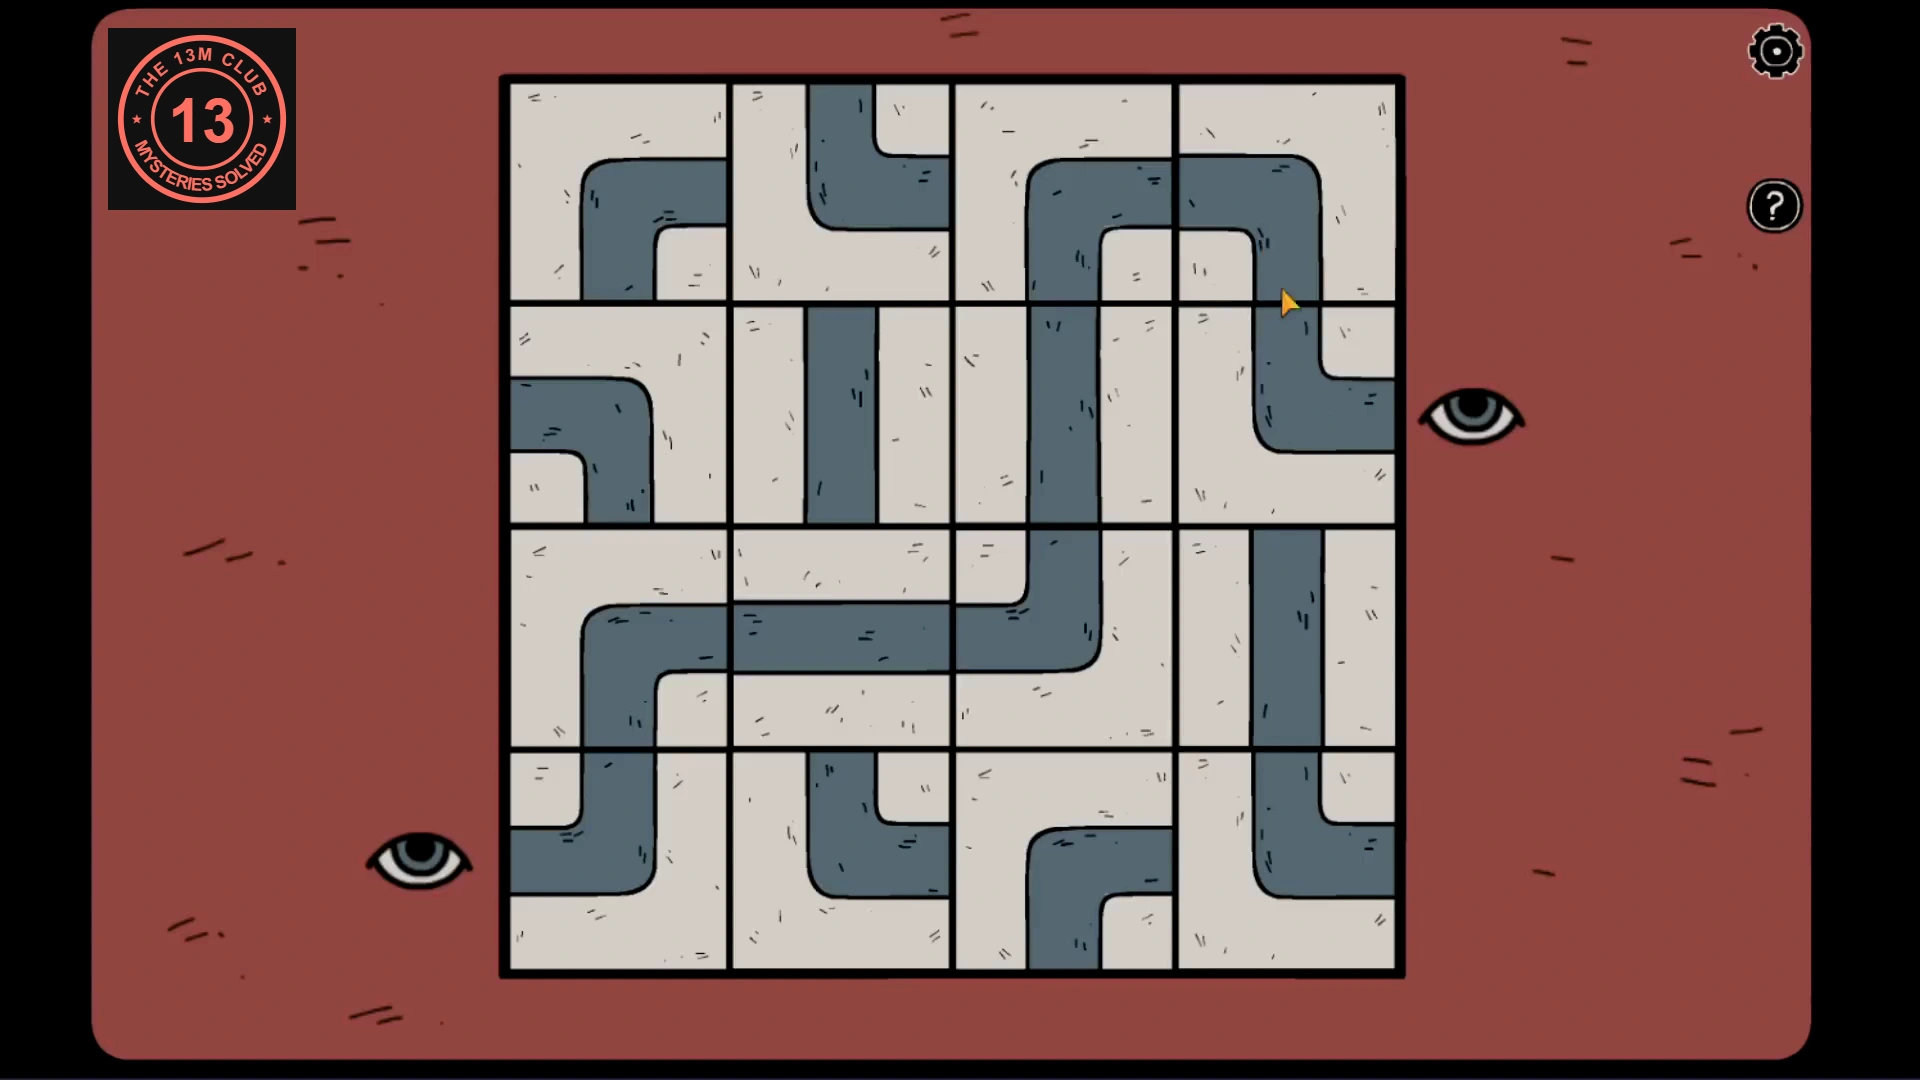
Continue through the cemetery and shop scenes after the successful ending.
- Advance through the closing scenes until Ren has handed the doll to Laia. When the red box and owl statuette appear, tap the statuette to view the reward for finding all nine owls.
- Tap the red box. Rotate the tiles until a continuous pipe joins the two eyes. Number rows from top to bottom and columns from left to right. In the shown layout the route is (4,1) → (3,1) → (3,2) → (3,3) → (2,3) → (1,3) → (1,4) → (2,4), then out to the right eye; these are tiles 1–8 in the picture. Turn each tile to connect to the preceding and following tile; ignore unused branches.
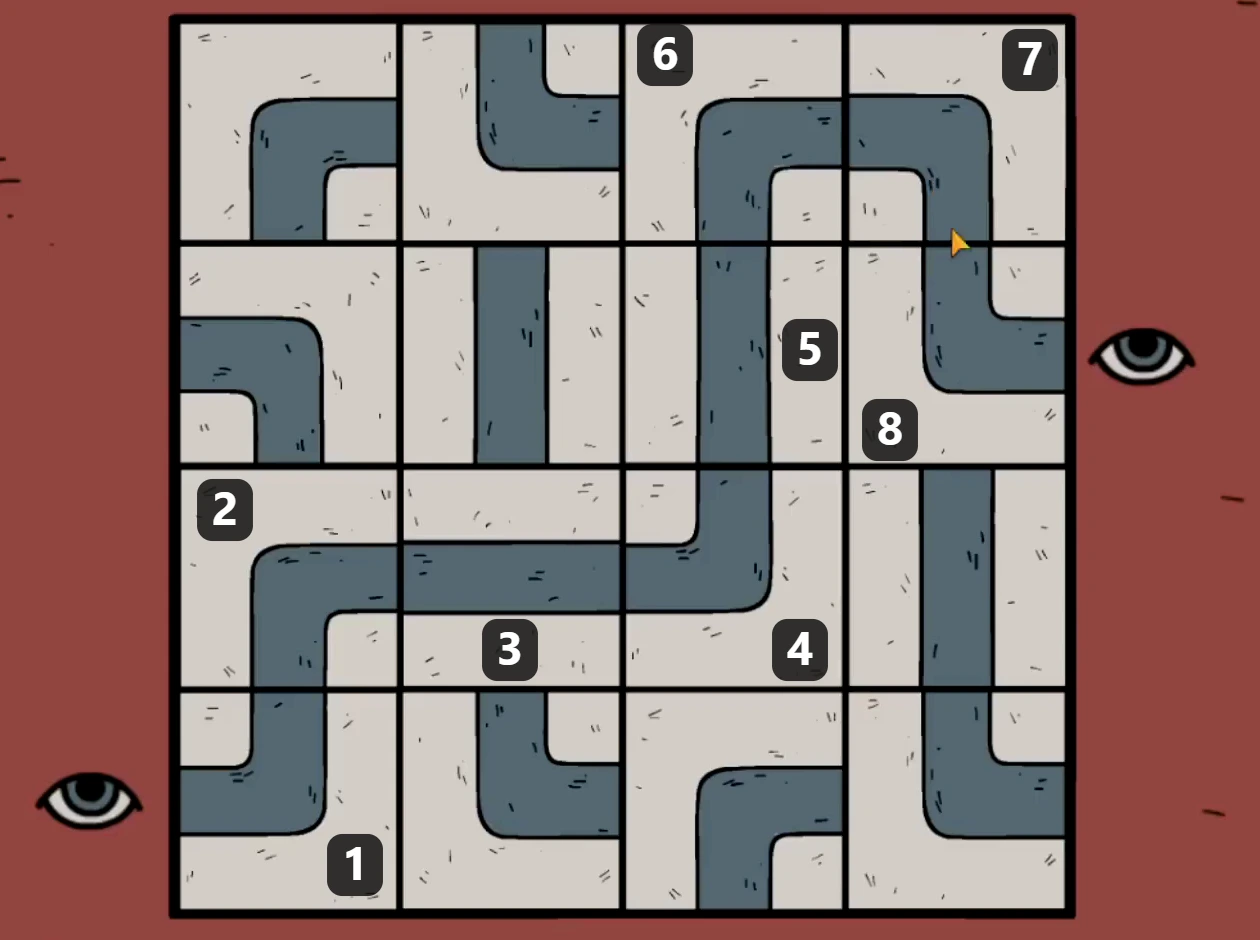
The numbered tiles form the connecting route in this layout; the unused tiles do not need to form a second path. - Continue the scene after the box opens to see its contents and the final reveal. This finishes the main story, the nine-owl collection and the box epilogue.