CHAPTER 9
Find Lian and deliver the letter
The station’s projector identifies the first witness.
- Travel to the police station. Put the slides into the projector and press its power button. Advance through the pictures, stopping on the house with number 430. Ren adds Lian’s house to the map.
- Owl 3: continue through the projector’s slides, including the blank ones, until the owl on a branch appears. Tap the owl.
- Go to Lian’s house and ring the doorbell. After he refuses to talk, select the letter, zoom in on the bottom of the closed door and slide it underneath. Enter when he invites you in.
- Ask Lian the available questions, including when he last saw the siblings. Take the perforated card he gives you.
- Owl 4: tap the owl design on the mug resting on Lian’s chair arm beside him.
CHAPTER 10
The secret closet and the bottle order
The red door with the keypad is in the stove room, beyond the formerly boarded doorway.
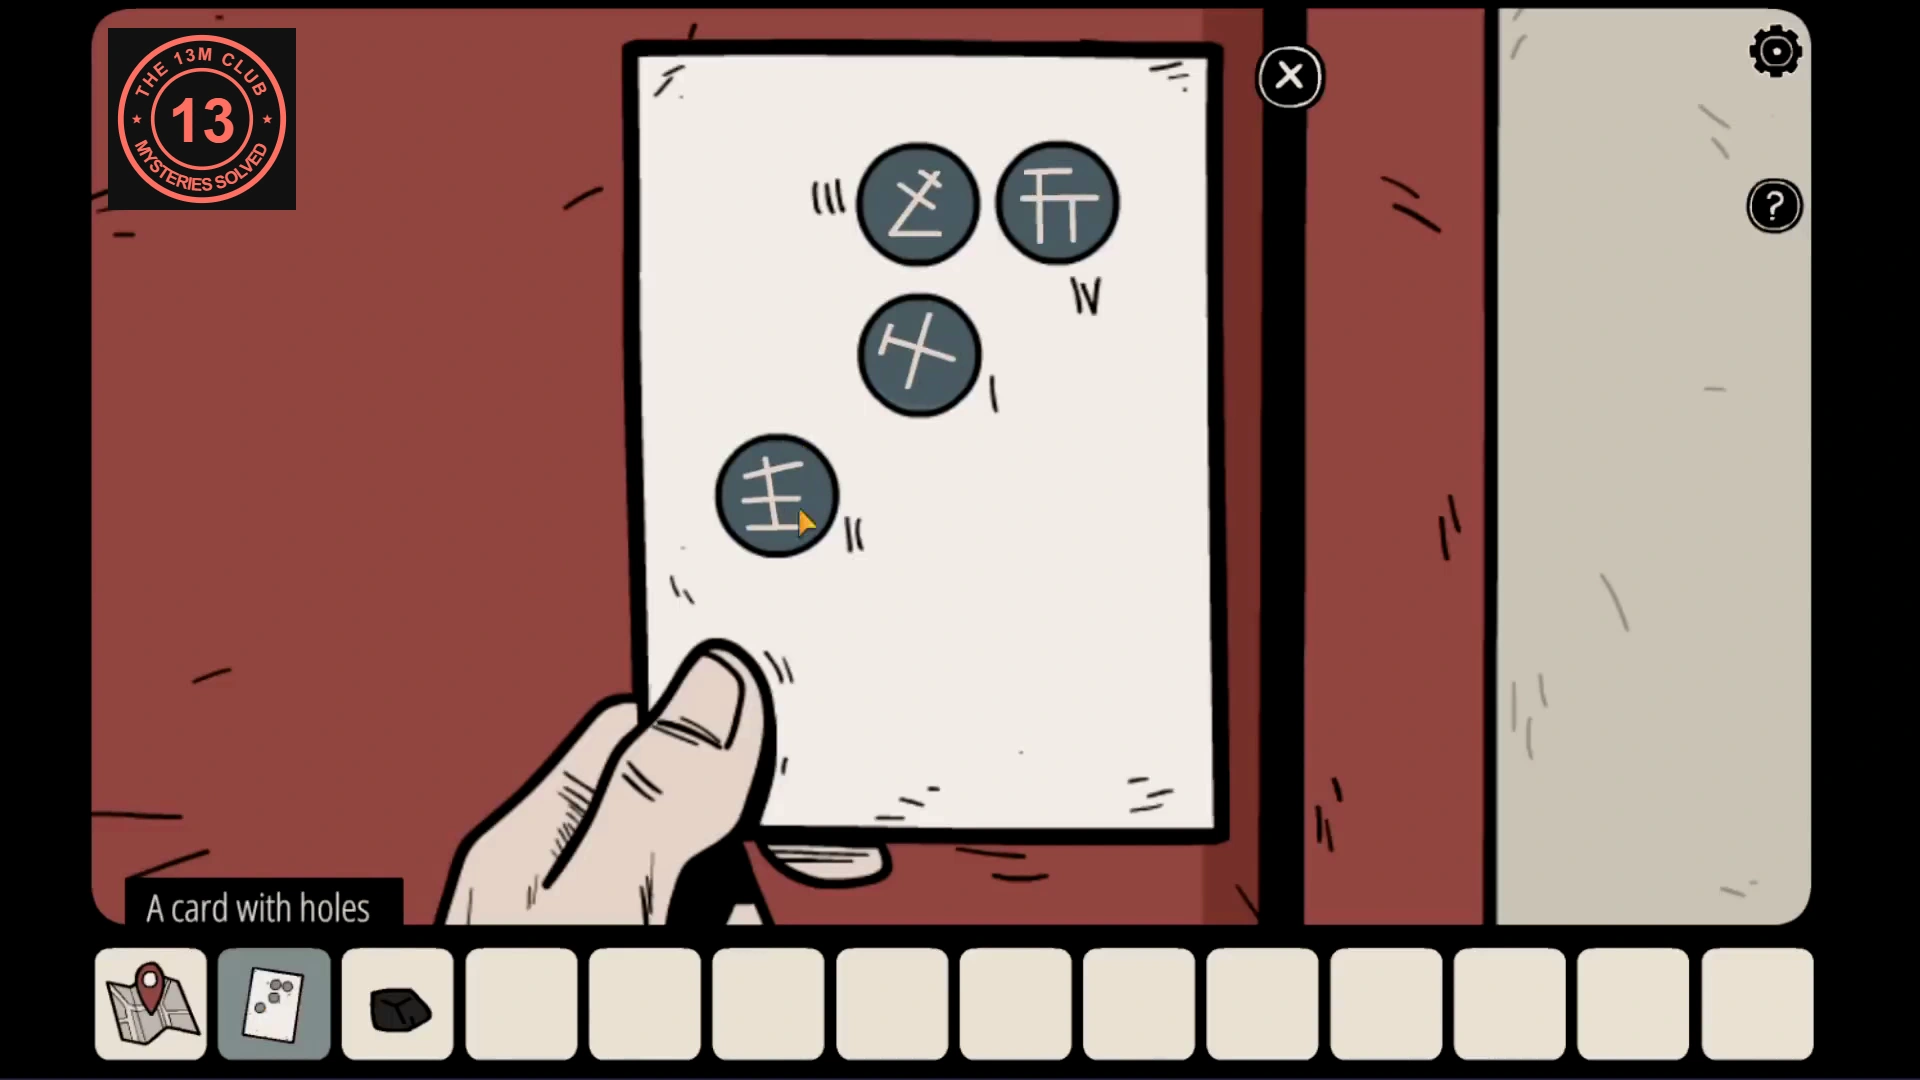
- Return to the stove room in the murder house and inspect the red door’s keypad. Put the perforated card over the grid and record the symbols exposed in the order I, II, III, IV. Remove the card, press those four symbols in order, then press OK and open the door.
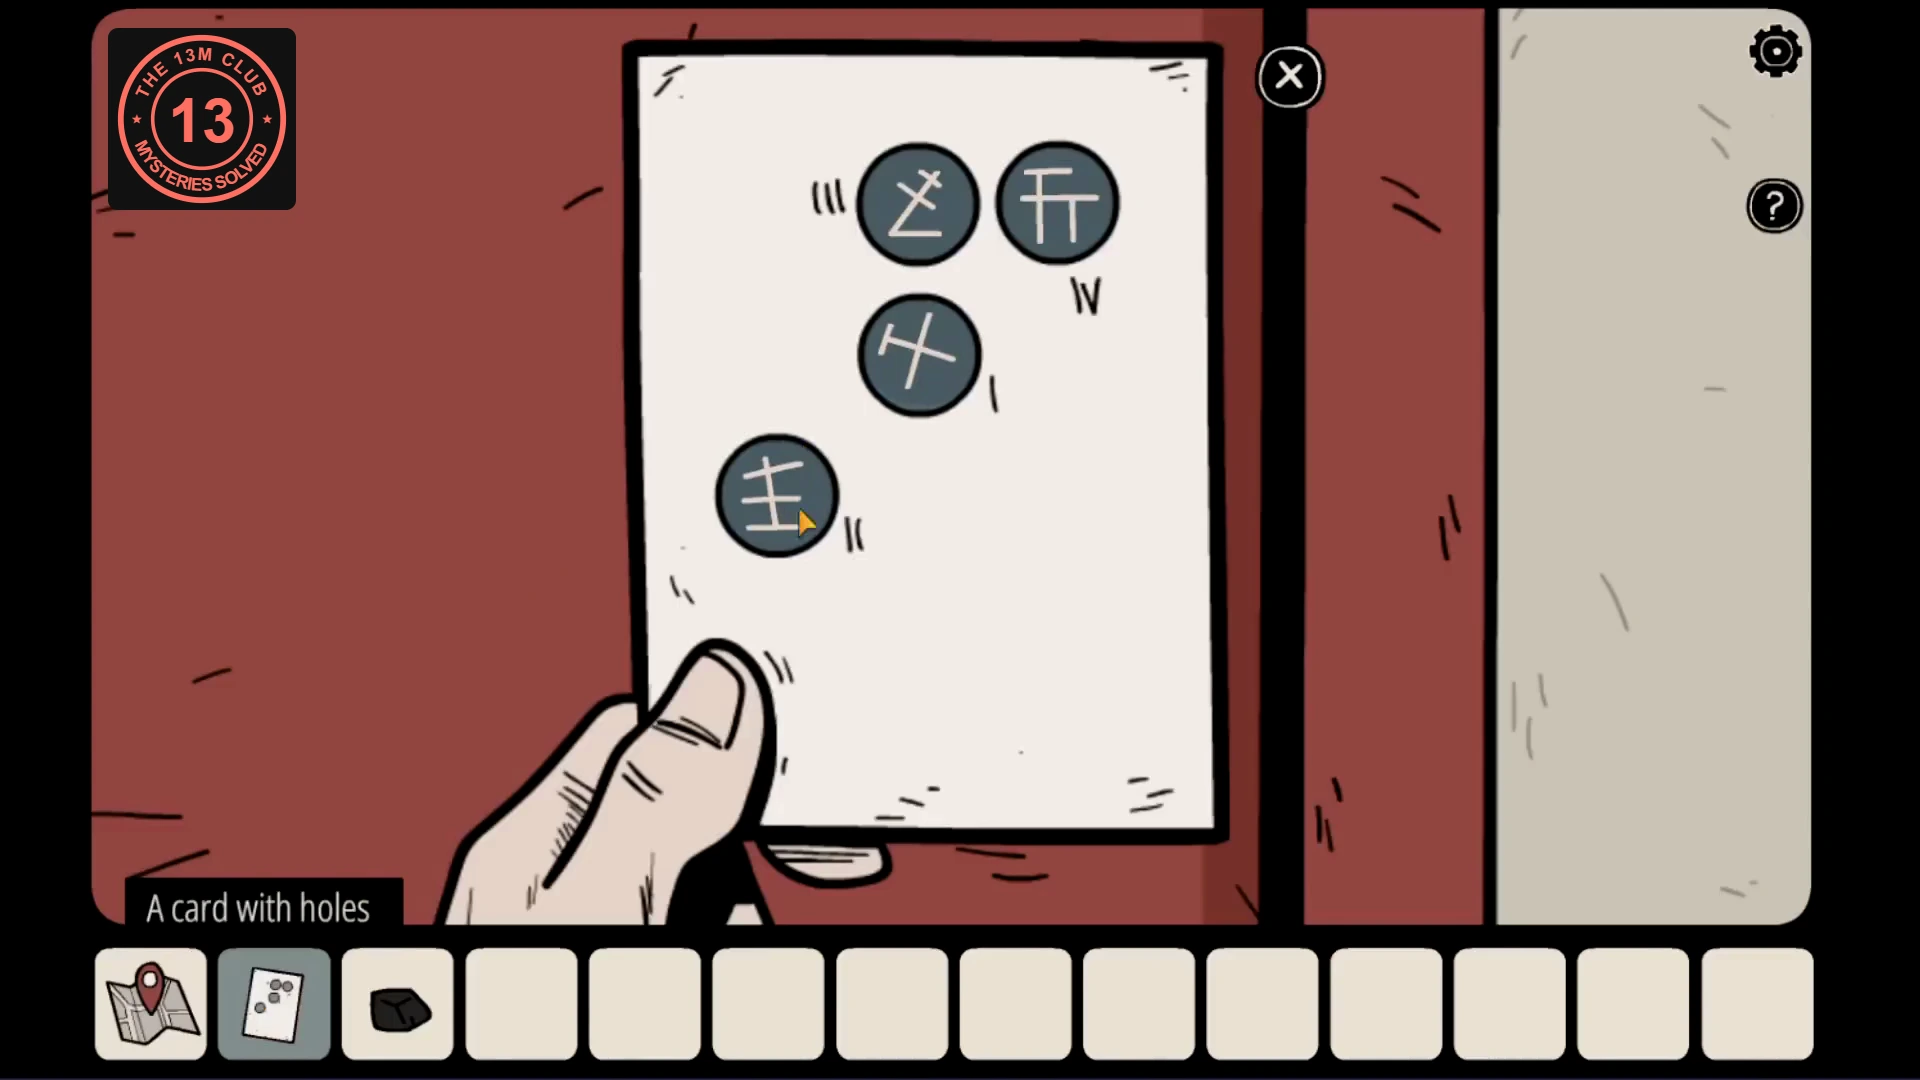
Record the exposed symbols in Roman-numeral order, then remove the card and enter them. - Inside the closet, open the lower drawer and take the pliers. Slide the hanging clothes to the left to uncover the stacked cardboard boxes on the right.
- Open the top cardboard box and take the paper. Its minus-to-plus clue refers to the liquid levels in the six bottles on the upper shelf. Swap the bottles until they stand from least filled on the left to most filled on the right. The correct arrangement opens a panel beneath the clothes and releases the briefcase; inspect it on the floor.
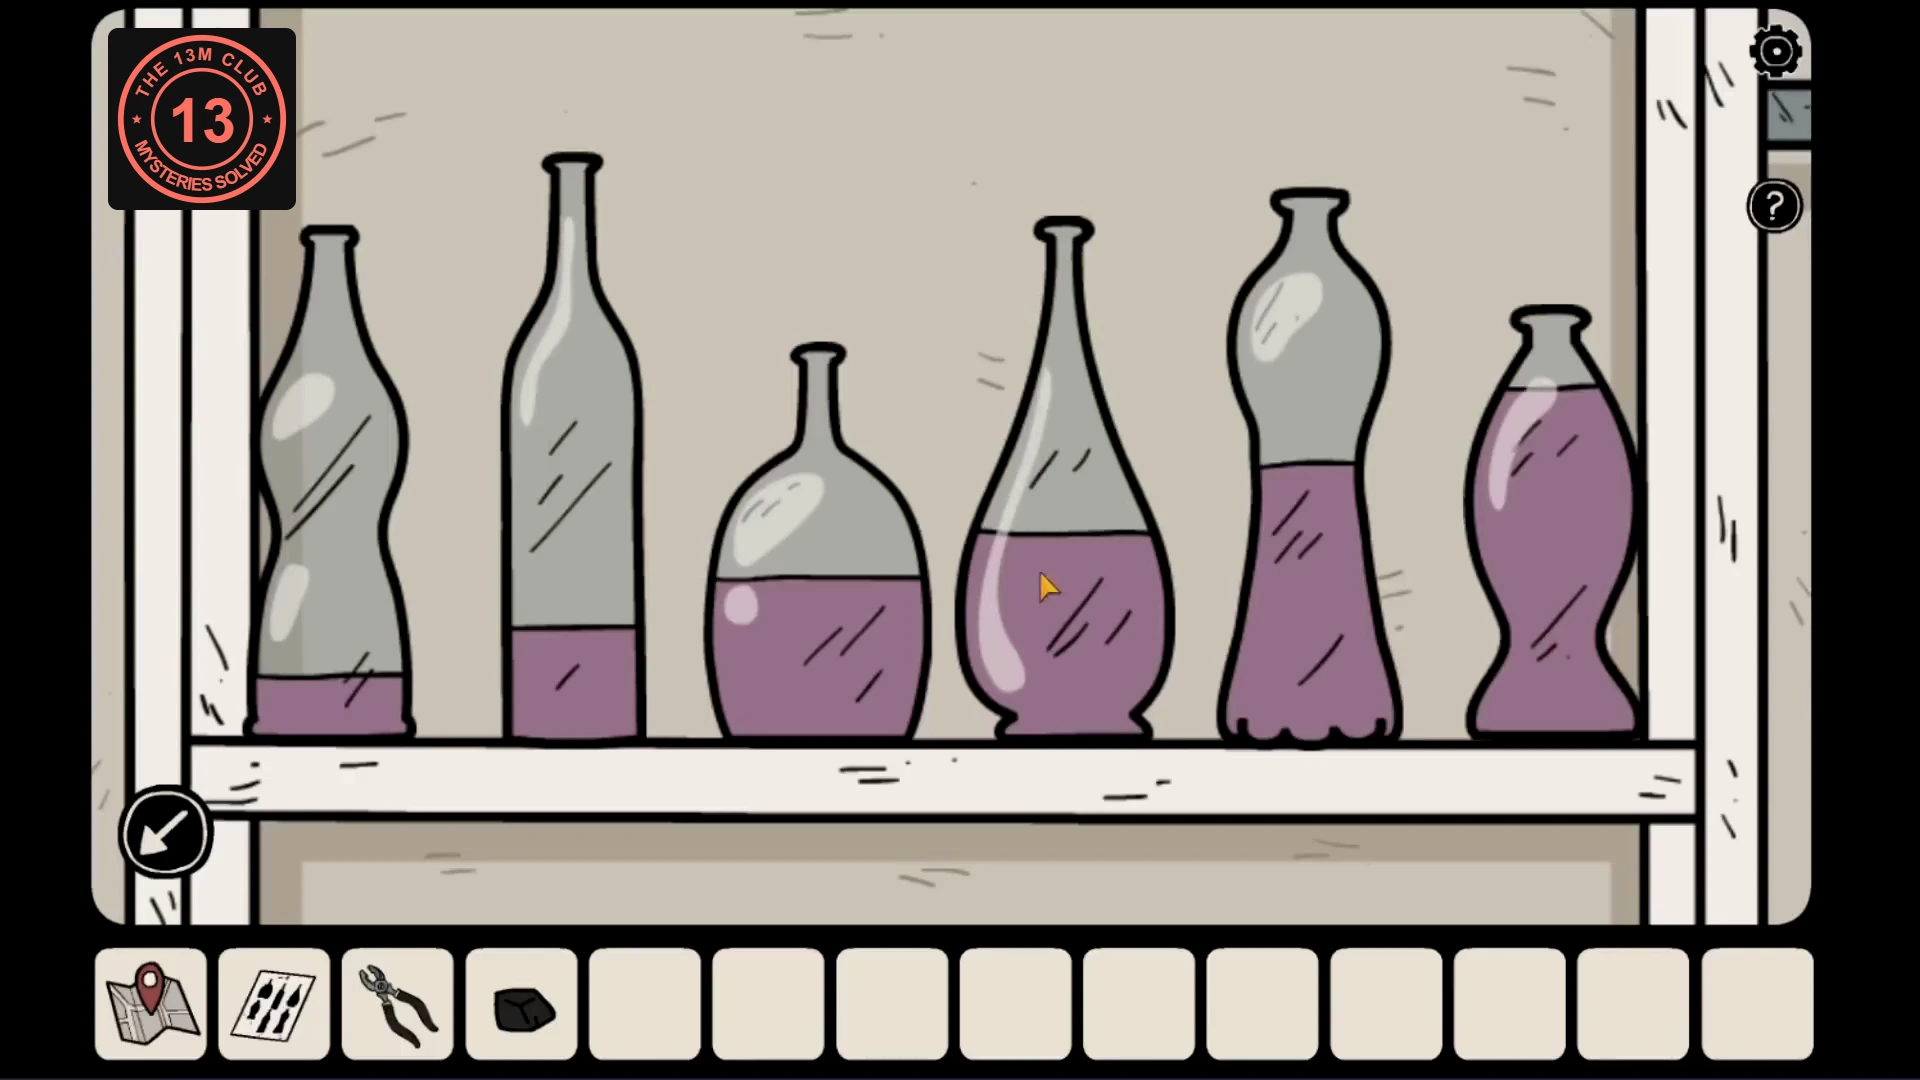
Completed shelf: the liquid line rises from left to right. Judge the liquid height, not the bottle size.
CHAPTER 11
The briefcase and the vent key
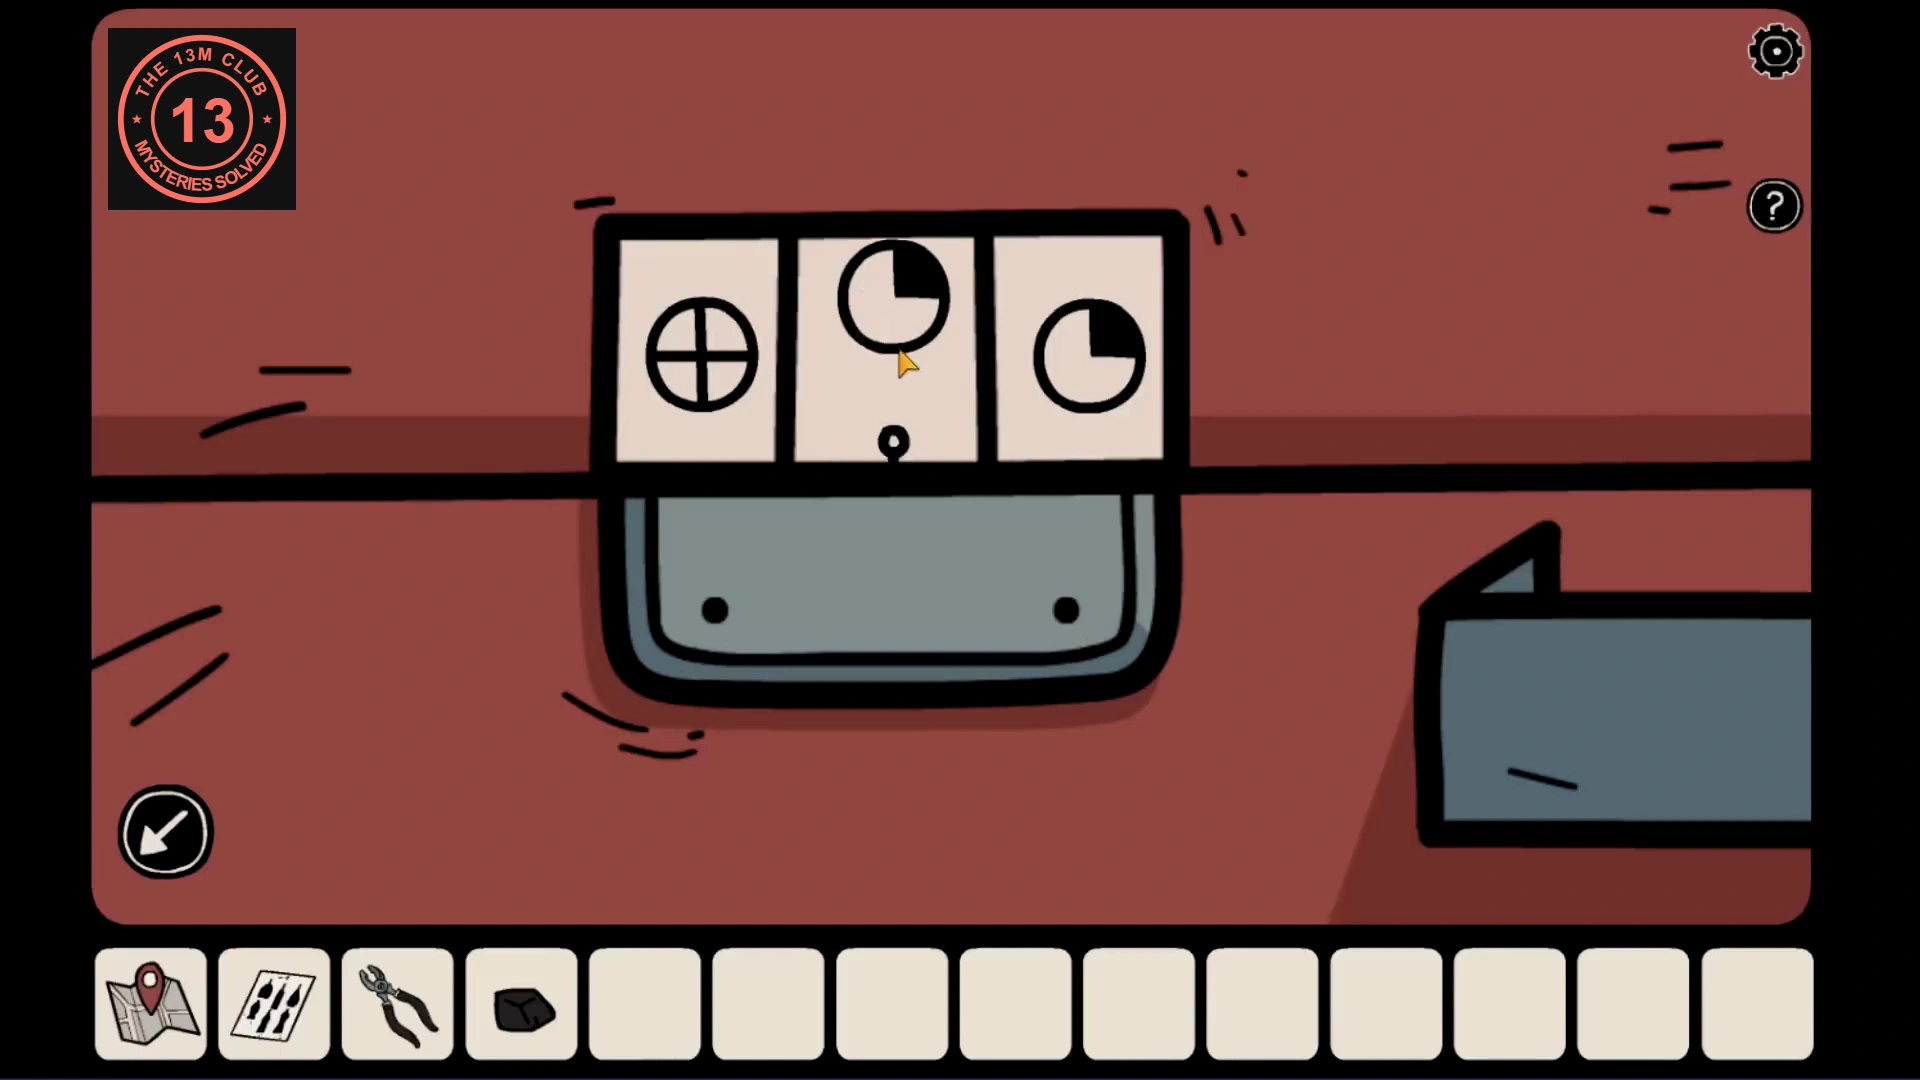
Use the shapes on the paper to translate the ordered bottles into symbols.
- Match each bottle shape to its symbol on the paper. Put the six symbols into the briefcase in order of increasing liquid level: first the three dials on the left, then the three on the right. Open it and take the wire.
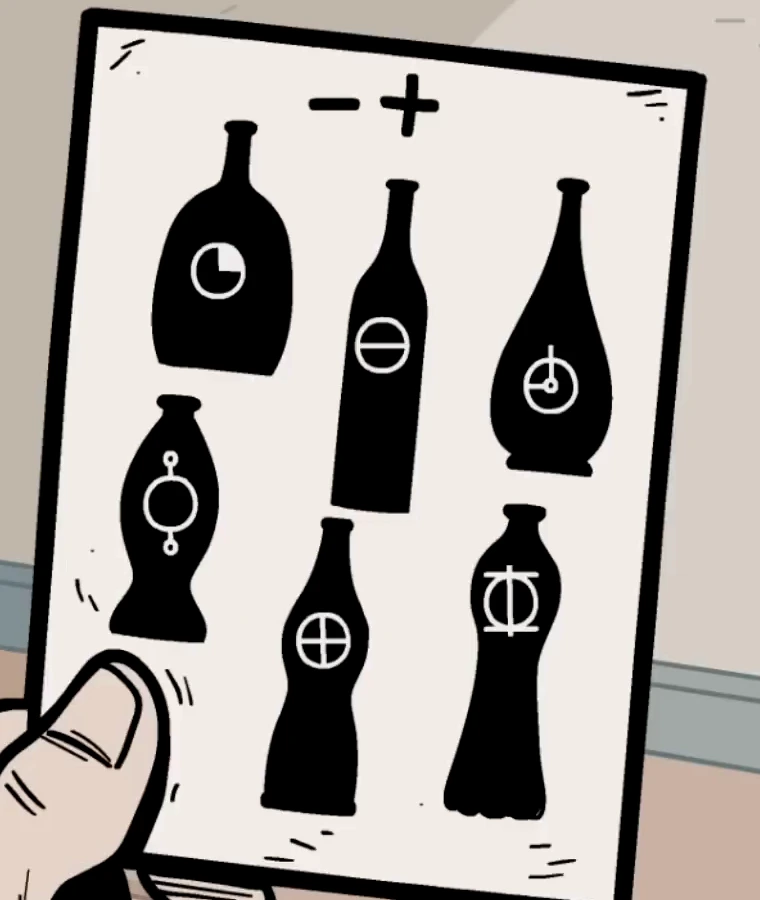
The paper’s silhouettes match the shelf bottles by shape. Read the symbol on each one in your own game. - Combine the wire with the pliers to make a hook. Open the floor vent below the sword and use the hook to pull out the white key.
- Use the white key on the locked upper drawer beneath the safe. Take the flashlight and the green notebook.
CHAPTER 12
Four clues for the closet safe
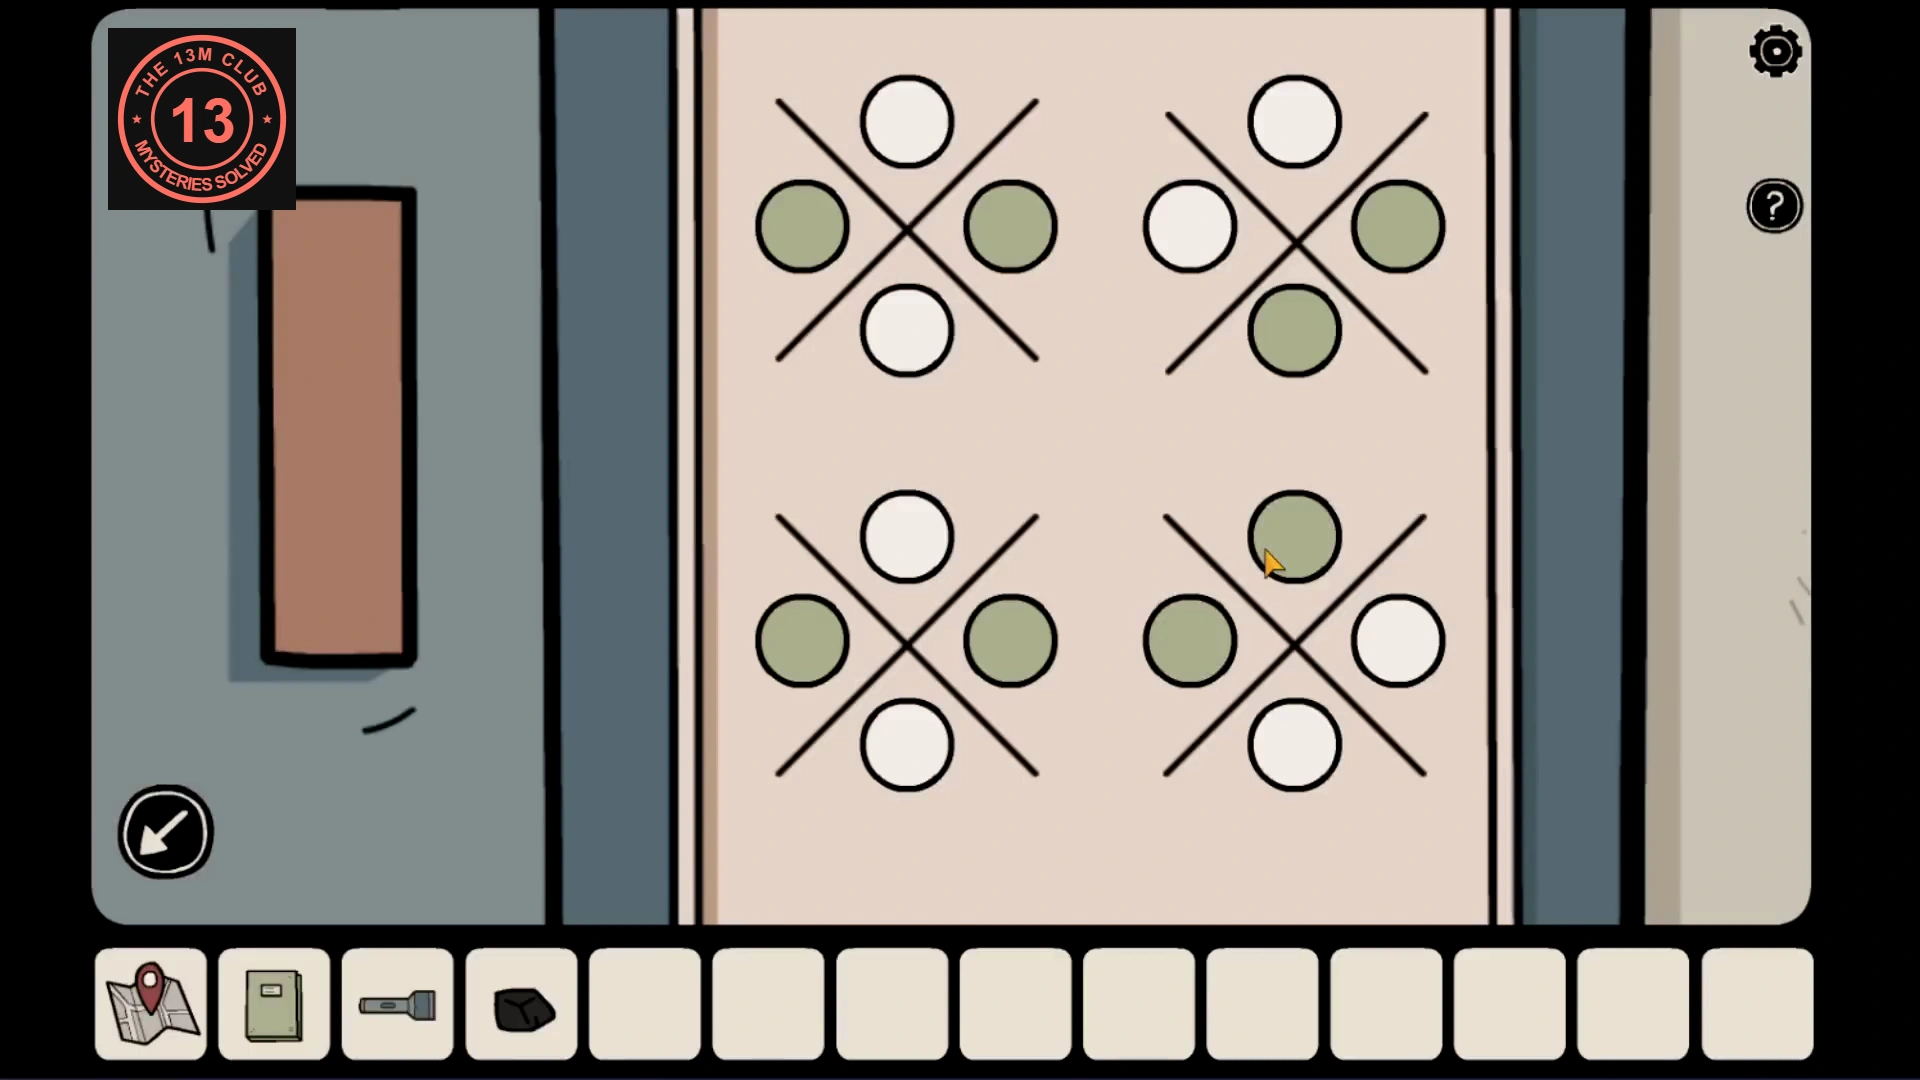
The notebook assigns one clue to each group of four buttons.
- Read the green notebook. Its four pictures identify the clues and their positions on the safe: pirate, vent, sword and shoes. Follow the positions on your page if they differ from the example.
- Study the pirate picture behind the clothes. Use the direction of the pointing hand and the colored compass needle as the two active positions for the pirate’s button group.
- Shine the flashlight into the open vent. Copy the filled circles on the small four-circle mark at the back for the vent’s button group.
- Pull the sword upward out of its sheath. Copy the filled circles engraved on the exposed blade for the sword’s button group.
- Slide all the hanging clothes to the sides. Note which of the four wall hooks carry shoes; those positions are active in the shoes’ button group.
- Set the four groups on the safe from those clues, switching off any extra buttons. In the pictured run: upper left = left/right; upper right = right/bottom; lower left = left/right; lower right = top/left. Open the safe and take the half medallion and floppy disk.
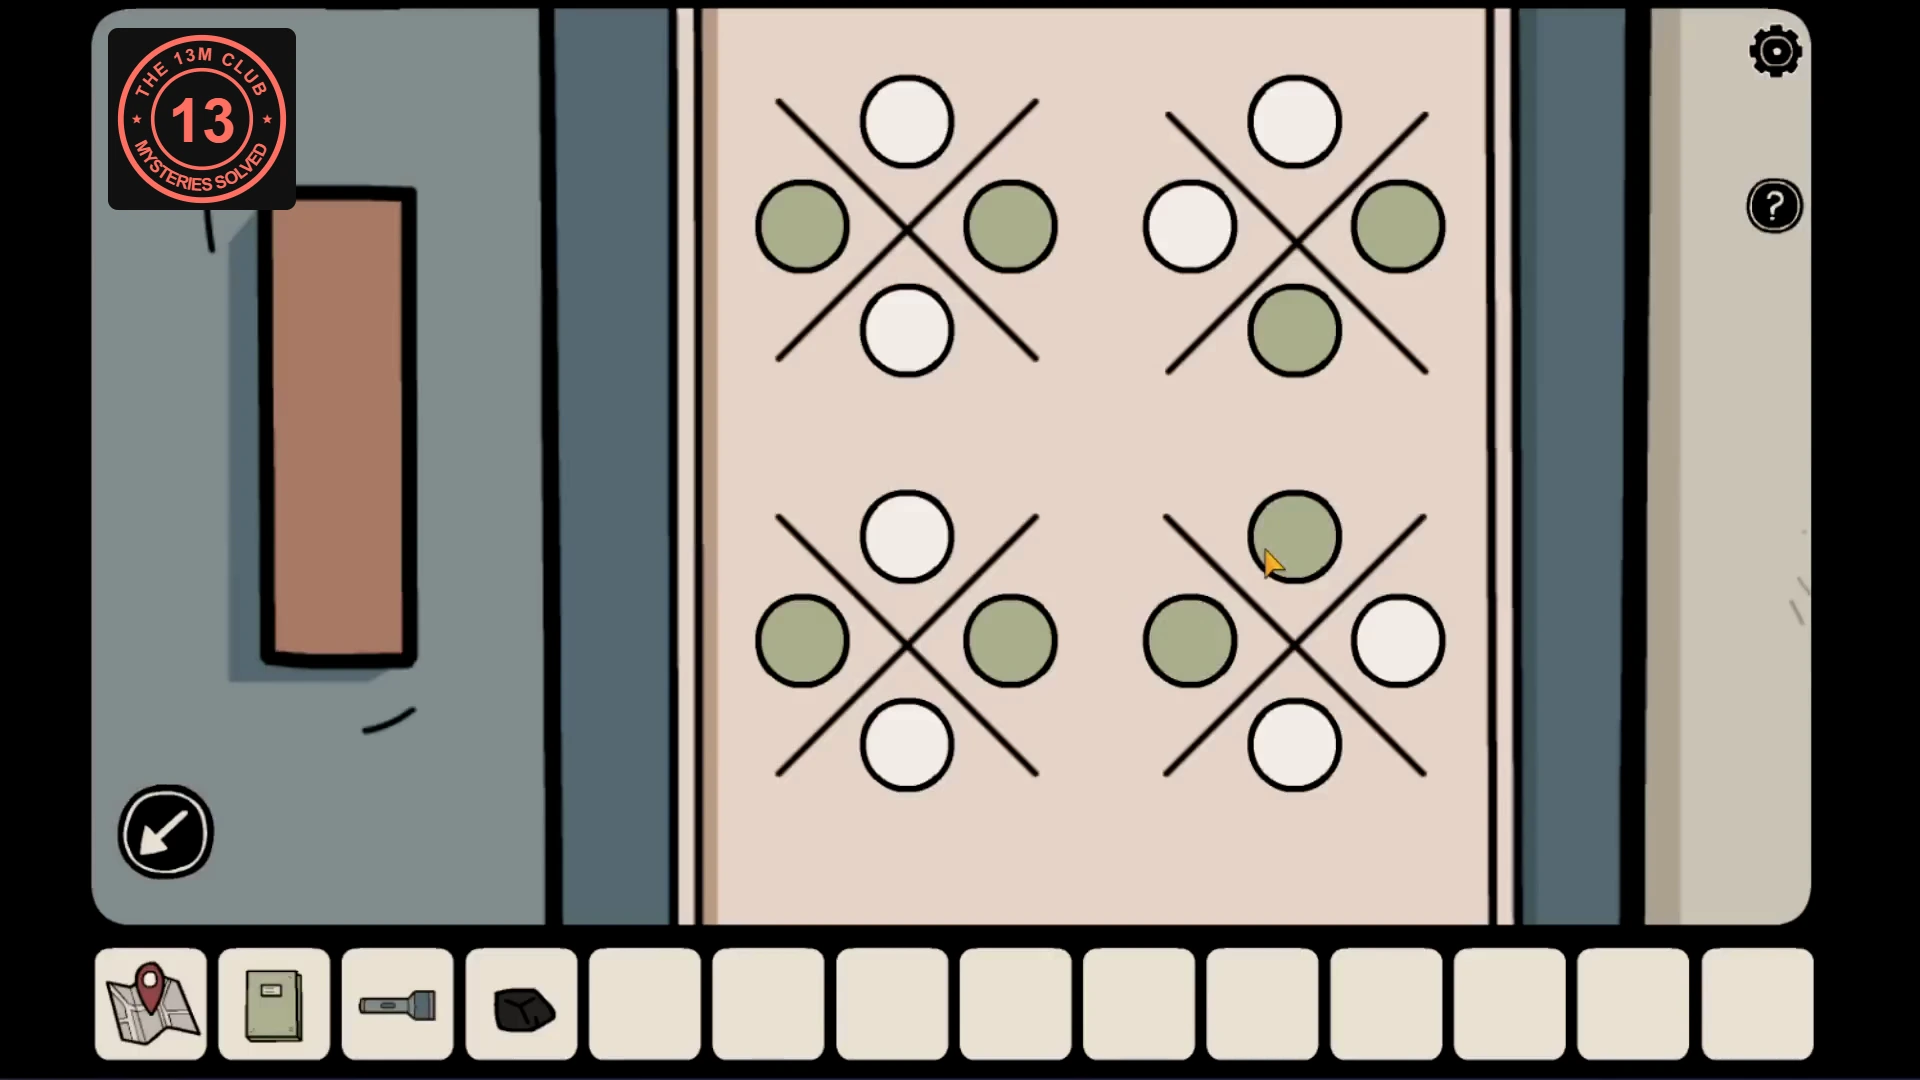
Example only: pirate upper left, vent upper right, sword lower left and shoes lower right.
CHAPTER 13
Read the disk and speak to Anna
The disk gives you the next address; the medallion persuades Anna to listen.
- Return to the station and insert the floppy disk into the computer. Open the files and read the diary entry containing Anna’s address, 1014. Her house appears on the map.
- Owl 5: close the open document and the disk window on the computer to reveal its owl wallpaper. Tap the owl.
- Visit Anna’s house and ring the bell. After she refuses, back out to the house view and tap her open window. Show her the half medallion to gain entry.
- Ask Anna all four questions, including the final one about who could have been chasing the siblings. That answer leads to the mausoleum drawing. Examine it and finish the conversation so the cemetery is added to the map.
- Owl 6: tap the owl on the wine bottle’s label on the kitchen counter behind Anna, beside the glass.
CHAPTER 14
Light the tomb and match the shadows
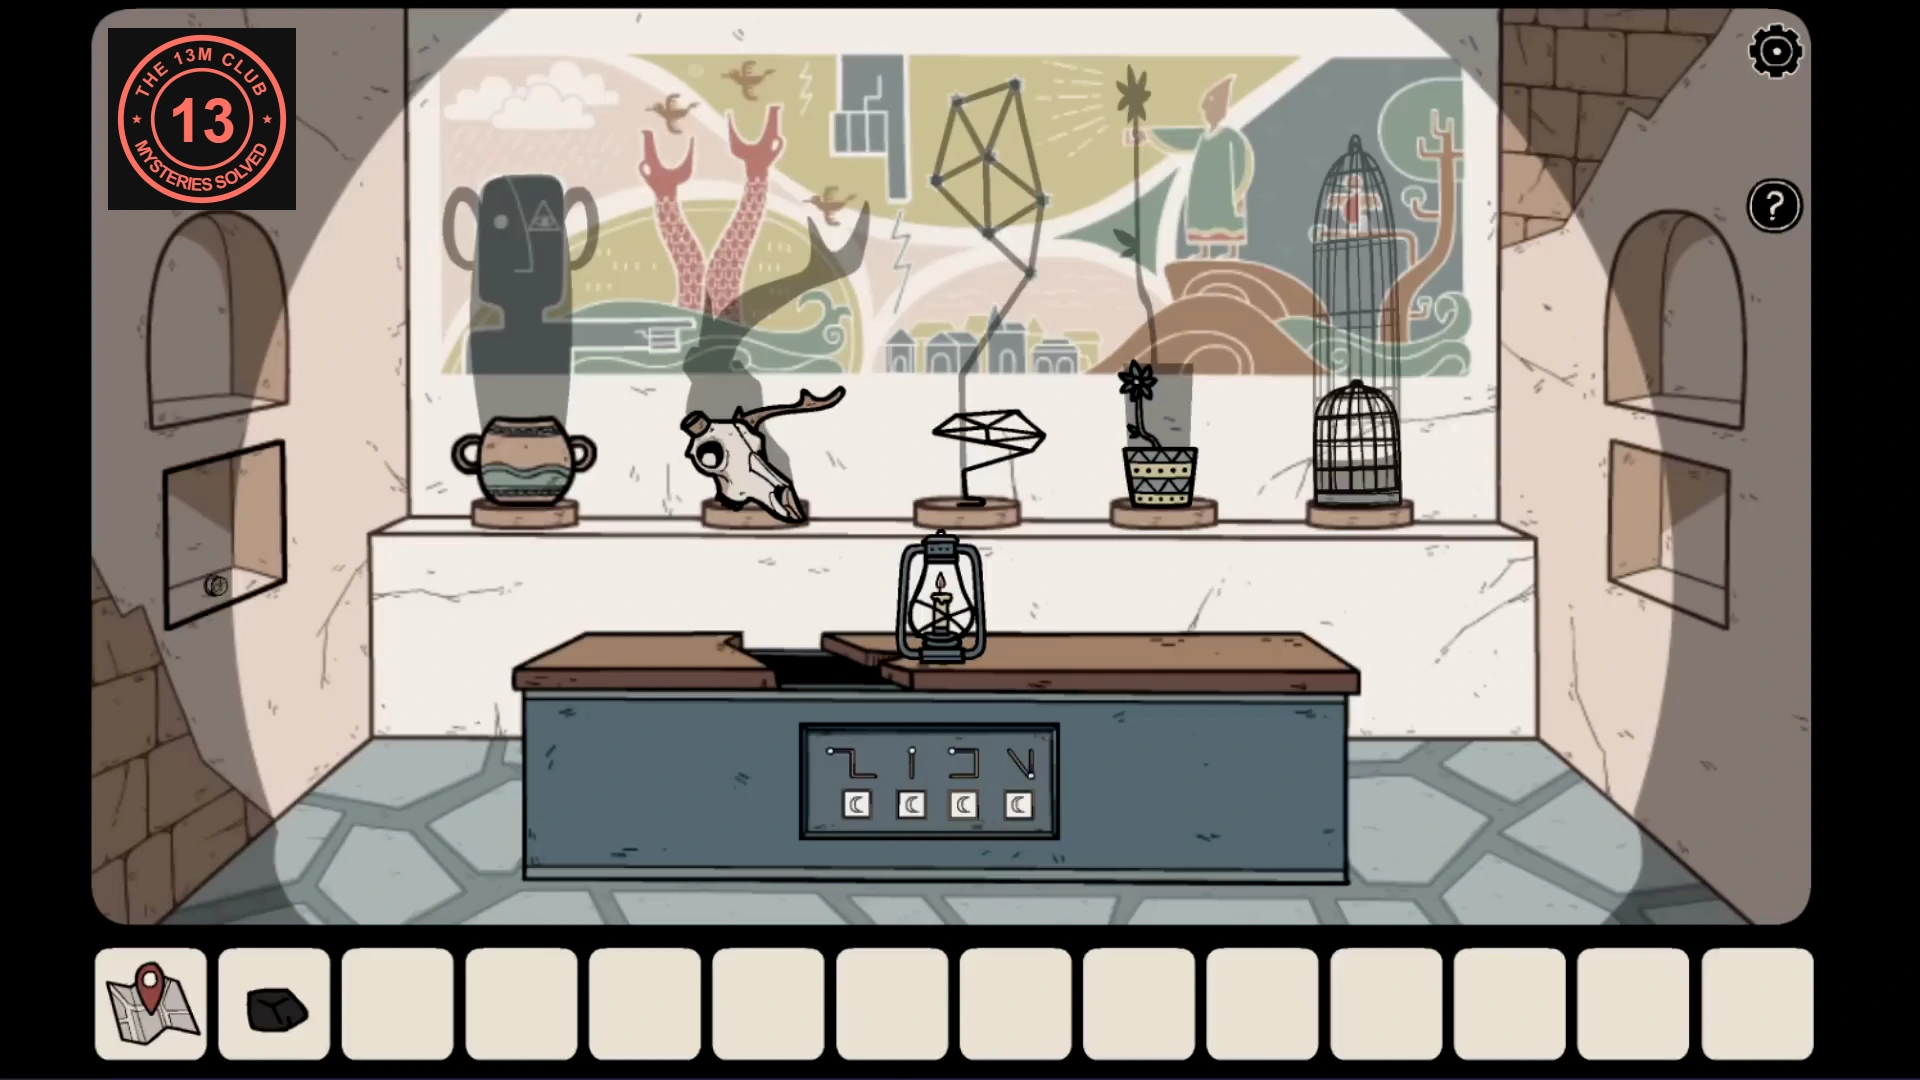
Enter the mausoleum shown in Anna’s drawing.
- Travel to the cemetery. Ren reads Frederick Nolsen’s name on the mausoleum front. Enter and take the lantern from a niche on the left and the matches from the lower niche on the right.
- Combine the matches and lantern. Place the lit lantern in the opening of the central tomb to cast shadows across the back wall.
- Slide the five objects horizontally until their shadows fit the incomplete figures painted behind them. Judge the shadow rather than the object’s own outline. In the illustrated arrangement, the objects run left to right: vase, antlered skull, diamond-shaped frame, flowerpot, cage. Correct alignment opens a wall niche and exposes the tomb’s controls.
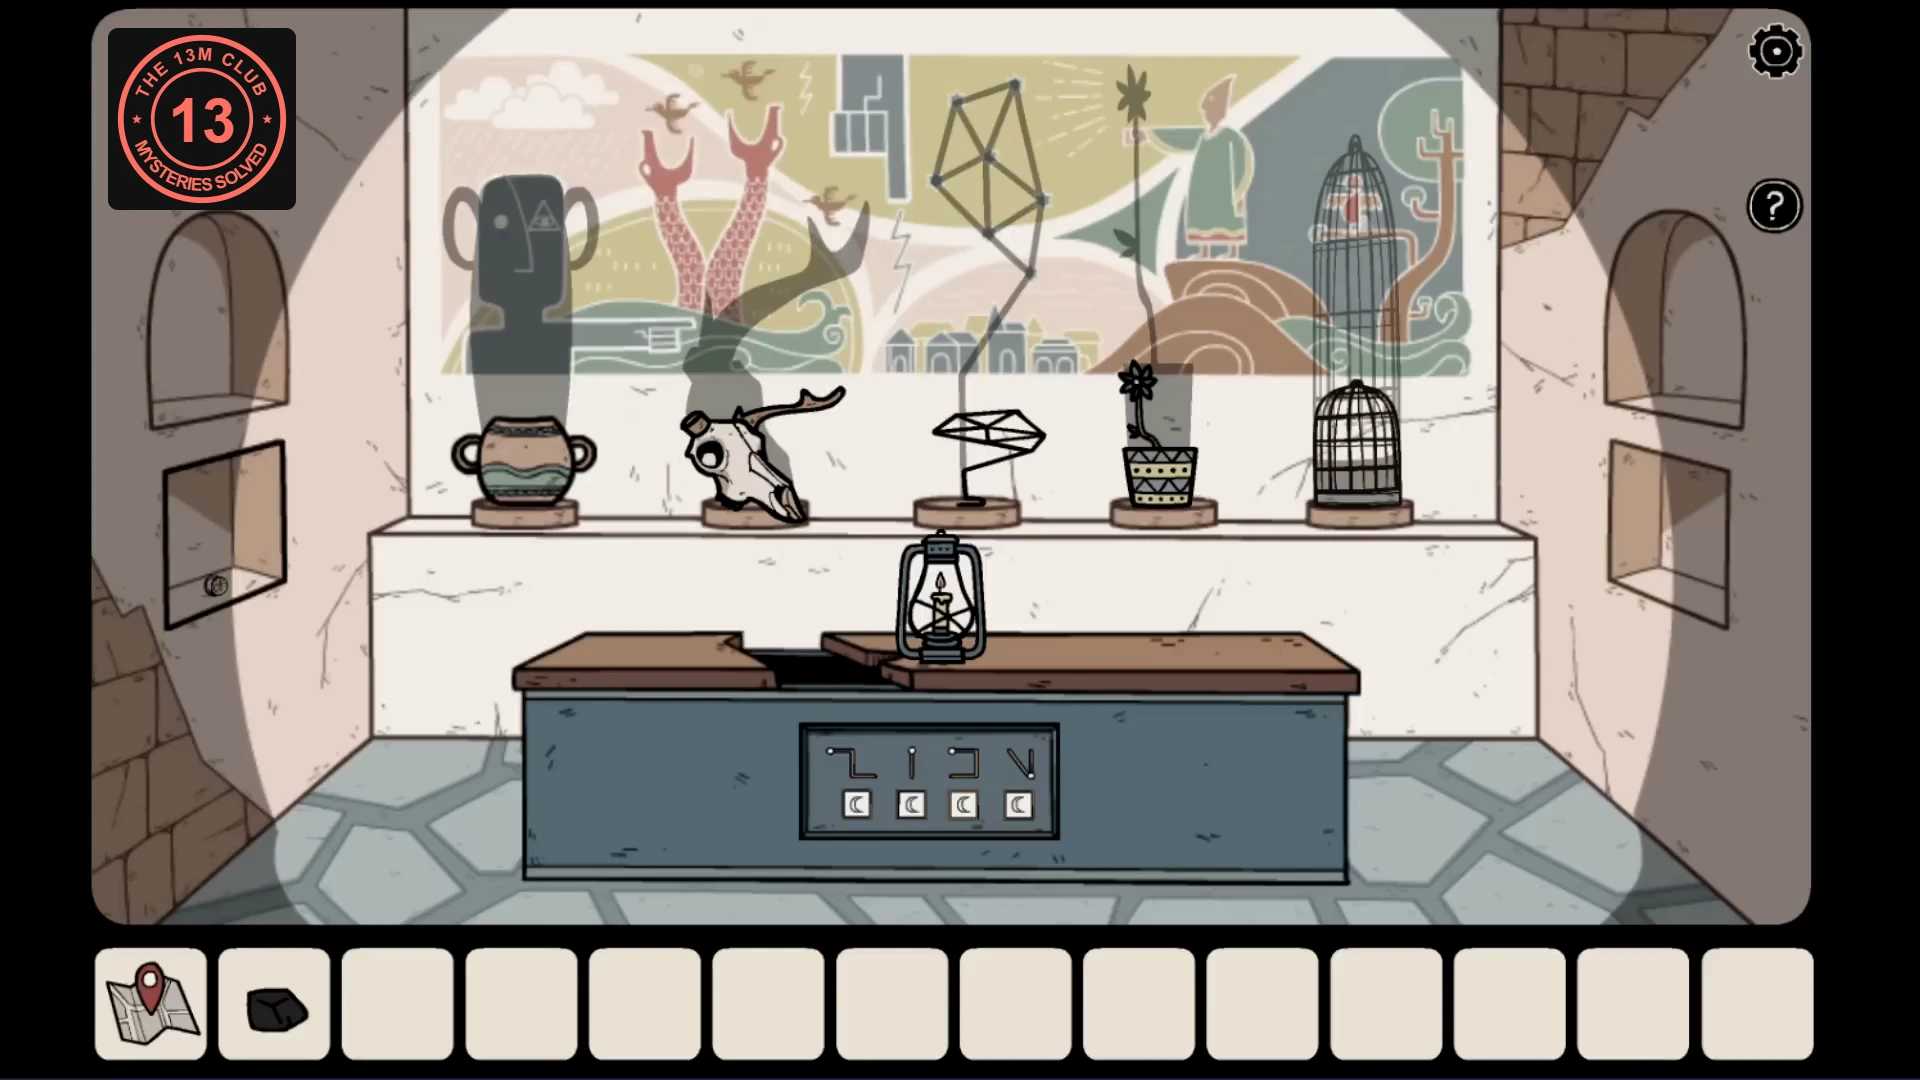
Completed arrangement: each shadow completes the painted shape behind it. - Take the ring from the newly opened niche on the left and inspect its mark. You now have both the ring and the name Ren read outside: Frederick Nolsen.
CHAPTER 15
Shamalu and the ritual doll
Laia’s shop connects the ring to the old investigation.
- Use the map to return to the police station. Continue the scene as Ren automatically checks Nolsen’s record and considers where to learn more about the ring. When the scene ends, the magic shop appears on the map as Store.
- Owl 7: enter the magic shop and tap the small owl ornament on the shelf behind Laia, to the left of her on screen and beside the bird ornament.
- Speak to Laia and choose the question asking what she can tell you about the ring. Continue with the questions about Shamalu and Frederick’s case. Read the newspaper information about Lenny; the mental hospital is added to the map.
- Ask Laia how to stop the ritual and continue until she gives you the ritual doll. Her instructions are to reverse the floor symbol with charcoal and use the ring with the doll.
CHAPTER 16
Lenny’s drawings and his riddle
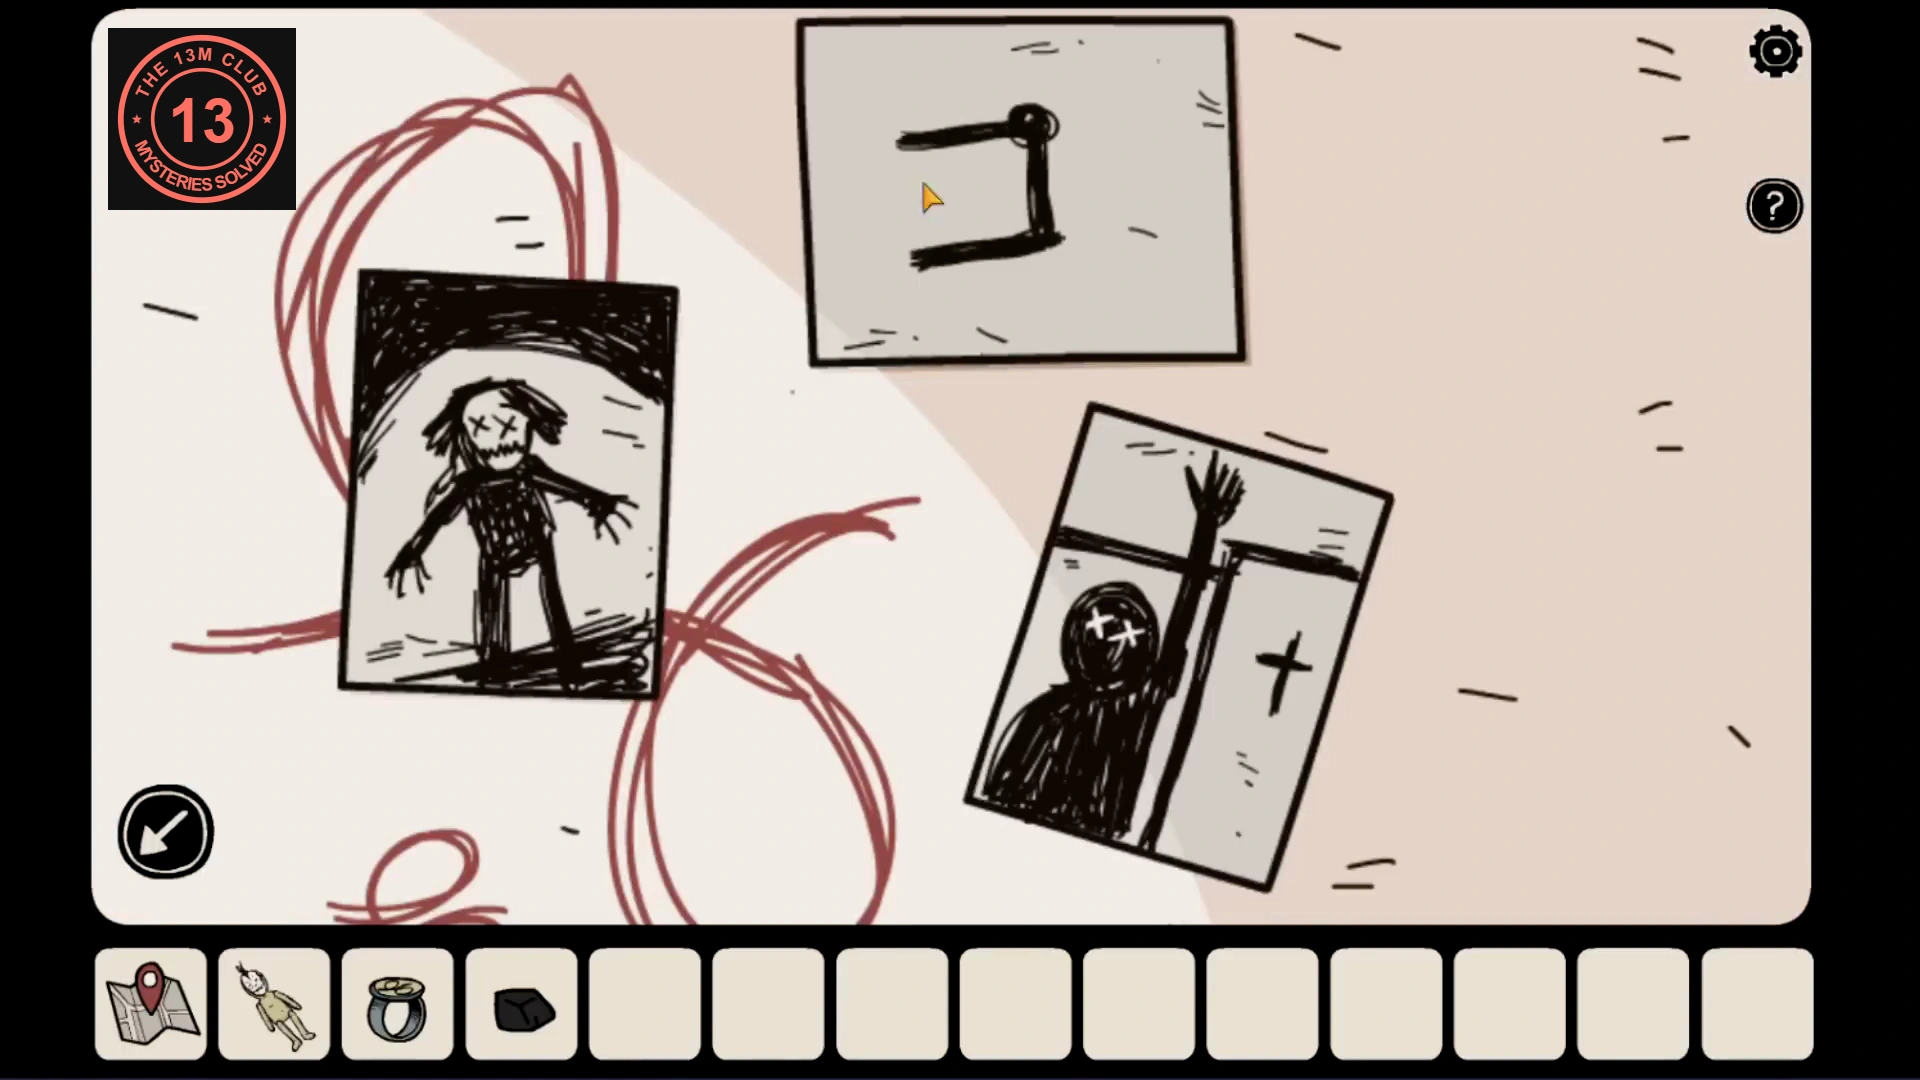
Collect both hospital owls before returning to the mausoleum.
- Visit the mental hospital. Speak to the nurse, ask about Lenny and ask to see him. She allows you into his room.
- Owl 8: at reception, zoom in on the book lying on the nurse’s counter and tap the owl on its cover.
- In Lenny’s room, inspect the four simple geometric diagrams among the wall drawings. Note where the black dot sits on each path. Match the whole path shape when using these clues later; their positions on the wall are not the order of the tomb locks.
- Owl 9: lift the near edge of Lenny’s mattress. Tap the owl drawing on the paper hidden underneath.
- Talk to Lenny and record all four lines of his riddle. Each line identifies a position or relates two positions. In this version, the last symbol is sun, the third is eye and the second is moon. The first is the symbol immediately after the second in the lock’s button cycle. Heart follows moon in that cycle, giving heart, moon, eye, sun. If your riddle differs, use its own clues with the cycle explained in the next section.CODEHeart → Moon → Eye → Sun