Open the stairway
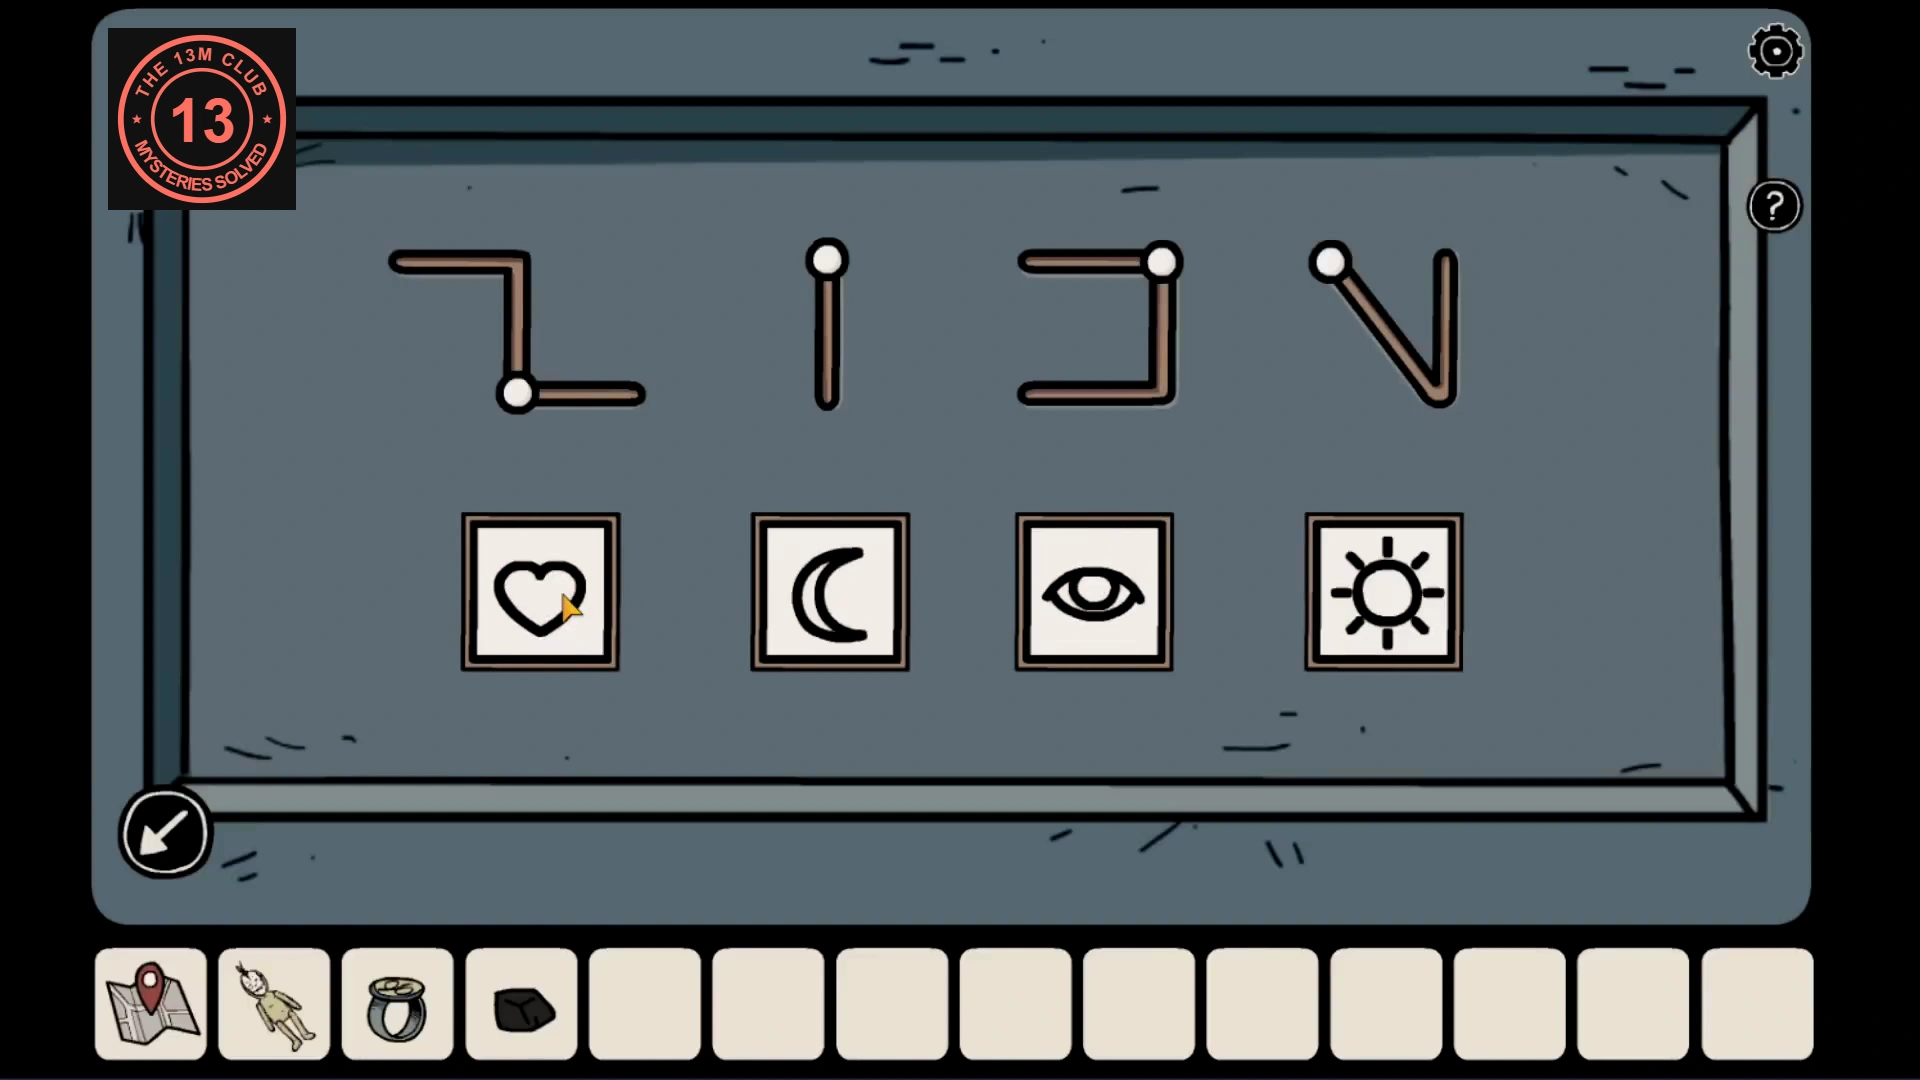
Use both clues from Lenny at the central tomb.
- Return to the mausoleum and inspect the panel on the front of the central tomb. Its four geometric tracks sit above four symbol buttons. Match each track to Lenny’s corresponding wall drawing and move the white dot to the position shown by that drawing’s black dot.
- Each button cycles through sun, waves, tornado, fire, frog, wind, moon, heart, eye and snail, then returns to sun. When the riddle says one symbol follows another, choose the next symbol in this cycle. For the riddle above, set heart, moon, eye, sun from left to right. Solve different riddle lines using the same cycle. With the dots and symbols correct, the tomb opens; go down the stairs.CODEHeart → Moon → Eye → Sun
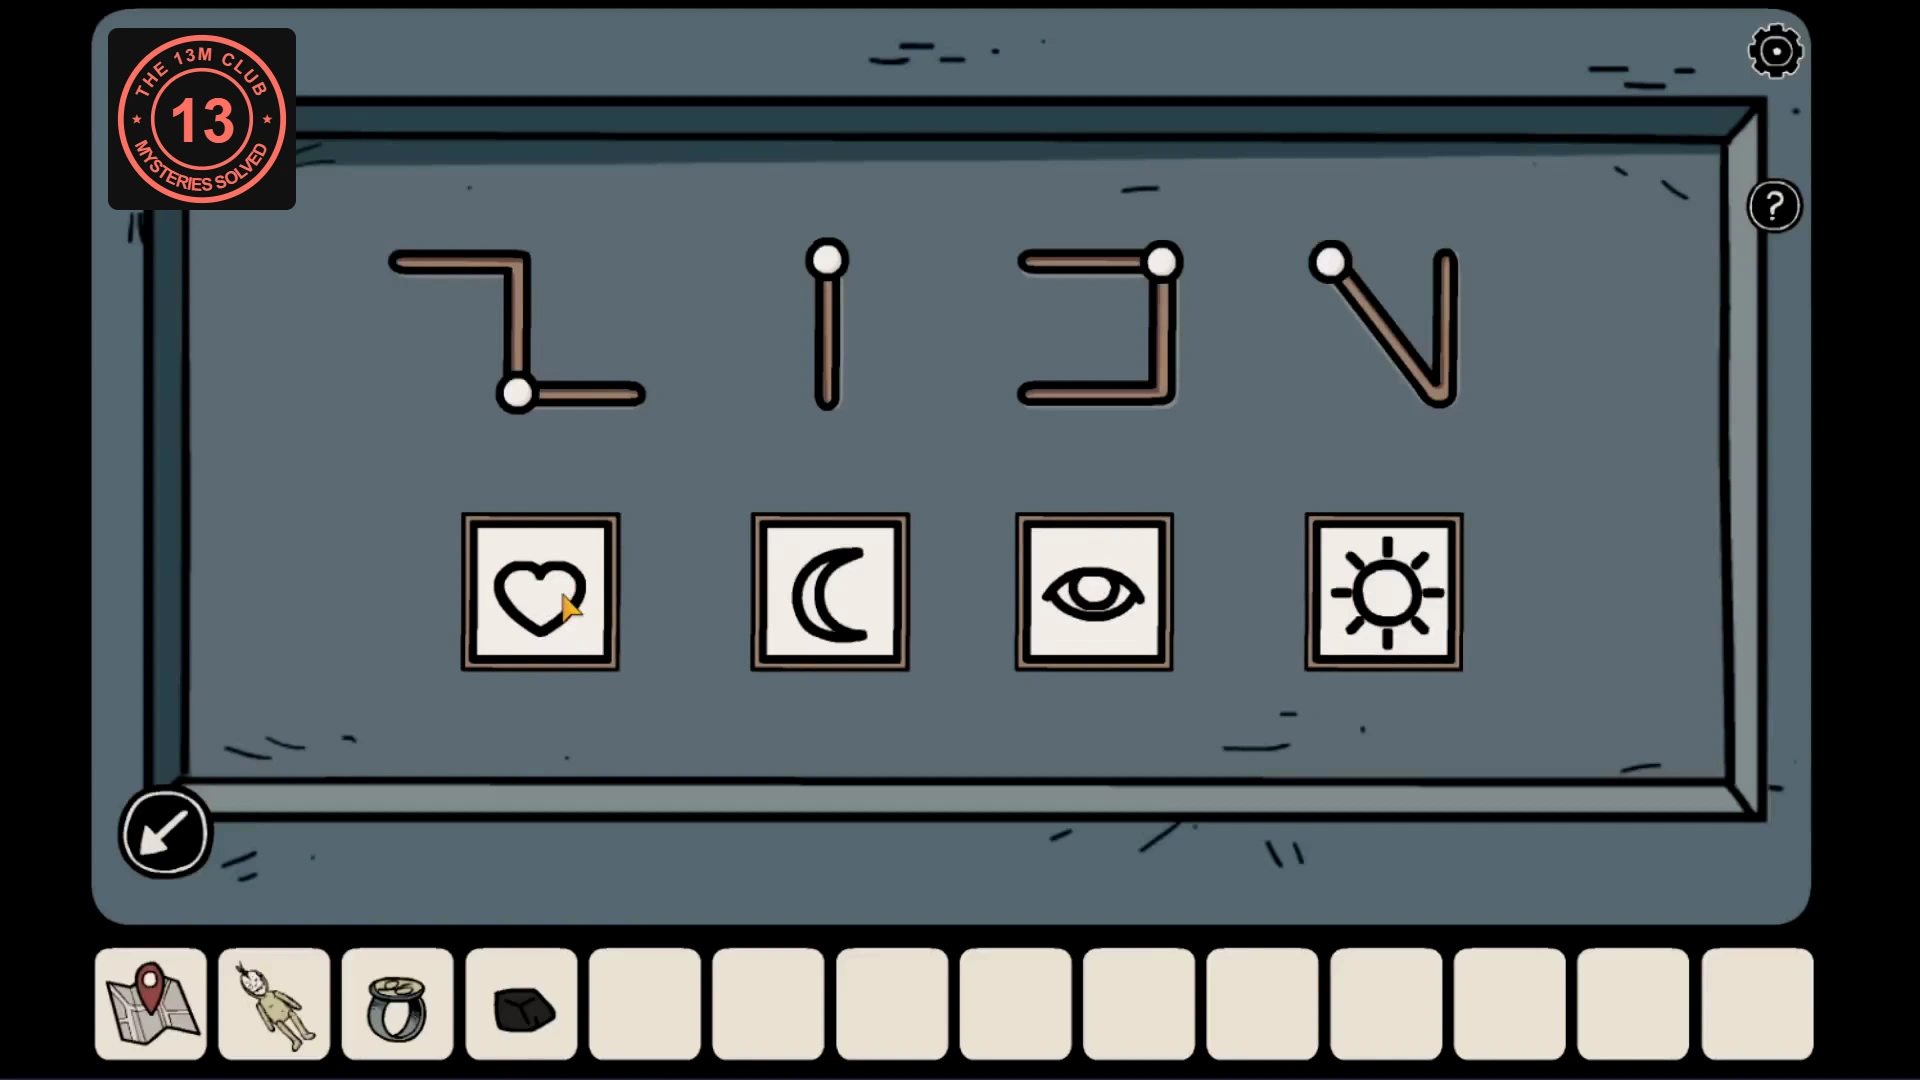
This run’s working order is heart, moon, eye, sun. Use your own riddle if it differs.
The animal figurines and the bee
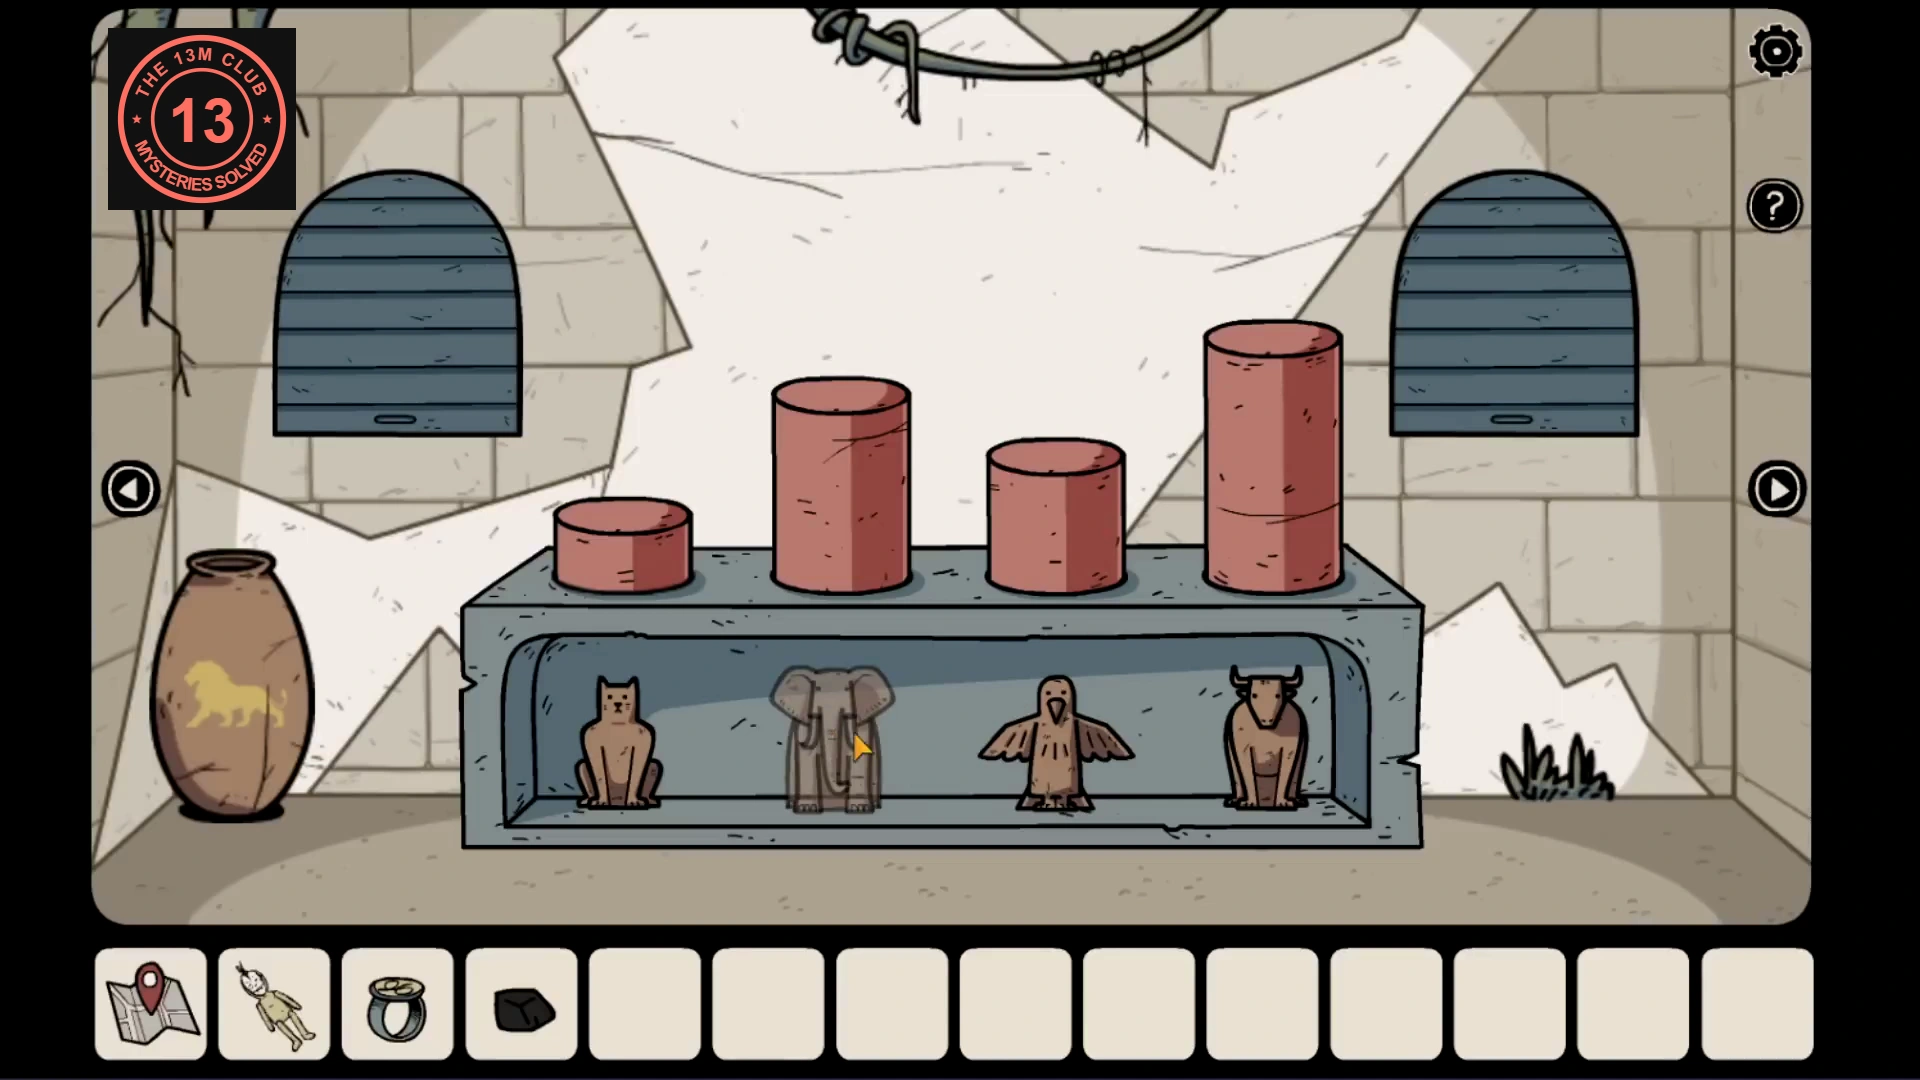
Below the stairs, use the side arrows to explore. The red-chest wall has a hole leading to the room with four painted people.
- Find the stone bench with four red cylinders of different heights and four animal figurines below them. Place one figurine on each cylinder: elephant on the tallest, bull on the next tallest, cat on the next and bird on the shortest. The correctly loaded cylinders sink and the compartments on both sides open.
- Take the old bone and an empty jar from the left compartment. Tap the small pot in the right compartment to release the bee. Also note the colour of the lion painted on the large pot on the floor to the left of the bench. The pot colours change between games; in the recorded game this lion is yellow.
Lead the bee to the tree
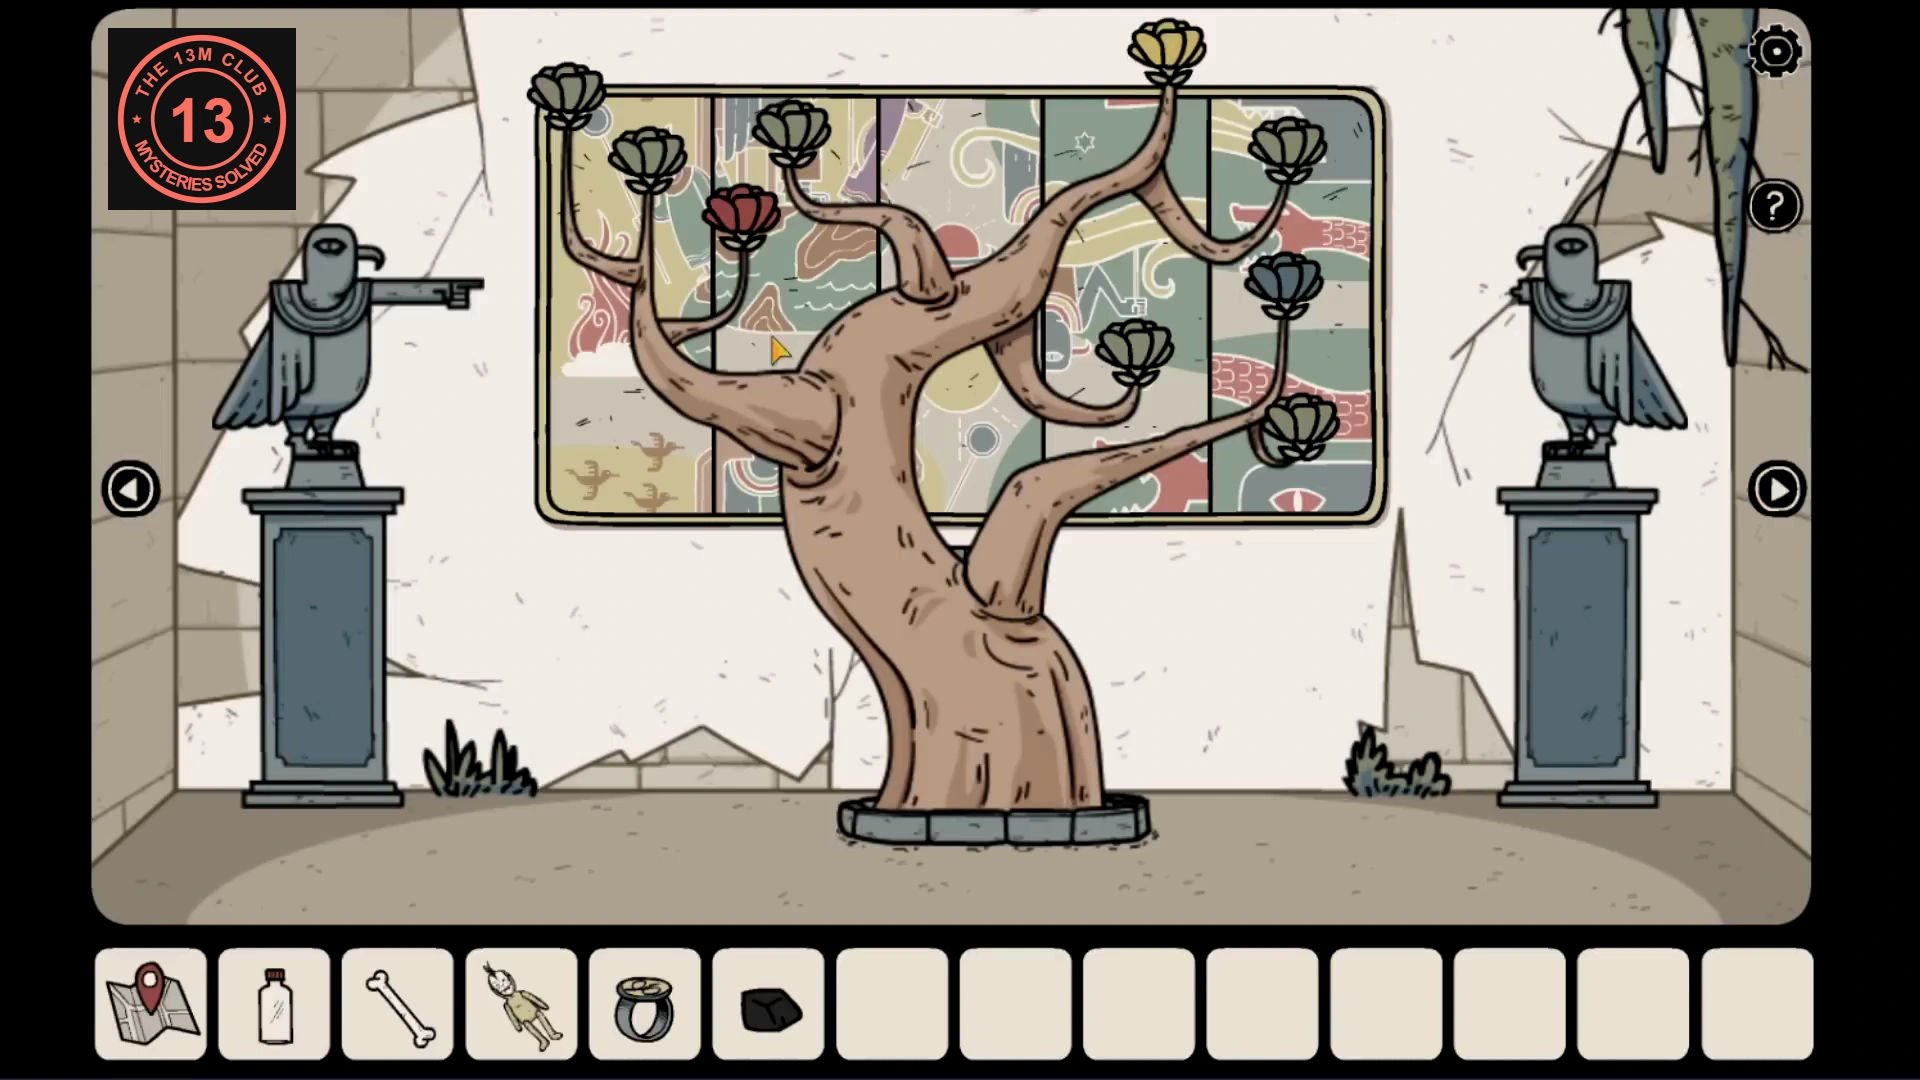
Let the bee finish at each flower before moving it onward.
- Follow the bee to the small flowers around the chambers. Tap each flower it pauses beside, wait for it to leave and follow to the next. The route passes the people mural, the red-chest room, the circular lock and the snake room before reaching the tree mural.
- Take the red, blue and yellow flowers from the tree. Once the tree vanishes, collect the red mushroom from the same spot.
The moving mural and the black key
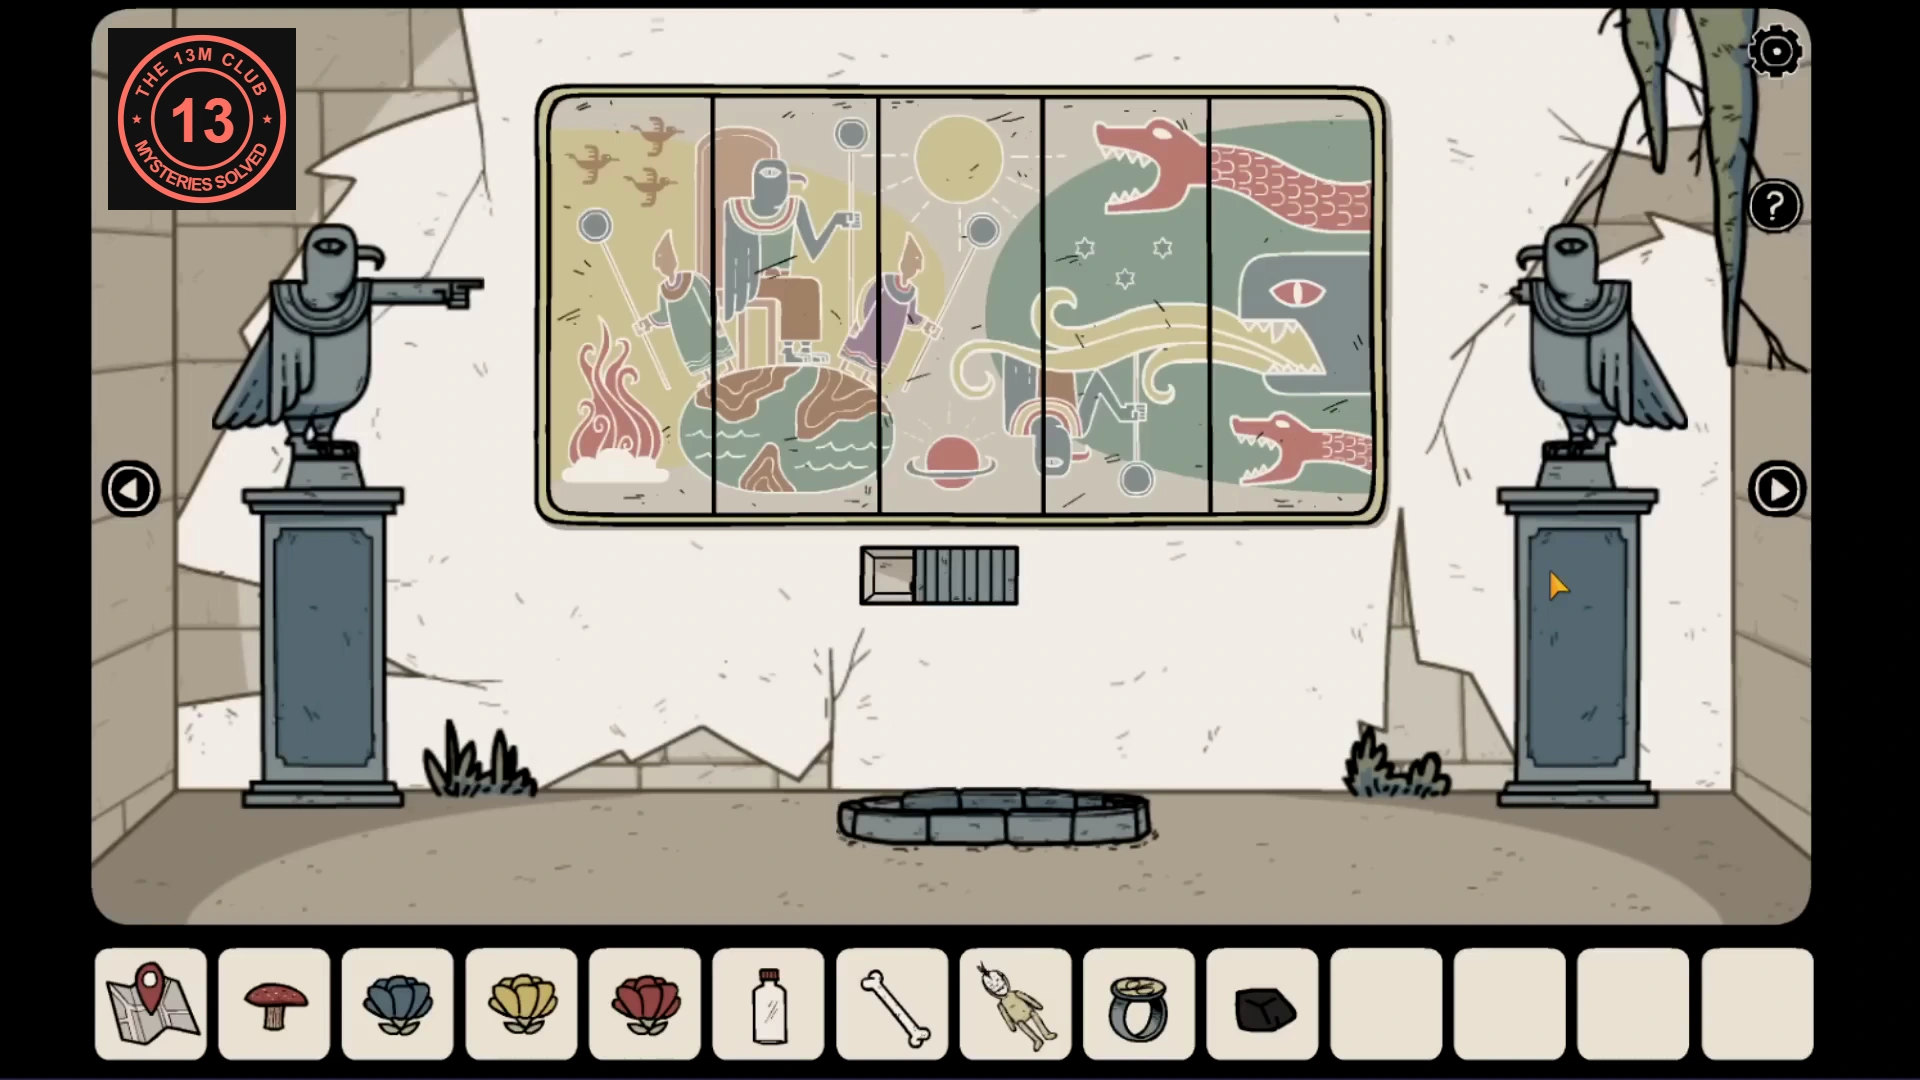
The vanished tree reveals a mural between the two small stone figures. It is divided into five vertical strips. The strips start in a different arrangement in each game and can take many taps, so this section gives the target picture and an approach rather than a tap sequence.
- Tap the mural’s vertical strips to scroll them vertically into the picture shown. Some taps move more than one strip, so first tap each strip once and watch which neighbors shift with it. Then build the picture around fixed landmarks: the seated bird-headed figure belongs in the second strip, the sun above the ringed planet in the middle strip, and the upside-down figure and serpent heads on the right. Follow the raised arms, the globe’s outline and the curved lines across each seam; a strip that looks right alone can still be one position out. When the complete picture aligns, take the black key from the opened compartment.
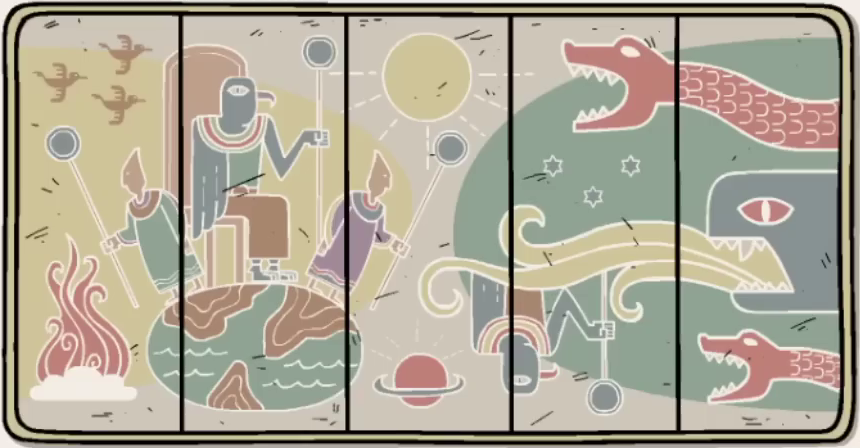
Target picture. The finished mural is the same in every game; only the starting arrangement changes. - Use the black key on the red chest. Take the flute, pestle and second empty jar. Note the colour of the snake painted on the large floor pot at the far left of this room; it is blue in the recorded game.
The snake, the stone hand and the staff symbols
The snake guards the arched niche on the right in the staircase room.
- Play the flute for the snake in the right arched niche. Wait for it to close its eyes and fall asleep, then take the stone hand it was guarding.
- Go to the tree-mural wall with the two stone figures. Attach the hand to the damaged figure on the right. Light reveals four circular symbols along the staffs in the mural. Read those symbols from left to right.
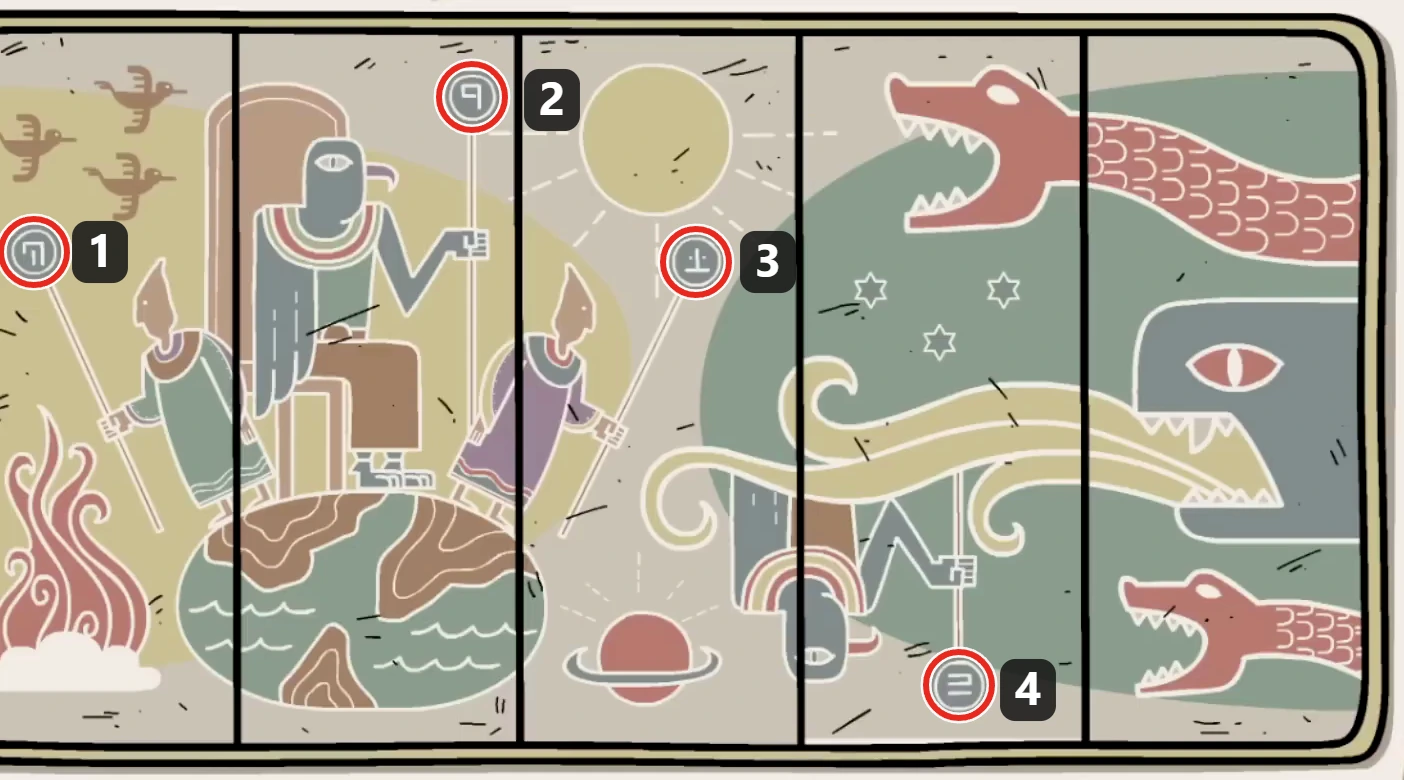
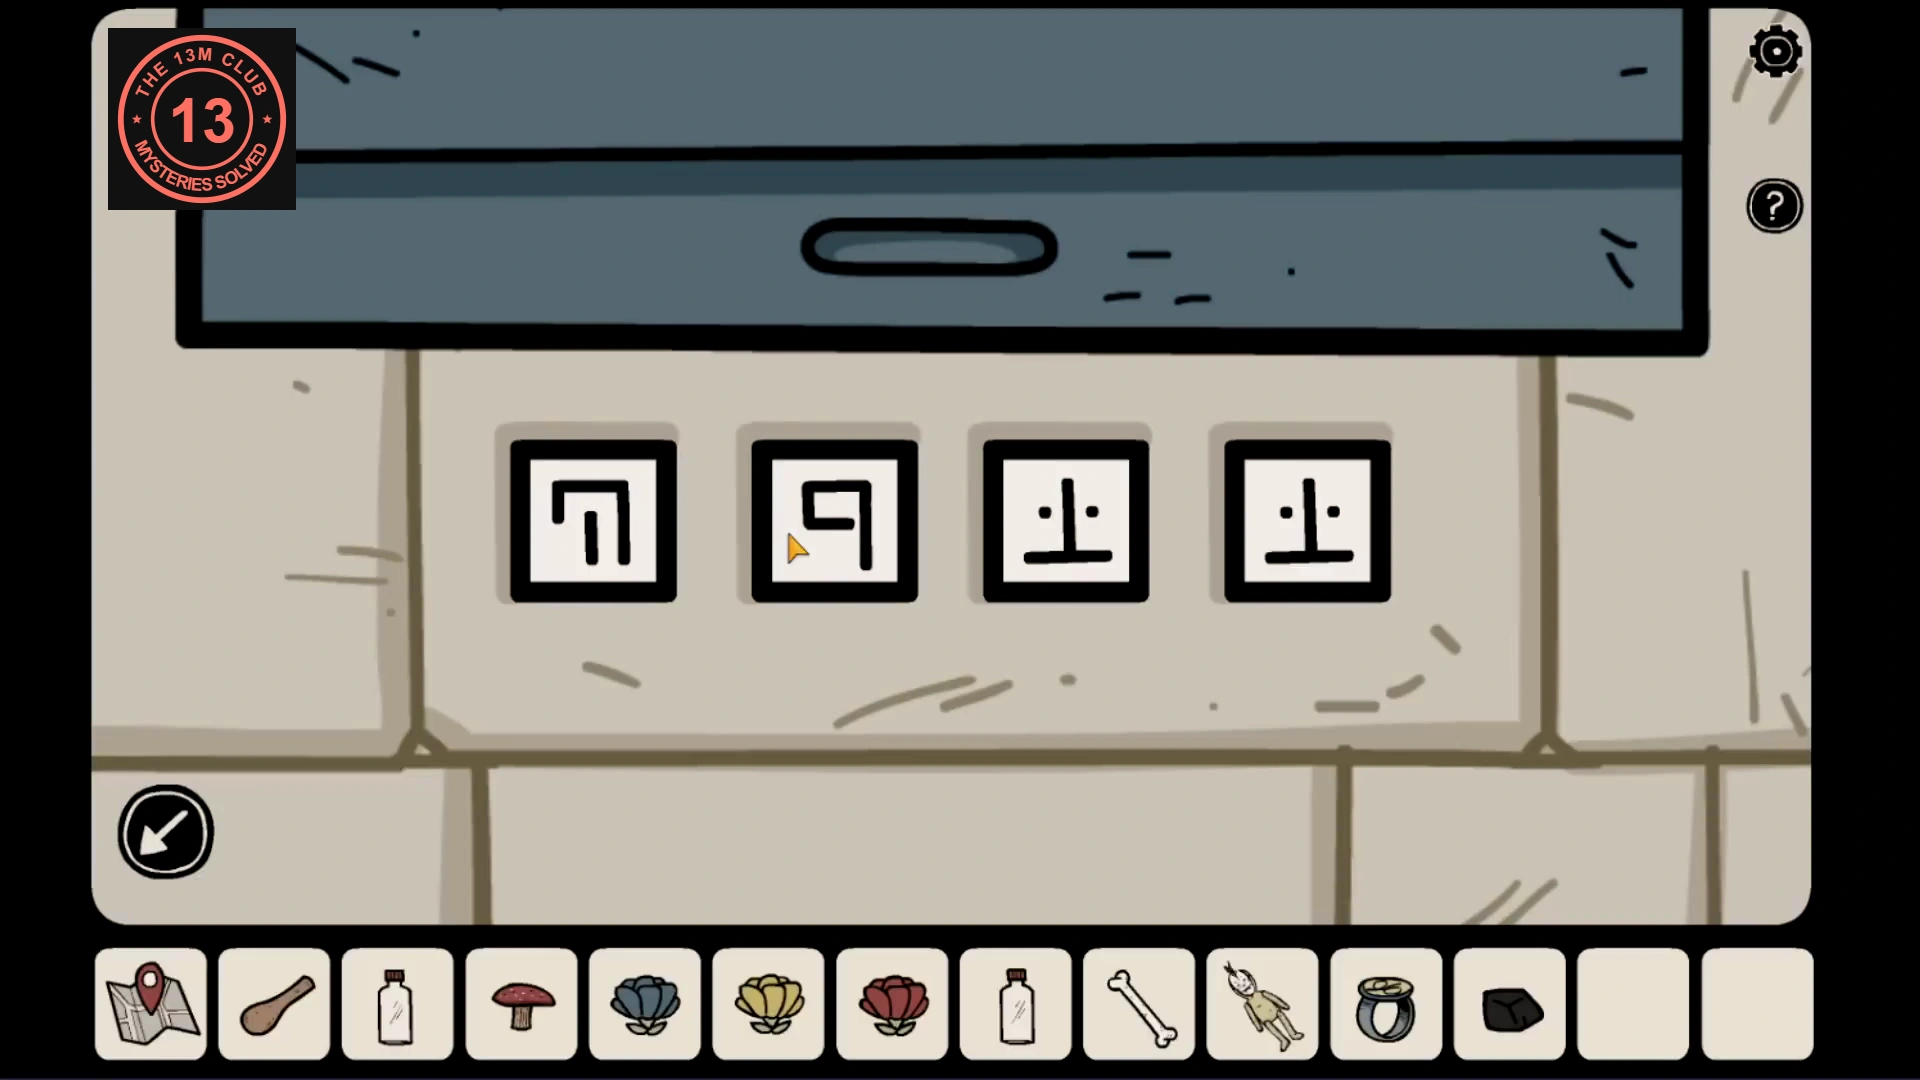
Example symbols, read left to right. Number 4 hangs at the bottom of the upside-down figure’s staff. - Return to the staircase room and inspect the four-symbol lock beneath the left arched niche. Enter the circled symbol on each staff, reading the mural from left to right. Include the symbol at the bottom of the upside-down figure’s staff. Open the compartment and take the paper with colored symbols and the third empty jar.
The concentric rings and the water supply
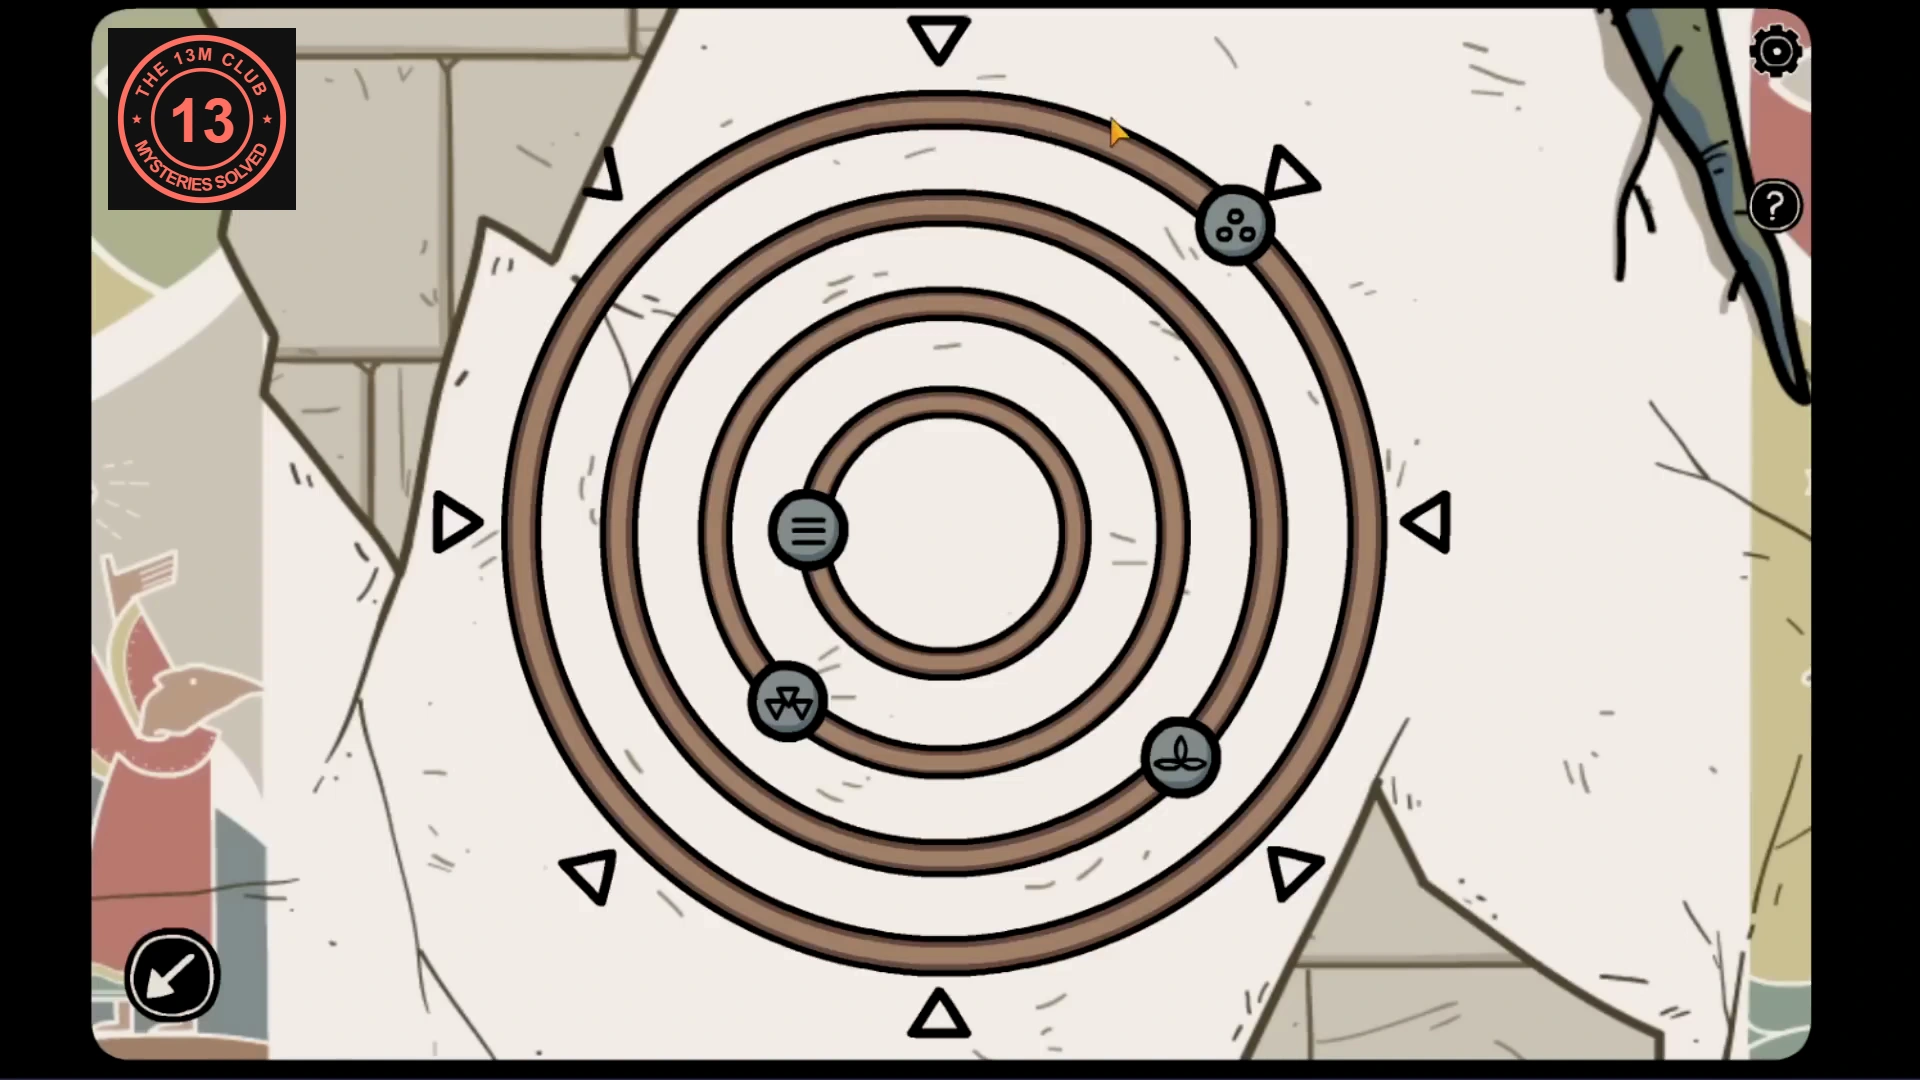
Combine colors from the paper with directions from the people mural.
- Inspect the mural of four colored people and note where each points. Read the colored symbols on the paper; their colors can differ between games. Pair each symbol with the pointing direction of the same-colored person.
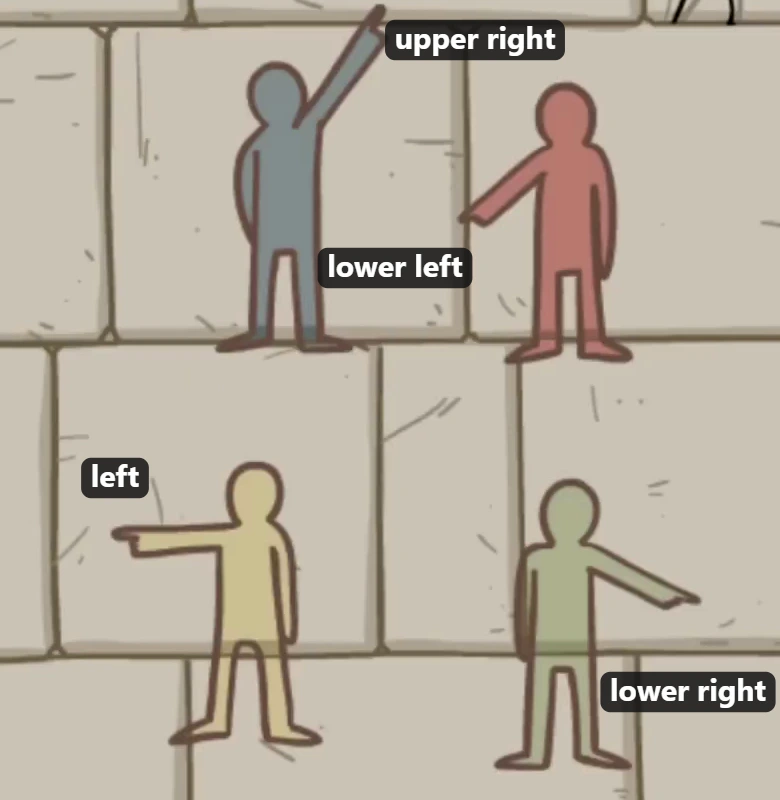
Each person’s pointing direction: blue upper right, red lower left, yellow left and green lower right. - At the concentric circular lock, rotate each ring until its symbol points in the direction assigned by the matching color. In the shown run: blue points upper right, red lower left, yellow left and green lower right. The finished lock opens a compartment containing the sun stone and a lever.
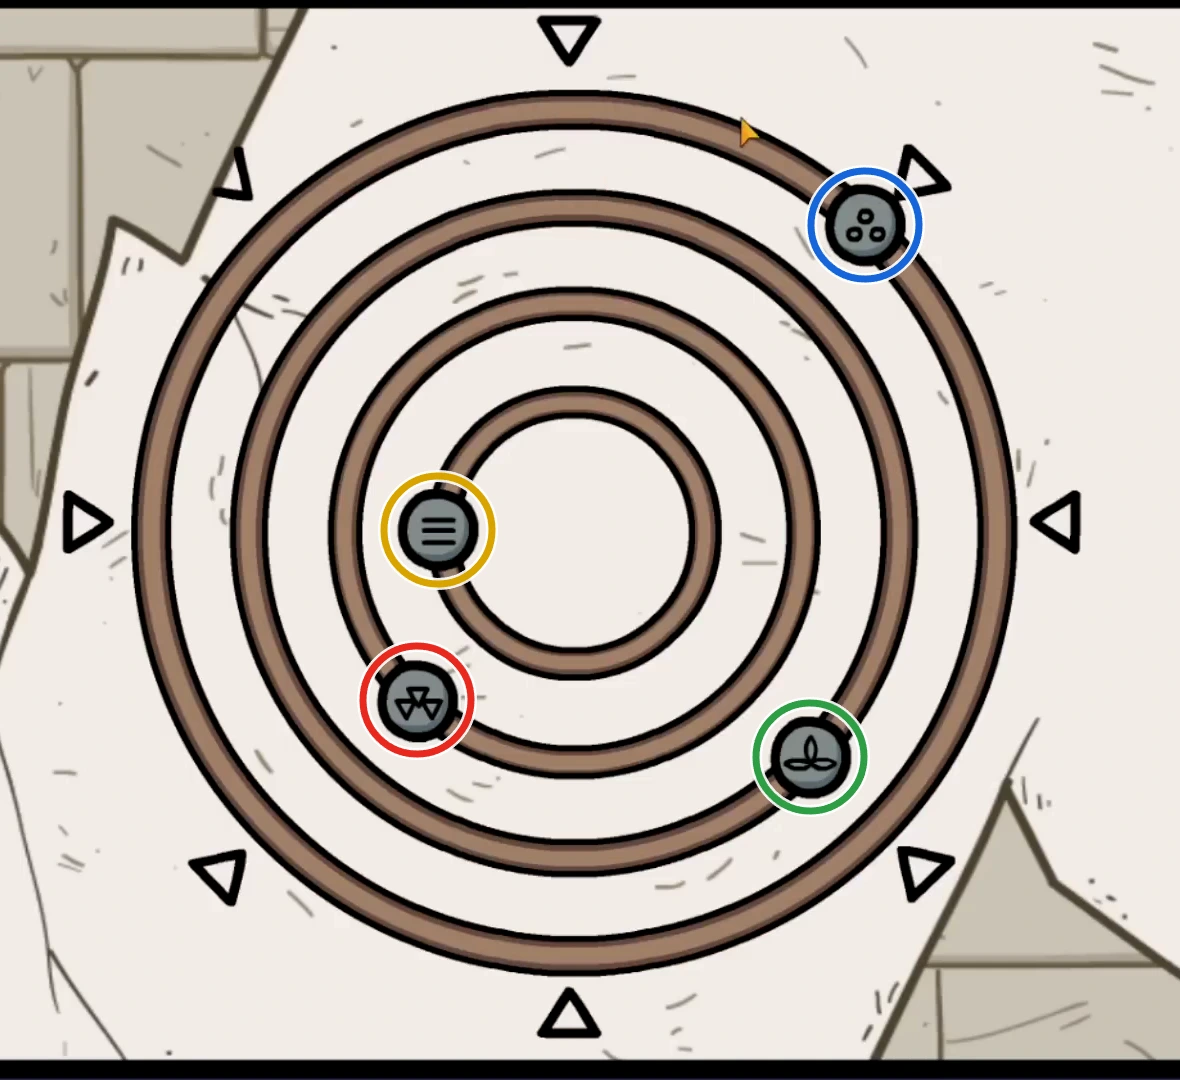
Example solution. Circle colors show each symbol’s color on this game’s paper; your colors can differ. - Take the sun stone and pull the lever. Water begins flowing through the animal-head fountain elsewhere in the chambers.
The sun stone and the three dyes
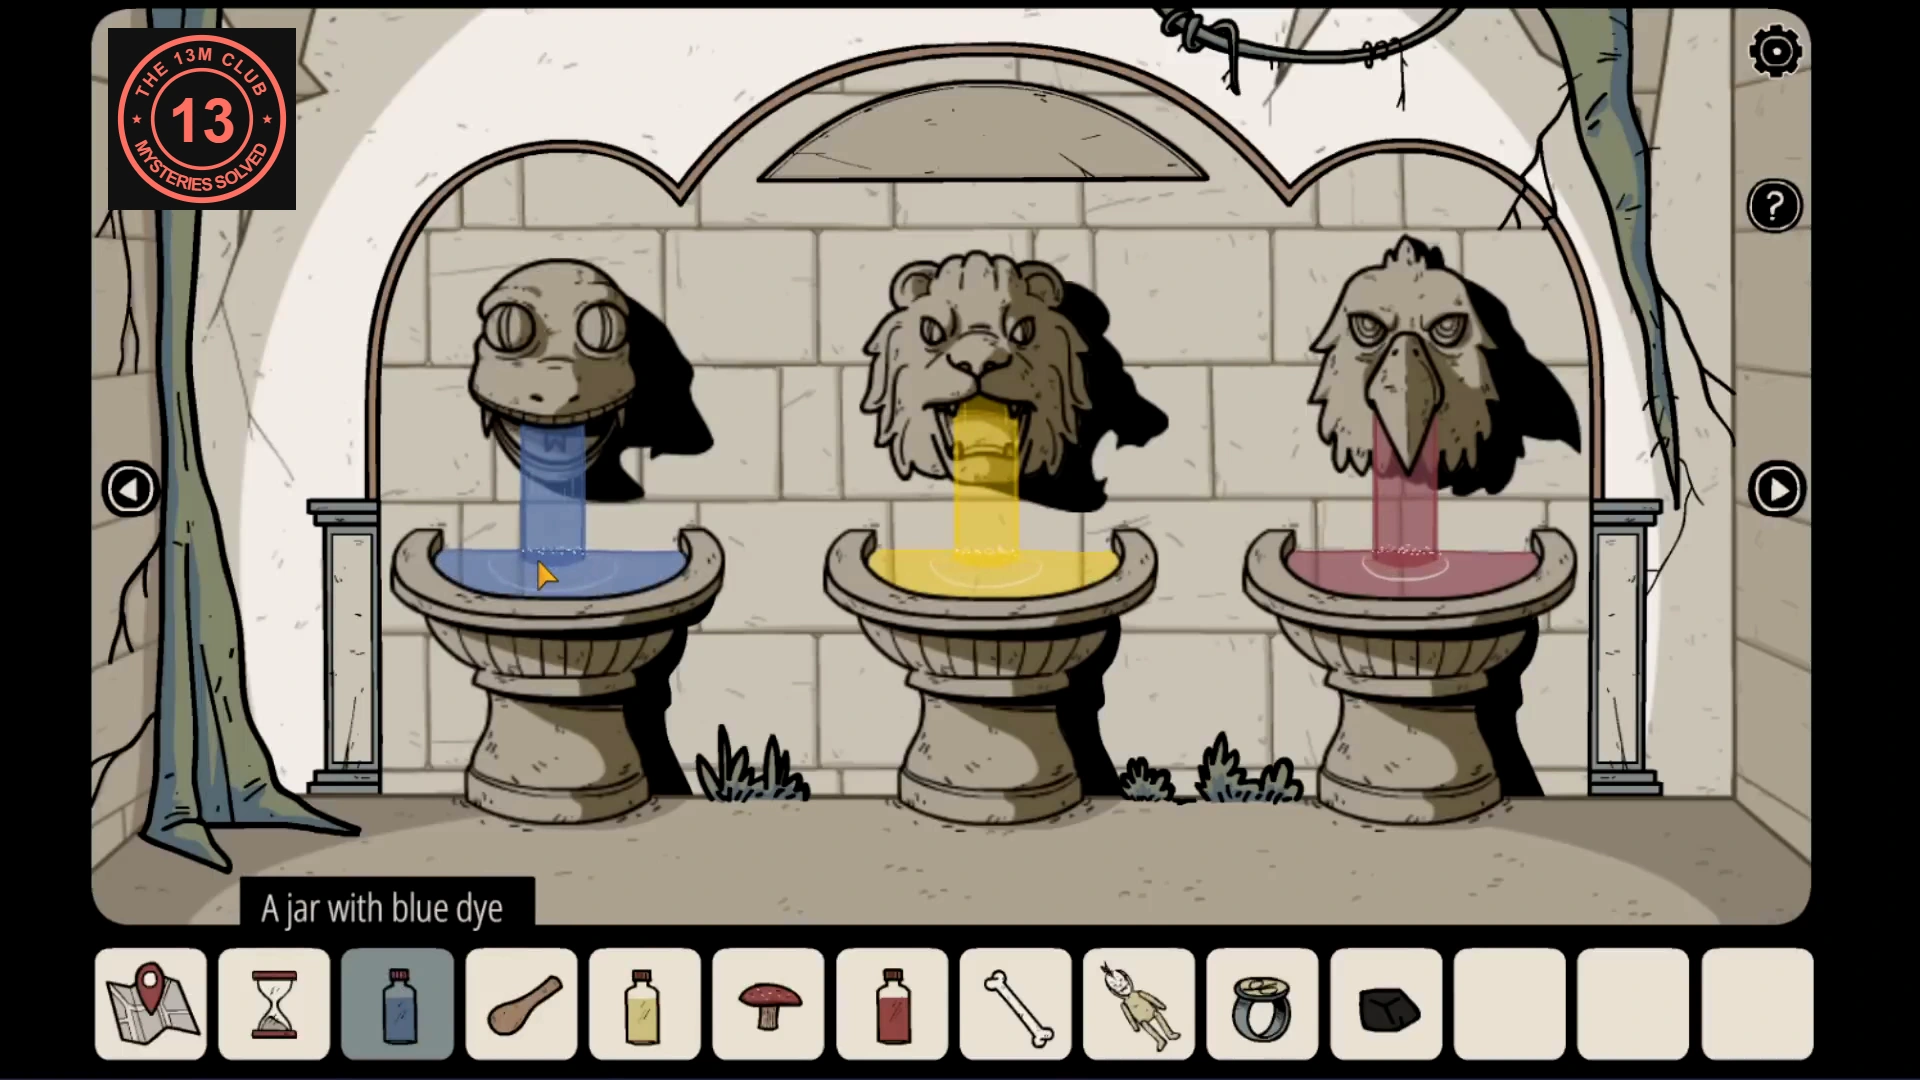
The concentric-ring room has a round slot in each of its two wall murals. The bowl for crushing flowers is in the separate people-mural room. The fountain’s colors change between games; three painted pots tell you which dye each animal head needs.
- In the concentric-ring room, put the sun stone into the round slot in the left, daytime mural. Take the gold key from the compartment below that mural.
- Use the gold key on the blue chest near the staircase and take the hourglass.
- At the bowl beneath the people mural, put in the blue flower and crush it with the pestle. Use one empty jar on the bowl to collect the blue dye.
- Put the yellow flower into the emptied bowl, crush it with the pestle and collect the yellow dye in another jar.
- Repeat with the red flower and the remaining jar to make red dye.
- Visit the passage with the two large guardian statues and the central doorway. Note the colour of the bird painted on the pot beside the right statue. Together with the snake pot at the far left of the red-chest room and the lion pot beside the animal bench, it gives all three fountain colors.
- At the flowing fountain, pour into each animal head the dye matching that animal’s pot: snake head on the left, lion in the middle, bird on the right. In the recorded game this was blue for the snake, yellow for the lion and red for the bird; another recorded game used different colors. Take the moon stone released by the fountain.
- Return to the concentric-ring room and place the moon stone in the round slot in the right, nighttime mural. Take the quartz crystal from the compartment below that mural.