CHAPTER 1
Enter the murder house
Start at Ren’s desk. The map remains available throughout the investigation.
- Zoom in on the coffee cup at the police station and take the sugar packet beside it.
- Open the middle drawer on the right side of the desk and take the map. Select the map, choose Murder house and enter through the front door.
- Use the side arrows to find the room with the television. Zoom in on the wall socket beside the TV and pull out the plug to collect the cable.
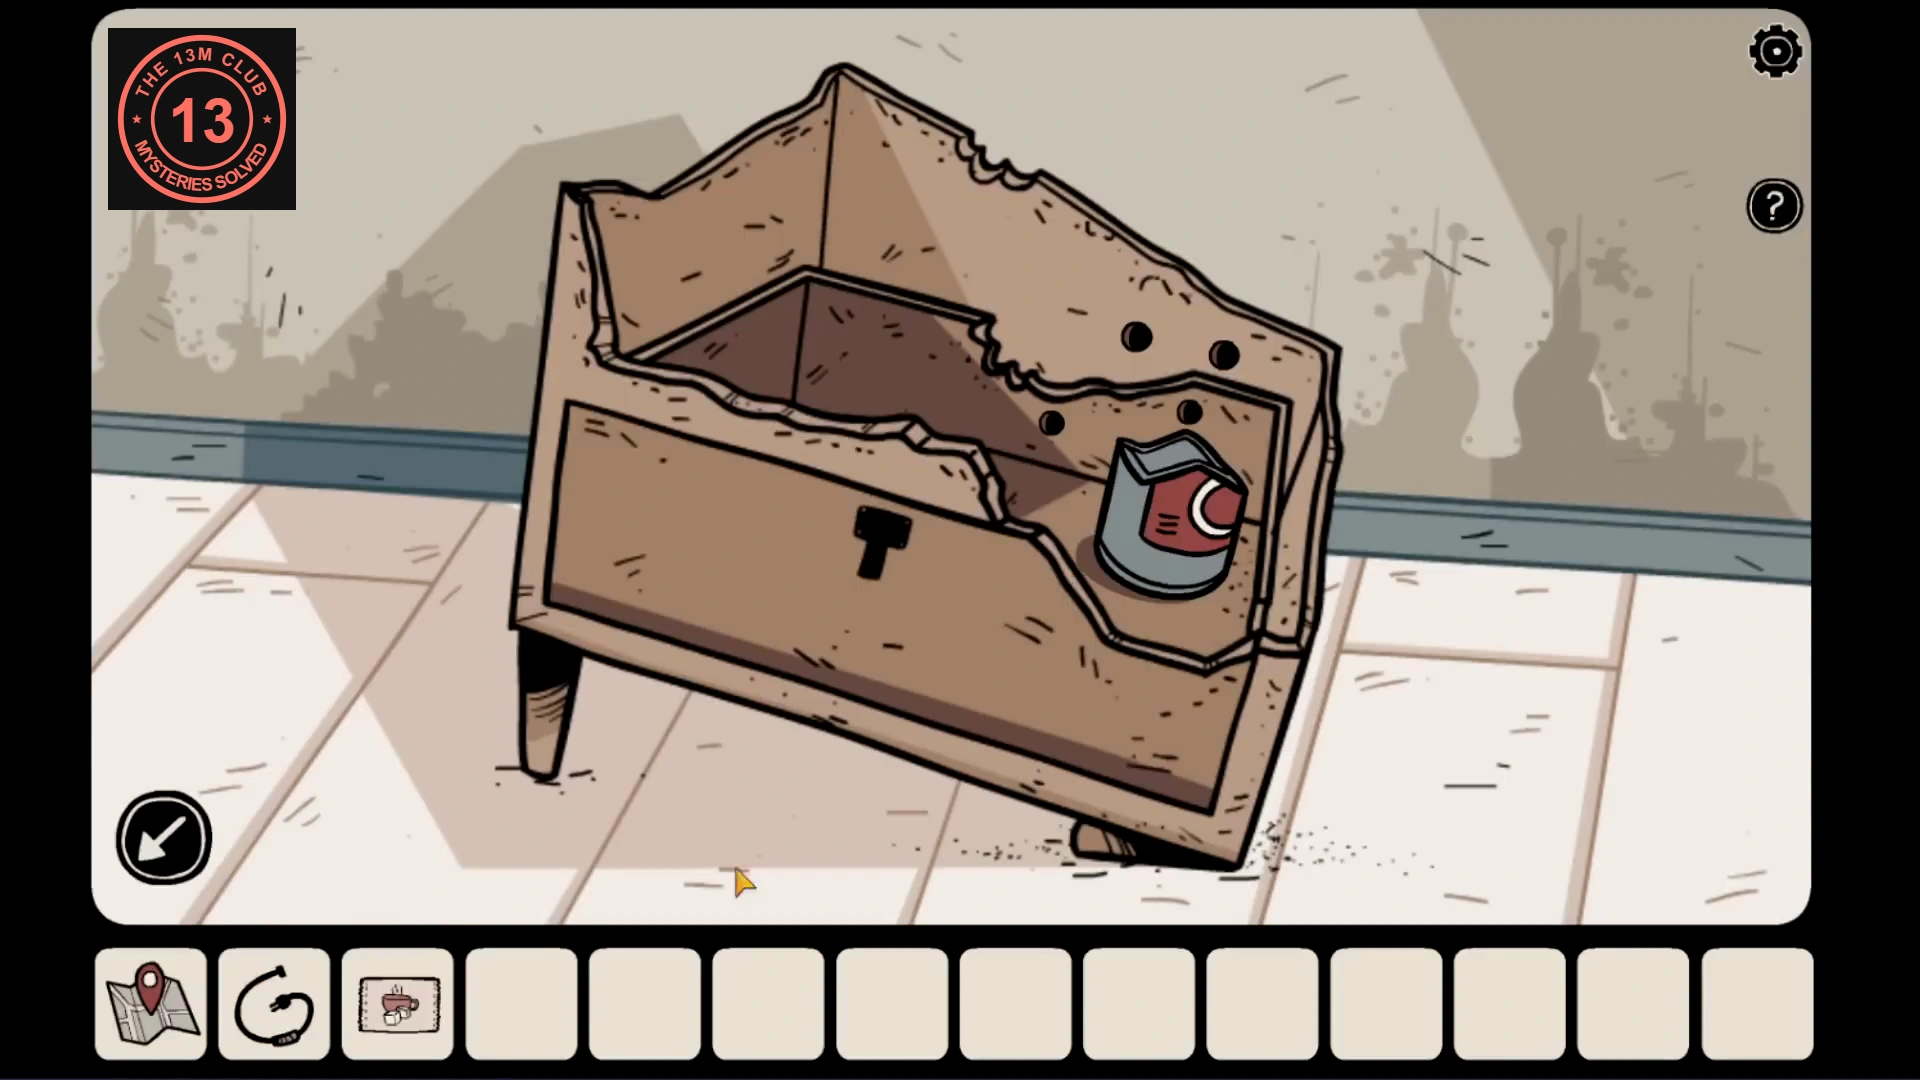
- Find the room with the armchair and low table. Take the broken bottle from the table, then inspect the damaged wooden drawer lying against the right wall.
- Place the broken bottle inside the damaged drawer and pour the sugar into it. Wait for the termites to crawl in, then take the filled bottle.
- Go to the white door covered with wooden planks. Use the bottle of termites on the boards, wait until the doorway clears and go inside.
CHAPTER 2
The portraits and the locked chest
Beyond the boarded door, the rooms form a loop: mirror, telephone, stove and vase. The two doors beside the telephone lead to the bedrooms.
- At the telephone, open both bedroom doors. The left bedroom has a fish tank; the right has a red desk and a clock. Take the yellow notebook from the red desk.
- Inspect the four pictures: beside the vase, above the telephone, above the bed in the fish-tank room and on the red desk. Arrange their plant stages from seed to sprout, leaves and fruit. Read the pointing finger in each picture in that order.
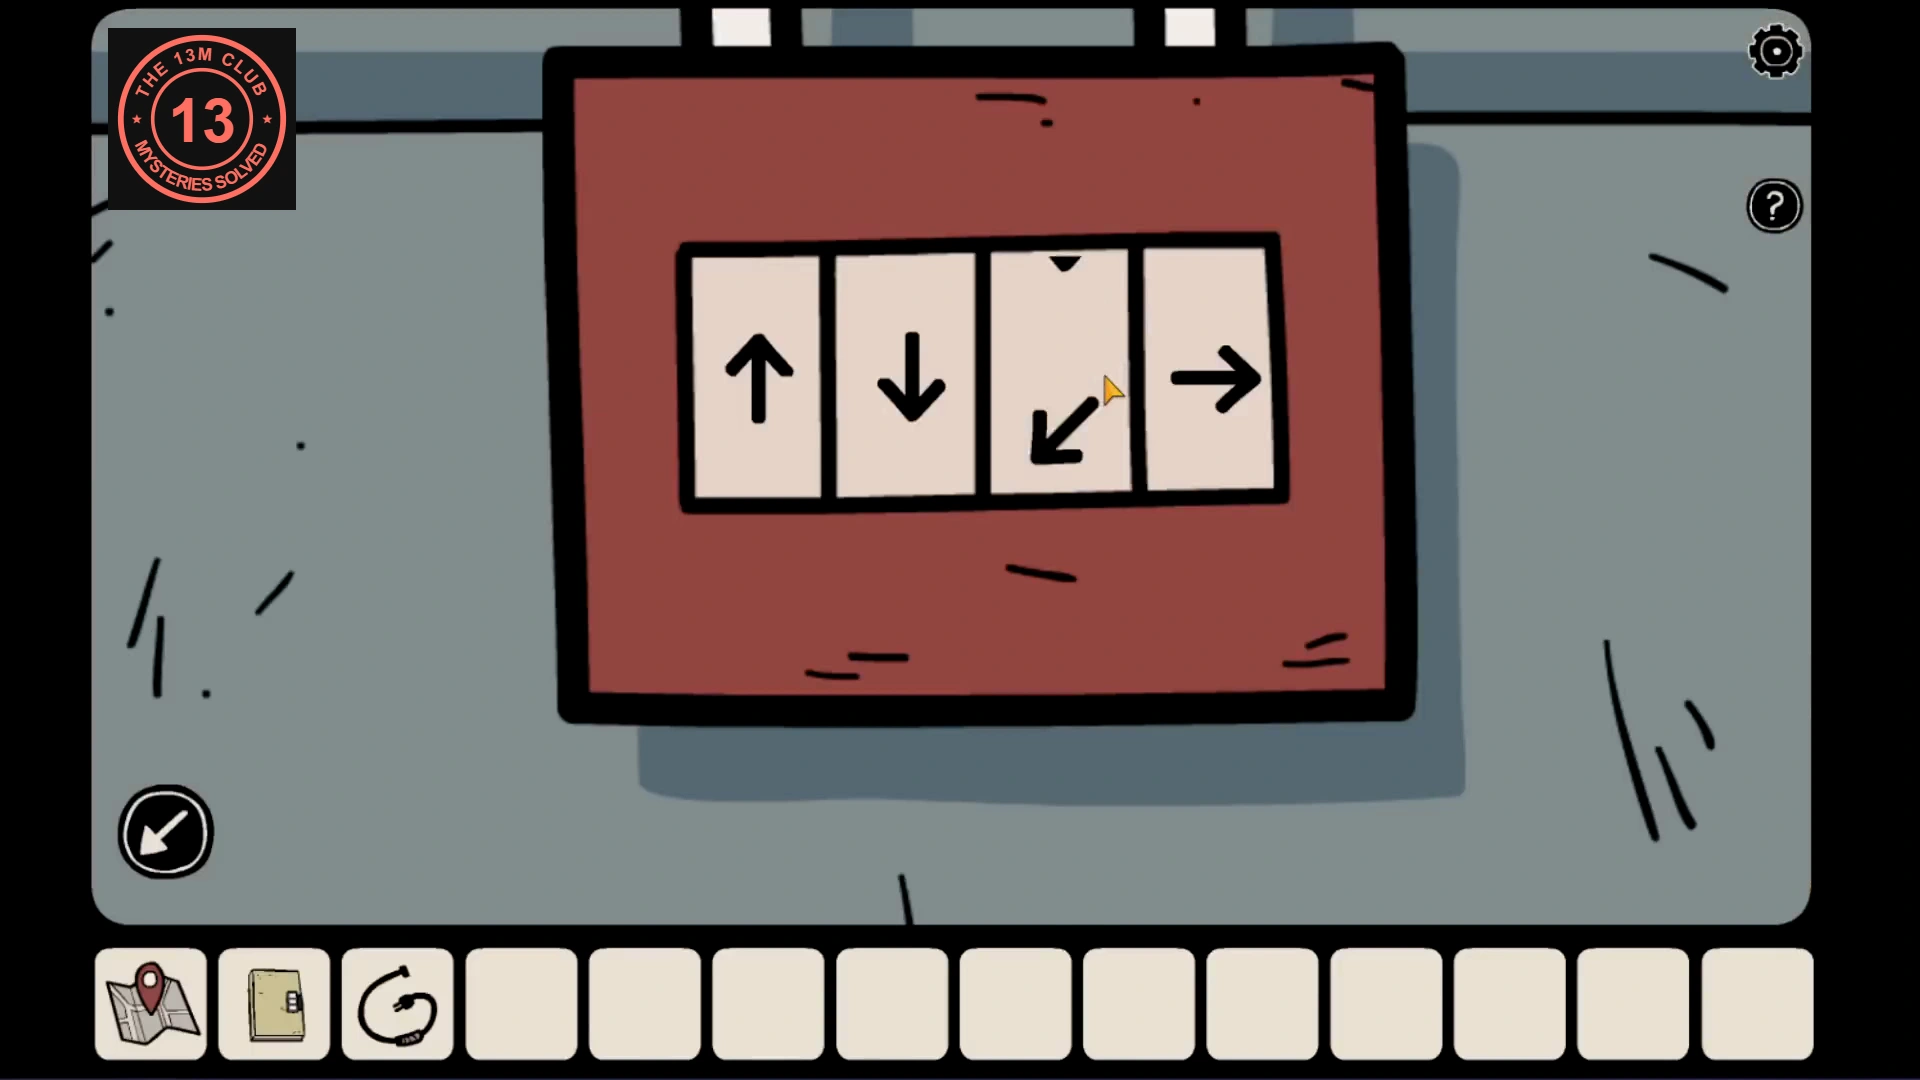
- In the stove room, enter those four directions on the blue chest’s arrow lock. The example run uses up, down, left, right. Open the chest and take the light bulb.CODE↑ ↓ ← →
- Examine the three shirts in the chest. Their designs represent one, two and three; the red shirt, for example, shows a large 1. Zoom in on each tag and enter its symbol into the yellow notebook’s lock in that order. Open the notebook and inspect its pages.
CHAPTER 3
The stove and the mirror
The yellow notebook controls both the stove lock and the room lighting.
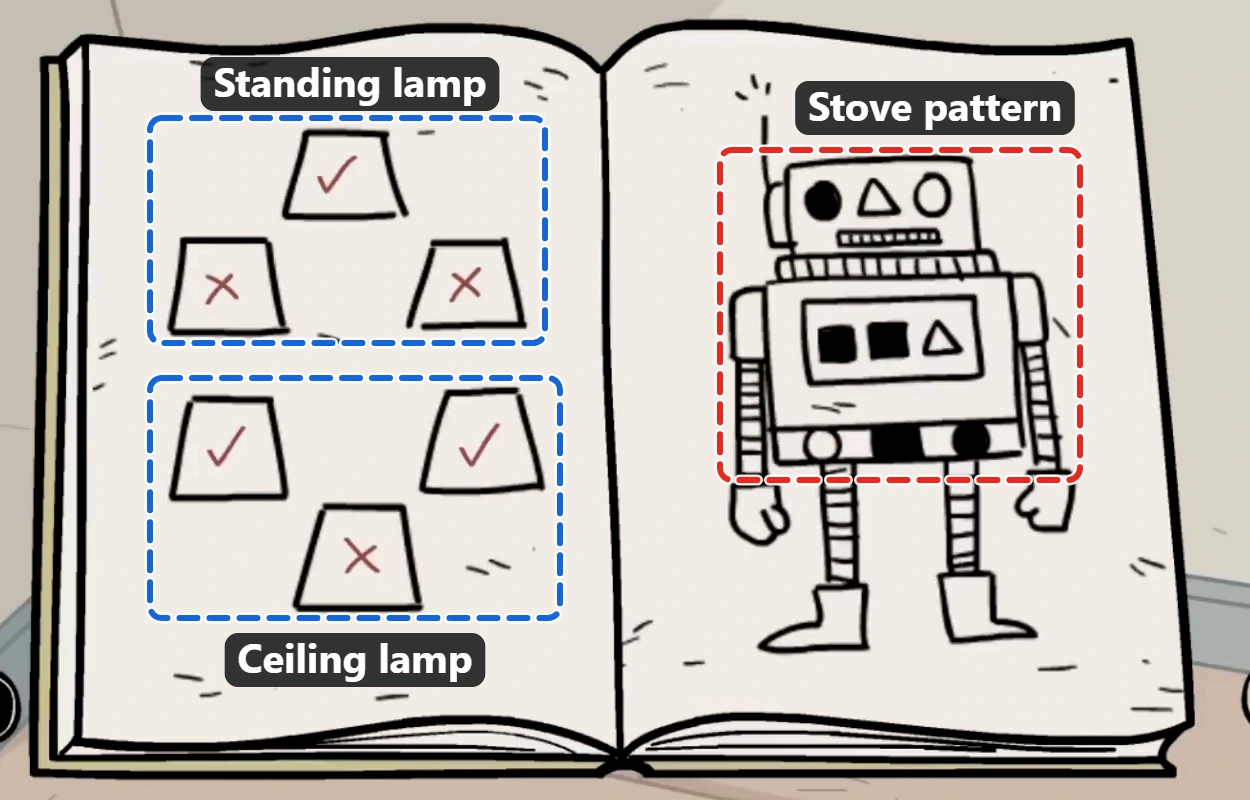
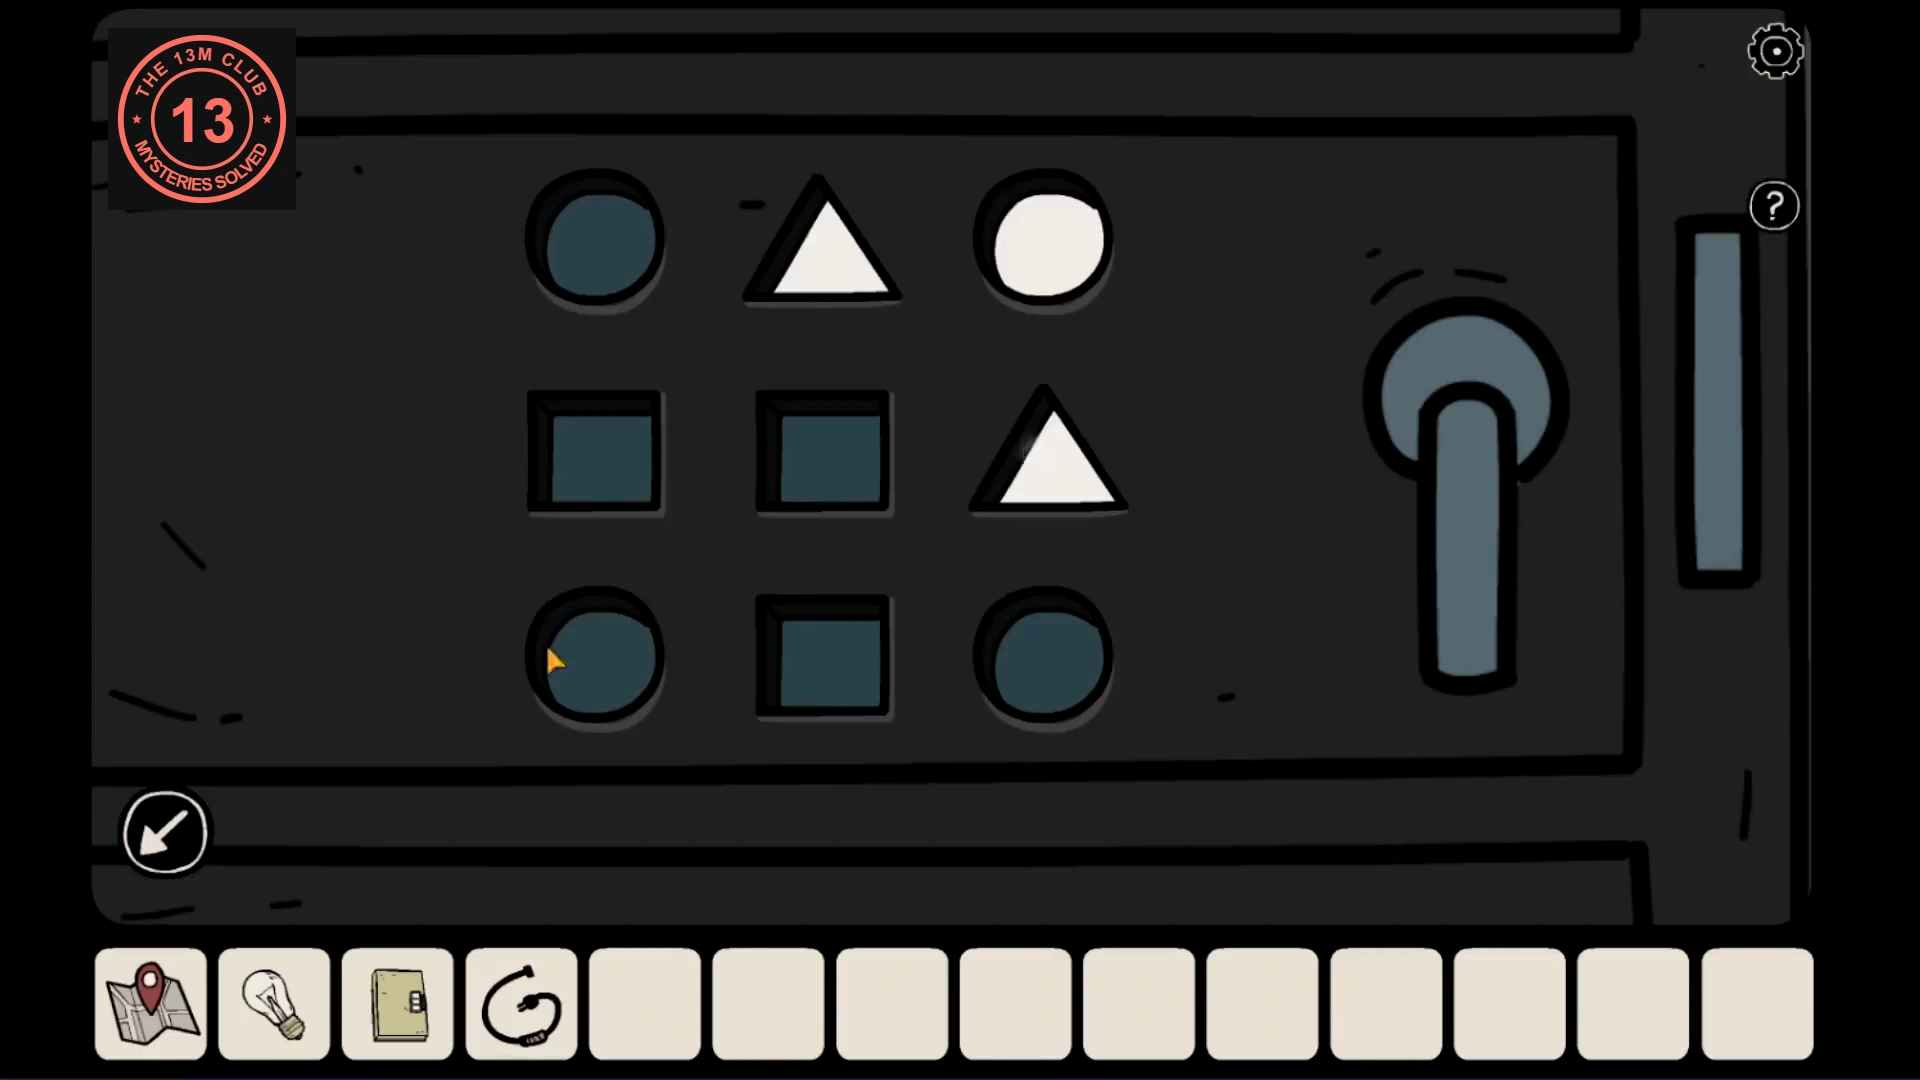
- Zoom in on the stove’s nine symbols. Tap them until the light and dark pattern matches the robot in the yellow notebook. Open the stove and take the pencil, the vase fragment and the charcoal. Keep the charcoal for the cemetery.
- Read the two groups of three shades beside the notebook’s robot. The upper group represents the standing lamp: one top bulb and two side bulbs. The lower group represents the ceiling lamp: left and right bulbs above a lower middle bulb. Put bulbs in the checkmarked positions and leave the crossed-out positions empty, moving the existing ceiling bulbs as needed. In this run, only the standing lamp’s top bulb and the ceiling lamp’s left and right bulbs are fitted.
- Connect the collected cable to the socket beneath the standing lamp and turn it on with the white button on its stem. In the stove room, pull the cord hanging from the ceiling lamp to switch it on. Return to the mirror: Mia appears and asks for her bear.
CHAPTER 4
The hidden drawer code
The tall cabinet stands in the room with the broken vase and the window.
- Enter the fish-tank bedroom through the left telephone-room door. Open the central drawer beneath the tank and take the glue.
- Open the yellow notebook to the torn final page. Rub it with the pencil to reveal four divided-square patterns.
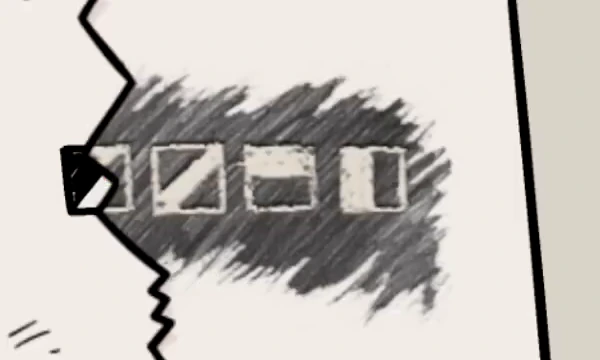
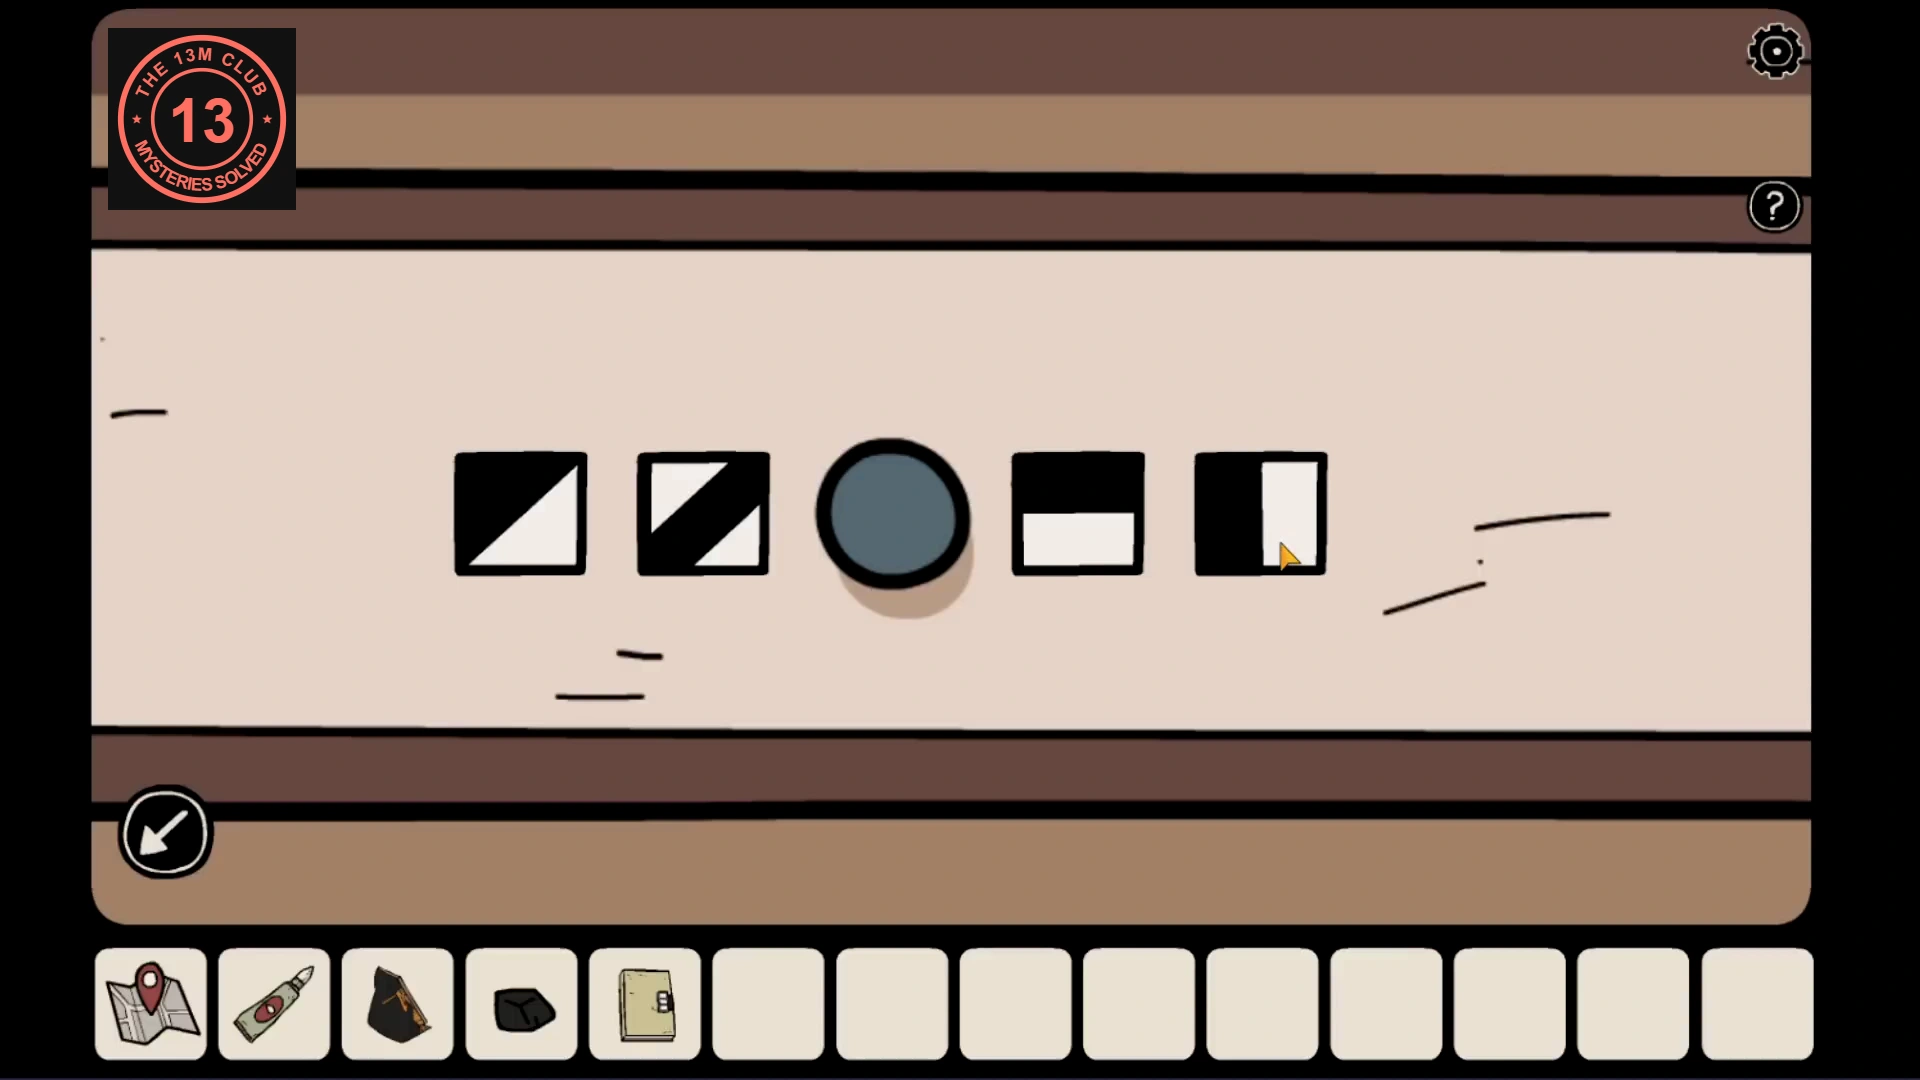
The rubbing’s four divided squares. The first square sits on the torn edge of the page. - Return to the vase room and zoom in on the tall cabinet’s top drawer. Set its four squares to the rubbing’s patterns from left to right. Follow the dividing lines: the rubbed dark areas correspond to the light areas on the lock. Open the drawer and take the blue token, microchip card and purple notebook.
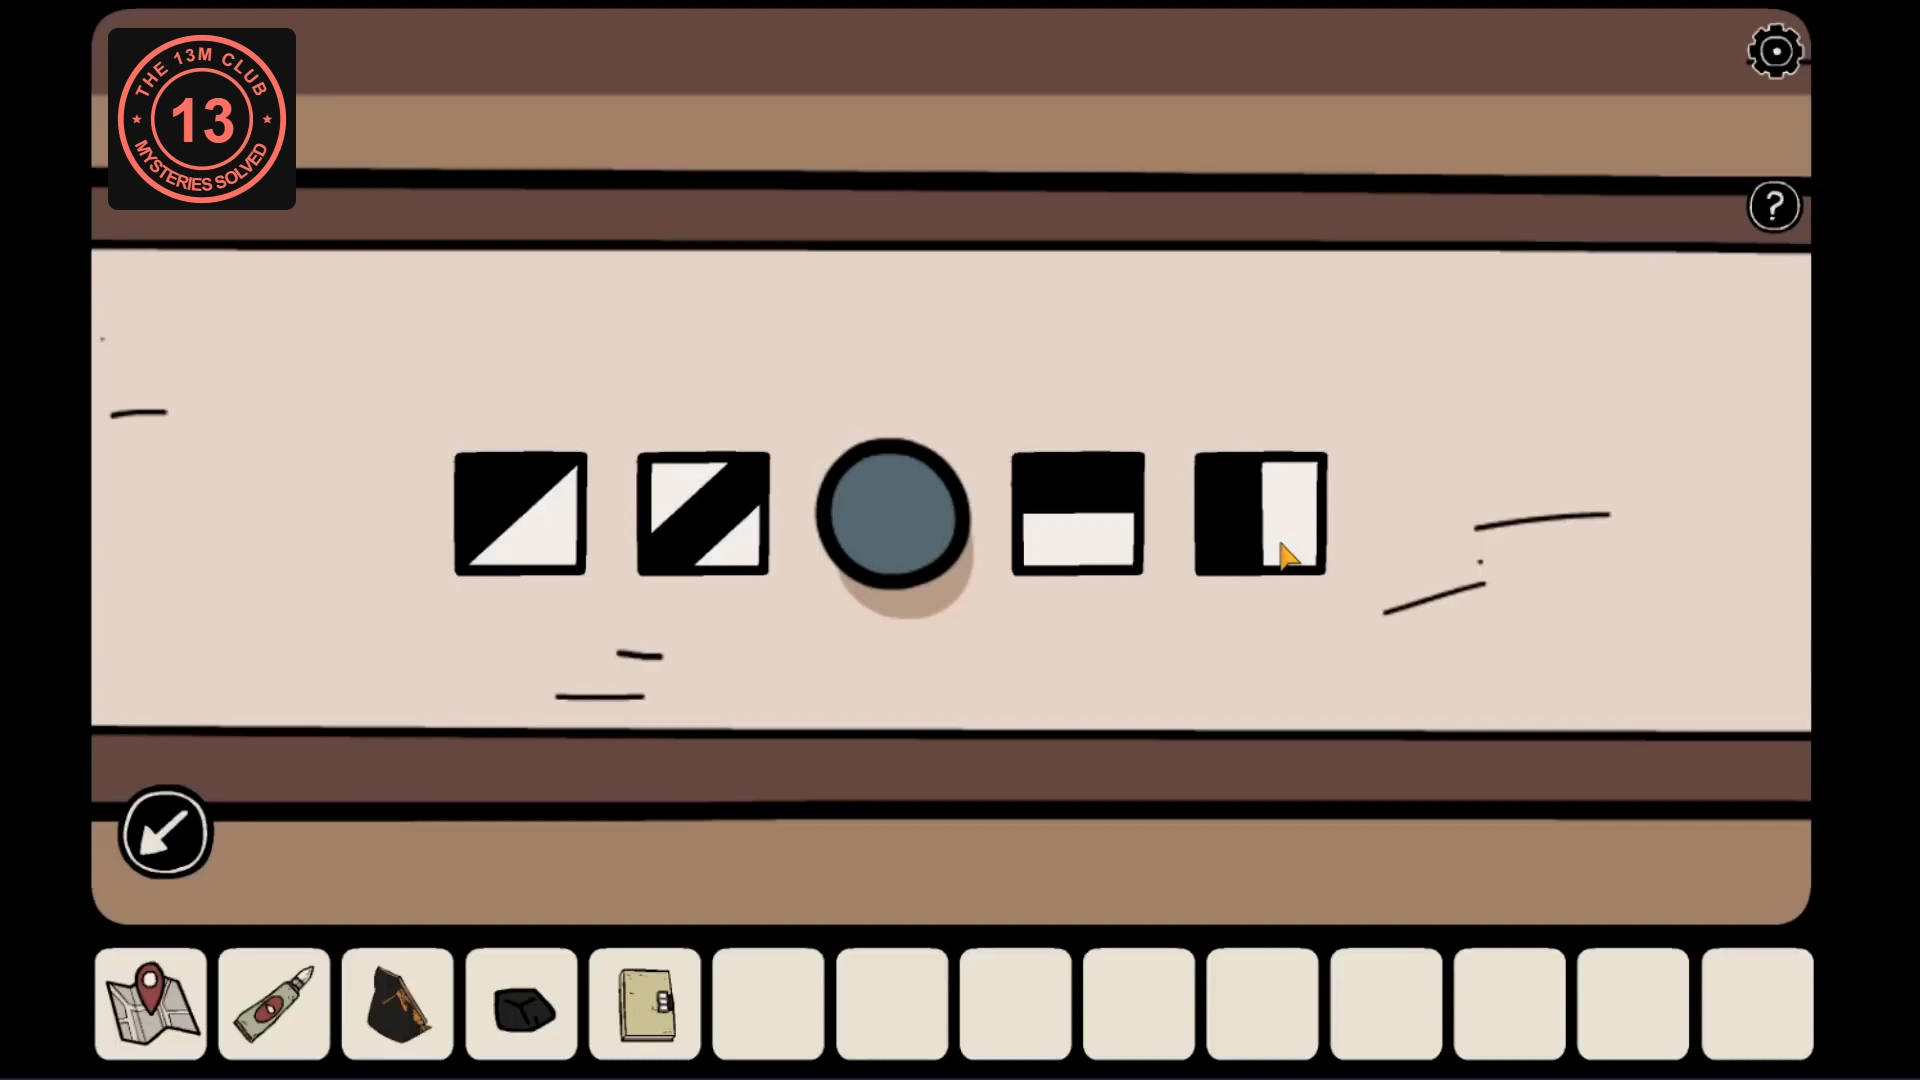
The same four divisions set on the drawer: the rubbed dark areas are light on the lock. - Open the bottom drawer of the same cabinet and take the green token.
CHAPTER 5
Mia’s bear and the piano tune
The mirror’s number leads to a musical clue. Turn up the game’s sound for this puzzle.
- Use the microchip card on the narrow reader beside the left cabinet door under the fish tank. Open it and take the teddy bear.
- Give the bear to Mia in the mirror. After she disappears, read the six digits left on the glass from top to bottom.
- Dial those digits on the red telephone. Listen to the short piano melody and note its order. The number in this run is 257014; use your mirror’s number if it differs. Dial again whenever you need to hear the clue.CODE257014
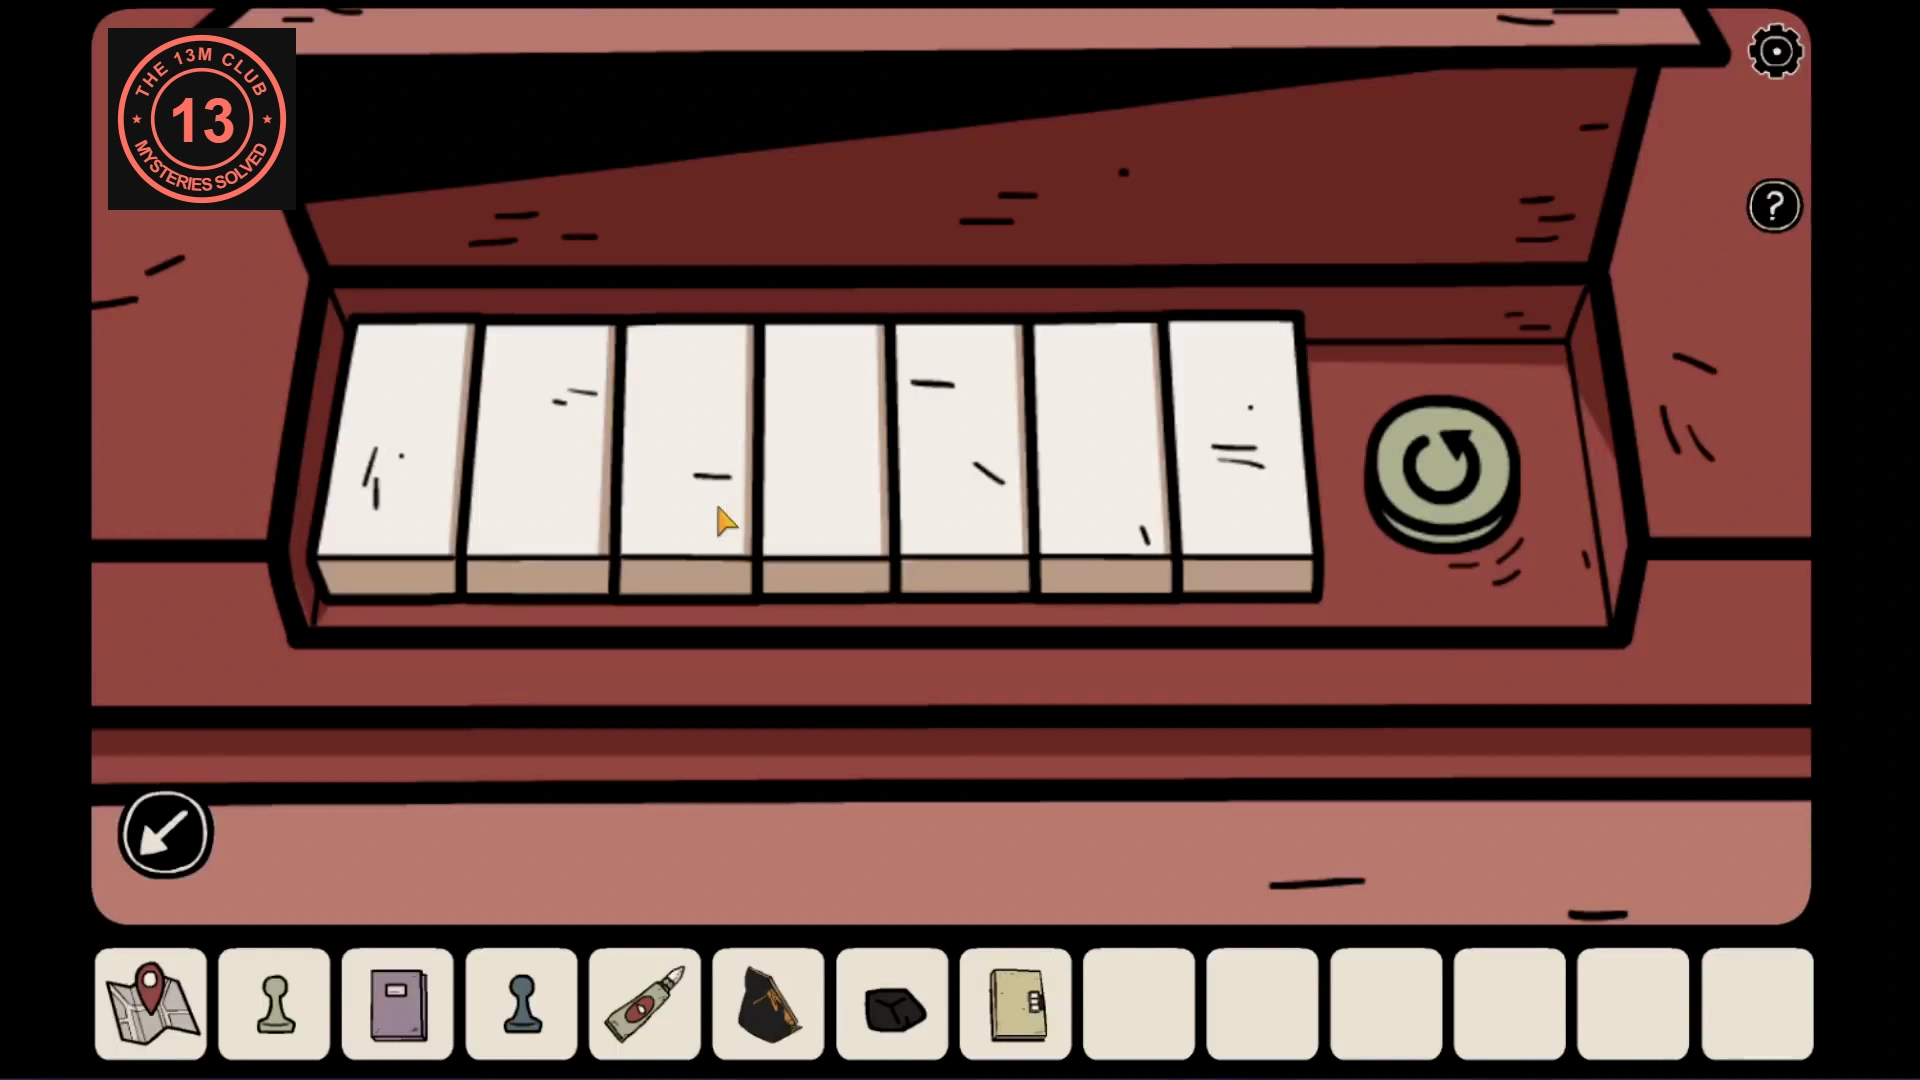
- Enter the right bedroom and lift the small keyboard cover on the red desk. Number its seven keys 1–7 from left to right and play the four-note phrase heard on the telephone. This run uses 3, 7, 2, 3 (E, B, D, E). Play the phrase once, then wait for the drawer to open. If it stays closed, listen to the telephone again and retry with your tune. Take the second vase fragment and the feathered metal clock hand from the drawer.CODE3 → 7 → 2 → 3
CHAPTER 6
Repair the vase and set all three clock hands
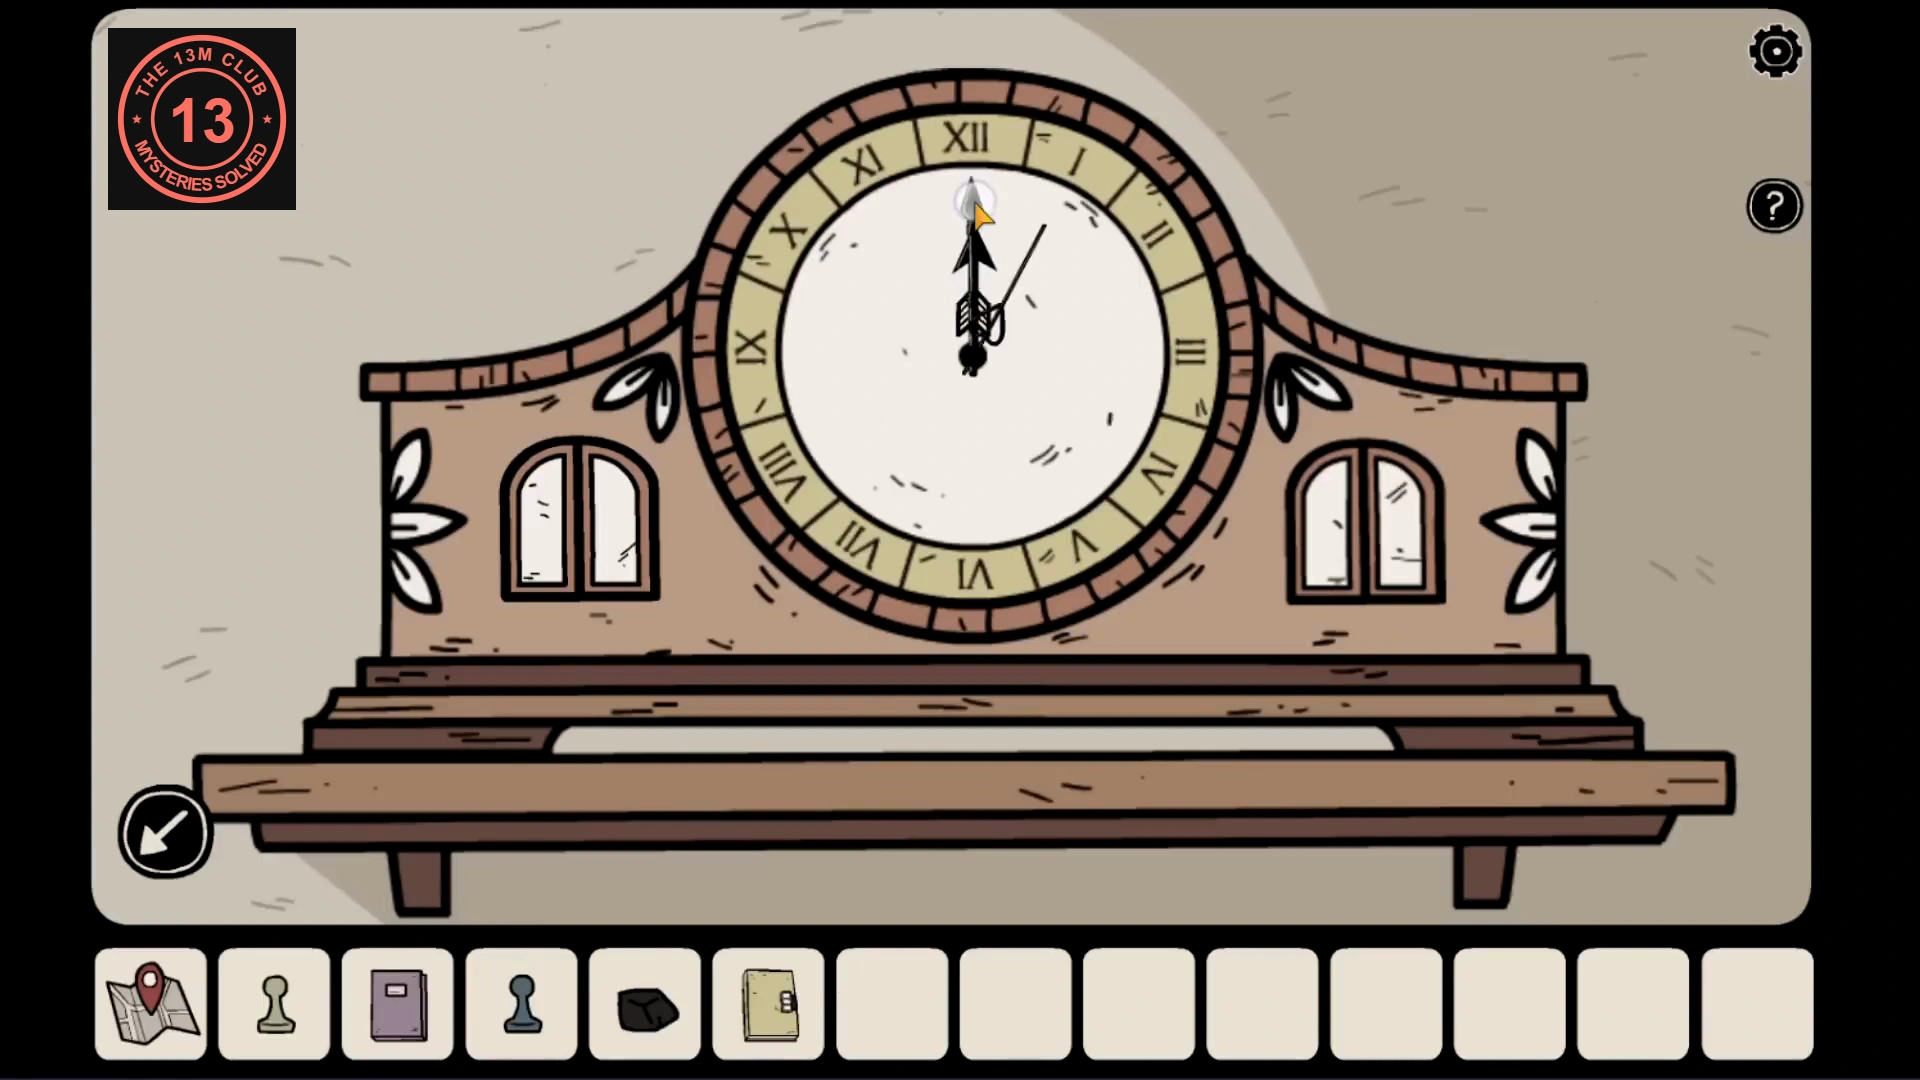
Two missing hands must be recovered before the clock can be solved.
- At the vase, put both collected fragments on the table and apply the glue to the loose pieces. Drag the pieces into the matching gaps, following the gold border and the warrior’s body. Fit the outer pieces first and the central piece last.
- Before taking the warrior’s spear, note the direction in which it points. Tap the spear to collect the second clock hand.
- Read the arrow page in the yellow notebook and find the arrow whose shape matches the feathered hand: the thick black arrow with striped fletching. Its direction can change between games. Then open the purple notebook’s last page for the thin hand’s direction. The third direction comes from the spear on the repaired vase.
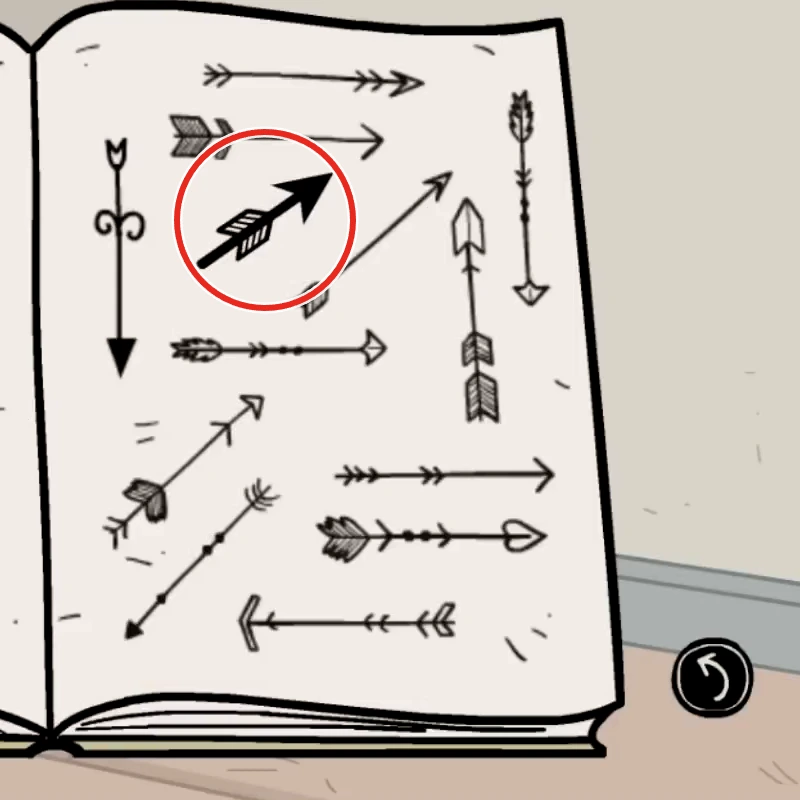
The circled arrow matches the feathered hand. Its direction can differ between games; this example points up and right. - Install both recovered hands on the bedroom clock. Rotate the feathered hand to match the yellow book, the spear hand to match the vase and the thin hand already on the clock to match the purple book. In the example, both recovered hands point to II and the thin hand to VIII. Take the red key from the figure that emerges on the left.
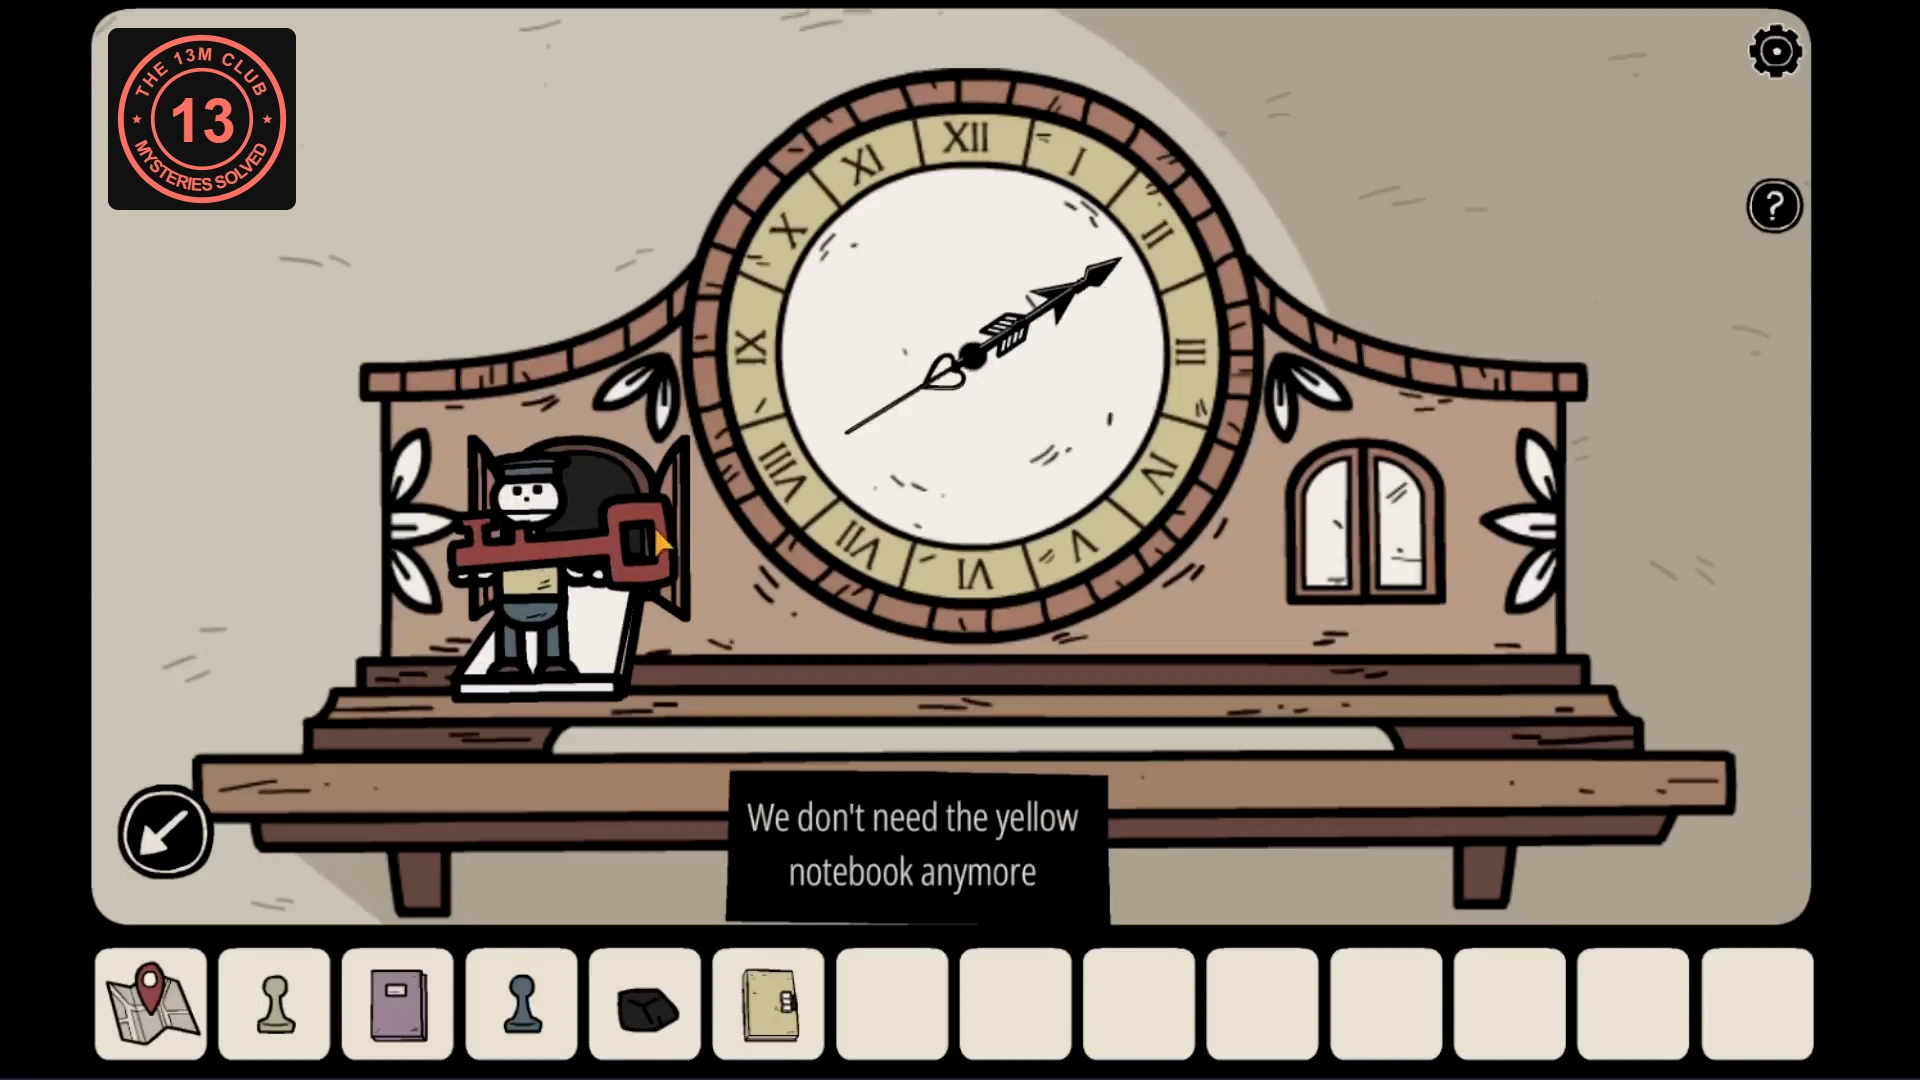
This run’s hands overlap at II; the thin hand points toward VIII. Use your three clues. - Owl 1: open the small door on the right side of the solved clock. Zoom in and tap the white owl peeking around its right edge.
CHAPTER 7
Feed the fish and find the last tokens
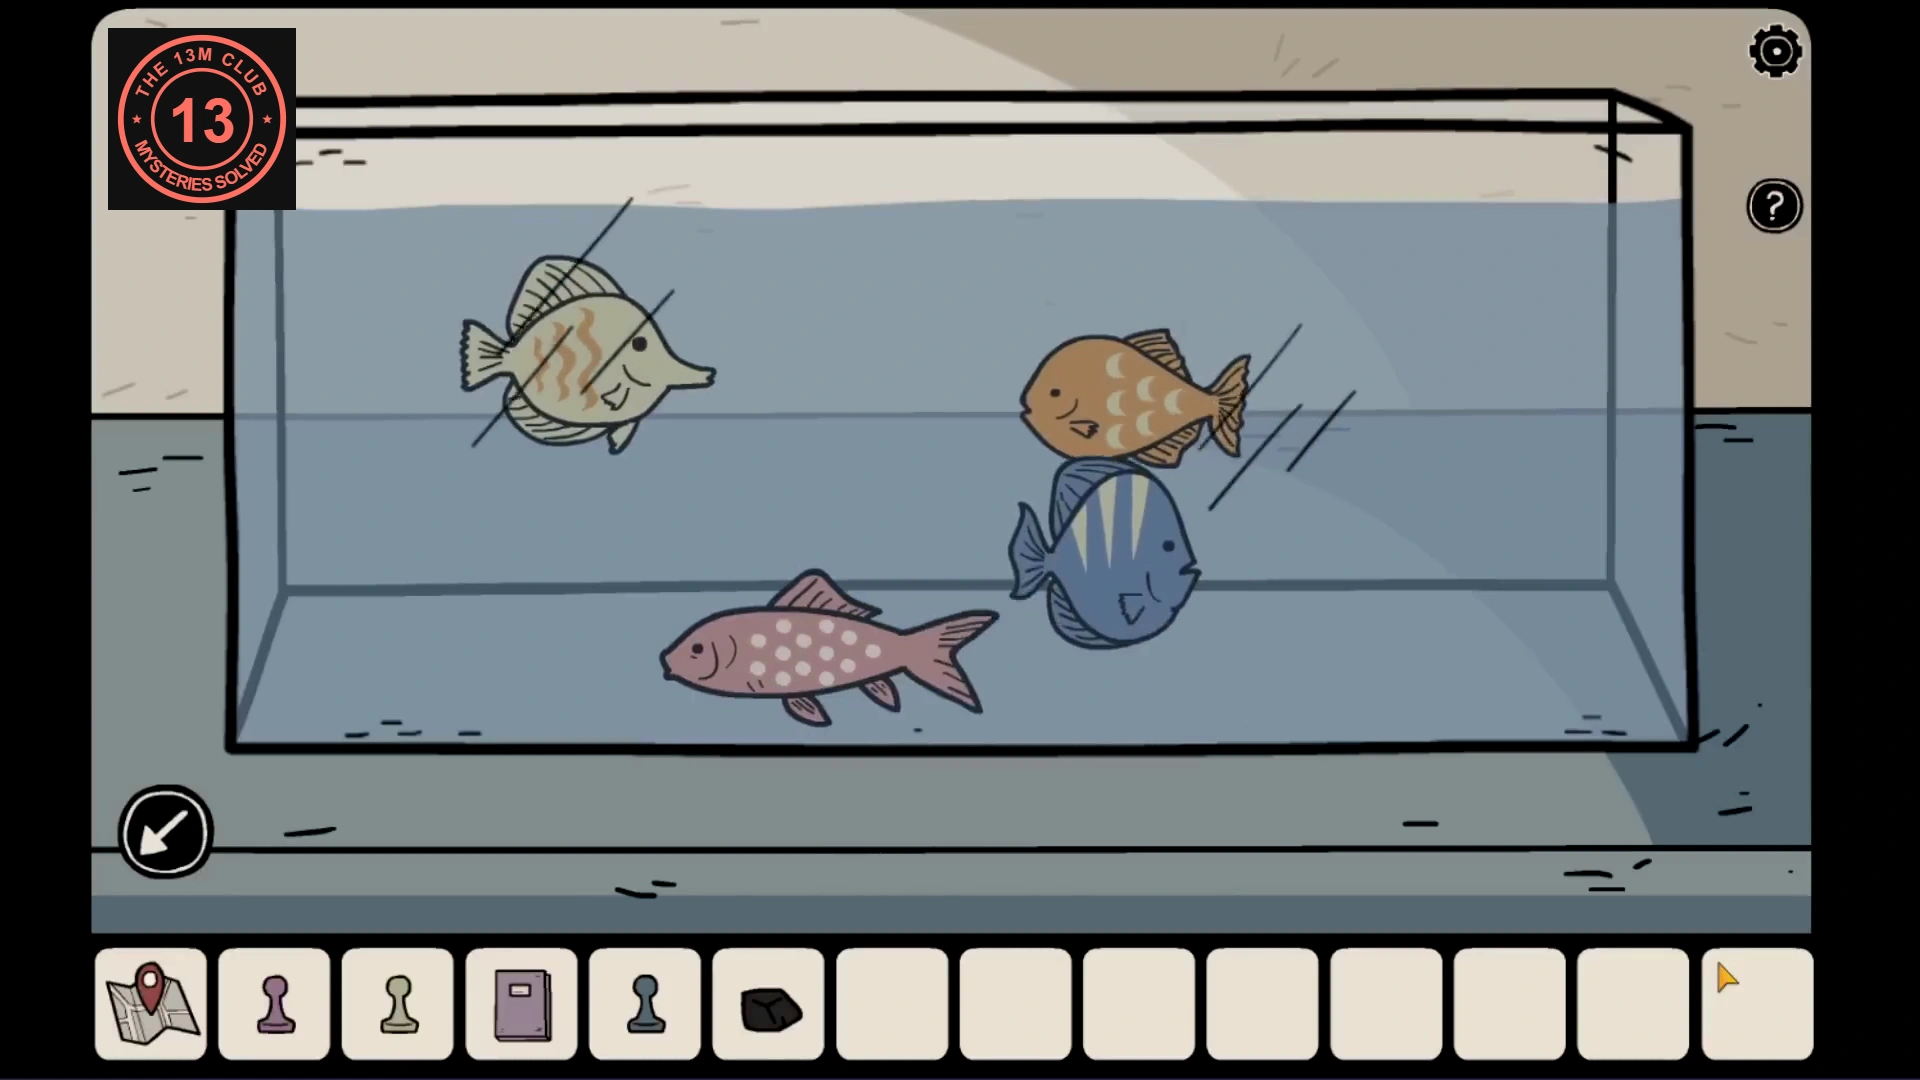
The purple notebook gives the order of the fish, not their swimming positions.
- Use the red key on the right cabinet door beneath the fish tank. Take the purple token and the fish food.
- Use the fish food on the aquarium and wait for the symbols to appear on the fish. Open the purple notebook’s fish page and write down the symbols in the pictured fish order. The fish order and symbols change between games, so read both clues in your own game.
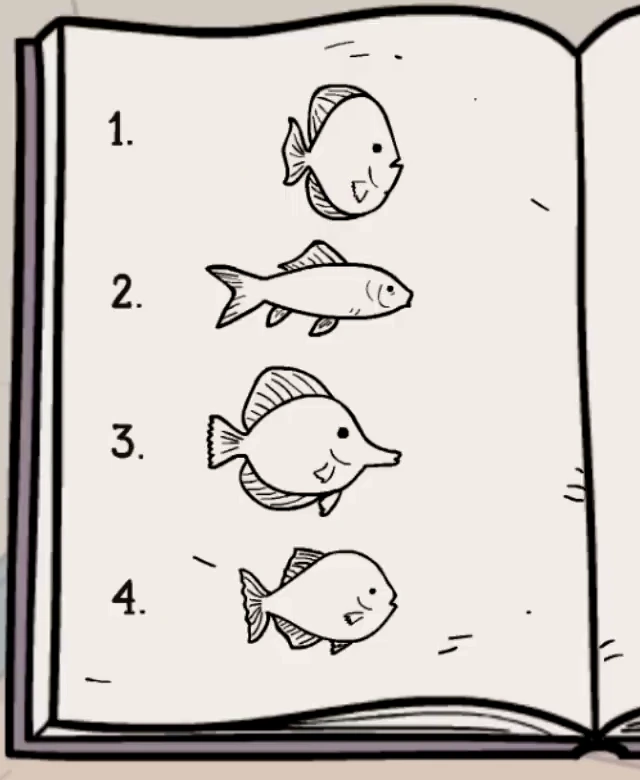
Example fish page. Match each outline to a fish by body shape and fins, not by colour. 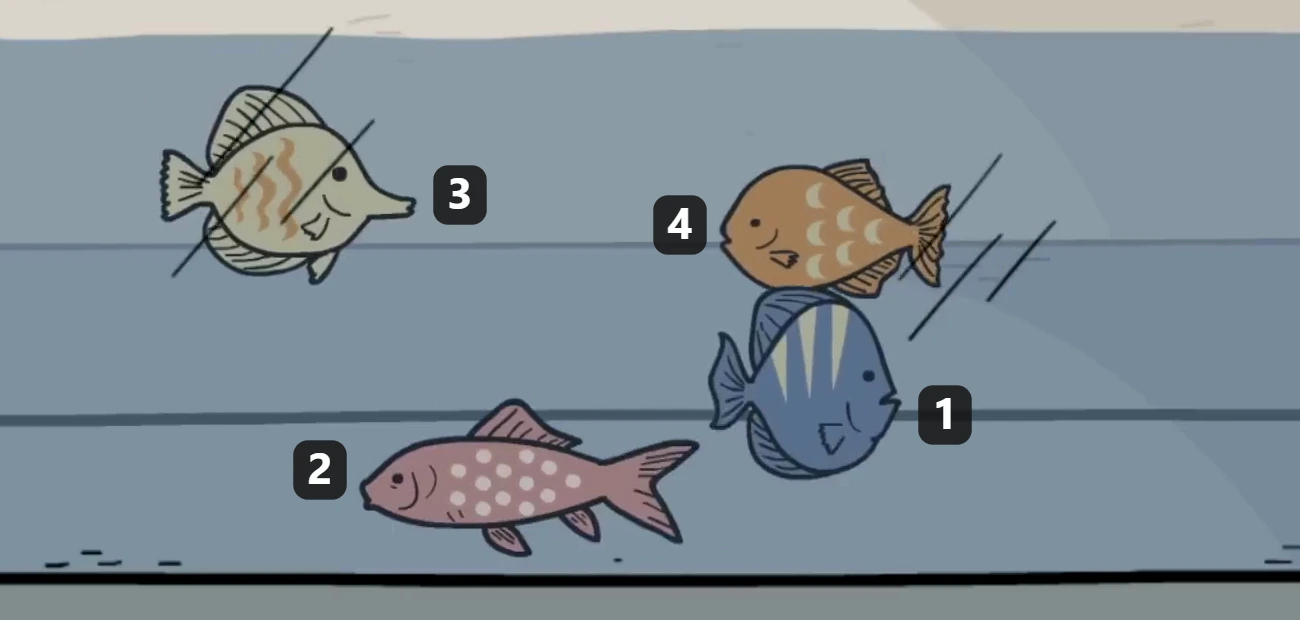
The same game’s fish numbered from that page: triangles, dots, waves, crescents. Your order and symbols can differ. - Go to the small blue box beside the mirror. Enter the ordered fish symbols and open it to take the red token.
CHAPTER 8
Dan’s board and the cabinet discs
Collect the window owl before leaving the house.
- Owl 2: in the vase room, open the window and wait through the apparition. Look out at the street, zoom in on the purple tree at the far left and tap the owl among its branches.
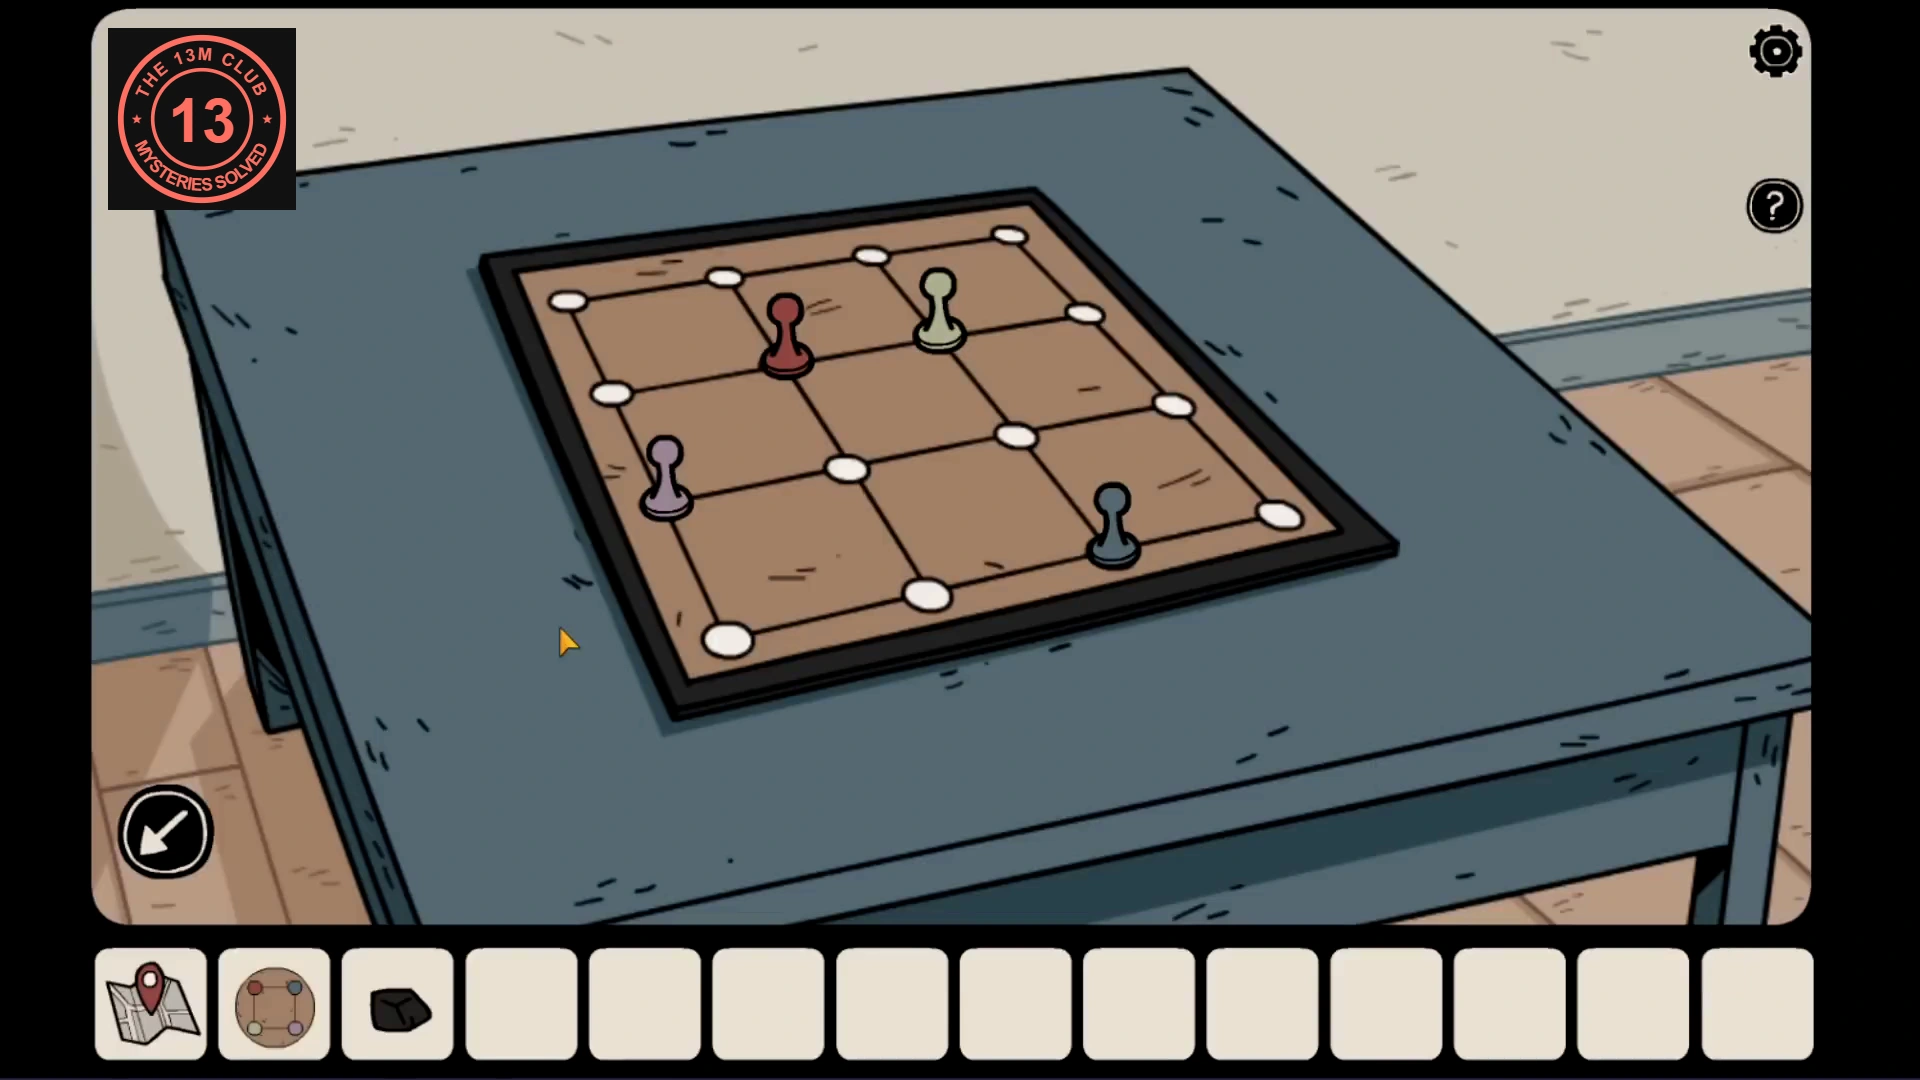
- Place all four colored tokens on the board on the blue bench. Wait for Dan to move them. Take the round tile he leaves, then note each token’s position.
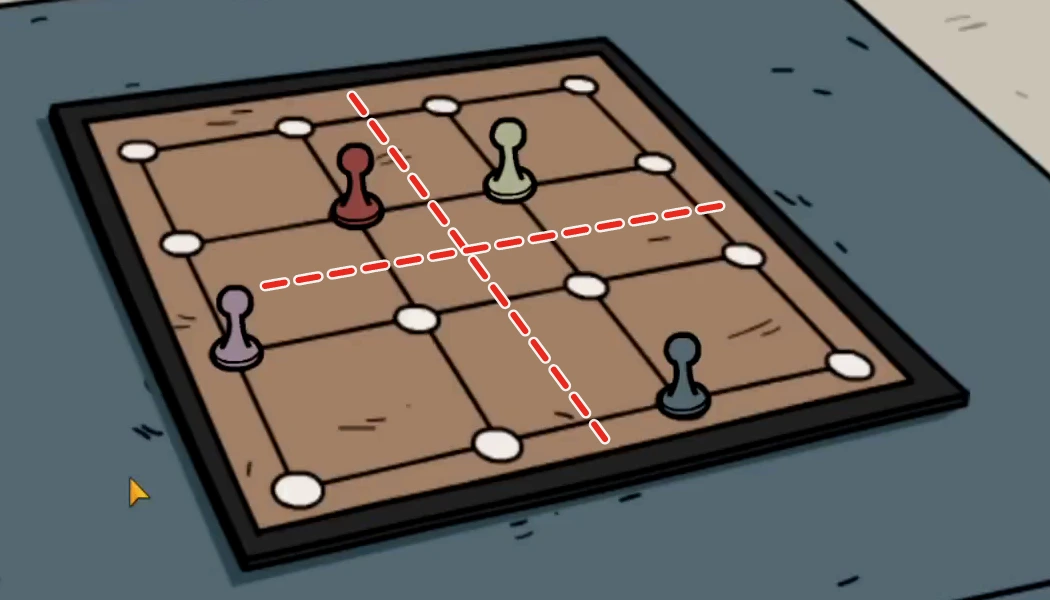
Example board split into four corners. Each token’s spot inside its corner is the clue for the matching cabinet disc. - Insert the round tile into the empty circle at the top of the tall cabinet. Treat the board as four two-by-two squares. Rotate each cabinet disc until the dot matching that corner’s token color occupies the same position within its four-dot square. Open the cabinet and take the letter and projector slides.
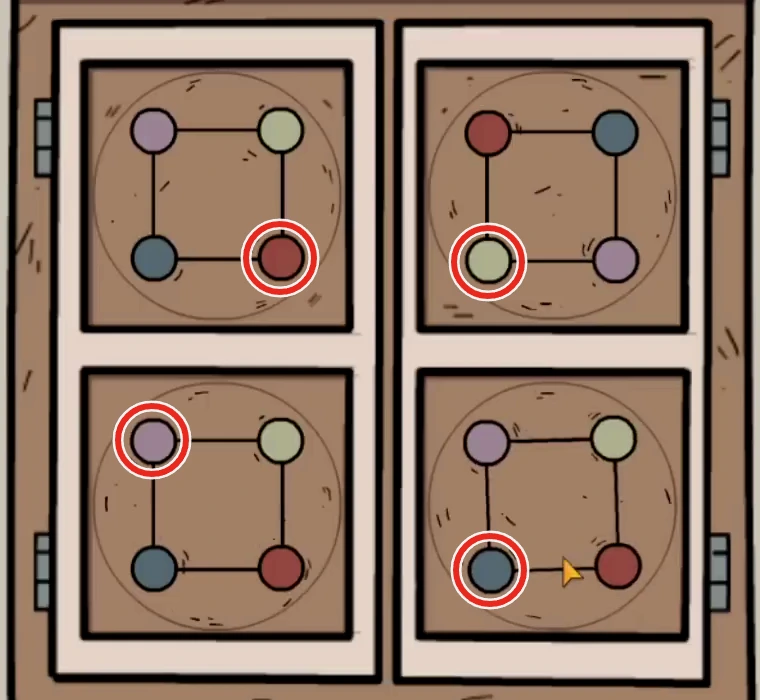
The same game’s solved discs: red lower right, green lower left, purple upper left, blue lower left.