The Entrance Hall
The entrance hall holds a model of the chapel on a pedestal to the right of the glass door, and a framed number-and-suit plaque on the left wall.
- From the altar view, turn to the open wooden double door and go into the entrance hall. Zoom in on the chapel model on the pedestal to the right of the glass door and pick up the Small key lying on it.
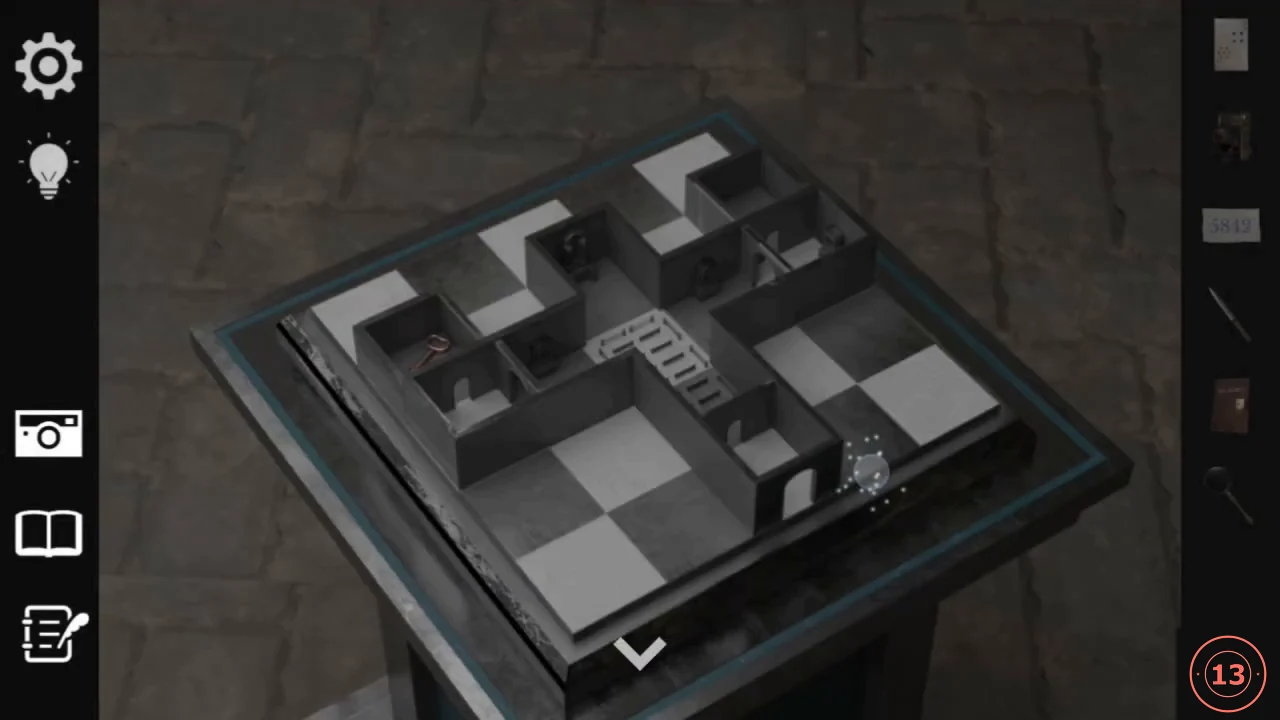
The chapel model on the pedestal; the Small key lies on it. - Look at the framed plaque on the left wall. The top row reads 1 2 3, then a blue diamond-shaped tile in the fourth place, then 5 6 7 8 9. Below it, a blue tile leads to an orange diamond, an orange diamond leads to a green club, and a green club leads to a purple heart. The glass entrance door is locked. Optional: talk to Eld.
- In the parlour, use the Small key on the diamond keyhole of the central wooden cabinet (under the kaleidoscope stand). The lower compartment holds a blue model building with 16 windows (4 rows of 4).
The Blue Building and the Live Clock
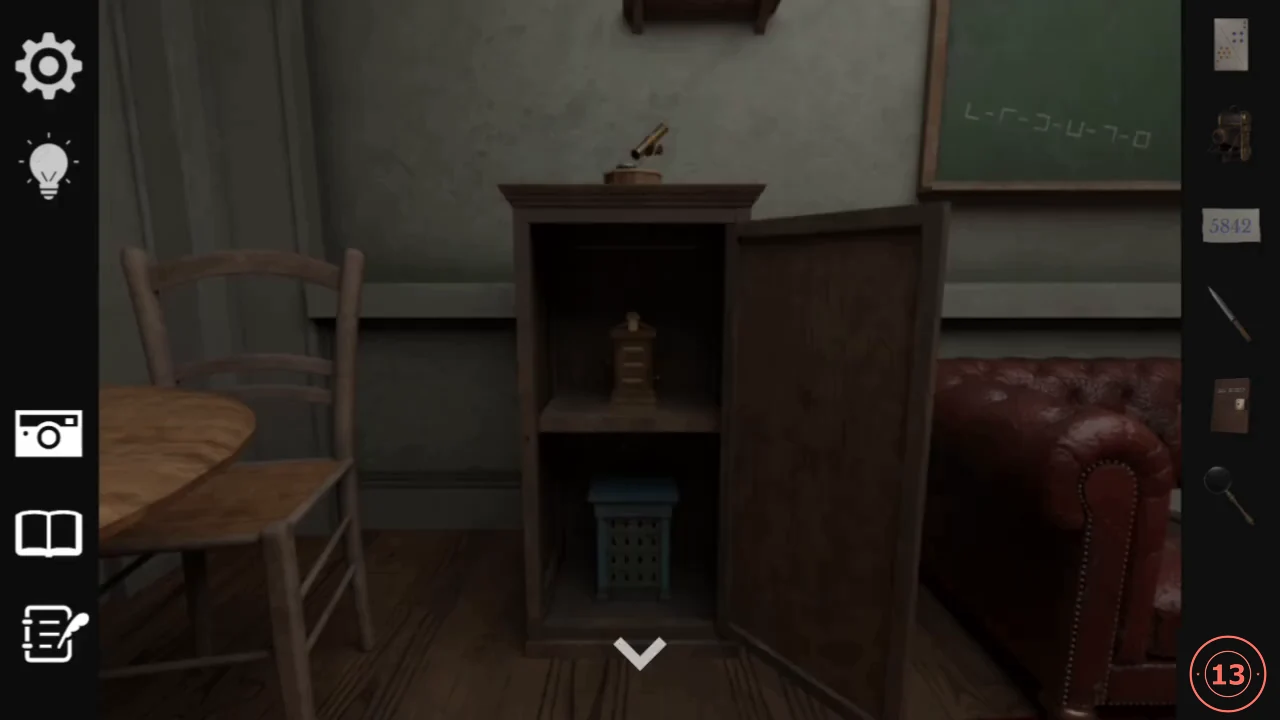
This answer changes: the blue clock shows your device's current time, so no fixed code works for everyone. Use the same windows-as-binary key as the red building in Chapter 2.
- Find the blue clock standing on the floor in the middle of Eld's room and tap it, for example "It is 15:42." It shows the current time on your device in 24-hour format, and the Options menu (gear icon) shows the same clock. Note the time.
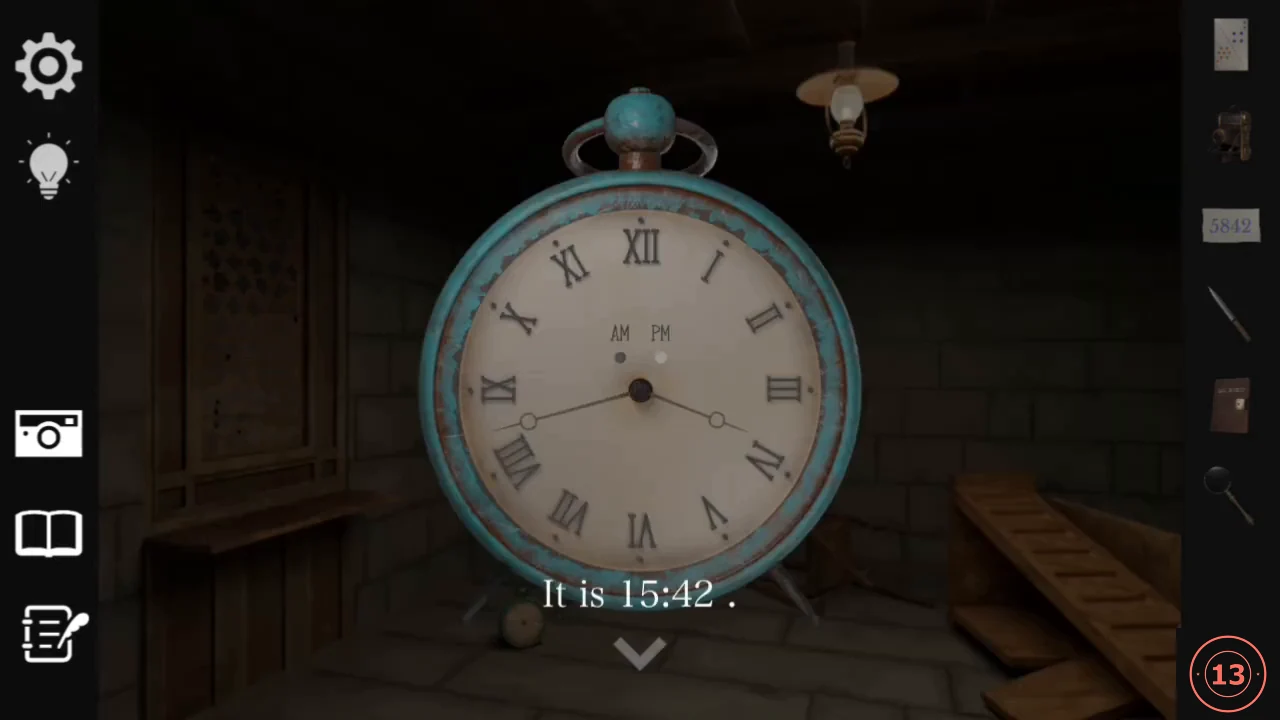
Example only: the blue clock shows your device's current time. - Open the sliding door at the lower left of the study sideboard to see the +8 / +4 / +2 / +1 key again, if you need it. Columns are the digits h h m m; rows from top to bottom are worth 8, 4, 2 and 1.
- At the blue building in the parlour, light the windows that add up to each digit of the current time. Example for 15:42: column 1 (digit 1) the bottom window; column 2 (digit 5) the second window from the top (4) plus the bottom window (1); column 3 (digit 4) the second window from the top; column 4 (digit 2) the third window from the top. If the minute changes before you finish, update the last column(s). "The drawer has been unlocked." appears and you take Pastor's Journal 4. It begins "3 days later..." and tells how the villagers tried to cut off the girl's horns.CODECurrent time (example 15:42)
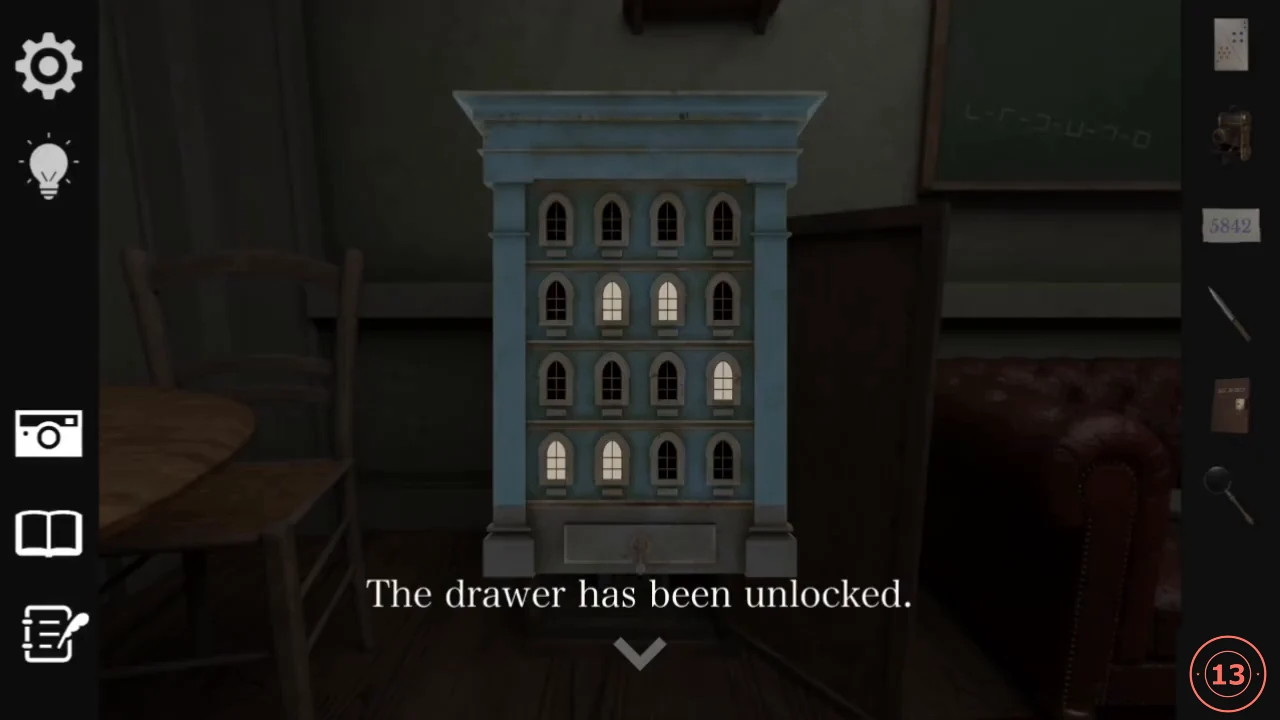
Example for 15:42 only. Light the windows for the time on your device.
The Perpetual Calendar
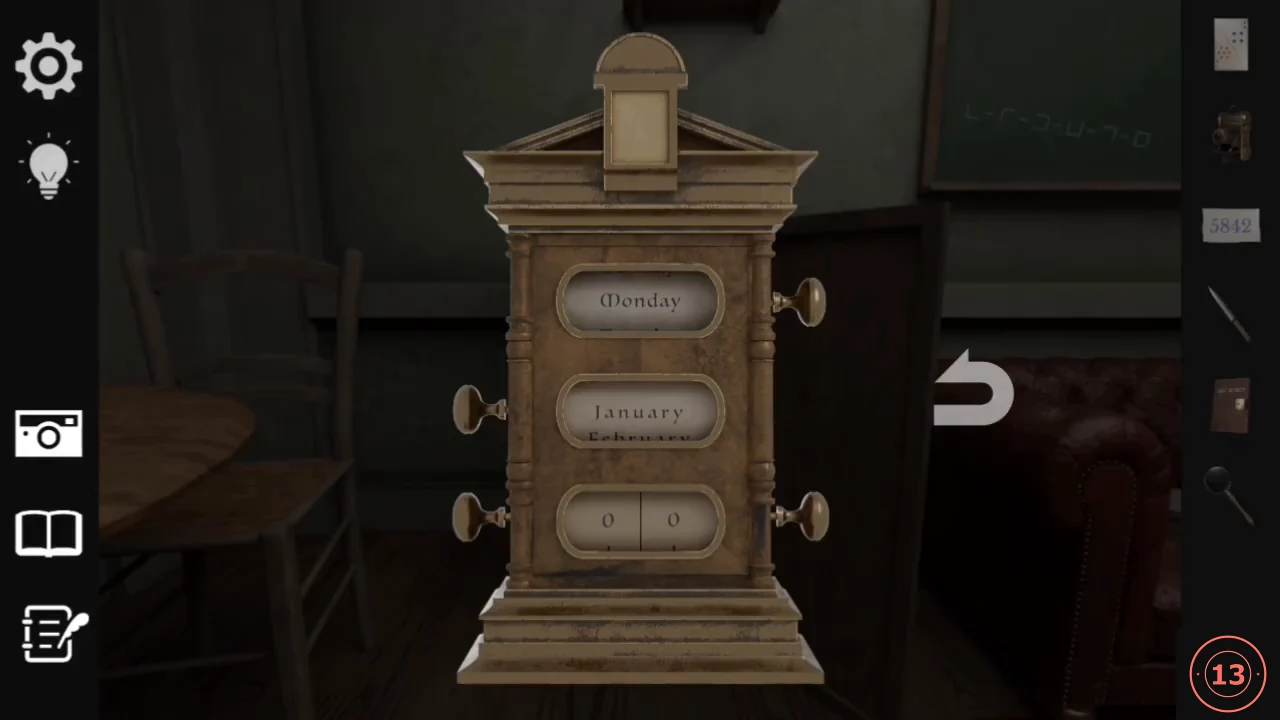
The upper compartment of the same parlour cabinet holds a wooden perpetual calendar with day-of-week, month and day dials. The journals give the date.
- Work out the date from the journals: Journal 1 is December 10th (Monday), Journal 3 is the 25th and Journal 4 is "3 days later", so the 28th of December. December 10th is a Monday, so the 28th is a Friday.
- Open the upper compartment of the central parlour cabinet. Set the top-right knob to Friday, the middle-left knob to December and the two bottom knobs to 2 and 8. "The box has been unlocked." appears and you get a purple Memo reading 7254.CODEFriday, December, 28
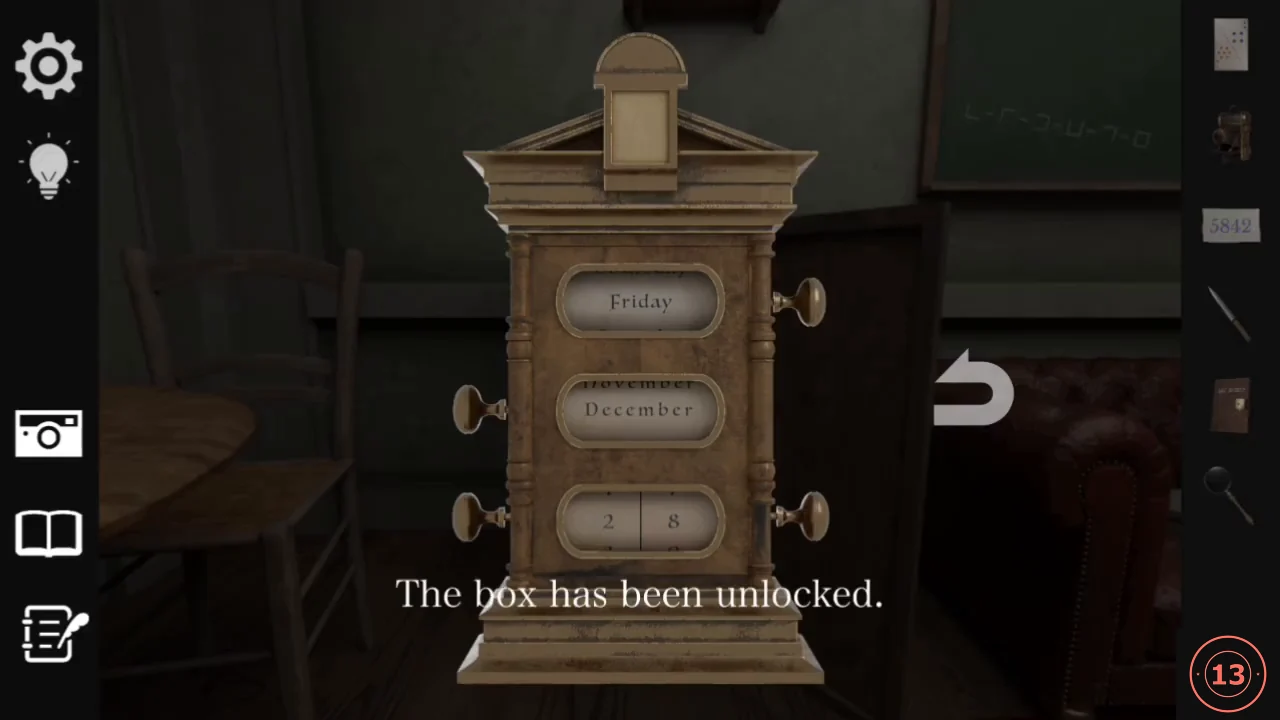
Solved: Friday, December 28.
The Suit Plaque Cipher
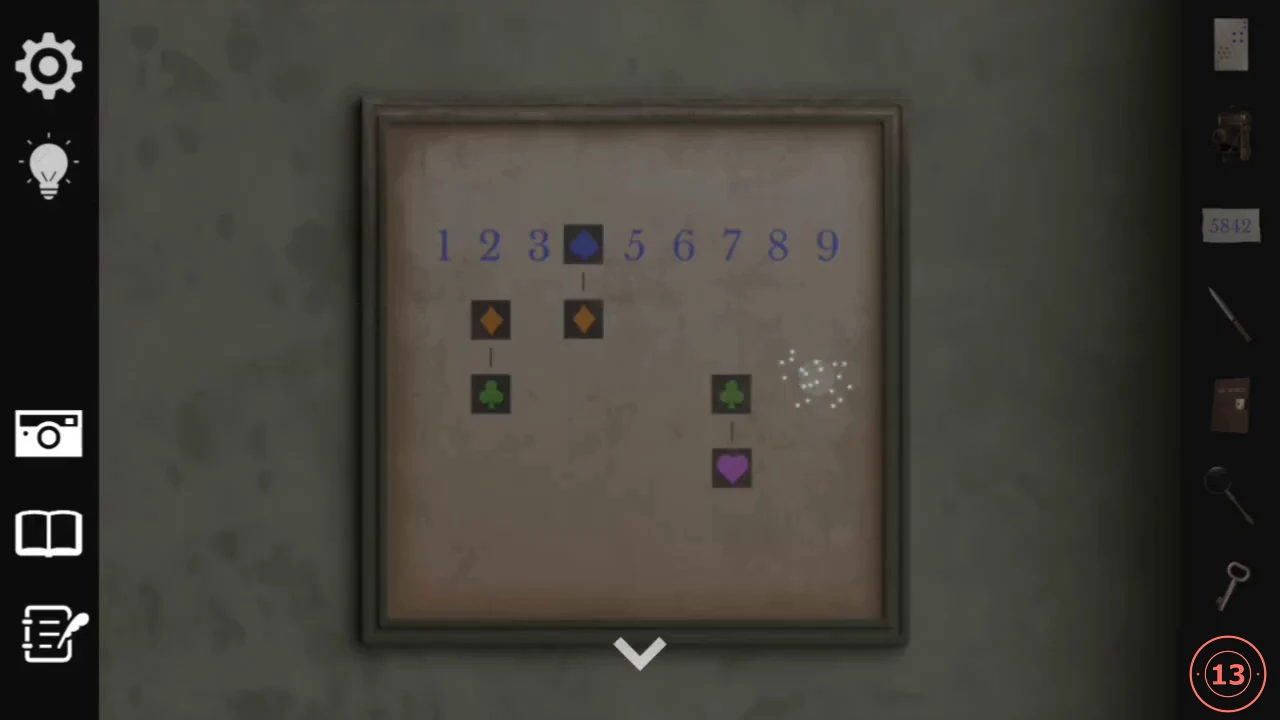
The purple Memo is written in "hearts" numbers. The entrance-hall plaque and your three cards convert it back to the plain 1-9 numbers (the spade row).
- Each card pairs the same value in two suits: 4 spades = 7 diamonds, 5 diamonds = 3 clubs, 8 clubs = 2 hearts. Numbers wrap around from 9 back to 1. So hearts are clubs plus 3, clubs are diamonds minus 2, and diamonds are spades plus 3. In total, a hearts number is the spade number plus 4. To decode a hearts number, count back 4.
- Decode the purple Memo 7254: 7 to 3, 2 to 7, 5 to 1, 4 to 9. The phone number is 3719.CODE3719
The Second Telephone Melody
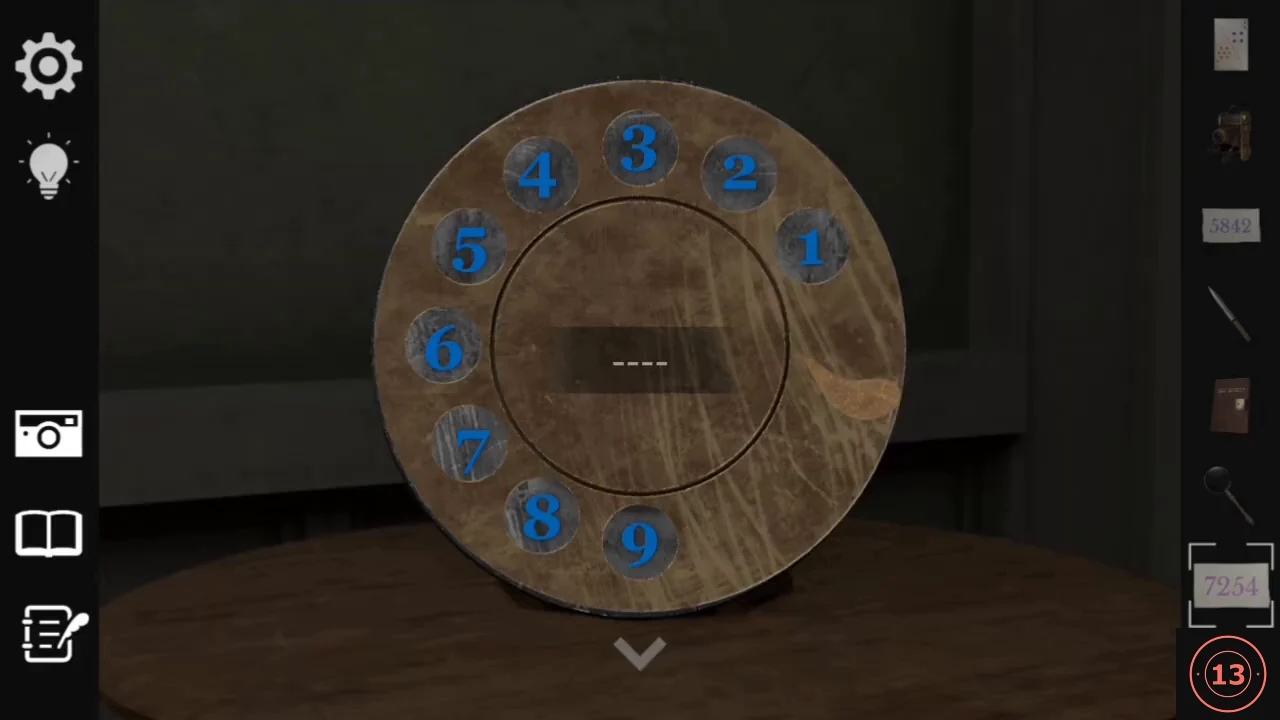
This puzzle depends on sound again. Use the three pitches from Chapter 2: high, middle and low.
- Dial 3719 on the study telephone. After the ringing and a tone you hear six notes: middle, middle, low, low, middle, high (E, E, C, C, E, G).CODE3719
- Open the Book at page 3/3. Across the two pages are six columns of dancing figures with three rows each; the rows stand for high, middle and low. Pick one figure per column, from left to right, using the melody: column 1 middle row, column 2 middle row, column 3 bottom row, column 4 bottom row, column 5 middle row, column 6 top row.
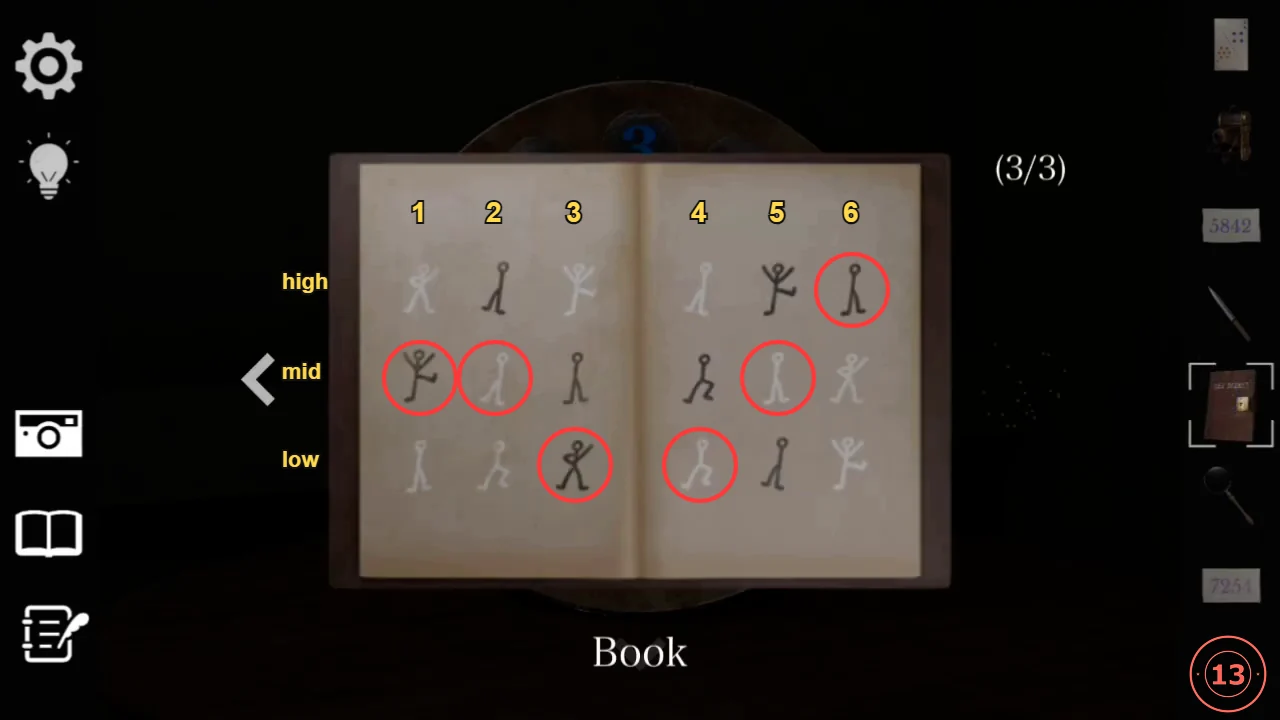
Book page 3/3 with the figures for middle, middle, low, low, middle, high circled. - Type those six figures on the study typewriter. The paper reads "rpkbqq".CODErpkbqq
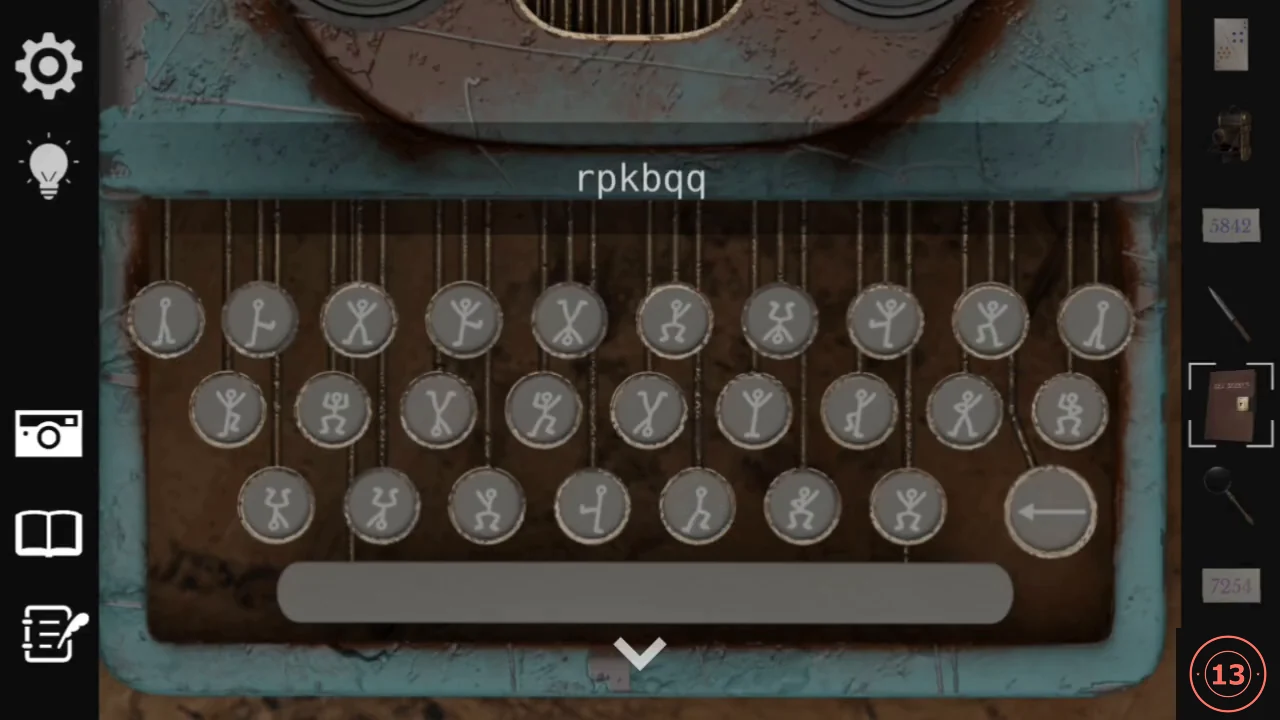
The typed result: "rpkbqq".
The Chess Board and the Chapel Model
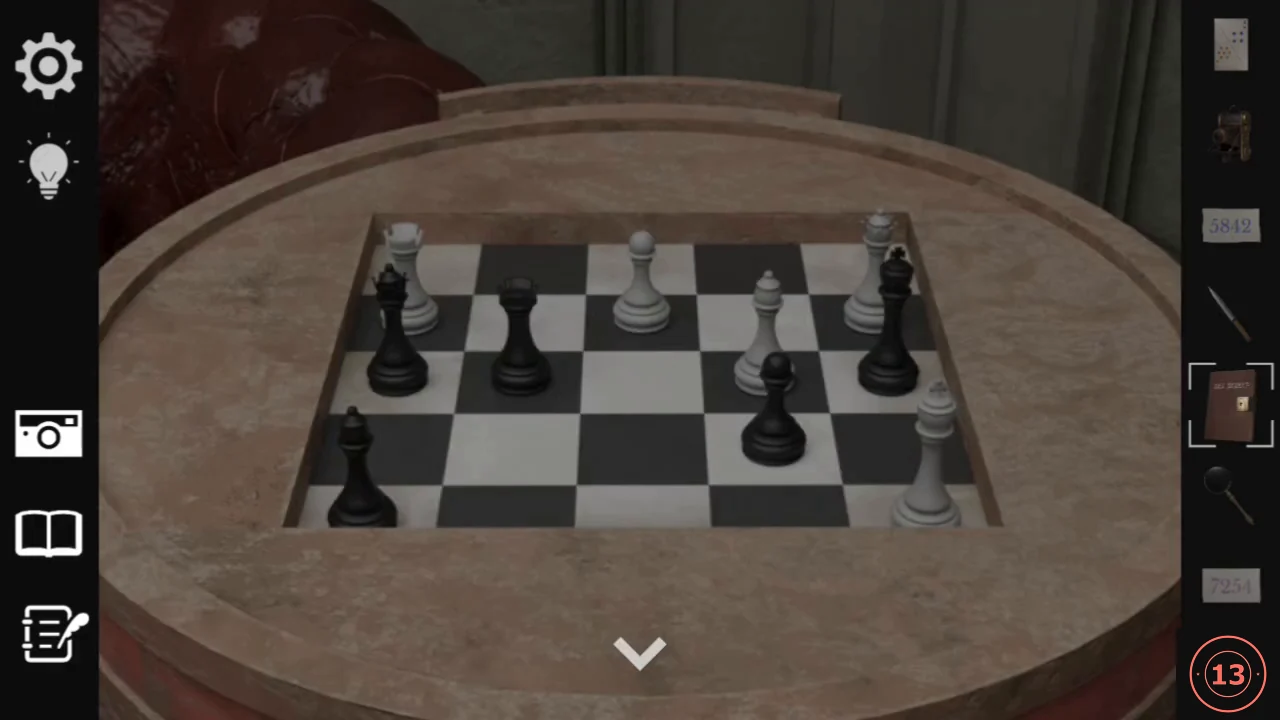
The letters are chess pieces, and the parlour chess board lines up with the chapel model in the entrance hall. The chosen pieces mark six banners around the chapel, in order.
- The right side of the parlour chalkboard names the pieces: Pawn, Rook, Bishop, Queen, King. So "rpkbqq" means rook, pawn, king, bishop, queen, queen.
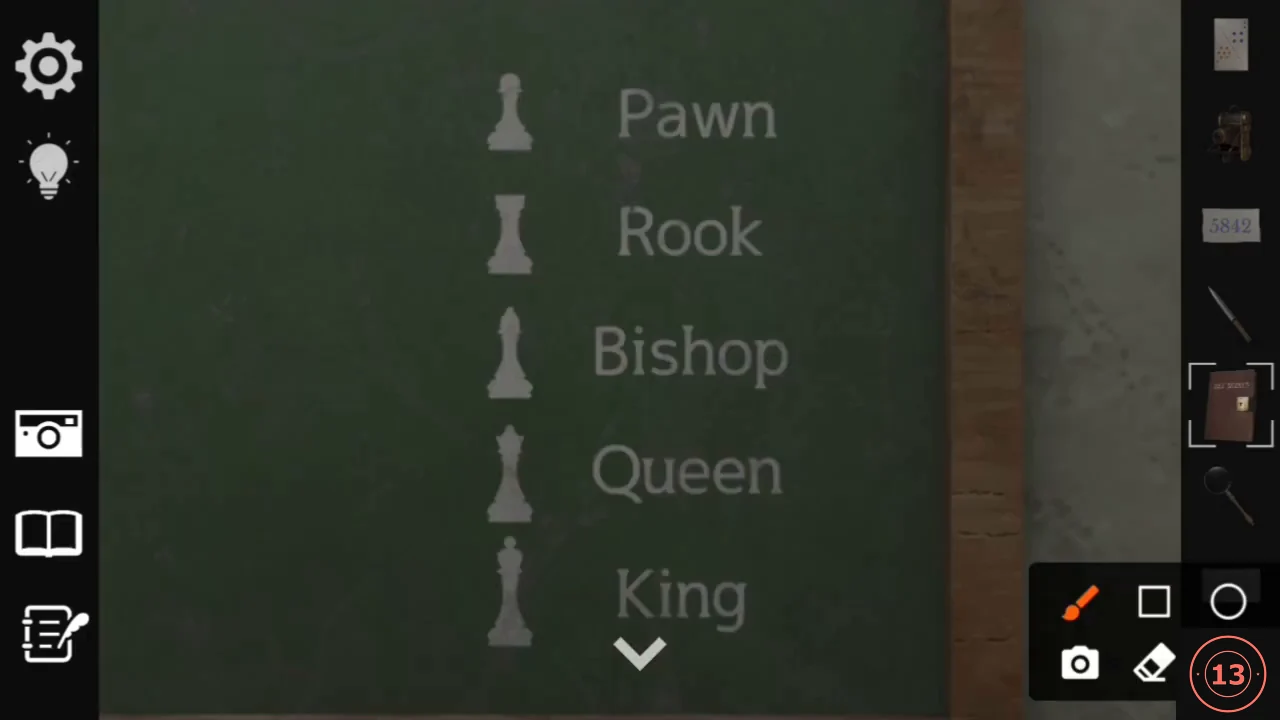
The piece legend on the right side of the chalkboard. - On the parlour chess table, find the pieces in that order: 1 the black rook in the second column, 2 the white pawn at the top centre, 3 the black king on the right, 4 the white bishop, 5 the white queen at the top right, 6 the black queen on the left. Compare the board with the chapel model on the pedestal in the entrance hall. Each chosen piece's square marks a place in the chapel where a banner hangs. In typed order the banners are: 1 the niche to the LEFT of the altar; 2 the tall banner behind the altar, between the columns; 3 the niche beside the study door; 4 the niche to the RIGHT of the altar; 5 the banner on the study wall; 6 the niche beside the west parlour door.
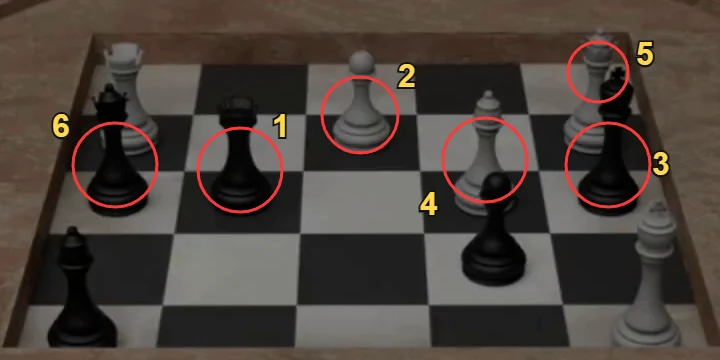
The six pieces in typed order: 1 rook, 2 pawn, 3 king, 4 bishop, 5 queen, 6 queen. 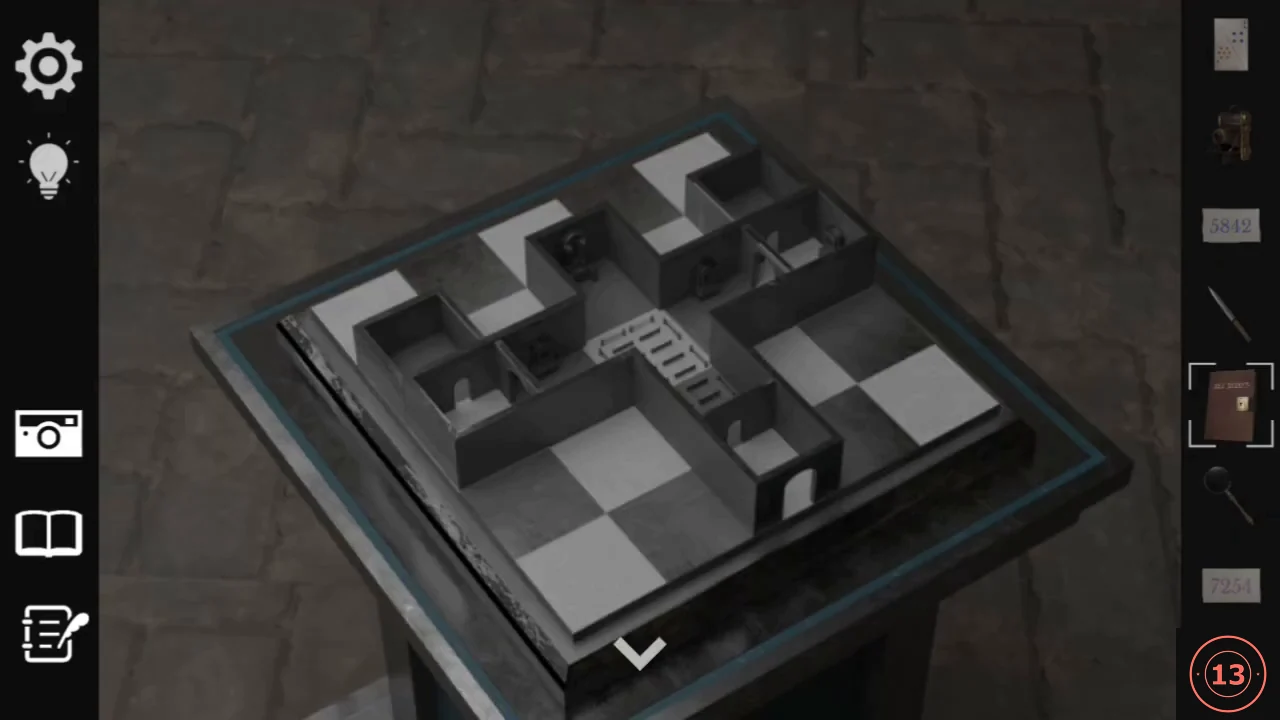
The chapel model's checkered floor lines up with the chess board. - Visit the six banners and note their emblems in order: 1 a sun; 2 a rayed sun with a crescent; 3 a crescent ringed with dots; 4 a crescent with a four-pointed star inside a double ring; 5 an eight-pointed star made of triangles, with a star in the middle; 6 a dark disc with rays.
The Altar Emblem Lock
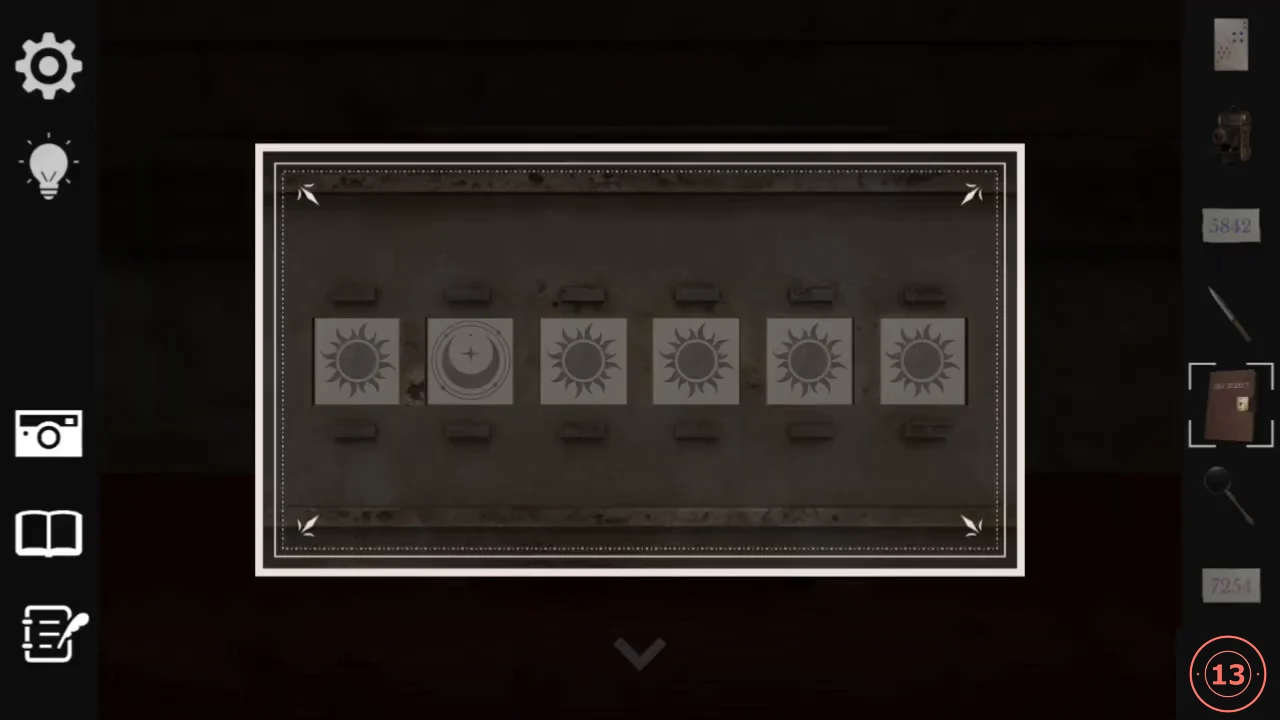
The box on the altar has six emblem tiles. Tap a tile to cycle through the emblems.
- Tap the box on the altar and set the six tiles, from left to right, to the banner emblems in order: sun, rayed sun with crescent, dotted crescent, starred crescent in a double ring, eight-pointed star, dark rayed disc. "The door has been unlocked." appears.CODESun, sun-crescent, dotted crescent, starred crescent, star, dark disc
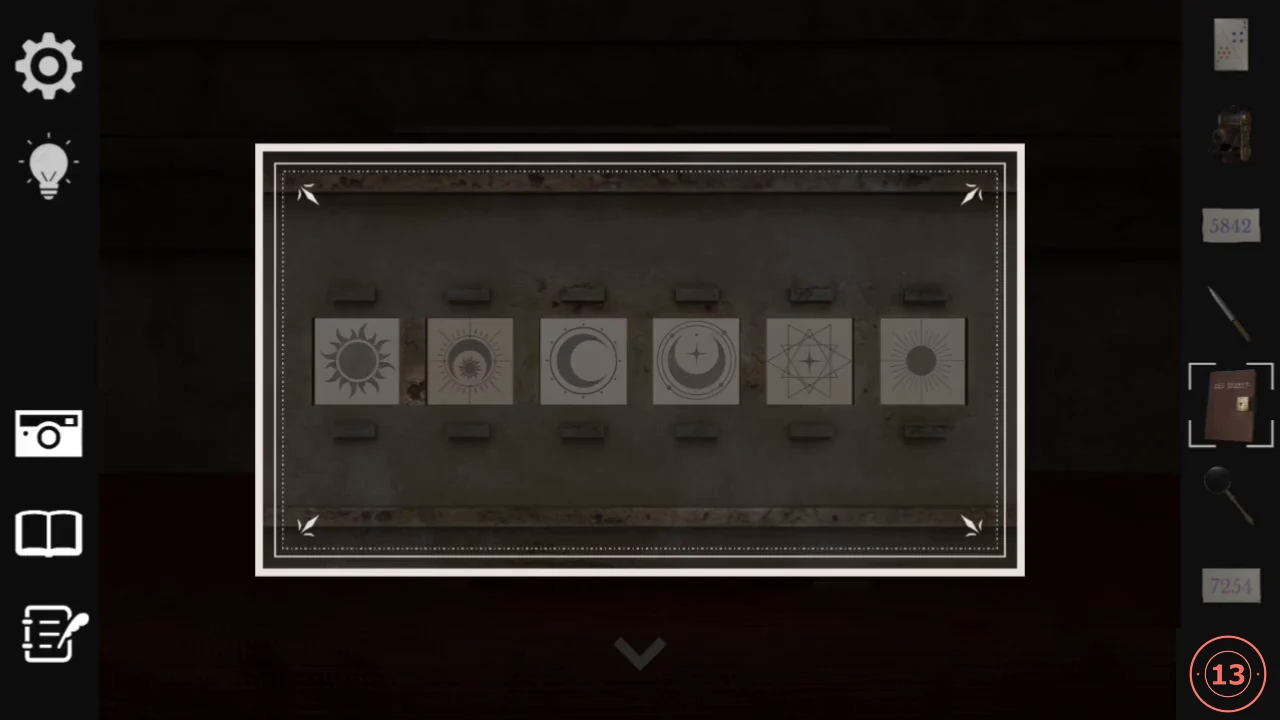
Solved: the six banner emblems in order. - Tap the small barred door at the top of the box and take the Key.
The Trapdoor and the Way Out
The basement door Eld remembered is a trapdoor in the floor in front of the altar.
- From the altar view, tap the floor in front of the altar to find a padlocked wooden trapdoor. Use the Key on the padlock, open the hatch and climb down the ladder into a stone tunnel with a door at the end. Eld joins you: "I see, so that's why there were three keys."
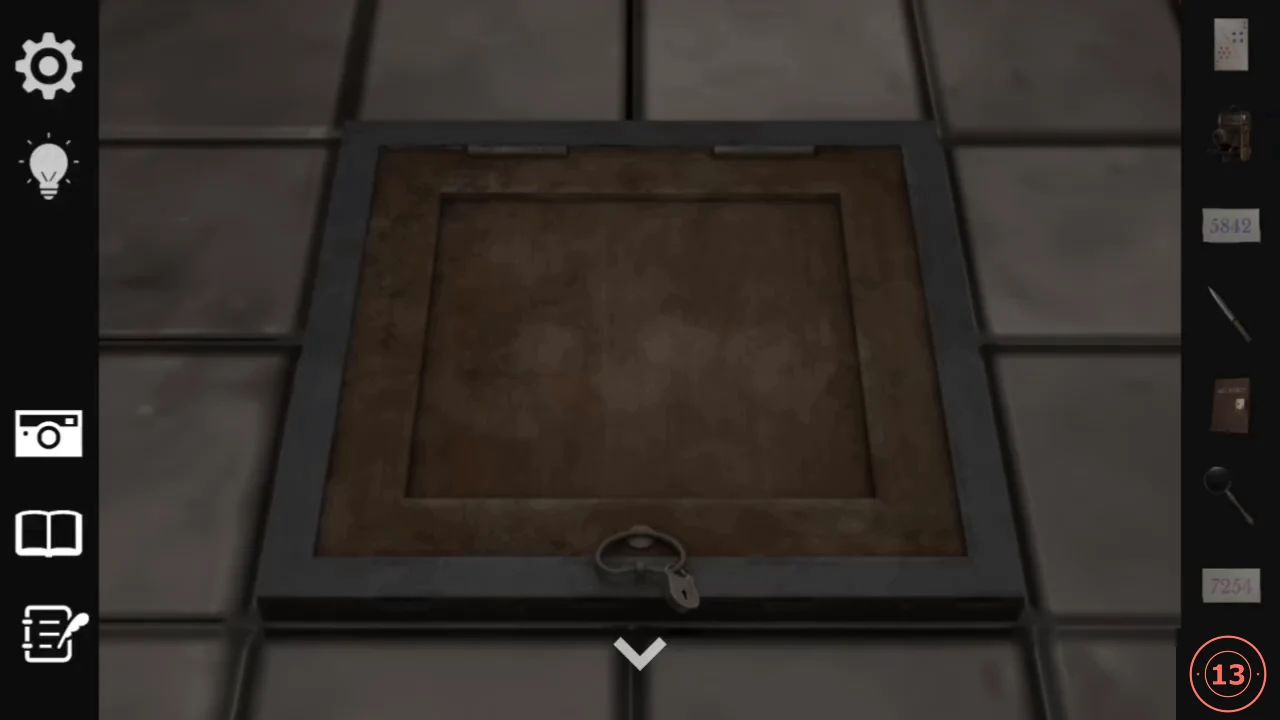
The padlocked trapdoor in front of the altar. - Eld shares her fears about escaping with you. When the final choice appears, choose "I want you to come with me." Eld replies "...Thank you." and the exit comes into view. A snowy illustration of Eld follows, she suggests heading north, and "Fin" appears. The other answer, "Let's think about it after we escape.", is outside this guide; see the notes.