The West Parlour
From the chapel entrance, press the left arrow. The corner view has a wooden door on the right of the screen, which leads to the newly opened west parlour. Inside are a banner, a chalkboard, a wall shelf with three wooden discs, a wooden cabinet in the centre, a sofa, an Othello table, a chess table and a hexagonal box on the rug.
- Optional: talk to Eld in the chapel first.
- Enter the west parlour and read Pastor's Journal 1 at the Othello table. It is dated December 10th (Monday) and explains that the Othello board flips pieces automatically and a mechanism activates when it reaches a certain pattern.
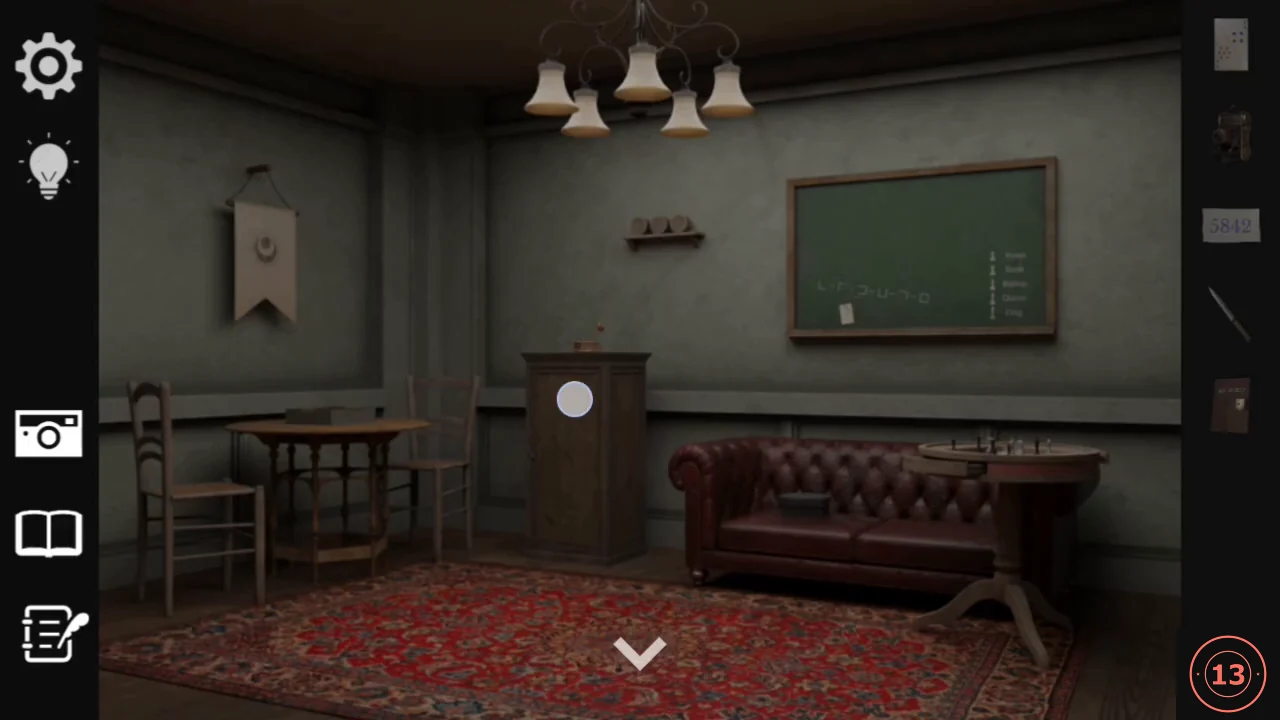
The west parlour. - Visit the study and look at the red building again. The windows you lit there in Chapter 2 are the Othello target: a lit window means a White piece and a dark window a Black piece. Rows 1 and 2 are all dark, row 3 has columns 2 and 3 lit, and row 4 has columns 1 and 2 lit.
The Othello Board
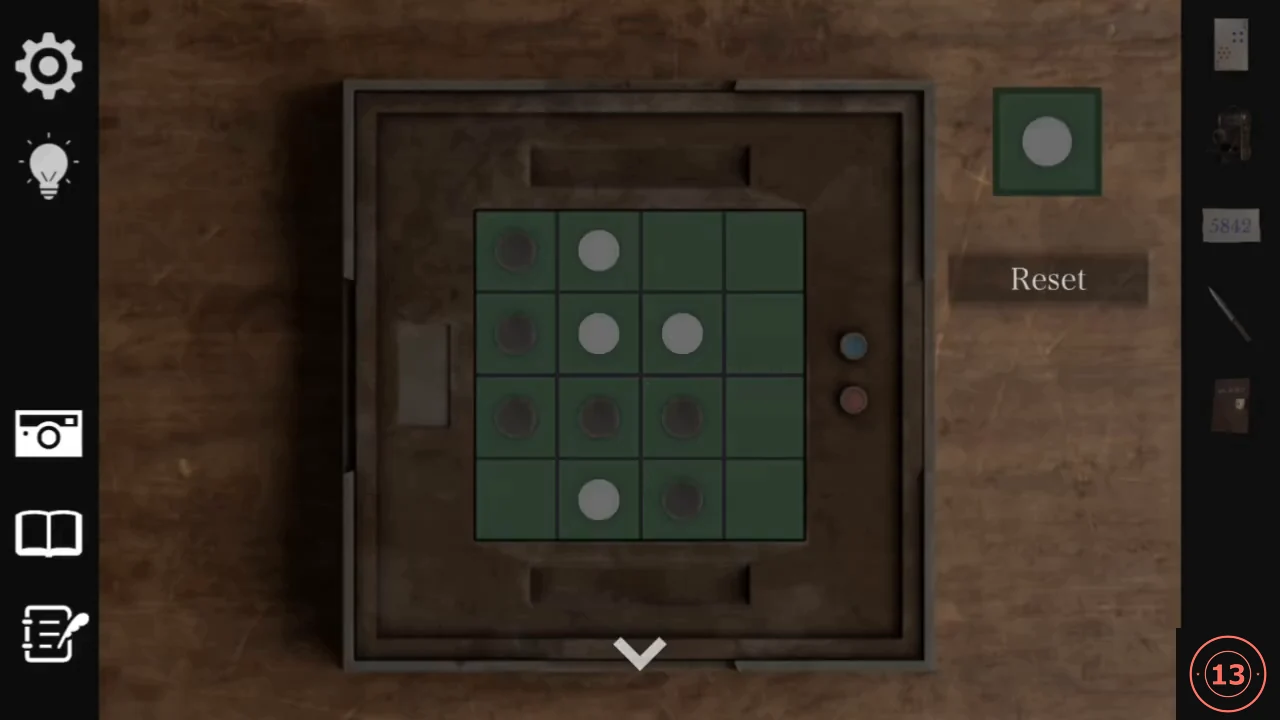
The 4 x 4 board always starts from the same position and the colours alternate automatically, starting with White (the indicator is top-right). Pieces between your new piece and another piece of your colour flip as in Othello. A Reset button restores the start if you make a mistake. Rows are numbered from the top and columns from the left.
- Starting position: row 1 Black, White, empty, empty; row 2 Black, White, White, empty; row 3 Black, Black, Black, empty; row 4 empty, White, Black, empty.
- Play these six moves: 1 White at row 4 col 1; 2 Black at row 1 col 3; 3 White at row 2 col 4; 4 Black at row 4 col 4; 5 White at row 3 col 4; 6 Black at row 1 col 4. The final board is row 1 BBBB, row 2 BBBB, row 3 B W W B, row 4 W W B B. "The Othello board's mechanism was activated." appears and you take a DialLock of 7 letters from the slot to the left of the board.CODEW r4c1, B r1c3, W r2c4, B r4c4, W r3c4, B r1c4
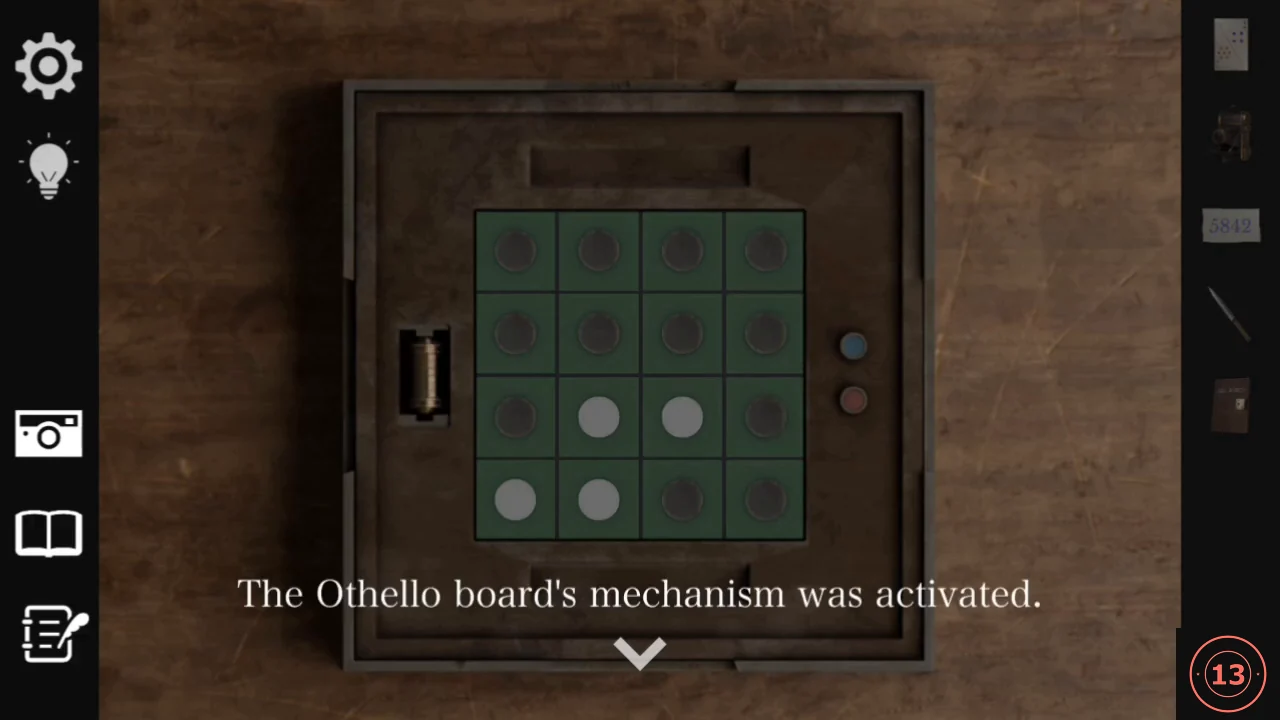
The target pattern after six moves.
The Card Dials, Third Column
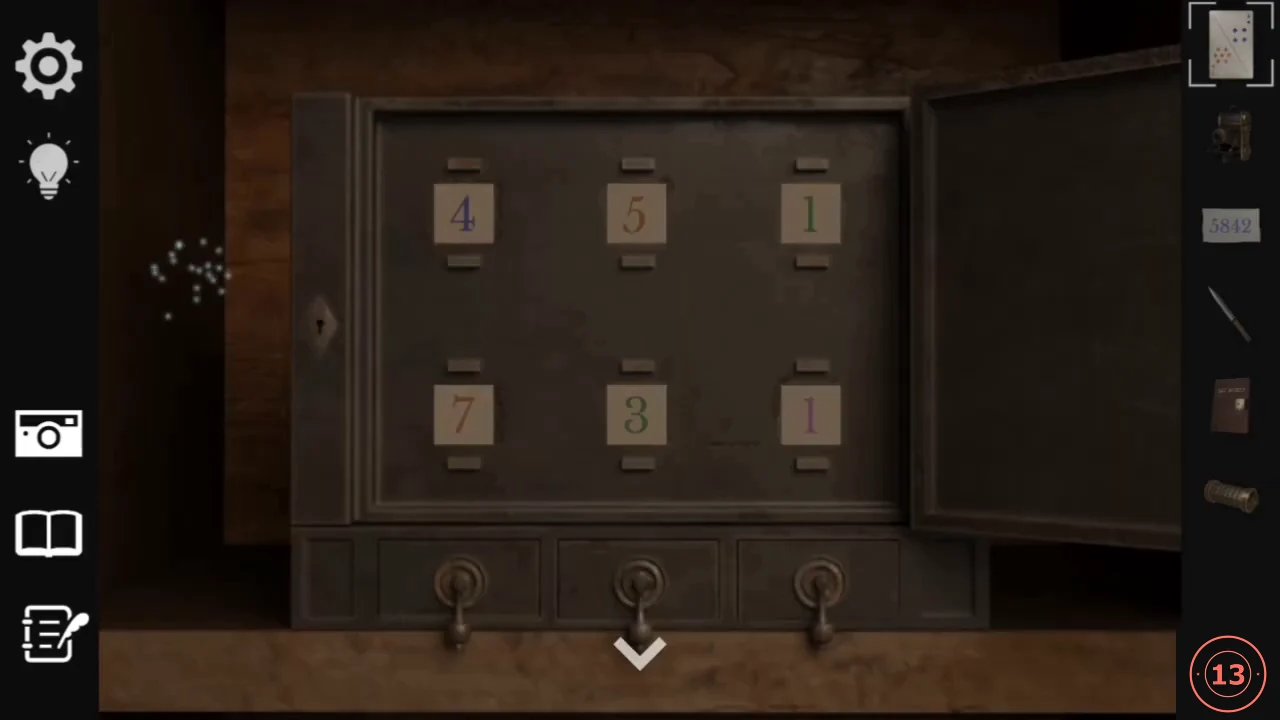
The last card is taped to the parlour chalkboard.
- Take the card taped to the chalkboard. It is added to your Cards: 8 green clubs on top and 2 pink hearts on the bottom.
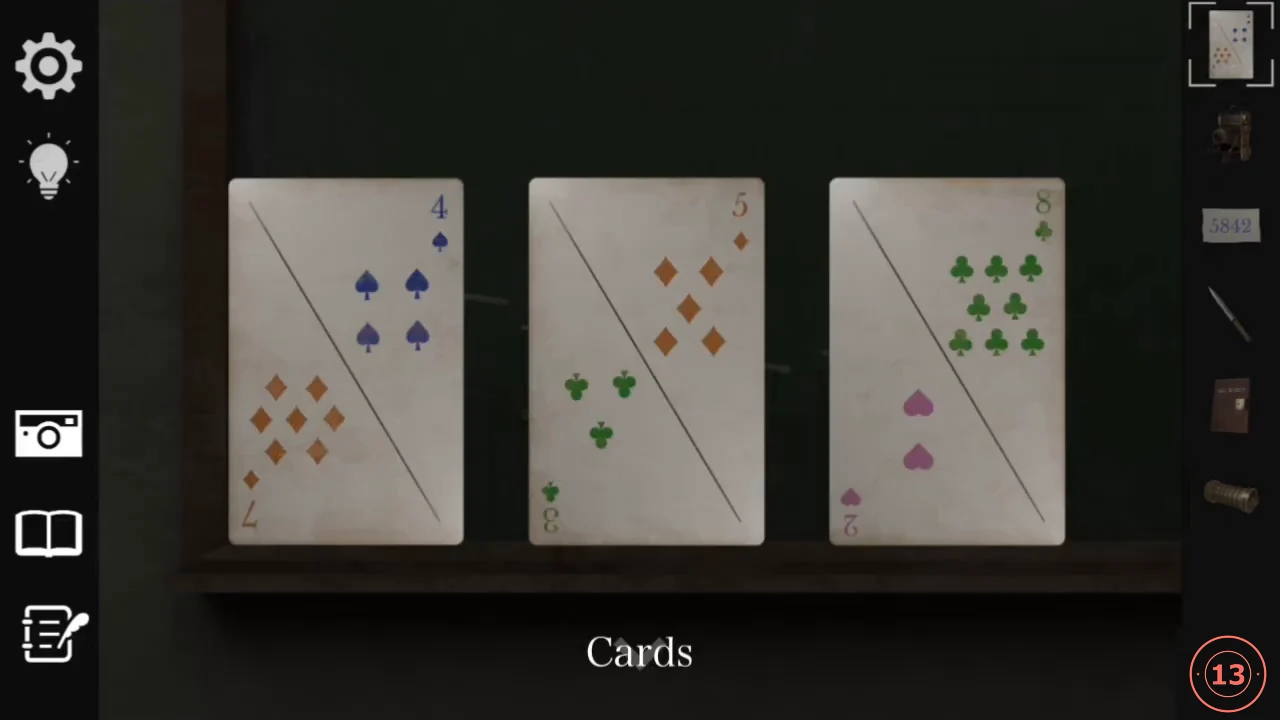
The third card: 8 clubs on top, 2 hearts below. - At the metal cabinet in the cell, set the RIGHT column to 8 on top and 2 below (full dials: 4 5 8 over 7 3 2). "The drawer has been unlocked." appears and you get a Kaleido Scope.CODE8 / 2
The Wall Discs and the Left Drawer
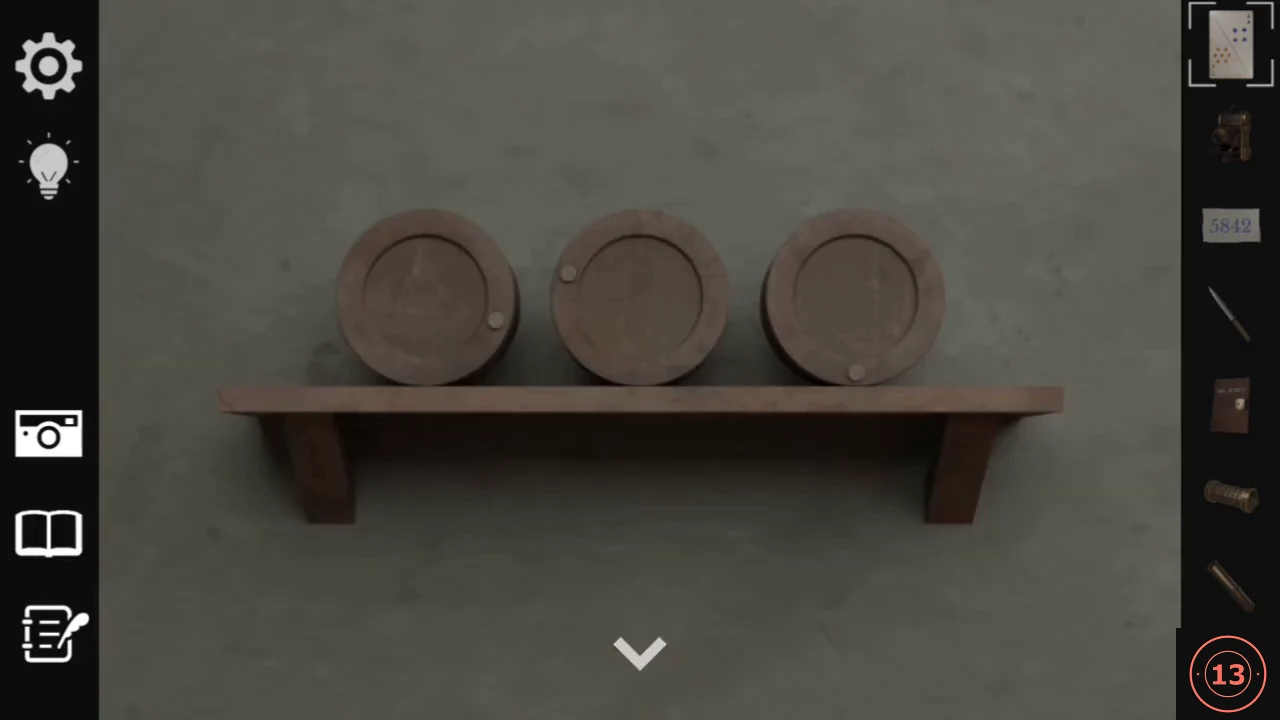
The three wooden discs on the parlour wall shelf each have one knob. Their positions set the three dials in the study sideboard's left top drawer (ten ticks, 0 at the top, counting clockwise).
- Look at the discs on the parlour wall shelf: the left knob points right, slightly below 3 o'clock; the middle knob points to the upper left; the right knob points straight down.
- Turn the dials of the LEFT top drawer of the study sideboard to the same positions: left 3, middle 8, right 5. "The drawer has been unlocked." appears and you get a Magnifier.CODE3 8 5
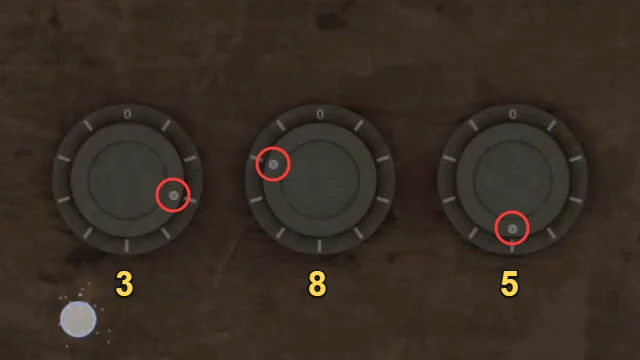
The left top drawer's dials set to 3, 8 and 5.
The Seven-Letter Dial Lock
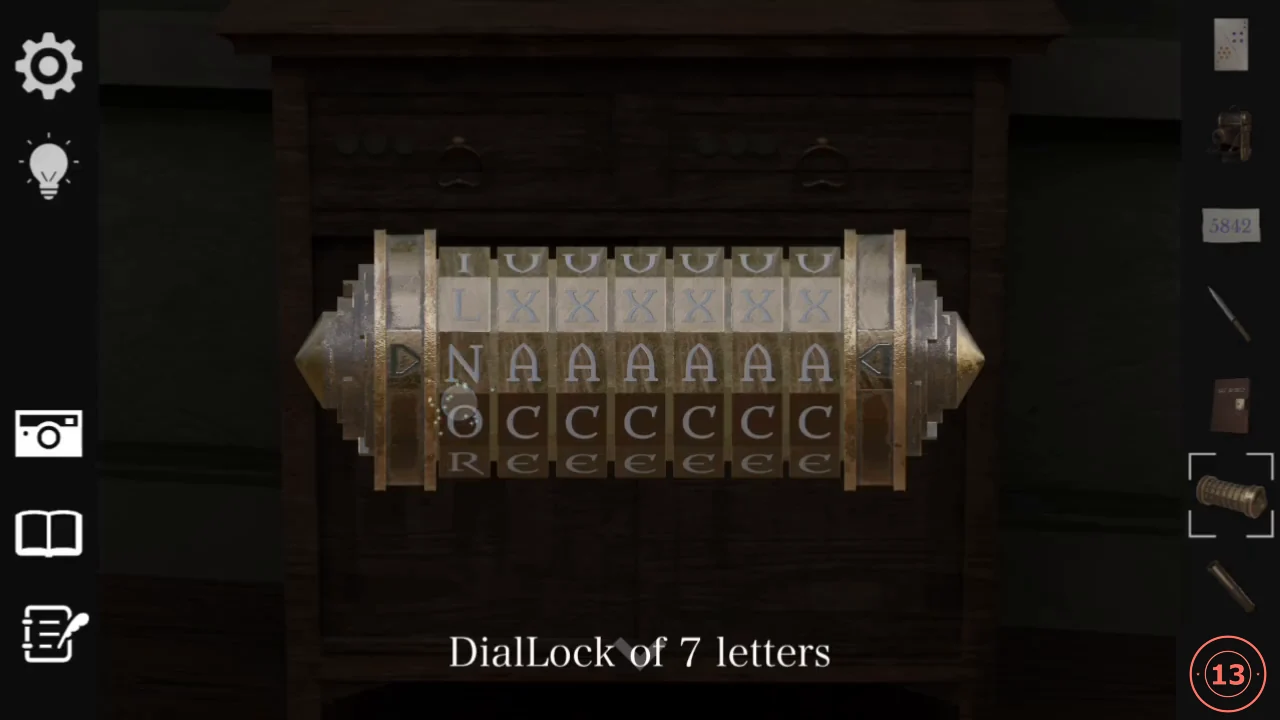
The Book's second page hides small stretched letters that you can only read with the Magnifier.
- Open the Book at page 2/3 and use the Magnifier on it. Stretched letters in the lower right of the right page spell UNICORN.

The Magnifier reveals the stretched word UNICORN. - Open the DialLock of 7 letters in the inventory and set it to UNICORN. "The dial lock has been unlocked." appears and you get a Screwdriver.CODEUNICORN
The Hexagonal Switch Box
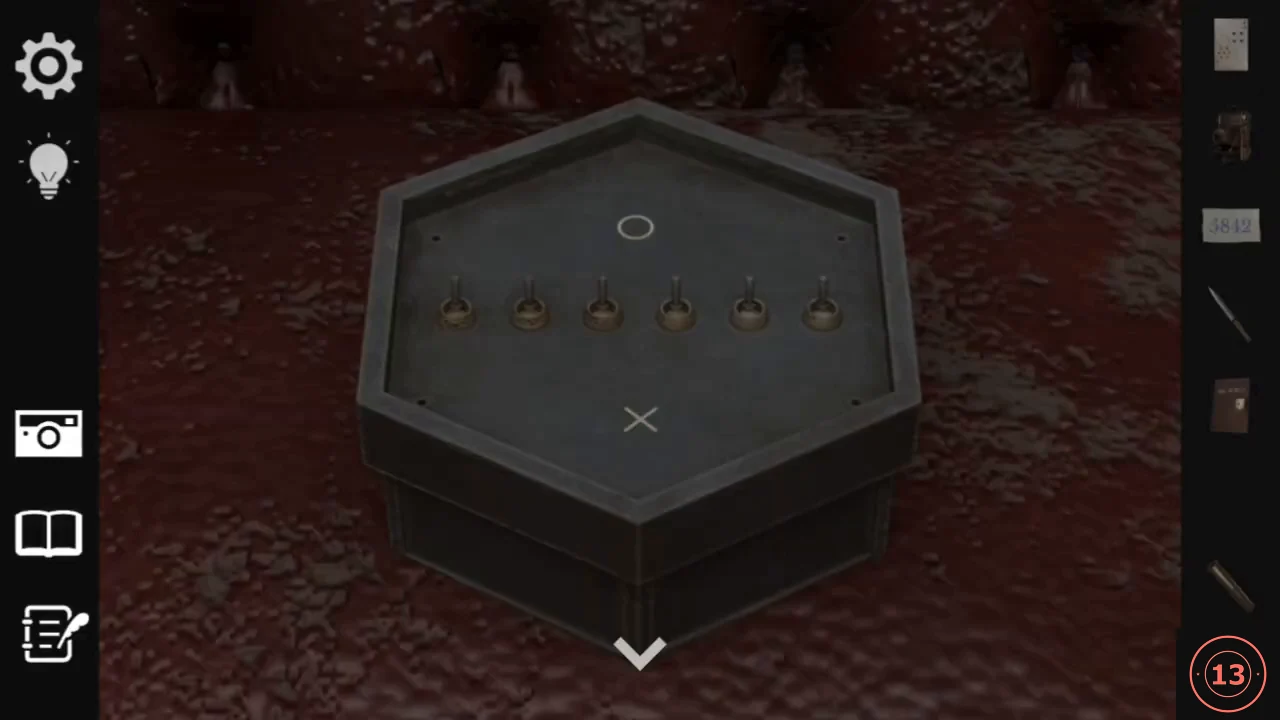
The hexagonal box on the parlour rug hides six toggle switches. The chalkboard symbols are outlines of single cells in a 3 x 3 grid, and that grid is carved inside Eld's room.
- Use the Screwdriver on the hexagonal box on the rug. The lid opens to show six switches with O above and X below; all start up (O).
- Read the symbols on the chalkboard: L, Γ, コ, 凵, ㄱ, ロ. Each shape is the outline of one cell of a 3 x 3 grid: L = top right, Γ = bottom right, コ = middle left, 凵 = top middle, ㄱ = bottom left, ロ = centre.
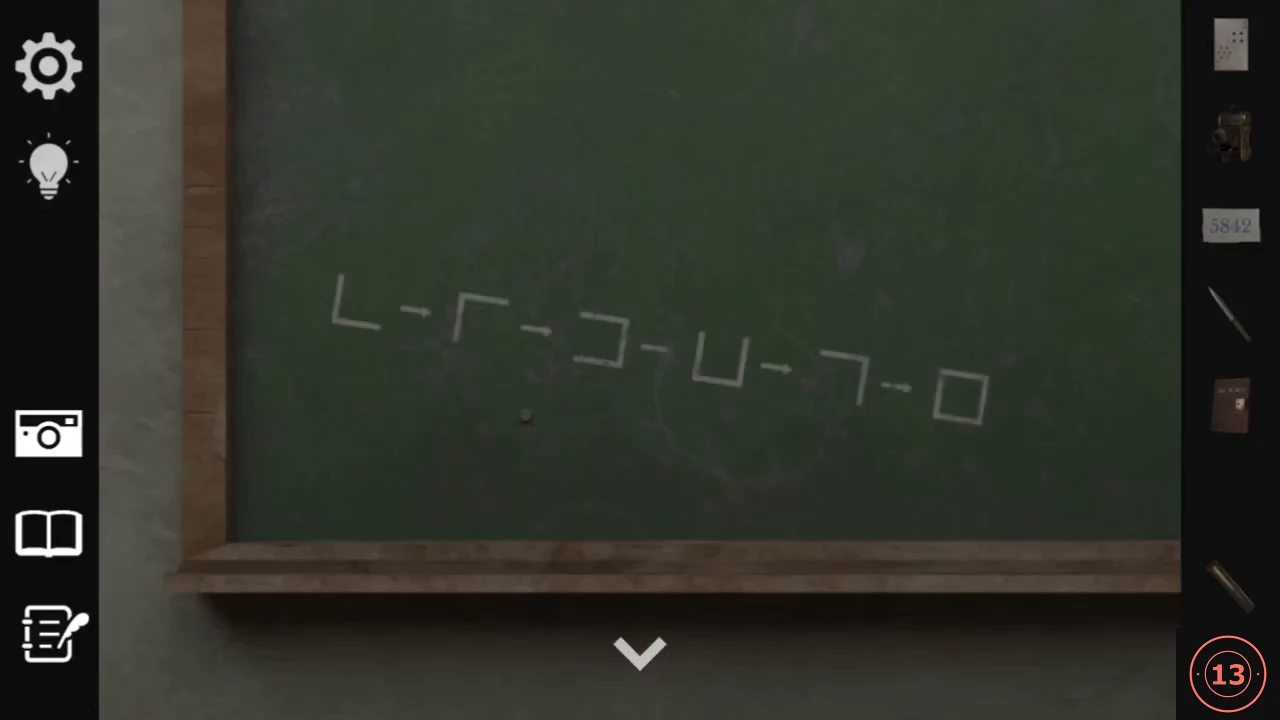
The chalkboard symbols: L, Γ, コ, 凵, ㄱ, ロ. - Go into Eld's room (right blue door beside the altar) and tap the slanted wooden planks on the right. The carved grid reads: top row O X O, middle row O X O, bottom row X O X.
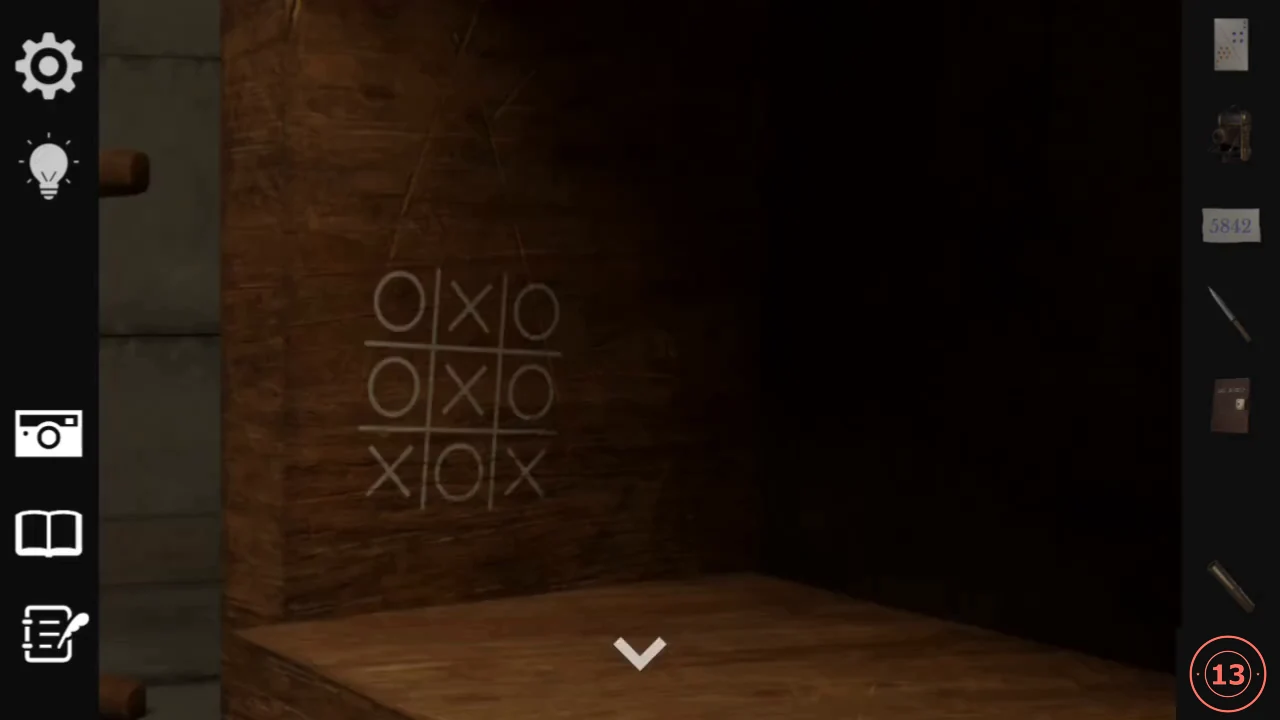
The carved grid in Eld's room: O X O / O X O / X O X. - Look up each chalkboard cell in that grid to get O X O X X X. Set the switches from left to right: up, down, up, down, down, down. "The box has been unlocked." appears and you get a Hexagonal Piece.CODEO X O X X X
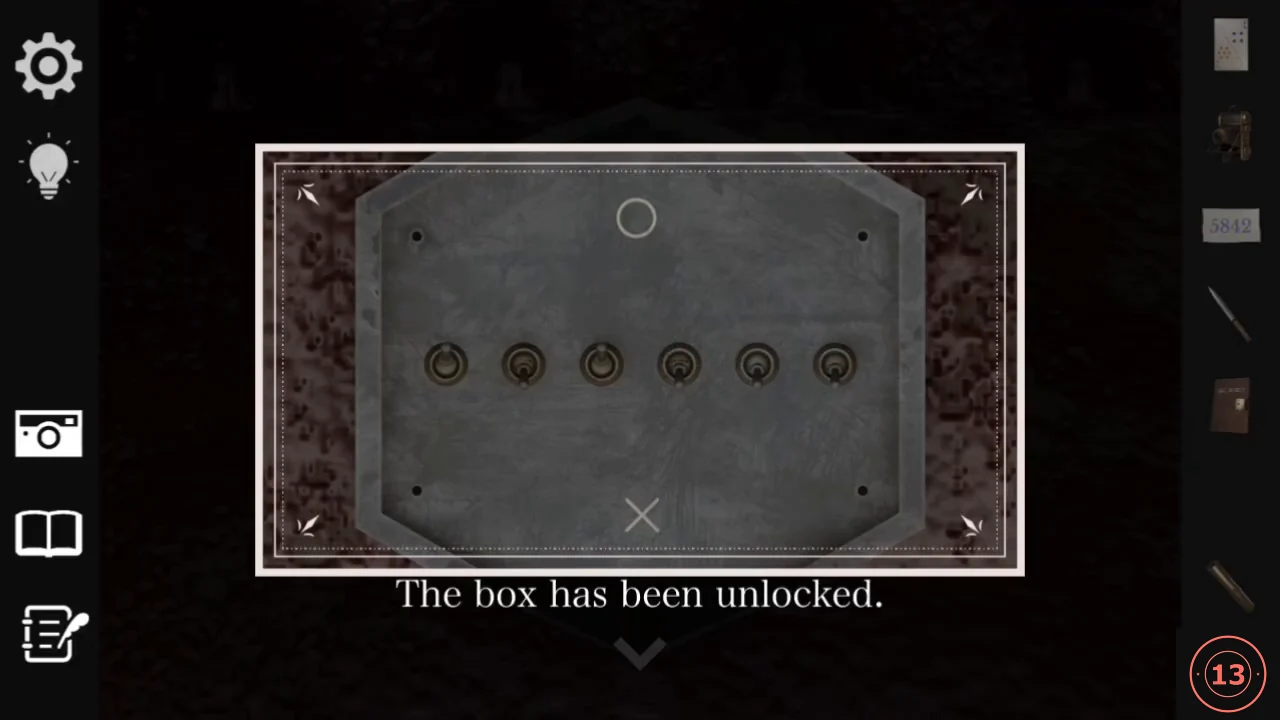
Solved: up, down, up, down, down, down.
The Kaleidoscope Hex Door
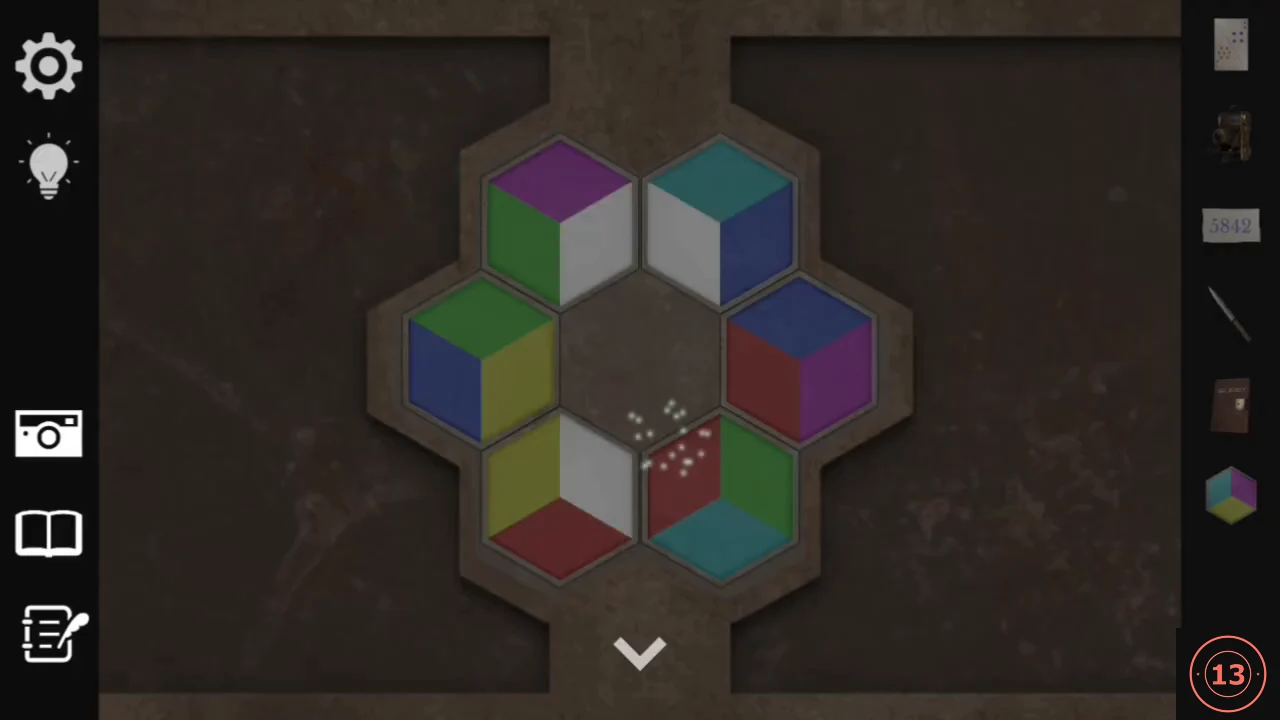
The wooden double door at the back of the nave carries a pattern of seven coloured hexagonal tiles. The kaleidoscope shows what the finished pattern must look like.
- Put the Kaleido Scope on the empty bracket on top of the wooden cabinet in the centre of the parlour, then tap it to look through. It shows seven hexagons, each split into three colours. Top left: blue, white and cyan. Top right: white, green and magenta. Middle left: cyan at the top, then green and red. Centre: cyan, magenta and yellow. Middle right: magenta, red and blue. Bottom left: red, yellow and white. Bottom right: yellow, blue and green.
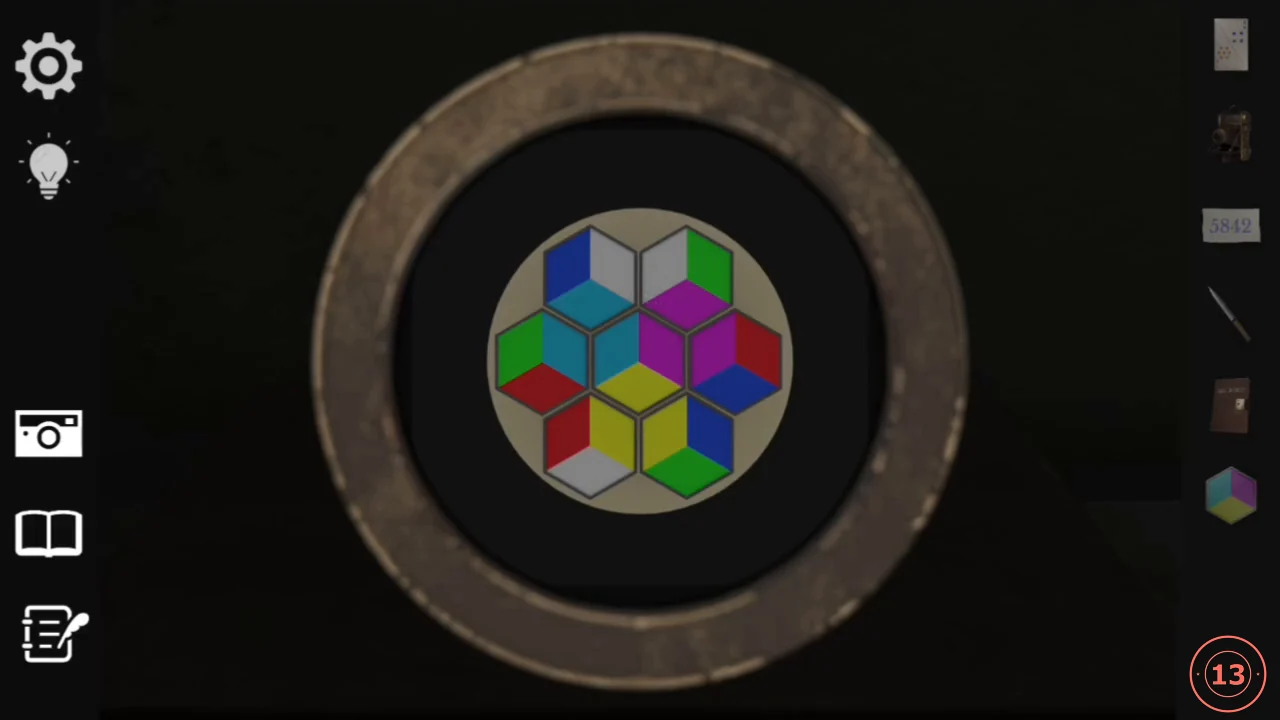
The target pattern seen through the Kaleido Scope. - In the chapel, face the altar and turn round with the arrows until you see the wooden double door at the end of the nave, which has a hex emblem. Tap the door to open the tile panel and place the Hexagonal Piece in the empty centre socket.
- Tap a tile to rotate it in 60-degree steps or to remove it to the tray, then tap a tray tile and an empty socket to put it back. To match the kaleidoscope, swap the top-left and top-right tiles, swap the middle-left and bottom-right tiles, and leave the middle-right and bottom-left tiles where they are. Then rotate every tile, including the centre one, until each colour sits exactly where the kaleidoscope shows it. "The door has been unlocked." appears when all seven match.
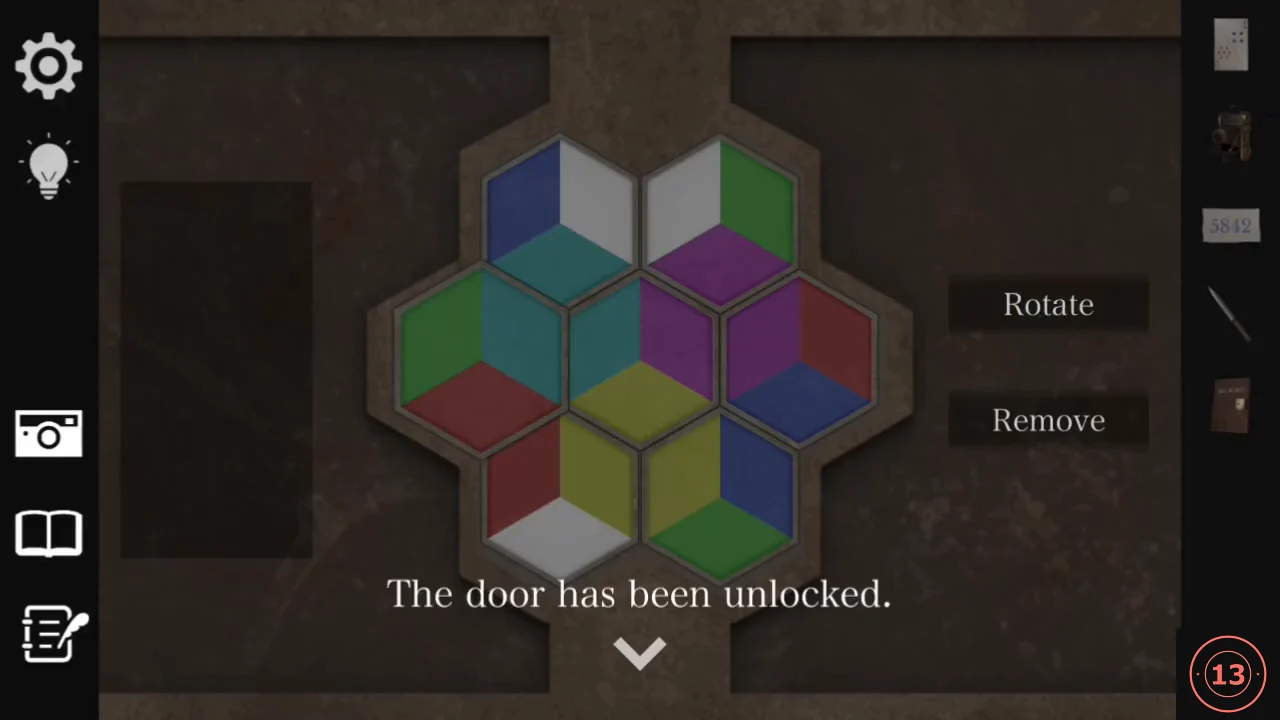
Solved: every tile matches the kaleidoscope.
Eld's Secret
The rear door opens onto the entrance hall, but the glass entrance door is still blocked.
- Tap the opened double door to enter the entrance hall. Eld offers to act as a decoy. When two answers appear, choose "Why are they afraid?" She lowers her hood to show a horn on her forehead. Next, choose "Your horn is cute.", the only answer offered. She remembers a basement door in front of the altar, and the "Next Chapter: Investigate Alternative Escape Routes" card appears; press and hold anywhere on the card ("Press and hold to Chapter") until the next chapter loads.