Blue Box Dial Lock
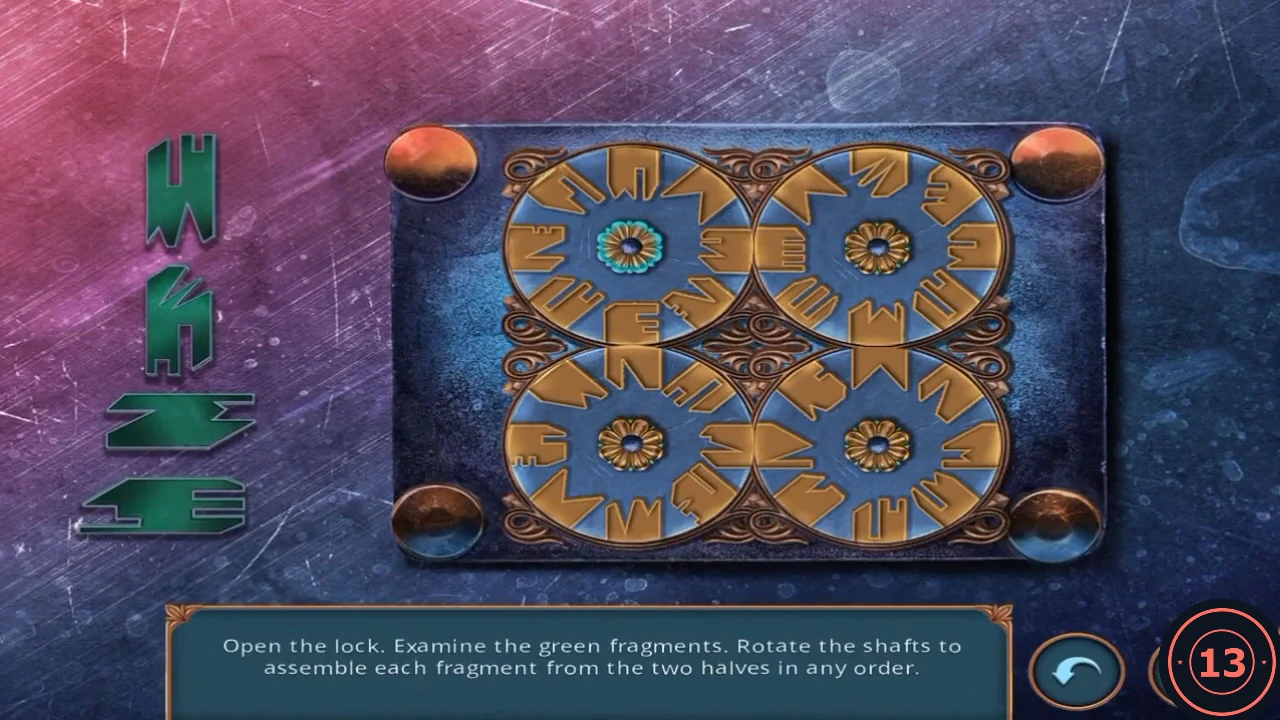
Four interlocking discs each carry symbol halves. Where two discs touch (top, left, right and bottom), their halves join into one symbol. Make the four green symbols shown on the left, in any order.
- Click a disc to select and rotate it. Turn the discs until each of the four contact points shows one complete green symbol from the clue list; a finished symbol lights green.
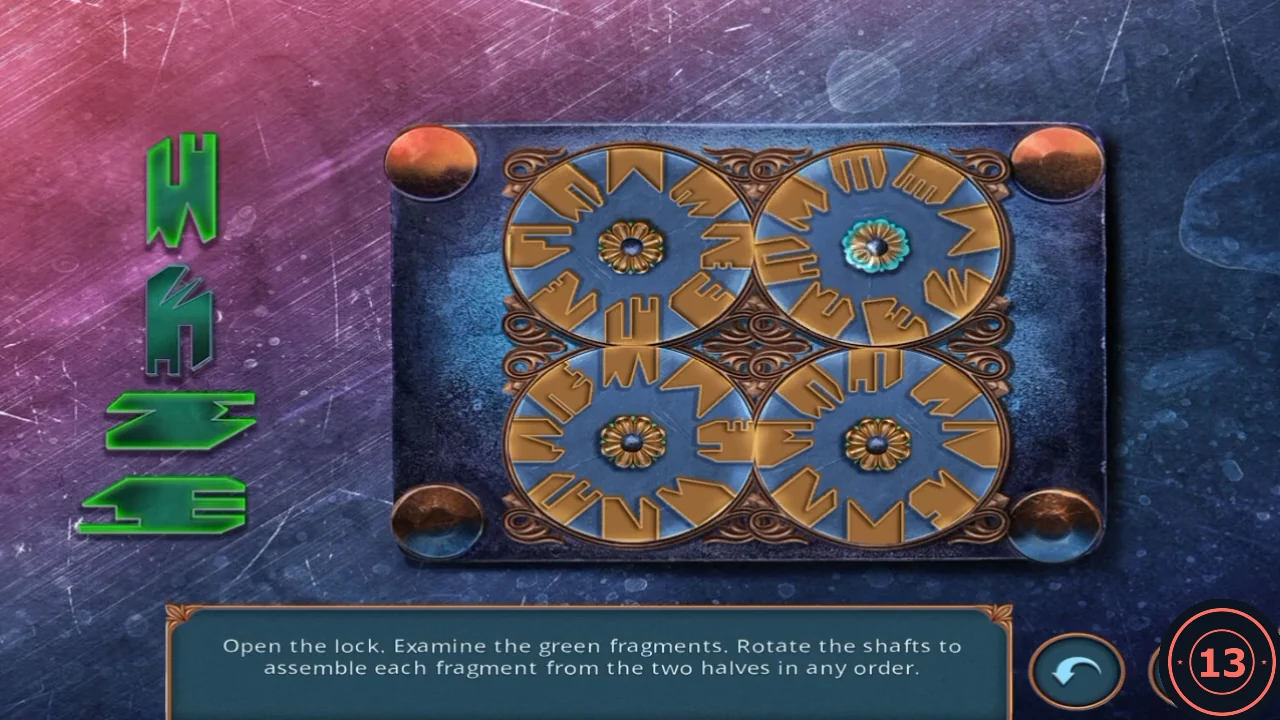
Solved: each contact point between two discs forms one of the green symbols. - The lid opens. Take the PHOTO PIECE (2/3) and the WIRE BRUSH.
Vault, Bookshelf and Piano Key
The wire brush from the blue box finally opens the vault. Its contents lead to the bookshelf and the piano keyboard in the study.
- Scrub the rust off the round vault door with the wire brush, then turn the handle. Take the NAILS (blue spiky bundle) and the round BOOK DECORATION from inside.
- Climb back to the study. Place the book decoration on the first (left) volume of the bookshelf to the right of the desk, then take the PIANO KEY.
- Place the piano key on the piano to start the keyboard repair.
Piano Keyboard Repair
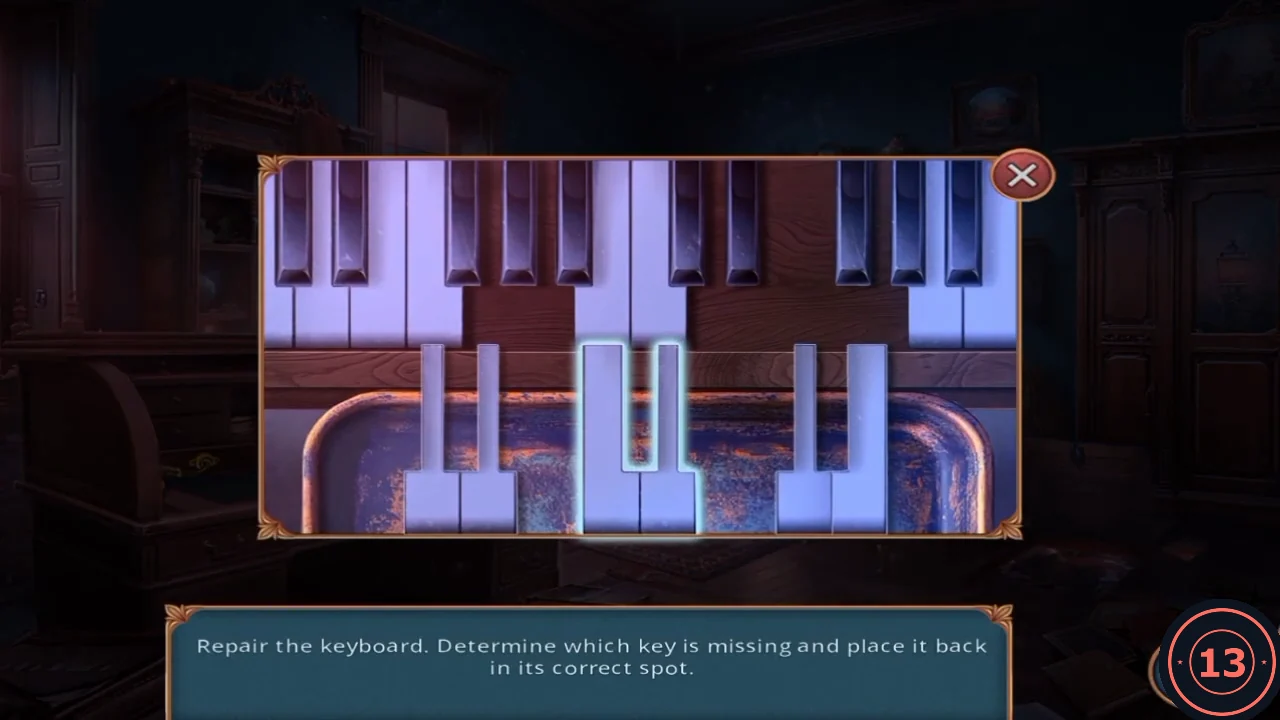
The goal is to find which key is missing and put it back. There are three rounds. In each, several loose white keys hang below the keyboard and only one shape fits the gap.
- Drag a loose key into the gap whose outline matches its notches; a wrong key bounces back. Complete all three rounds. The Relentless Tracker achievement (five mini-games without skipping) can appear during this puzzle.
- Take the PHOTO PIECE (3/3) and the GOLD BOLT from the keyboard compartment.
Basement Evidence Board
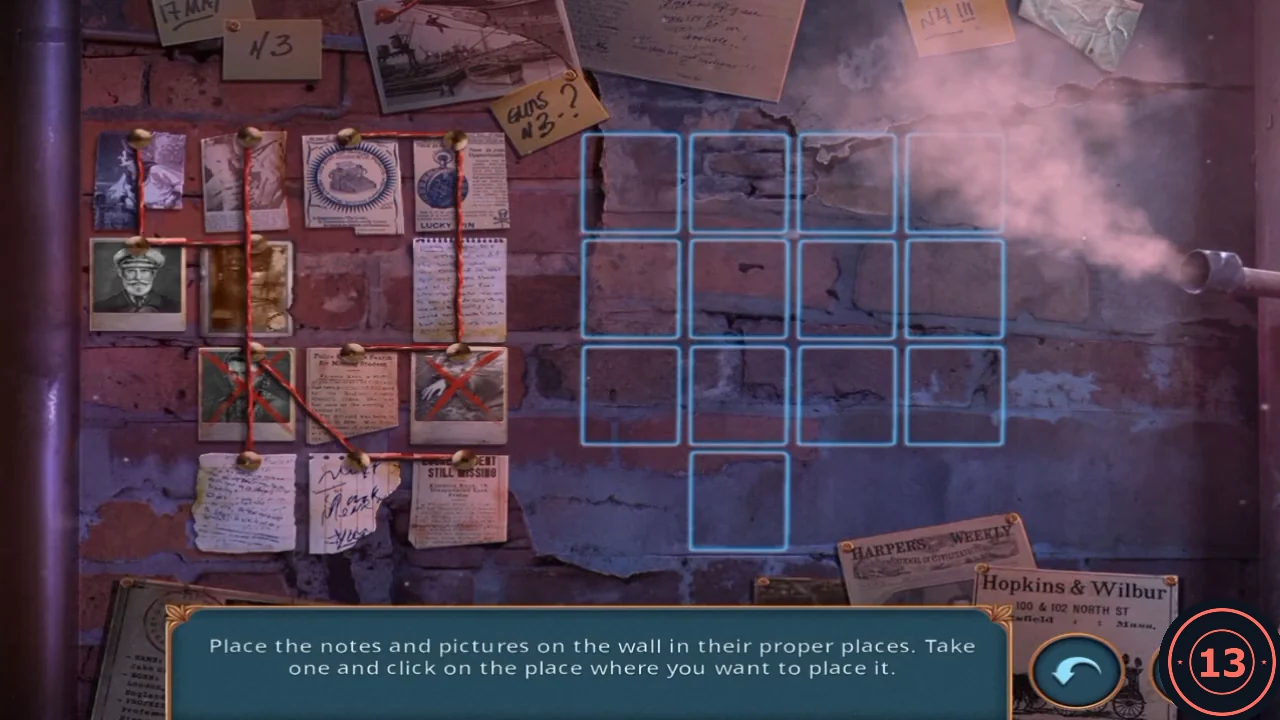
The goal is to rebuild Frederick's evidence wall. The old board on the left is a template, and the empty grid on the right has 13 slots: three rows of four, plus one slot under the second column.
- In the basement, place the three photo pieces on the evidence board on the left brick wall. This earns the Dead. Dead. Dead. achievement and opens the board puzzle.
- Take a note or picture, then click the slot where it belongs. Solved layout: Row 1: crossed-out dark-haired man, sepia figure photo, round ship-emblem clipping, "LUCKY..." pocket-watch clipping. Row 2: painting of sailors, torn handwritten note, "STILL MISSING" clipping, lined notepad page. Row 3: white-bearded captain portrait, brown sepia photo, newspaper article, crossed-out photo. Under column 2: handwritten letter.
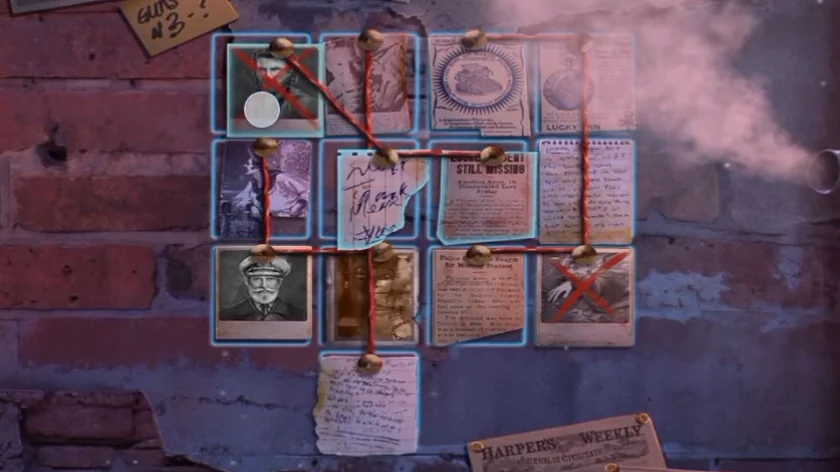
Solved layout of the evidence board. - The completed board reveals an old photograph of the ship.
Charles Offers His Help
After the evidence board is solved, a grey-haired man, Charles, talks to Thomas about the case. This chapter contains a dialogue decision.
- A grey-haired man in a brown waistcoat (Charles) works out that the Captain is the next victim and offers to come along. Choose "I'm only too happy, sir." (35 coins, +1 point, Welcome help) or "I'm not a kid, so I'll manage on my own!" (free, 0 points, Refuse help). Either way Charles comes with you and Emily goes home.
- Leave Frederick's house. The task "Explore Frederick's house" completes and the new task "Get on the ship" starts.