Living Room: Rebuild the Knight Figurine
Thomas has tracked his missing friend Emily to Frederick's house. After the opening conversation, the task "Explore Frederick's house" appears and you start in the living room. Items marked (+) in your inventory are incomplete and need another part before you can use them.
- Zoom in on the fireplace and take the KNIGHT TORSO from the front of the grate. The small box burning in the grate is too hot to touch for now.
- Zoom in on the wardrobe lock (gold hexagon tokens above a snowflake-shaped keyhole). Click the note pinned to the door to take the RAZOR BLADE and the TORN PAPER. The lock is missing a piece, so leave it for later.
- Zoom in on the photo table. Take the blue quilted OVEN MITT (it needs repair), the GLUE tube and the KNIGHT LEGS. Look at the wedding photo too: its back has two clips you cannot move yet.
- Open the knight legs in your inventory, apply the glue and attach the torso to build the KNIGHT FIGURINE.
- Zoom in on the shelf on the right wall. Take the brown JUG, then place the knight figurine on the shelf to start the figurine puzzle.
Figurine Height Puzzle
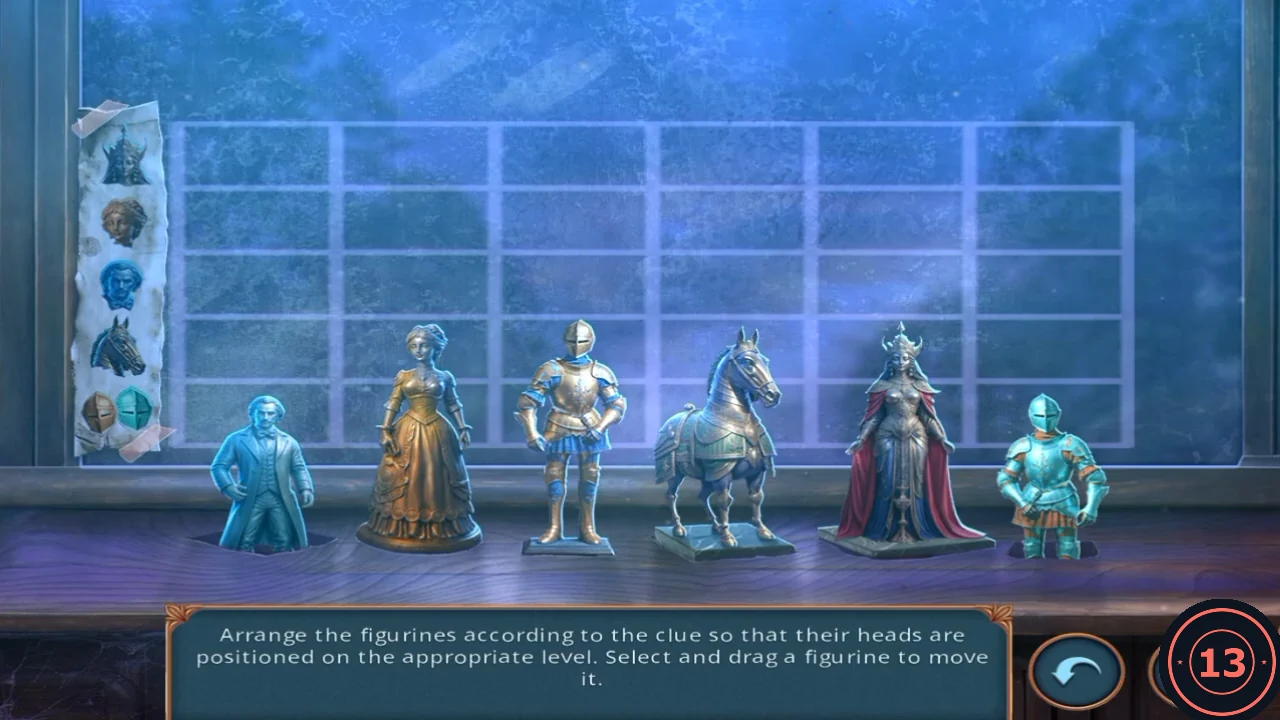
Arrange the figurines so that each one stands on the level shown by the clue strip on the left. From top to bottom the strip shows the crowned queen, the curly-haired lady, the gentleman, the horse, and both knights on the bottom row.
- Drag the figurines to these levels: queen at the top, lady on level 2, gentleman on level 3, horse on level 4 and both knights on the bottom. A figurine on its correct level glows green. Example from one playthrough: the horse and the teal knight were already in place, so only the gentleman (up to level 3), the lady (up to level 2), the gold knight (down to the bottom) and the queen (up to the top) had to move.
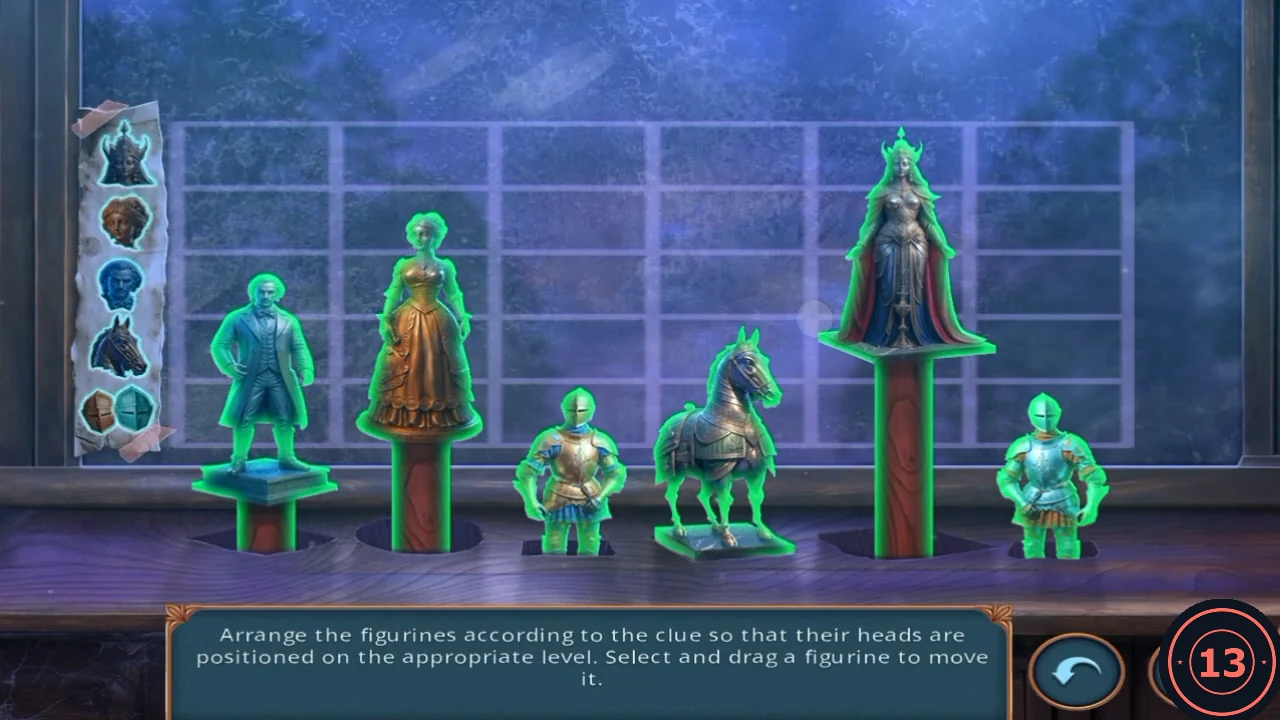
Solved: queen at the top, lady on level 2, gentleman on level 3, horse on level 4, both knights at the bottom. - Take the ORNATE KEY from the compartment that opens. Solving within a minute earns the Quick Thinking achievement.
Put Out the Fire and Enter the Study
With the ornate key in hand, deal with the fireplace and open the study next door. The study desk gives you the parts for the wall safe clue.
- Pour the jug on the fireplace to put out the fire. The box in the grate is still too hot to pick up.
- The ornate key does not fit the wardrobe. Use it on the interior door to the left of the archway (fleur-de-lis plate) to open the study.
- Zoom in on the roll-top desk and take the round KNOB (1/2) and the INK STAMP from the blotter.
- Zoom in on the carved ledge of the desk. Lay the torn paper over the carved symbols and use the ink stamp on it, then take the SYMBOL RUBBING. It shows a theta-like circle, a triangle, an S-shaped loop and a branched cross.
Study Wall Safe Symbol Code
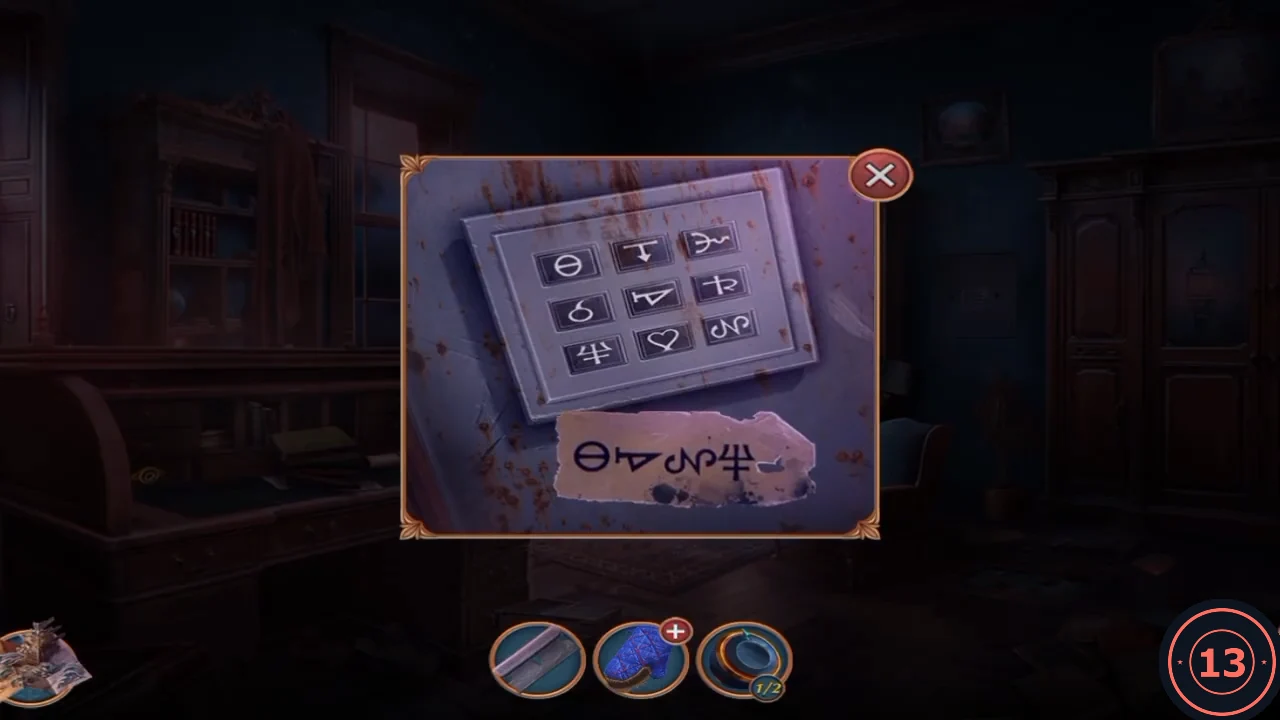
The wall safe on the right has a 3x3 keypad of symbols. Your rubbing is shown under the keypad as the clue.
- Press the four rubbing symbols in this order: top-left circle with a bar, centre triangle, bottom-right S-loop, bottom-left branched cross. The safe opens into a hidden-object scene.CODETheta circle (top-left), triangle (centre), S-loop (bottom-right), branched cross (bottom-left)
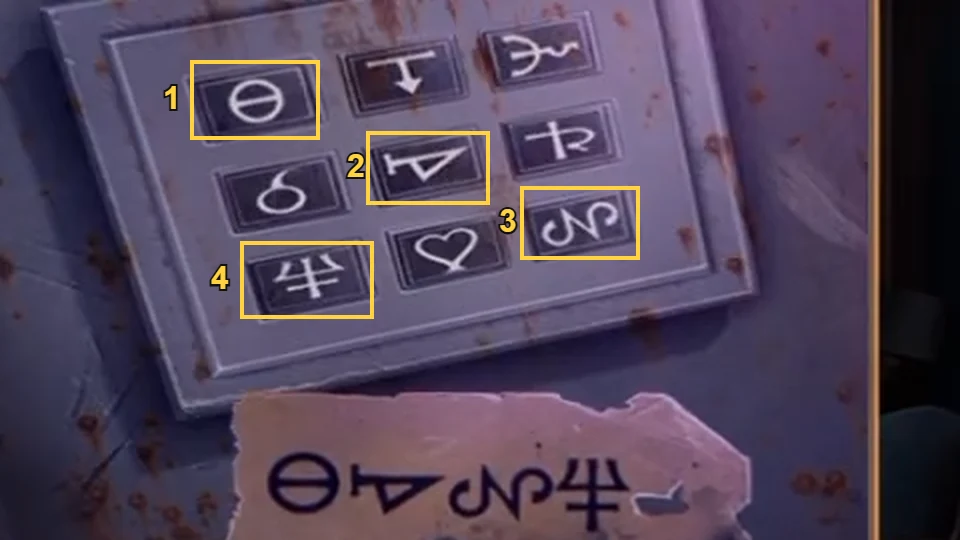
Press order: 1 circle with a bar, 2 triangle, 3 S-loop, 4 branched cross.
Wall Safe Hidden-Object Scene
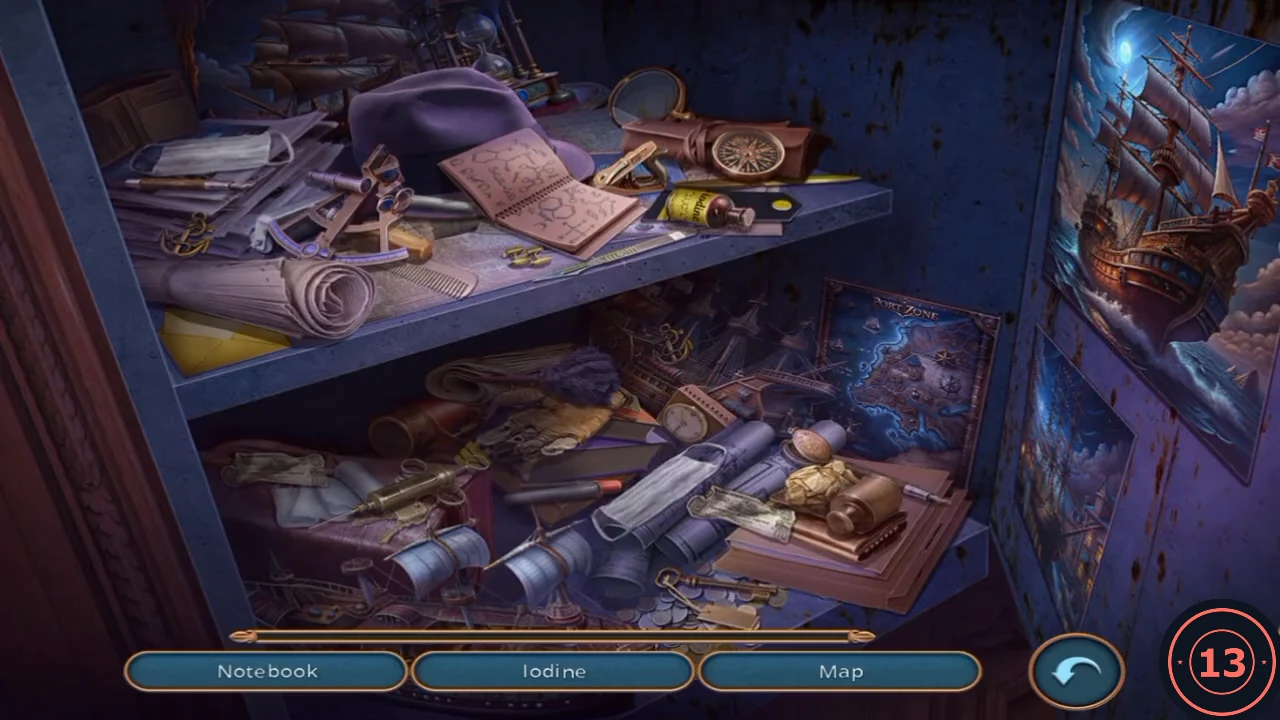
Find the objects named in the list at the bottom. Each found item is replaced with a new name until the list is empty.
- The list starts with Notebook, Iodine and Map; each find adds the next name. Locations, in the order the names appear: NOTEBOOK – the open notebook with chemical sketches, top shelf, in front of the purple hat. IODINE – the small bottle with a yellow label, top shelf, right of the notebook. MAP – the blue "Port Zone" chart standing at the back of the lower shelf, right side. SEXTANT – the brass sextant on the papers at the top-shelf left, beside the hat. SCALPEL – the thin blade lying along the front edge of the top shelf, right of centre, next to two small brass pieces. LOCKET – the small round brown locket resting on the rolled blueprints, lower shelf right, just below where the map stood. WEIGHT – the brass cylinder beside the crumpled gold paper on the books, lower shelf right. COMPASS – on the brown leather roll at the back right of the top shelf. ENVELOPE – the yellow envelope at the front-left corner of the top shelf, under the rolled paper. GLOVE – the leather gloves under the purple feather duster, lower shelf centre-left. SYRINGE – the brass syringe on the left of the lower shelf. TIMER – the small table clock at the back of the lower shelf, centre-right. PIPE – the last slot shows only a pipe silhouette: click the purple hat on the top shelf so it flips over, then click the pipe it was hiding.
- You receive the LUXURY PIPE.
Desk Drawer and Piano Stool
The luxury pipe from the safe opens the study desk drawer. Collect the second knob and take both knobs to the piano stool.
- The top-left desk drawer has a brass fitting that "needs a lever or something like that". Use the luxury pipe on it, then take the PINK CASKET.
- Open the casket in your inventory to get the second KNOB (2/2).
- Zoom in on the piano stool and place both knobs to start the knob puzzle.
Piano Stool Knob Puzzle
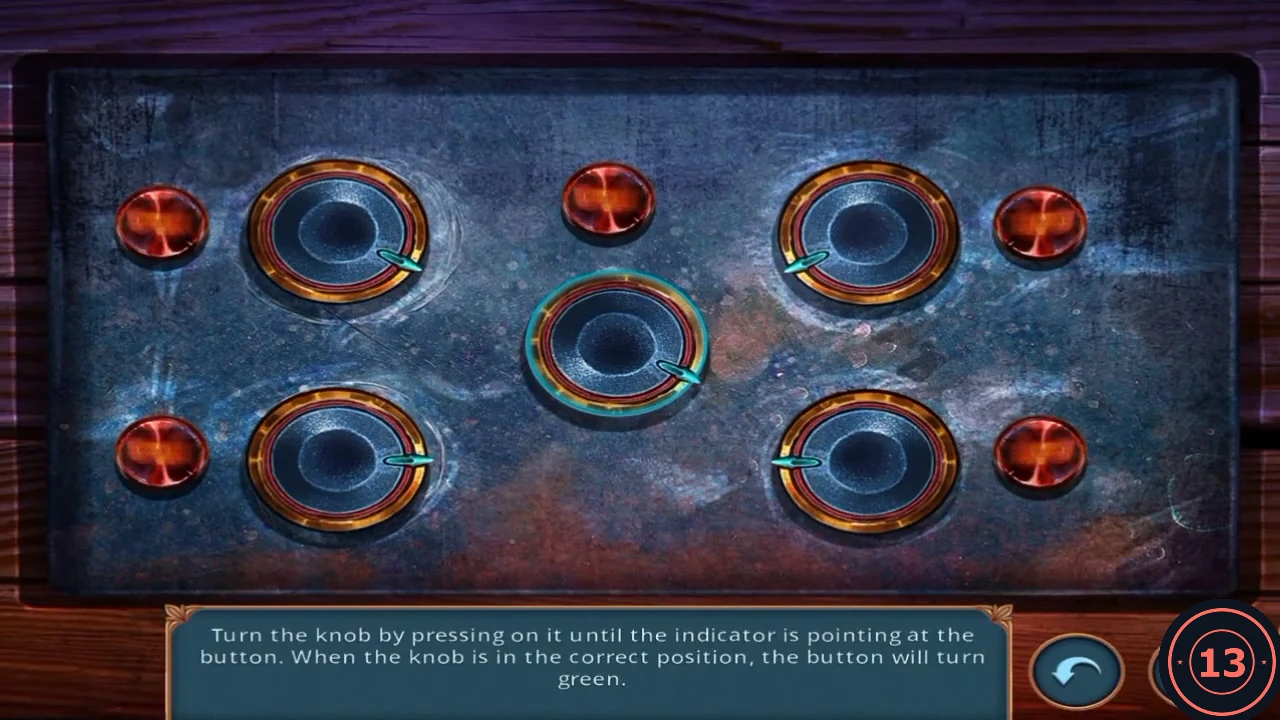
Five knobs each have a small button beside them. Click a knob to turn it clockwise until its pointer faces its button; a correct knob lights green. Some knobs also turn a neighbour.
- Links seen in the recording: the bottom-left knob also turns the top-left knob, the bottom-right knob also turns the centre knob, and the top-left knob turns only itself. Set the knobs in this order: bottom-left, top-right, bottom-right, centre. Finish with the top-left knob, because turning it does not move any other knob. The number of clicks depends on where the pointers start, so keep clicking each knob until it lights green before you move on.
Talk with Emily
This is the first of five decisions that add up to your score at the end. The premium answers cost in-app coins.
- Click the study to talk with Emily ("I still can't believe you were looking for me, Thomas."). Choose "You're my friend. I wouldn't abandon you like that." (35 coins, +1 point, recorded at the end as Be confident) or "I just wanted to feel like a detective." (free, 0 points, Respond uncertainly). Either answer leads to the same basement.
Basement: Red String, Needle and the Oven Mitt
The basement holds Frederick's evidence board. Here you make a needle and thread to repair the oven mitt, then go back for the hot box in the living room fireplace.
- At the evidence board on the left brick wall, the red string cannot be torn by hand. Cut it with the razor blade to take the RED STRING. A PHOTO PIECE (1/3, a picture crossed out with a red X) also comes away from the board.
- Zoom in on the blue box on the floor and take the SHEET MUSIC card (bird picture with notes) from the lid. Its lock is broken; you will come back later.
- Zoom in on the needle; it slips from Thomas's fingers. Use the red string on it to get a NEEDLE AND THREAD.
- Open the oven mitt in your inventory and sew it with the needle and thread to repair it.
- Go back through the study to the living room fireplace. Use the oven mitt on the hot box to take the BLUE GLASS PLATE and the SNOWFLAKE EMBLEM.
- Place the snowflake emblem in the snowflake keyhole of the wardrobe to start the hexagon pairs puzzle.
Wardrobe Hexagon Pairs
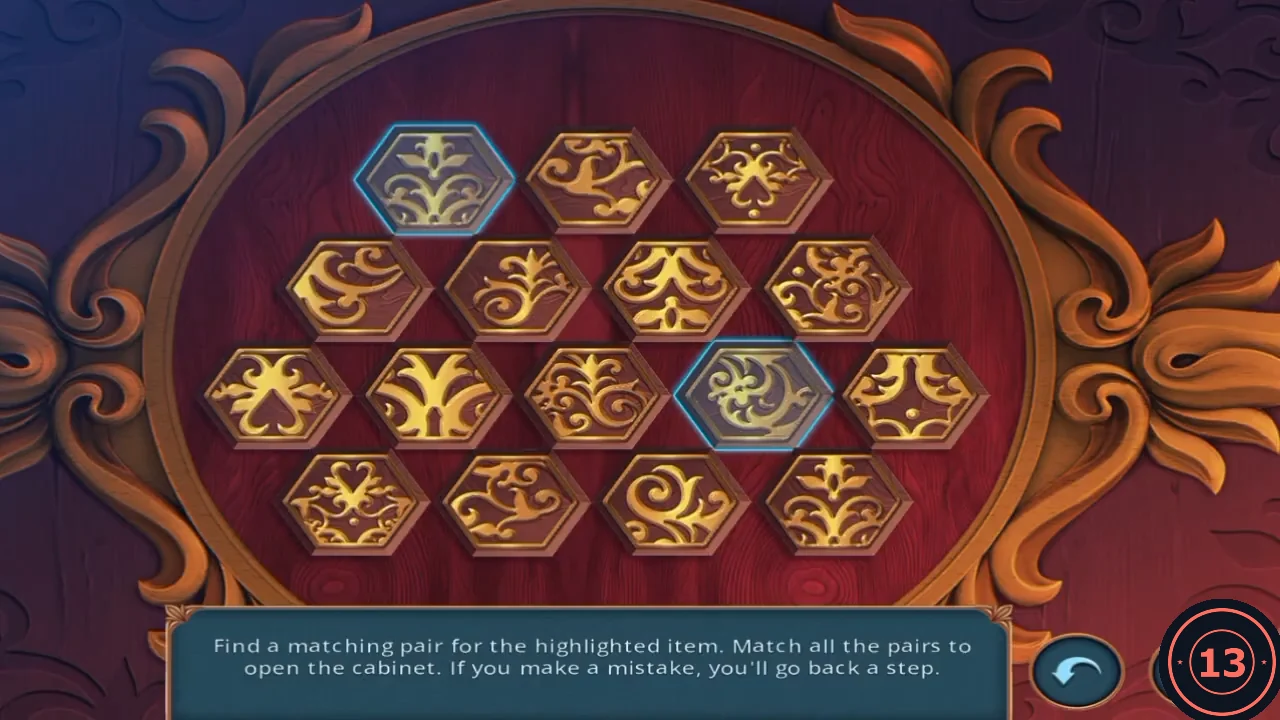
The lock holds 16 hexagon tiles in four rows (3, 4, 5 and 4). The game highlights one tile at a time; click its identical twin. A mistake undoes one step.
- Keep matching the highlighted tile with its identical twin until every pair is gone. The highlighted tile changes each time, so read the next one before you click.
- The wardrobe opens. Take the purple leather BOOT from the shelf.
The Piano and the Wedding Photo
The boot opens the piano in the study, and the pliers open the back of the wedding photo in the living room.
- In the study, the piano lid has a padlock without a keyhole. Hit it with the boot to knock it off.
- Take the blue PIANO HAMMER piece and the PLIERS from the keys, and place the sheet music on the stand. Thomas needs all the keys before he can play.
- Open the piano hammer in your inventory and add the blue glass plate. It still needs a handle, which you find later on the ship.
- In the living room, turn the wedding photo over and remove its two clips with the pliers. A newspaper falls out.
- Click the three marked details on the newspaper picture: the sinking ship, the skull on the rocks and the captain's cap in the water. This earns the Down With the Ship achievement. Then take the MACHINE OIL from the frame.
Study Safe: Find the Pairs
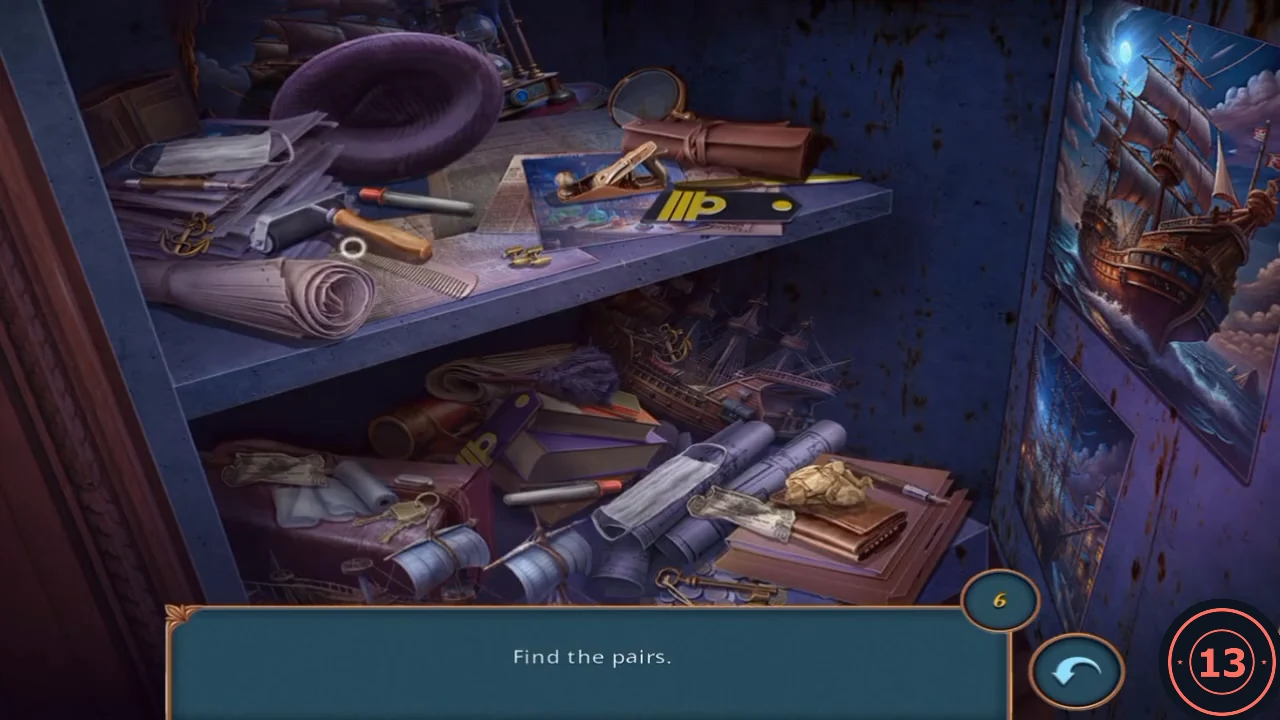
Thomas decides to check the safe again. This time it is a pairs scene with a counter of 6.
- Click both items of a pair to remove it; the counter drops by one. The six pairs: PENS – one on the papers at the top-shelf far left (under the face mask), the other on the books at the lower-shelf right, beside the crumpled gold paper. RED-CAPPED SILVER TUBES – one at the top-shelf centre in front of the overturned hat, the other on the purple books at the lower-shelf centre, left of the rolled blueprints. SMALL BRASS ANCHORS – one at the front-left corner of the top shelf, the other at the back of the lower shelf, on the ship picture above the purple books. FOLDED BANKNOTES – one at the lower-shelf far left, the other on the books at the lower-shelf right, beside the gold paper. BLACK SHOULDER BOARDS with yellow stripes – one at the front right of the top shelf, the other on the lower shelf, partly hidden between the leather case and the purple books. WHITE FACE MASKS – one on the papers at the top-shelf far left, the other lying on the rolled blueprints at the lower-shelf centre.
- You receive the TOY CAT.
Basement: Vault Door and Rat Hole
The toy cat from the safe chases the rat out of its hole in the basement. The machine oil goes on the vault door, which stays stuck for now.
- In the basement, oil the round vault door to the left of the red cabinet with the machine oil. The handle is still too rusty to turn.
- Zoom in on the rat hole to the right of the aisle and use the toy cat. The rat runs off; take the ornate DISC.
- Place the disc on the blue box on the floor to start its dial lock.