CHAPTER 4
Michaels' alley
Relight the lantern, then search the alley for key parts.
- After the trap the alley is too dark to search ("It's too dark. I can't see anything."). Tap the lantern on the right wall, the one you covered with resin. In the close-up it lights up again by itself and the alley becomes bright.
- At the barrel in the right foreground, take KEY PART 1/3.
- At the trash can, take the golden SHIP ornament lying on the lid.
- Use the SPECTACLES in the two holes of the trash-can lid to lift it, then take the PESTICIDE.
- Use the PESTICIDE on the weedy flower window box on the left.
PUZZLE
Pesticide drop puzzle
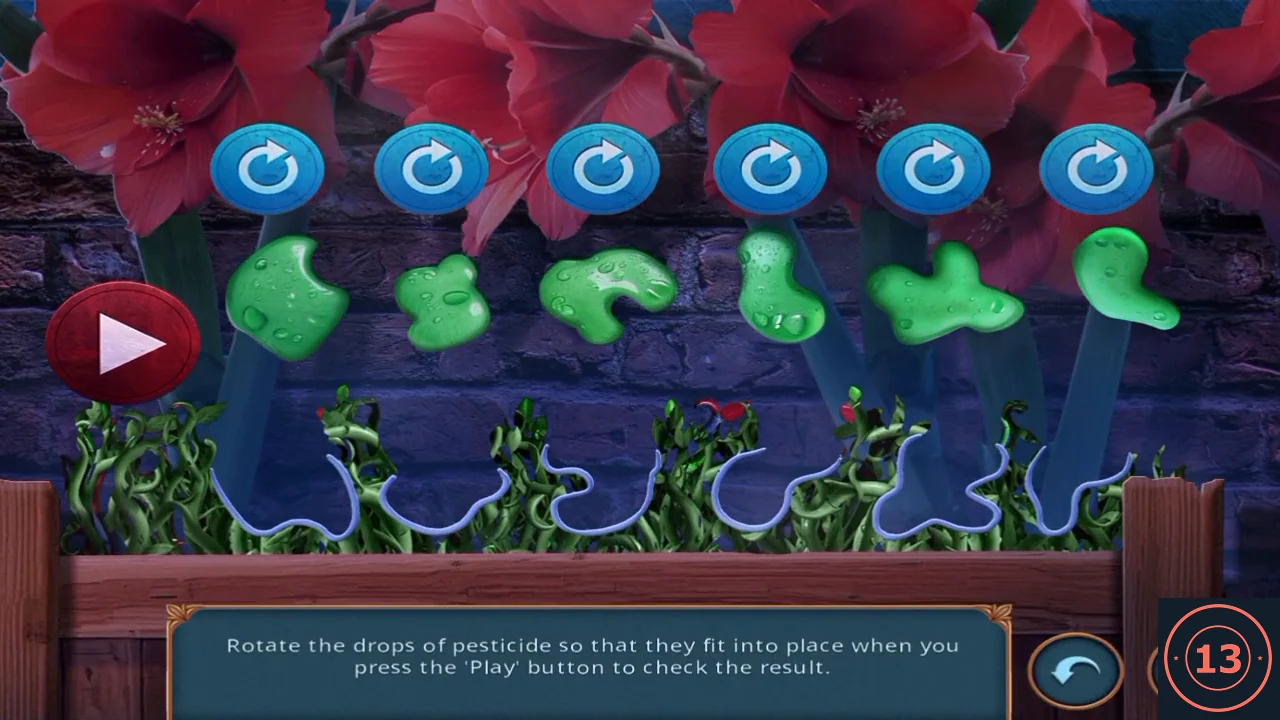
Turn each drop with the blue button above it until its lower outline matches the blue outline in the vines directly below, then press the red Play button.
- Rotate all six drops to match the outlines underneath, then press Play. The starting rotations may differ, so match shapes rather than counting clicks.
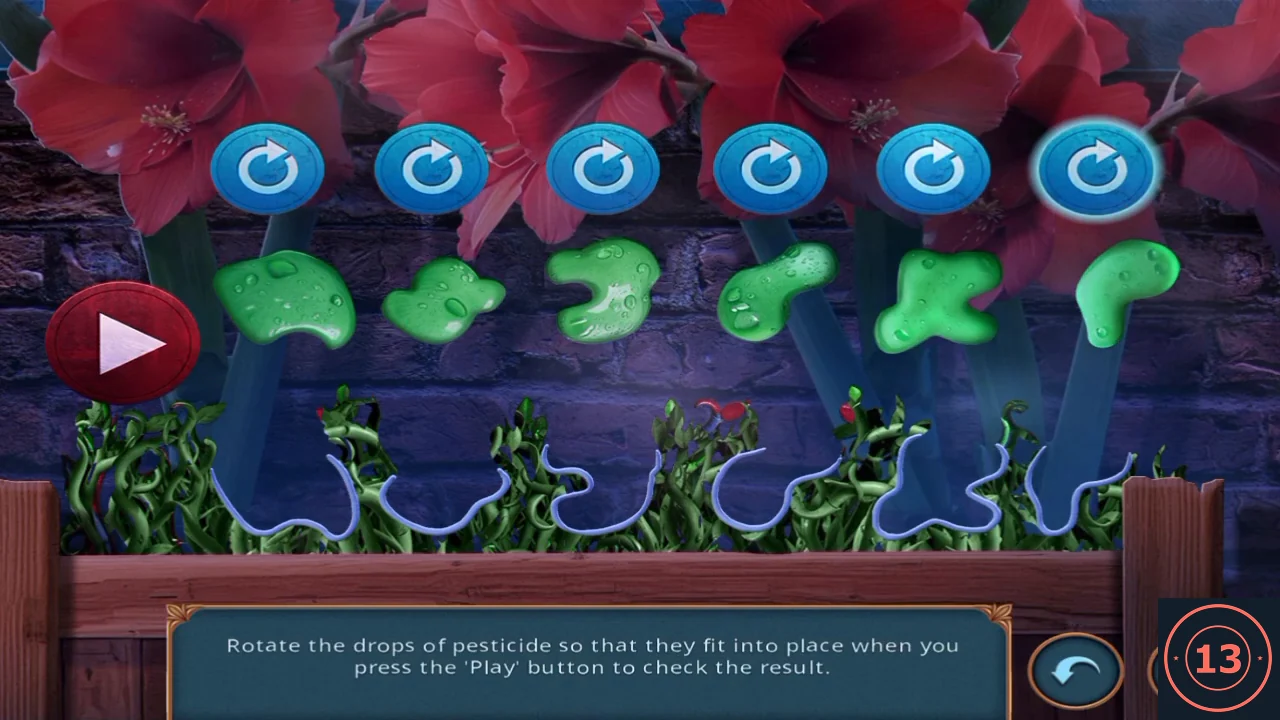
Drops rotated to match their outlines, ready for Play. - Take the TONGS from the cleared window box.
HIDDEN OBJECTS
Fire pit key and the unpaired items
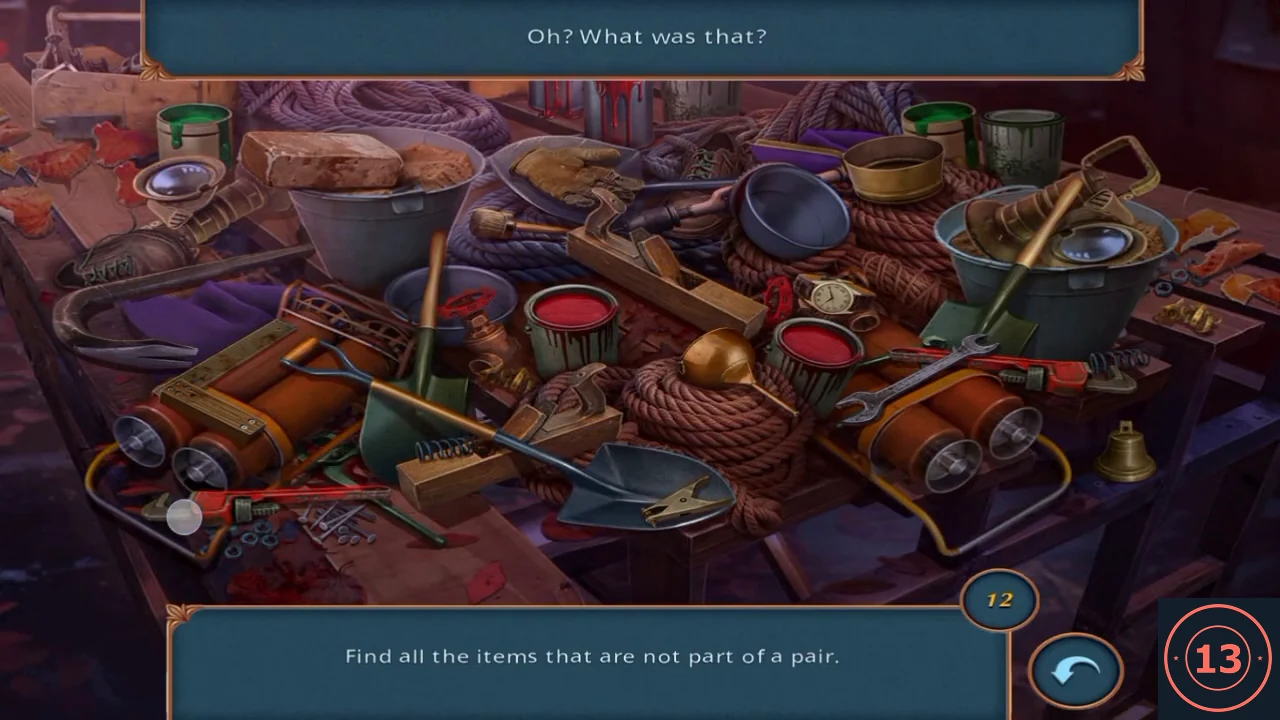
Pull the key part from the coals and search the workbench again.
- Go to the first alley. At the fire pit, use the TONGS on the coals and take KEY PART 2/3. Read the burnt wanted notice and take the BURNT PORTRAIT.
- At the workbench, find the 12 items that are not part of a pair: nails, crowbar, brick, file, funnel, metal clip, wristwatch, wrench, bell, brass pot, work gloves and carpenter's square. The blue pan then disappears; take the HAND DRILL.
PUZZLE
Wanted poster puzzle
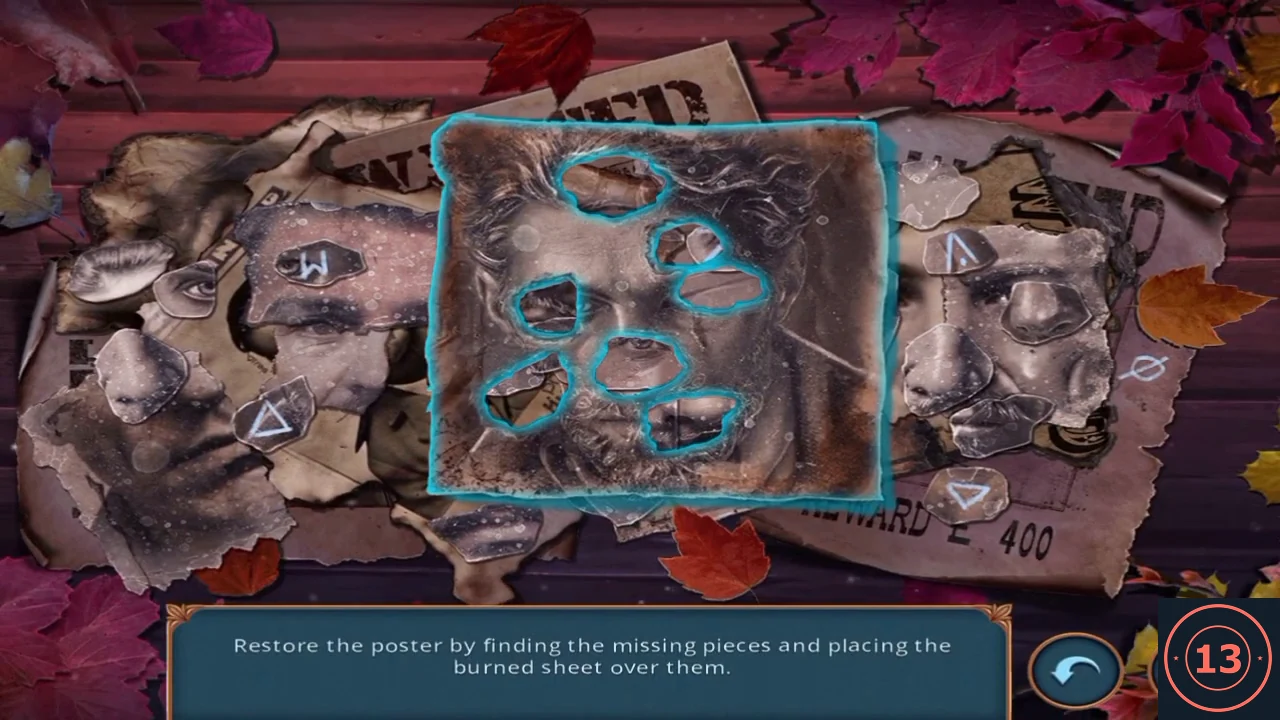
Find the matching wanted poster for the burnt portrait.
- In Michaels' alley, use the HAND DRILL on the barrel to drain it and take the RAKE.
- Return to the port pier. Use the RAKE on the leaves by the carved stone to uncover wanted posters, then use the BURNT PORTRAIT there.
- Drag the burnt sheet over the pile of posters until its holes line up with the top of the right-hand poster (REWARD £400), in the upper right. The holes then show hair, eye, nose, mouth and three symbols: a lambda shape above the right eye, a W at the right eye and a triangle on the left cheek.
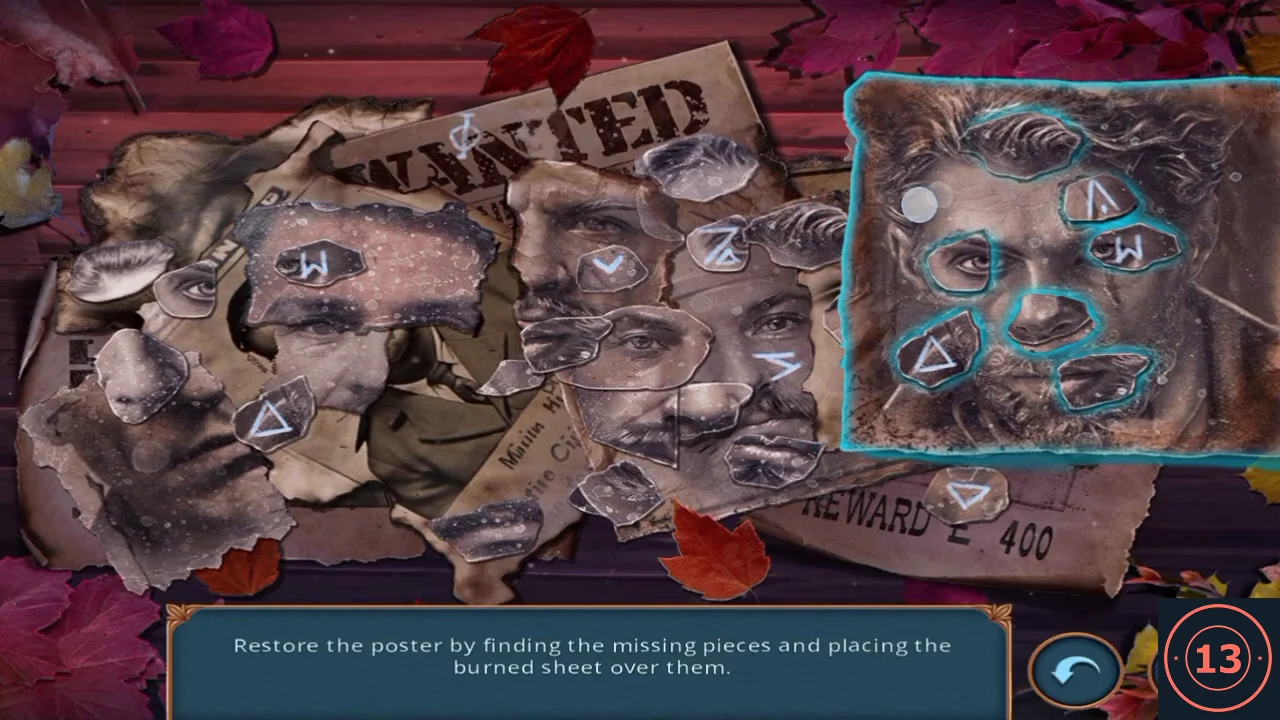
The burnt sheet lined up on the REWARD £400 poster; its holes reveal triangle, W and lambda.
PUZZLE
Fire pit chest symbol lock
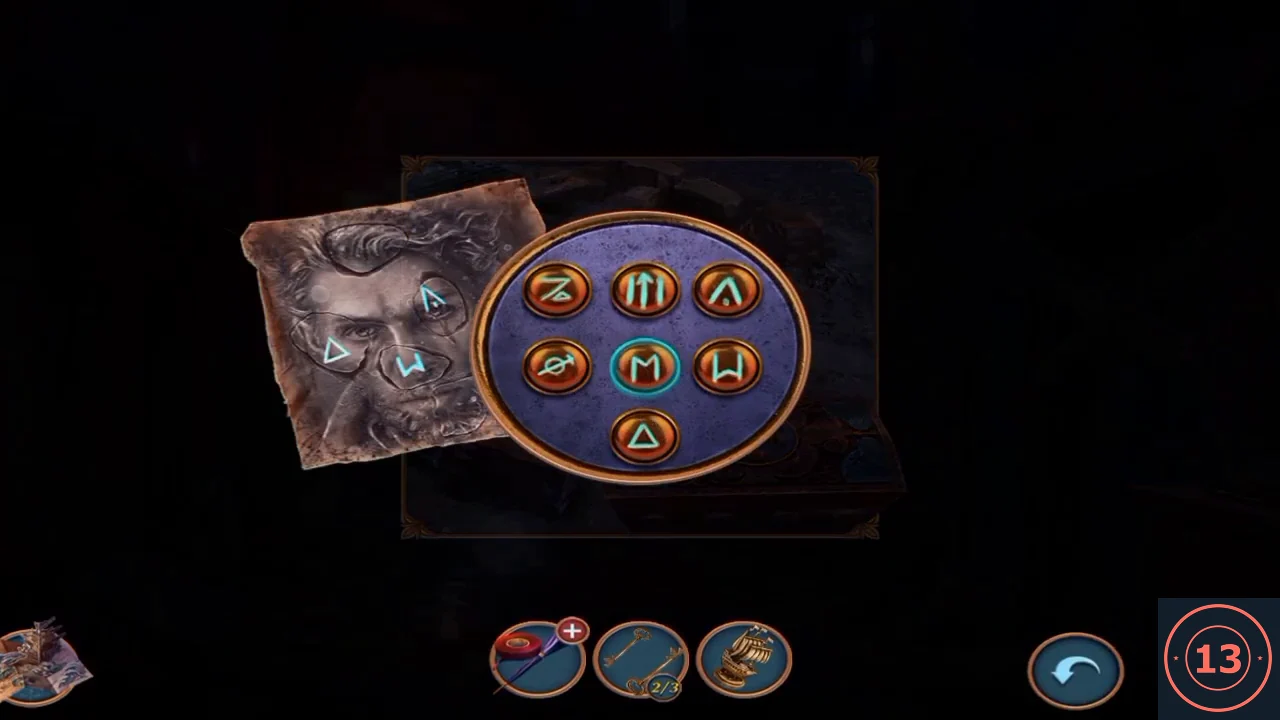
The restored portrait shows which three of the seven chest buttons to press.
- Go to the fire pit chest and use the RESTORED PORTRAIT. Press the triangle, W and lambda buttons. The recording used that order; it did not test other orders.
- Take the ETHER, BRASS FAN PART 1/2 and the CHEESE.
- At the bird nest on the right side of the alley, give the CHEESE to the bird. Take the FLUTE and the UMBRELLA HANDLE.
- Open the taped UMBRELLA (+) and add the UMBRELLA HANDLE to complete the UMBRELLA.
PUZZLE
Lock box key-parts puzzle
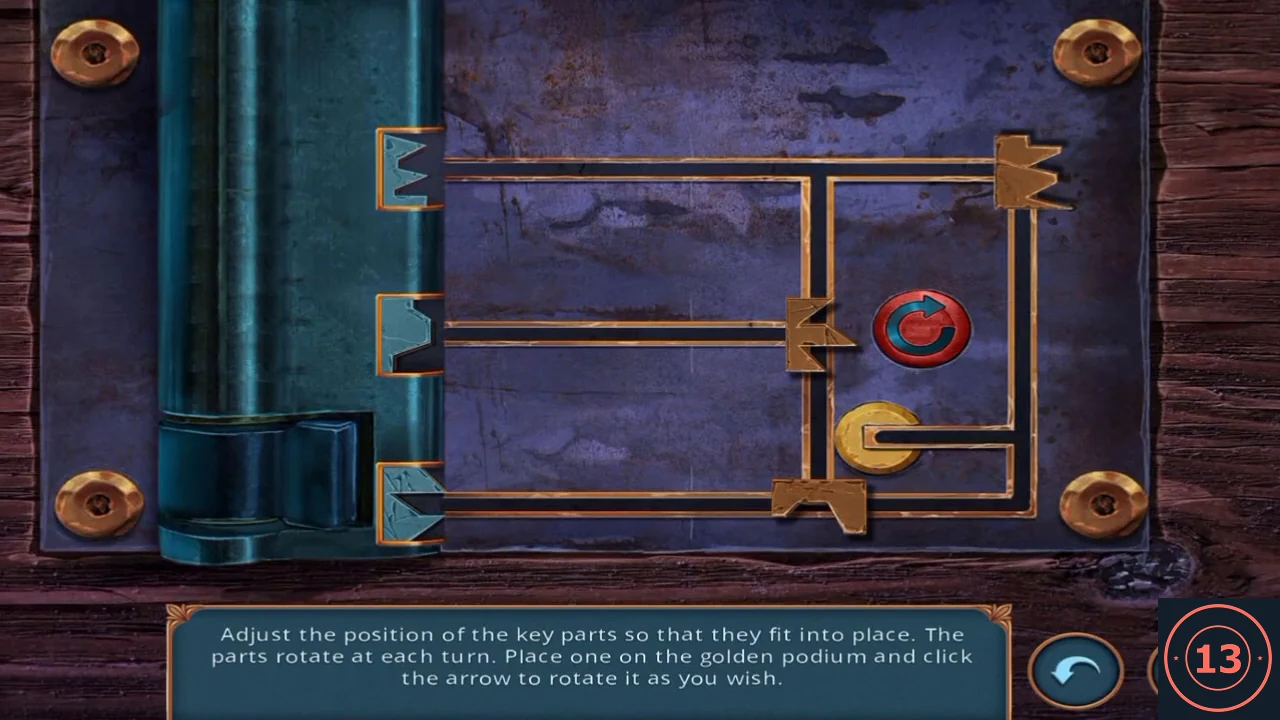
Complete the key and fit its three parts into the lock box.
- In Michaels' alley, use the UMBRELLA to hook the SCRUB BRUSH off the lantern bracket above the lock box.
- At the trash can, use the SCRUB BRUSH on the moss on the wall and take KEY PART 3/3.
- Use the KEY 3/3 on the lock box under the lantern.
- Click a key part, then a circled destination; parts turn as they round corners, and the golden podium plus red arrow lets you turn a part freely. Recording solution: move the top-right part to the podium, turn once, send it to the top slot; park the bottom part in the top-right corner; move the middle part to the podium, turn three times, send it to the bottom slot; send the parked part to the middle slot.
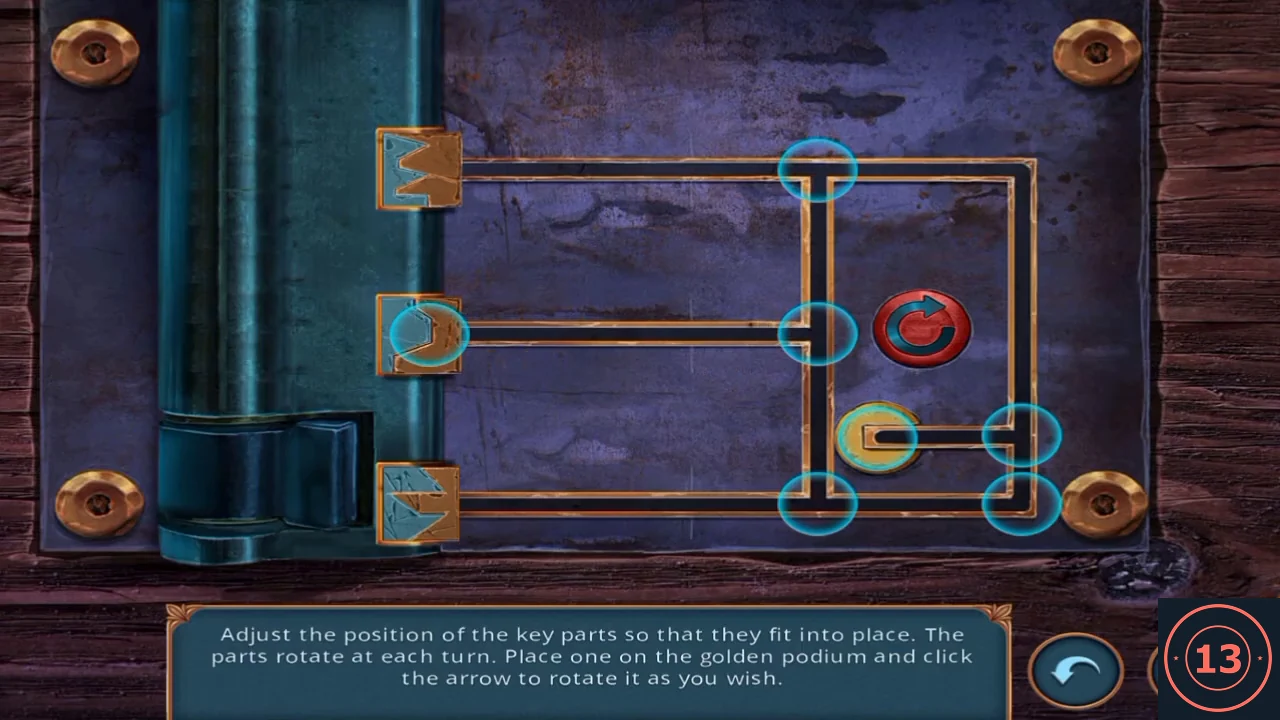
Solved: all three key parts seated in place. - Take the MATCHBOOK, the RAG and the MAP. Task Find the map is complete; the new task is Get on Silas's ship.
PUZZLE
Harbour map token maze
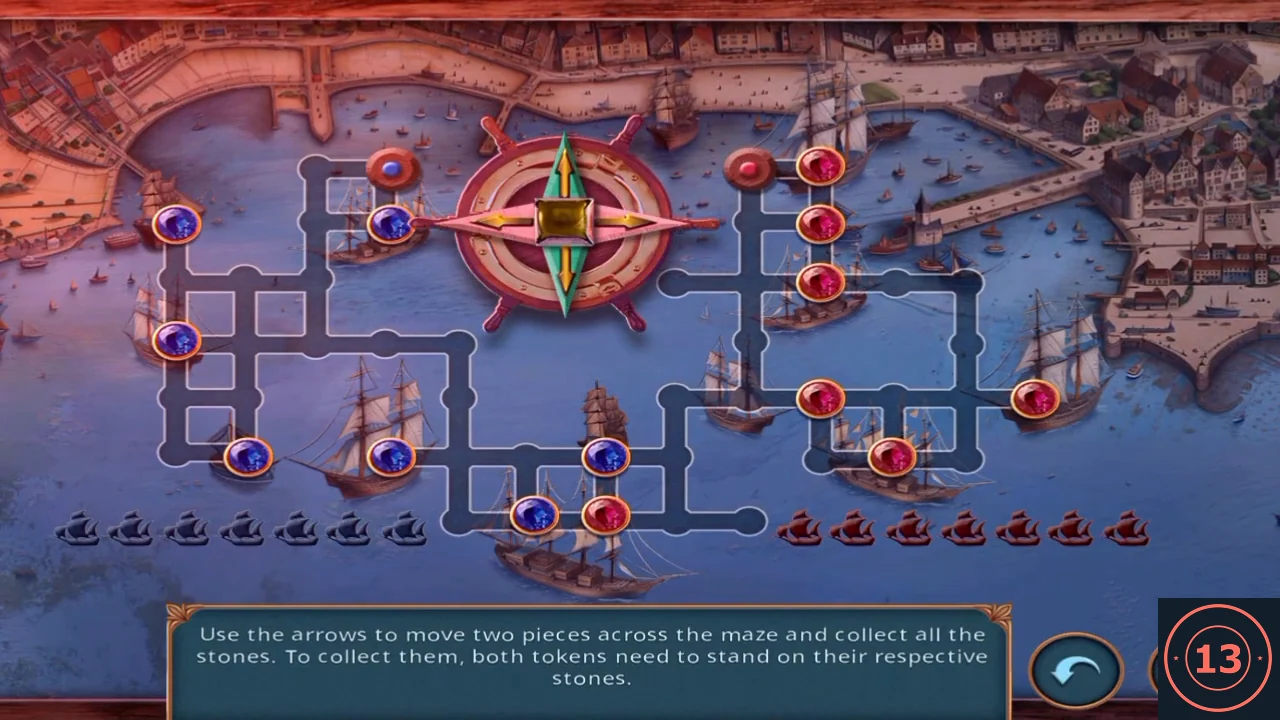
Clean the map board and move both tokens to collect every stone.
- Return to the port pier. At the rowboat, dip the RAG in the water to get a WET RAG.
- At the notice board, clean the dirty glass with the WET RAG, then use the MAP.
- Each arrow press moves both tokens one junction in that direction; a pair of stones is collected when both tokens stand on their own coloured stones. The recording's full sequence (R right, L left, U up, D down): R D L D L L U R R D D D D U U D D R R D D R U U R R R D D L L L D R R R R L U L L L D D R D R R R L L.
ACCESS
Key gate and boarding the ship
The adventure stops at a Mystery Files key gate before the ship.
- A Mystery Files padlock screen appears: "Use the key to continue the adventure." Press Unlock to spend one key; the key counter at the top right showed 2 before unlocking in the recording. If you also want the paid Find Lewis option later in the ship chapter, you need one more key at that point. The screen also offers notifications for when keys recover.
- Choose "Yes, but we have to bring something to the police." (35 coins, +1 star; chosen in the recording) or "Any suggestions, partner?" (free). Task Get on Silas's ship is complete; next you sneak into Silas's office.