Unlocking the Bonus Chapter
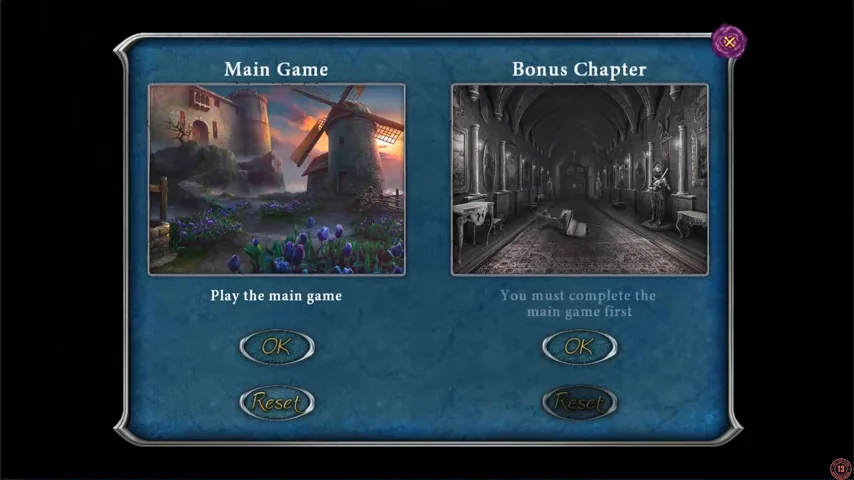
The bonus chapter follows Katrina and her son Christian, who has painted his fears with the Baron's magical paints. It is a separate paid unlock in this free-to-play edition.
- Finish the main game, then choose PLAY on the title screen. The Bonus Chapter entry reads You must complete the main game first until the main story is finished, and then Play the bonus chapter. It is a paid unlock in this free-to-play edition; the App Store listing names the purchase Unlock Bonus Game. If you bought it earlier, use the Restore button on that entry. The bonus chapter has its own Reset button, separate from the main game.
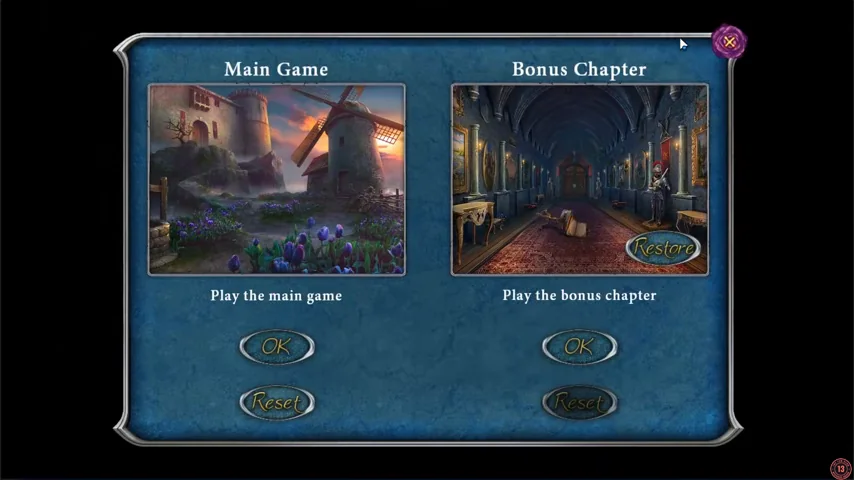
After the main game: the Bonus Chapter entry is active and shows the Restore button on its picture.
Castle Courtyard
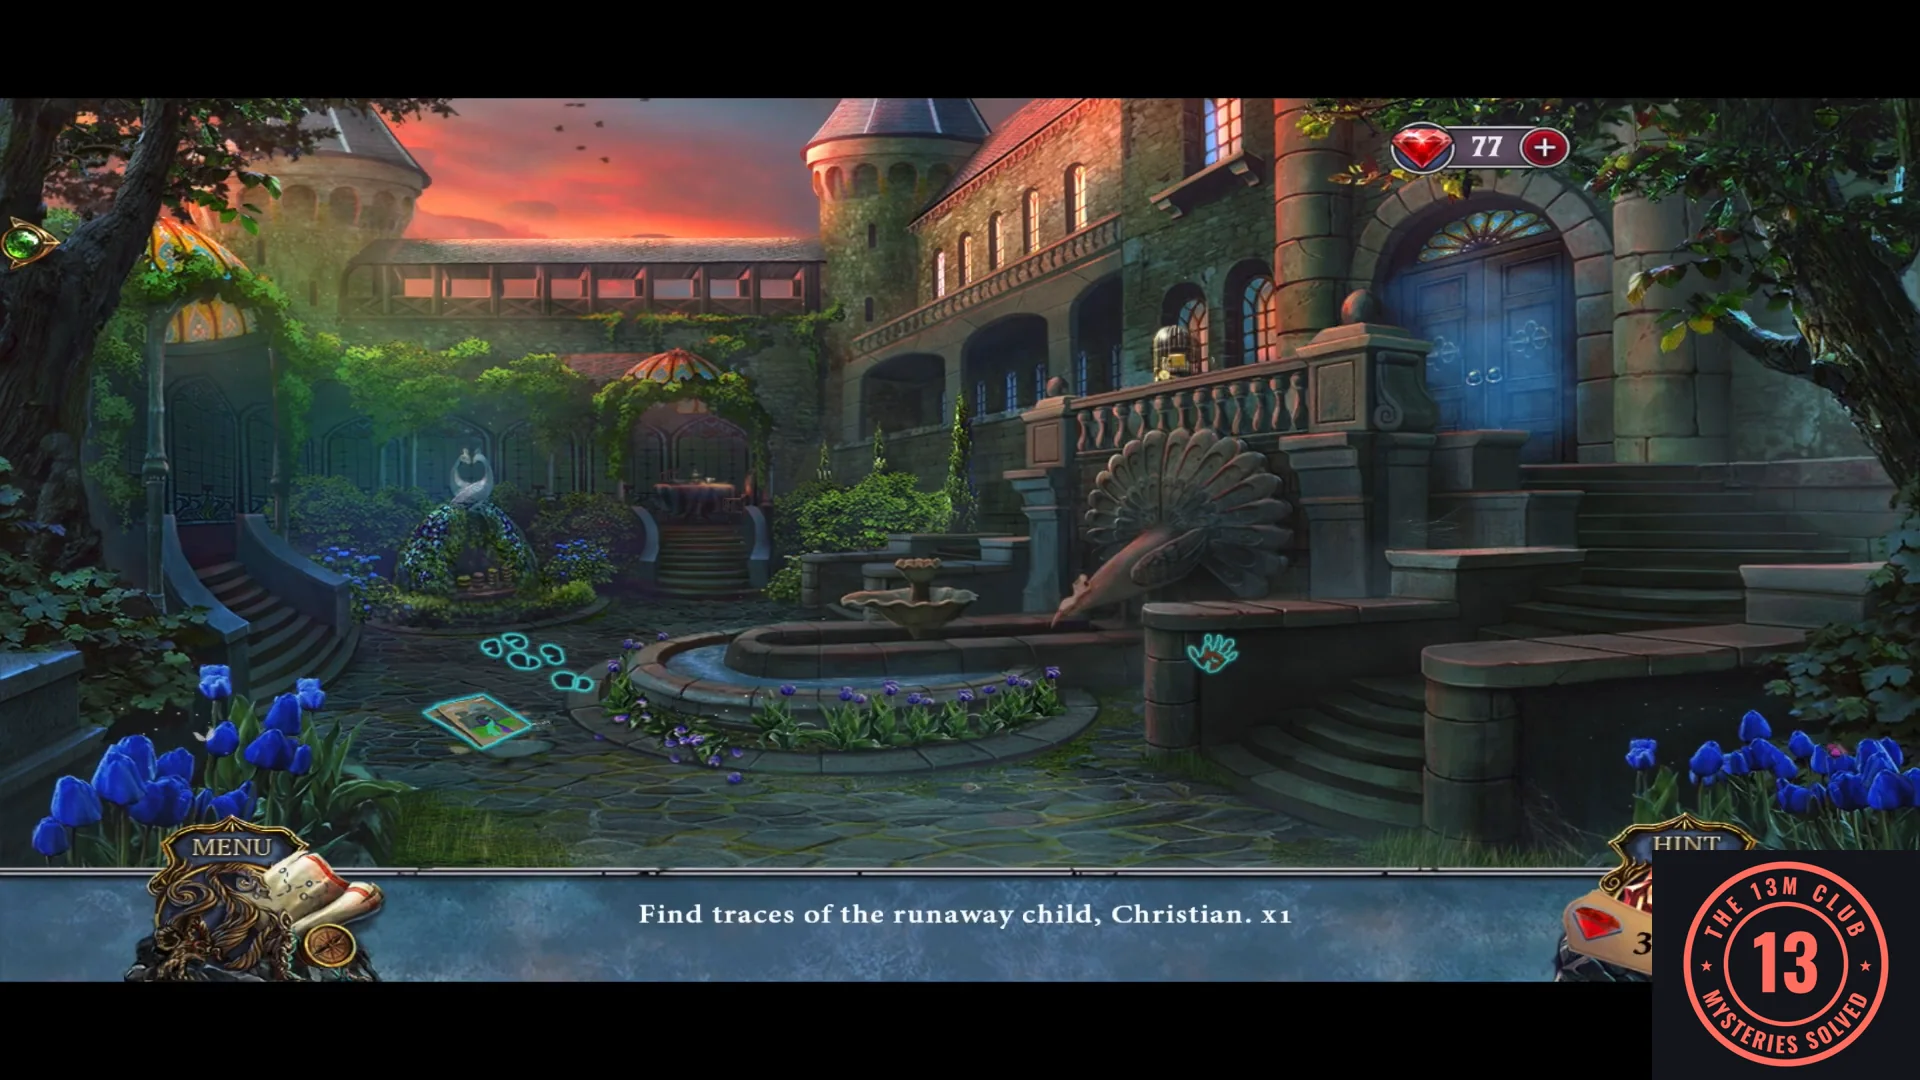
Find the runaway Christian, calm him with tea and cake, and send a letter to the magician Cornelius.
- Find the four traces of Christian. The objective counter in the bar goes down with each one: the crayon handprint on the stone post below the peacock statue, to the right of the fountain; the drawing lying on the ground left of the fountain; the cut flowers at the left end of the fountain's flower bed; and the muddy footprints on the paving in front of the fountain. Katrina then says he is hiding in the bushes: click the peacock-shaped bushes behind the fountain and Christian appears on the left.
- Click the drawing on the ground left of the fountain to read it, then turn it over and take the GOLDEN CAGE. Take the dirty butter knife from the paving underneath the drawing. Zoom into the head of the large stone peacock by the stairs and take the COAL.
- At the tea table in the gazebo, put the GOLDEN CAGE on the box lid to open it. Take the letter paper, the KEY and the SILVER KEY. Take the KETTLE from the burner and put the COAL in the burner.
- Open the pigeon cage on the balcony with the KEY and take the GREEN GEM and the farmer's letter.
- Put the GREEN GEM in the peacock fountain's empty eye. Fill the KETTLE and wash the knife to get the TABLE KNIFE.
- Put the kettle on the burner and cut a slice of cake with the TABLE KNIFE. Use the spoon beside the tea tin to scoop tea leaves into the cup, then pour from the kettle into the cup. Click the finished tea and cake to pick them up as a TREAT and give it to Christian. He tells you about the magical paints and gives you his CRAYONS.
- Write the letter on the letter paper with the CRAYONS and give it to the pigeon in the balcony cage. Cornelius Van Wright's reply has red words in the text and doodles around the border: click the doodles that match each red word. Birds (3): the owl on the left side, the eagle at the lower left and the swan at the top right. Paint (3): the watercolour box at the top, the small palette on the left side and the round palette with a brush at the bottom right. Star (3): the star at the top right, the shooting star at the bottom right and the star at the bottom left. When no red words are left, you receive the AMULET.
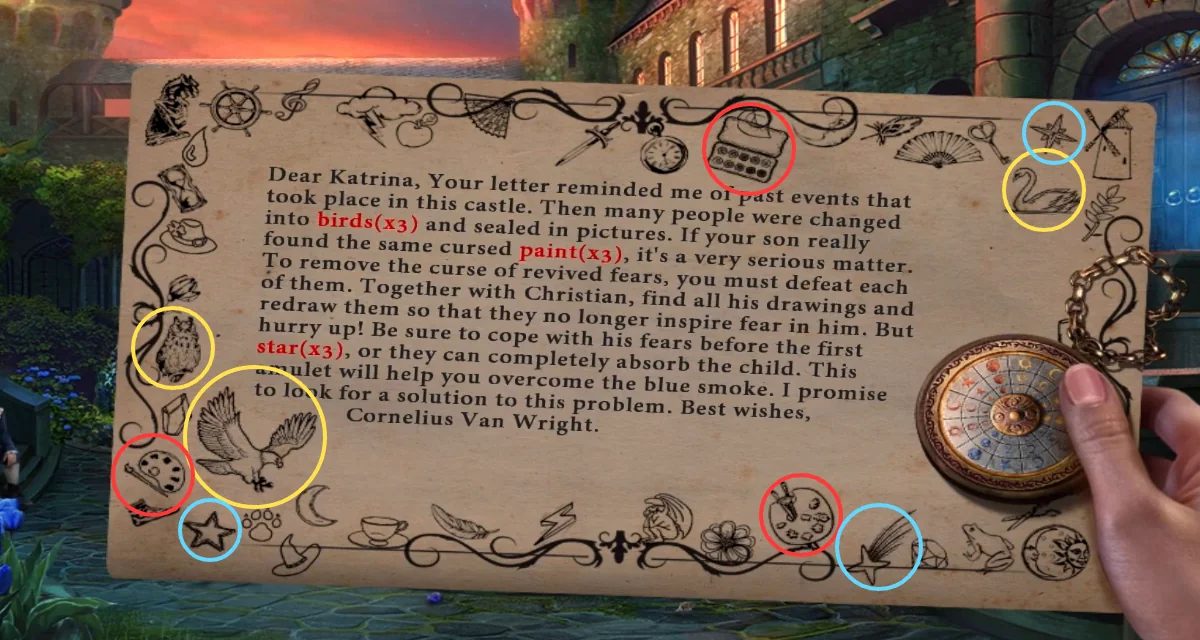
The nine doodles to click: birds in yellow, paint in red, stars in blue. - Open the AMULET in your inventory. It has three rings of symbols around a copper centre. Press a ring to spin it until identical symbols line up along every spoke. Going clockwise from the gold crescent at the top, the 12 spokes run: gold crescent, gold star, gold disc, blue sun, blue crescent, blue star, blue disc, red sun, red crescent, red star, red disc, gold sun.
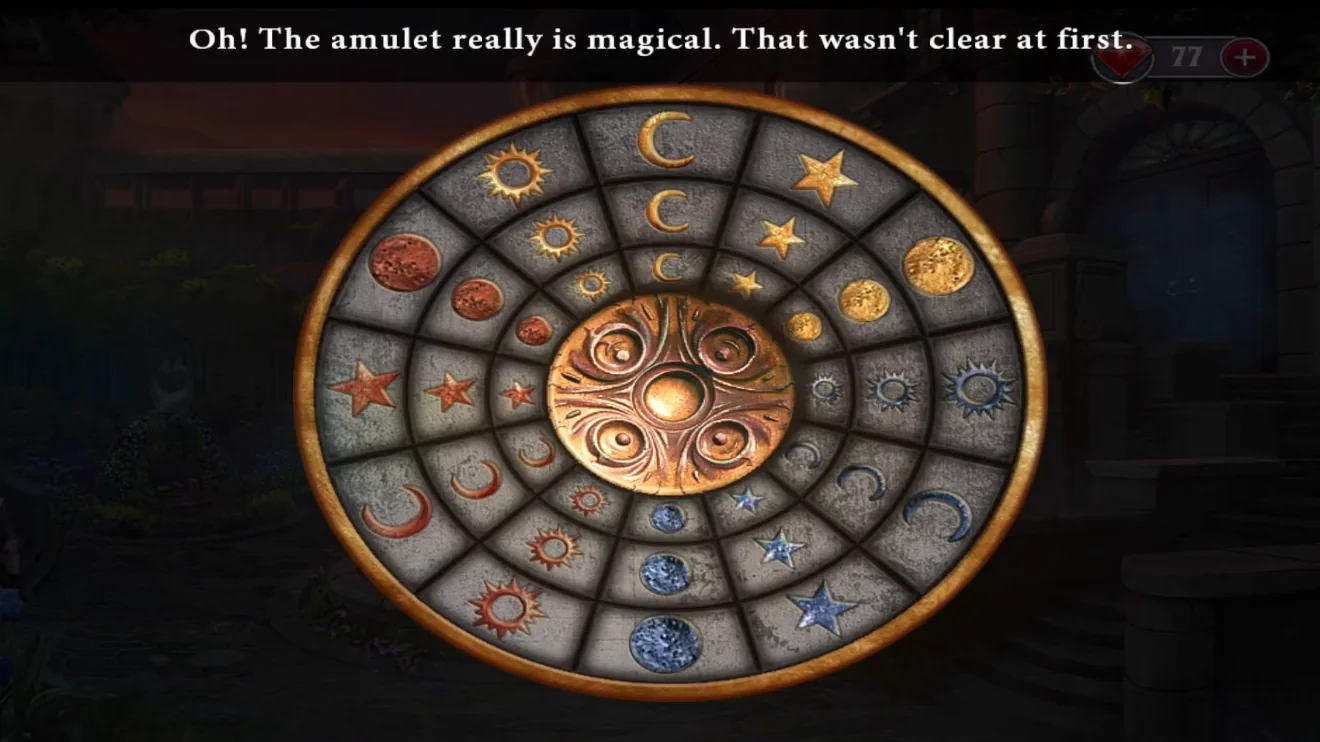
Solved: each spoke shows one symbol on all three rings.
Lobby: Fear of Strangers
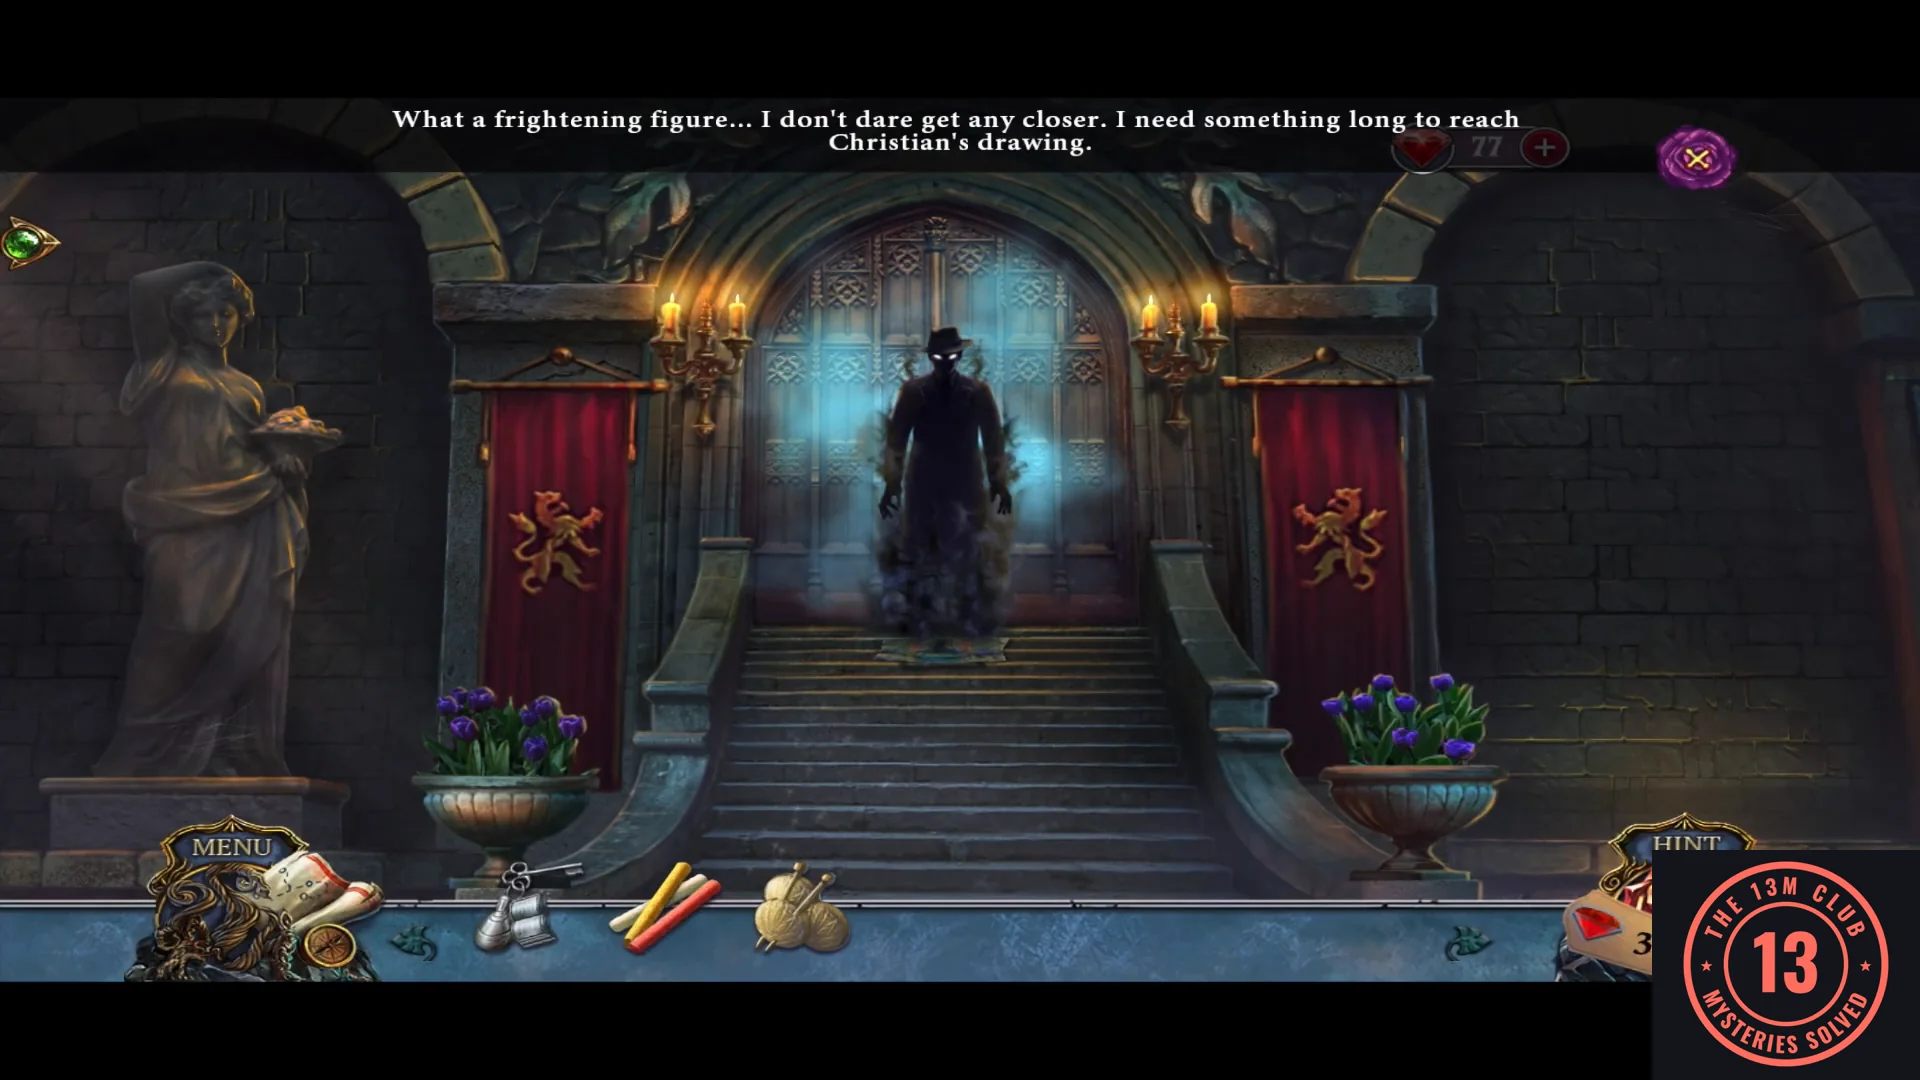
Prove to Christian that strangers can be kind and repaint his shadowy stranger.
- Use the AMULET on the blue castle door at the top of the courtyard stairs and go in. Talk to Christian: his first fear is a shadowy stranger at the top of the stairs. Give him the farmer's letter; Katrina then decides to look for letters from the locals. Go up to the stairs close-up and read Christian's note on the right-hand planter, then take the EMBROIDERY lying on it. Zoom into the broken stool on the floor to the right of the carpet and take the PALETTE beside its legs.
- Zoom into the round green sewing box by the left swan. Take the SCISSORS lying on its closed lid first, then put the EMBROIDERY in the clover slot on its side; the ribbon puzzle opens. Turn the two ribbon wheels with the arrows until no ribbons cross, then take the SATIN RIBBON.
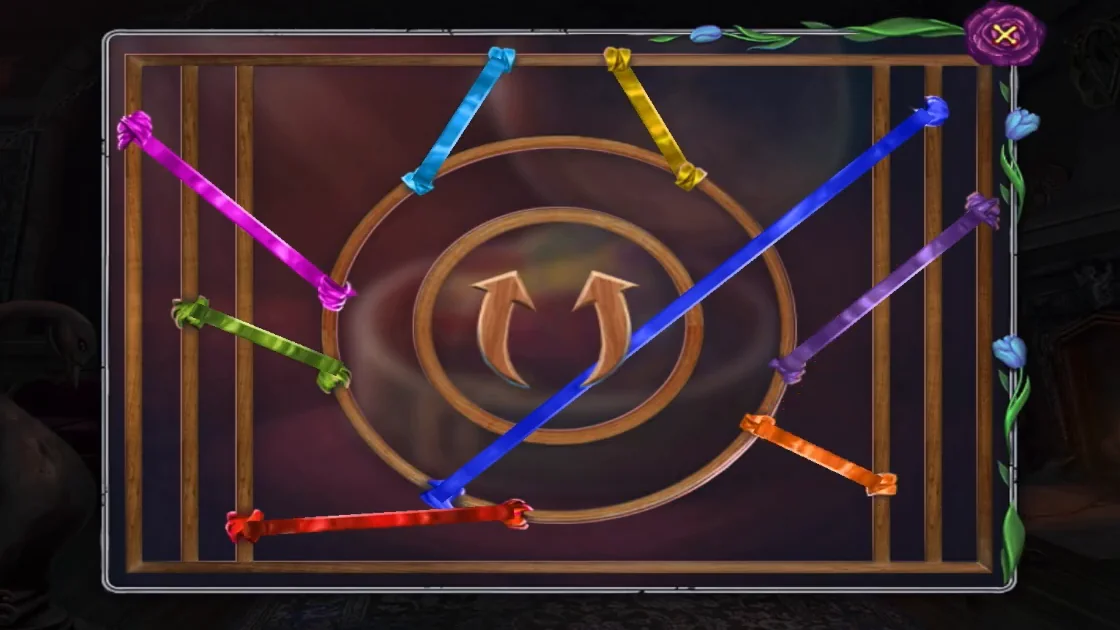
Solved: no ribbon crosses another. - Scrape the spreading wax off the desk with the SCISSORS to uncover the keyhole plate and take STAR PIECE 1/3.
- Tie the broken stool leg with the SATIN RIBBON. Climb to the shield on the right wall and take KEY RING PART 1/2 and STAR PIECE 2/3.
- Use the SILVER KEY on the uncovered keyhole plate. Find the 6 pairs of matching letters and items in the desk to get the CORRESPONDENCE.
- Give the CORRESPONDENCE to Christian; he gives you the BIRD emblem. Put it in the shield to free the SWORD, then use the SWORD to reach the drawing at the top of the stairs.
- Play the desk hidden-object scene. Most entries are simply lying on the desk or in its drawers, but three need extra steps. Feathers: take the small ornate key by the candlestick and use it on the glass box beside the candle; the feathers fly out. Stamp: click the small chest at the left, then slide the tiles of its metal plate into the gap until the plate shows the whole scissors figure, and the chest opens. Click the gold stamp head inside it and the wooden stamp handle standing on the upper shelf to join them. Knife: click the blade, the brass rod on the shelf under the desktop at the right, then the knife handle standing on the desk to the right of the safe. The WHITEWASH is the brass jar on the shelf to the left of the white roses; you keep it when the list is complete.
- Cover the stranger's silhouette with the WHITEWASH and redraw it with the CRAYONS as a jolly baker. Apply the drawing; the shadow disappears.
Gallery
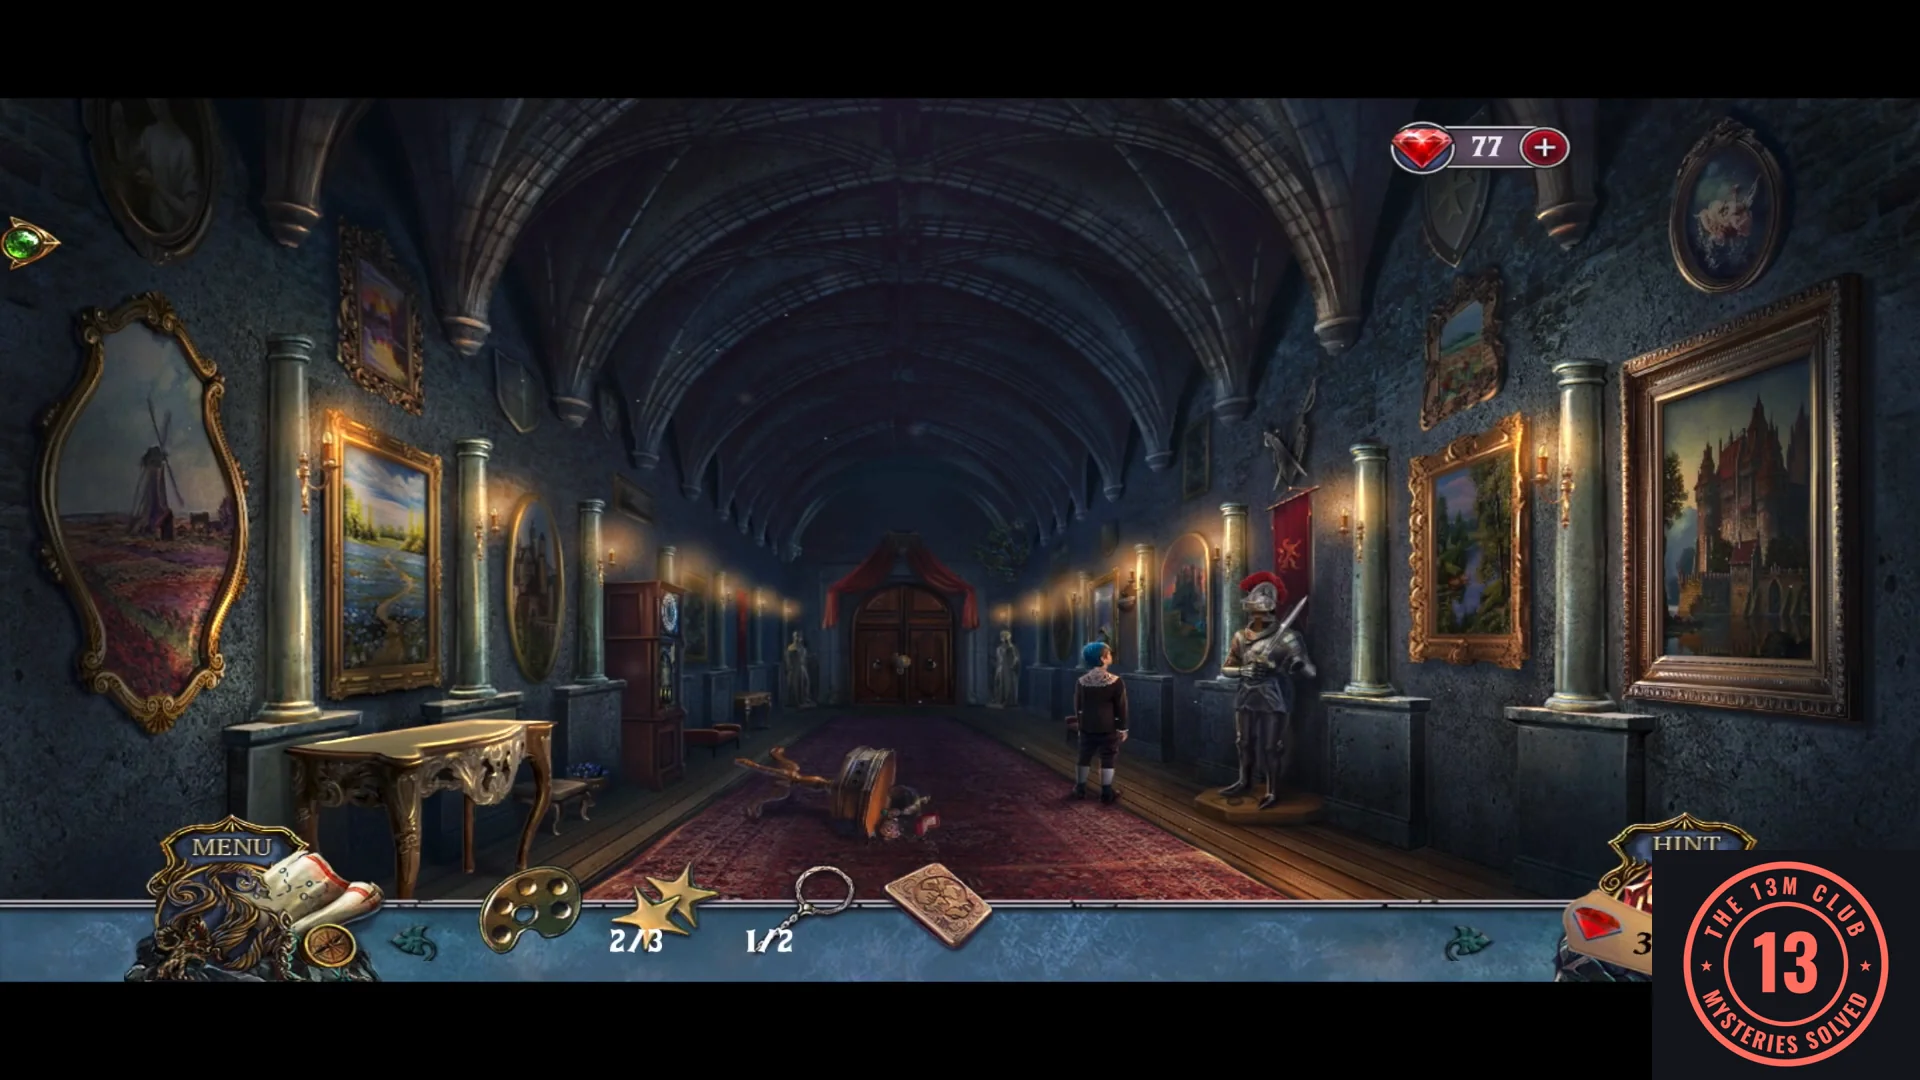
Reach Katrina's studio through the gallery.
- Enter the gallery. Zoom into the armor on its pedestal on the right and take the rolled paper between its feet, with the DIAL RING around it; read the note on the paper. On the small table at the left of the gallery, read the diary (it hints at the door) and take the CIGAR CASE.
- Put the DIAL RING on the grandfather clock and turn the wheel until the numerals are in order with XII at the top.
- Take STAR PIECE 3/3 beside the end door and put all three in the star box on the table. Take the CLOCK WATCH PART and the TRINKET.
- Put the CLOCK WATCH PART in the clock centre and read the watchmaker's gift card; its clock-face picture is the hint for later. Take DOORKNOB PART 2/2 and the GEAR.
- Fit the completed DOORKNOB to the door at the end of the gallery. Put the GEAR in the round slot between the armor's feet; the armor opens at the waist, so take the torn DRAWING PIECE (the armor itself needs instructions later). Go through the end door into the dark studio.
Katrina's Studio: Fear of Failure
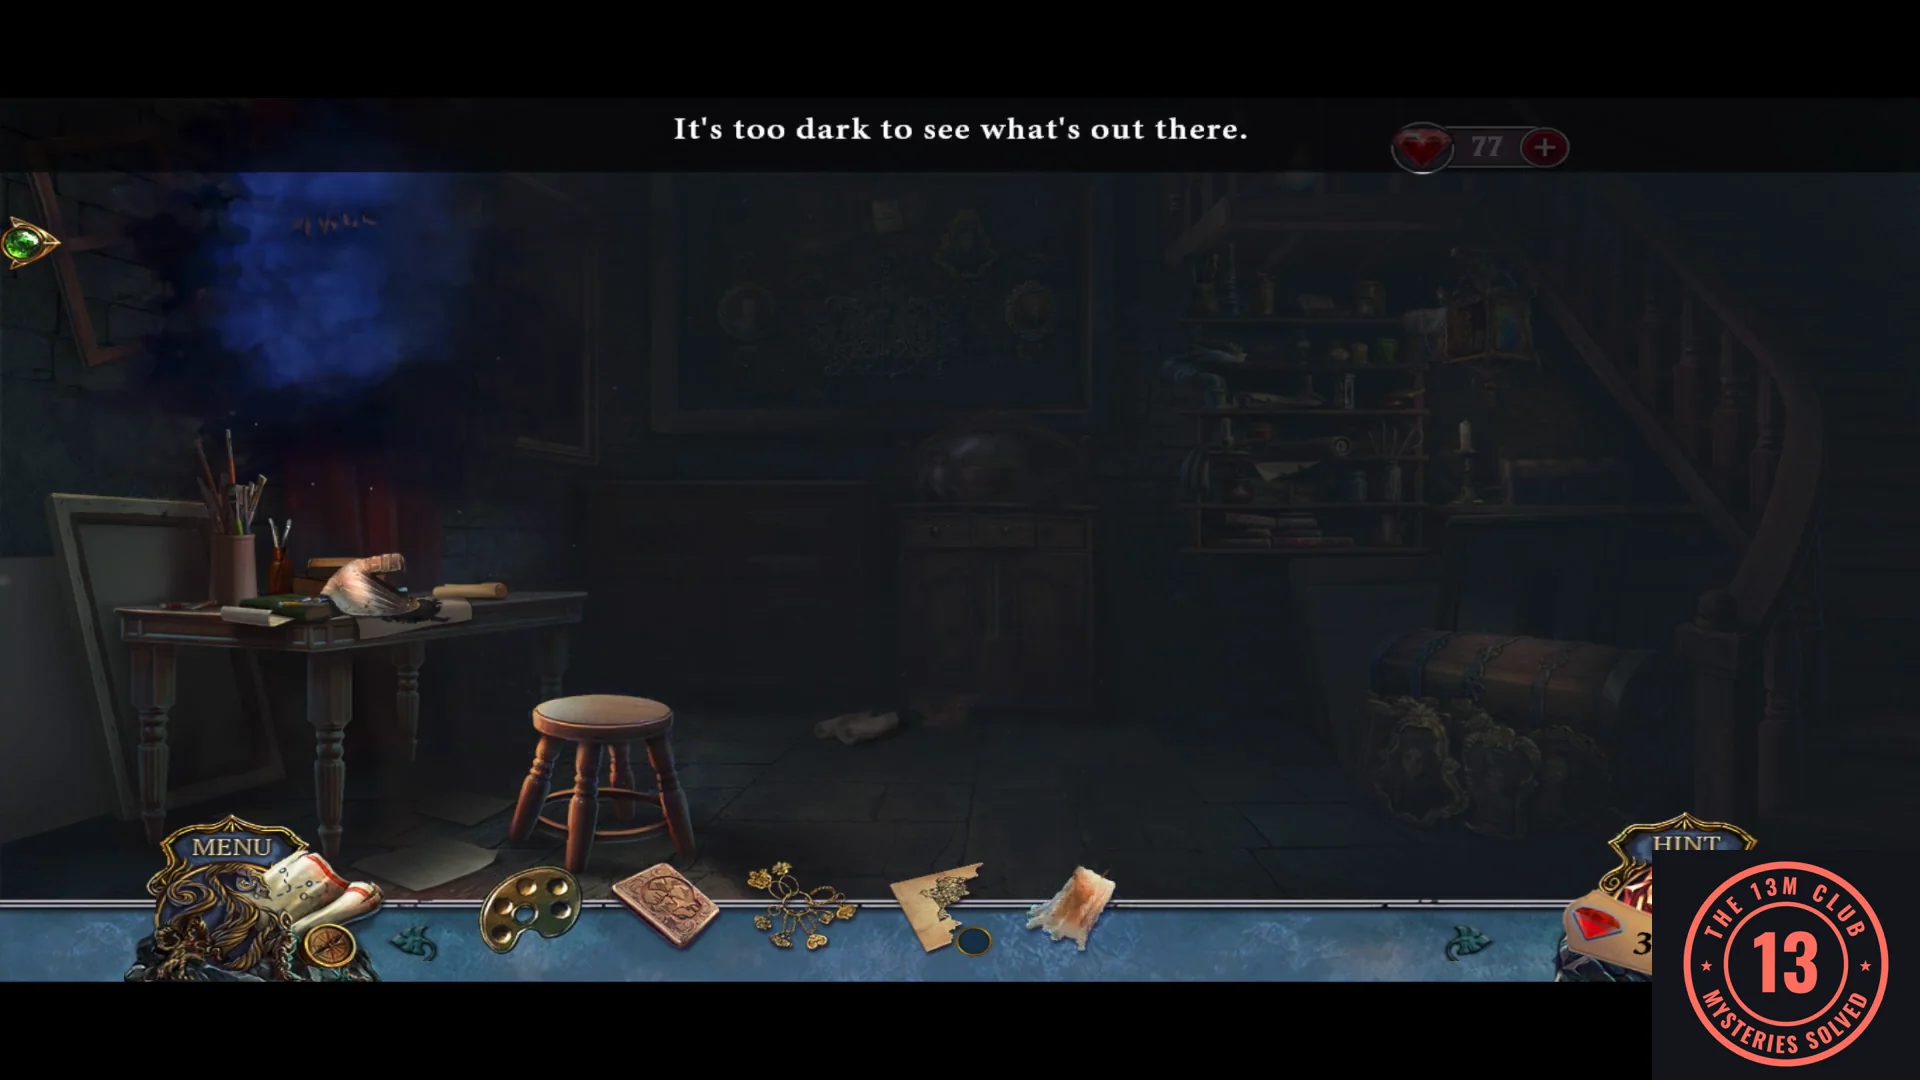
Light the studio, show Christian Katrina's first drawings and repaint the blob that blocks the window.
- Take the CANDLE from the stool and put it in the stained-glass lantern by the stairs. Open the CIGAR CASE for matches and light it. Take the DIARY KEY and the EMBROIDERED NAPKIN.
- Take the BRUSHES. In the four-drawer cabinet, put the BRUSHES in the crossed-brushes drawer (code card: crow 1, raven 2, swan 3) and the PALETTE in the palette drawer (RECONSTRUCTION FLUID).
- Clean the portrait chest under the stairs with the EMBROIDERED NAPKIN and the RECONSTRUCTION FLUID and take the PAINTINGS.
- At the grate on the left wall, add the TRINKET and the PAINTINGS and hang each portrait above the plaque with the same frame shape. Then press the birds in order crow, raven, swan. Take the diary, the CANVAS and PAULDRON 1/3.CODEcrow, raven, swan
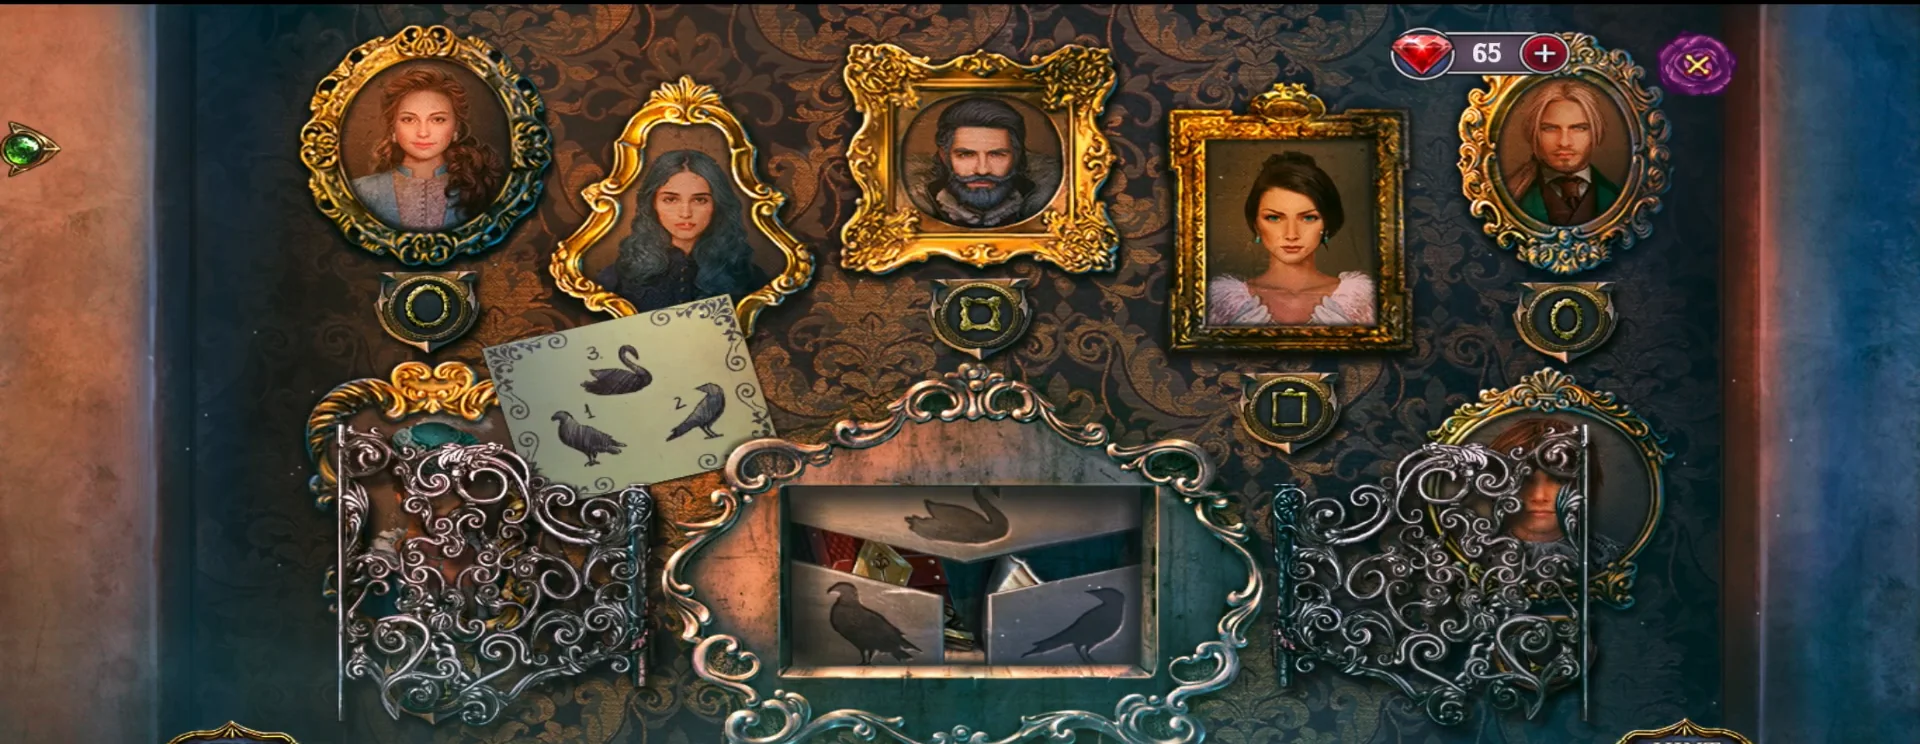
Solved: each portrait hangs above the plaque with its frame shape. - Open the red diary with the DIARY KEY to get the PARTIAL PATTERN and use it on the chest under the stairs. The bar shows silhouettes of what to find next; several need an extra step first. Find the hair ornament and give it to the doll in the right compartment. Click the blue tube beside the doll until it opens and take the paintbrush. Open the tied letters in the left compartment and take the KEY from them; it opens the gold padlock of the pink round box on the centre shelf. Take the WOODEN PICTURE from that box, open it from the bar and rearrange its pieces until the flower picture is whole, then take the spiral medallion from behind it. Put the medallion in the round hole of the rose-cornered folder at the front and take the pink ballerina. A ballerina belongs on the grey round box at the upper right: place her there and take the silver frame. Swap the frame's tiles until the portrait is whole, open it and take the code card. Set the wheels on the red case at the lower left to the card's flowers, rose, tulip, round bloom, daisy. Take the palette knife from the case and scrape the wax off the pink diary on the centre shelf; open the diary and take the heart item inside. Take the pendant necklace hanging from the strap below the centre shelf and put it on the gold statue in the left compartment. Read the letter it reveals, take the CROWN and put it on the doll. Take any remaining bar silhouettes as they appear. You receive KATRINA'S OLD DRAWINGS.CODEFlower wheels: rose, tulip, round bloom, daisy
- Put the CANVAS in the top-left crossed-scrolls drawer. Take CLOCK WATCH PART 1/2 and the DRAWING PIECE from the opened drawer; the piece completes the armor drawing (COMPLETE DRAWING).
- Give KATRINA'S OLD DRAWINGS to Christian and take the PALETTE KNIFE. Put it in the crossed-knives drawer, take the FOLDING RULER and pry the blob drawing off the window. Take PAULDRON 2/3.
- Play the trunk hidden-object scene and take the COLORED INK.
- Use the COLORED INK on the blob drawing (yellow, blue, then red bottle) to turn it into a bird, then apply it. Christian gives you CLOCK WATCH PART 2/2, which completes the CLOCK WATCH.CODEyellow, blue, red
- In the gallery, put the CLOCK WATCH on the clock. All three weights start hanging low. Click weights to raise them until they match the hint card at the top right of the panel: left weight low, middle weight raised in the centre and right weight raised beside it. The doors open as soon as this pattern is reached, and the weights then drop on their own. Take the BOWL and PAULDRON 3/3.CODELeft low, middle raised, right raised
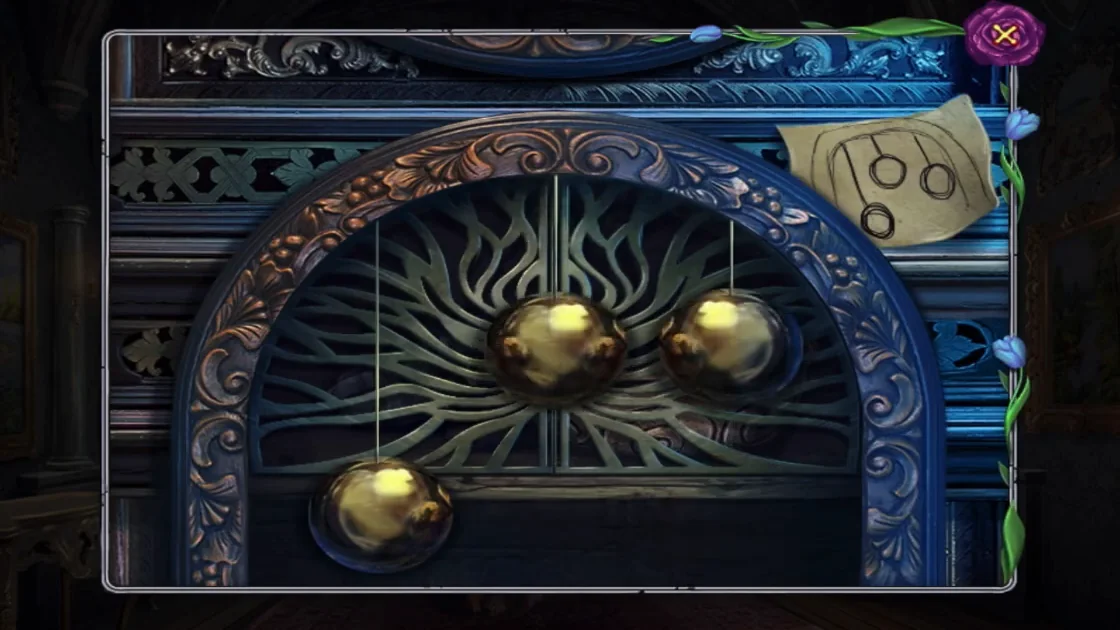
The pattern from the hint card, just before the doors open: left low, middle and right raised. - Put the PAULDRONS and the COMPLETE DRAWING on the armor and pose it as the sketch shows: plumed helmet, sword lowered across the lap, one fist on the chest. The passage to the winter garden opens.
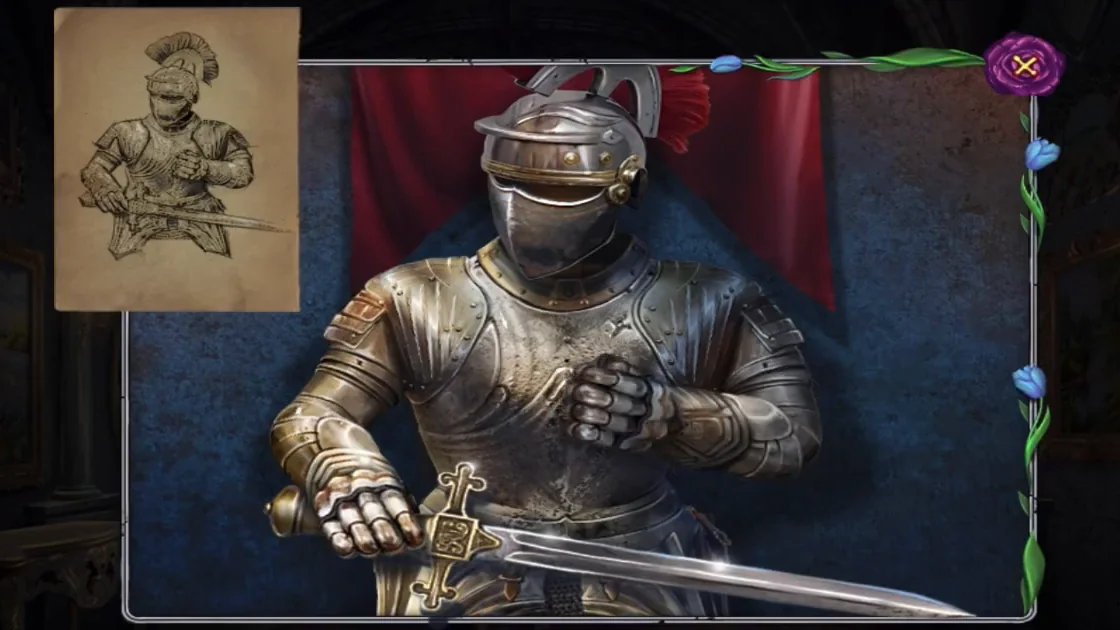
The accepted pose: sword low across the lap, one fist turned inward, as in the sketch.
Winter Garden and Library: Fear of Insects
Show Christian that insects can be beautiful by finishing the stained-glass window, then fish out his caterpillar drawing.
- Take BIRD 1/3 from the left bear's ring at the lion fountain, the GOLDEN SUN at the base of the cage statue and the RAKE by the rose pot. Fill the BOWL at the fountain.
- In the library tower, put the GOLDEN SUN in the jewelled box on the desk and take the SCHEME and BIRD 2/3. Take the FISHING LINE.
- Pour the BOWL OF WATER on the brazier coals and rake them with the RAKE. Take the BEETLE KEY and the RING.
- At the fountain, put the RING in the empty mouth of the centre lion; both bears already have their rings. The water stops. Take the METAL STICK from the dry basin and tie the FISHING LINE to it.
- Open the beetle box on the rose pot with the BEETLE KEY. Take BIRD 3/3 and the ornate KEY from inside; keep the KEY for Christian's bedroom. Put the three BIRDS on the cage statue and take the BOOK and the CRYSTALS.
- Put the SCHEME and the CRYSTALS in the tower cabinet and rotate them with the buttons until they match the diagram. Take the WINDING KEY and the WOODEN CASTLE.
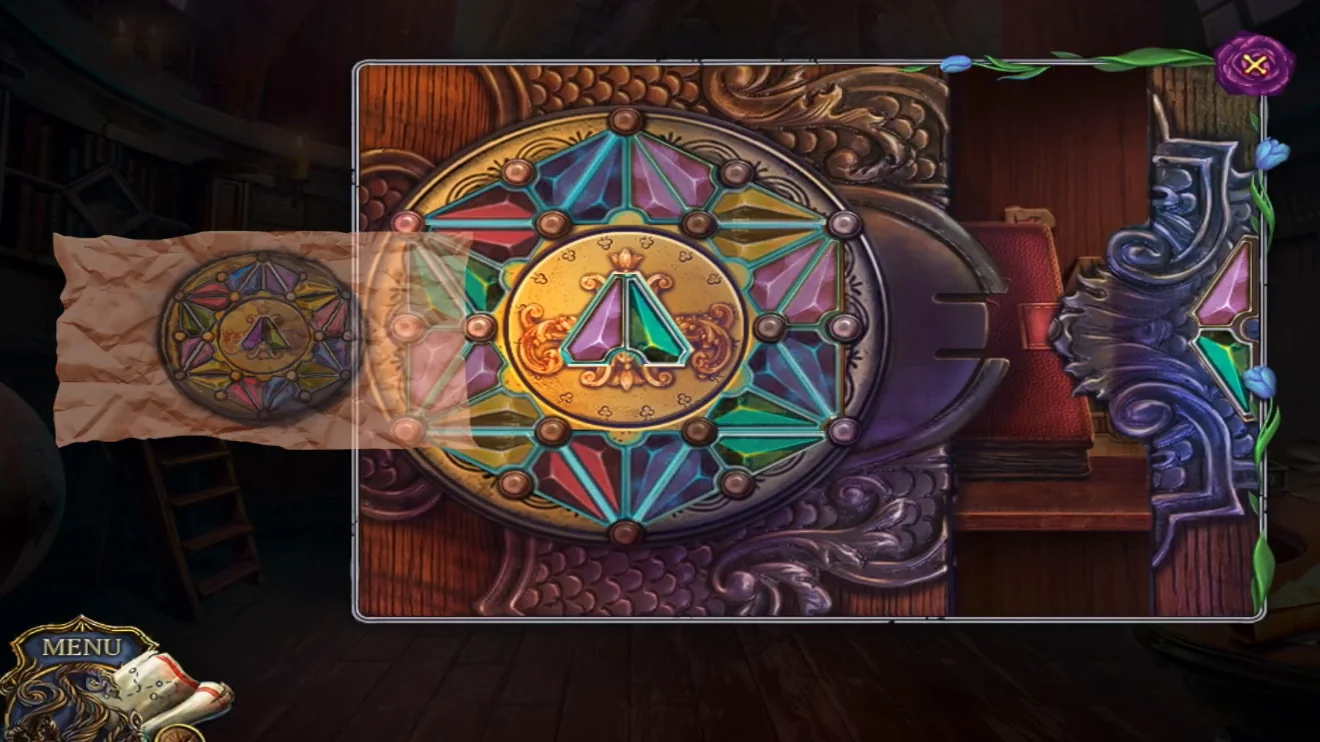
The accepted arrangement, just before the cabinet opens. - Put the BOOK on the bookshelf and swap the top-shelf books until they match the bottom shelf. Take the BUTTERFLY SCHEMATIC and the STAINED-GLASS WINDOW.
- Put the STAINED-GLASS WINDOW in the garden's back wall. Six round plates overlap, and each click turns one plate a third of a turn clockwise, carrying with it whatever part of a neighbouring plate lies inside it. Because they overlap, the order matters. From the untouched layout in the picture below, click each plate twice in this order: right, lower right, top, centre, lower left, left. The window is finished when every insect is whole, as in the target picture. If you have already clicked and lost track, undo your clicks newest first; two more clicks on the same plate cancel one click.CODEClick twice each: right, lower right, top, centre, lower left, left
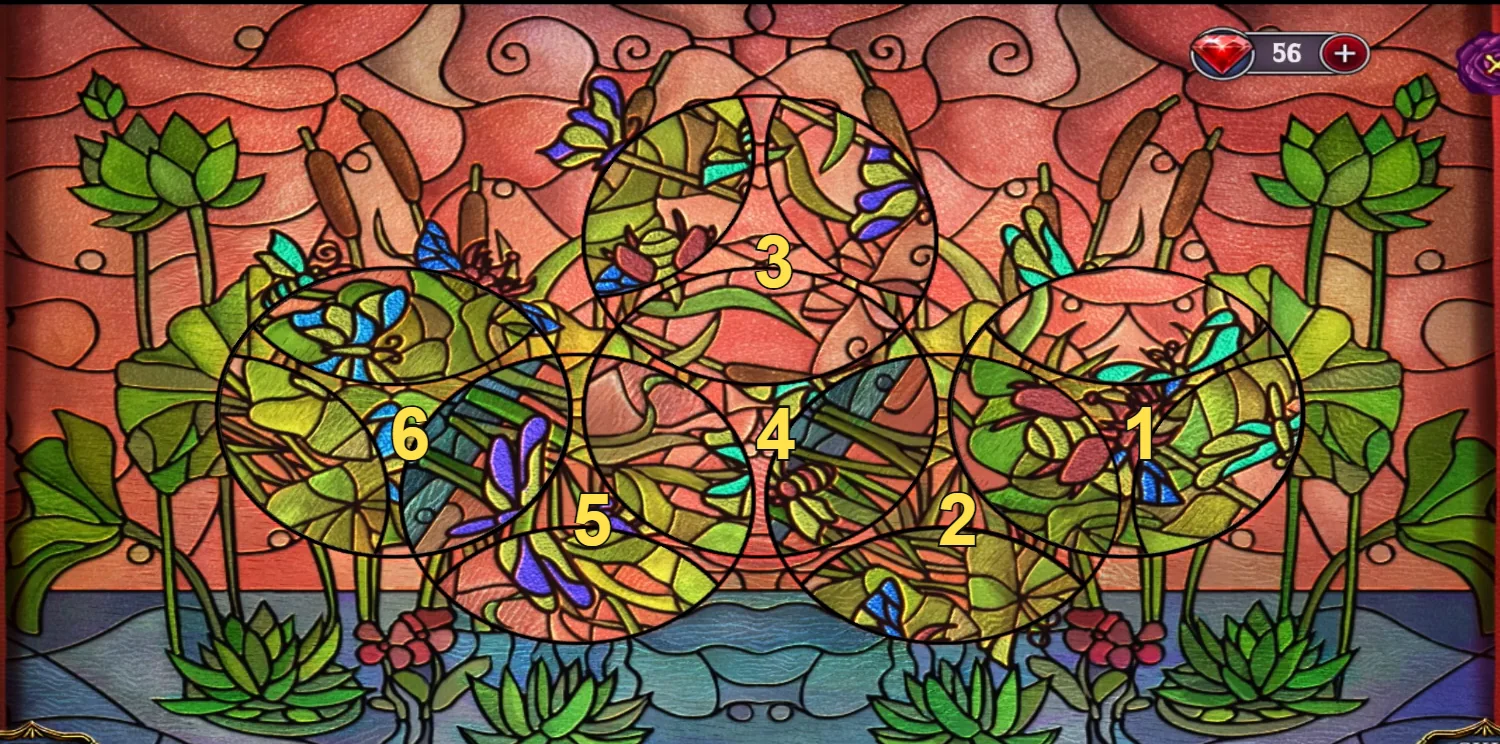
The untouched layout. Click each plate twice, in the numbered order. 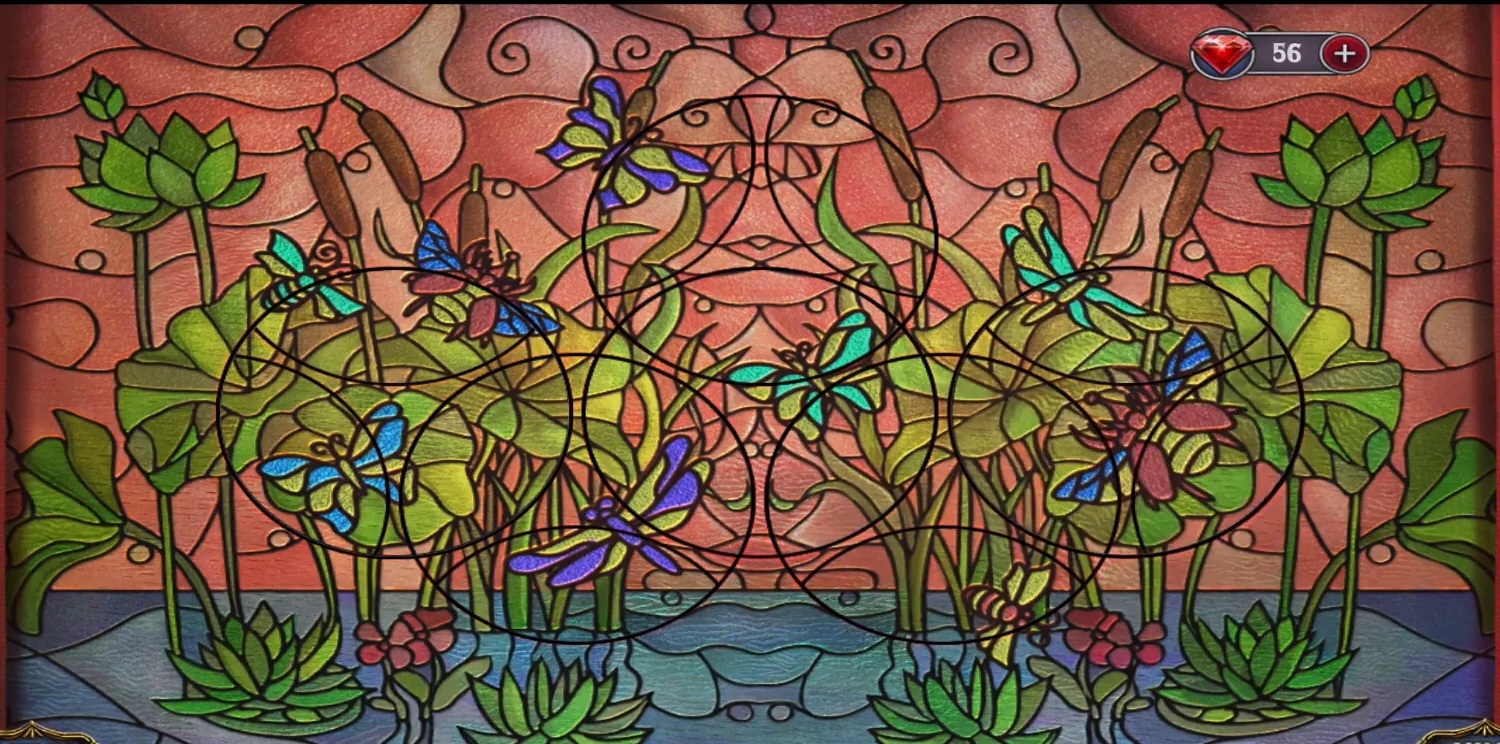
Target picture: every insect is whole just before the window is accepted. - Christian gives you the PIN. Finish the FISHING ROD with it and fish the caterpillar drawing out. Fold the BUTTERFLY SCHEMATIC over the drawing and apply it; the caterpillar disappears.
Christian's Bedroom: Fear of the Dark
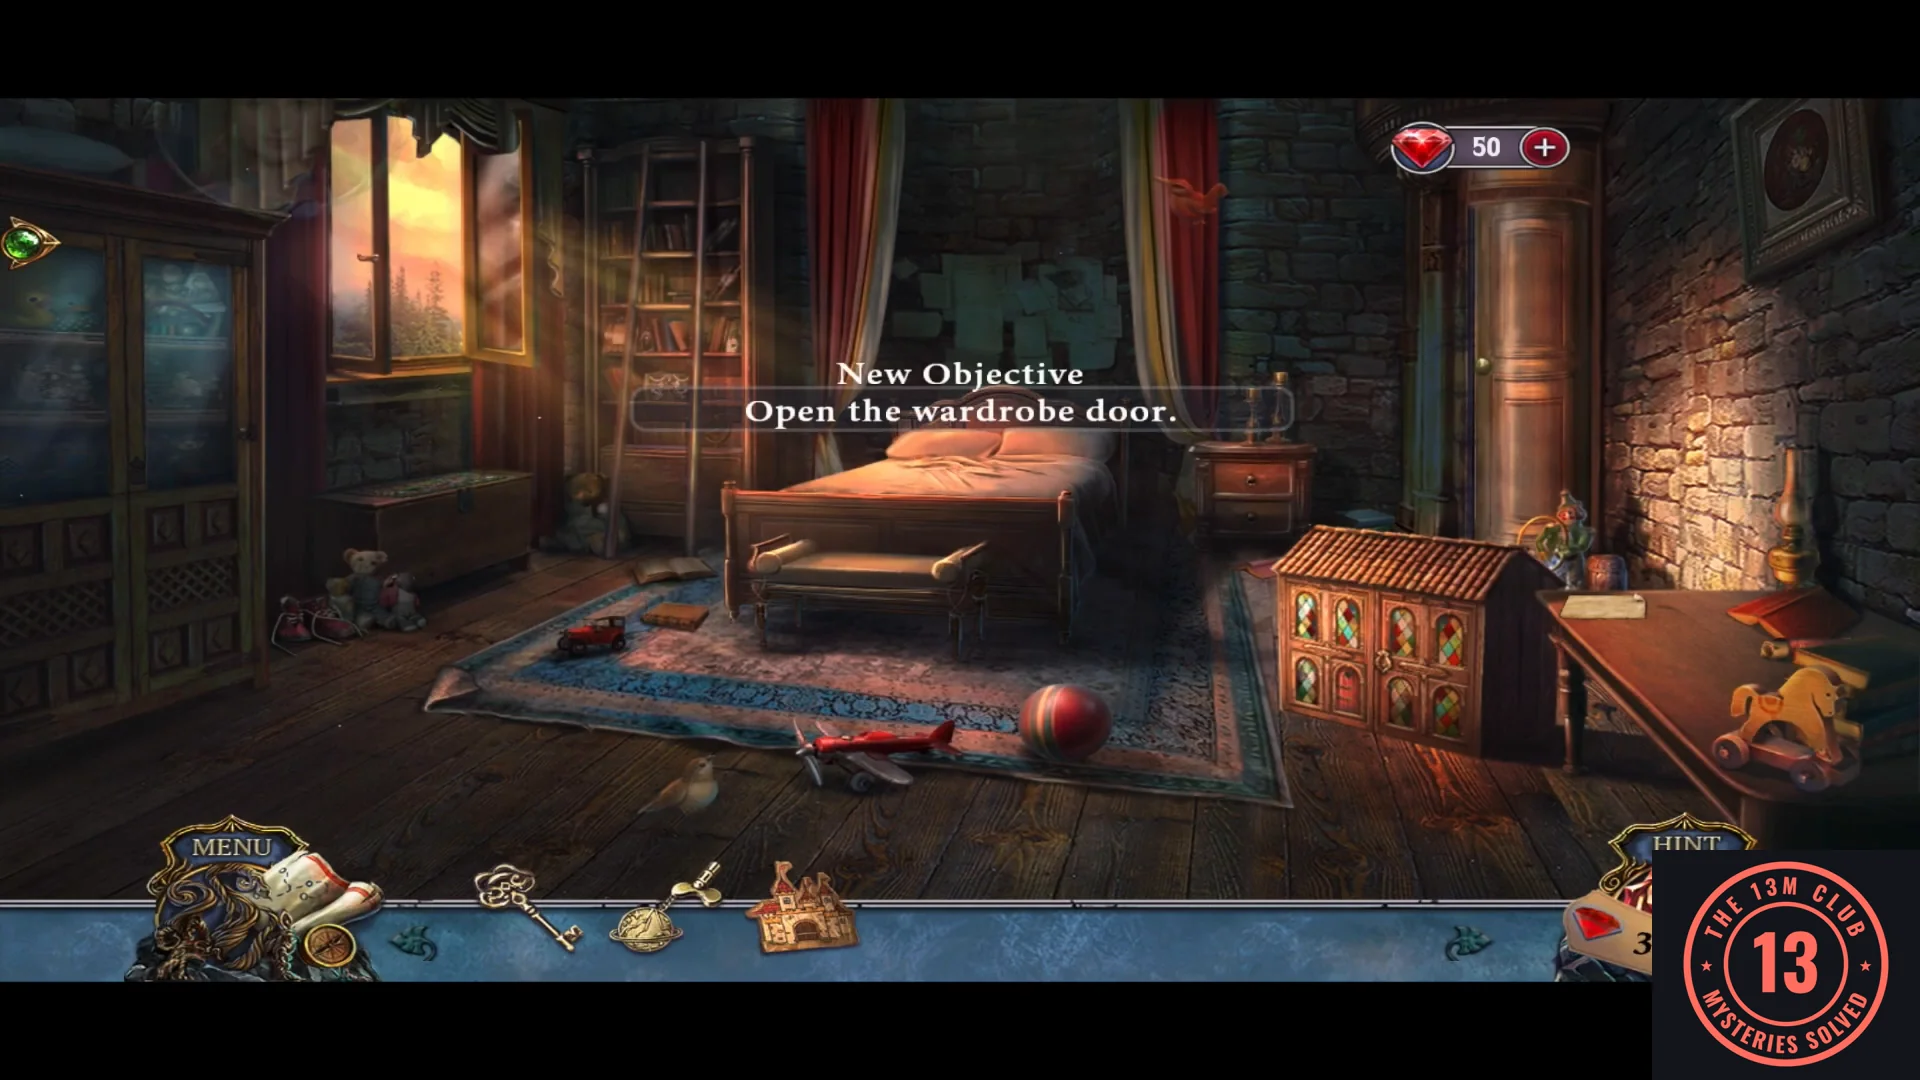
Get Christian out of the wardrobe, mend his toy bunny and prepare the family portrait for the talisman.
- Take the SHEET lying on the table to the right of the doll house. Open the doll house with the ornate KEY from the beetle box. The toy plane on the rug is a collectible object, not the key. A list scene starts, and most items are plain pick-ups, with these exceptions. The Medal hangs on the opened right door. For the Kaleidoscope, click its silver tube, add the three coloured stones lying beside the mouse on the top shelf and look through it. For the Ship, put the red sails from the second shelf on the wooden hull behind the bunny on the top shelf. For the Castle, click the torn page with the castle sketch and finish the drawing with the red pencil from the floor. The Flag is the rolled yellow flag at the left end of the second shelf, the Drums are on the lower shelf and the Sword leans at the left. You receive the FLAG.
- Click the rug in front of the bed and lift its edge to find a coded plate engraved in the floorboards. Lay the SHEET on it. You need a pencil before you can copy the code, and that comes next.
- Put the FLAG in the gap beside the wardrobe door handle. The door opens and Christian is hiding inside. Take the PENCIL lying on the satchel at his feet.
- Go back to the rug and run the PENCIL over the SHEET on the floor plate to get the CODE. Use the CODE on the satchel lock and set eagle, sun, butterfly, leaf. Take the NEEDLE AND THREAD and the MONOGRAM.CODEeagle, sun, butterfly, leaf
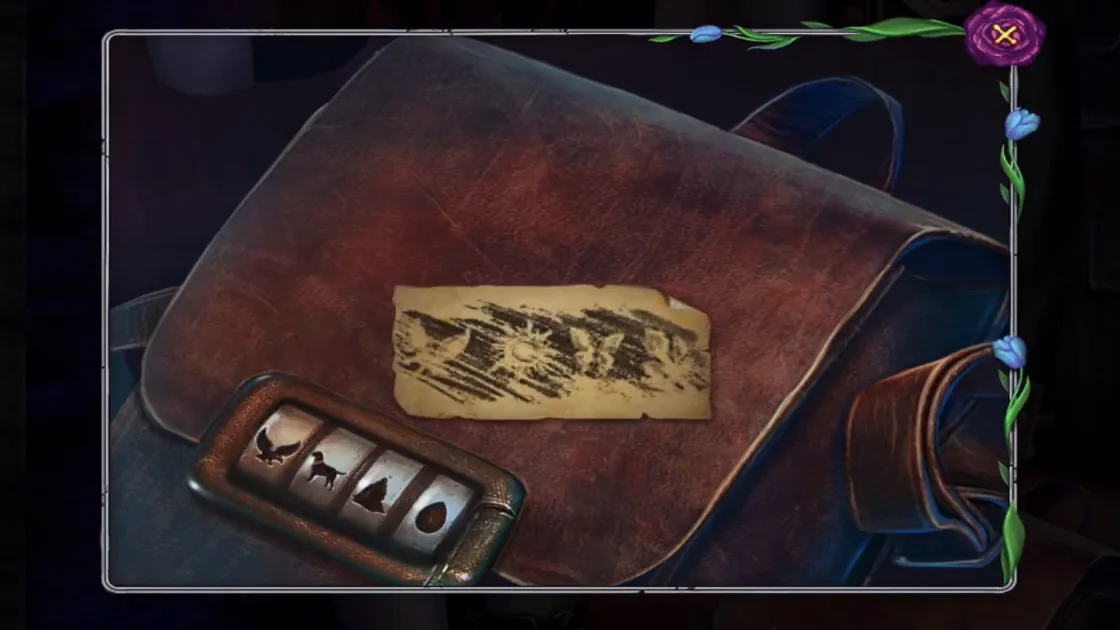
The copied code strip above the satchel's dial lock, before the dials are set. - Open the pillow diary on the bed with the MONOGRAM and take the HEART PATCH. Open the doll house scene again. Each card along the bottom gives two clues to one toy animal: click that toy and a new card replaces the old one. Bone and doghouse: the dog on the bottom floor, left of the little chairs. Round ears and barrel: the teddy bear at the lower left. Bell and cabbage: the wooden cow on the second shelf. Fishing rod and milk carton: the cat on the seat at the top left. Burrow and hen: the small animal in the shadow by the rocking chair on the second shelf. Nest and small prints: the blue bird on the right door. Cage and paw prints: the lion on the top shelf. Mouse hole and cheese: the mouse on the top shelf. Pond and feather: the swan beside the cactus. Bowl on a stand and cubes: the red horse in the shadow behind the framed picture at the lower left. Needle and apple: the hedgehog on the floor by the round rug. Long ears and carrot: the bunny on the top shelf. You receive the TORN TOY BUNNY. Sew the HEART PATCH on it with the NEEDLE AND THREAD and give the bunny to Christian.
- Read the magician's letter to get the CONSTELLATIONS cards. Christian gives you the KNIGHT TOKEN. On the chest under the window, fit the WOODEN CASTLE at the right of the board and put the KNIGHT TOKEN on the board. Click the points in the order numbered in the picture below. From the start in the upper-left loop: right along the short branch (1), up to the top (2), left to the corner (3), down the left side (4, 5), down to the bottom point (6), up to the next point (7), down to the bottom middle (8), right along the bottom to the corner (9), up (10), left to the centre (11), up-left under the bush (12), straight up to the top (13), right along the top (14, 15), down-left (16), right beside the tree (17), down-left (18) and right into the castle. Take the FAMILY PORTRAIT and LADDER STEPS from the chest and repair the bedroom ladder.
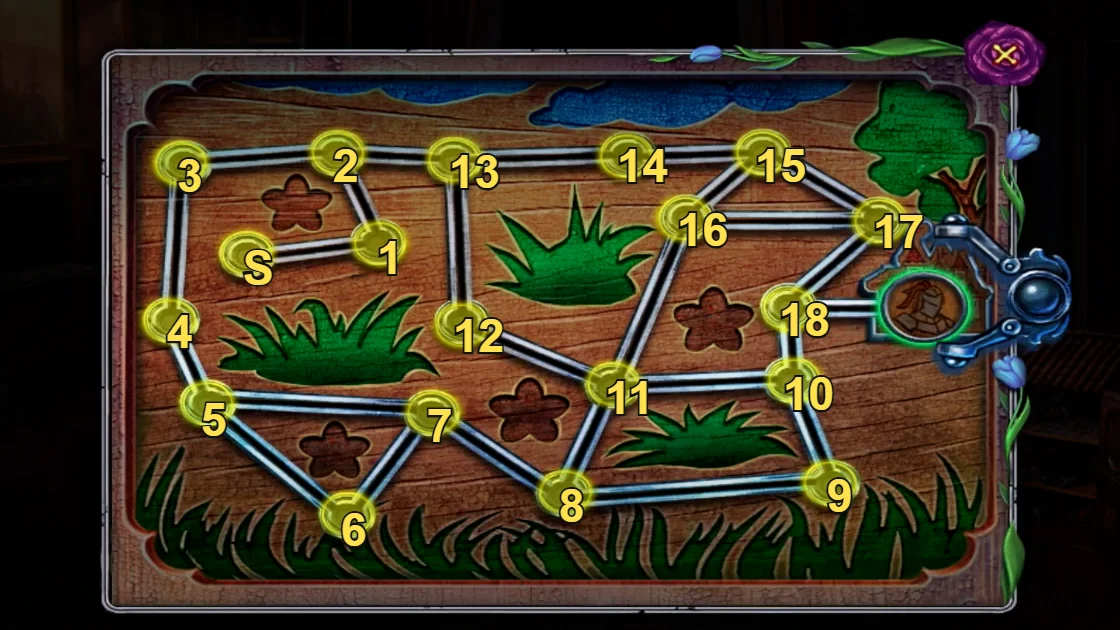
Visit the points in number order from S, then go right from 18 into the castle.
Observatory and the Talisman
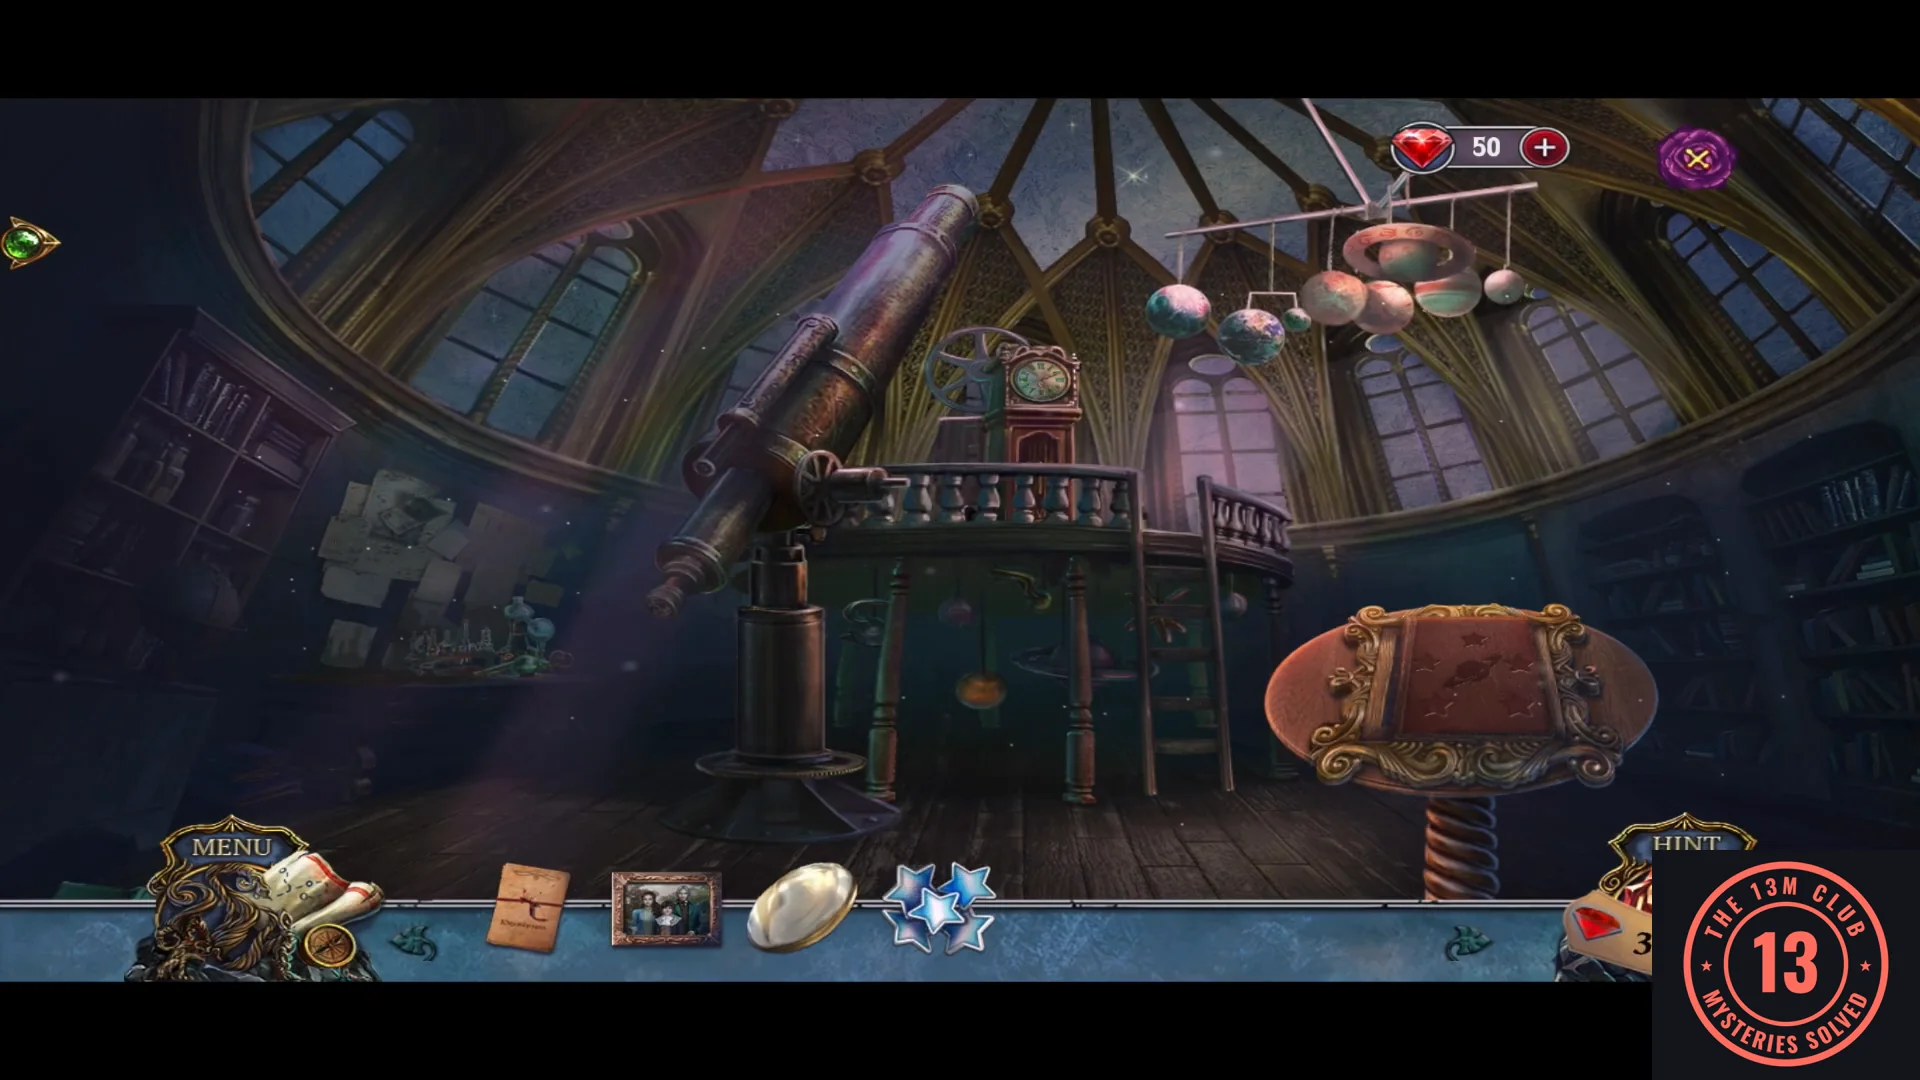
Charge the talisman with the light of the constellations and free Christian from his fears.
- Use the LADDER in the library tower to reach the observatory and take the EYEPIECE LENS. Stop the planet mobile with the WINDING KEY and take the MIRROR STARS.
- Fit the EYEPIECE LENS and the CONSTELLATIONS on the telescope. For each card (Swan, Lizard, Fox, Lyra), pan the sky with the arrows and tap the stars that form its shape.
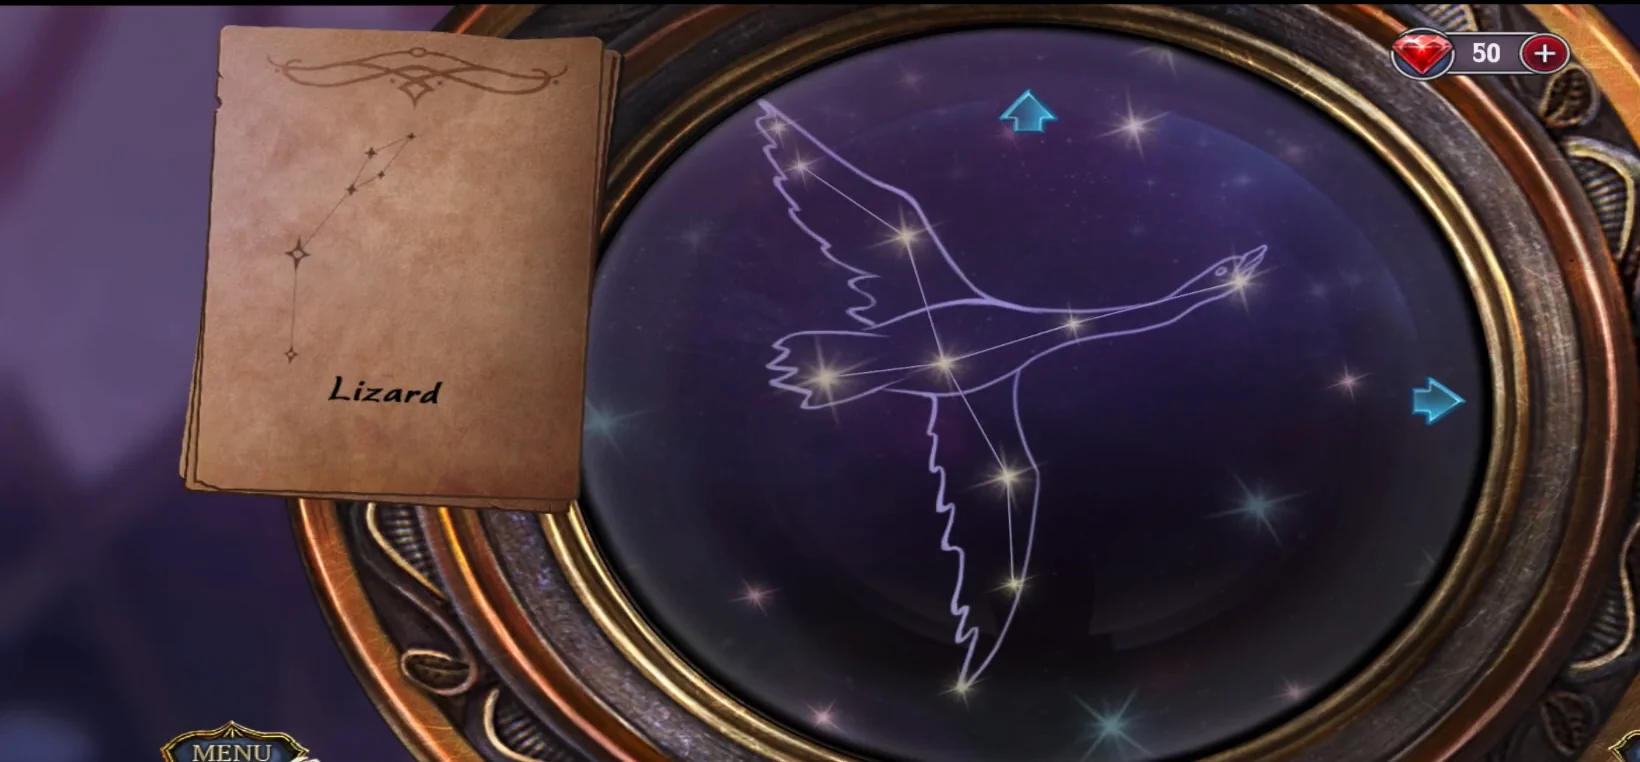
The Swan finished: its stars become a bird, and the card moves on to the Lizard. - Open the star book with the MIRROR STARS, put the FAMILY PORTRAIT in the locket to make the PENDANT WITH PORTRAIT and charge it on the telescope to get the TALISMAN.
- Give the TALISMAN to Christian in the library. He is free of his fears and Katrina burns the Baron's paints. The game confirms you have completed the bonus game.
Bonus Chapter Characters and Objects
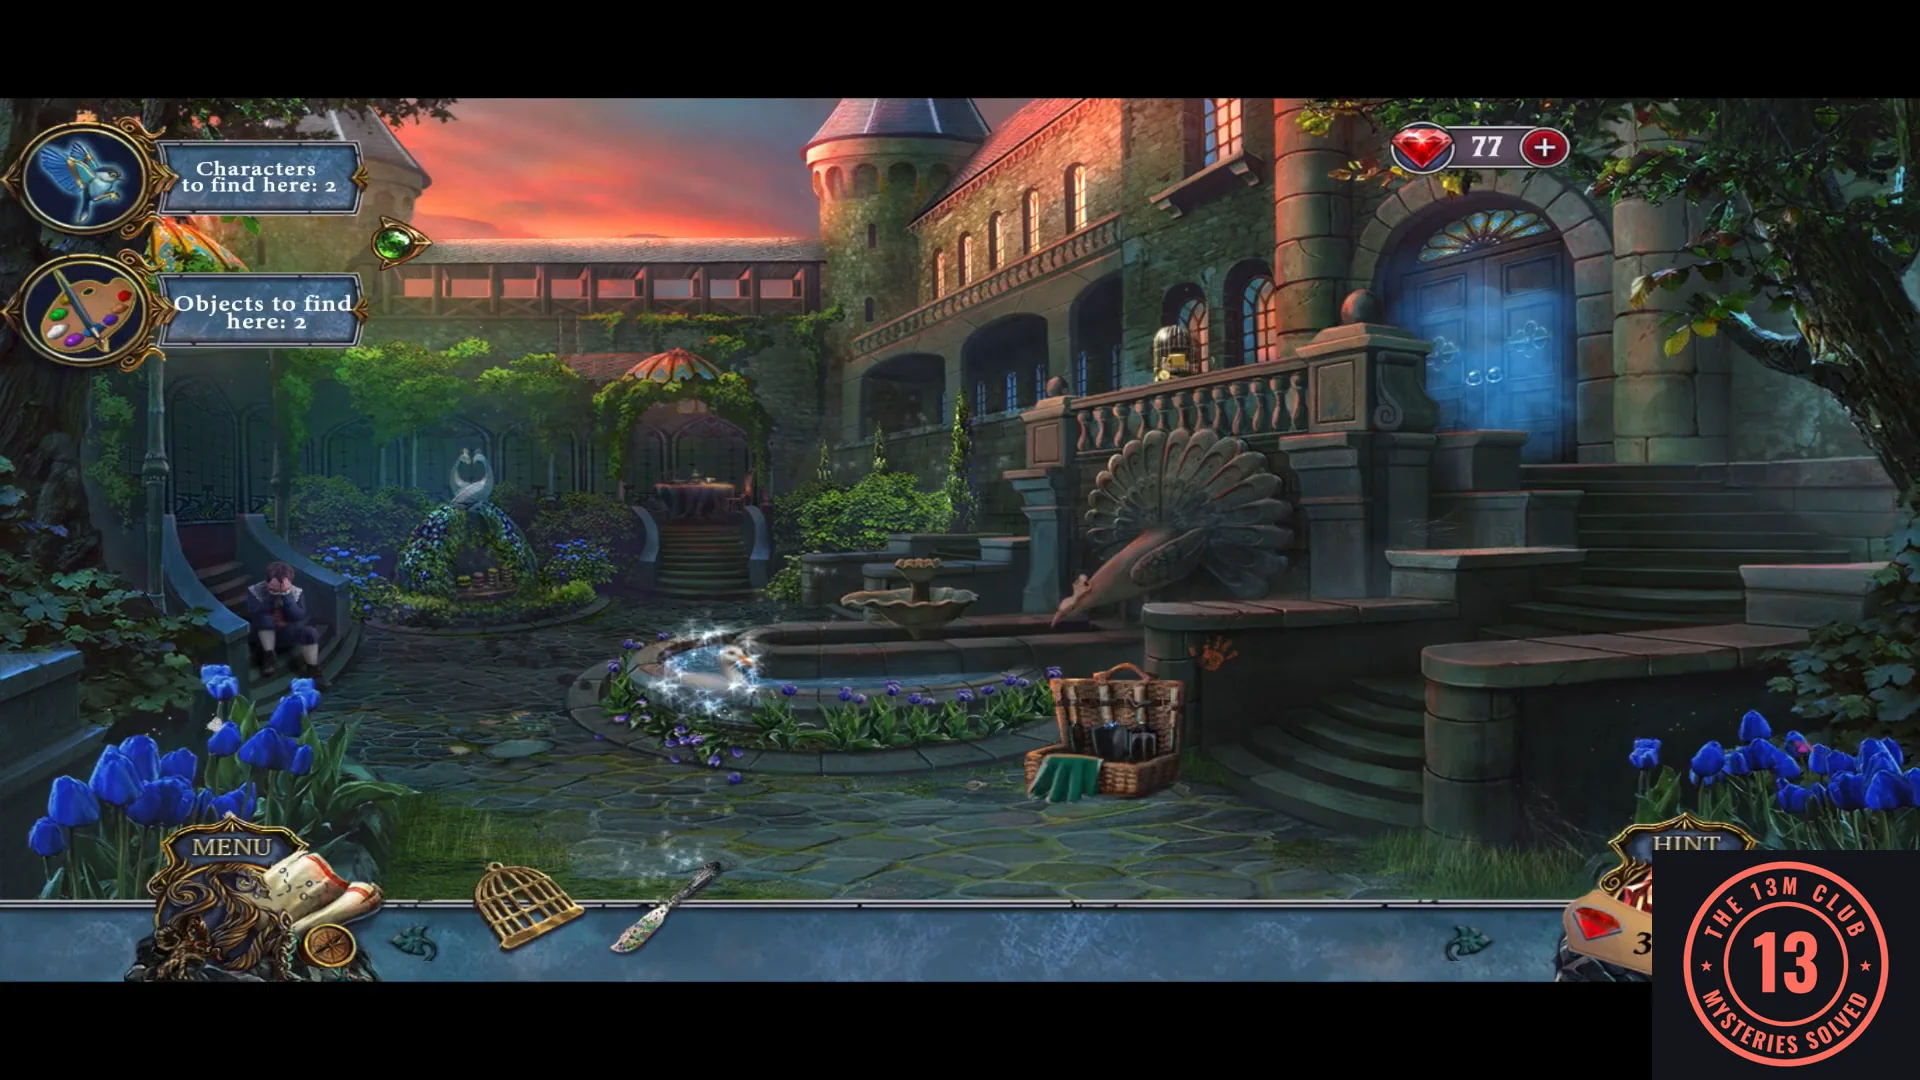
The bonus chapter has its own top-left counters for hidden characters and objects in each scene. Objects can change shape here too, so go by the position. Click them as you play; they are optional. A few bonus collectibles were never shown being collected in any available recording; those scenes say so below.
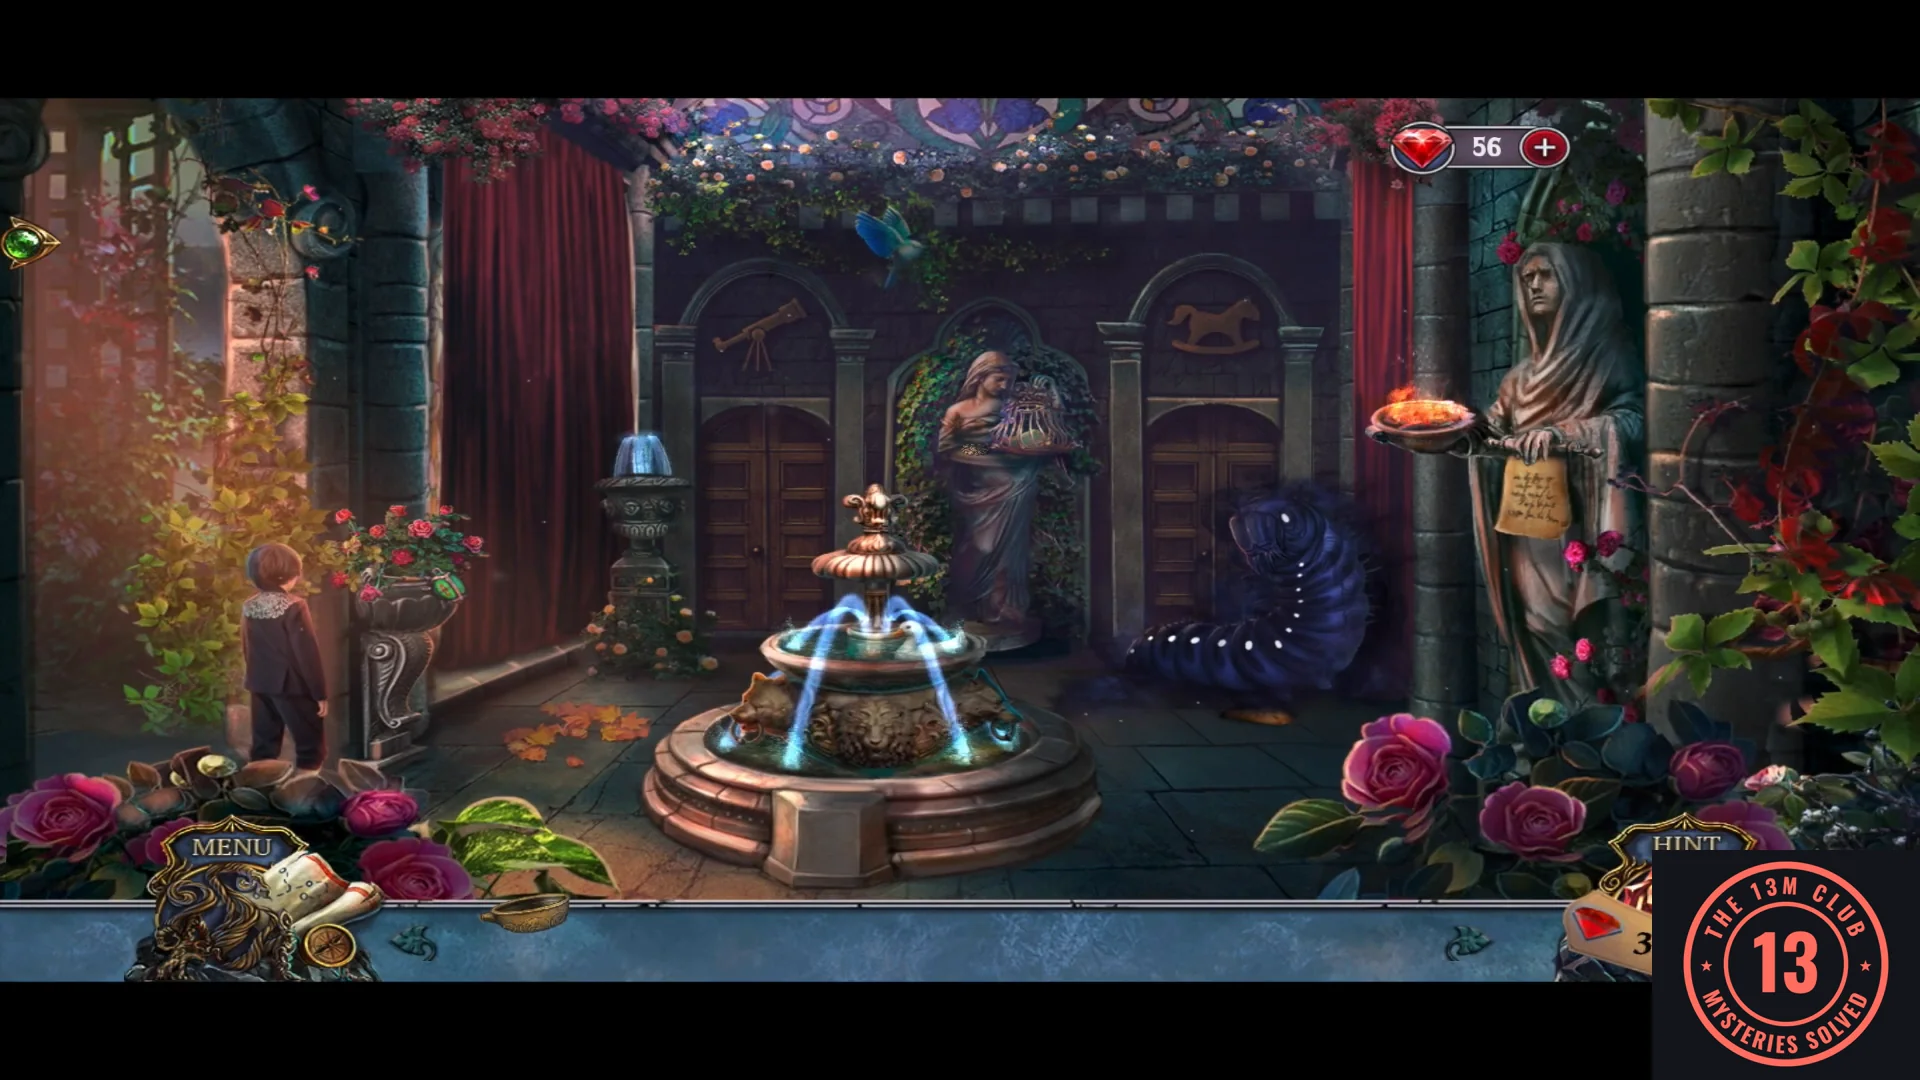
- Castle Courtyard (2 characters, 2 objects). Character: the white duck swimming in the fountain basin. Object: the picnic basket with a green cloth on the right edge of the fountain. The second character and second object here were not collected in any available recording, so their locations are not given.
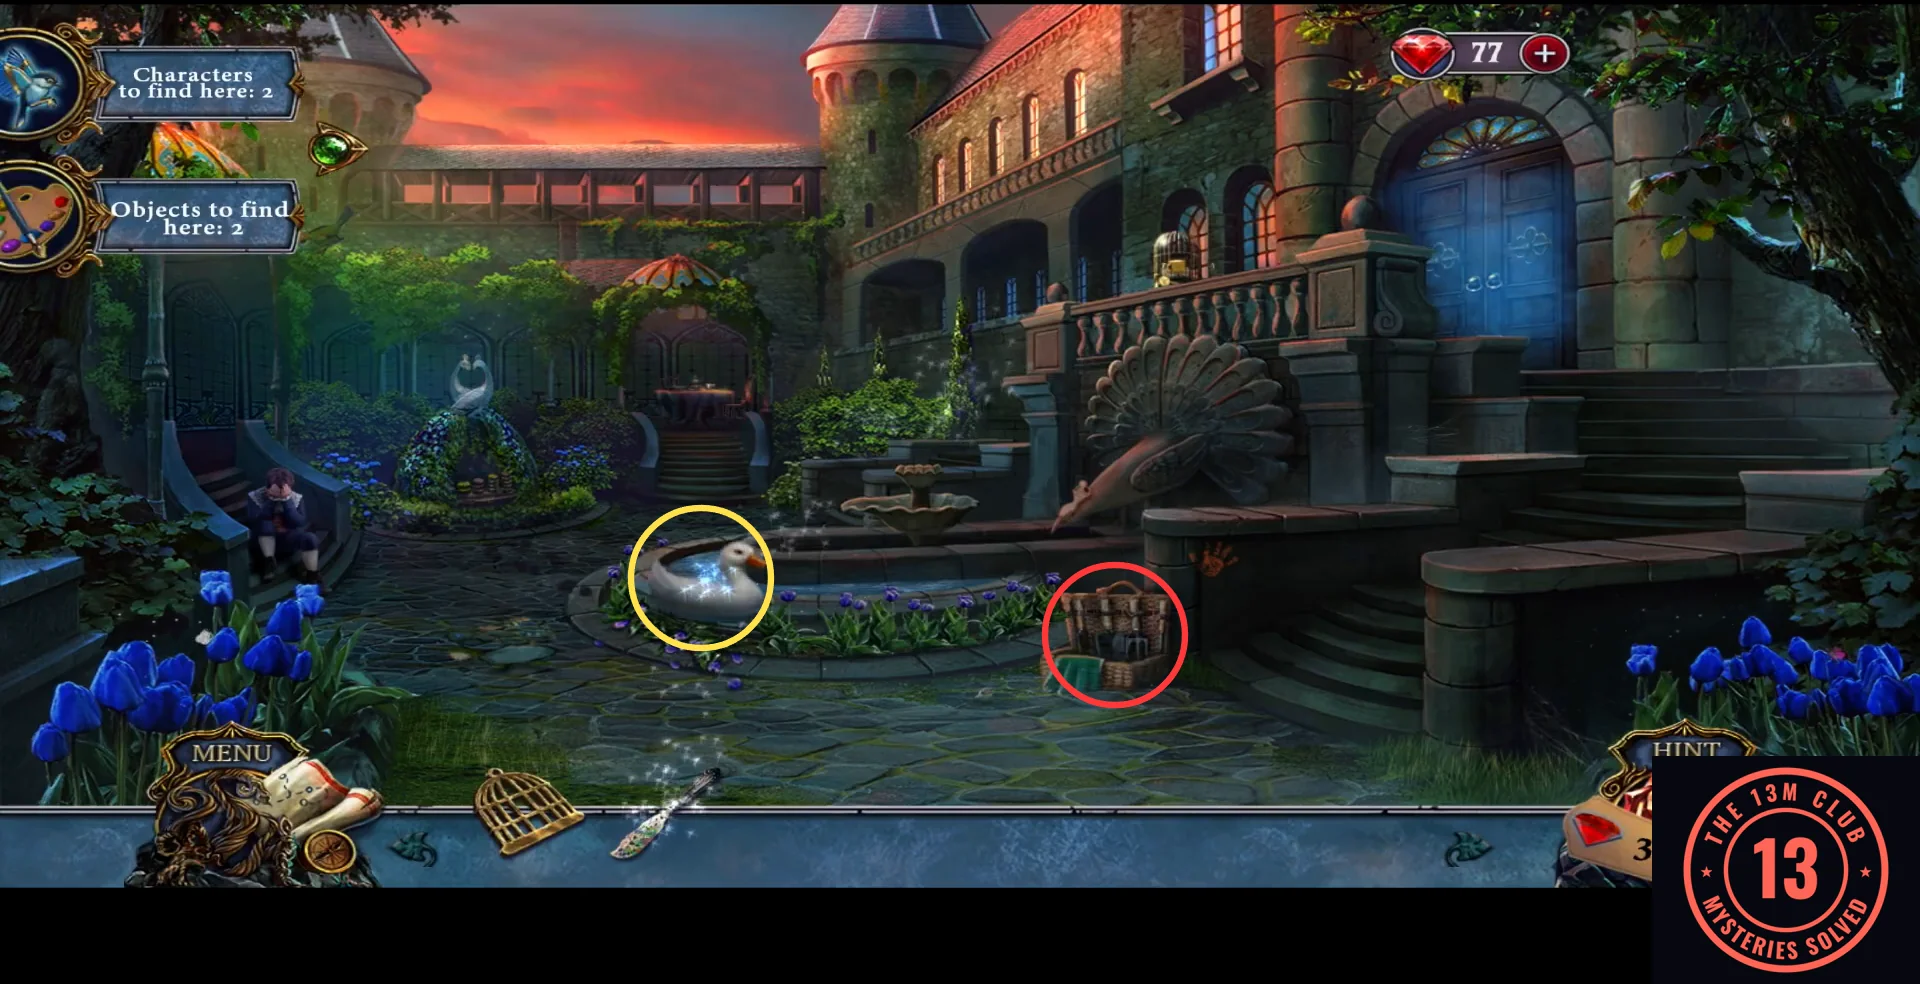
Castle Courtyard: the two locations that are known. Yellow circles mark characters, red circles mark objects. - Lobby. Characters: the robin on the floor left of the fireplace, by the fallen red stool, and the red bird high on the left wall above the left painting. Objects: the fireplace tool stand in front of the hearth, and the purple ball of yarn on the floor at the base of the left swan statue.
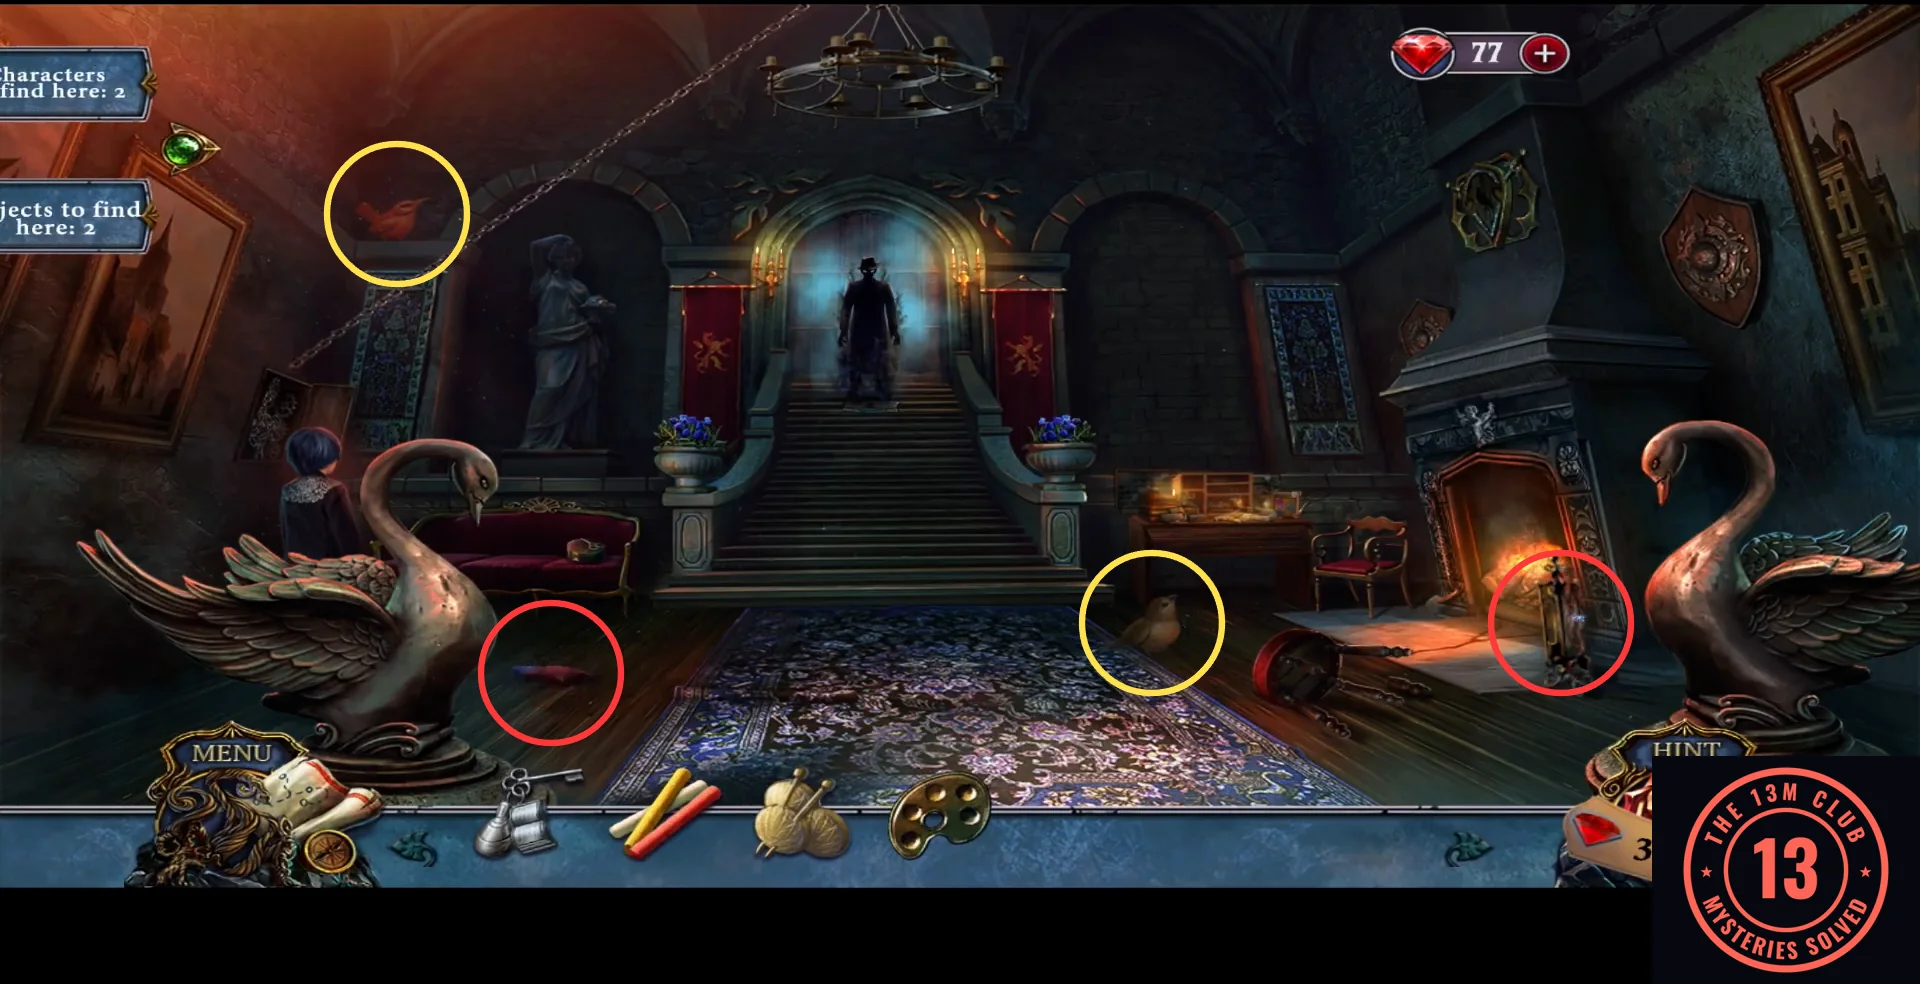
Lobby, bonus chapter. Yellow circles mark characters, red circles mark objects. - Gallery. Characters: the grey bird perched by the candle on the right wall near the top, and the yellow bird on the floor right of the left writing table. Objects: the small crest above the door at the far end of the corridor, and the open book lying on the left writing table.
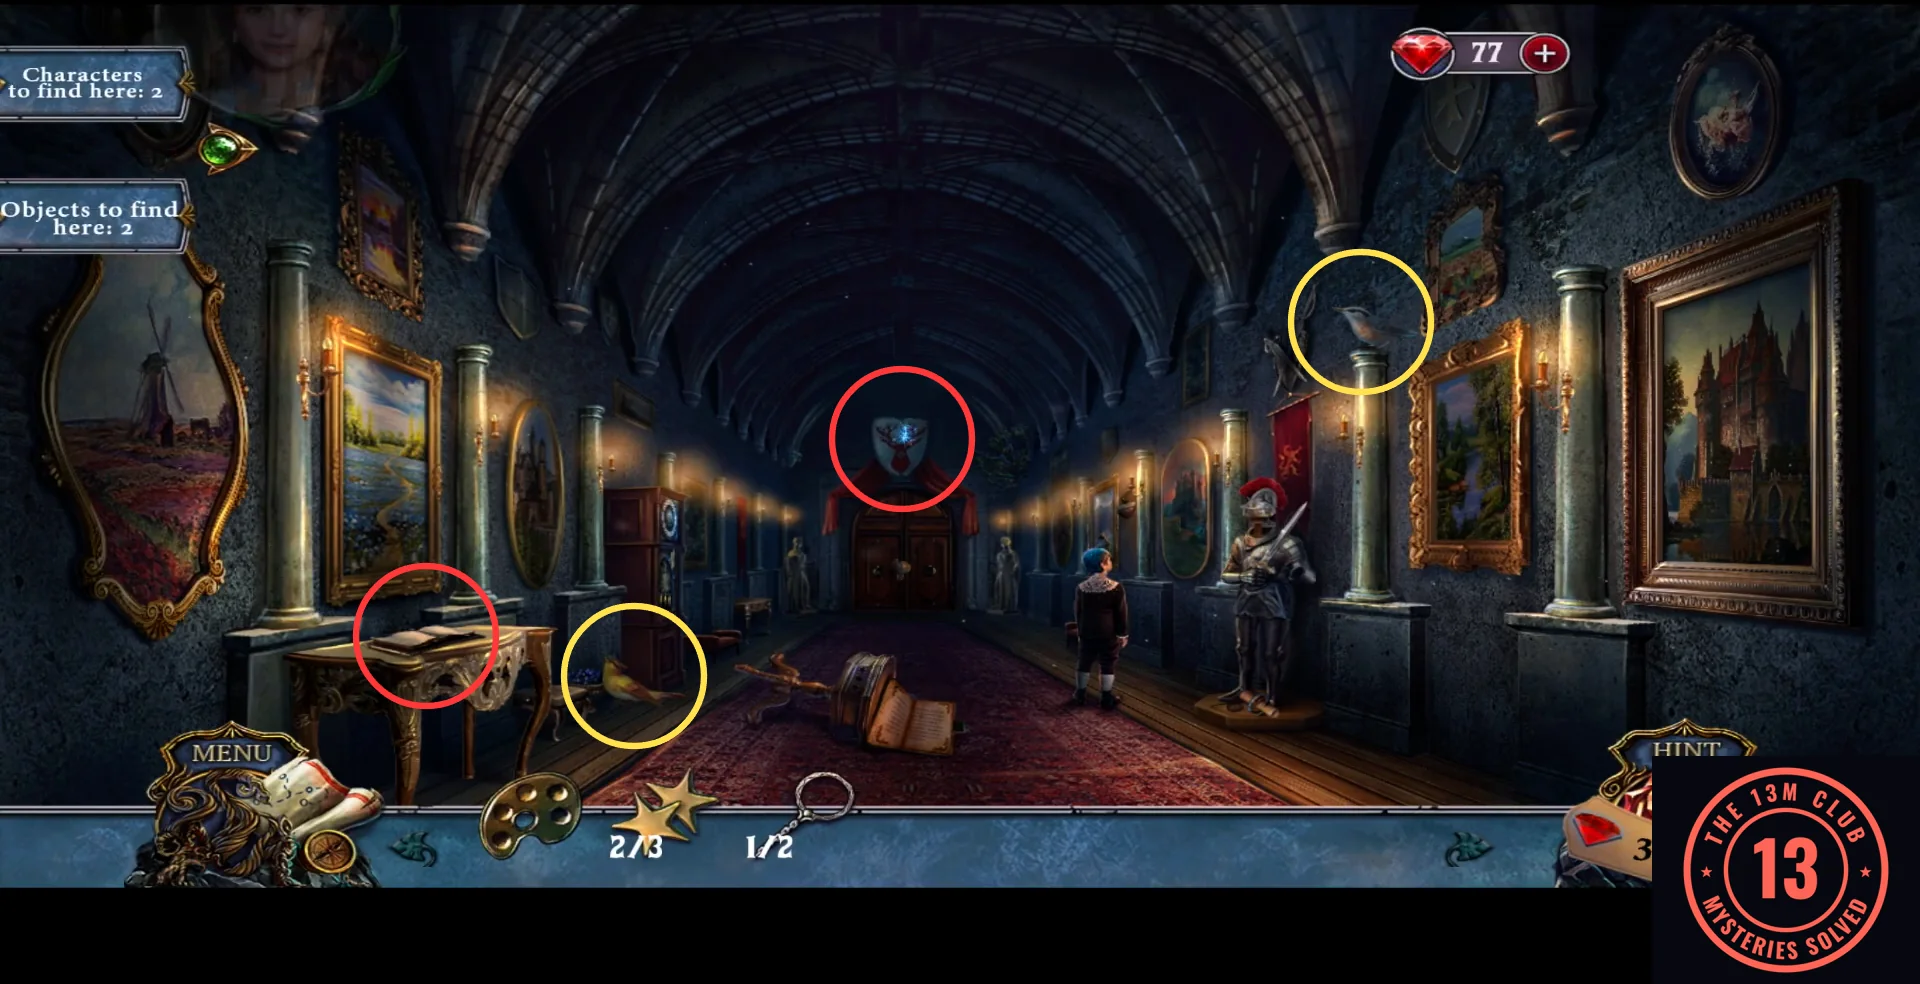
Gallery. Yellow circles mark characters, red circles mark objects. - Katrina's Studio. Characters: the red bird on the floor in front of the small cabinet in the middle, and the brown bird perched on the rail of the upper landing at the top right, above the shelves and left of the staircase (click it before you leave; it dissolves in sparkles). Objects: the small framed picture on the shelf by the candle, right of the bookshelf, and the glass dome on top of the small cabinet.
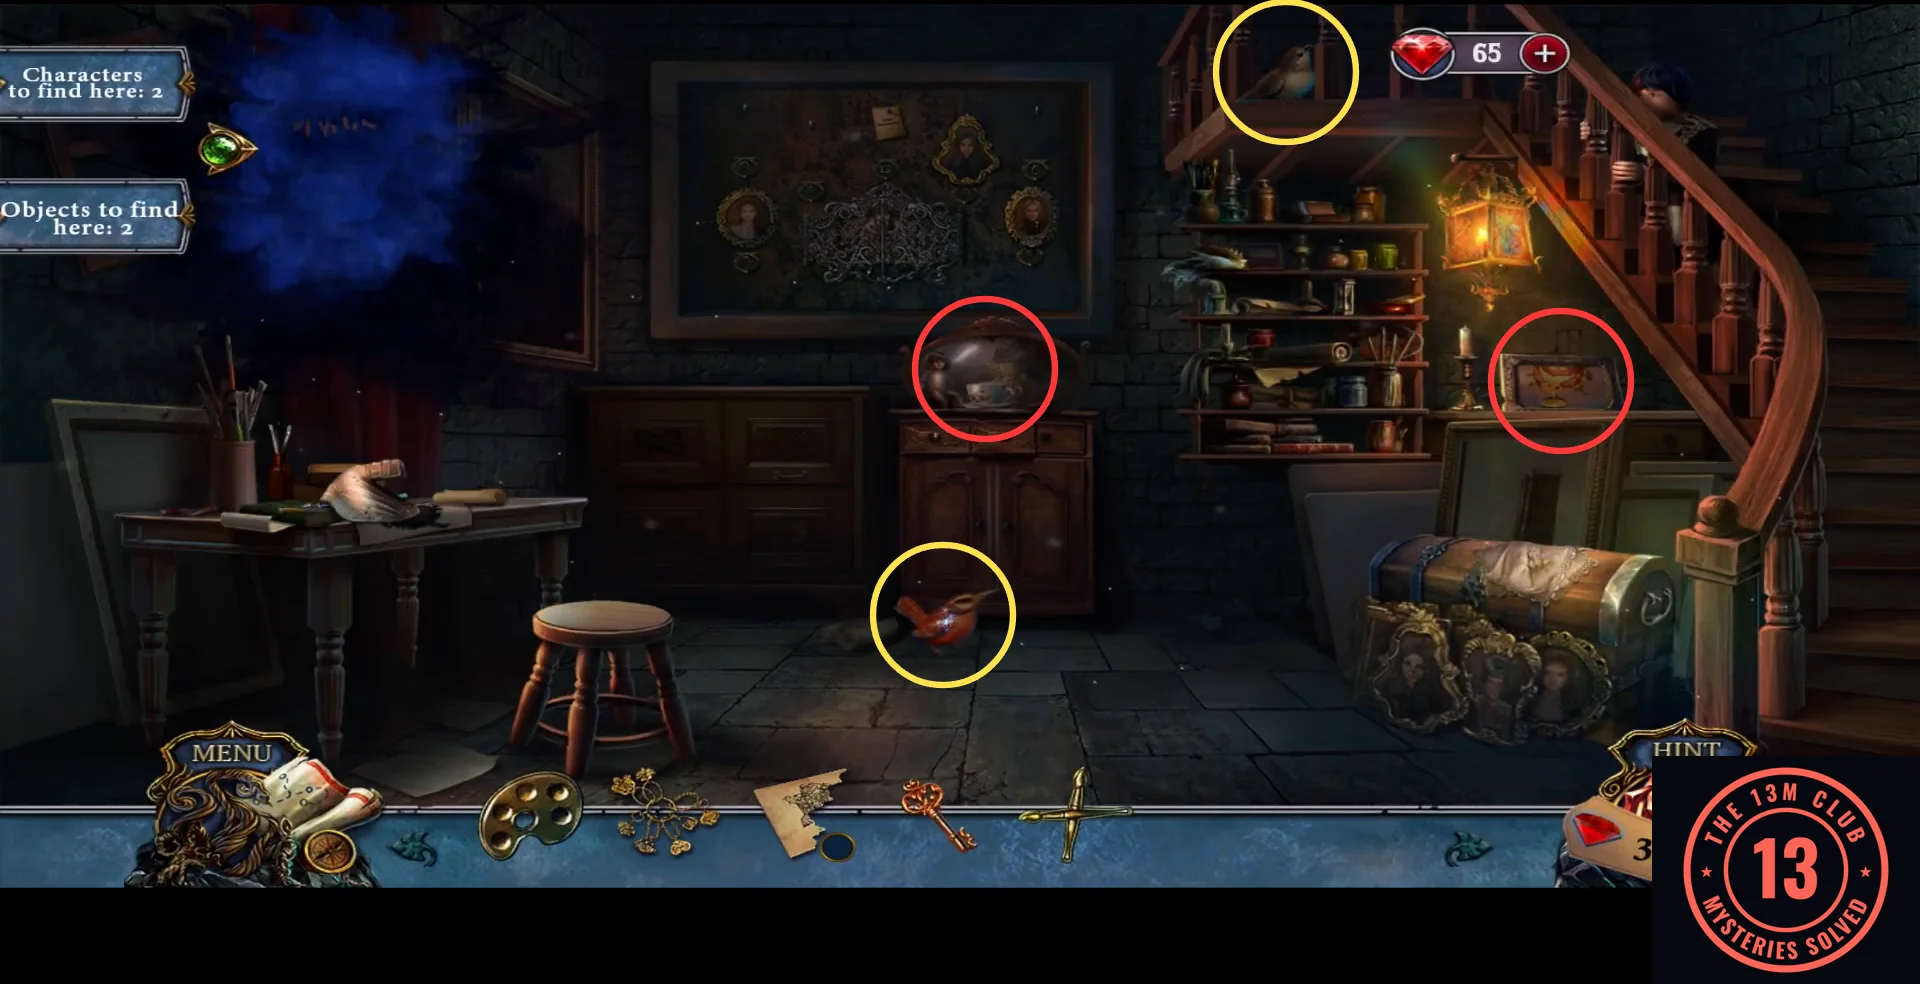
Katrina's Studio. Yellow circles mark characters, red circles mark objects. - Winter Garden (2 characters, 2 objects). Character: the blue bird fluttering above the arches at the top centre. Objects: the pair of green rubber boots on the floor left of the fountain, below the rose planter (they dissolve in sparkles when clicked), and the orange butterfly on the plants at the lower right, beside the statue. The second character here was not collected in any available recording, so its location is not given.
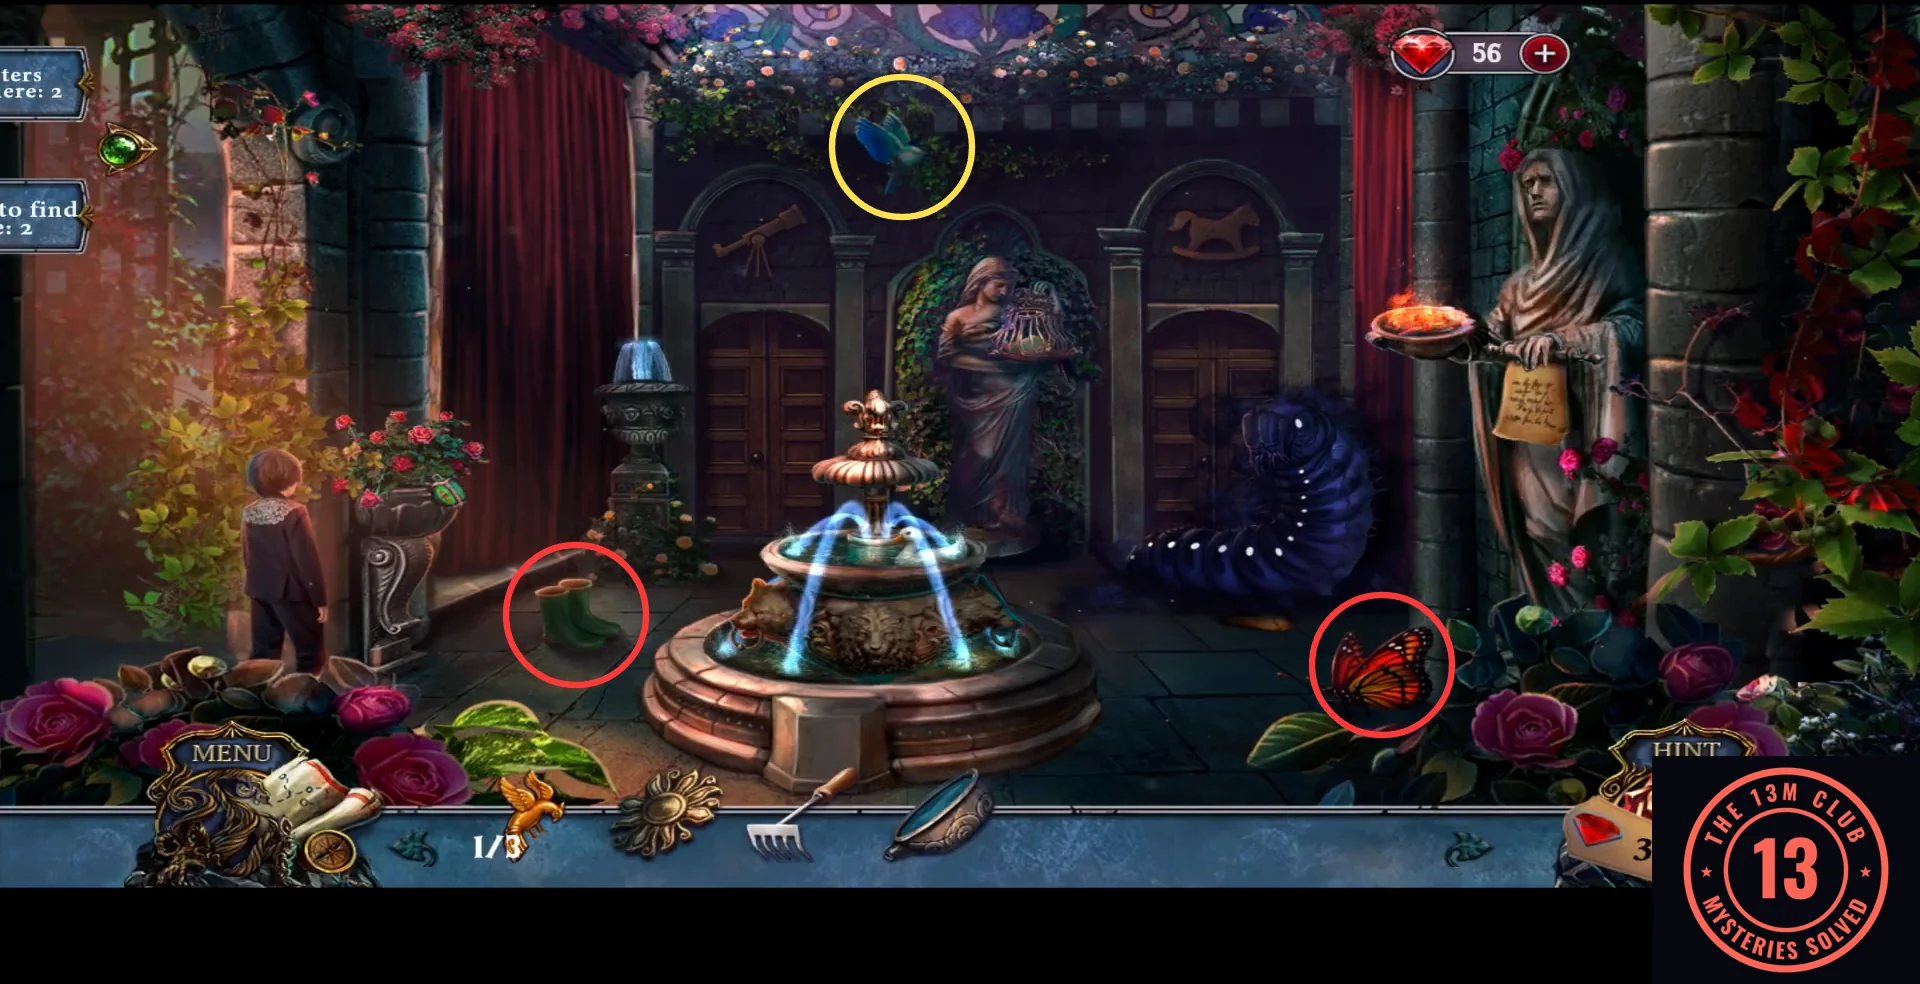
Winter Garden: the three locations that are known. Yellow circles mark characters, red circles mark objects. - Astronomy library, ground floor. Characters: the nuthatch on the balcony rail at the right, below the window, and the yellow bird on the floor under the step-ladder, beside the globe. Objects: the colourful bunting garland under the right balcony, and the round red footstool on the floor left of centre.
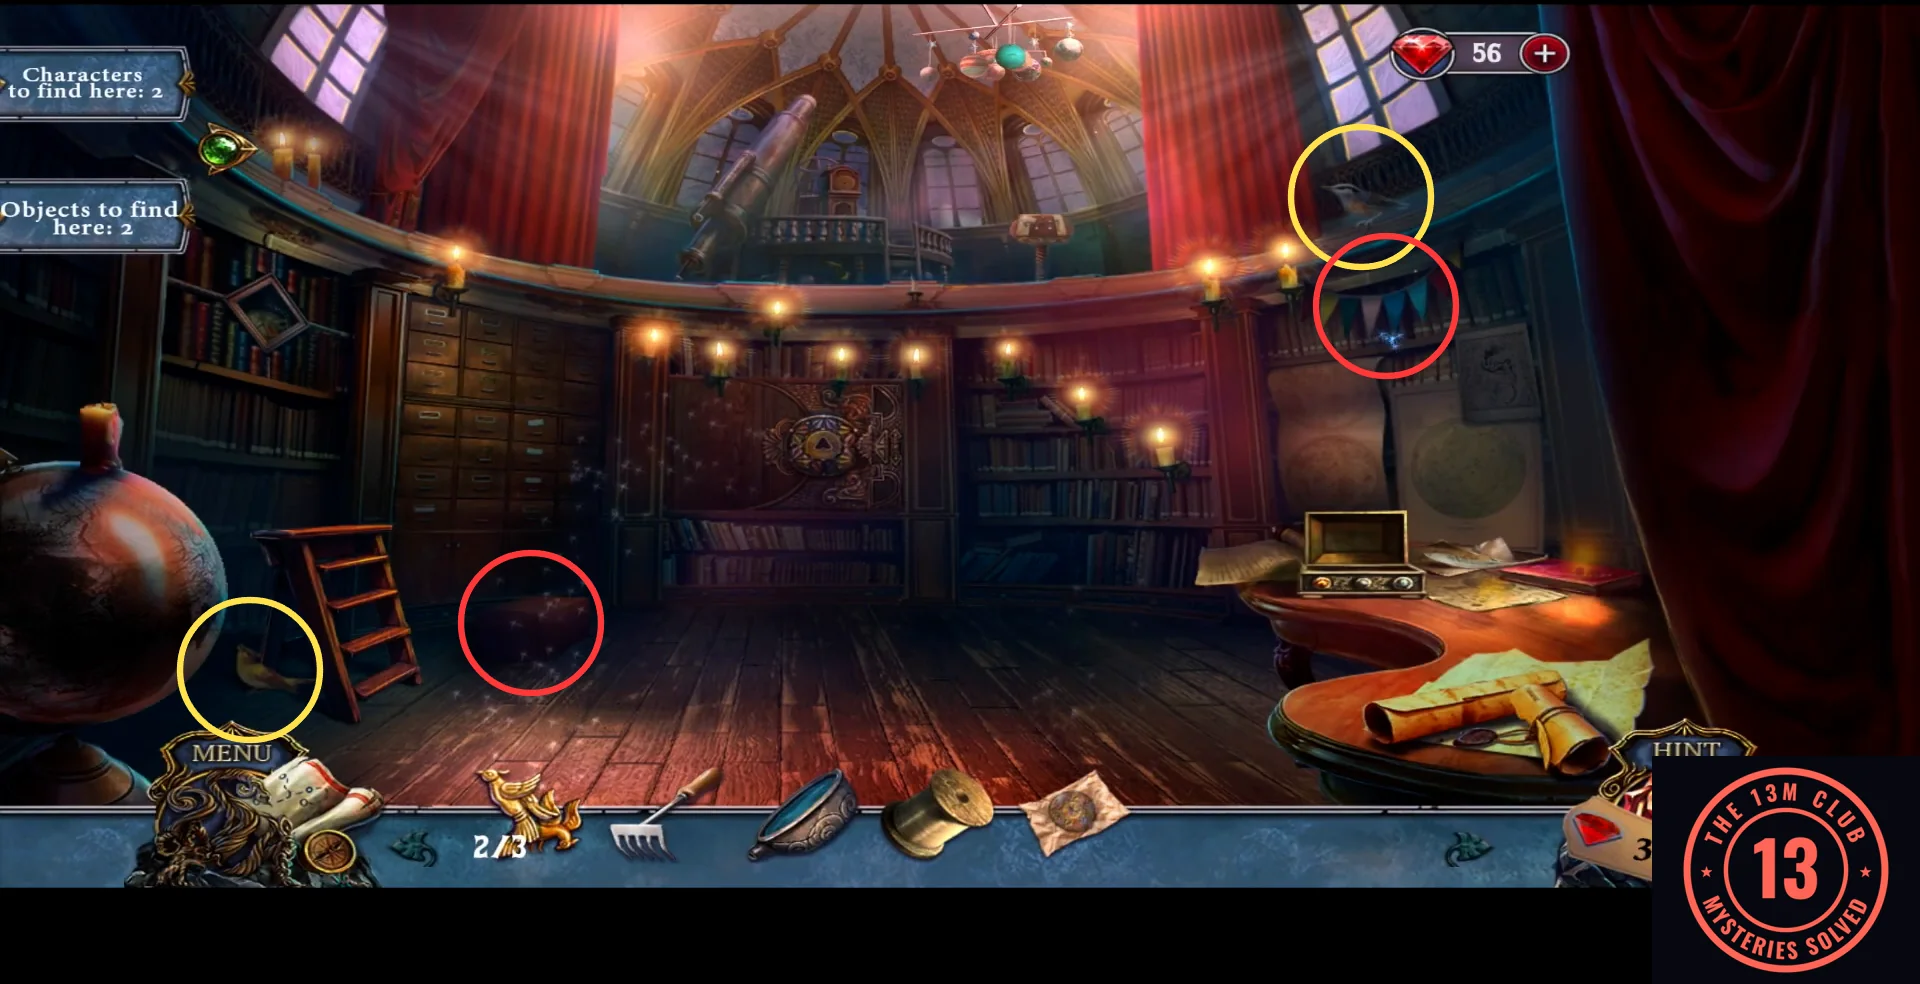
Astronomy library. The yellow bird sits under the step-ladder. Yellow circles mark characters, red circles mark objects. - Christian's Bedroom (2 characters, 2 objects). Character: the small bird on the floor at the lower left, in front of the bed. Objects: the red toy aeroplane on the floor by the rug, and the tiny red lantern in the close-up of the pillows on the bed. The second character here was not collected in any available recording, so its location is not given.
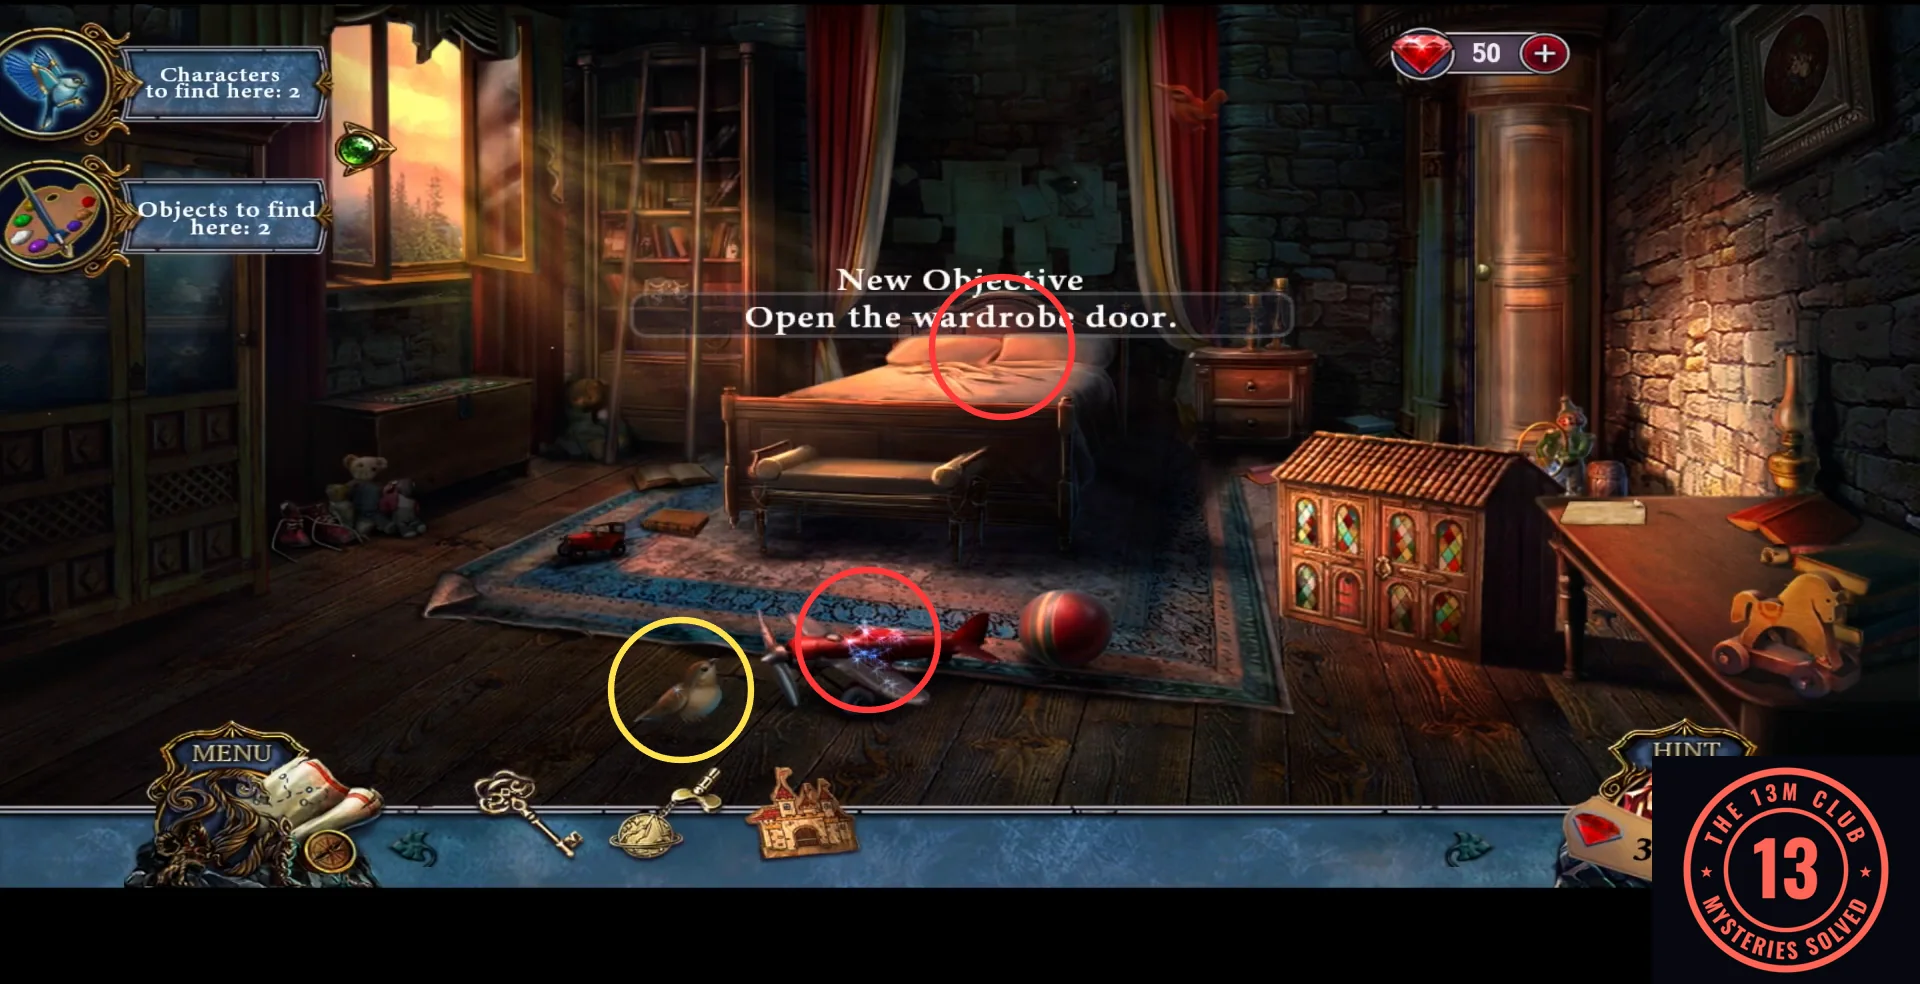
Christian's Bedroom. Click the pillows to zoom in; the tiny red lantern is in the top right of that close-up. Yellow circles mark characters, red circles mark objects.