Living Room: Puzzle Box and Door Key
Start a new game and choose Chapter 1. Several clues in this chapter are only used much later, so read every note you find. The numbers on the hallway number box can differ between games, so the guide explains how to work them out from your own clue.
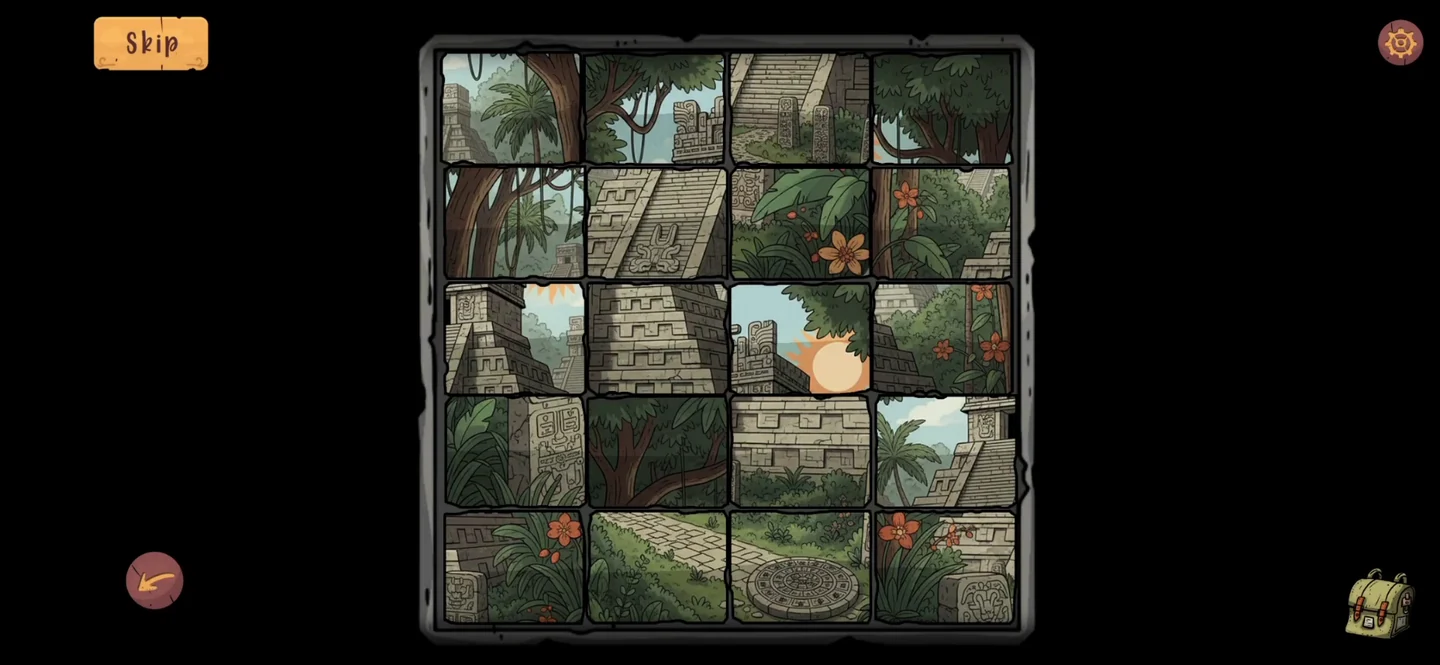
- Tap the wooden box on the round coffee table. Its twenty picture tiles sit in four columns and five rows. Swap tiles two at a time until they form a picture of a jungle step pyramid; placing the pyramid’s outline in the middle of the board first gives you a landmark for the rest. When the box opens, take the two torn photo pieces inside. They belong to the broken photo above the hallway piano. Also read the note with the letters C A D G A and D F F G A. This is the melody for the piano later.
- Open the bottom drawer of the orange dresser and take the orange ring wedge inside. The top drawer has a round lock that you will open later.
- Tap the vase on top of the orange dresser. A striped mug drops out: take it.
- Slide aside the map picture, the lowest of the three pictures on the left wall, beside the scale. The paper behind it shows two rows of circles, and some of them are marked with #. These marks show which piano notes are sharp.
- Look at the framed math sheet on the wall. It places the letters A D M B X Y O under the Roman numerals I to VII. You need this for a number box in the hallway.
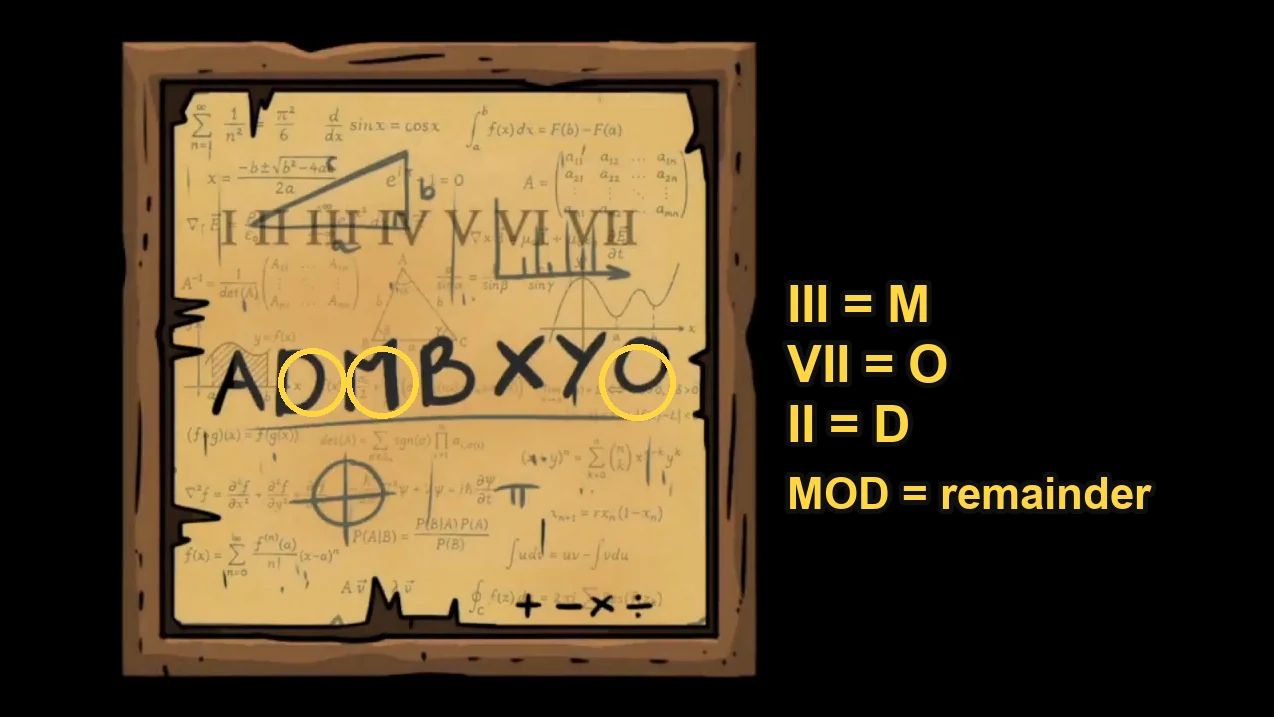
The math sheet turns the Roman numerals on the hallway number box into the word MOD. - Slide aside the flower vase picture on the right wall, above the small shelf, and take the key from the hole behind it.
- Tap the top of the wall safe on the back wall and pick up the torn photo piece lying there. The safe itself stays shut for now. You need this piece, together with the two from the coffee table box, for the broken photo in the hallway.
- Use the key on the door's padlock, then go through to the hallway.
Hallway: Pictures, Floor Note and Number Box
The hallway holds several pickups and two clues you will need for the piano. Collect everything here before solving the number box on the chest.
- Take the lantern hanging on the wall between the two doors on the left, and the wolf mask on the floor by the bush in the bottom left corner.
- Tap the leaves of the nearer potted plant in the red pot and take the small weight marked 1 hidden there.
- Slide the pyramid picture fully aside. Write down the four Egyptian symbols carved on the wall behind it, from left to right. Then slide the Mayan picture aside and take the torn paper scrap.
- Tap the loose paper on the floor to the right of the chest. It shows two rows of numbered triangles. These numbers are the octaves for the piano notes.
- Tap the stacked cylinders on the right bookshelf and move them until a key appears. Take it.
- Open the lower drawer of the chest under the broken picture and take the second orange ring wedge.
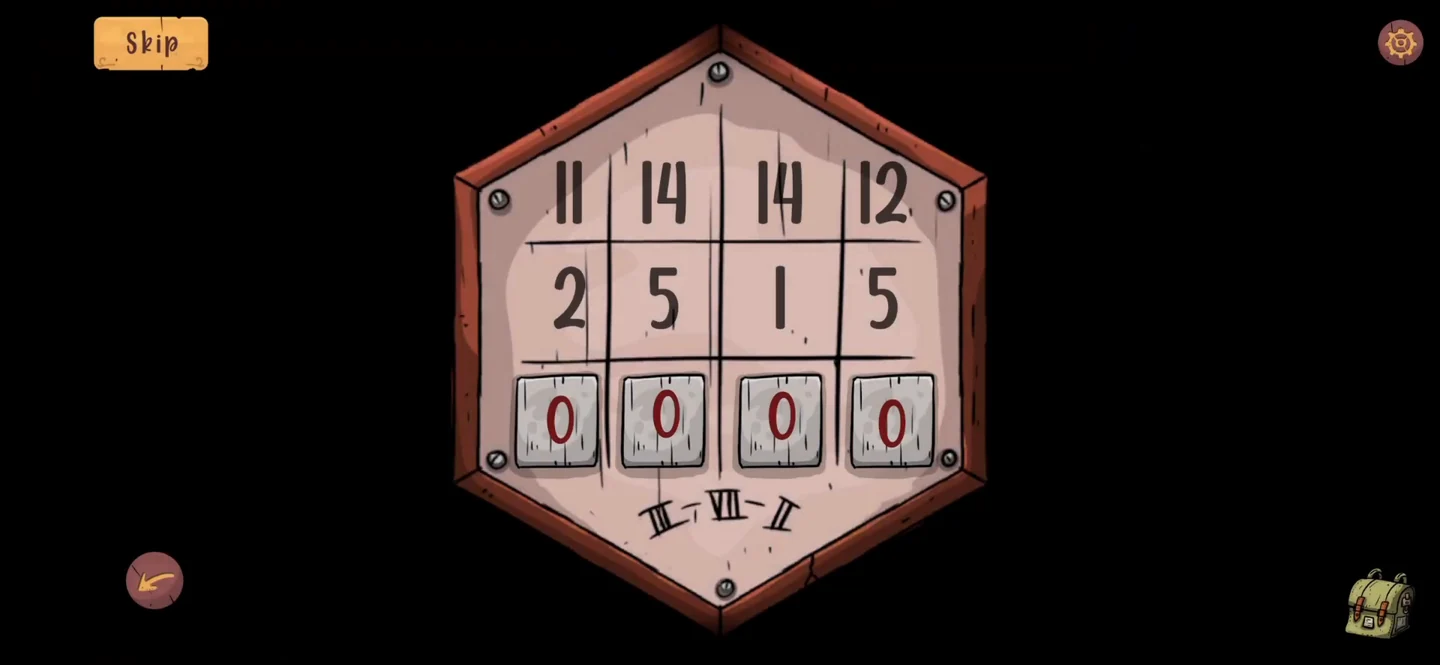
- Open the six-sided number box on the chest. The Roman numerals III, VII and II under it stand for M, O and D on the math sheet. MOD means divide each top number by the number below it and enter the remainder. The numbers change between games. For example, 11 14 14 12 over 2 5 1 5 gives 1 4 0 2. A drawer opens: take the white piano key. It belongs to the toy piano on the same chest.CODE1402
Hallway Pipe Puzzle
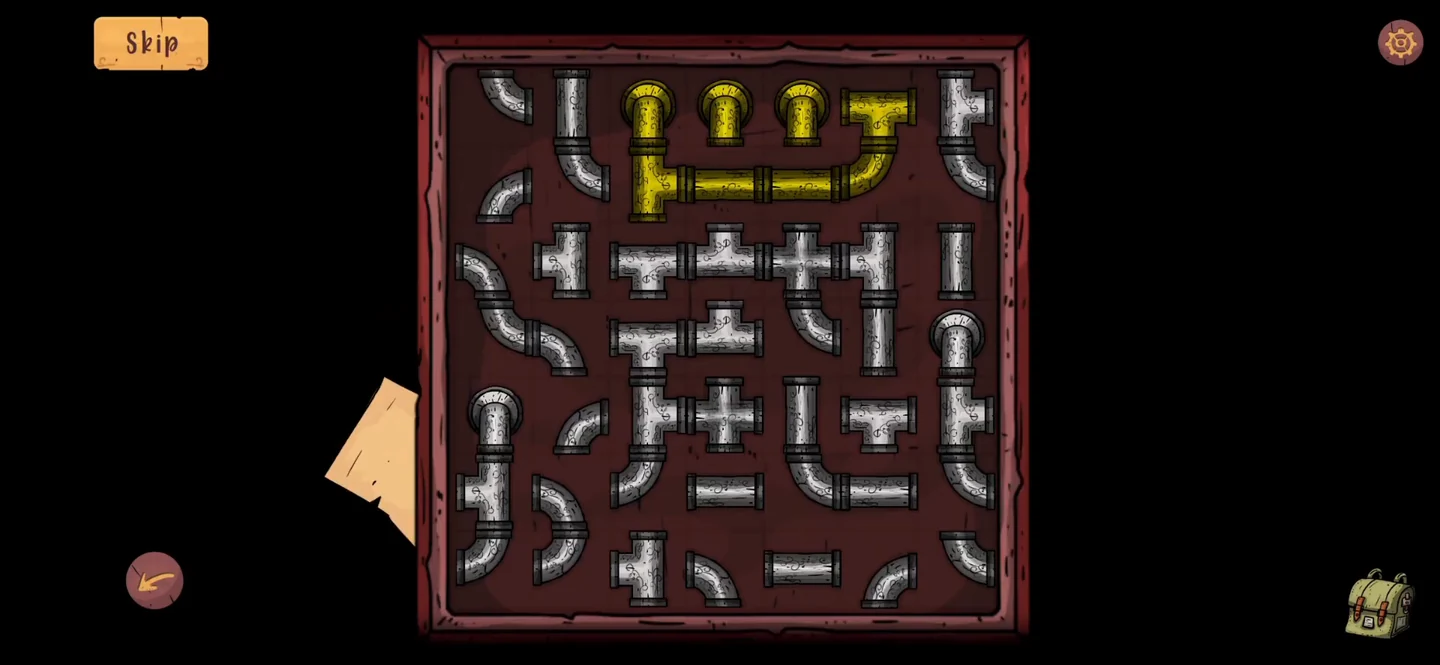
The grey door next to the far left hallway door is locked by a pipe puzzle. Solving it opens the workshop.
- The far left door in the hallway leads back to the living room. Tap the grey door just to its right, where the lantern was hanging, to open the pipe puzzle. Rotate the tiles until water flows from the three yellow inlets to both exits without any leaks. The door then opens into the workshop.
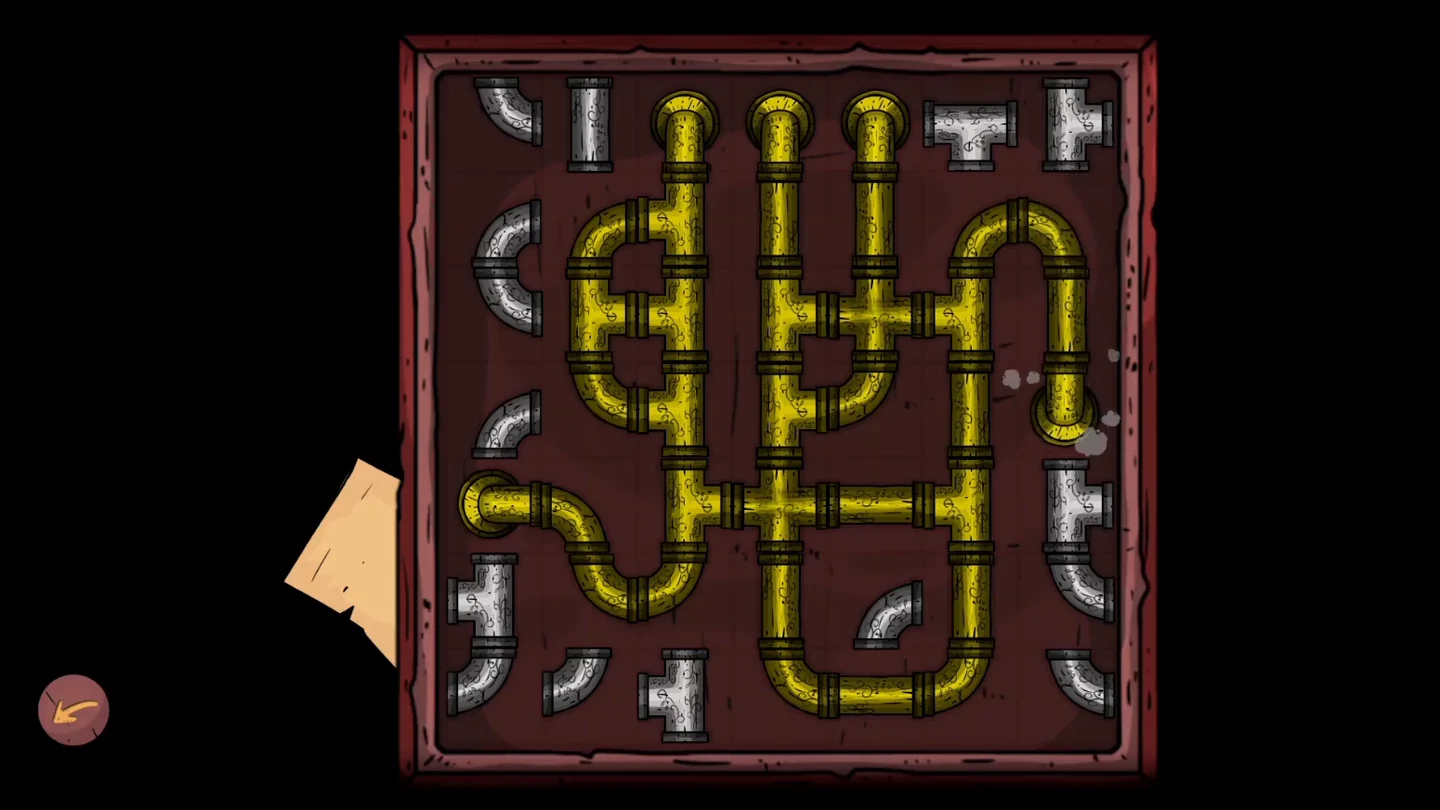
One completed pipe layout.
Workshop: Clues and the Memory Box
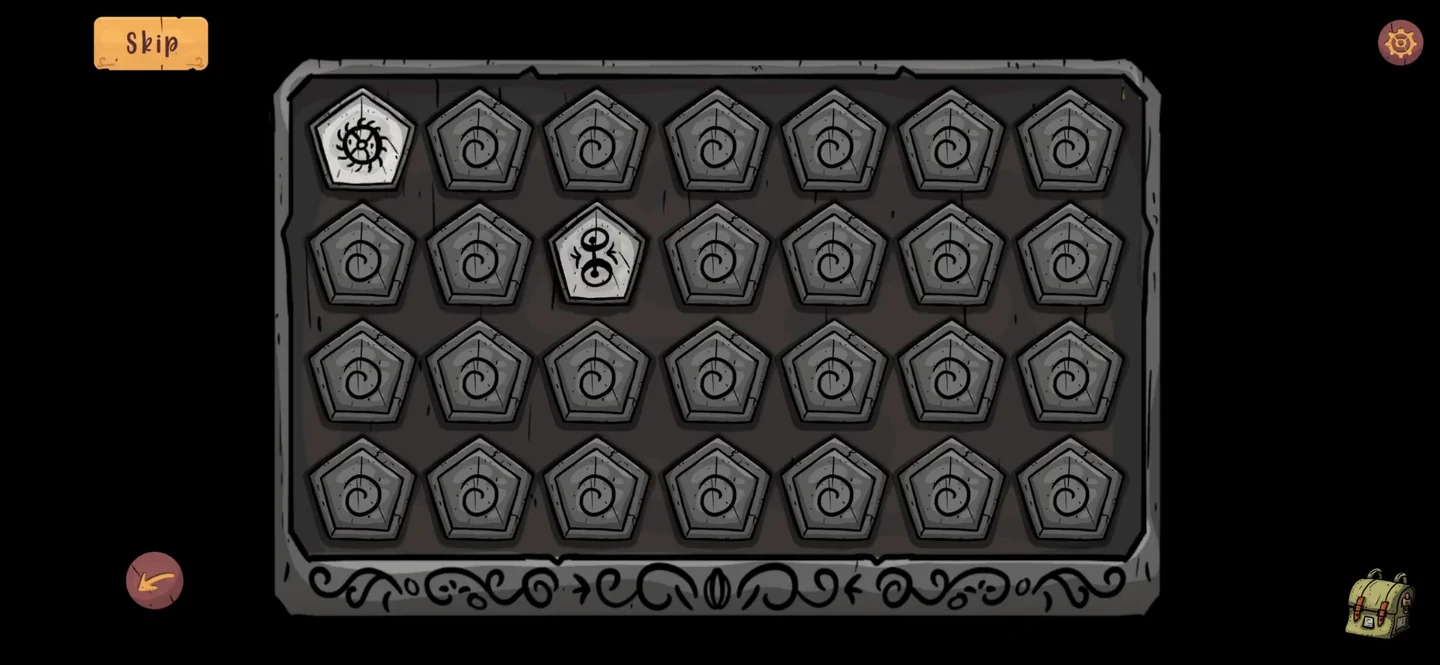
The workshop has more papers and pickups, plus a memory game inside the blue box on the green cabinet.
- Move the book stacks on the top wall shelf until the torn paper scrap behind them is free, and take it. Then read the paper pinned to the wall beside the shelves. It shows a piano keyboard: the left part is marked octave III and the right part octave IV.
- Tap the papers on the right-hand side of the worktable to read the green paper with short horizontal and vertical dashes. It is the solution pattern for the living room safe. It does not go into your inventory, so note the pattern or come back to it.
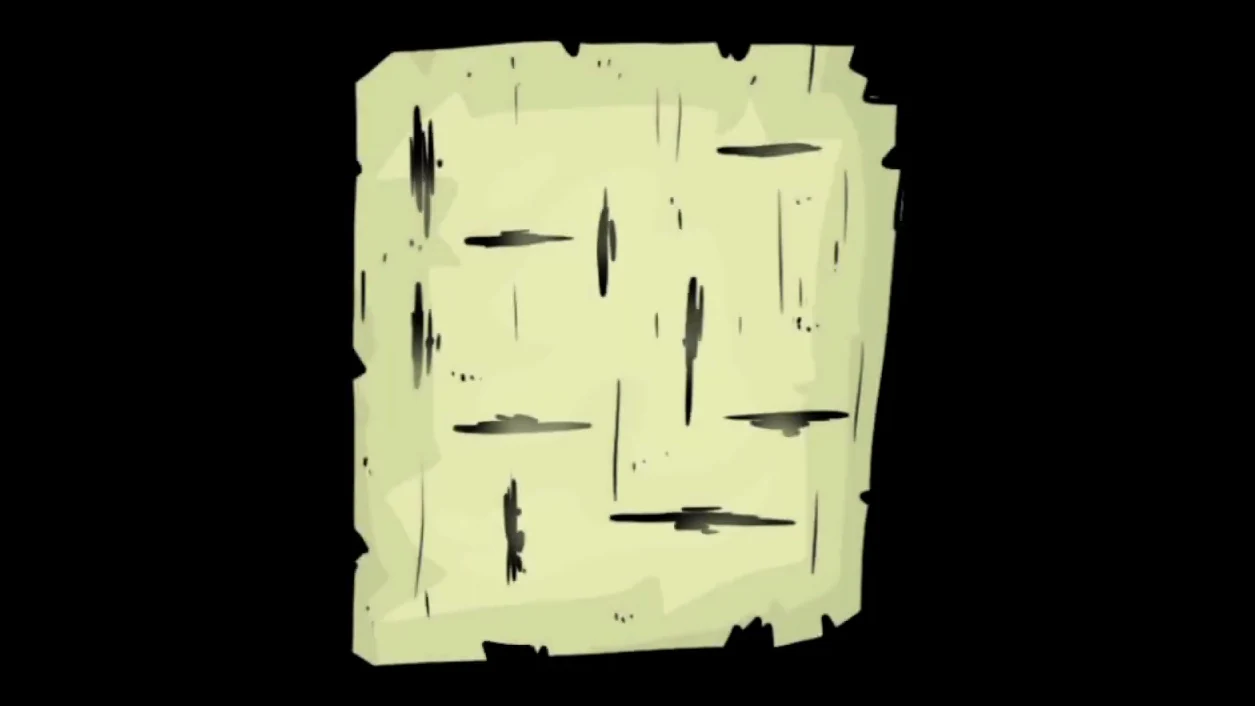
The green dash paper on the worktable: the target pattern for the living room safe. - Take the orange triangle with a spiral from behind the books on the lower wall shelf, and the weight marked 3 from the left end of the same shelf. Then open the lower left door of the green cabinet and take the black piano key. It is the second missing key of the toy piano.
- Put the orange triangle into the slot on the blue box on the green cabinet. Clear the board by finding matching pairs of symbols. Turn over two tiles at a time and memorise every symbol you see. When the box opens, take the gold coin.
Living Room Safe and Torn Diagram
Return to the living room with the wedges, the key from the hallway bookshelf and both torn scraps.
- Back in the living room, put both orange ring wedges into the round slot on the dresser's top drawer. A three-ring dial appears, which you will solve later.
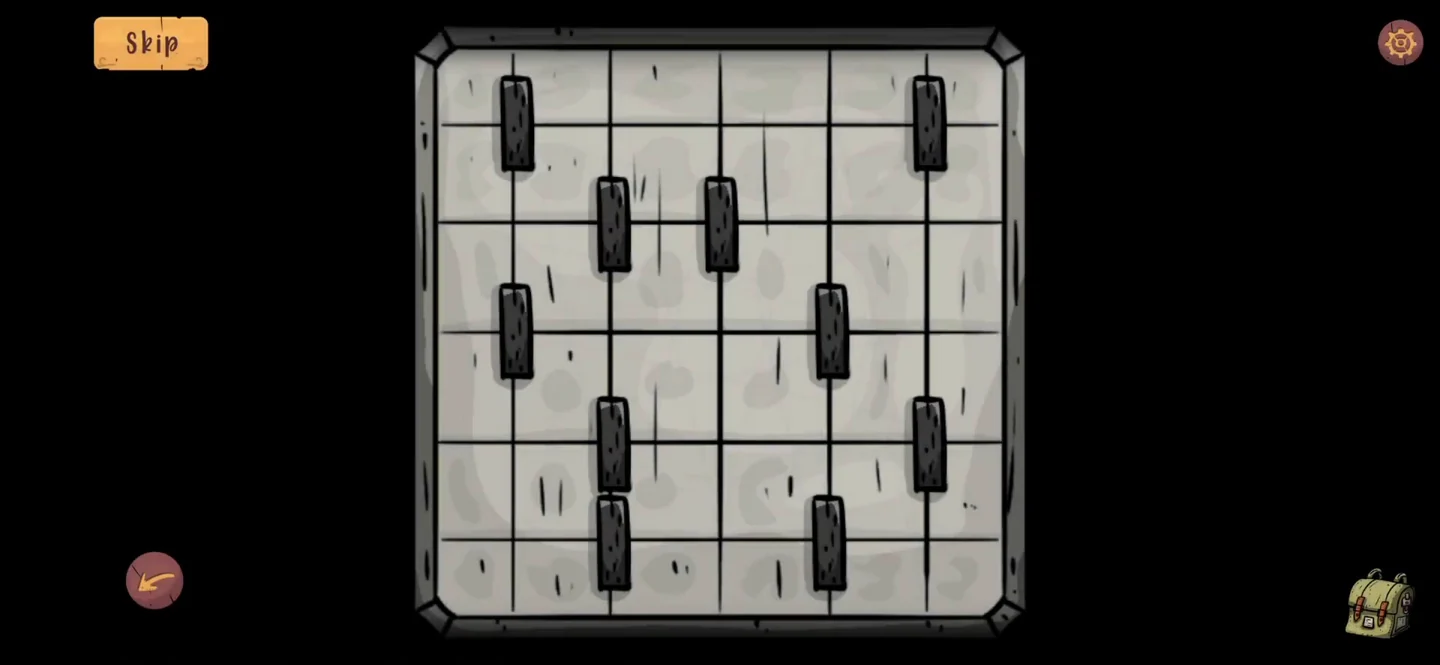
- Use the key from the hallway bookshelf on the wall safe to unlock it. Tap the grid of bars inside and turn the bars until their positions match the dashes on the green paper. Take the amber bottle from inside the safe.
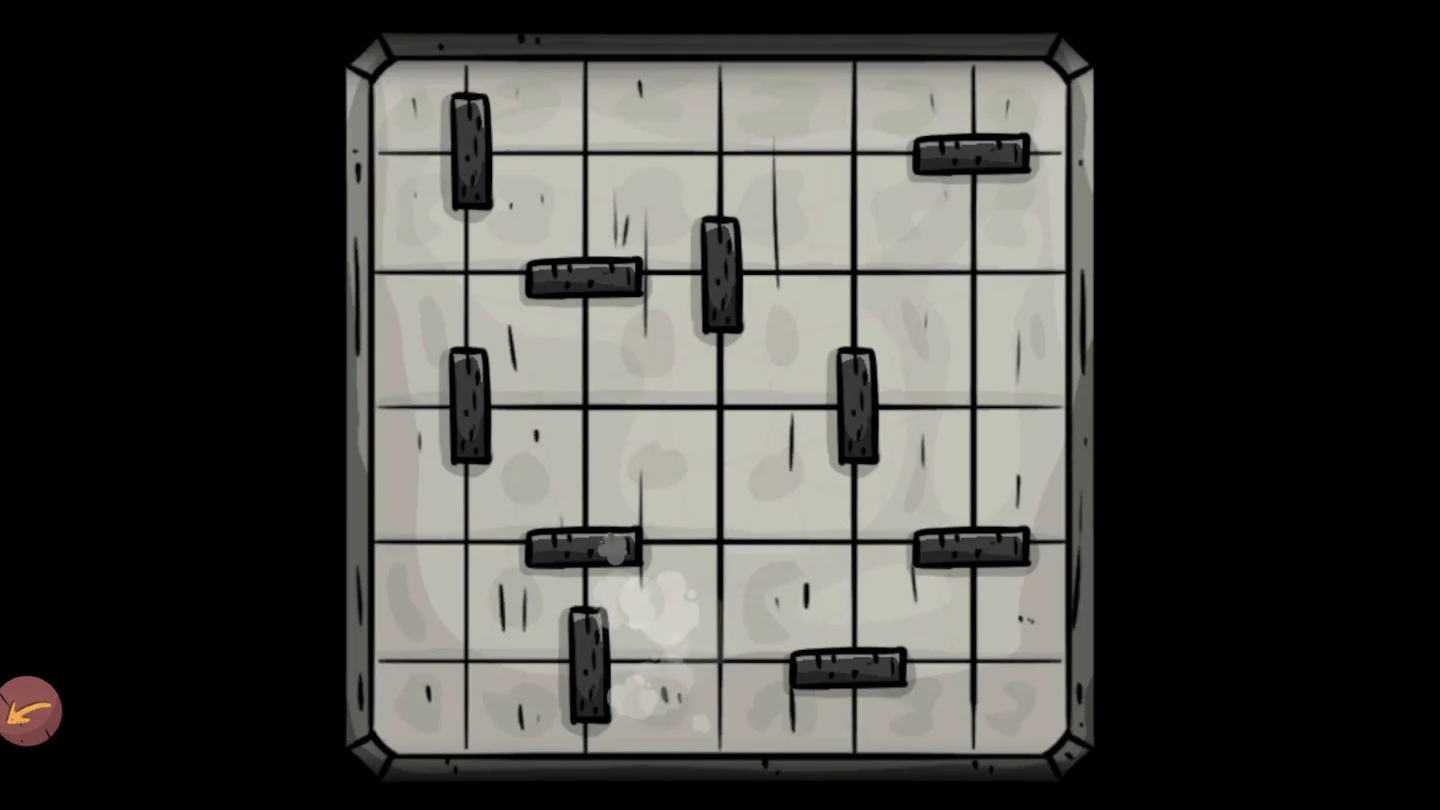
The bars set to match the green dash paper. - Place both torn paper scraps in the torn frame on the left wall, the middle one of the three pictures, between the math sheet and the map picture. The completed diagram shows circles with 1 to 4 dots, each pointing to a shape. A peg also slides out. Pull it to get a paper that shows a spiral, a zigzag and a square spiral, from top to bottom.
Hallway Piano
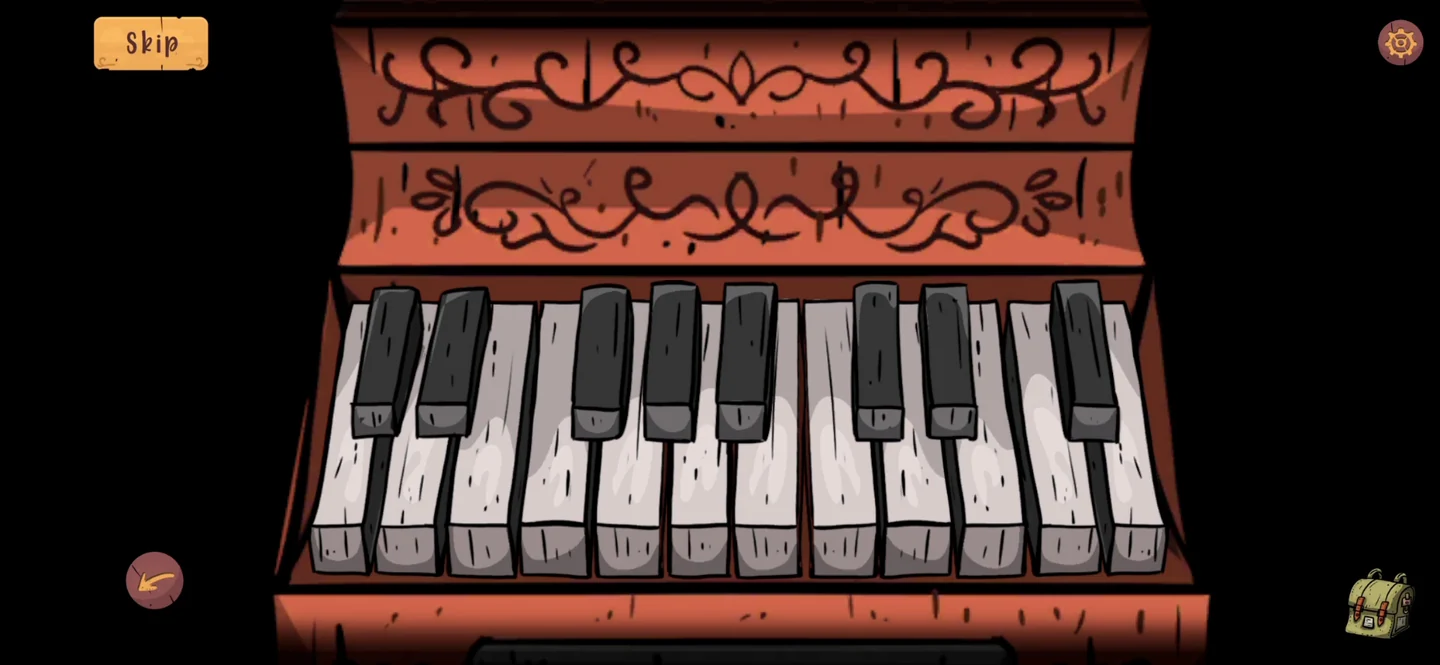
The toy piano on the hallway chest is missing two keys: the white key from the number box and the black key from the workshop cabinet. Once they are fitted, combine three clues: the letter note from the picture box, the sharp marks behind the map and the octave numbers on the floor paper.
- Tap the toy piano on the hallway chest. Two of its keys are missing. Put the white piano key from the number box into the gap at the third white key from the left, and the black piano key from the green workshop cabinet into the gap at the first black key of the right-hand octave IV part.
- With both keys in place, play the toy piano using the letters C A D G A, then D F F G A, in order. Check the circle paper: if a note’s circle is marked #, play the black key just to the right of that note. The triangle number gives the octave. The 7 white keys on the left are octave III and the 5 on the right are octave IV. Together the clues give C3, A#3, D4, G#3, A3, D4, F#4, F3, G#3, A3. Take the gold coin from the top of the piano.
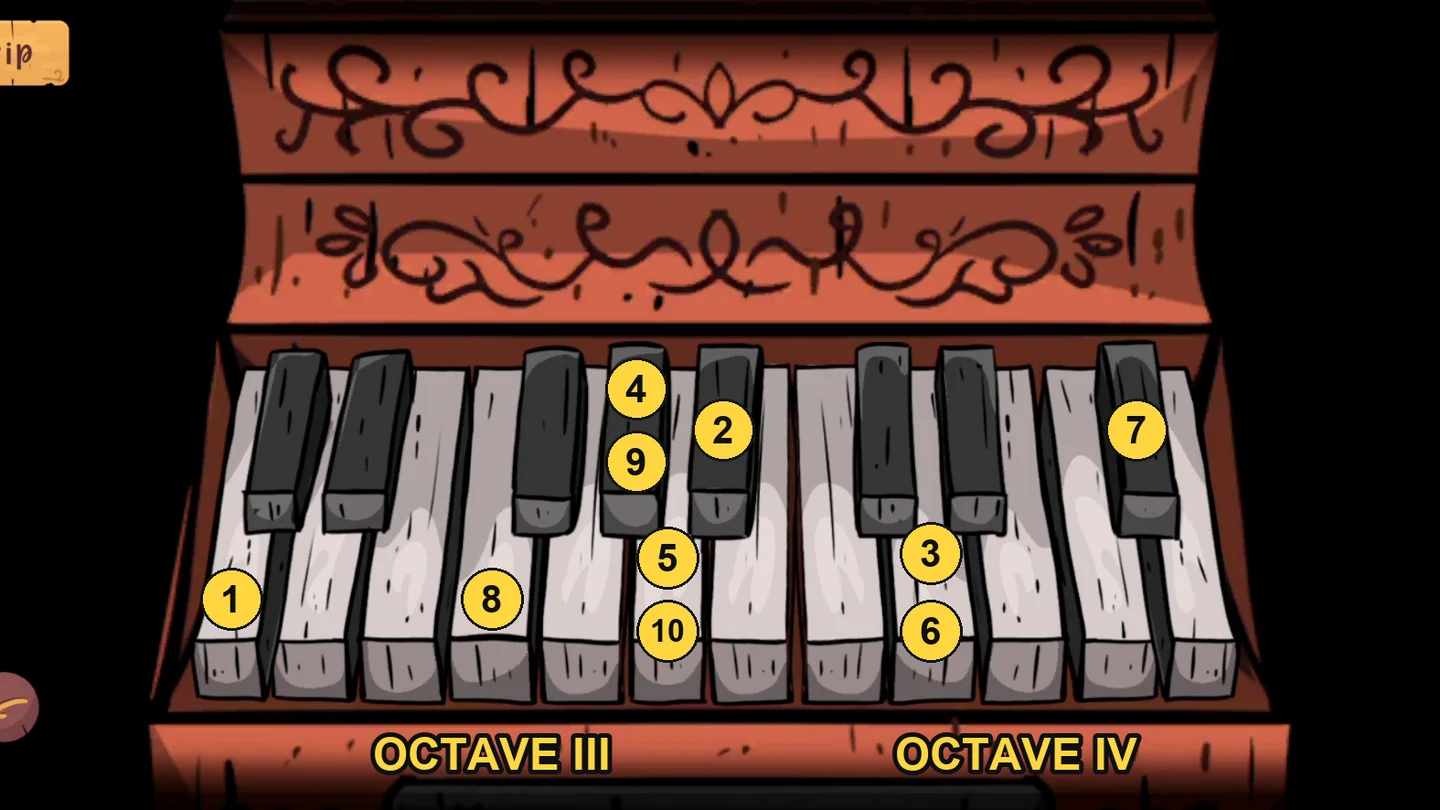
Press the keys in number order. Keys with two numbers are pressed twice.
Hallway Photo Puzzle
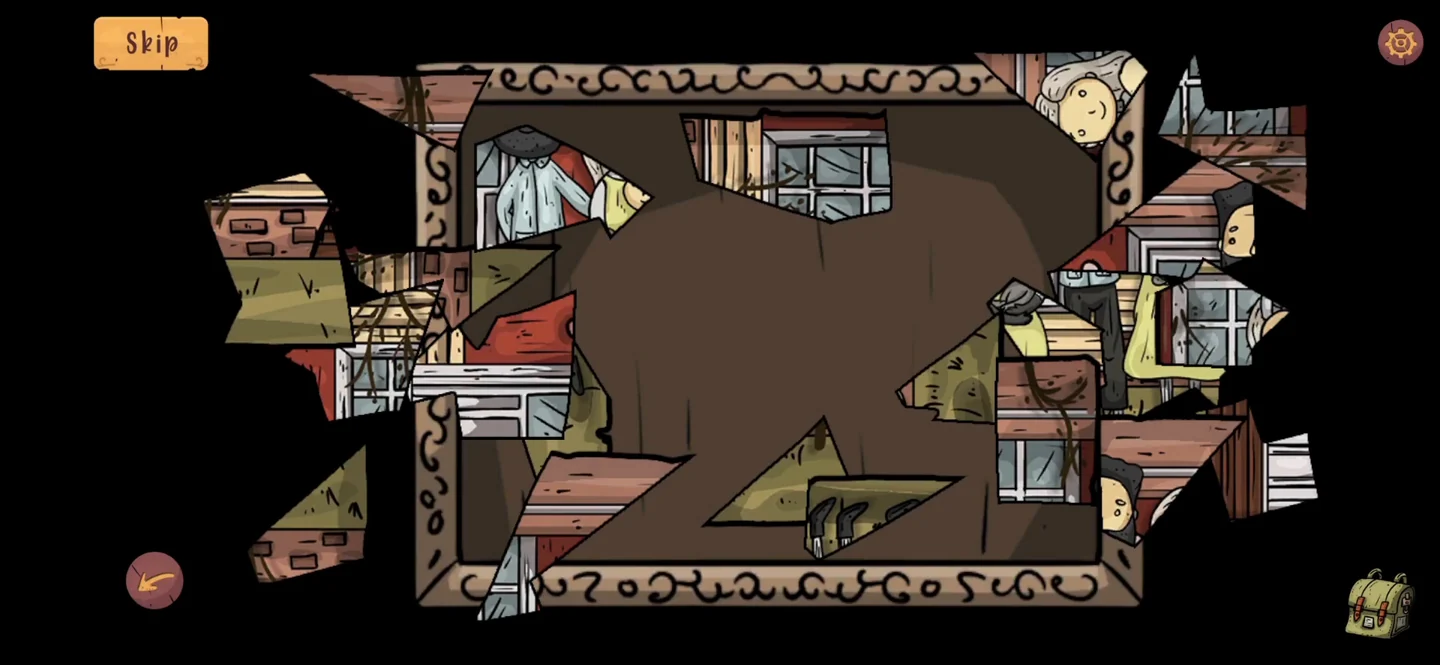
The broken picture above the piano needs the two photo pieces from the coffee table box and the photo piece from the top of the living room safe.
- Tap the large broken picture above the piano. Add all three photo pieces: the two from the coffee table box and the one from the top of the living room safe. Drag the fragments into place to rebuild the photo of a couple in front of a house. This takes a while, so build the edges and the two figures first. When it is complete, take the scroll with the mandala.
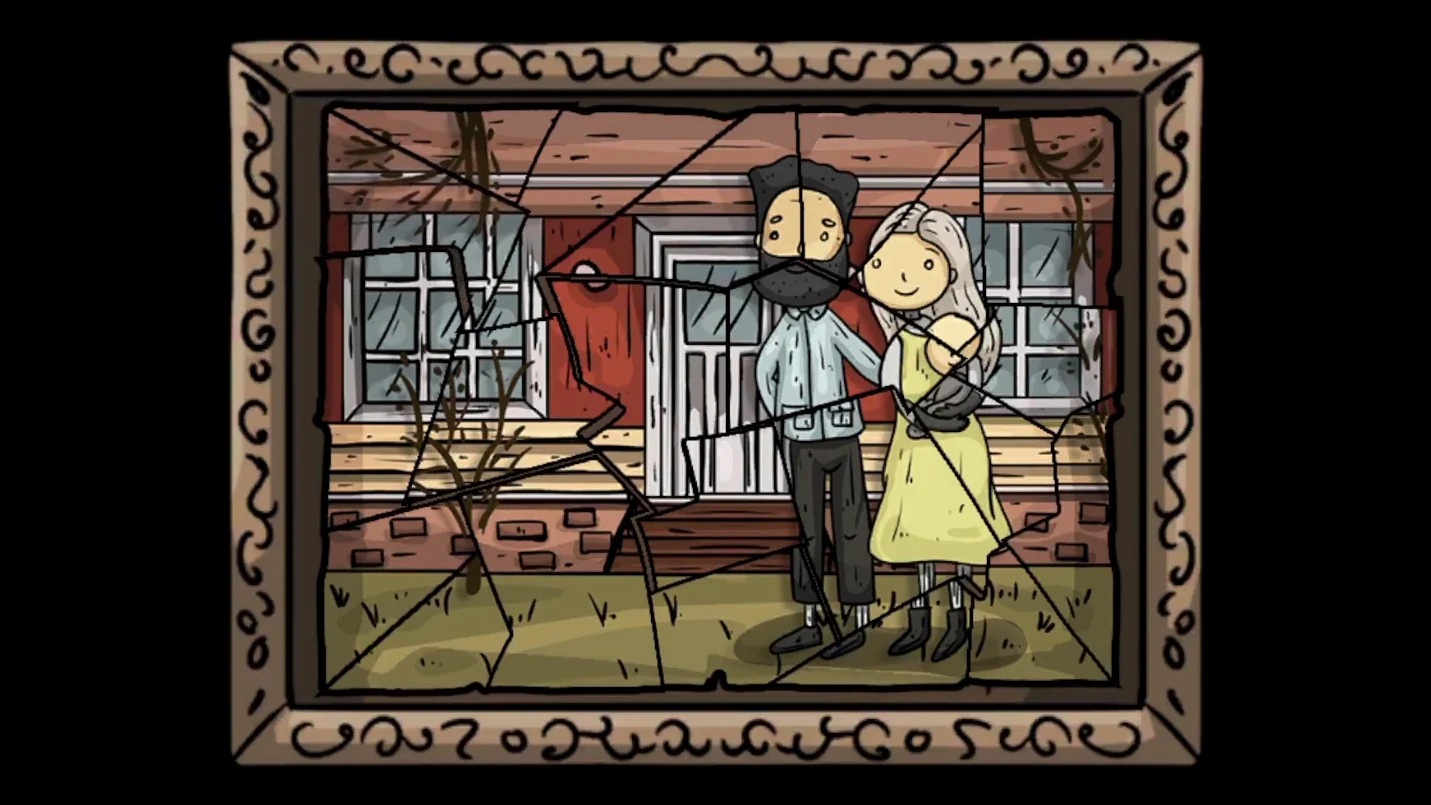
The finished photo.
Living Room Ring Dial
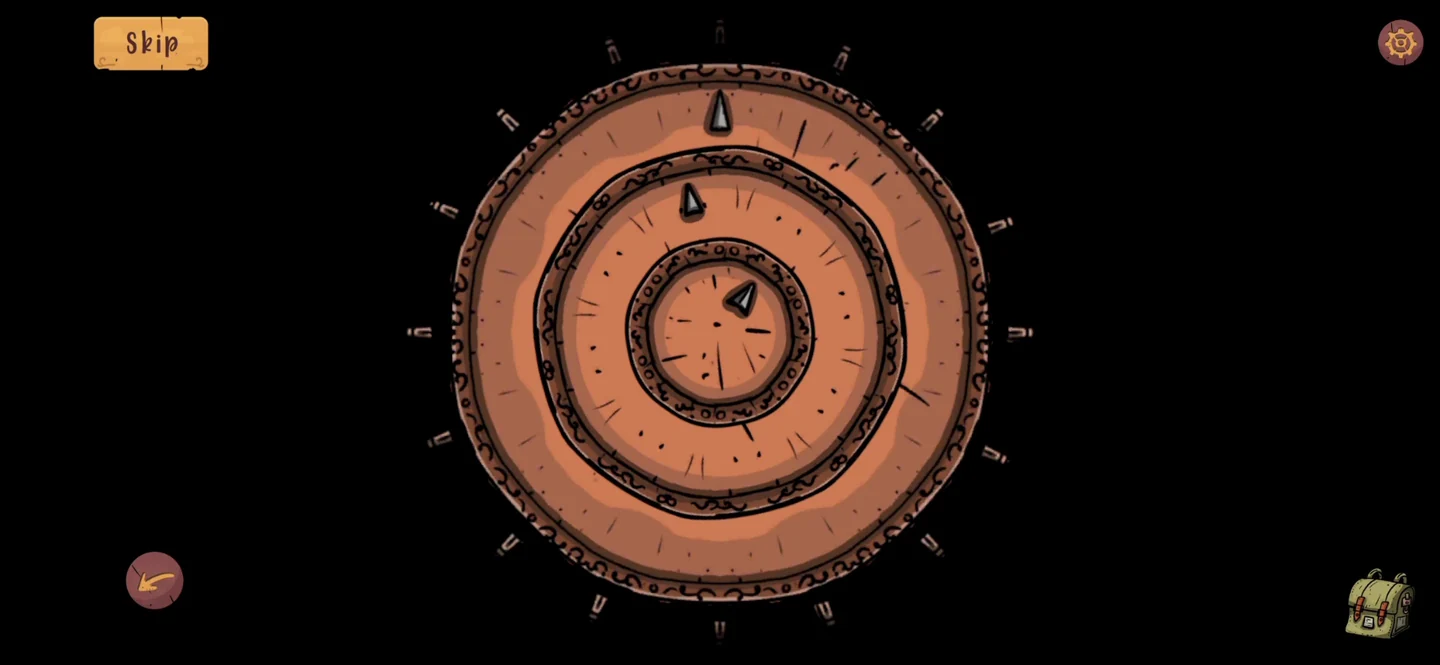
With the mandala scroll from the photo puzzle, you can now open the three-ring dial on the living room dresser.
- Open the ring dial on the dresser. The mandala scroll has the marks I, II and III near its corners. Turn the outer ring to point at I, the middle ring to II and the inner ring to III: that is top right, bottom right and bottom left. When the drawer opens, read the note: 52386 G.
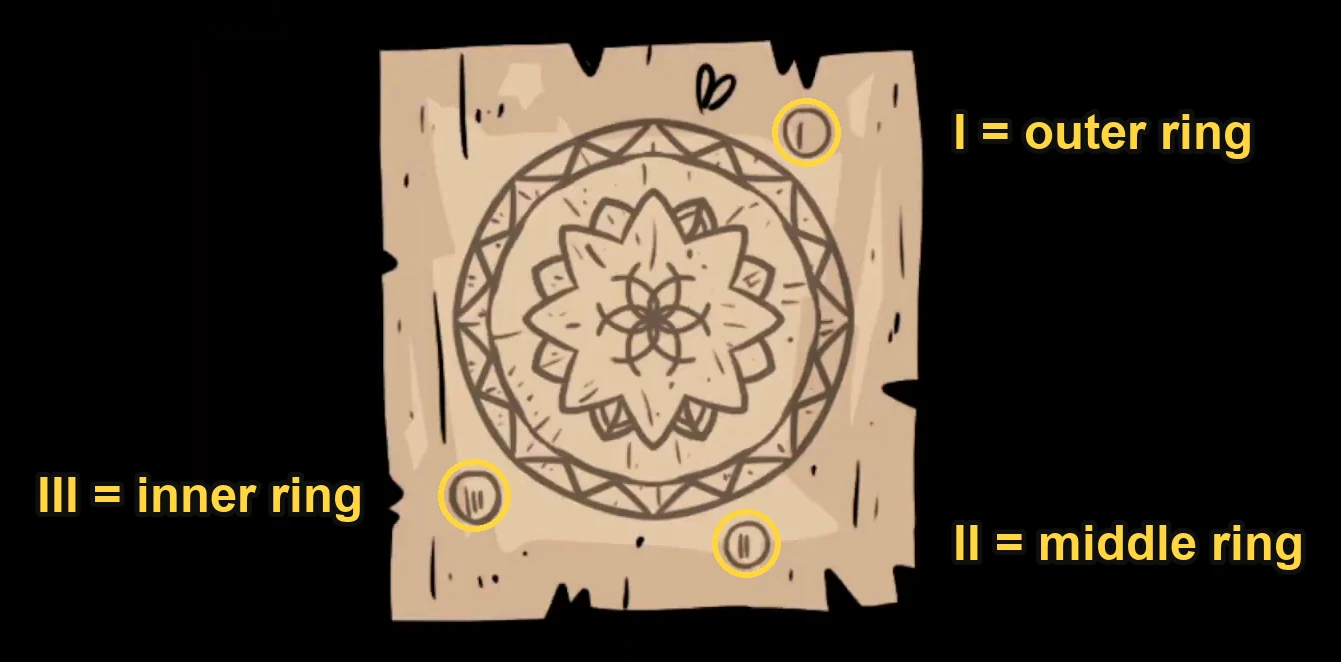
The mandala scroll. Each mark shows where one ring's pointer must point. 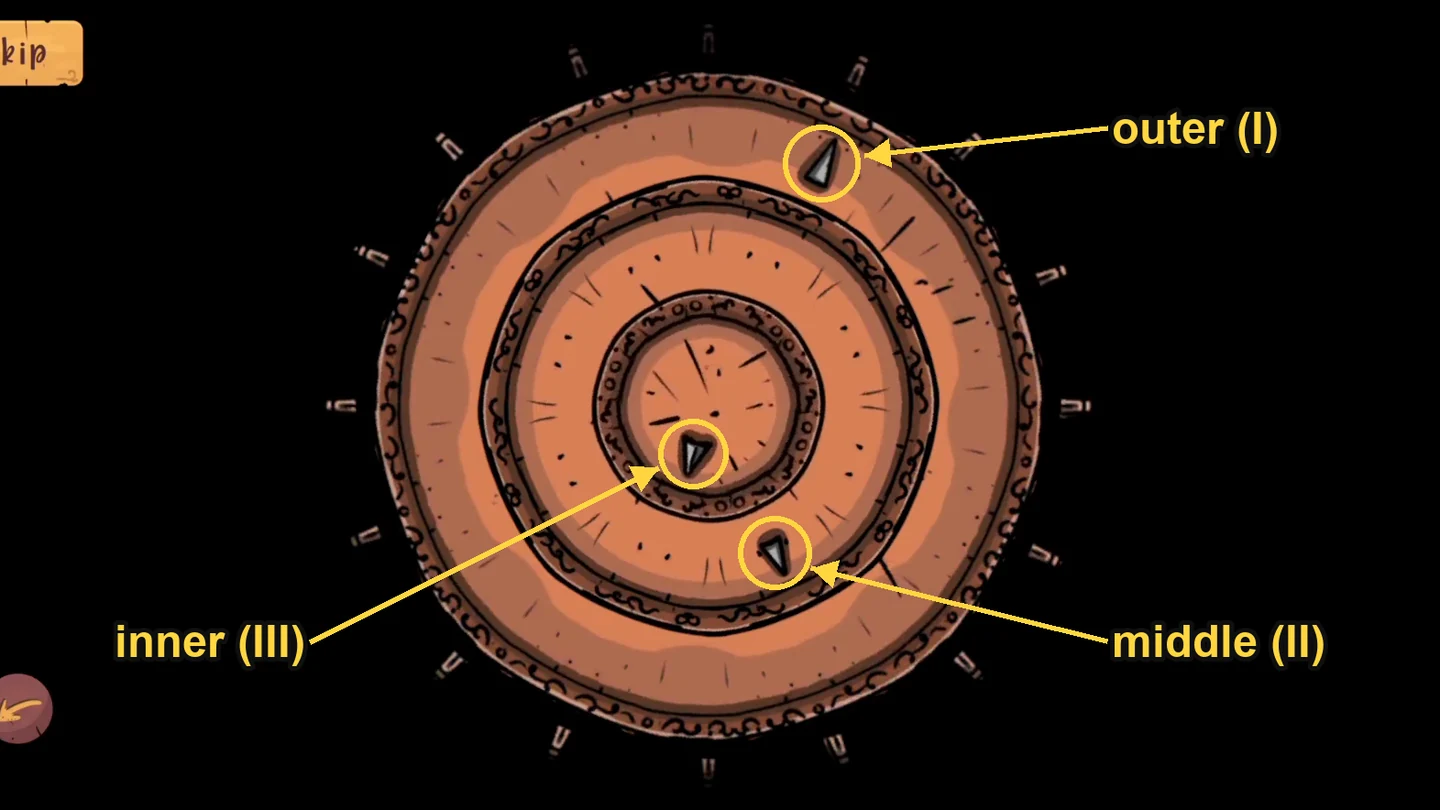
Solution: outer ring top right, middle ring bottom right, inner ring bottom left.
Workshop Cabinet Code
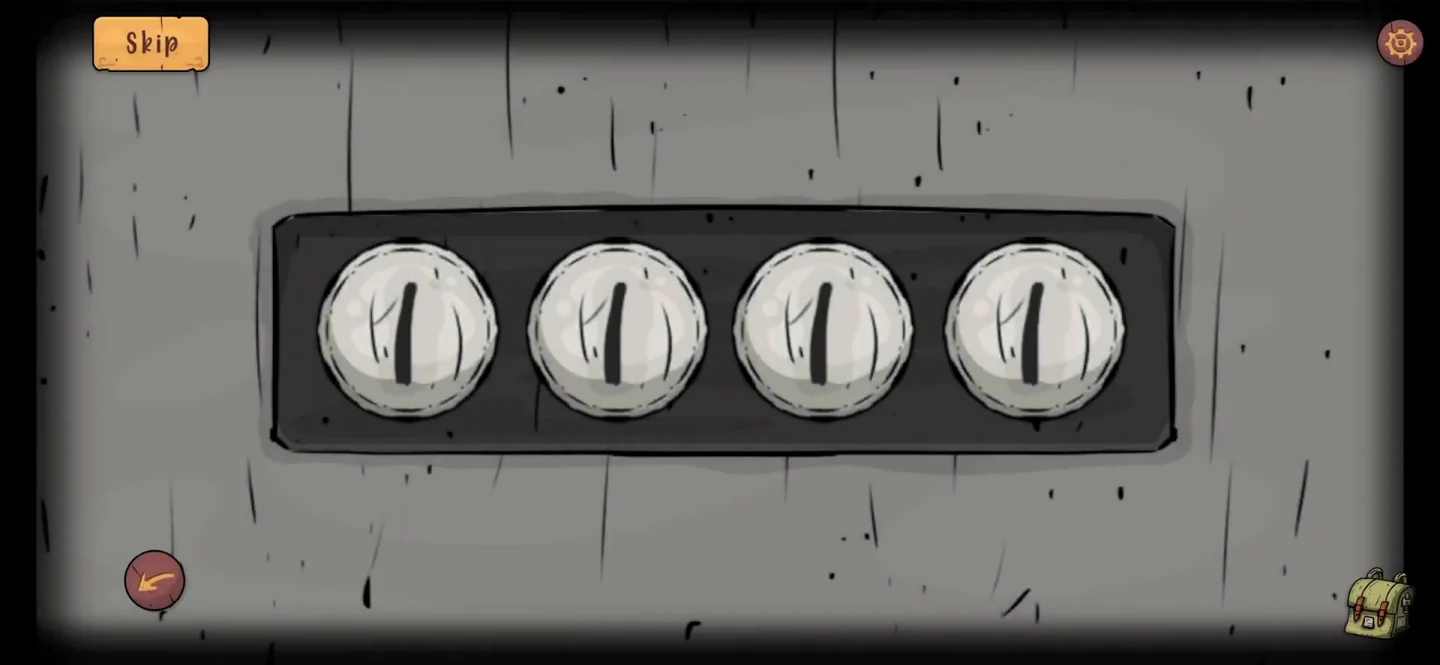
The right door of the green workshop cabinet has a four-digit lock. The torn diagram from the living room tells you the code.
- Open the 4-dial lock on the right door of the workshop’s green cabinet. Use the torn diagram. Each digit is the number of sides of the shape the matching dot circle points to: the 1-dot circle gives the first digit, the 2-dot circle the second, and so on. A spiral counts as 1. Spiral, hexagon, square and triangle give 1643. Take the gift box.CODE1643
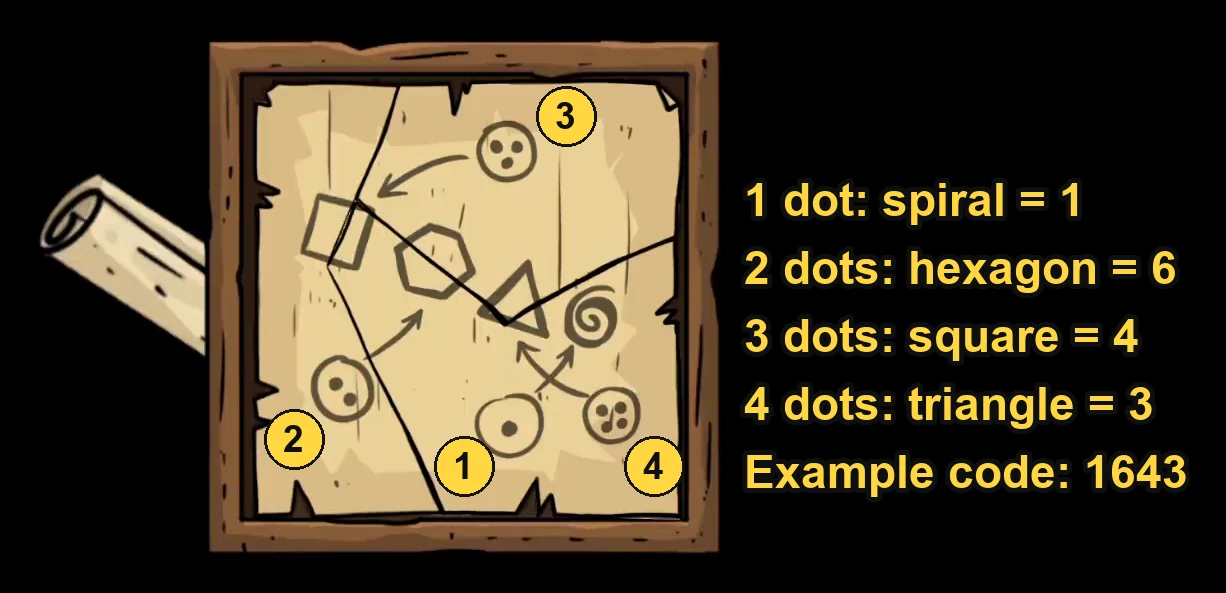
Each dot circle points to a shape, and its number of sides gives the digit.
Weighing Scale and Workshop Stands
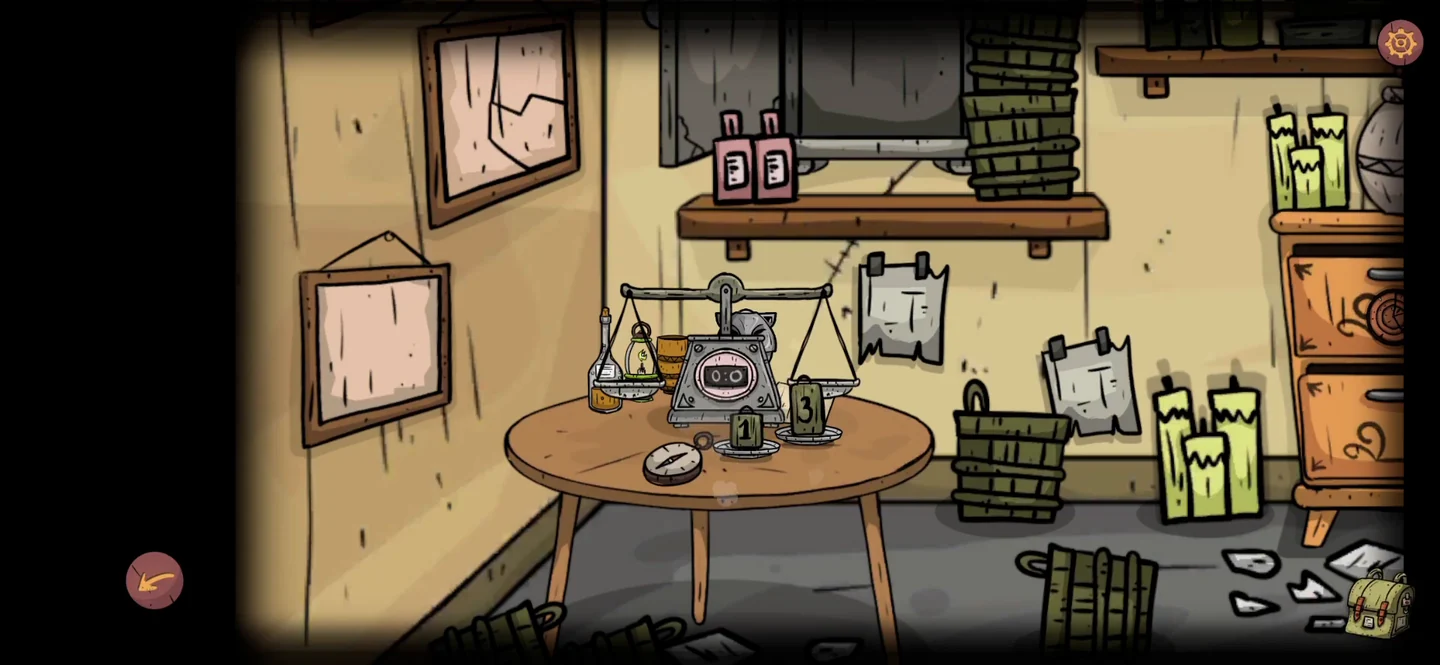
The note from the ring dial gives the order for five objects. The living room scale tells you which object is which.
- Once you have all five objects (gift box, wolf mask, mug, bottle and lantern), go to the scale on the living room table. Use the weights marked 1 and 3 on the scale in the room to place them on its right pan. Then tap the scale to open its weighing screen, with the five objects lined up above it. The display shows 4 for the two weights. Put the gift box, wolf mask, mug, bottle and lantern on the left pan one at a time, subtracting 4 from each reading. In this game they weighed 2, 8, 3, 5 and 6.
- Go to the five grey stands on the lower shelf of the workshop and use the five objects on them, in any order. Once all five are on the stands, tap the shelf again to open the ordering screen. Arrange the objects on its five slots so their weights read 5 2 3 8 6, as on the note. From left to right: bottle, gift box, mug, wolf mask, lantern. Take the gold coin that rises from the mug.
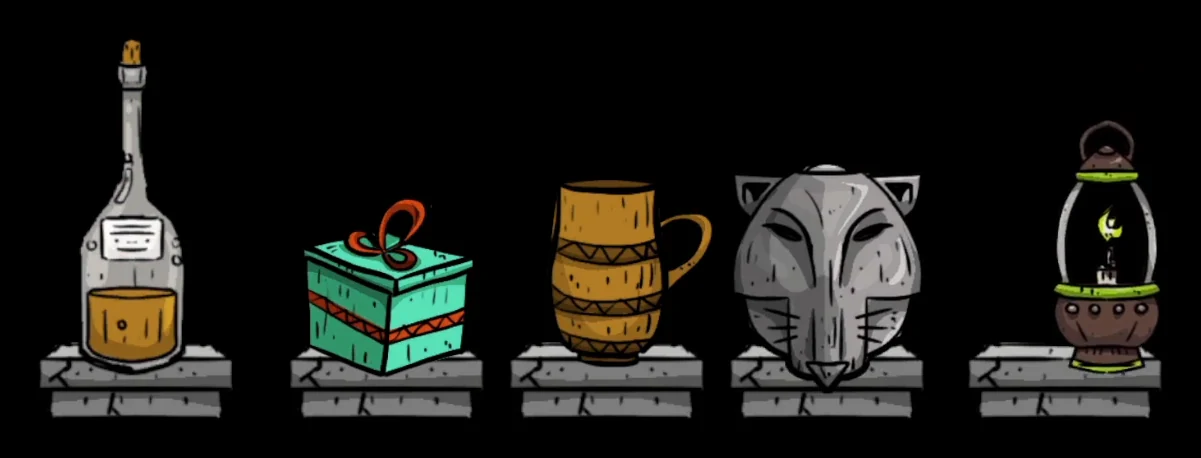
The objects in the correct order on the ordering screen.
Workshop Door
The final lock of Chapter 1 is on the workshop’s right wall and needs the three gold coins.
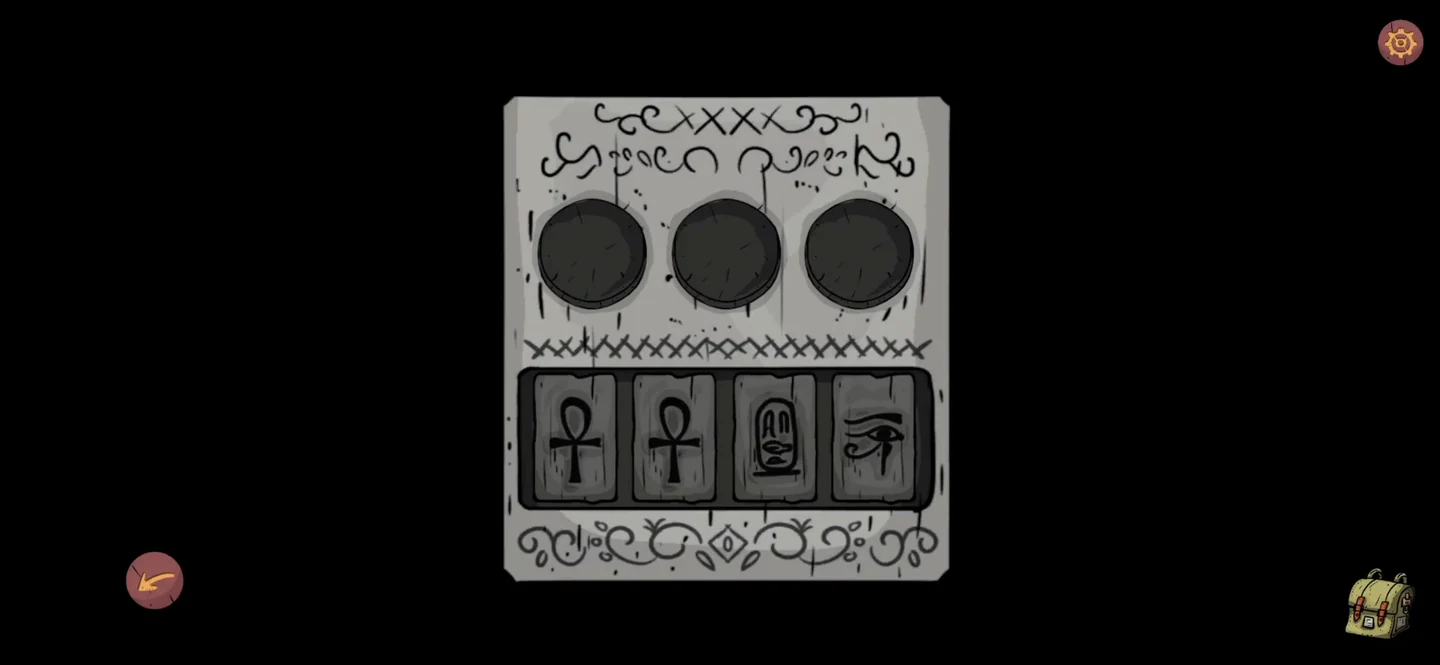
- Tap the lock panel on the workshop's right wall and insert the three gold coins. Arrange them to match the spiral paper, from left to right: spiral, zigzag, square spiral.
- Tap the four tiles below the coins to change their symbols. Set them to match the symbols carved behind the hallway pyramid picture, in the same order: feather, cartouche, pillar and ankh. The door opens and a story scene ends the chapter.
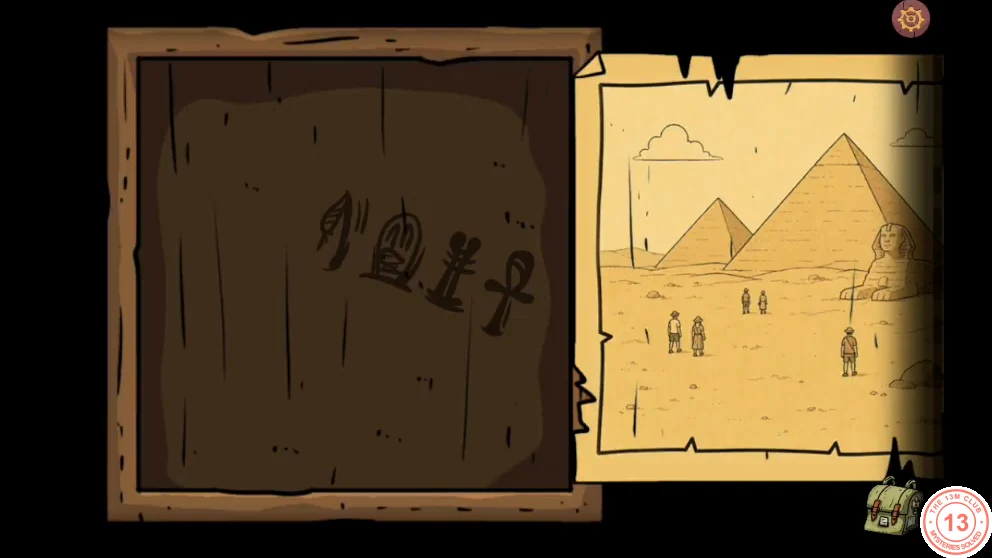
The symbols carved behind the pyramid picture. 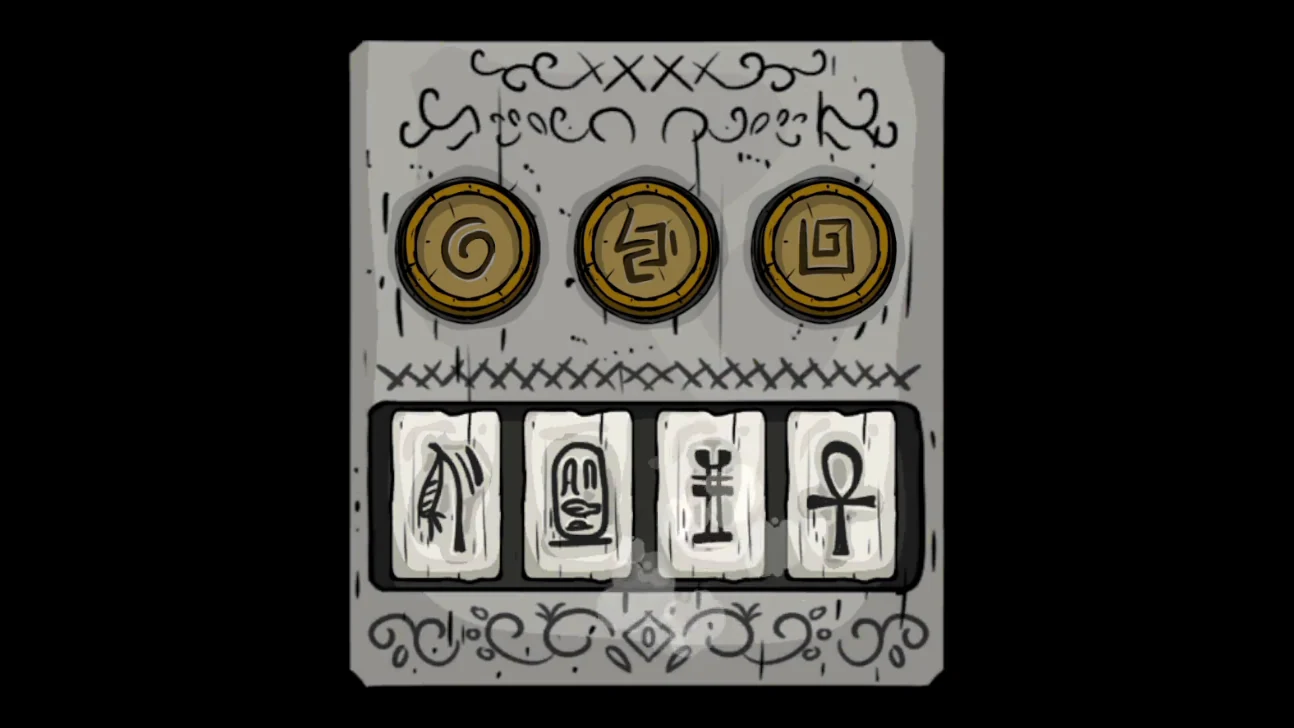
The coins and tiles in place.