Brick Courtyard Arrival
The ritual leads Dakota and Sebille to an industrial courtyard.
- Decision 3: Sebille asks how you are holding up. "Fine. I need to do this for mom and myself." costs 35 coins and adds 1 point (Confident). "Awful! I can't believe this is happening!" is free and adds 0 points (Terrified).
- Listen to Sebille. The search-ritual task is complete, and a new task to find the killer's hideout begins.
- Click the payphone booth. Use the shears to cut the blue tape wrapped around the receiver and take the strip of tape. Also take the cyan rod and the taser from the side of the phone.
- Click the switch box to the left of the shutter. Use the blue tape on the exposed wires, then press the green button when the cover closes. The shutter opens; go into the depot.
Alarm Box: LED Flask Puzzle
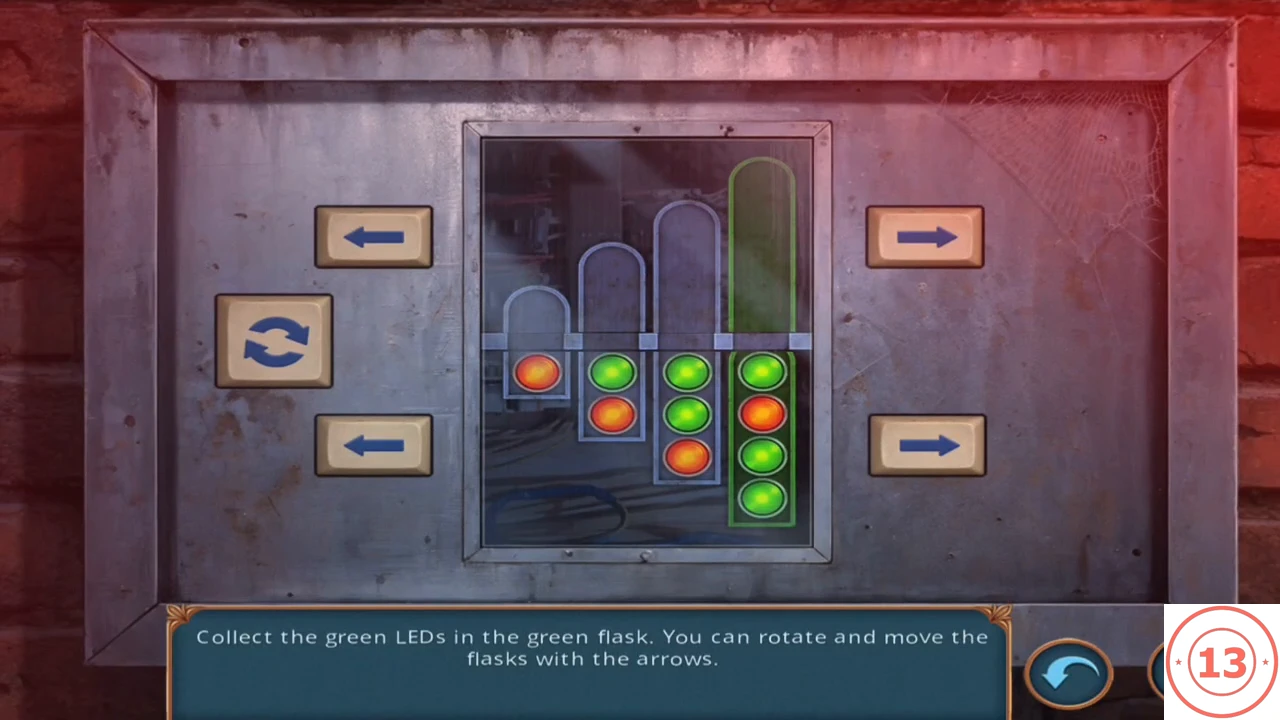
An alarm guards the depot and would bring the police.
- Click the alarm box with the red light and open its panel with the tool roll.
- Collect the four green LEDs in the green-outlined flask. The arrows shift the upper or lower halves of the flasks left or right in a loop, and the rotate button flips the frame so the LEDs fall. This sequence from the same starting layout works: top-right arrow once, rotate, top-right arrow twice, rotate, top-left arrow twice. If your layout differs, line up an empty upper half with green LEDs below it, then rotate to drop them in.
Depot Machine, Bike and Guard Dog
Gather the parts needed for the forklift.
- Click the punch-card machine in the depot (it has no power yet). Take the pizza slice and the pliers.
- Click the keypad by the inner doorway that says NO ACCESS. Use the taser on it to give it a jolt. Access is authorised and the shutter opens.
- Click the bike and cut its chain lock with the pliers. Take the bike chain. The green safe here needs a letter code, which you will find later.
- Go back to the courtyard. Give the pizza slice to the guard dog. When it leaves, take the gear from the doghouse.
Forklift Chain-Ring Puzzle
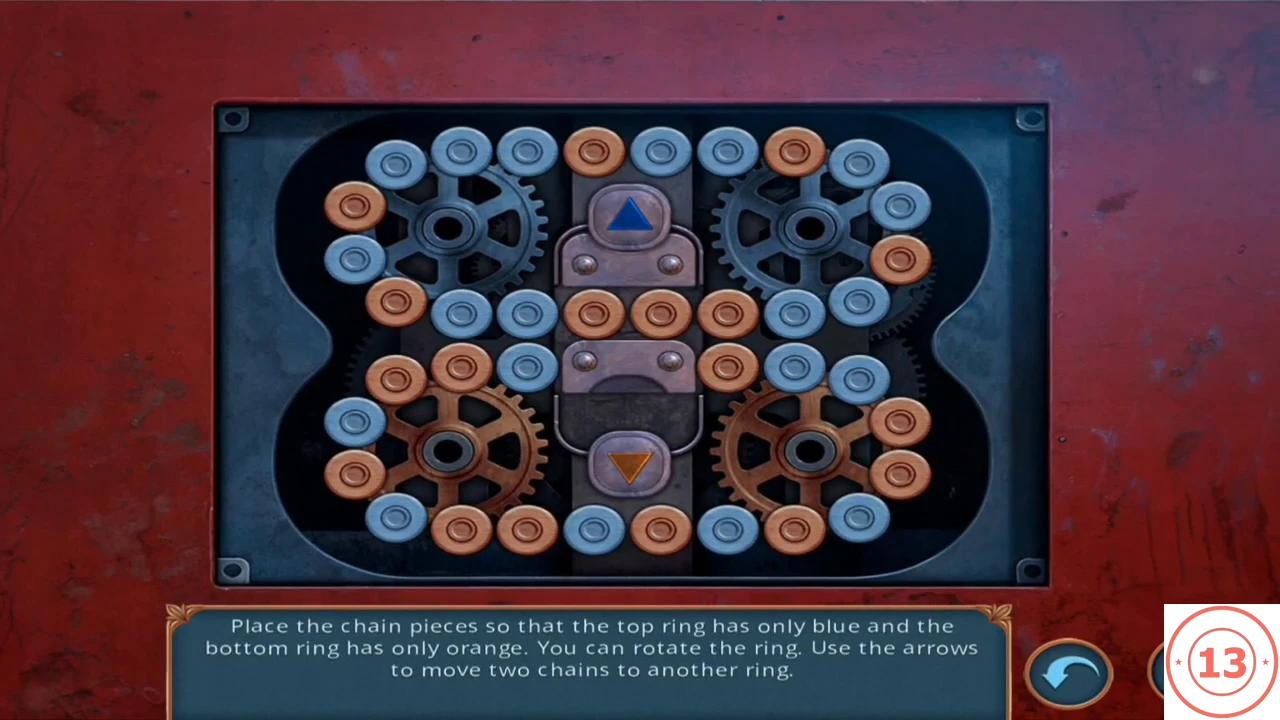
The forklift engine is missing its gear and chain.
- Click the forklift engine on the left of the courtyard. Place the gear and the bike chain.
- Make the top ring all blue and the bottom ring all orange. Drag a ring to rotate it. The down arrow moves the pair of pieces in the shared centre slot from the top ring to the bottom ring, and the up arrow moves a pair back. Rotate the top ring to bring two orange pieces into the slot and press down. Rotate the bottom ring to bring two blue pieces into the slot and press up. Repeat until finished. It takes many moves, so follow this method rather than a fixed list.
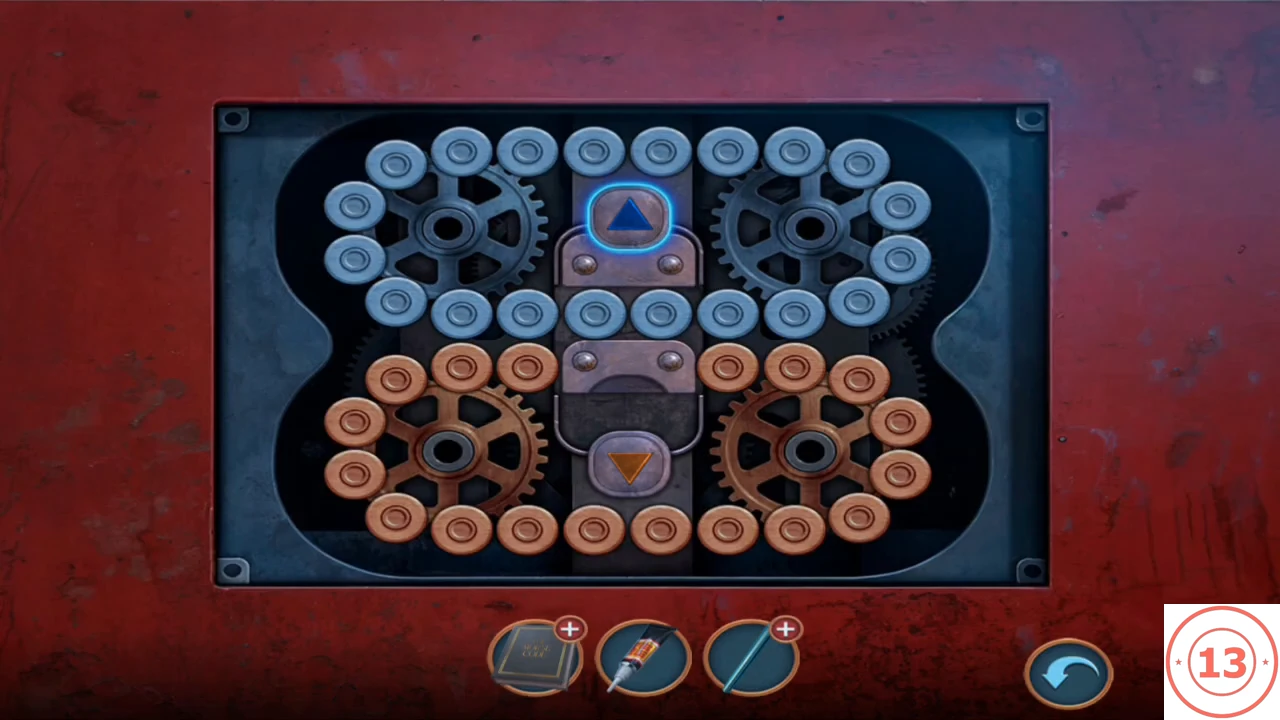
Target state: the top ring is all blue and the bottom ring all orange. - The forklift swings aside. Take the crutch that it uncovers.
Rail Switch and Rail-Car Door Puzzle
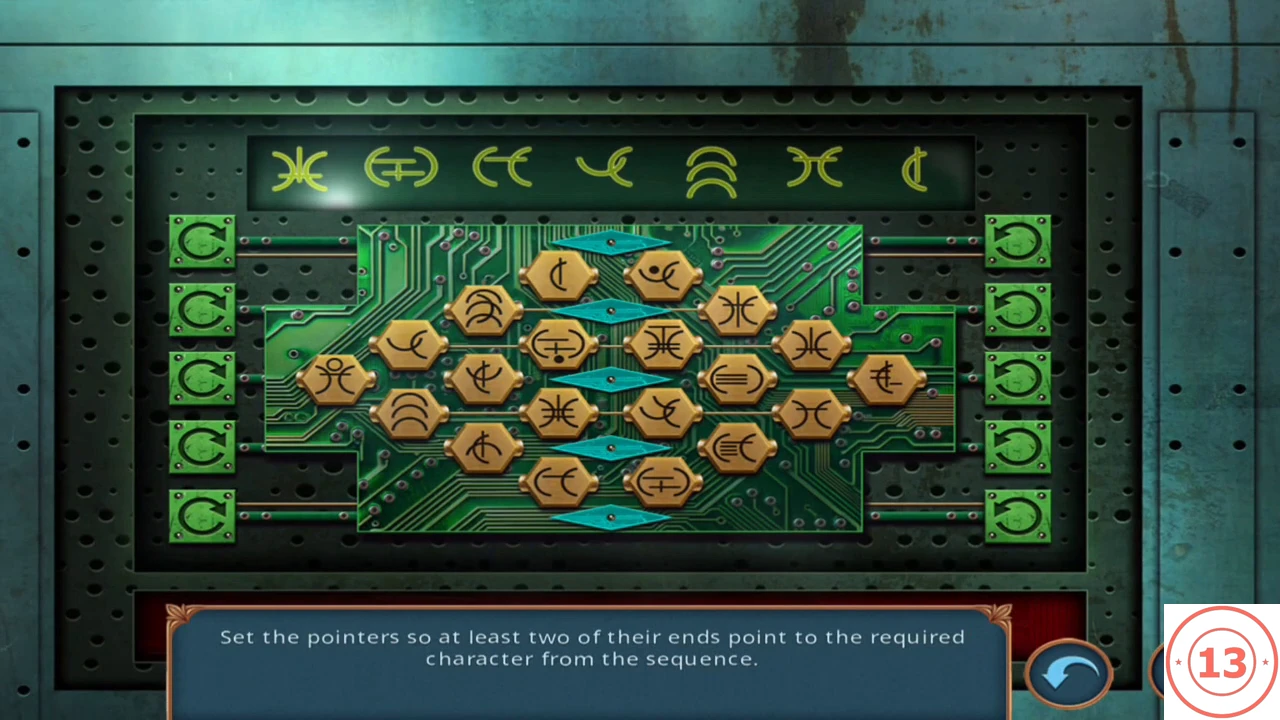
Move the rail car and open its door to reach the hideout.
- In the depot, click the rail switch box beside the minecart. Put the crutch in the socket as a lever and pull it.
- Click the teal rail-car door to open its circuit panel.
- The seven symbols at the top light up one at a time. For each one, turn the pointers so that at least two pointer ends touch hexagons showing that symbol. Each of the five cyan double-ended pointers sits in its own row and turns with the green buttons on either side. When a symbol turns green, move to the next one.
Hideout: Chemical Shelf Hidden-Object Scene
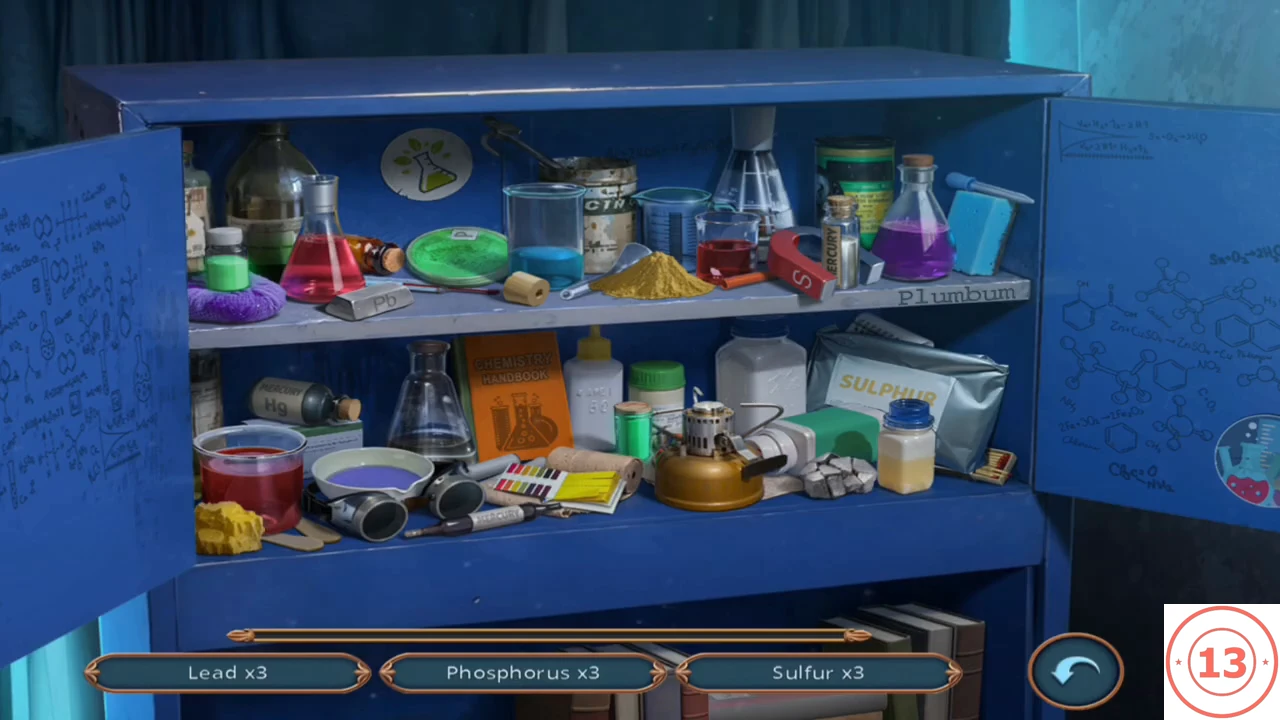
Inside the killer's rail-car lab, search for evidence.
- Decision 4: Sebille says "My sisters are in danger and you're hurt - all because of him! Let's scour the area for anything we can use to bring this to an end." "You're in danger too! Aren't you scared?" costs 35 coins and adds 1 point (Worry about Sebille). "Let's get to it." is free and adds 0 points (Get to the point). A new task asks you to find evidence in the hideout.
- Click the carved box on the desk on the right and take the killer's mask. The batteries on the desk are wired to a live cable, so you need protection before taking them.
- Click the shelf on the left side of the red fridge and take the screwdriver handle and the caduceus emblem.
- Click the blue cabinet at the back. Repair its broken emblem with the glue tube, then place the caduceus emblem. The cabinet opens.
- Find three items each for lead, phosphorus and sulfur, then mercury when it replaces a finished group. Sulfur: the yellow powder pile, the SULPHUR bag and the yellow rock. Mercury: the MERCURY vial, the Hg bottle and the thermometer. Phosphorus: the green petri dish, the small green bottle and the green tube. Lead: the "Plumbum" label on the upper shelf edge, the grey metal chunks beside the brass burner and one more lead object at the foot of the red flask on the left of the upper shelf. Your reward is a latex glove.
Punched-Card Machine and Morse Code
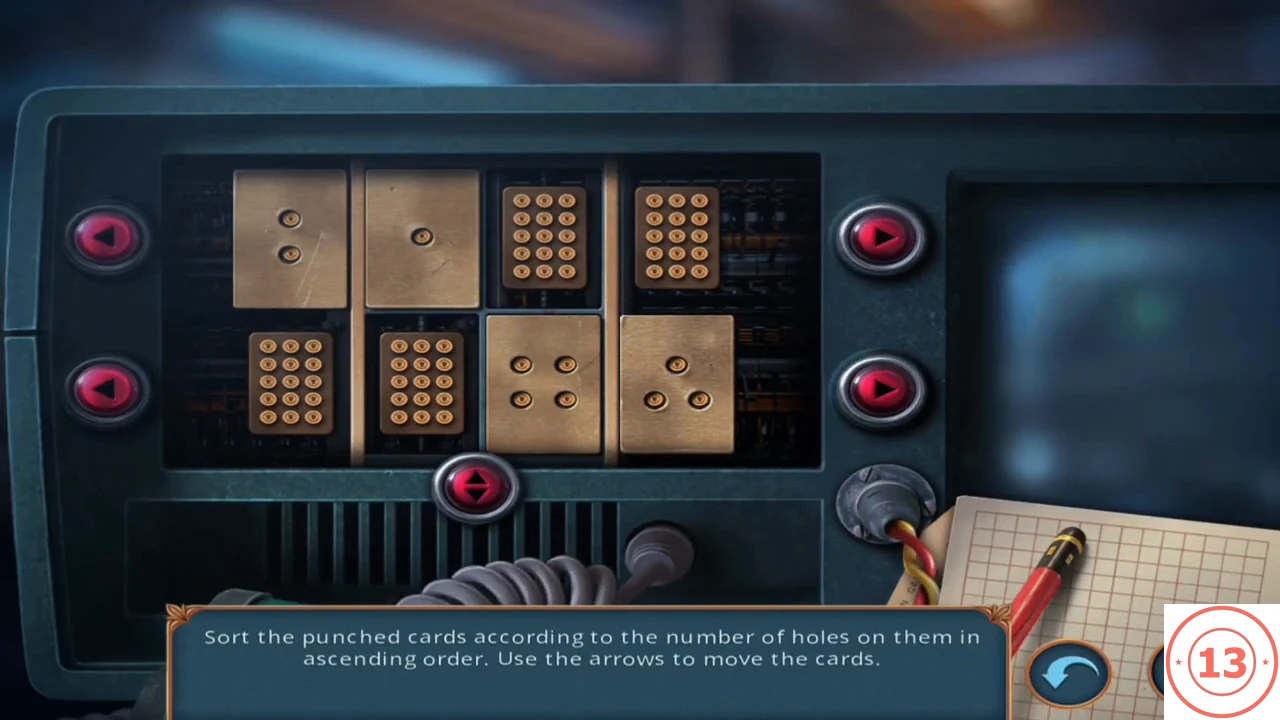
Power the depot machine and decode its message.
- Put on the latex glove and take the batteries from the desk.
- In your inventory, attach the screwdriver handle to the cyan rod.
- Go to the depot's punch-card machine and insert the batteries.
- Sort the punched cards by number of holes in ascending order. The arrows beside each row slide that row (it wraps around). The centre button swaps the top and bottom cards in the two middle columns. The starting layout is fixed. Example of an accepted finish: top row 1, 2, 15, 15 and the bottom row 15, 15, 3, 4 (the four dark cards have 15 holes each).
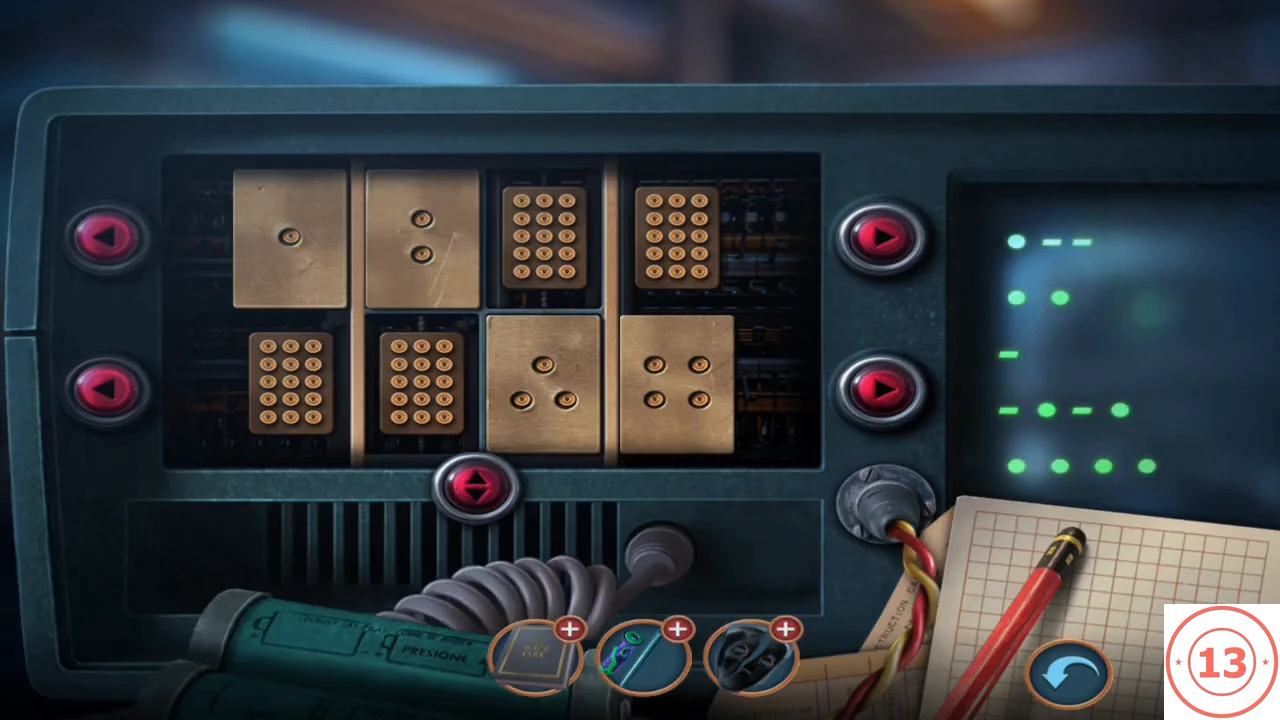
Example accepted finish from step 4, with the Morse message on the screen. - Take the note with the code. Open the Morse code book in your inventory and add the note to decode it: WITCH.CODEWITCH
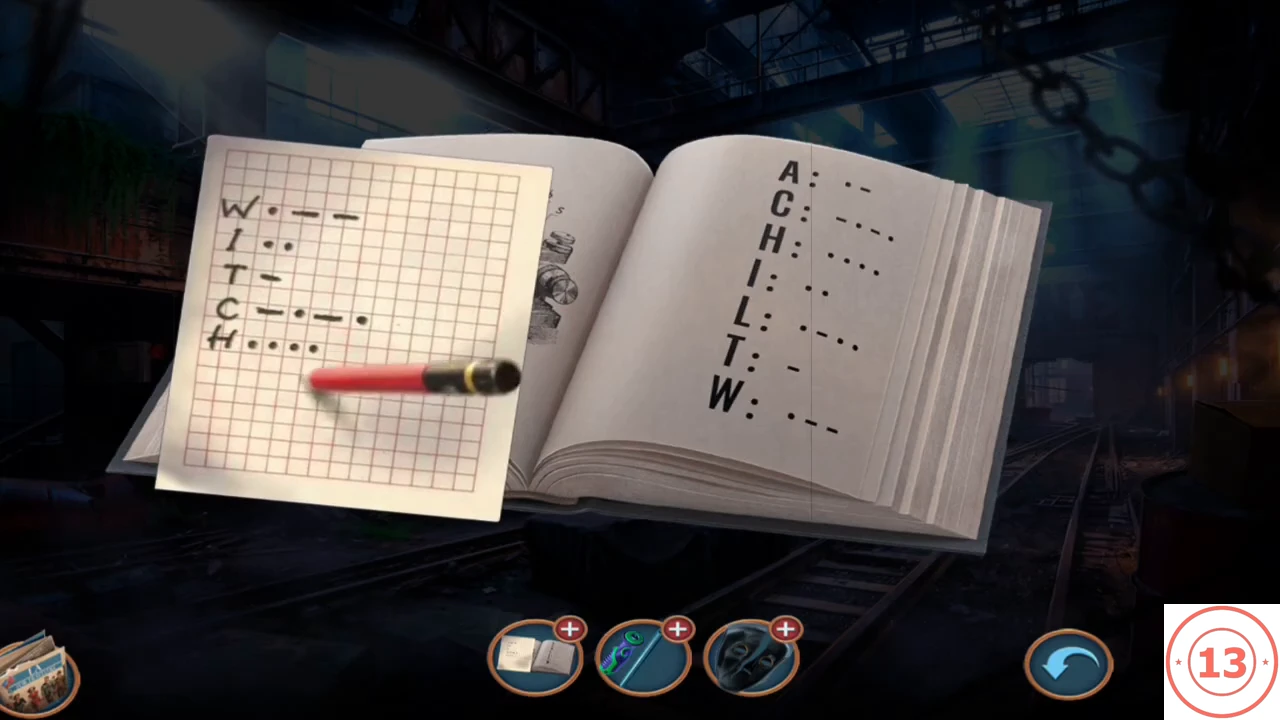
The Morse book decodes the note to WITCH.
Green Safe and Frozen Fridge: Flame Puzzle
Use the Morse code to open the safe, then thaw the fridge.
- In the back of the depot, enter WITCH on the green safe's keypad. Take the glass lenses and the grey control part.CODEWITCH
- Open the killer's mask in your inventory and fit the lenses.
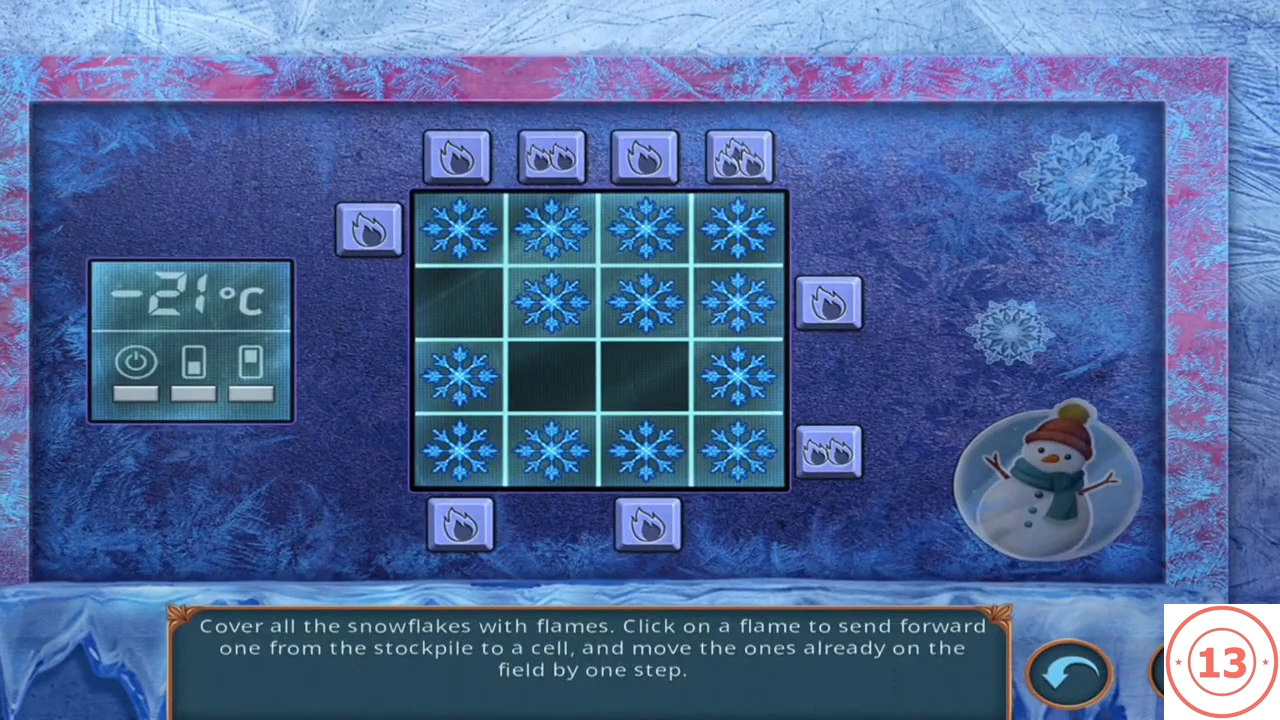
- In the hideout, click the frozen keypad on the red fridge (-21 °C) and use the control part to start the flame puzzle.
- Cover all 13 snowflakes with flames. Clicking a flame stack outside the 4x4 grid pushes one flame into the grid and moves flames already in that line forward one step. In columns from the left and rows from the top, this order works: top column 1, top column 2 twice, left row 1, top column 3, right row 2, top column 4 three times, bottom column 3, right row 4 twice, bottom column 1.
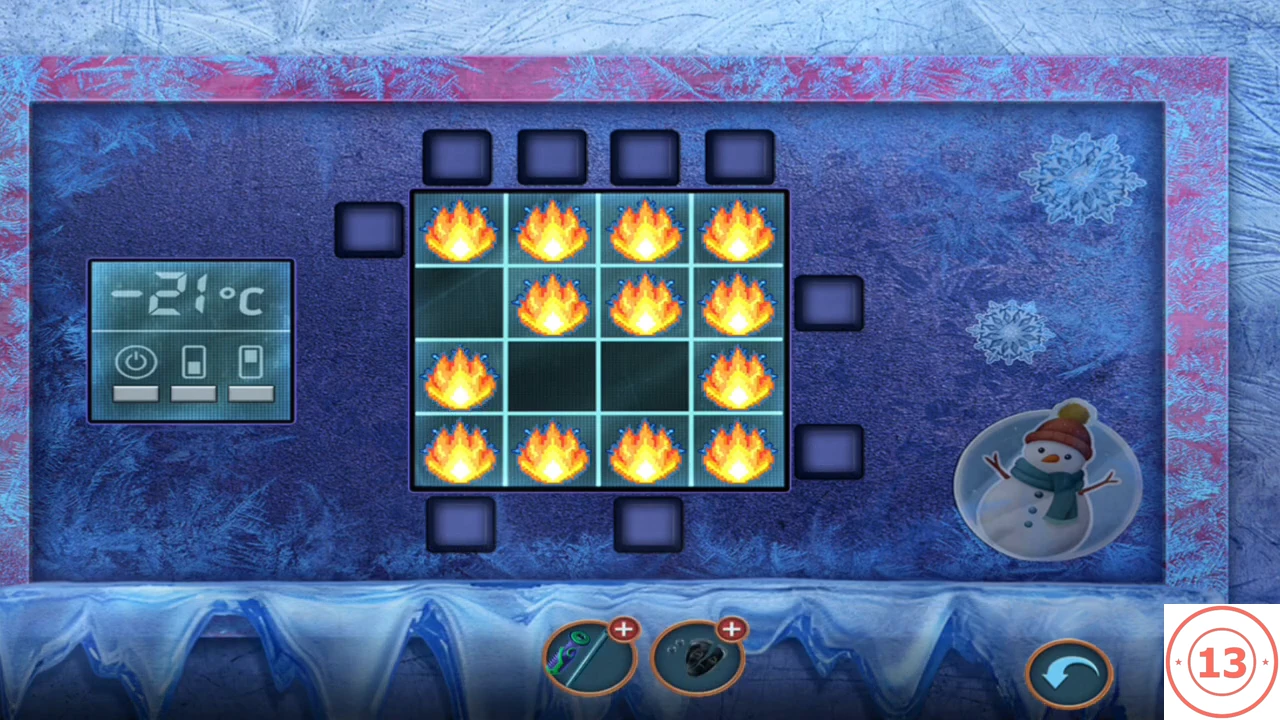
Completed state: every snowflake is covered with flames. - Open the fridge and take the ladle.
Barcode Receipt and the Hidden Corkboard
Finish the screwdriver, then match a barcode to reveal the killer's secret.
- In the courtyard, dig in the mound of earth to the right of the doghouse with the ladle. Take the flat screwdriver bit.
- Add the bit to the screwdriver in your inventory.
- Click the payphone. Pry off its upper panel with the screwdriver and take the barcode receipt.
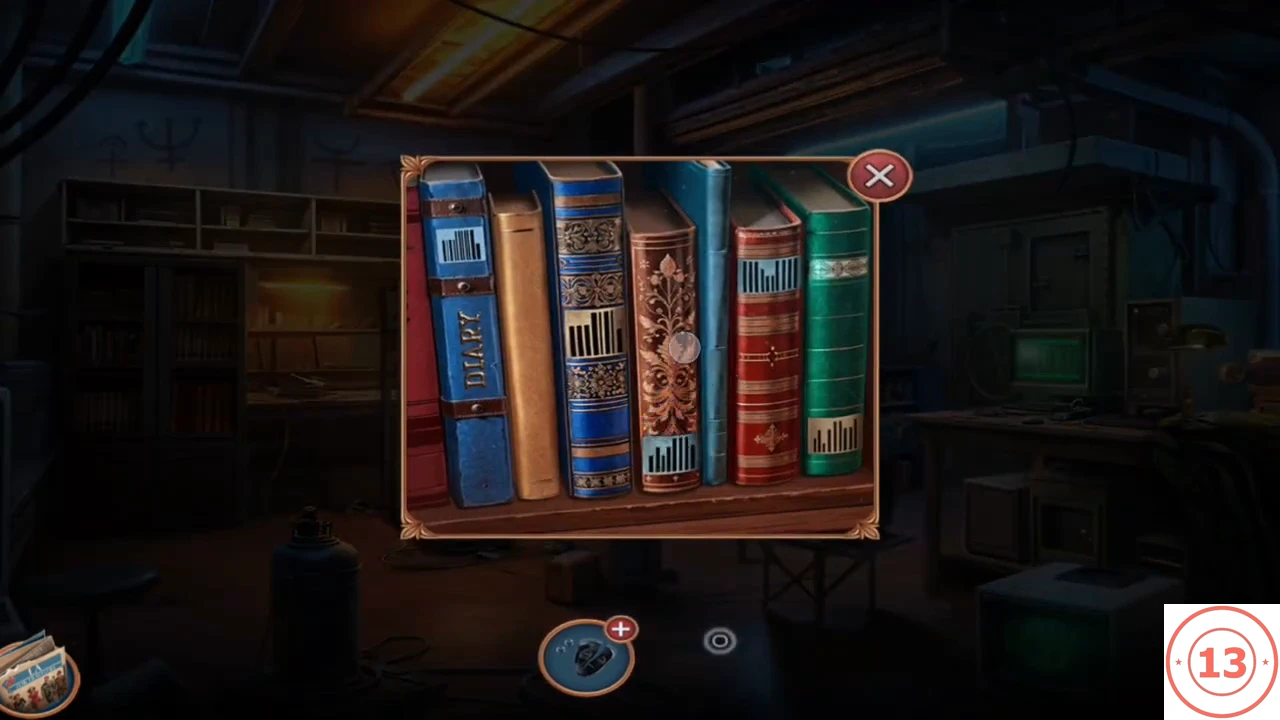
- In the hideout, click the bookshelf on the left and place the receipt. Its barcode has bars rising in height; find the book with the same barcode on its spine (the brown floral book) and pull it. The shelf swings open.
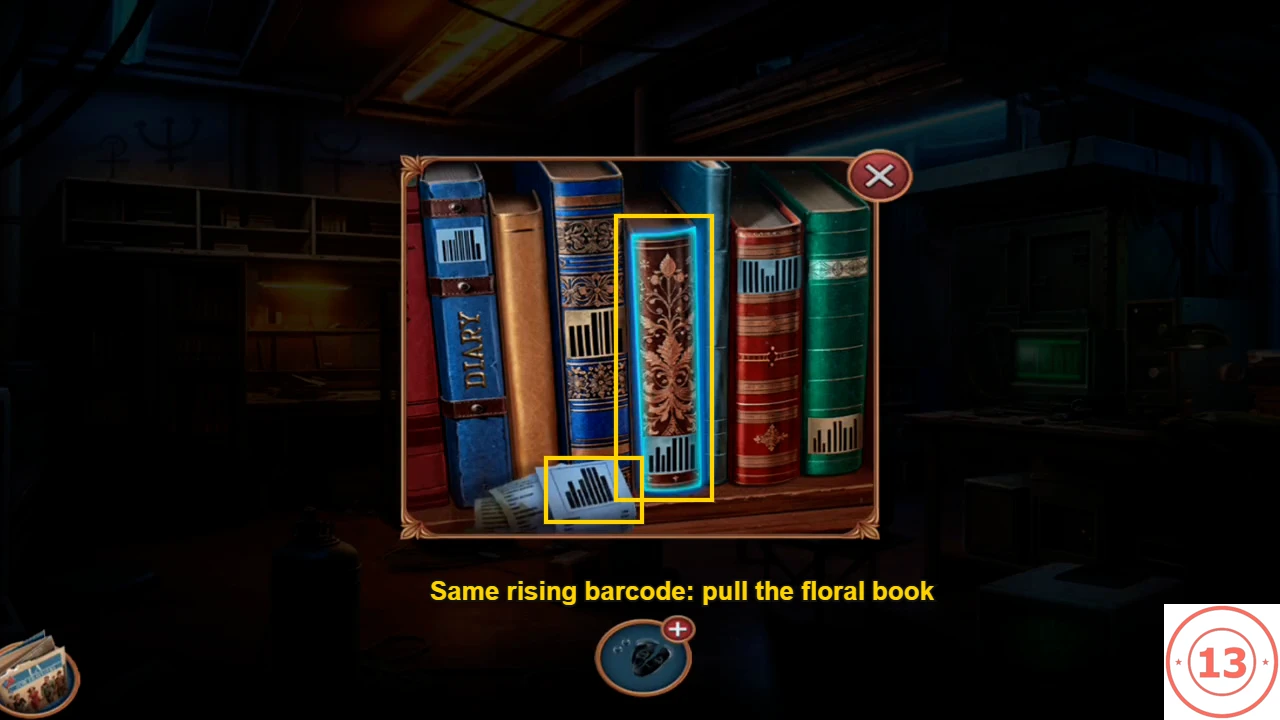
Match the receipt's rising barcode to the brown floral book and pull that book. - Click the hidden compartment to see the "DEATH TO WITCHES" corkboard. Sebille realises she is the killer's next target, and smoke starts filling the room.
- Decision 5: "You should do something!" is free and adds 0 points (Panic). "You want me to leave you?" costs 25 coins and adds 2 points (Leave Sebille). "I'm not going without you!" costs 35 coins and adds 4 points (Help Sebille). The observed Panic and Help Sebille routes both continue to the mask-making puzzles below. Leave Sebille's continuation is unverified.
Riddle Cabinet Hidden-Object Scene
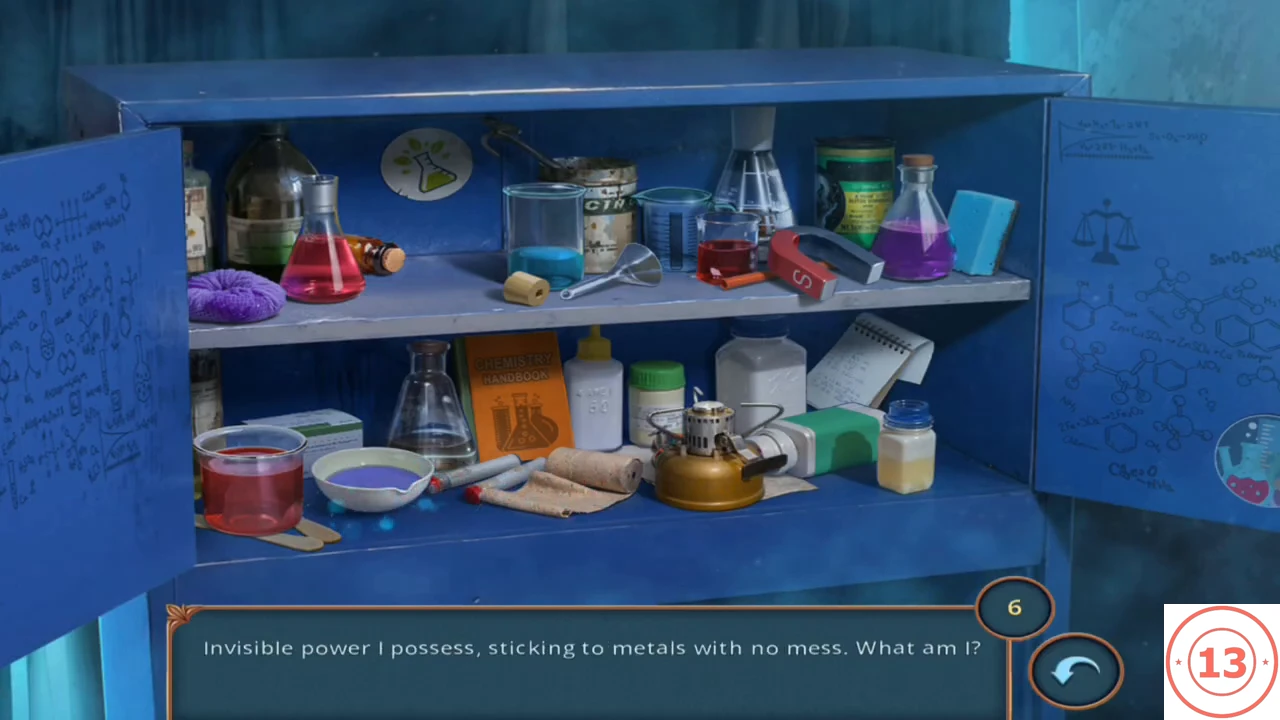
Dakota needs something to help against the smoke.
- Click the blue cabinet on the left to open the riddle search.
- Solve each of the 12 riddles by clicking the matching object. The answers are the dropper, the scales drawn on the right door, the thermometer, the matchbox and the litmus paper. Then find the goggles, the horseshoe magnet, the notepad, the chemistry book, the measuring cylinder, the funnel and the burner. Your reward is a soaked handkerchief.
Gas Mask and the Escape Maze
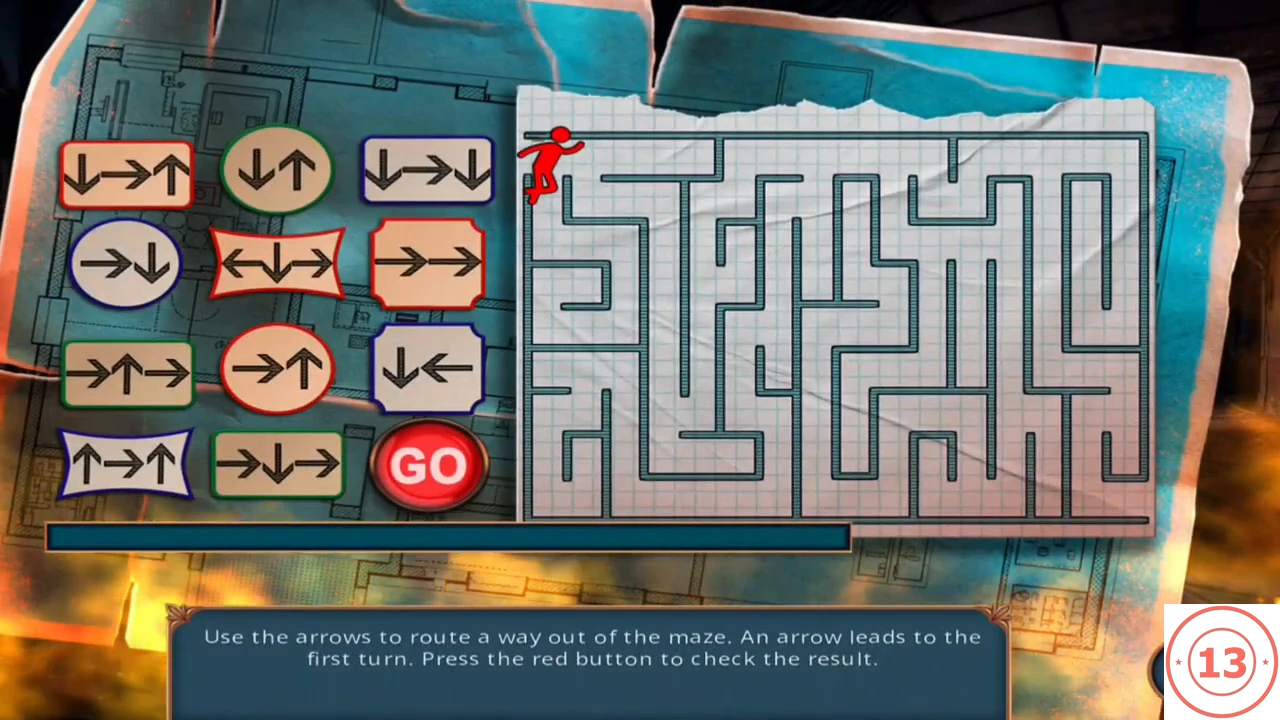
Build a gas mask for Sebille and find the way out of the burning hideout.
- Click the carved box on the right desk and use the gold ring in its flower-shaped keyhole. Take the red thread and needle.
- Open the mask in your inventory. Stitch the crack with the thread and add the soaked handkerchief to make a gas mask. Give it to Sebille.
- Route a way out of the maze on the blueprint. Each arrow tile leads to the next turn; press the red button to test your route. Place these tiles in order: right-down-right, down-right-up, up-right-up, right-right, right-down, right-up-right, down-right-down, left-down-right, then press the red button. The tiles down-up, right-up and down-left are not used.
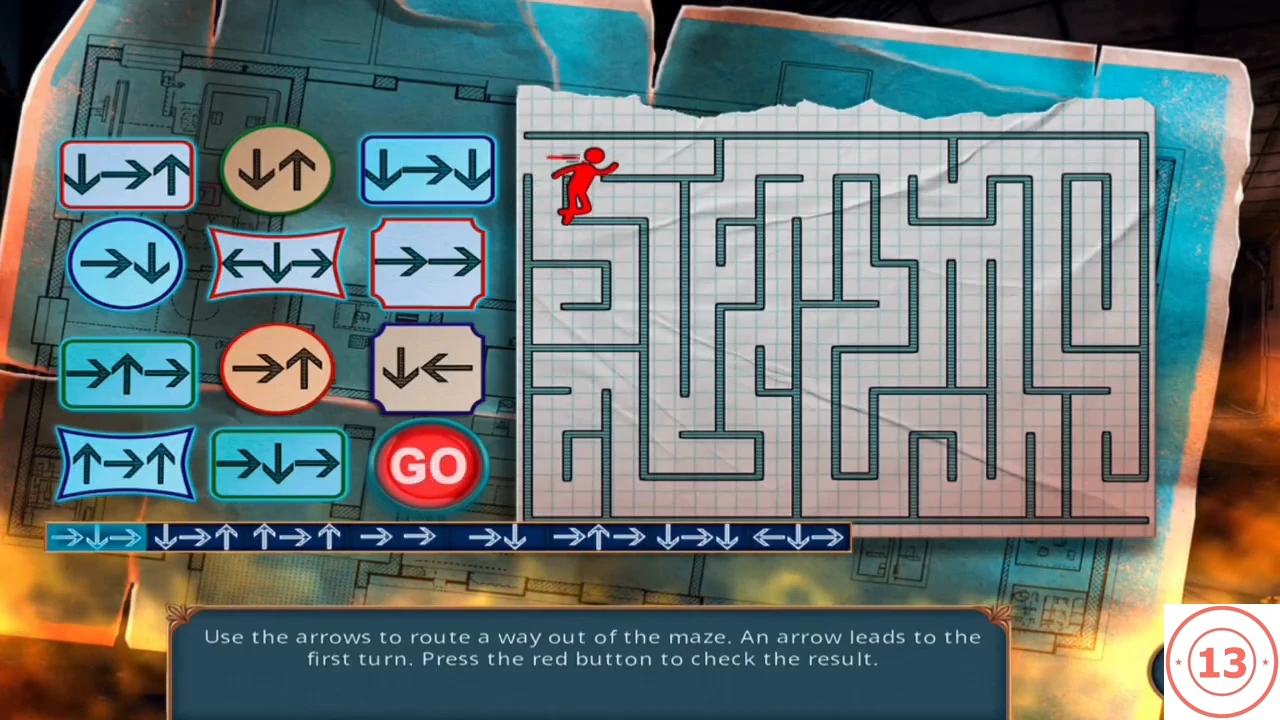
The tile order from step 3 placed in the bottom bar, ready to test with the red button. - Dakota and Sebille escape. The Decision Points journal opens next.
Decision Points and Episode Endings
The five dialogue decisions add up to 13 Decision Points. At the end, the journal shows three outcome cards marked 0, 4 and 10 points, and highlights the one you earned. This guide covers the 4- and 10-point outcomes.
- Scoring summary: Decision 1 Ask for advice +1. Decision 2 Accept Sunlight's offer +6. Decision 3 Confident +1. Decision 4 Worry about Sebille +1. Decision 5 Leave Sebille +2 or Help Sebille +4. All other options add 0. The maximum is 13. Without accepting Mr. Sunlight's offer you can reach at most 7, which is below the 10 shown on the top card. The journal does not state the exact point range for each card. Each playthrough earns one card; to see another outcome you have to play the episode again with different choices, and the checked gameplay does not show a replay or reset option.
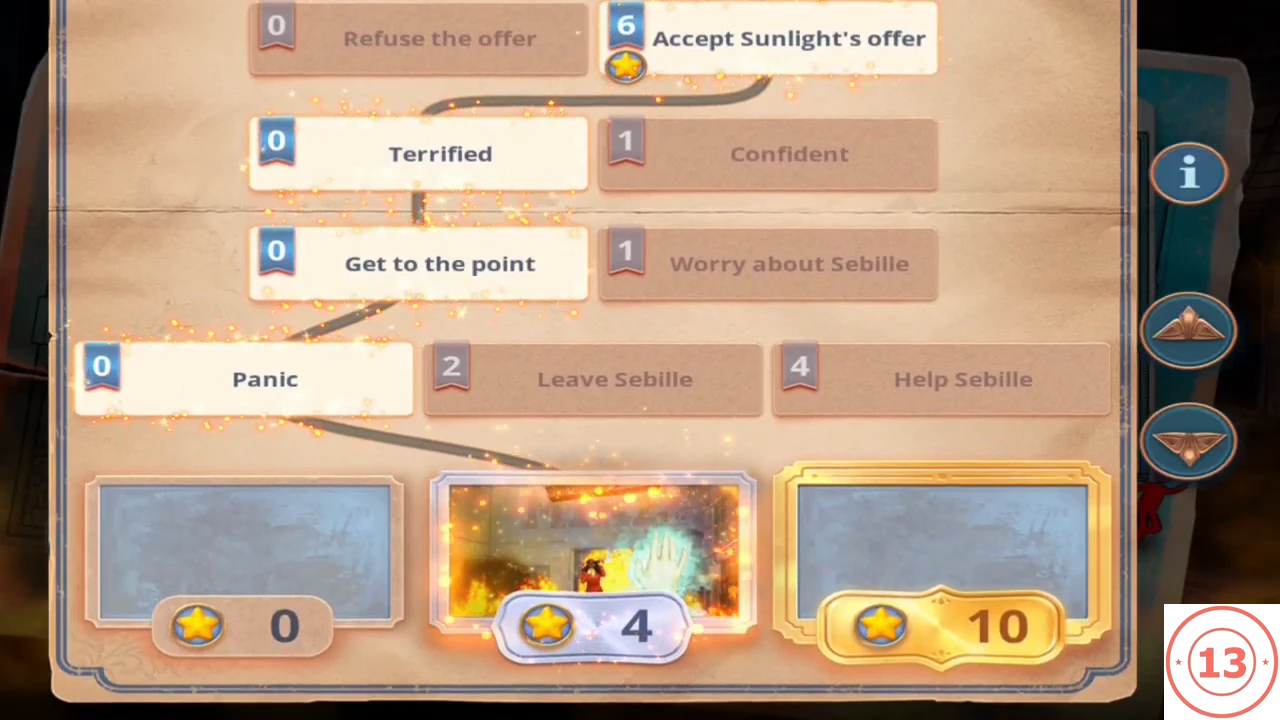
The Decision Points journal: the card for your total is highlighted (here 4 points). - 4-point outcome. In the checked gameplay, 6 of 13 points (only the offer accepted, every other option free) earned this card. Sebille, in the gas mask, is surrounded by flames until Dakota's witch power pushes the fire back ("That's my girl!"). The hideout burns and the episode ends.
- 10-point outcome. In the checked gameplay, 13 of 13 points (the paid option at all five decisions) earned this card. The same rescue scene plays, followed by an extra view of the burning building and the masked killer watching from outside, before the Season 1 Episode 1 title. Choosing every paid option, ending with "I'm not going without you!", is the only route shown to earn it; whether a lower total such as 10 to 12 points also qualifies was not shown.