Living Room: Restore the Power
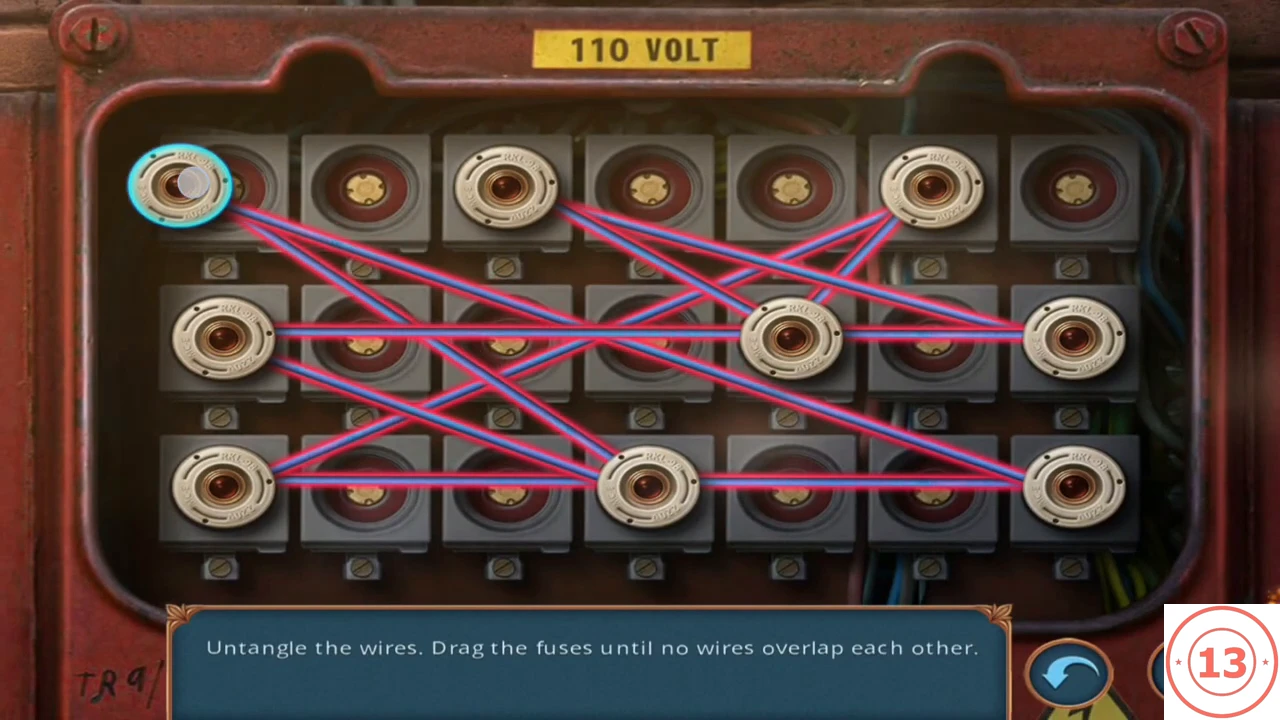
Dakota arrives at her mother's dark house. Your first task is to turn the power back on so the telephone works.
- Click the handbag on the coffee table. Take the toothbrush and the leopard-print hair clip. The bag's zipper is broken, so leave the bag for later.
- Open the drawer of the small table with the red telephone and use the hair clip to pick its lock. Take the ammonia bottle, the gold ornament fragment (1 of 3), the red rubber band and the fuse. The phone will not work until the power is on.
- Click the fuse box on the wall to the left of the door and insert the fuse to open the wiring puzzle.
- Untangle the wires: drag the round fuses to new positions until no wire crosses another. Work from the busiest crossing outward; there is no move limit. When every wire is clear, the power comes back on.
The Phone Call and Sebille's Picture Puzzle
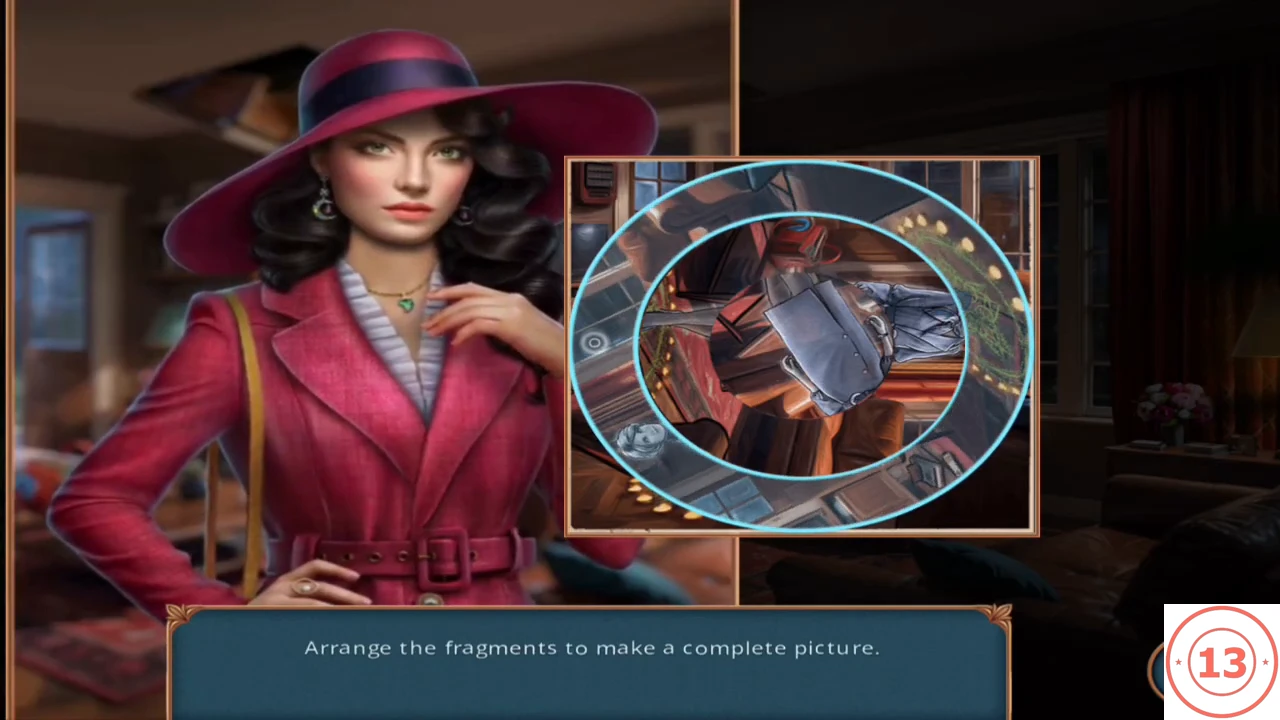
With the power restored, the phone rings and the story begins in earnest.
- Answer the ringing red telephone. After the threatening call, a new task tells you to hide. Click the tall wooden closet on the left side of the living room; Dakota hides inside and watches the intruder through the slats.
- The ghost of Sebille, a witch from Felicia's coven, introduces herself and a picture puzzle opens by itself. Rotate the concentric rings until they form one complete picture of Dakota's spirit standing in the circle on the rug.
- Decision 1 (Decision Points journal): "What do we do now?" costs 35 coins and adds 1 point (Ask for advice). "I just can't believe it!" is free and adds 0 points (Refuse to believe). Both continue the same way. Afterwards you are asked to take a look around, and the backyard opens.
Backyard: Lawnmower, Wheelbarrow and Attic Hatch
Search the backyard for the second ornament fragment and a way into the attic.
- Click the lawnmower. A gold ornament fragment is stuck in dried red paint. Use the ammonia on the paint, then scrub with the toothbrush. Take the ornament fragment (2 of 3) and the paint can.
- Click the wheelbarrow. Take the metal rod lying on the grass beneath it. The wheelbarrow has lost its wheel, so use the paint can as a replacement wheel. Once it rolls aside, take the umbrella it was hiding.
- Return to the living room. Use the umbrella to hook the blue pull loop on the ceiling hatch. The ladder drops; climb into the attic.
Attic Cabinet and Felicia's Hand Puzzle
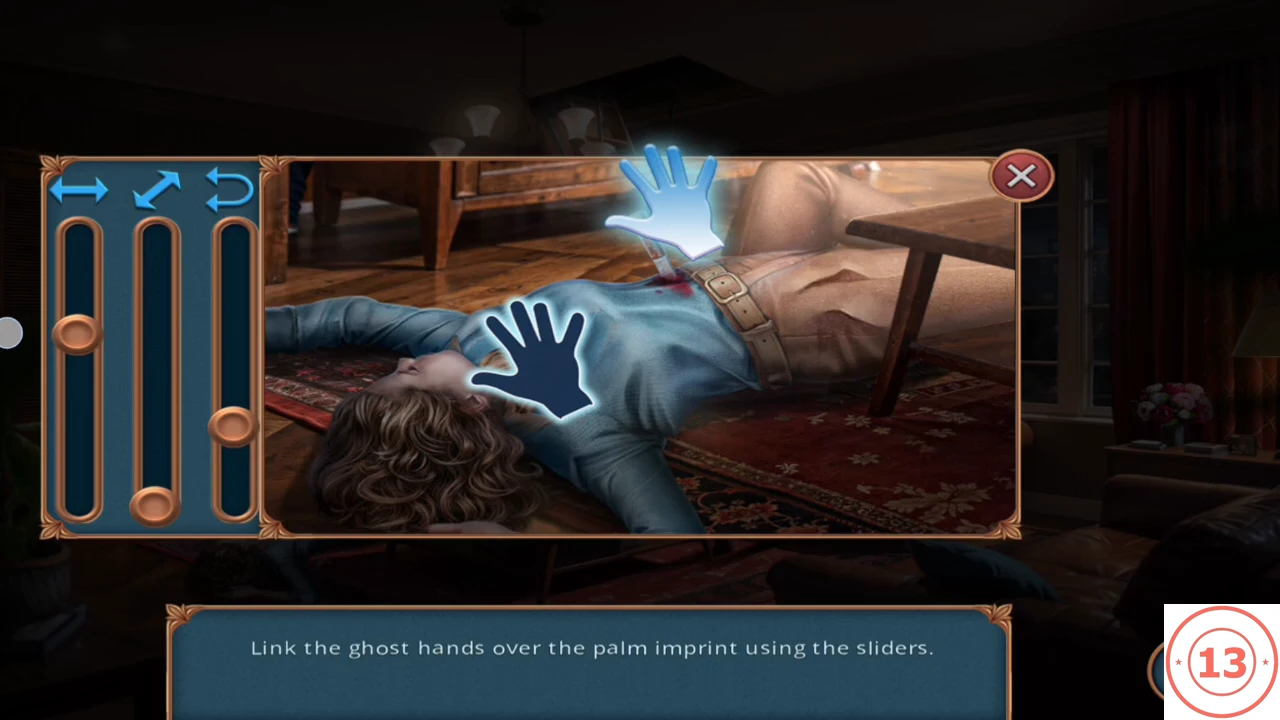
The attic holds Felicia's first message. Then examine her body in the living room.
- Click the cabinet in the attic. Take the metal plate, then fit the red rubber band on the door as a handle and open it. Read Felicia's note about the two pendant halves. Dark energy blocks the shelf for now. Take the typewriter key (1 of 3).
- Click the typewriter in the attic and use the metal rod on its keyboard. It still needs three missing keys, so come back later.
- Go down to the living room and click Felicia's body. Use the three sliders to move the ghostly hands onto the palm print: one moves them horizontally, one diagonally and one rotates them. Adjust them one at a time until both ghost hands line up over the print.
- Take the knife from Felicia's chest and the golden locket ("It was my mother's!").
Rotor and the Gold Heart
A taped box in the attic supplies the part needed to get the lawnmower going.
- In the attic, click the taped cardboard box next to the hatbox with the voodoo dolls. Cut the tape with the knife and take the blue pump body and the rotor. Keep the knife.
- Go to the backyard and place the rotor in the lawnmower. The mower cuts the grass and reveals a round cover. Open it and take the third ornament fragment. The three fragments join into a gold heart.
Porch Swing Box: Gem Puzzle
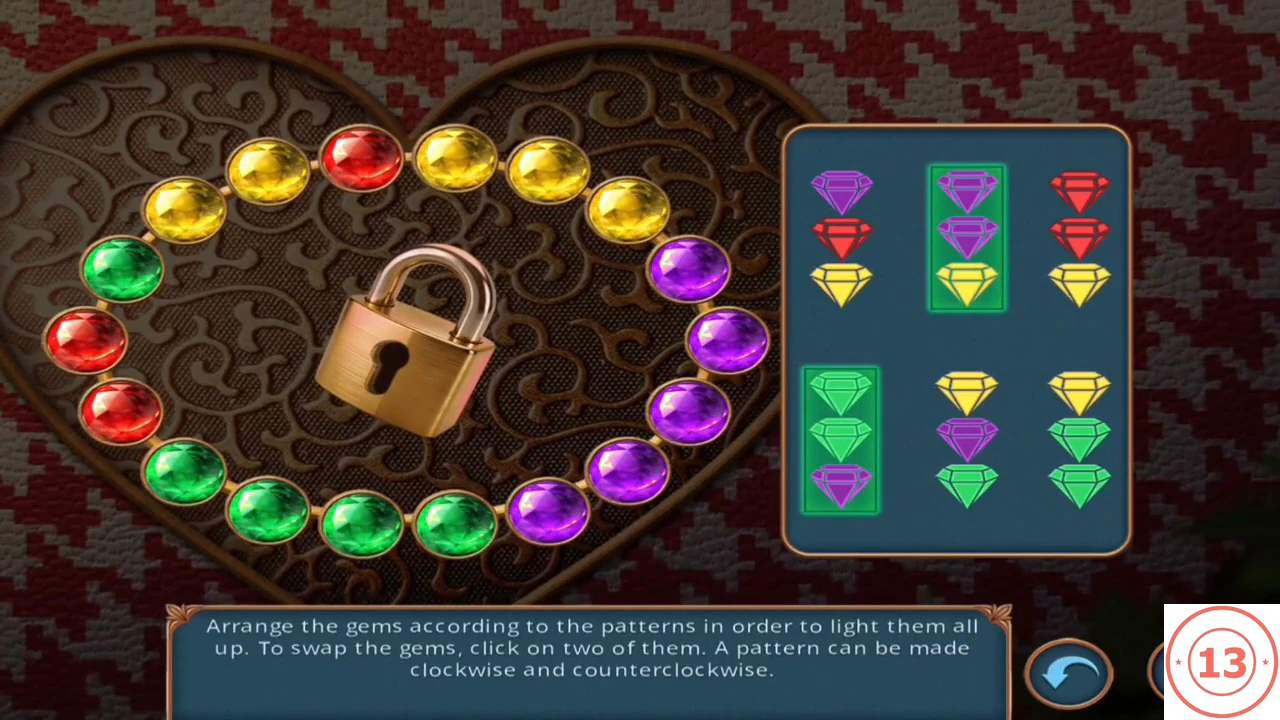
The red houndstooth box on the porch swing has a heart-shaped recess.
- In the backyard, click the red box on the porch swing and place the gold heart in its recess to start the gem puzzle.
- Arrange the gems to match the six patterns: purple-red-yellow, purple-purple-yellow, red-red-yellow, green-green-purple, yellow-purple-green and yellow-green-green. Click two gems to swap them. Each three-gem pattern can run clockwise or counterclockwise around the ring. Example finished ring, read clockwise from the top-left purple gem: purple, red, yellow, green; yellow, purple, purple, purple, yellow; purple, green, green, green, yellow; red, red, green, yellow.
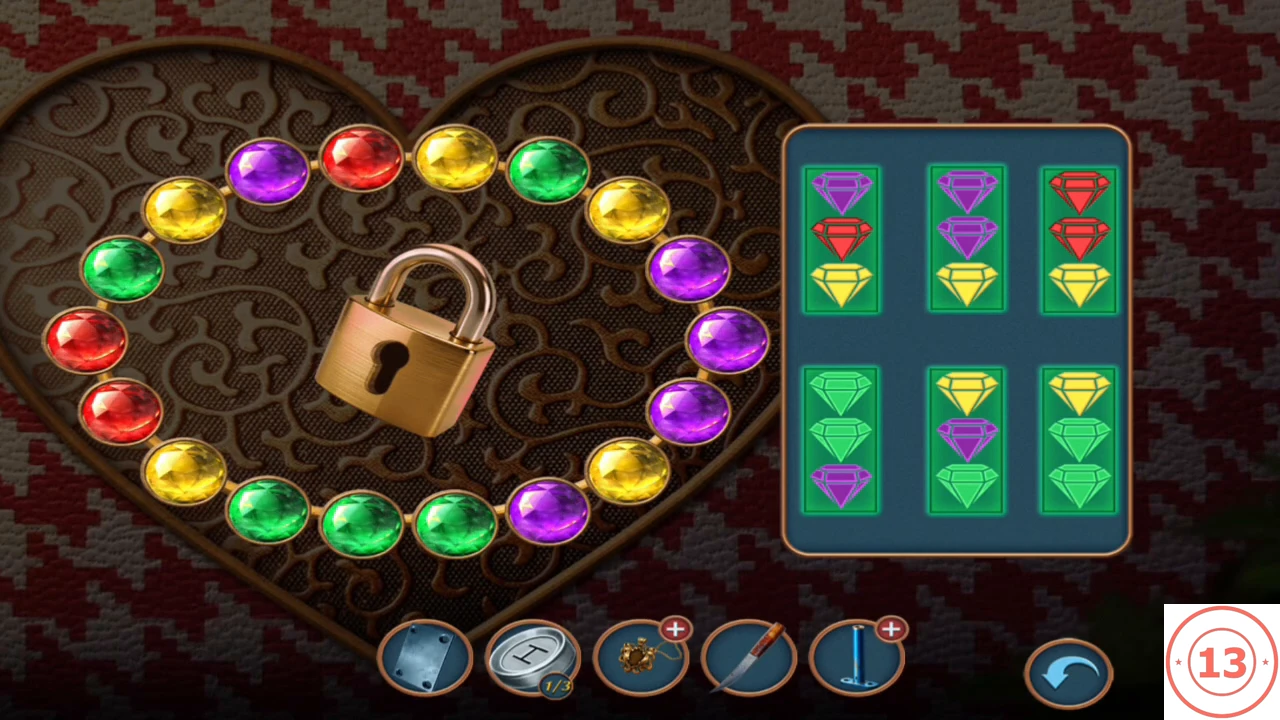
Completed state: every pattern panel is lit and the box unlocks. - Read Sebille's letter to Felicia, then take the round brooch.
Handbag, Hatbox and Attic Window
The brooch fixes the handbag, which starts a chain of item uses in the attic.
- Return to the handbag in the living room and use the brooch as a new zipper pull. Open the bag and take the magnet.
- In the attic, click the hatbox and use the magnet to pull the pins out of the voodoo doll. Read Felicia's note: shadow animals are afraid of light. Take the eyeglasses.
- Click the attic window where a shadow crow sits. Put the eyeglasses in the sunbeam so the light scares the crow away, then take the red valve handle.
Fairy Fountain: Valve Puzzle
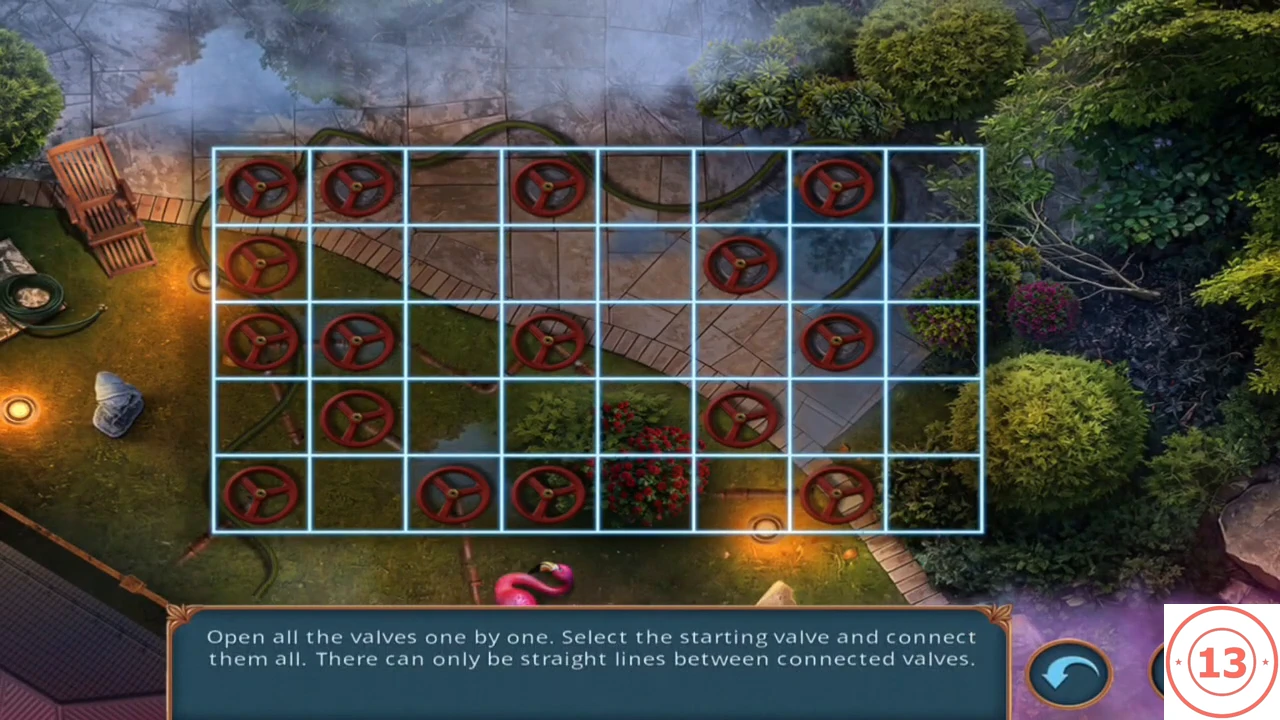
The fairy fountain in the backyard needs its valve handle.
- Click the fairy fountain in the backyard and attach the red valve handle to open the valve puzzle.
- Pick a starting valve and connect all 16 valves in one chain using straight lines only. Counting rows 1-5 from the top and columns 1-8 from the left, this route works: start at row 5 column 7, then row 5 column 4, row 5 column 3, row 5 column 1, row 3 column 1, row 3 column 2, row 4 column 2, row 4 column 6, row 2 column 6, row 2 column 1, row 1 column 1, row 1 column 2, row 1 column 4, row 3 column 4, row 3 column 7 and finally row 1 column 7.
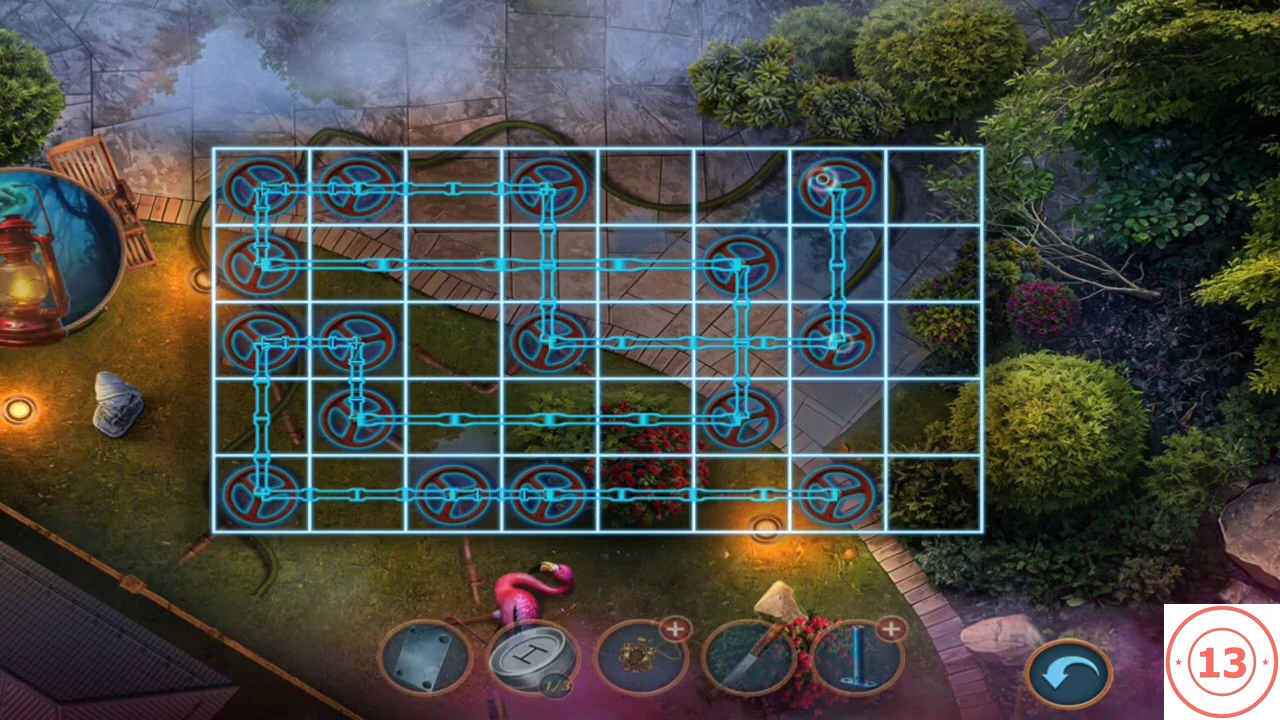
Completed state: the route from step 2 links all 16 valves in one chain. - When the water flows, take the typewriter key (2 of 3) and the emerald from the basin.
Protective Amulet and the Third Key
Felicia's note said the pendant protects against dark energy.
- Open the golden locket in your inventory and set the emerald into it to make a protective amulet.
- Go to the attic and click the cabinet with the dark energy. Place the amulet on the rune shelf to dispel it. Take the typewriter key (3 of 3) and the orange T-handle.
Typewriter Puzzle: The Search Ritual
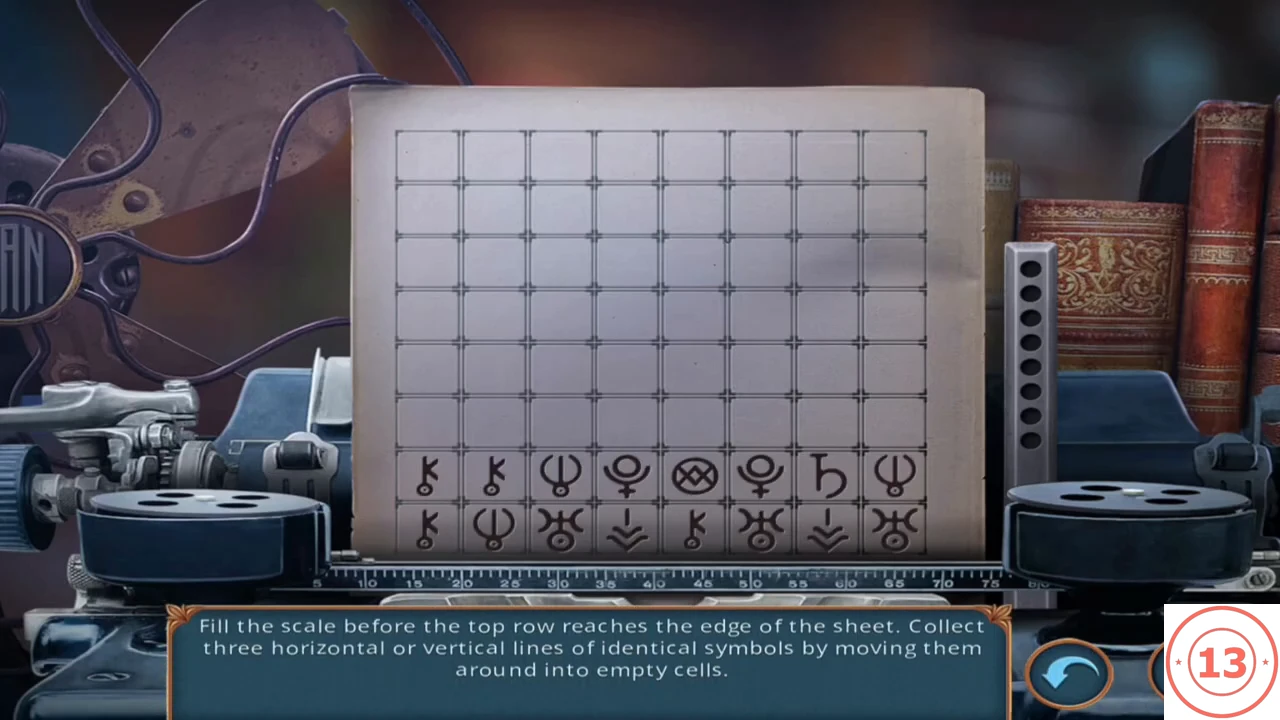
With all three keys, the attic typewriter reveals Felicia's ritual.
- Click the attic typewriter and insert the three typewriter keys.
- Symbol puzzle: rows of symbols rise from the bottom of the page. Move a symbol into an empty cell to make a line of three identical symbols across or down; each line clears and fills the red scale on the right. Fill the scale before the stack reaches the top. The symbols are not the same each time, so there is no fixed move list. Clear low rows first and keep empty cells near the top.
- Read the printed Search Ritual. It needs a knife, an incense stick and a lighter. Sebille realises Felicia was planning to confront the killer herself. The chapter ends and Dakota travels to a new location.