Count Babington's estate
Harry explains that Count Babington wanted to buy land in Easttown. The Dog figurine opens the gate to his estate behind the town square.
- Talk to Harry in the farmyard about Count Babington. The task Talk to the count opens.
- In the town square, put the Dog figurine on the round medallion of the estate gate and walk into the garden. The butler says the Count is in the living room.
- In the garden: take Detail 1/5 from the fountain bowl. Tap the green splashes by the drain grate, the first Mystical scam clue (Blurred traces of blood of an unusual color). Lift the grate with the Crowbar for Detail 2/5 and a Screwdriver. Take Detail 3/5 from the stone flower urn on the right, and unscrew the bronze rose from the back of the bench with the Screwdriver (Flower 6/7). The gazebo is locked for now.
- Enter the house and talk to Count Babington in the living room. He mentions his grandfather's diary in the library and a secret room. The task Explore the legend of the dog opens.
- In the living room, move the newspaper on the coffee table for Flower 7/7, take Detail 4/5 from the glass cabinet on the left and Detail 5/5 from the dog statue on the mantelpiece, and rake the fireplace coals with the poker for the Orange stone.
The library door book puzzle
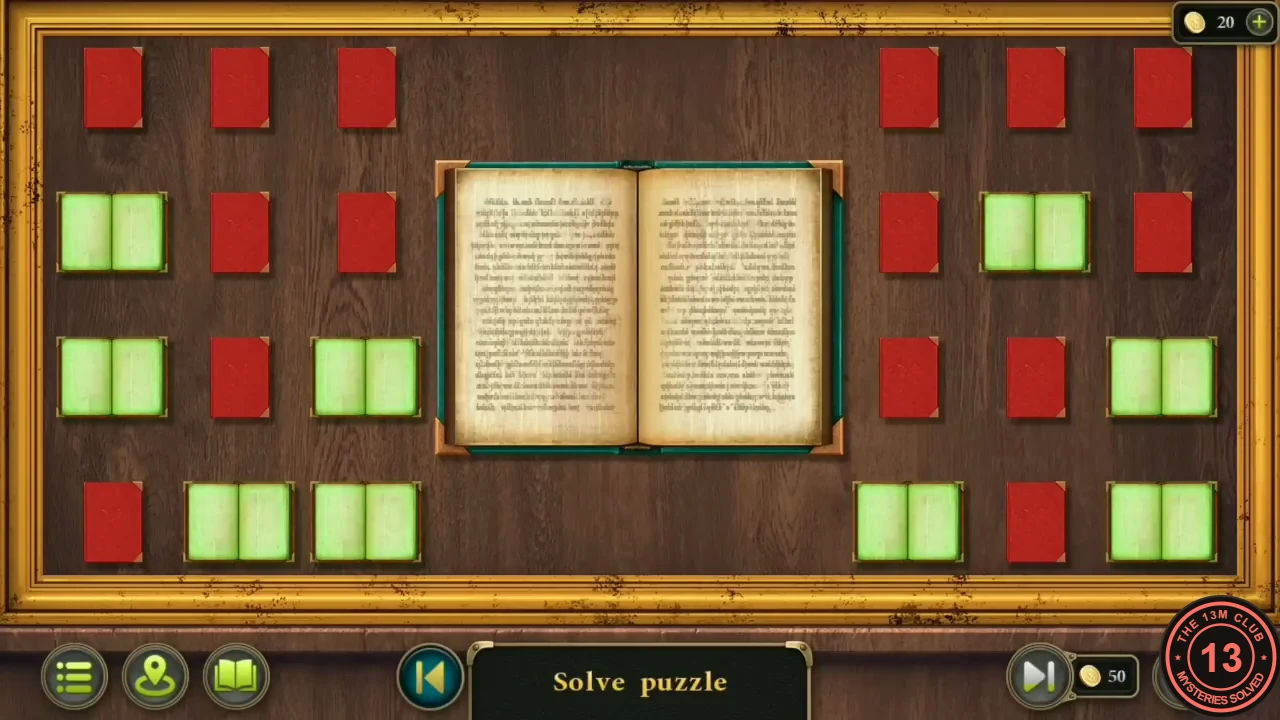
The door at the top right of the living room has a green book cover with five empty sockets. Behind them is a light-switching puzzle of open and closed books, and its starting pattern can differ.
- Put the five Details on the green book cover of the door.
- There are two separate blocks of twelve books, three across and four down. Tapping a book flips it and the books directly above, below, left and right of it in the same block between closed (red) and open (green pages). Open every book; a finished block glows and locks.
- A reliable approach: go down each block row by row and, for every closed book, tap the book directly below it. Only the bottom row can then be left closed; note its pattern and try the top-row books one at a time, then repeat the sweep. Example for the pictured start, counting rows from the top and columns from the left: in the left block tap row 1 column 3, row 2 column 1 and row 3 column 1; in the right block tap row 1 column 1, row 2 column 3 and row 3 column 2. The door opens into the library.
Hidden symbols on the grandfather's diary
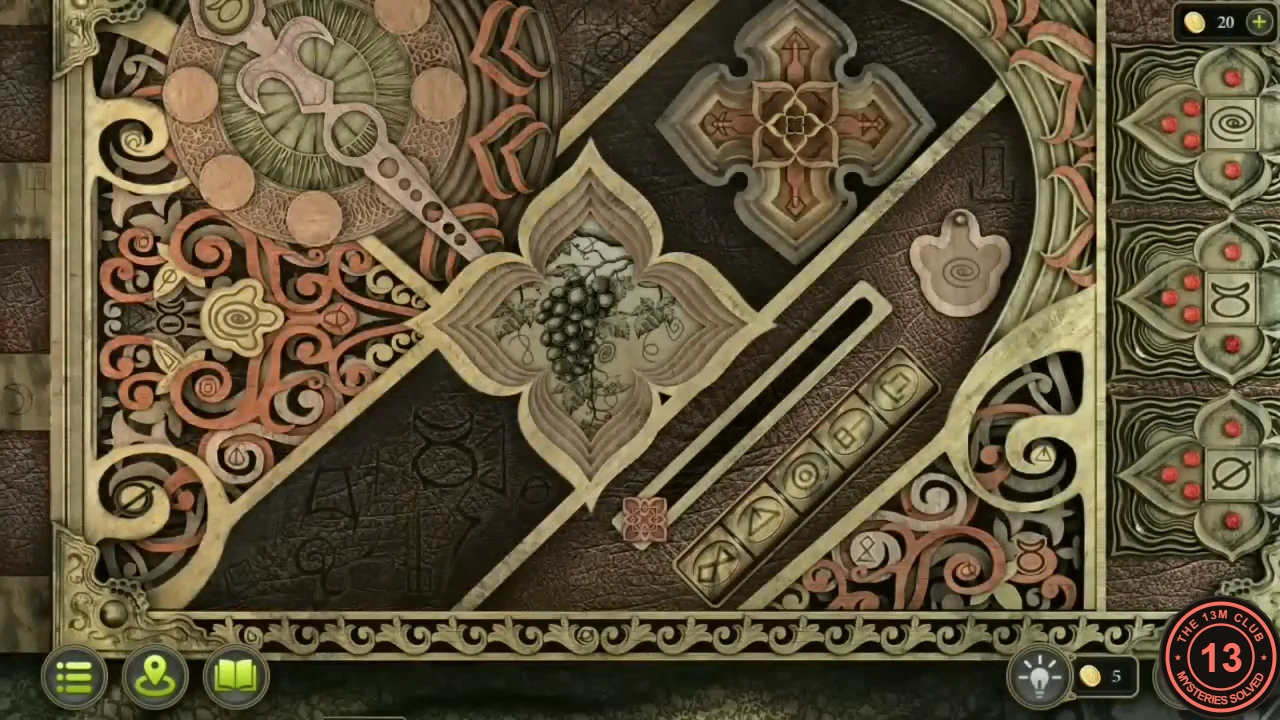
In the library, the grandfather's diary lies in a green display case. Its cover is a hidden-object scene: find five copies of each of the three symbols shown on the clasps at the right.
- Prise the latch of the green display case open with the Knife and tap the diary.
- Find 15 symbols: five spirals, five horned circles and five slashed circles. The cover is larger than the screen, so drag it. Many symbols are plain carvings; others appear only after you flip the five tiles in the diagonal channel at the bottom right, slide the red rose knob up that channel to move the grape picture aside, turn the large dial at the top left, or swing the tulip-shaped pendant on the right out of the way.
- The first page is blank. Use the Lighter on it to reveal three drawings of ornaments: a vine leaf, a fleur-de-lis and an acanthus leaf. Take the star medallion (Order) and the Statuette from the display case.
The gargoyle fountain token board
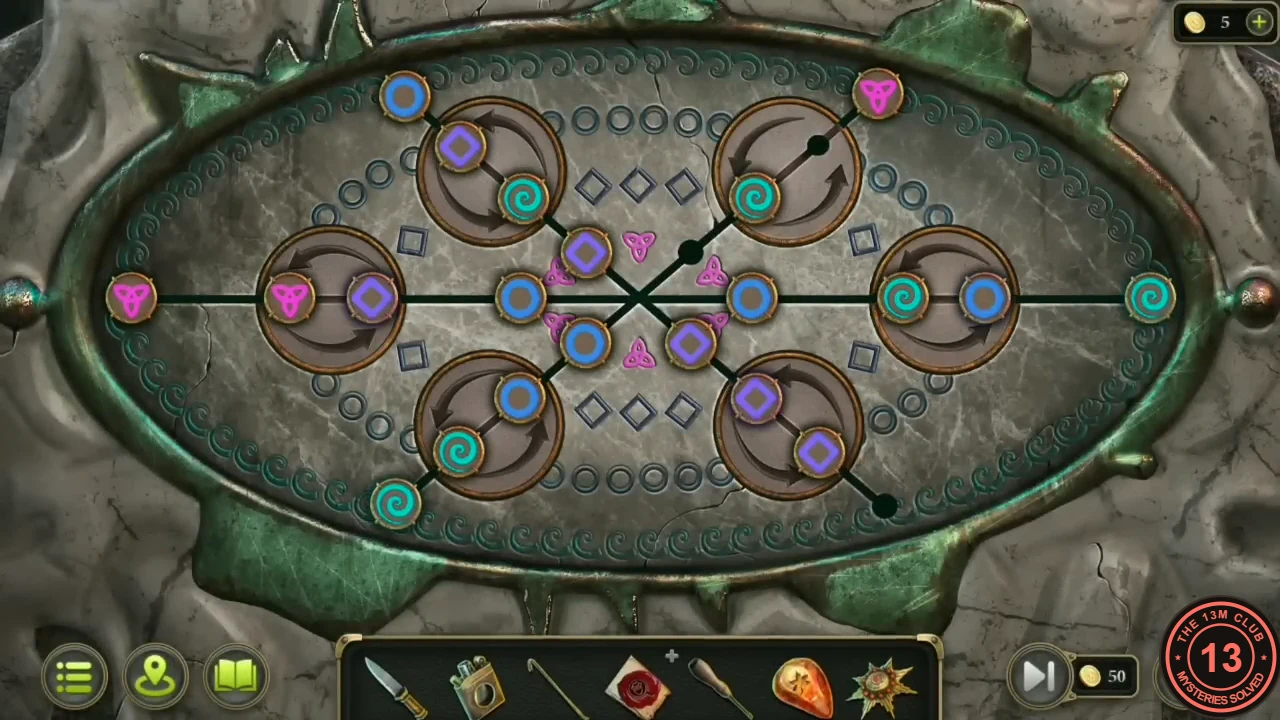
The garden fountain has four places on its rim for statuettes. With all four placed, a stone board of tokens rises.
- In Harry's farmhouse, put the seven iron Flowers into the holes of the leaf-lidded box on the shelf and take the Statuette inside.
- Place all four Statuettes on the rim of the estate fountain. A token board rises.
- Three straight lines cross at the centre. Tap a token to slide it along its line into a neighbouring empty place; tokens can pass through the centre onto another line. Tap one of the six brown discs to turn it and swap its two tokens. Sort the tokens by the shapes printed on the stone: teal spirals in the six end sockets at the rim, blue circles in the outer slot of each disc, purple diamonds in the inner slots, and the three pink triskeles in the slots beside the centre. One spare diamond may sit beside the centre too. Clear a path by parking tokens in empty slots near the middle.
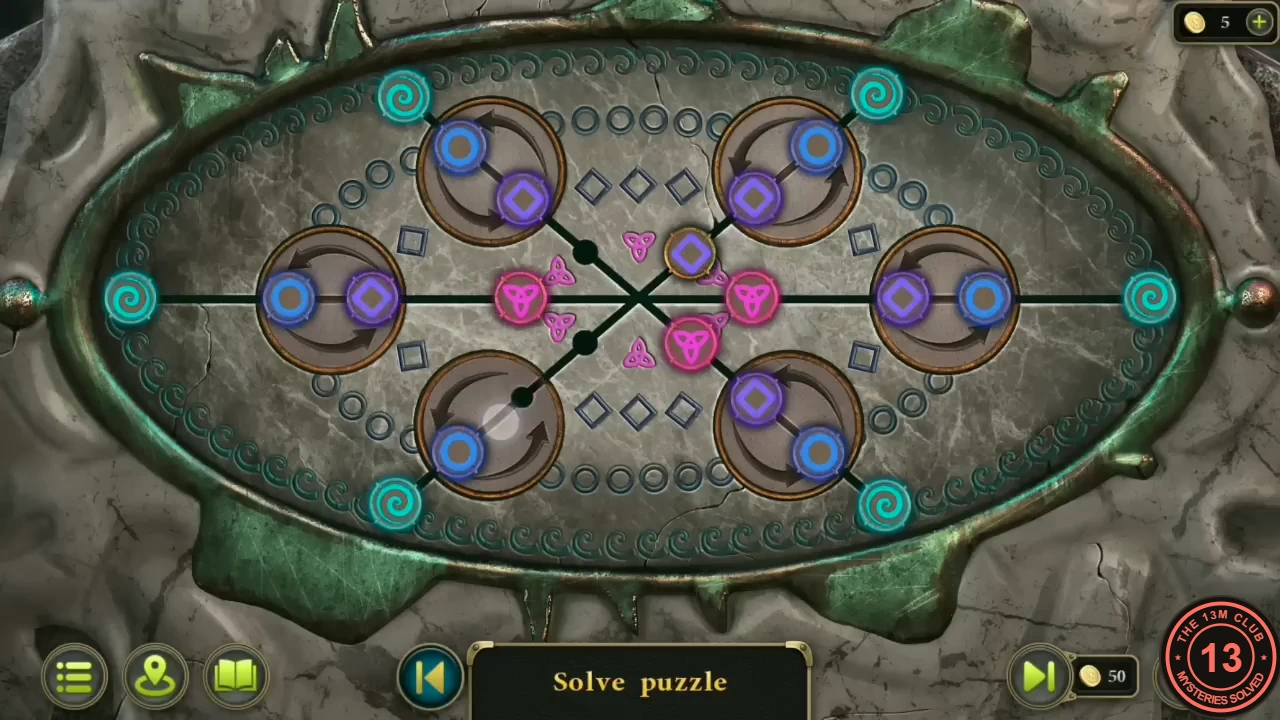
The sorted fountain board. - The gargoyles' eyes glow and point to the gargoyle by the porch steps. Take the Stucco molding from its plinth.
The three antler sconces in the library
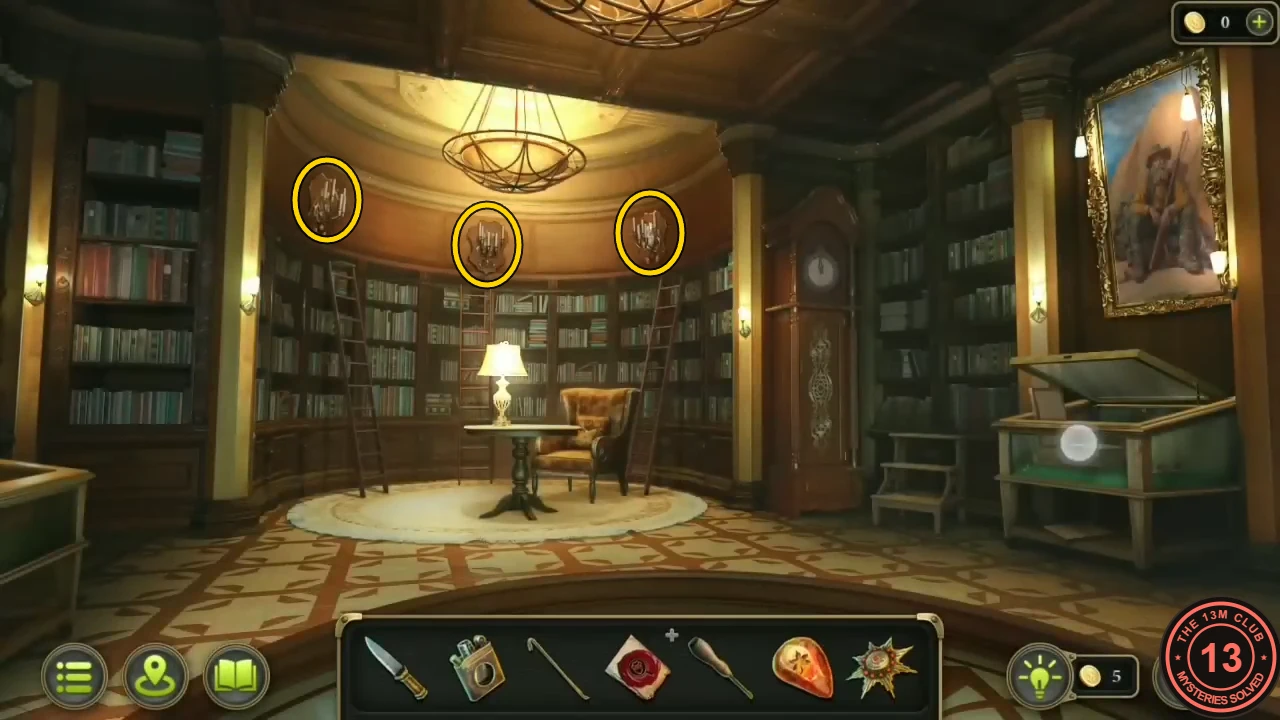
Three candle sconces mounted on antlers hang on the library's curved back wall, each with a carved medallion. They must match the ornament drawings revealed in the diary.
- Put the Stucco molding on the empty medallion of the right-hand sconce.
- Tap a medallion to turn its ornament 45 degrees clockwise. Turn each to the angle drawn on the diary's first page: vine leaf on the left sconce, fleur-de-lis in the middle, acanthus on the right. You can reopen the diary from the display case to compare. In the recording the leaf stood upright, the fleur-de-lis lay on its side pointing left and the acanthus pointed down. A section of the left bookcase then opens.
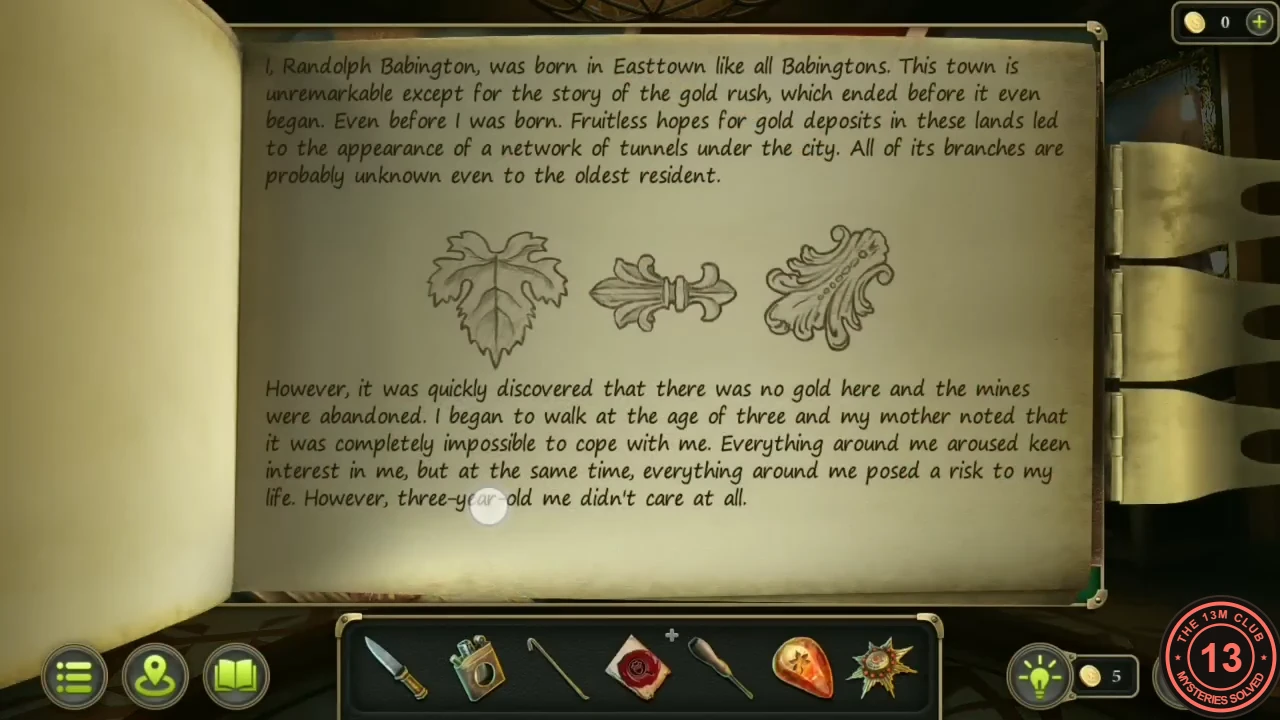
The ornament drawings revealed in the diary; match each sconce to its drawing.
The numbered books behind the bookcase panel
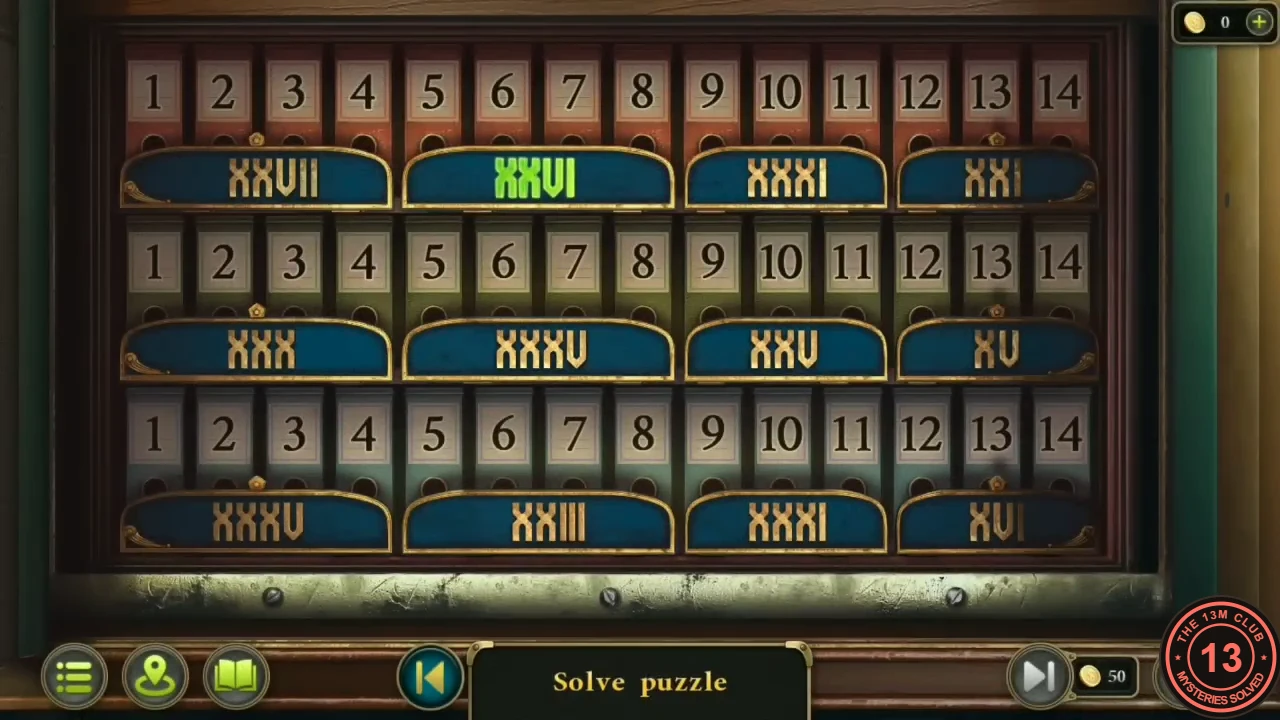
The opened bookcase panel has a star-shaped recess for the Order. Behind it are three shelves of numbered books under Roman-numeral plaques. The target numbers can differ between games.
- Put the Order (star medallion) into the star recess of the bookcase panel.
- Each shelf holds books numbered 1 to 14 under four plaques that cover books 1-4, 5-8, 9-11 and 12-14. Tap two books on the same shelf to swap them. A plaque turns green when the numbers of the books above it add up to its Roman numeral. Read your own targets, settle the two three-book groups first, then balance the two four-book groups with what is left. Every shelf's four targets add up to 105, the total of 1 to 14.
The secret room and the demon dog's plaque
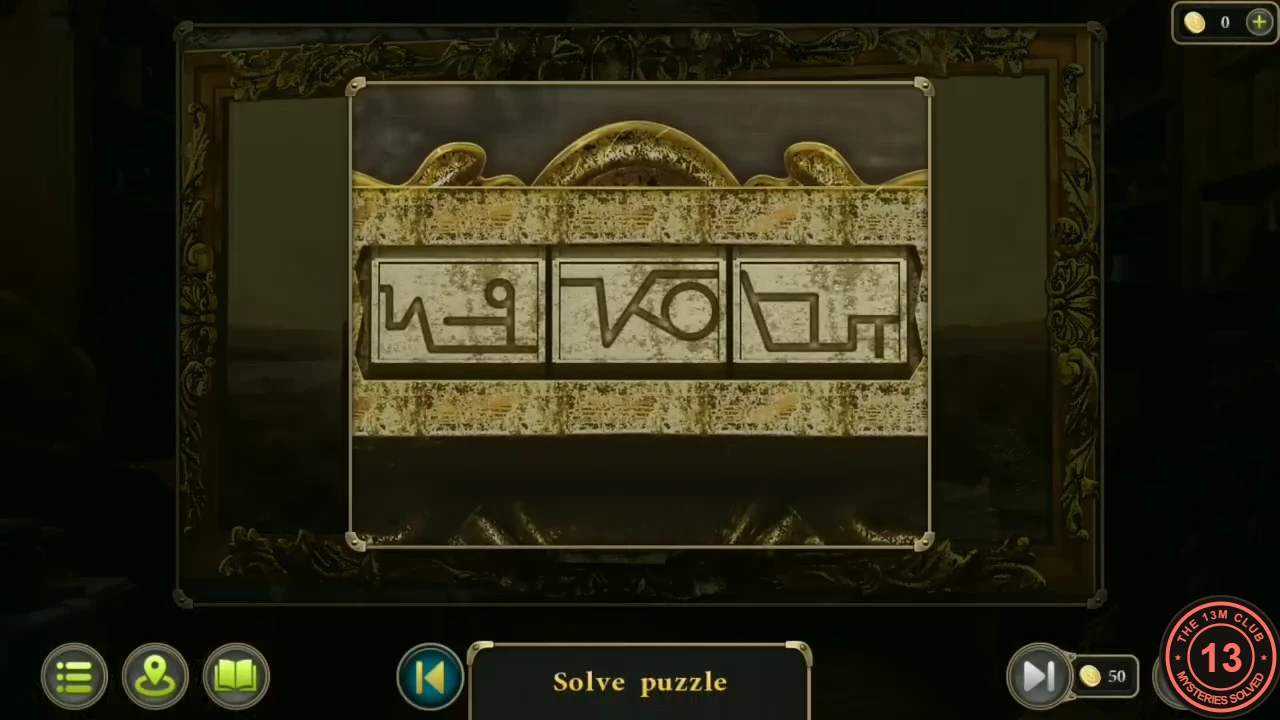
The hidden doorway leads to the grandfather's secret room, with a stuffed demon dog, a desk and a large painting. The plaque under the painting copies three glyphs from a portrait in the library.
- Cut the chest of the stuffed demon dog on the left with the Knife for the Pendant. Cut the cushion of the wing armchair and open the tube inside for the Red stone.
- On the desk, open the drawer under the white dog statuette for a small Key and use it on the upper drawer of the cabinet. The grandfather's notes describe a place in the forest reached by following out-of-season green trees to a clearing with a face carved in a stump. Explore the legend of the dog is complete.
- In the library, zoom in on the brass plate under the prospector's portrait at the top right: it shows three glyphs.
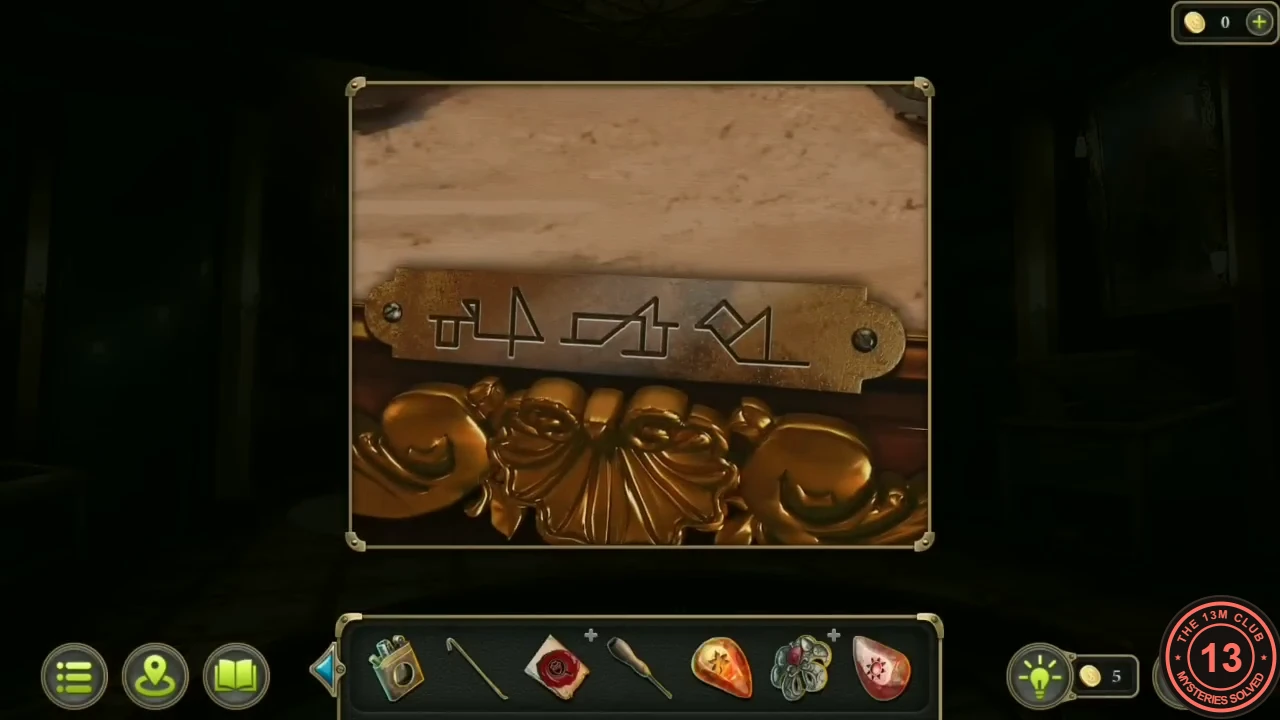
The glyphs to copy, on the plate under the library portrait. - Back in the secret room, tap each of the three tiles on the plaque under the demon-dog painting to cycle its glyph, until all three match the portrait plate in the same order. The glyphs can differ between games, so always copy the plate.
- The painting slides away from a round golden vault. Tap it: the lock cannot be used yet, but the Clue scroll is pinned across it. Take it: seven columns of pictures (owl, clock, chandelier, flower urn, face-carved stump, small house and wall sconce), each waiting for a symbol you find at that place.
The library clock and the Clue symbols
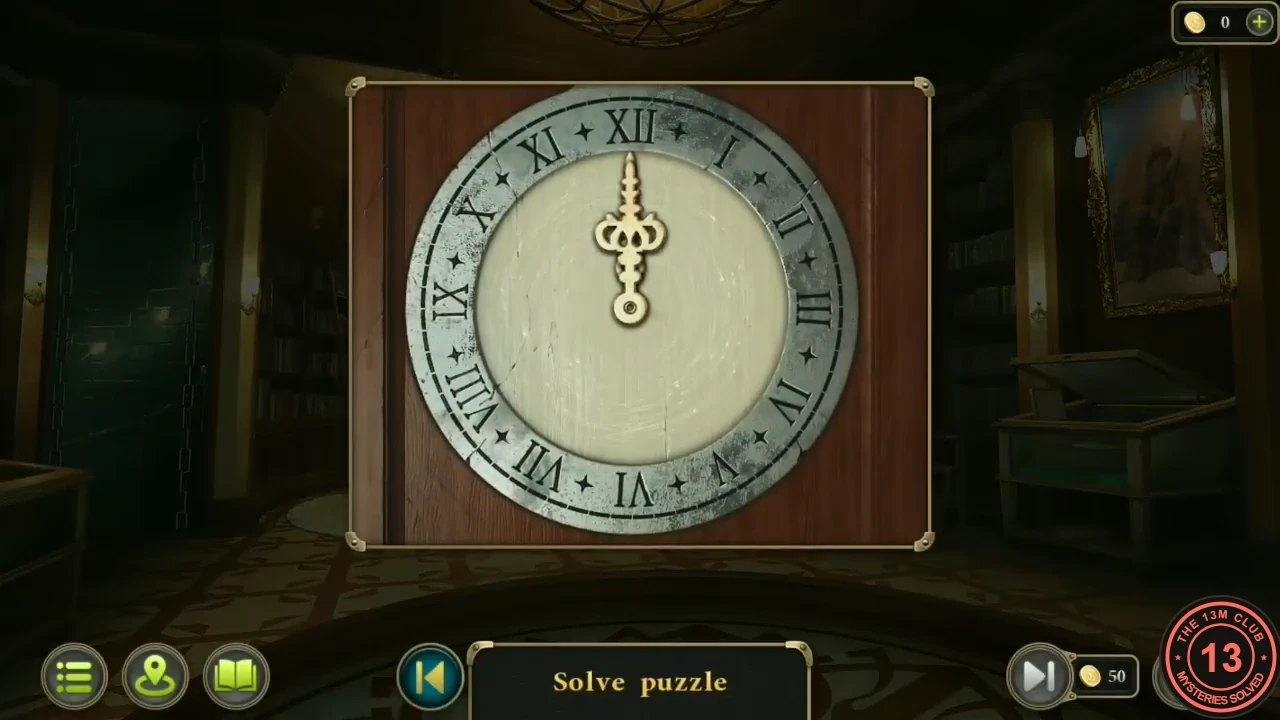
Most of the Clue scroll's symbols are hidden around the estate. The grandfather clock in the library has to show the time drawn on the scroll.
- Use the Screwdriver on the screw hole at the left edge of the left-hand antler sconce in the library. The wooden shield swings open to show gears; tap the symbol scratched on the wood beside them to copy it onto the Clue (wall sconce).
- Tap the grandfather clock and drag its hands to 4:45, the time drawn in the clock column of the Clue: minute hand on IX, hour hand between IV and V. Take the Lever arm from the clock case and tap the symbol scratched inside it to copy it onto the Clue.CODE4:45
- In the living room, tap the owl on the staircase post: it spreads its wings and the owl symbol is copied. Fit the Lever arm to the crank bracket on the frame of the big window at the left of the living room, by the red curtain, and turn it: the chandelier lowers. Tap the symbol in its bowl to copy it onto the Clue.