Harry Lloyd's farmyard: the first evidence
Press Play, then Play next to "Case 1. Troubles on the farm" on the case-selection screen. After the opening scene you arrive in the farmyard outside Easttown. The first task, Collect evidence in the yard, asks for seven clues for the "Farm inspection" file.
- If the game offers a tutorial, choose whichever option you prefer. Talk to Harry, the farmer sitting on the bench in front of the farmhouse. The task Collect evidence in the yard opens.
- Go into the farmhouse and talk to Harry's wife, Maria. Place the Suitcase on the desk on the right and take the Knife and the Lighter from it. The open suitcase stays on the desk as your laboratory. Take the Rope from the trunk at the bottom left and the Ladle and Pincers from the stove. The small box with a leaf-shaped lid on the shelf needs seven iron flowers; collect them as you go.
- Outside, examine the window beside the porch. Tap the scratches (Beast scratches), pull the claw out of the sill with the Pincers (Beast claw) and scrape the green substance with the Knife to get a Substance sample.
- Take the Key lying by the barrel near the chicken coop, the small shed left of the barn, and unlock the coop door. Inside, tap the bloody paw prints (Track of the beast) and the broken floorboard (Broken board).
- At the doghouse on the right, tap the frightened dog (Scared dog) and take the Boards lying beside it.
- Repair the broken ladder in front of the porch with the Boards and then the Rope. Climb to the roof, tap the broken tiles (Traces on the roof) and take the Pouch by the chimney. Cut the Pouch open in your inventory with the Knife to get the first iron Flower (1/7).
- Return to the desk and tap the green cloth in the suitcase to lift it: the microscope comes out onto the desk. Place the Ladle on the desk and put the Substance sample in it. Pour in the teal bottle standing by the microscope, then the small brown bottle and the blue test tube from the compartments of the suitcase. Take the Ladle with substance, heat it on the hot plate of the stove and tap it when it boils: the test gives Strange colored blood, the seventh clue.
- The case file opens with all seven clues. Talk to Harry again: he gives you a Door knocker for the field gate, and the next task is Explore the dead fields.
The field gate flower lock
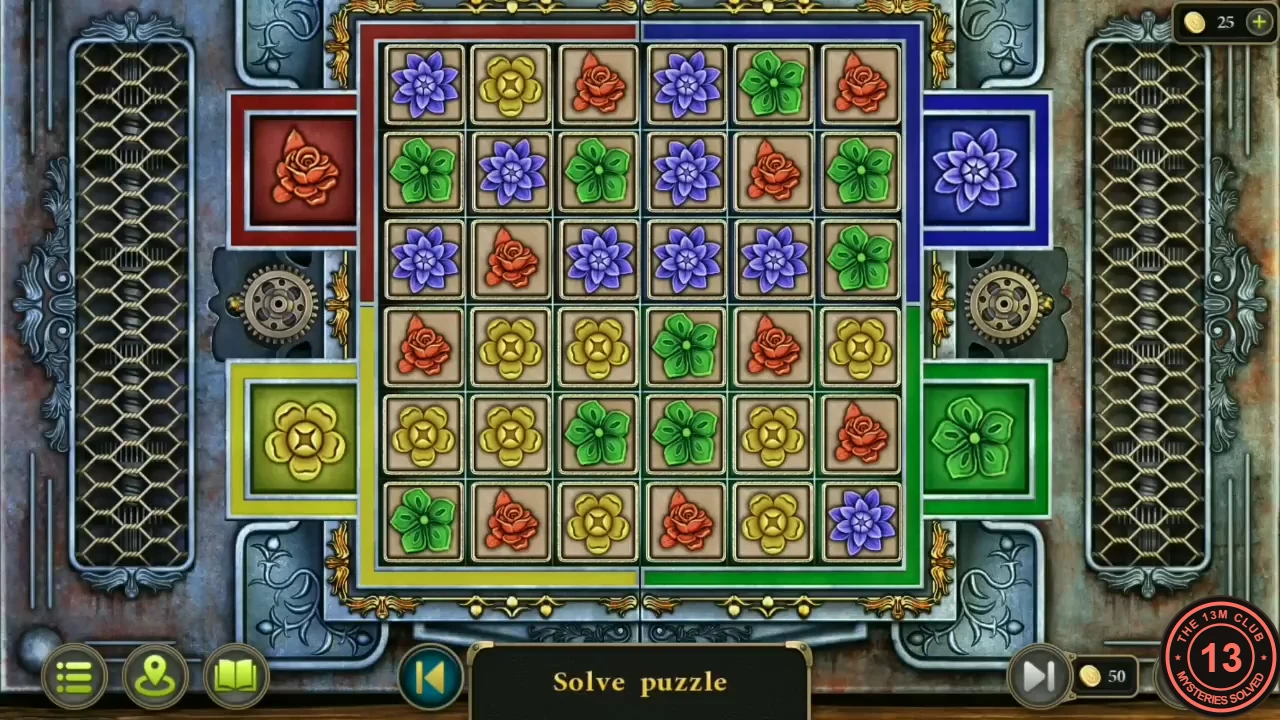
The big gate at the back right of the yard leads to Harry's field. Its lock is a 6 by 6 board of flower tiles that must be sorted into four coloured corners. The starting layout can differ between games, so this section explains the method instead of a fixed list of taps.
- Put the Door knocker on the round plate on the left side of the gate. The flower lock opens.
- How it works: tap any tile that is not on the outer edge and the eight tiles around it move one step clockwise; the tapped tile stays put. Tapping the same tile eight times brings everything back, so you can carry a flower as far round a ring as you need.
- Goal: nine red roses in the top-left 3 by 3 corner, nine blue stars top right, nine yellow flowers bottom left and nine green four-petal flowers bottom right, as shown by the coloured frame round each corner. Work one corner at a time, starting with its outermost tiles, and use the inner tiles near the middle to ferry flowers between corners. Once a corner is complete, avoid tapping tiles whose ring touches it; if you have to, tap the same tile again until that corner comes back. The four tiles one step in from each board corner turn rings that stay inside a single corner, so use them for the final touches. The gate opens when all four corners are complete.
The field, the town square and the Blue Fire temple
Beyond the gate lies the field with a fallen totem. The road at the back right leads into town, where the cleric of the Blue Fire cult asks you to repair the totem before he will talk.
- In the field, cut the ivy wrapped round the tree stump by the river with the Knife and take the Chest, a small locked casket that you will open later.
- Follow the road at the back right to the town square. Cut the green tarp on the wagon on the left with the Knife and take the Tongs from the crate. Take the Shovel beside the notice board and the iron Flower hanging in the wind chime of the apple tree on the far right (2/7).
- Enter the temple and talk to Saxon, cleric of the Blue Fire cult. He gives you the task Repair the totem.
- Read the book on the lectern: the totem needs a lampada burning with blue fire and an offering of crocuses, temple sagebrush, an apple, wheat and cinnamon. Take the Lampada standing on the shelf above the book.
- Outside, cut the plant in the flower bed by the temple steps with the Knife for Sagebrush, and take the Valve lying on the edge of the planter. Pick the Apple from the apple tree.
- Go back to the field; the fallen totem lies left of the road. Take the path at the back left into the Mysterious forest. Tap the black bird perched on the bare birch branch at the top left: it flies off and drops something into the tangled roots under the mossy mound at the bottom left, out of reach for now. Pick the Crocuses. Enter the sawmill with the red roof. Open the panel of the saw engine and remove its broken gear, then open the saw bench and lift out the broken saw blade; both are replaced later. Outside, take the second Valve from the chopping block.
The valve machine behind the temple
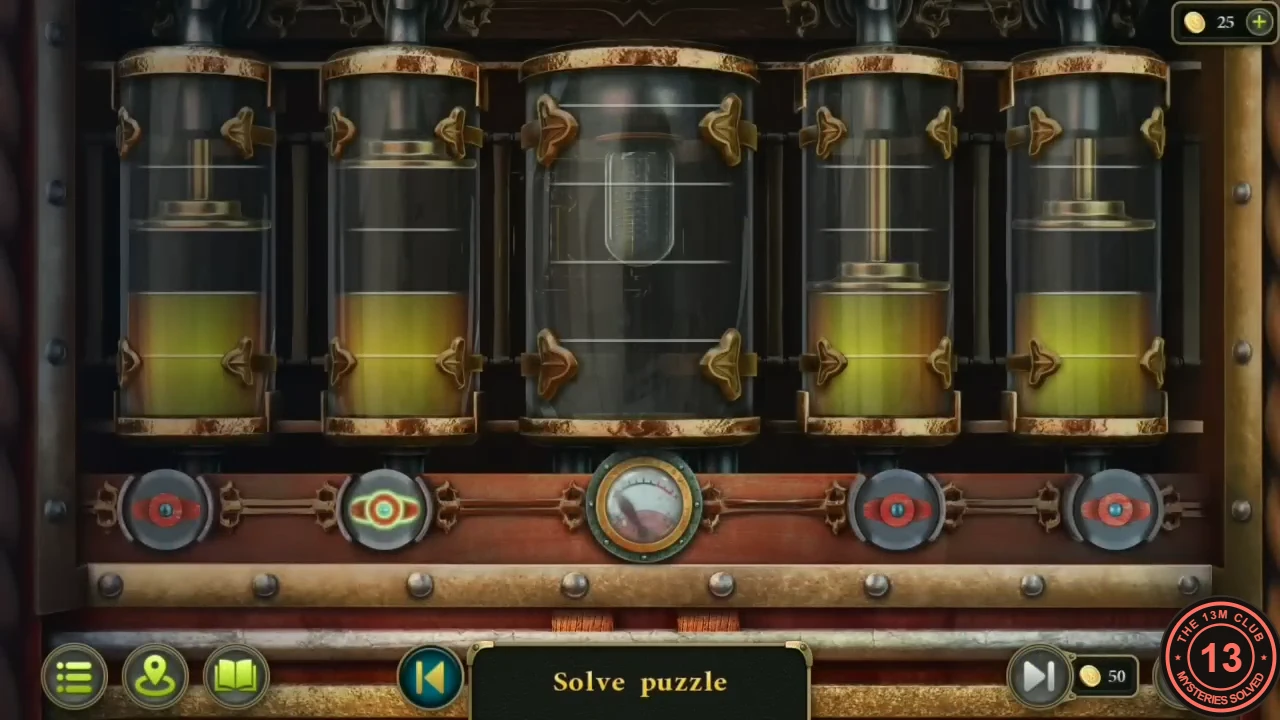
Behind the right-hand door of the temple stands a machine of five glass cylinders. The four side cylinders each hold some yellow liquid; pump all of it into the large centre cylinder.
- Return to the temple, go through the right-hand door and place both Valves on the two empty sockets in the middle of the valve row.
- Each tap turns a red valve a quarter turn, but not every turn pumps: if nothing moves, tap the same valve again. The valve under the far-left cylinder always pumps into the centre. The other three pass liquid along a chain. The second valve sends its cylinder into the far-right cylinder. The far-right valve sends liquid on to the fourth cylinder or straight into the centre. The fourth valve sends liquid to the far-left cylinder or into the centre.
- Work along that chain: empty the second cylinder into the far-right one, push that liquid on through the fourth cylinder, and keep emptying the far-left cylinder into the centre. If a portion runs back the wrong way, tap that valve again until it moves forward. When the centre cylinder is full, lightning fills it and the machine is solved.
- Go through the right-hand doorway and climb the spiral stairs to the top of the tower. Use the Tongs on the crystals in the blue-fire brazier to get a ring-shaped Handle, and light the Lampada in the blue fire (Burning lampada).
The poisoned crop and the fallen totem
A flower hides in the tower rim, the watchtower in the field overlooks a patch of dead crop, and the totem has to be stood up again before the offering.
- At the tower top the Knife is too wide for the crack in the rim. Go back to the desk in the farmhouse (use the map button at the bottom left to travel quickly), take the Tweezers from the suitcase, return and use them on the crack for Flower 3/7.
- In the field, put the ring Handle on the watchtower door, climb up and look over the dead patch of crop. Go down to it and tap the purple puddles (The place where the harvest died).
- Take an empty test tube from the suitcase, fill it at the purple puddle and put it on the desk. Pour in the pink reagent from the suitcase and then the small brown bottle on the desk: the result is Herbicide sample.
- Tell Harry about the herbicide and ask about cinnamon. Maria, in the house, gives you the Cinnamon.
- At the fallen totem in the field, dig in the gravel hollow beside it with the Shovel (Flower 4/7), then tap the totem to stand it upright in the hole. Use the Shovel lying on the ground once more to fill the hole and fix the totem in place.
- In the Mysterious forest, pick up the small cross-headed Part lying by the crocus patch near the fallen log.
The barn door symbol lock
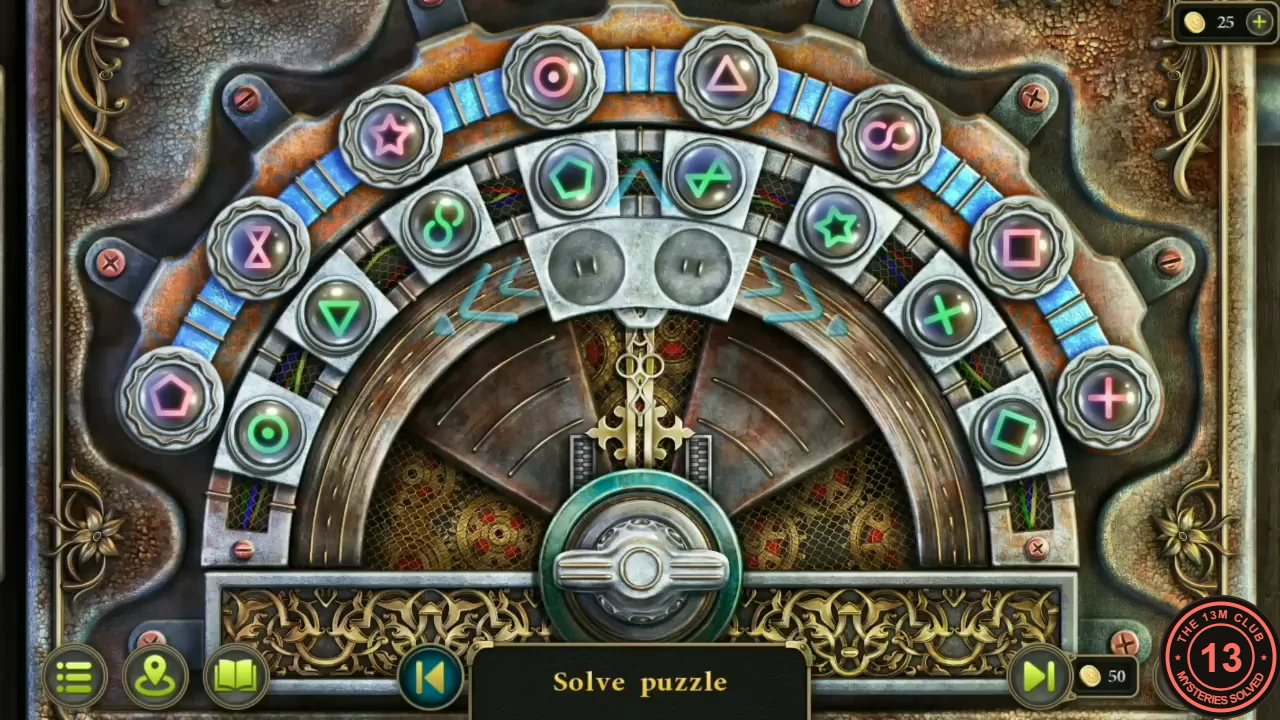
The barn's double doors are held by a lock box with a cross-shaped socket. Inside is a sorting puzzle with a moving tray. Starting orders differ between games.
- In the farmyard, put the Part into the cross-shaped socket of the lock box on the barn doors.
- The pink symbols along the top arc are fixed. Each green token in the slots below must end directly under its matching pink symbol (tokens are drawn tilted, so an infinity sign can look like an 8 and a plus like an x). The grey tray under the slots has two cups: the arrows slide the tray one place left or right, and the up arrow swaps whatever is in the two cups with the two tokens above them.
- Use the tray as a pair of hands: lift two tokens, slide to where one of them belongs and swap, so each swap puts at least one token in its final place. Work from one end of the arc to the other. In the recording the targets read, left to right: pentagon, hourglass, star, ring with a dot, triangle, infinity, square, plus. When every token sits under its symbol the lights turn blue and the barn opens.
Barn hidden-object scene: 15 spikelets
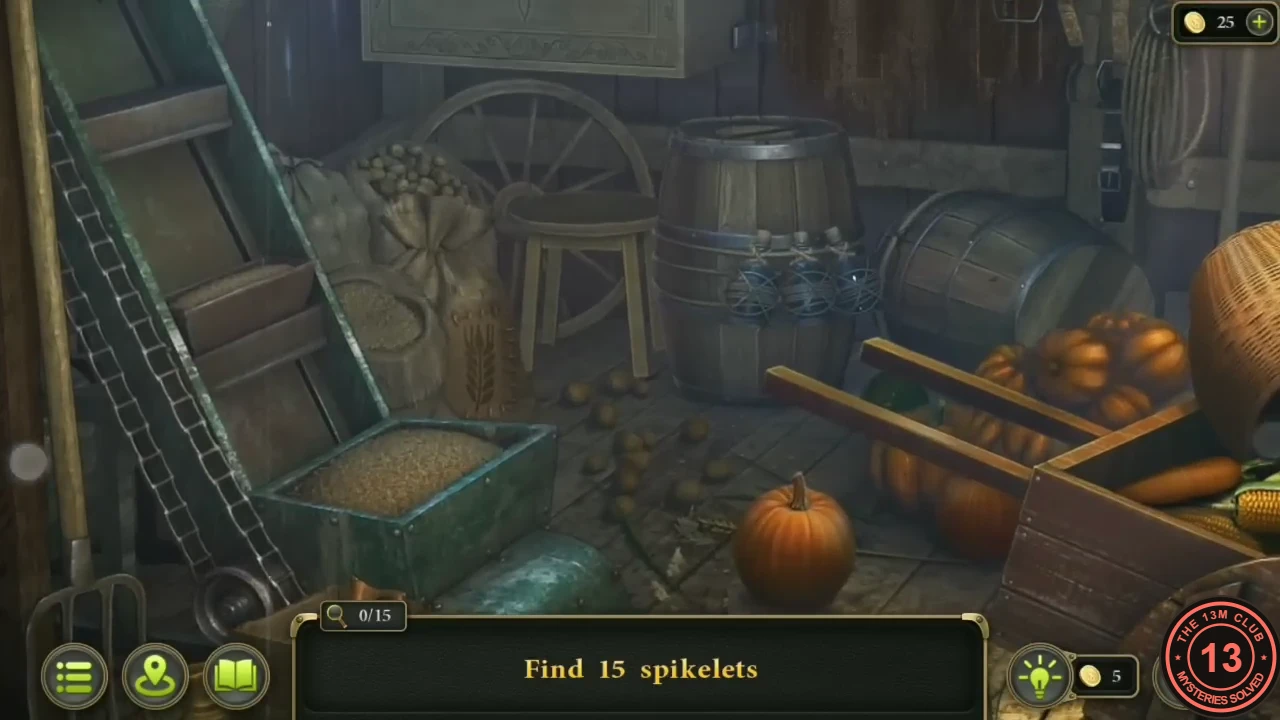
The wheat for the offering is scattered through the barn. The bar at the bottom asks you to find 15 spikelets and counts them. The scene is wider than the screen, so drag it left and right.
- Search the main view, including behind the pumpkins and on the floor and wheelbarrow. Open the lid of the barrel at the back for more, open both bags of the saddle hanging on the right wall, and check the shelf on the left wall behind the ladder. Some spikelets are carved or painted shapes rather than real ears of wheat.
- Open the Basket with wheat in your inventory and add the Apple, Crocuses, Sagebrush and Cinnamon to make the Offering.
- At the totem in the field, place the Burning lampada at its foot and then the Offering. The rain stops and the task is done.
- Talk to Saxon in the temple. Lightning set the mill on fire, the miller has vanished and the bridge to the mill is broken. He gives you an Amulet, and the next task is Explore the burnt mill.
The hunters' chest: sliding animal tiles
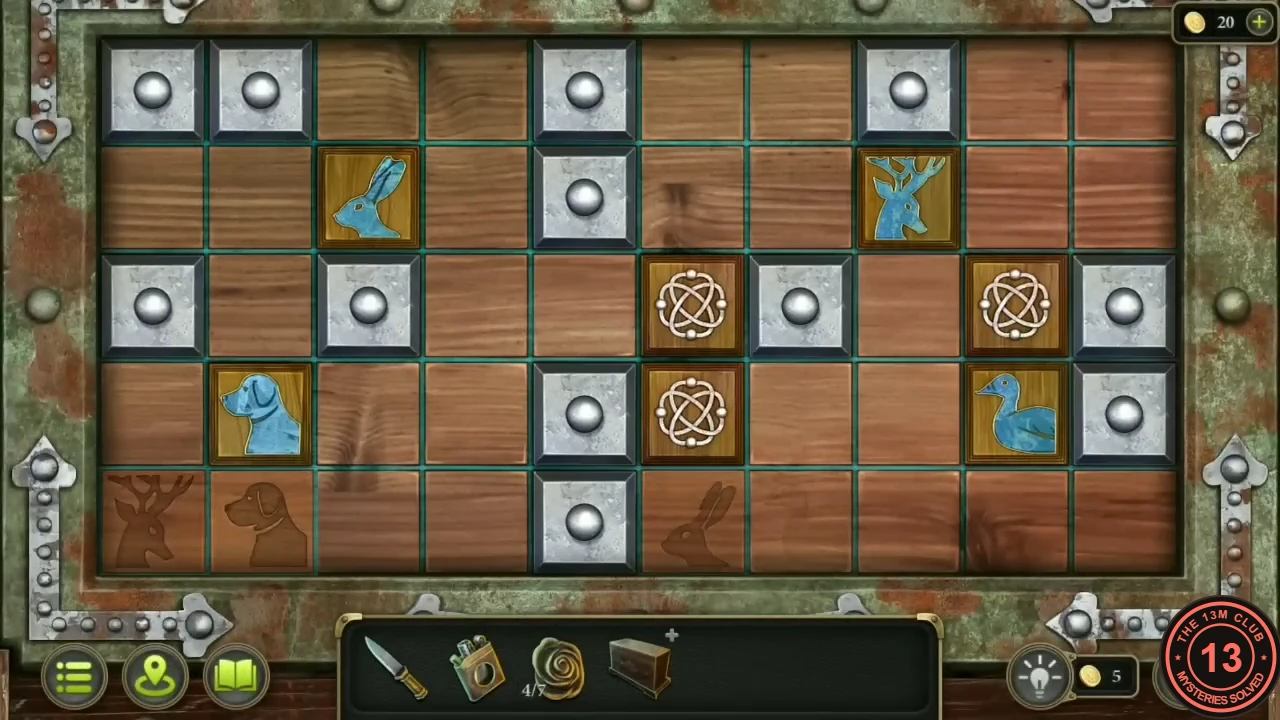
The striped chest in the log shed of the Mysterious forest opens with the Amulet. Its lid is a sliding-tile board. The arrangement can vary, so use the method below.
- In the Mysterious forest, open the log shed and put the Amulet into the lock of the striped chest.
- Each arrow moves every loose tile one cell in that direction if the cell ahead is free; the edge, the fixed metal studs and other tiles stop them. Bring the hare, deer, dog and duck tiles onto the carved hare, deer, dog and duck squares in the bottom row; an animal glows when it is home. Use studs and the three plain knot tiles as stoppers: a tile you want to keep still can be pinned against one while the others move. Plan one animal at a time and check what every other tile will do before each press.
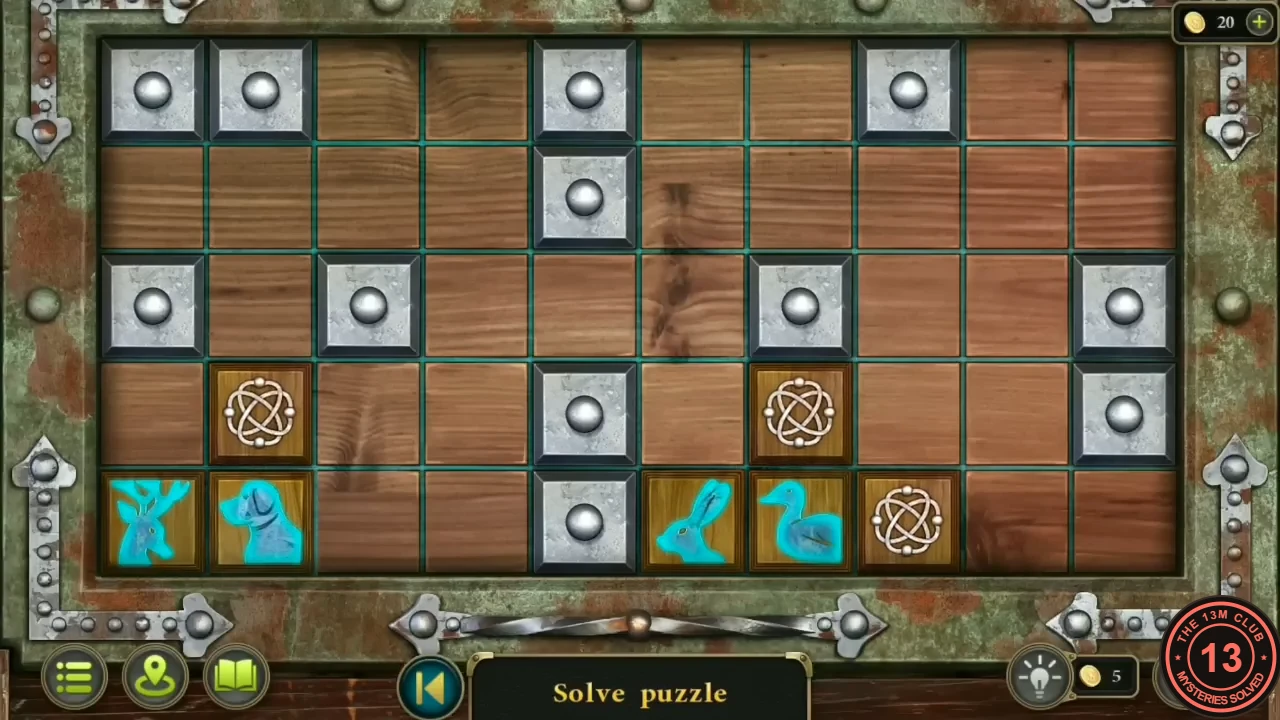
The four animals on their squares. - Read the hunters' note in the chest and take the Ax.
The sawmill, the bridge and the burnt mill
With the Ax you can get the sawmill running, cut planks for the broken bridge and reach the burnt mill.
- Chop the thick roots at the bottom left of the forest, where the bird dropped its find, with the Ax and take Flower 5/7 from the hole. Split the hollow trunk on the right with the Ax and open the Bundle in your inventory: a Statuette and a crank Handle.
- In the sawmill, fit the Handle to the saw engine. Chop the chopping block with the Ax to get Firewood and a Crowbar.
- Put the Firewood in the furnace, tap the wood shavings on the floor to add them, and light the fire with the Lighter.
- Break the padlock of the toolbox with the Crowbar, take the Gear and fit it in the engine where you removed the broken one.
- In the town square, prise open the nailed crate on the wagon with the Crowbar for the Saw. Free the well mechanism with the Ax and wind up the bucket for a second Statuette.
- Back in the sawmill, put the Saw in the empty blade slot of the saw bench. Then go to the saw engine and pull the Handle you fitted earlier: the log is cut into Boards. Take the Nails from the toolbox.
- At the broken bridge over the river in the field, lay the Boards, add the Nails and hammer them in with the Ax. Cross to the burnt mill.
- At the mill, take the Chain with hook from the sacks under the lean-to and tap the scorched ground (Lightning strike). Hook the chain to the winch over the trapdoor in the ruin to lift it, and go down.
- In the basement, tap the miller's body (The suffocated miller), take the Key by his hand and open his leather bag: a paper shows three digits. In the cage on the left, tap the fur (Dog's fur) and notice the scratched number hidden under soot on the wall.
- Open the padlocked cage of boxes with the Key (the boxes hold dynamite, needed much later). Take the Brush lying inside and sweep the soot off the wall of the left cage to reveal three more digits.
The safe in the mill basement
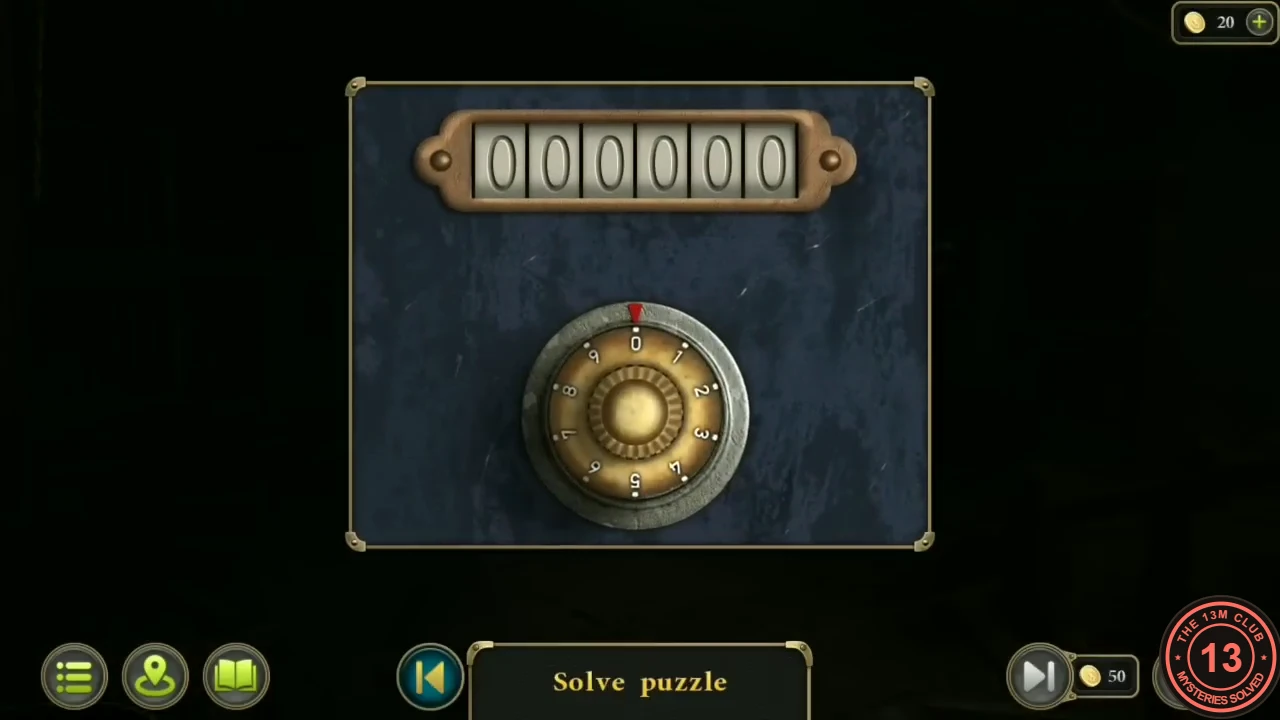
The safe on the basement's right wall takes a six-digit code read from two clues in the room. The numbers change from game to game, so read your own.
- Tap the safe. Turn the dial until a digit sits under the red pointer and release to enter it; the next wheel then becomes active. Enter the three digits from the paper in the miller's bag first, then the three digits from the cage wall. Example from the recording: the paper read 602 and the wall 296, so the code there was 602296.
- Take the Key from the safe and read Sylvester Courtney's letter to Count Babington: the Dobermans he was shown at the mill are not ready for sale yet and need a few more months of training (Documents on the dog's sale). The file concludes that the miller bred dogs in his basement.
The casket from the river stump
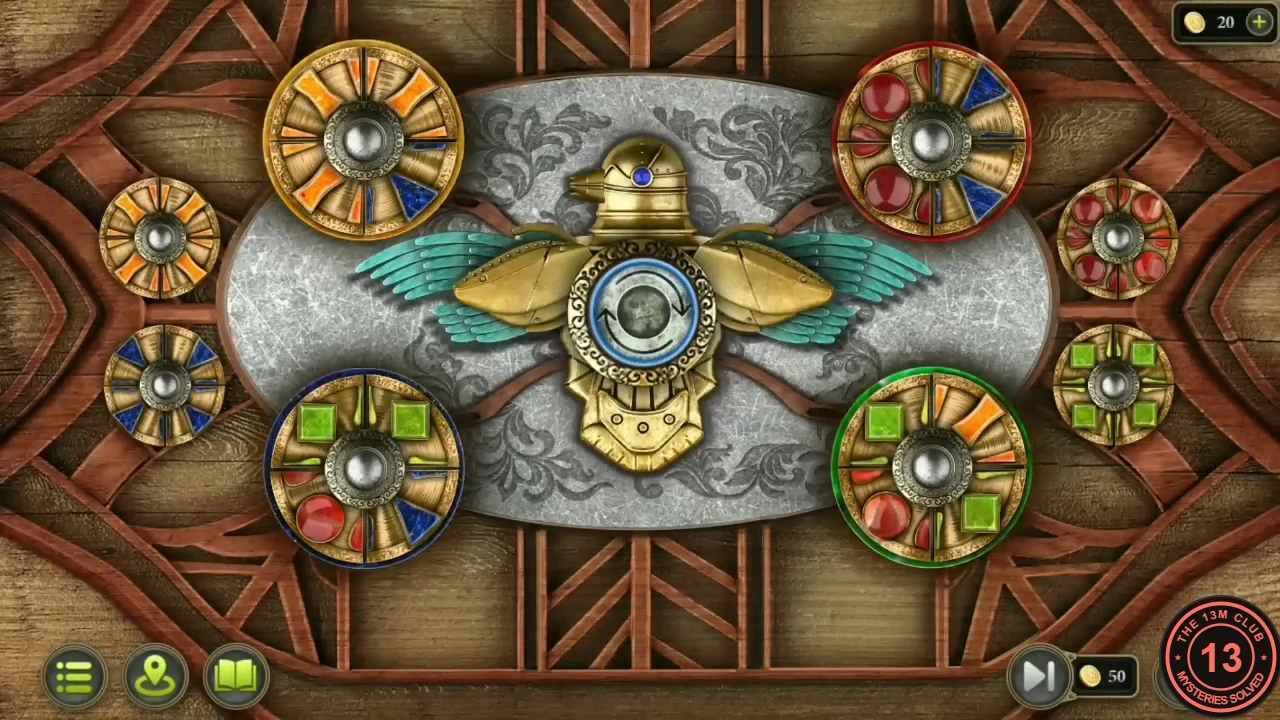
The small locked casket from the field opens with the Key from the safe. Its lid is a colour-sorting puzzle with four discs around a winged scarab. Starting positions differ between games.
- Open the casket (the Chest item) in your inventory and use the safe Key on the keyhole in its side.
- Each big disc is made of four quarters. Tap a disc to turn it a quarter turn. Tap the round button on the scarab in the middle to pass the four quarters facing the centre one disc onward clockwise. Make every disc a single type: orange spokes, red gems, blue triangles or green squares. Tip: before pressing the button, turn each disc so the quarter facing the centre is the one the next disc clockwise needs, while its other three quarters are already its own type. In the recording the game accepted orange top left, blue bottom left, green top right and red bottom right.
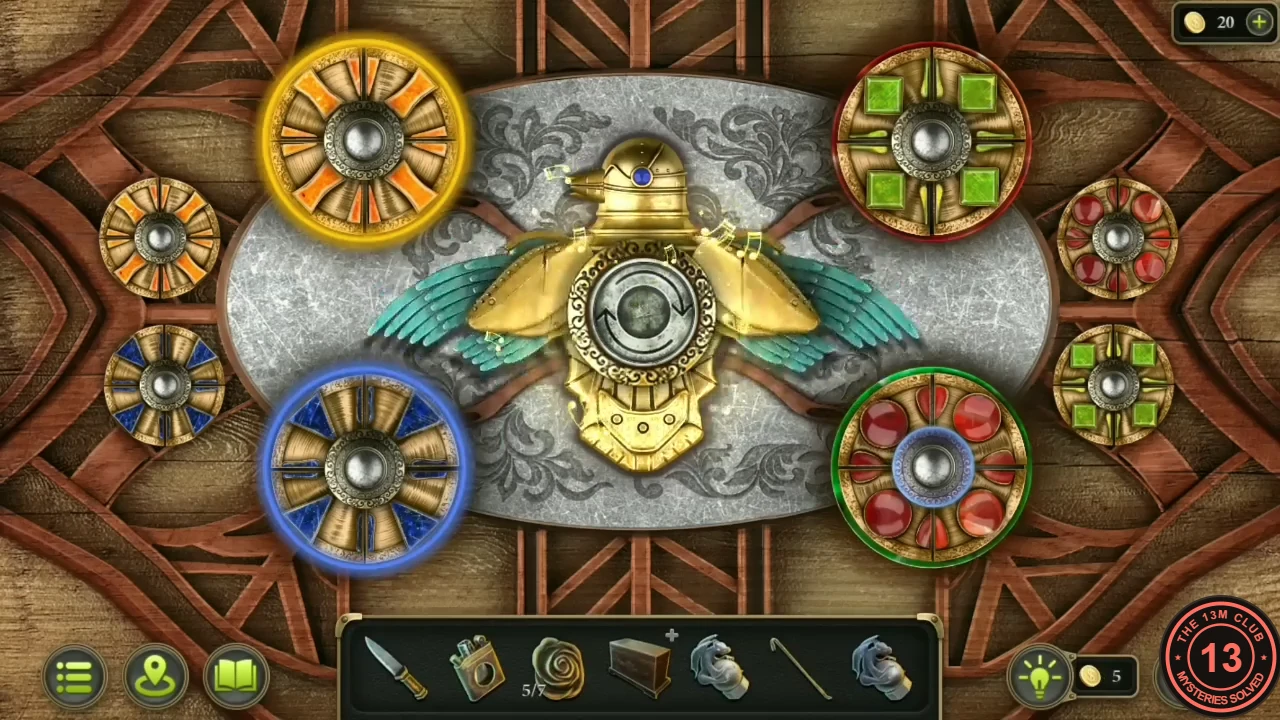
An accepted finish from the recording: orange top left, green top right, blue bottom left, red bottom right. - Take the Dog figurine from the drawer.