The gargoyle spout and the revolver
The basement has a gargoyle statue on the left, a woodpile under an arch, a gargoyle-head water spout on a pillar and an iron door behind crates on the right. The hatch above is shut, so the way out lies ahead.
- Zoom into the gargoyle statue on the left and take the incomplete Revolver.
- Zoom into the water spout and take the Gypsum bag and the grey bat-wing-shaped revolver part.
- Put the Plastic Bag over the spout and strap it on with the Belt. The water is redirected; take Ornament 1/2 (silver fleur-de-lis) and the green Bat Key.
- In the inventory, attach the bat-wing part to the Revolver. It still needs ammunition.
Behind the iron door: the match box
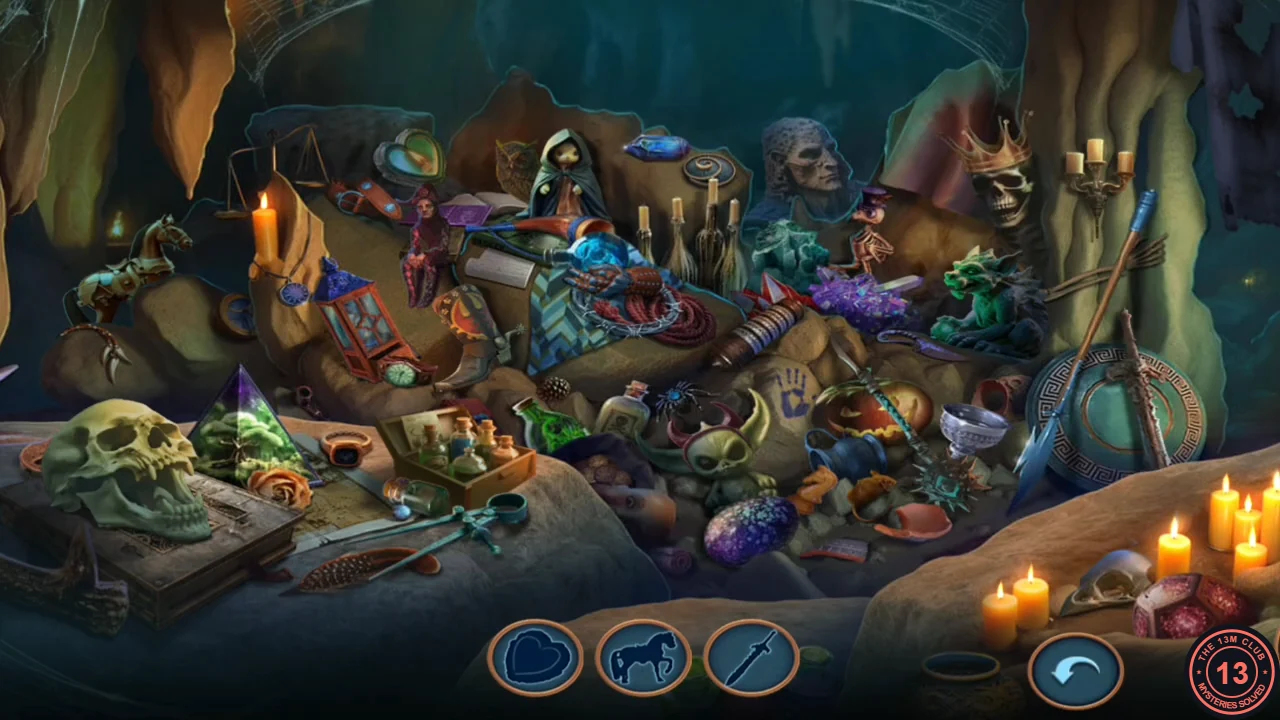
The iron door behind the crates opens with the Bat Key from the spout.
- Zoom into the iron door behind the crates and use the Bat Key on its keyhole. The door opens on a junk pile.
- The search scene shows three silhouettes at the bottom; each found object is replaced by the next silhouette until twelve are found. In the recording's order: the bronze mechanical horse (far left); the rusty sword standing upright in front of the round teal shield (right); the green-and-gold heart locket (top left, beside the scales); the cowboy boot (centre left); the three-candle wall sconce (top right); the big yellow skull (lower left); the silver barbed-wire wreath under the blue glove (centre); the wooden box of potion bottles (centre left); the spiked mace below the jack-o'-lantern (right of centre); the small hooded doll (top centre); the green gargoyle statue (right); and the green horned imp skull (centre, near the purple handprint). None of them needs an extra action. At the end you receive the Match Box. The recording had used no hints in this scene or in the two decoration piles and got the achievement "Eerie Company" (Finish 3 HOPs without any hints). If you have not earned "On All Hallows Eve" yet, this scene needs no extra actions, so it is another chance to finish within a minute.
Blast the rubble
The woodpile under the arch blocks a tunnel. The Box from Vlad's study still holds fireworks.
- Zoom into the pile of firewood and rubble under the arch. Place the Box at its foot; the fireworks end up in the pile. Light the fuse with the Match Box. The blast clears a glowing tunnel.
- The detective wants to check the tunnel first. "Let him go" is free and gives no points; "Throw something" costs 25 coins and gives 2 decision points; "Explore" costs 35 coins and gives 4. With "Let him go" (the primary recording) he walks into a trap and barely escapes ("Oh, I nearly died!"). With "Explore" (seen in another recording) a short scene follows instead: a torch lights the tunnel and shows a rope-and-pulley trap in the wall, the rope is cut, and the detective says "Thank goodness you noticed that, or our pieces would be hanging from those axes!". There is no puzzle, and you carry on at the gargoyle tunnel. The "Throw something" scene was not shown.
Rune door code
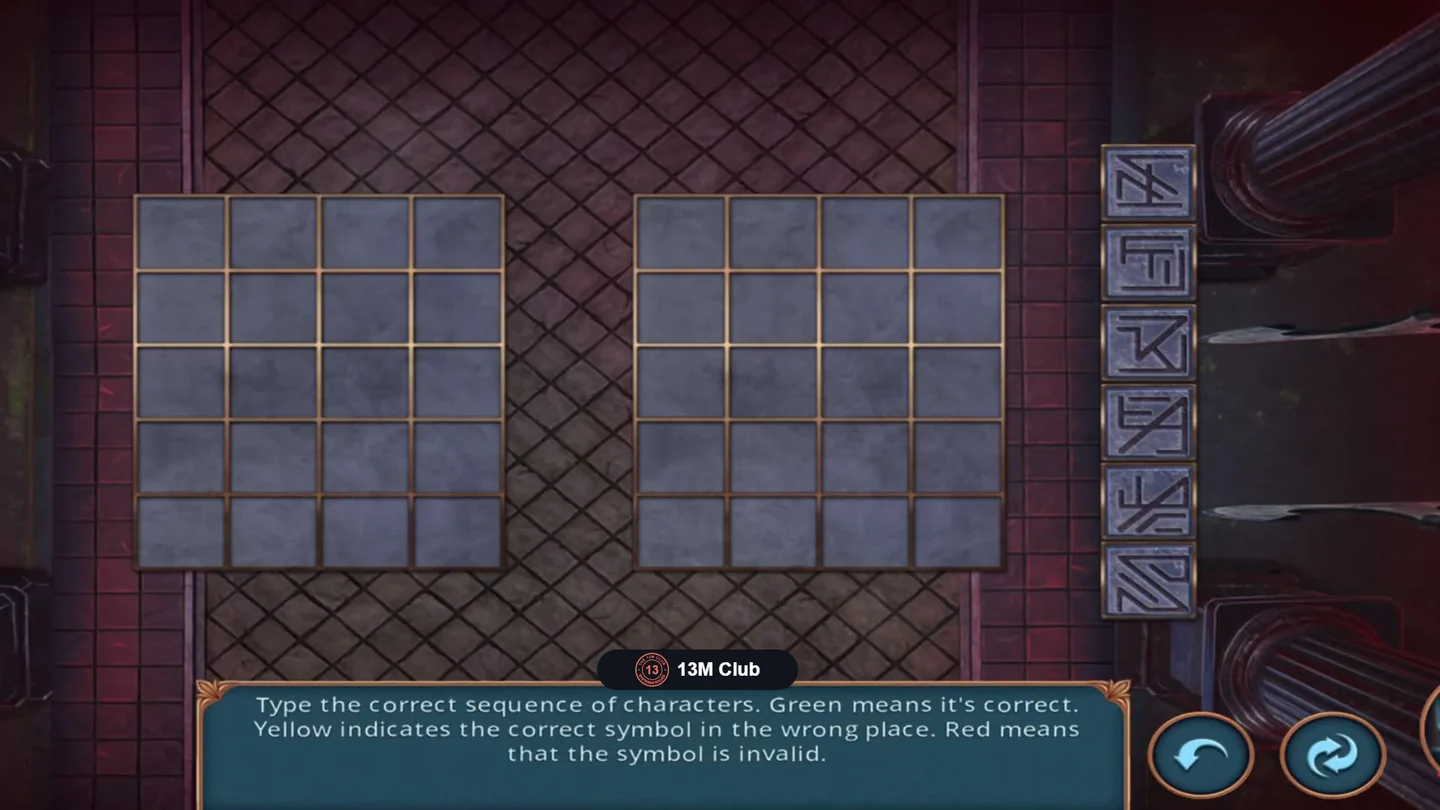
At the end of the tunnel a door is locked with a rune code. No item is needed; the code screen opens after the detective escapes the trap.
- Puzzle: "Type the correct sequence of characters. Green means it's correct. Yellow indicates the correct symbol in the wrong place. Red means that the symbol is invalid." Enter four runes from the six buttons on the right; your guess fills the bottom row first and the result appears on the right. Keep green runes, move yellow ones and drop red ones. In the recording the first guess was correct: a zigzag S-shaped rune, a rune like a 4 with a slash, a T-shaped rune and a K-shaped rune. Whether the answer changes between games is unknown.
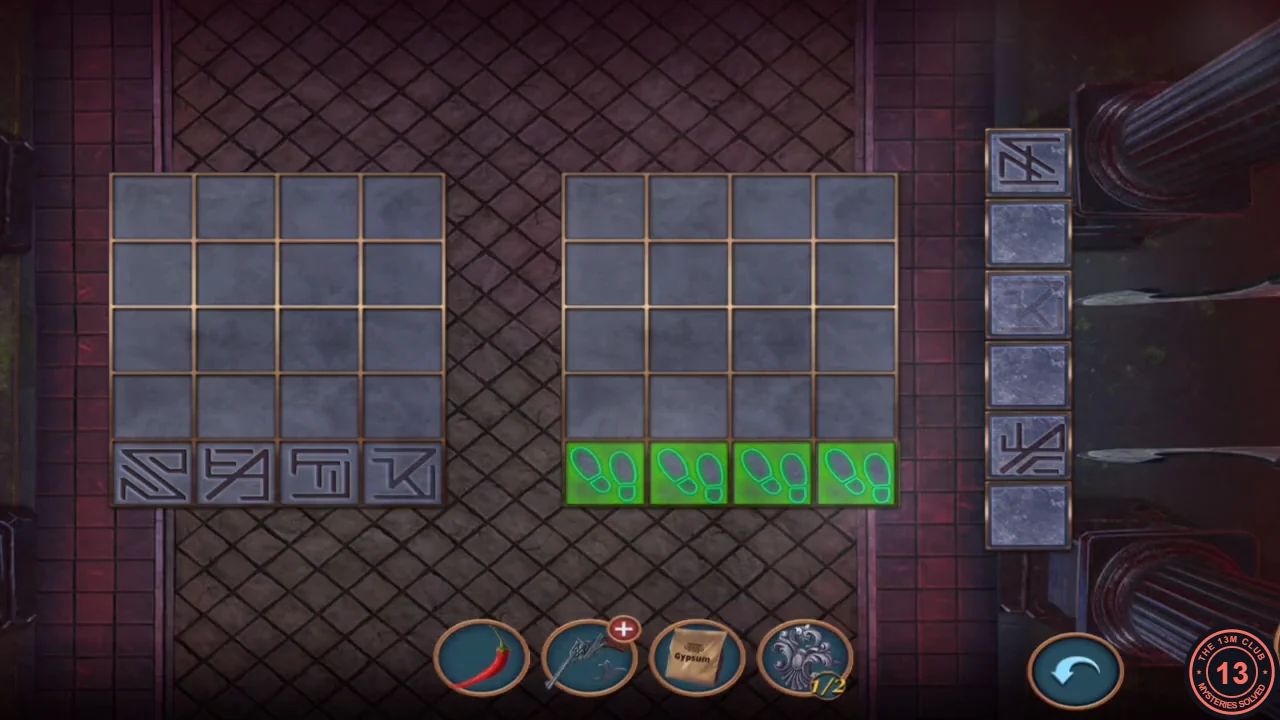
The correct guess in the recording: all four results are green.
The mimic chest and the rose mold
The crypt has a wardrobe on the left, an ivy-covered stone tablet left of the sarcophagus, the sarcophagus in the centre and a chest on a table on the right.
- Zoom into the ivy-covered tablet left of the sarcophagus and take the Rose Mold.
- In the inventory, add the Gypsum to the Rose Mold.
- Zoom into the chest on the table (it is a living mimic). Feed it the Chili Pepper. It snaps open and shut; take the Water Bottle and the Rolled Paper.
- Add the Water Bottle to the Rose Mold ("I can make a new one with a mold."). It is still incomplete.
- Zoom into the top of the sarcophagus (a skull with blue eyes, a small box and two round holes). Place the Rolled Paper beside the box; it unrolls into a maze plan and a puzzle opens.
Light maze
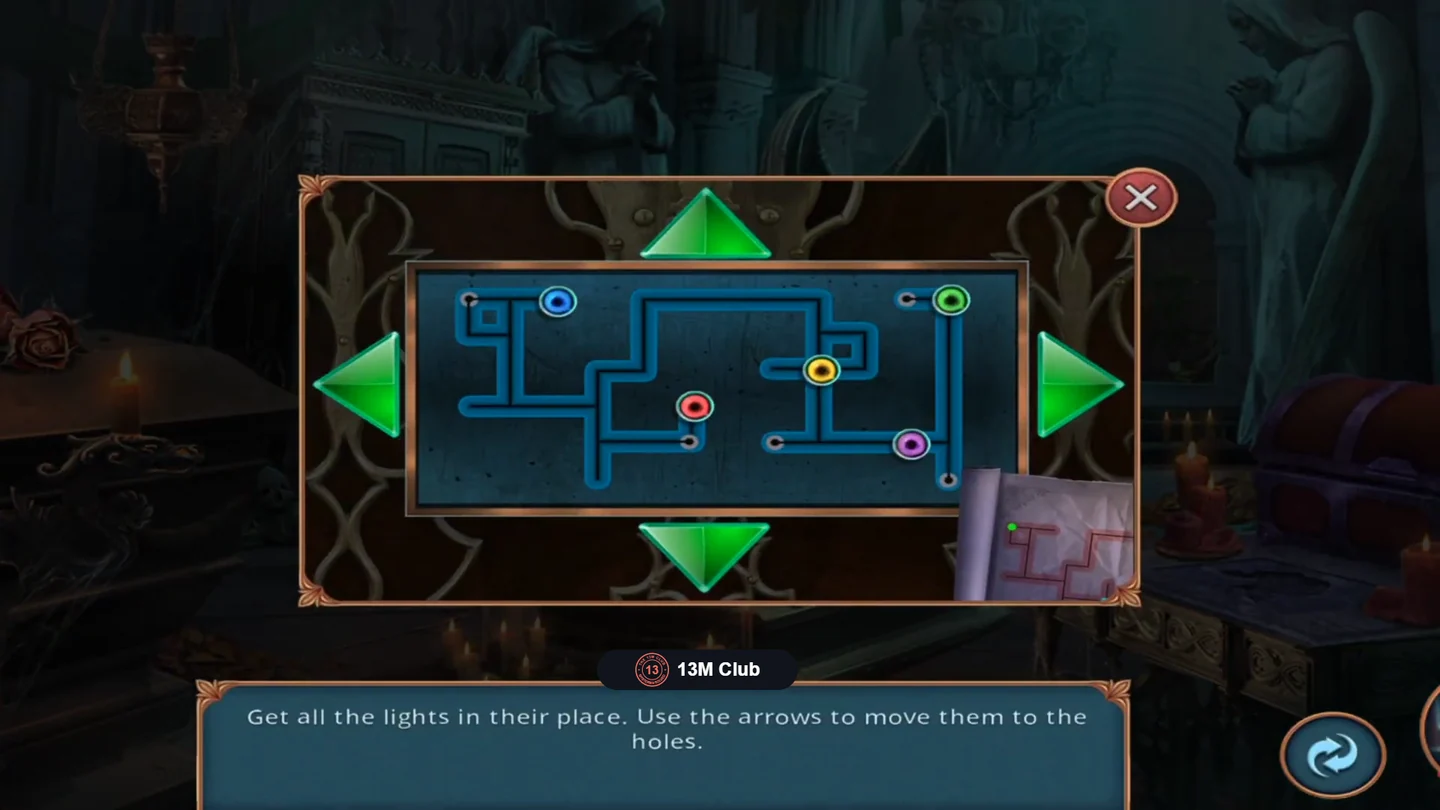
Five coloured lights sit on a network of blue channels with five holes at dead ends. Any light can go into any hole; colours do not need to match.
- Puzzle: "Get all the lights in their place. Use the arrows to move them to the holes." Each big green arrow moves all free lights at once until they hit a wall. A light that stops on a hole locks there as a green ring and no longer moves. Lock the lights one at a time, using walls to separate a light from the others before sliding it into a dead end. In the recording the holes filled in this order: bottom right, top right, top left, lower centre, and lower centre-right last. It took about 45 presses.
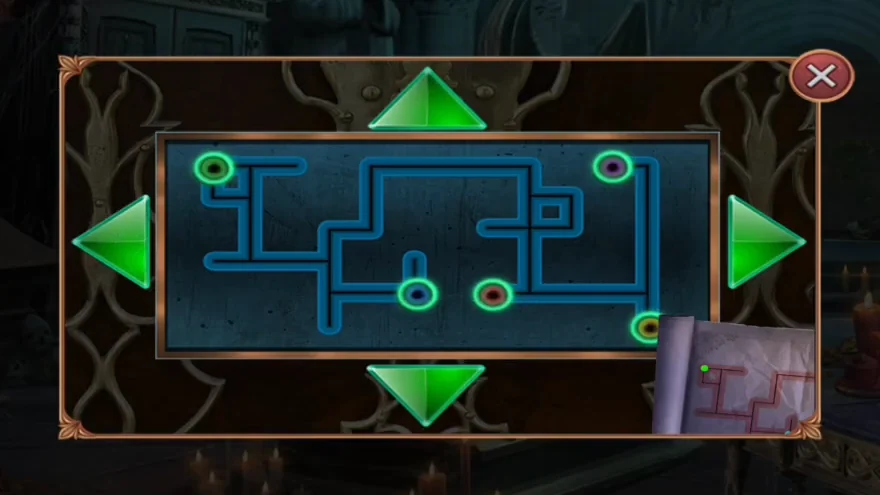
Solved: all five holes show green rings. The paper at the lower right is part of the game screen. - Take the Bullet from the opened box on the sarcophagus and load it into the Revolver in the inventory.
The wardrobe skull and the ghost
With the Bullet loaded, the Revolver opens the padlocked wardrobe in the crypt.
- Zoom into the padlocked crypt wardrobe and shoot the padlock with the Revolver. Inside, one book is missing from the shelves ("Someone has not put one of the books back in its place."). Take Skull 1/2 (blue glowing eyes).
- Return to the basement. A blue ghost flies out of the iron doorway, and the junk pile behind it becomes a new hidden-object scene.
Paired-items scene: the statue part
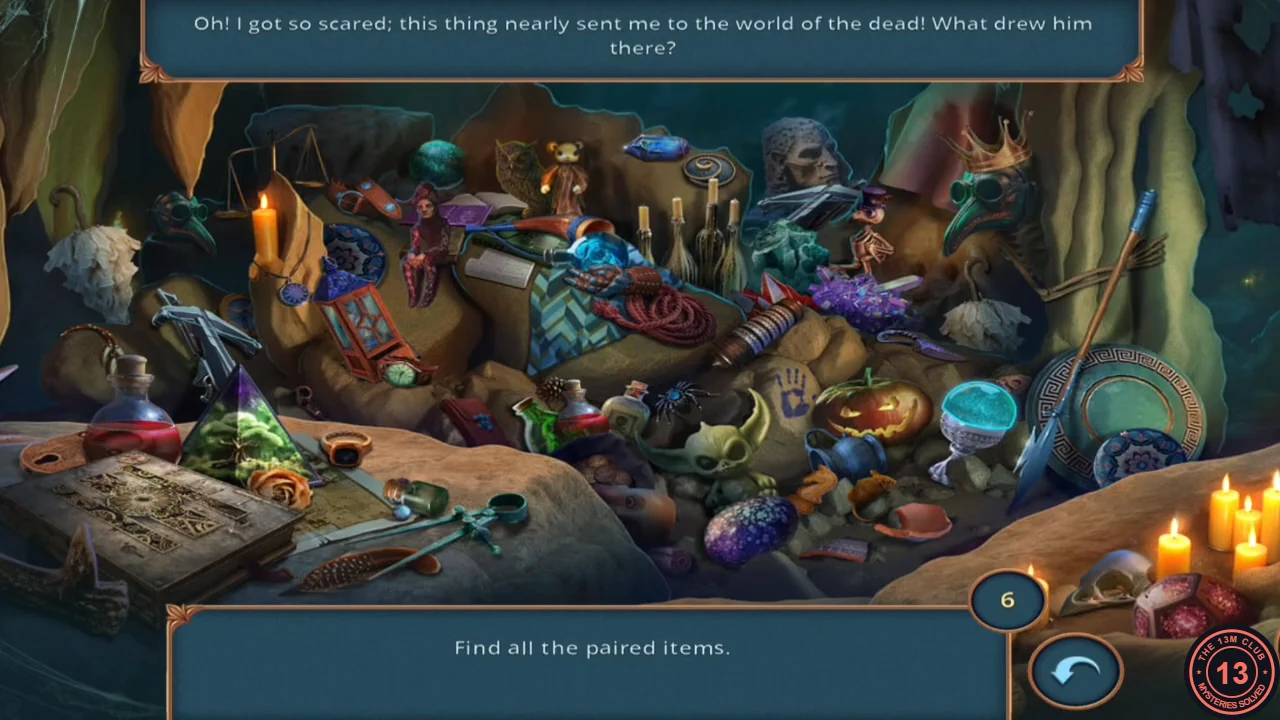
After the ghost leaves, the junk pile behind the basement iron door can be searched again, this time for pairs.
- Open the scene behind the iron door: "Find all the paired items." Tap both objects of a pair to remove them; the counter goes from 6 to 0. In the recording's order the six pairs are: the teal speckled ball (top centre left) and the glowing glass ball in the silver goblet (right of the jack-o'-lantern) — in the recording the achievement "Your Luggage, Sir!" (Find 40 objects) appeared right after this pair; the two blue patterned plates (one left of centre beside the candle, one lower right in front of the round shield); the two red potion flasks (a large one far left, a small round one in the centre); the two white ruffled mop heads (upper left and right, below the purple crystals); the two green plague-doctor masks (upper left and upper right, on the crowned skeleton); and the two grey crossbows (left of centre and top right, below the stone head). When all pairs are found you receive the Statue Part (a curved horn).
The gargoyle horn and the coffin hand game
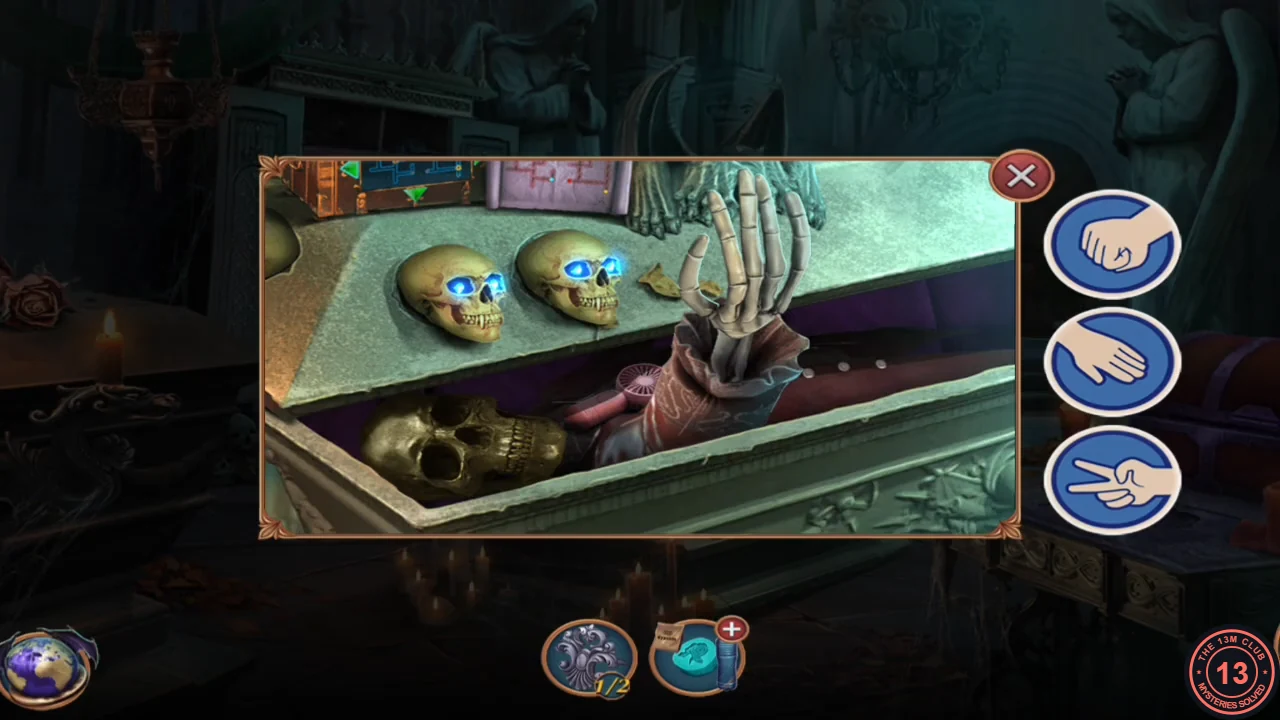
The Statue Part completes the basement gargoyle, and the two skulls open the sarcophagus in the crypt.
- Fit the Statue Part onto the basement gargoyle statue as its missing horn. Its hand opens; take Skull 2/2.
- In the crypt, put both Skulls into the round holes on top of the sarcophagus. The lid slides open, an achievement banner appears and a skeletal hand rises.
- Play rock-paper-scissors against the hand using the three buttons on the right: fist (rock), flat hand (paper), two fingers (scissors). In both recordings we checked, the hand played Rock and Paper won in a single round. It is not known whether the hand always plays Rock, and neither recording showed what happens after a lost round.
- Take the Hand Fan from the coffin.
The plaster rose and the book
The Hand Fan from the coffin is the last ingredient for the rose mold.
- In the inventory, add the Hand Fan to the Rose Mold. The gypsum and water are poured in and the fan dries the cast; take the Plaster Rose.
- Press the Plaster Rose into the rose-shaped recess in the stone slab in front of the mimic chest. A glowing spark flies out and you receive a Book.
- Zoom into the ivy-covered tablet ("No one has touched this lock for a long time.") and place the Ornament on it. It is not open yet.
Wardrobe arrow puzzle
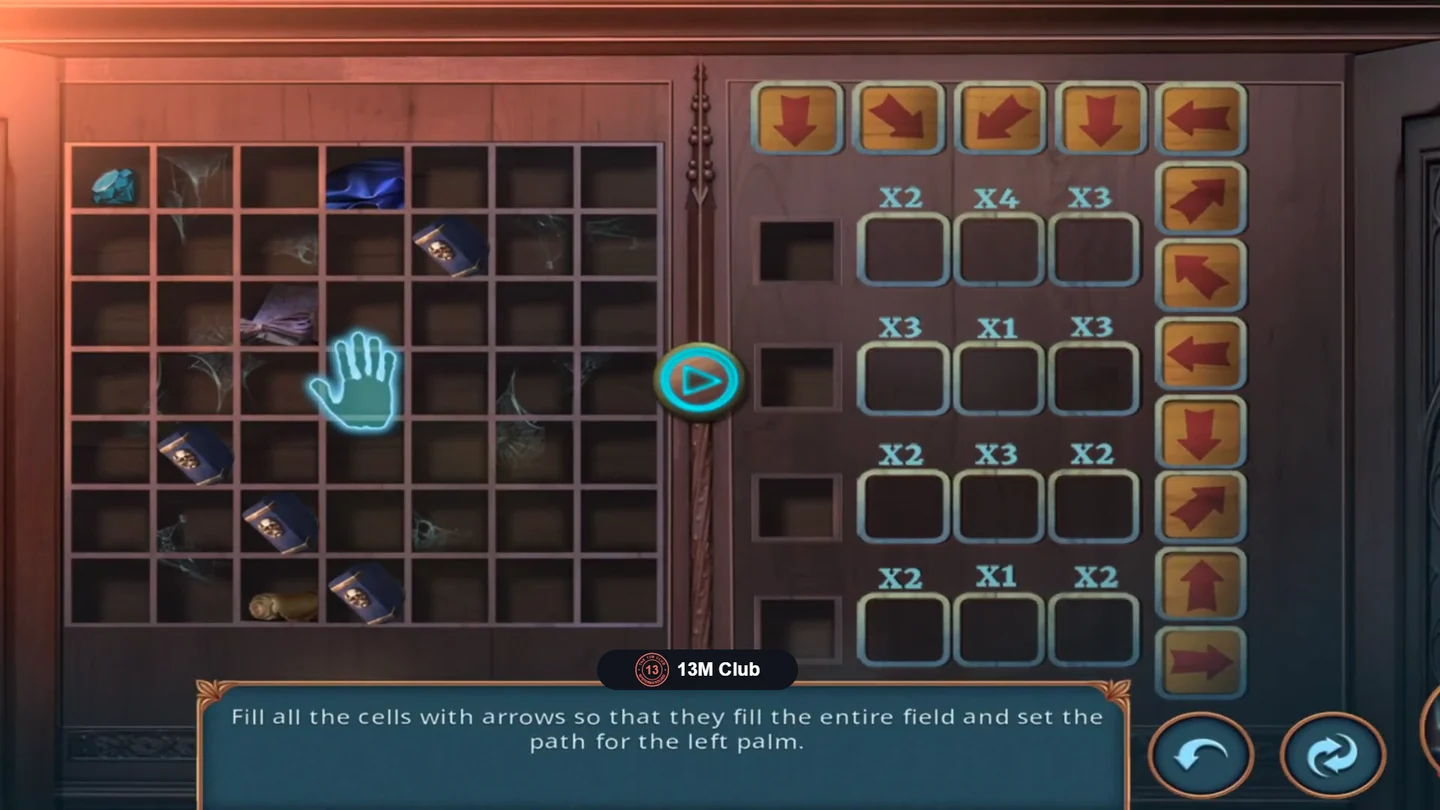
Placing the Book on the crypt wardrobe shelves starts a programming puzzle. The left side shows a 7x7 grid of the shelves with a glowing palm. The right side has four programme rows of three cells; each cell repeats its arrow a fixed number of times.
- Put the Book into the gap on the wardrobe shelves. A ghostly face bursts out and a puzzle opens.
- Puzzle: "Fill all the cells with arrows so that they fill the entire field and set the path for the left palm." Tap an arrow in the pool (top row and right column), then a programme cell. Repeat counts in the recording: row 1 x2, x4, x3; row 2 x3, x1, x3; row 3 x2, x3, x2; row 4 x2, x1, x2. Programme that worked in the recording: row 1 up-right, down, left; row 2 up, up-left, down; row 3 right, up-right, left; row 4 down, down-right, down-left.
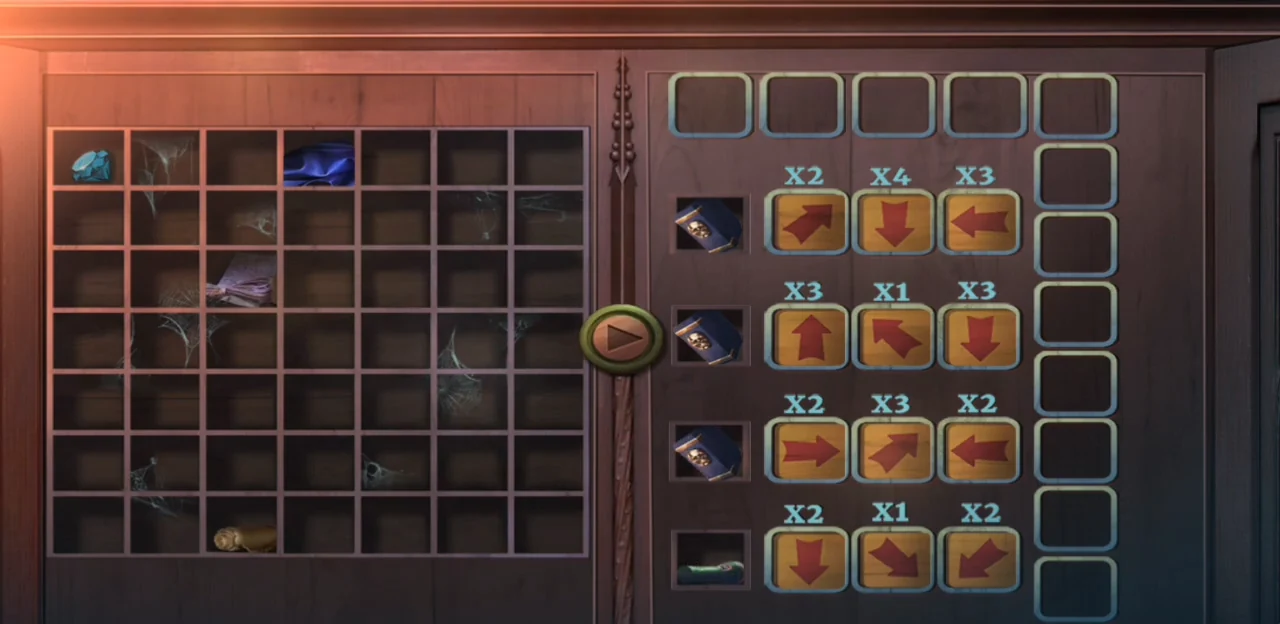
Programme used in the recording: all twelve cells filled, ready for the play button. - Press the play button between the grid and the programme. The palm follows each row and collects an item; the last one is the Flashlight.
The scraper and the ivy tablet
The Flashlight leads to a handle for the blade by the water spout, and the finished Scraper clears the ivy tablet in the crypt.
- In the basement, zoom into the dark alcove above the stairs where red eyes glow. Shine the Flashlight to drive the creature away and take the Wooden Handle.
- Zoom into the water spout. A bare metal blade is stuck in a crack to its left ("There's nothing to even grab onto."). Fit the Wooden Handle onto it and take the Scraper.
- In the crypt, use the Scraper on the ivy tablet to clear the left and right shields. Tap the emblem on the middle shield; all three emblems light up, the tablet slides open and a passage leads into a red labyrinth.