Pack for the party
The episode opens in your apartment with the task "Get ready". The bedroom holds the wardrobe, the suitcase on the armchair and the desk with the laptop and printer; the bathroom is through the door on the right.
- Open the wardrobe on the left and take the Yellow Ink Bottle from the shelf.
- Open the suitcase on the armchair. Read the invitation (a party on 31 October at 21:00), then take the Empty Soap Bottle, the Dividers (two thin metal rods) and the Plastic Card.
- Go through the door on the right into the bathroom. Use the Plastic Card on the jammed cabinet door, then take the incomplete Tripod and the Screwdriver.
- Return to the bedroom, zoom into the desk and take the Tripod Leg (the red rod under the papers by the laptop).
- Pour the Yellow Ink Bottle into the printer's ink tank.
- Use the Screwdriver on the computer mouse to open it and take the Battery.
- In the inventory, attach the Tripod Leg to the Tripod. It still needs one more part.
- In the bathroom, put the Battery into the soap dispenser (its light turns green), then place the Empty Soap Bottle under it to fill it. Take the Soap.
- Use the Soap on the rusty zipper of the suitcase. Take the Laptop Charger, the Tripod Head (purple knob) and the Costume Note.
- In the inventory, attach the Tripod Head to the Tripod to complete it.
- Place the Costume Note in the wardrobe. It lists a striped suit, an orange wig, a mask, a red bow tie and white gloves (the back reads "This is your costume. Annabelle"). Tap those five pieces in the wardrobe to collect the Costume.
- Put the Costume into the suitcase. The achievement "Cut of your jib" (Pack for the party) appears.
Laptop pinwheel puzzle and the plane ticket
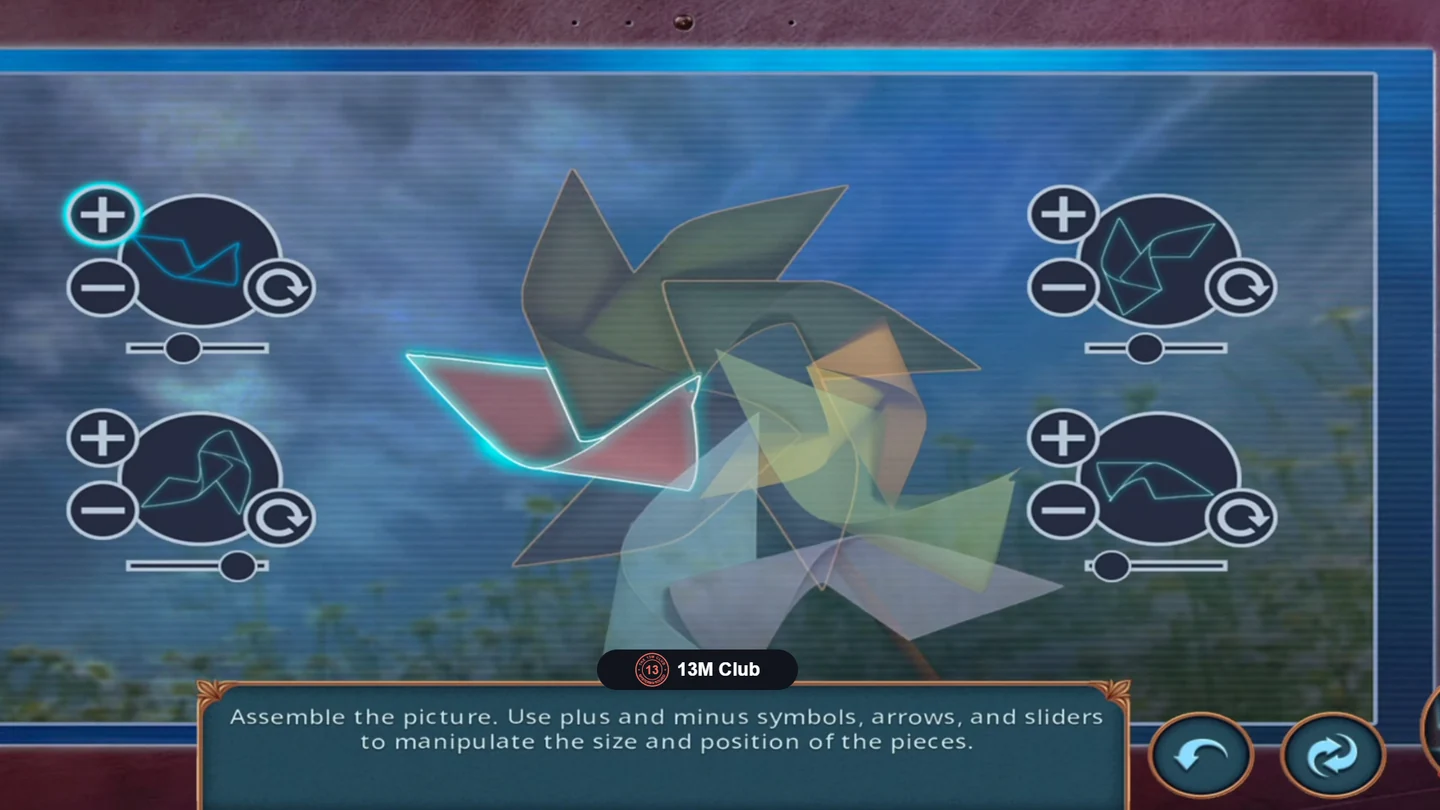
Charging the laptop opens a picture-assembly puzzle of a pinwheel. Each of the four pieces has its own control panel.
- Plug the Laptop Charger into the laptop on the desk.
- Puzzle: "Assemble the picture. Use plus and minus symbols, arrows, and sliders to manipulate the size and position of the pieces." There are four panels, two on each side, each showing the outline of one piece. Use + and - to change that piece's size, the round arrow to rotate it and the slider to move it until it fits the pinwheel outline in the centre. A piece glows when it is correct, so finish one panel at a time. The puzzle ends when all four glow.
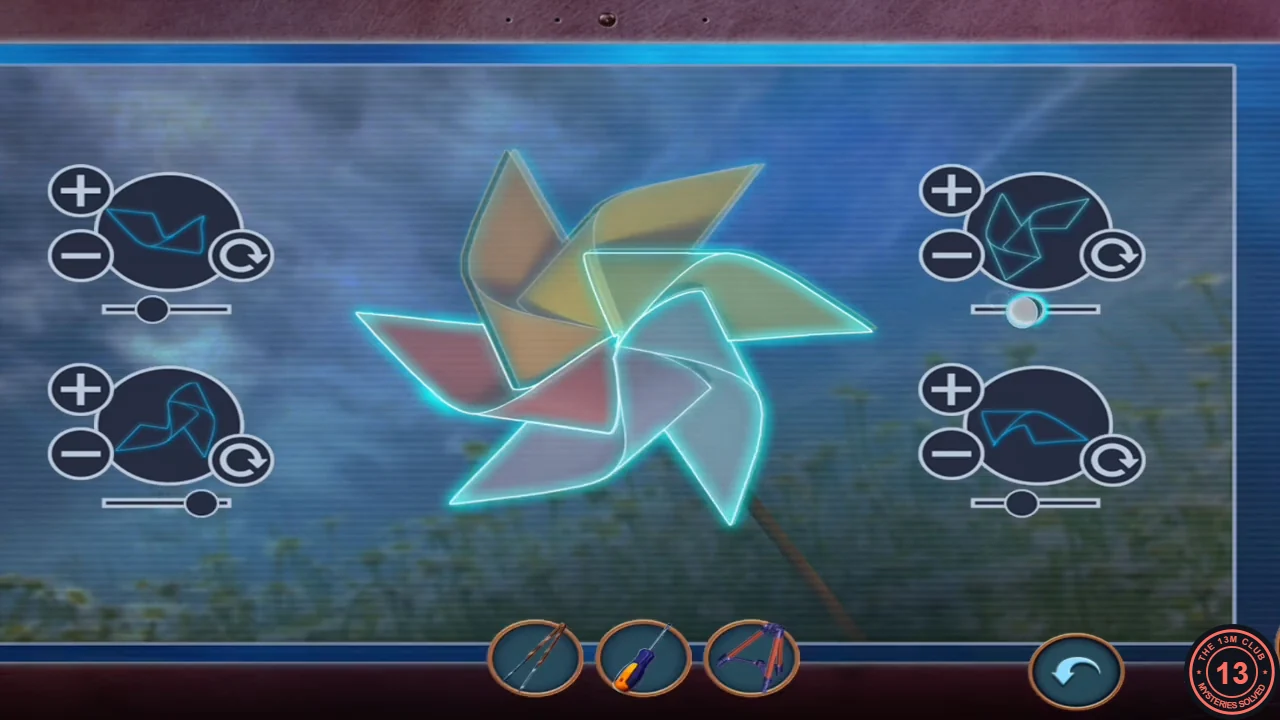
Solved: all four pieces glow and the instruction panel disappears. - The laptop now shows the Airplane Ticket. Press Print and take the Ticket from the printer.
- Put the Ticket into the suitcase. You travel to the hotel; the task "Get ready for a party" is complete.
The hotel lobby and the card table
You arrive in the hotel lobby. It has a card table, the reception desk with a telephone, a sofa on the left and the door to the bar on the right.
- Zoom into the card table and take the Screw lying below it.
- At the reception desk, read the welcome postcard. Use the Dividers on the crack beside the telephone to pull out Cards 1/2.
- Zoom into the sofa on the left (a green hand hides beneath it). Use the Tripod to lift the sofa, then take the Skull Mug, the Bone (a thin bone rod) and Cards 2/2.
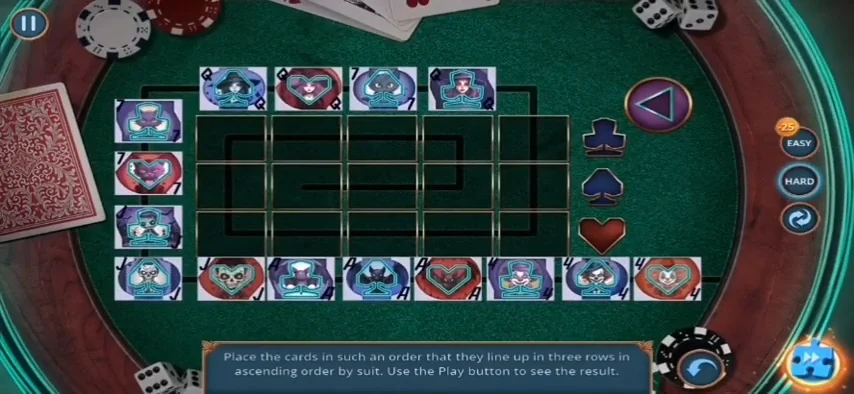
- Place the cards on the card table. In the primary recording they arranged themselves on the grid and a drawer opened at once. In another recording of this game a puzzle appears instead: "Place the cards in such an order that they line up in three rows in ascending order by suit. Use the Play button to see the result." Fifteen cards — the 4, 7, J, Q and A of clubs (♣), spades (♠) and hearts (♥) — sit in a frame around the empty grid; drag one card onto another to swap them. Arrange them like this. Top row, left to right: Q♣, Q♠, J♠, 7♠. Left column, top to bottom: J♣, 7♣, 4♣, then 4♠ in the bottom-left corner. Bottom row, left to right after the corner: 4♥, 7♥, J♥, Q♥, A♥, A♠, A♣. Press the triangular Play button to the right of the top row: the cards travel into the grid and form three rows — clubs, spades, hearts — each in the order 4, 7, J, Q, A. Either way a drawer opens: take the red Bar Pass.
Abraham's story: the round picture
The bar door is to the right of the lobby. Inside, the historian Abraham tells the hotel's legend through two picture puzzles.
- Give the Bar Pass to the skeletal hand on the bar door. The hand grips it and the door opens. Enter the Blood Moon Bar and listen to Abraham.
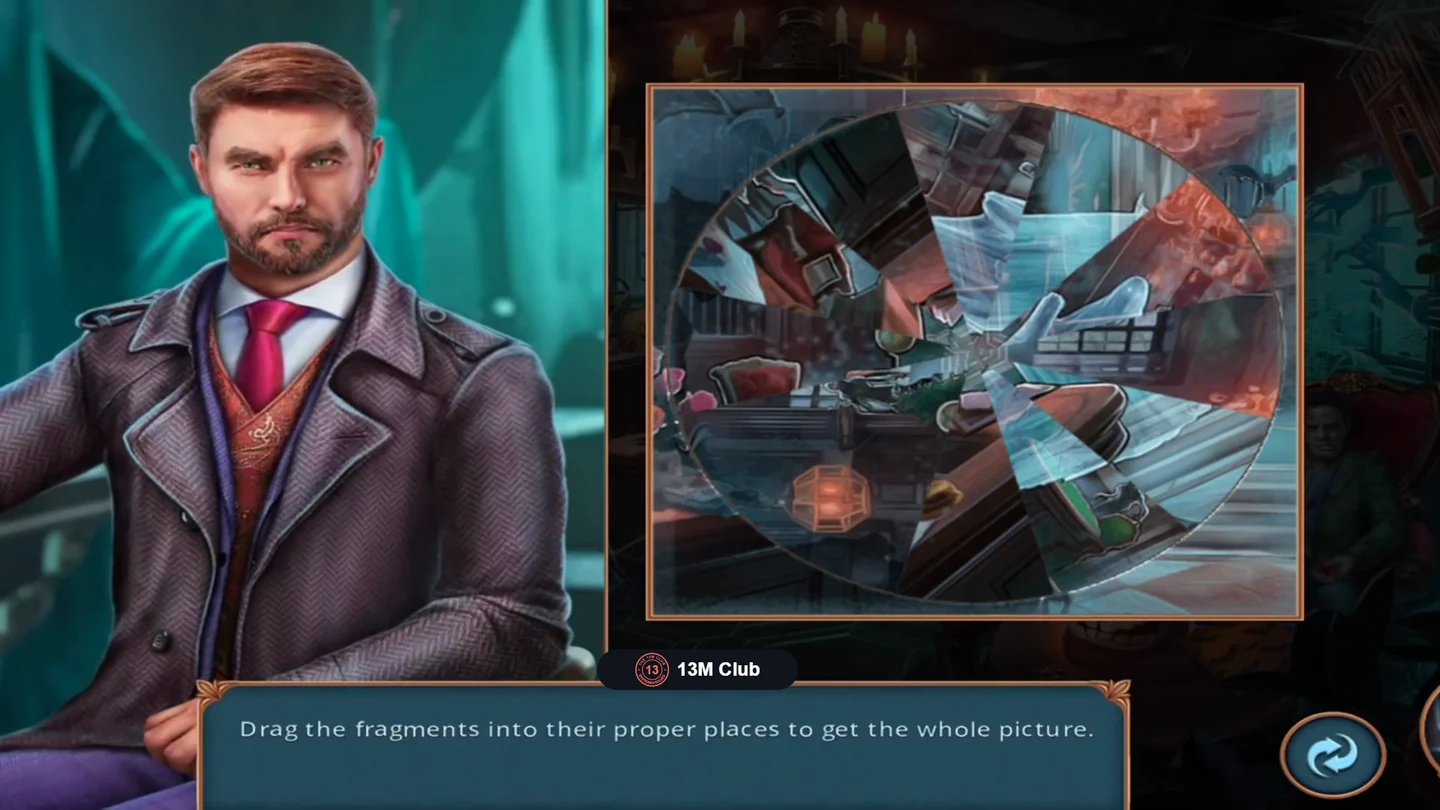
- Puzzle: "Drag the fragments into their proper places to get the whole picture." The round picture is cut into about twelve wedges. Drag one wedge onto another to swap them until the picture is whole: it shows the hotel lobby with a ghost beside the reception desk. The starting order may differ in your game; place the wedges with the ghost and the desk first and build outwards from them. An achievement banner appears when it is done.
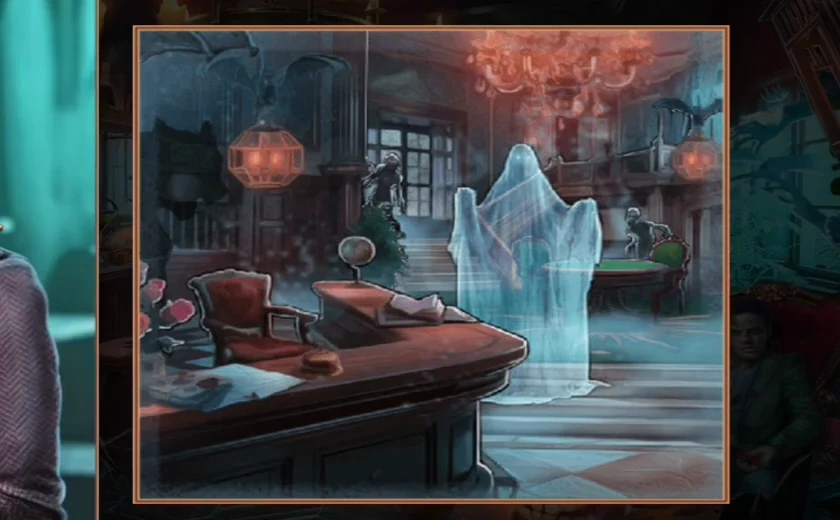
The finished round picture (view cropped to the picture).
Abraham's story: the striped picture
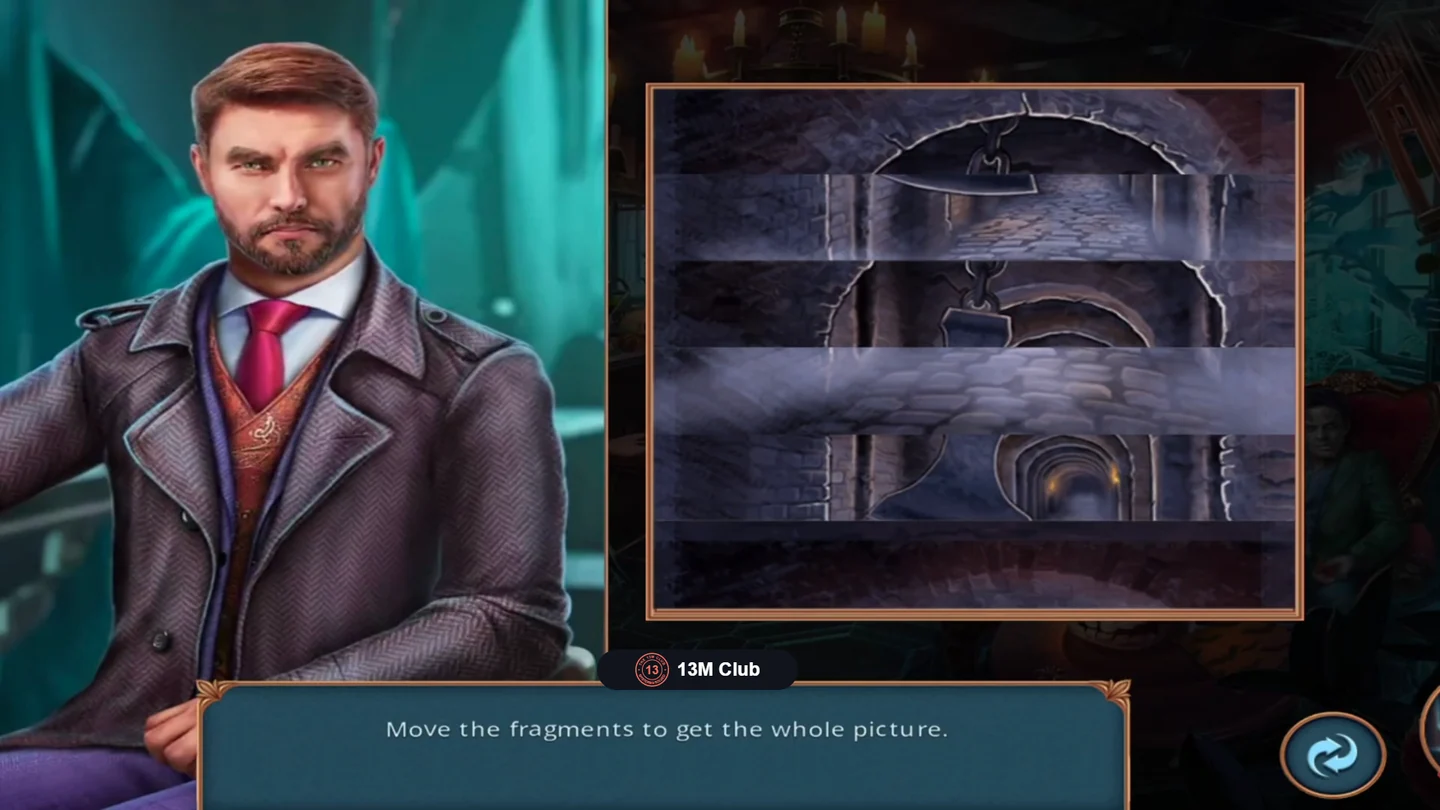
Abraham continues ("Legends can be exciting, but they're usually more fiction than actual facts. I'm a historian, so I would know.") and a second picture follows.
- Puzzle: "Move the fragments to get the whole picture." The picture is cut into about six horizontal strips. Swap strips until they form one image of a foggy tunnel arch with something hanging from it. Start with the top of the arch and the fog along the bottom, then fit the middle strips between them.
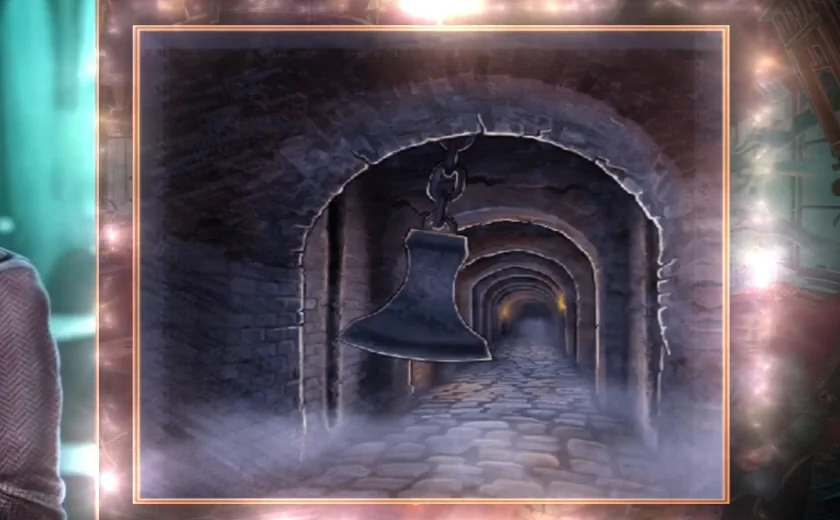
The finished striped picture (view cropped to the picture). - Abraham asks what you think of legends. "A grain of truth lives in each legend." costs 35 coins and gives 1 decision point; "No idea what you're talking about." is free and gives none (the recording chose the free answer). Decision points decide which ending you see; see the final section.
Order a drink and open the fridge
Explore the bar: the counter, Vlad's table on the right beside the pumpkin, the blue fridge door left of the counter, the jukebox and a cart in the left foreground.
- Tap the cocktails and bell on the bar counter. The task "Order a drink at the bar" completes ("Vlad seems polite!").
- Zoom into Vlad's table on the right and take the Bat Napkin and the Cold Regulator.
- Use the Cold Regulator on the blue fridge door left of the counter to start a puzzle.
Fridge thermometer puzzle
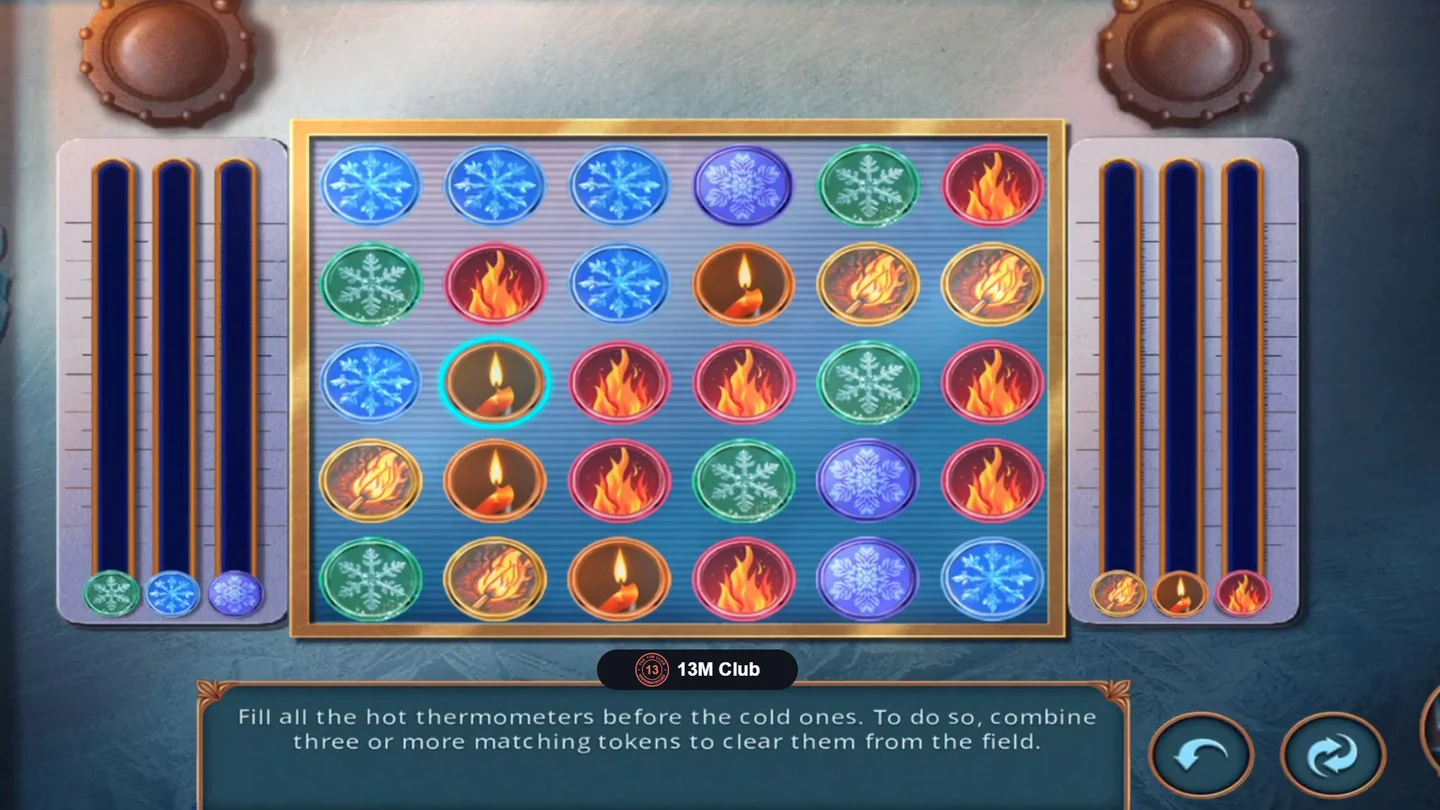
A chain-matching board with three cold thermometers on the left and three hot ones on the right. The tokens are shuffled, so your board will differ from the recording.
- Puzzle: "Fill all the hot thermometers before the cold ones. To do so, combine three or more matching tokens to clear them from the field." Press on a token and drag a connected line through three or more identical tokens, then release to clear them. The line can turn corners and can also link diagonal neighbours. The hot tokens are the burning match (gold), the candle (orange) and the flame (red); clearing them fills the three hot thermometers on the right. The three snowflakes (green, blue and purple) fill the cold thermometers on the left. Clear hot tokens and avoid cold chains when you can. You win when all three hot thermometers are full.
- Take the Strawberry and the Jelly Eye from the fridge.
The skull, the blade and the cart
Back at the bar counter, the ingredients from the fridge open the skull and give you a blade for the planter by the jukebox.
- Zoom into the bar counter (skull, glass and a chained axe). Read the cocktail menu (an achievement banner appears). Place the Bat Napkin on the counter and put the Strawberry on the glass.
- Put the Jelly Eye into the skull's empty eye socket. Its jaw opens; take the Blade. (The axe is chained down: "The chains won't let me have this axe.")
- Zoom into the hanging planter beside the jukebox. Cut it with the Blade and take the Broken Mask (a bat mask) and the Wheel.
- Zoom into the cart in the left foreground. Fit the Wheel on its axle, then fix it with the Screw and the Screwdriver. The cart rolls away. Return to the stair hall of the lobby.
The secret door and the museum
A conversation in the stair hall leads to a hidden door under the stairs and the hotel's small museum: a grandfather clock without hands, a blue cabinet, a weapon rack with a padlocked casket and a portrait above the desk.
- In the stair hall Abraham says he saw a secret door. "Sure, we have some time." costs 1 key and gives 6 decision points; "Curiosity killed the cat." is free and gives none. Every recording we checked chose the paid answer, so what happens after the free answer was not shown. After the paid answer the door under the stairs opens to the museum and the task "Explore the museum" starts. You don't have to explore it straight away: one recording solved the museum puzzles much later, after the study and the mummy.
- Take the Cold Spray (a blue can with a frosted skull on the label) from the base of the grandfather clock (its dial has no hands).
- At the blue cabinet on the back wall, take the Heavy Figurine (a small bronze knight) and Clock Hand 1/2.
- Zoom into the padlocked casket on the weapon rack. Spray the padlock with the Cold Spray to freeze it, then strike it with the Heavy Figurine. The frozen lock breaks and the lid opens; take the Portrait Piece.
- Put the Portrait Piece into the portrait above the desk. It slides aside; take the Pliers.
- Go back to the lobby. At the fog machine, take the Adhesive and Carved Tile 1/2.
- Dip the Skull Mug into the cauldron on the refreshment table to get a Mug of Hot Punch.
- In the inventory, apply the Adhesive to the Broken Mask. It still needs a missing piece.
The axe, the slime and the skeleton's chest
Now you move between the bar, the museum and the lobby, using each new tool where the previous one left off.
- In the bar, use the Pliers on the chains around the axe on the counter and take the Axe.
- Pour the Mug of Hot Punch on the green slime on the counter and take Carved Tile 2/2. The Skull Mug goes back to your inventory; keep it, because you use it again on the fire in the study.
- In the museum, hang the Axe on the empty hooks of the weapon rack. A compartment opens; take the Monster Emblem.
- Put the Monster Emblem on the doors of the blue cabinet. Bats fly out; take the Bat Figure from the shelf.
- In the lobby, zoom into the chest beside the skeleton figure right of the stairs. Place both Carved Tiles in the empty slots; the tiles light up and the lock opens by itself. Take the Witch Hat.
- Drop the Witch Hat onto the fog machine. A hidden-object scene opens.
Decoration pile and Annabelle's lights
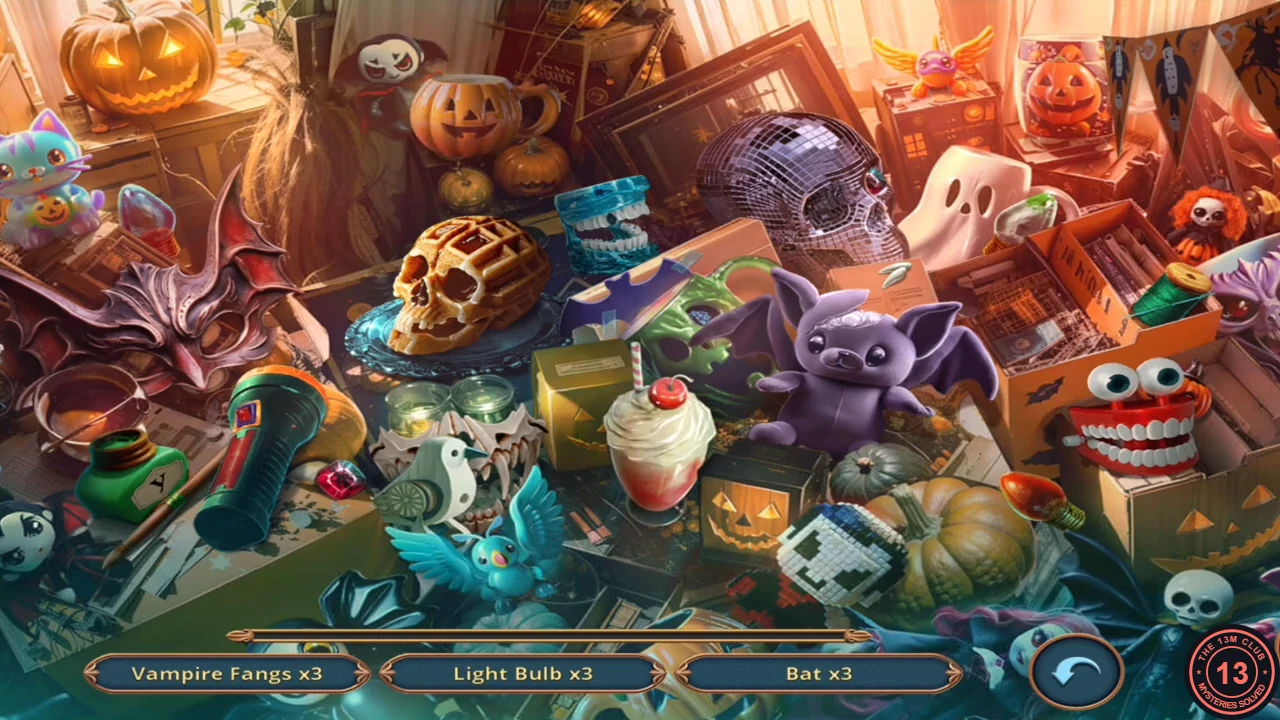
A pile of Halloween decorations with twelve objects in four groups of three. The list at the bottom shows three groups at a time; when a group is finished, the next one takes its place. Achievements for the search scenes (from the in-game achievements list): "Lone Mouse" – finish a hidden-object scene without any hints; "Eerie Company" – finish three hidden-object scenes without any hints; "On All Hallows Eve" – finish a hidden-object scene in one minute; "Your Luggage, Sir!" – find 40 objects. To aim for them, do not use the hint button in any search scene. For the one-minute achievement, read a scene's object list in this guide before you tap its pile. This first pile has three objects that need an extra action and took the recording more than a minute. The recording earned it in the second decoration pile ("Second decoration pile: the lighter"), which it finished in about 35 seconds. "Your Luggage, Sir!" unlocked by itself in the recording, during the paired-items scene in the basement.
- Find these objects (positions as seen in the overview above). Three of them need a small action first, described below. Vampire Fangs: the white fanged jaw under the white bird (lower centre-left); the teal dentures at the top centre, left of the disco-ball skull; the red wind-up chattering teeth with googly eyes on the right. Light Bulbs: the red bulb beside the cat figure (top left); the red Christmas bulb right of the big pumpkin (lower right); the pale, colourless bulb beside the ghost (upper right). For that last bulb, drag the green ink pot with the brush (lower left) onto it to paint it, then tap it. Bats: the large red-and-purple bat-wing mask on the far left; the flat purple bat cut-out lying on the box lid left of the green monster mask (centre); the purple plush bat (centre right). The plush bat's head is torn: first drag the green thread spool from the open box on the upper right onto the bat to sew it up, then tap the bat. Skulls (they replace the bulbs in the list): the waffle skull (centre left); the disco-ball mesh skull (top centre); the orange skull-and-crossbones on the straw at the top left. For that one, tap the green torch at the lower left to switch it on; its beam lights up the skull-and-crossbones, then tap it. A wrong tap only shows "Oops.". When all twelve are found you receive the Pumpkin Lanterns. The recording used no hints here and got the achievement "Lone Mouse" (Finish a HOP without any hints).
- In the stair hall, give the Pumpkin Lanterns to Annabelle, the woman in the witch costume sitting by the stairs. After a short scene you get a Coin with a music note. She is hurt, and a new task to treat her wound begins ("I'll get the first aid kit!").
Jukebox cassette puzzle
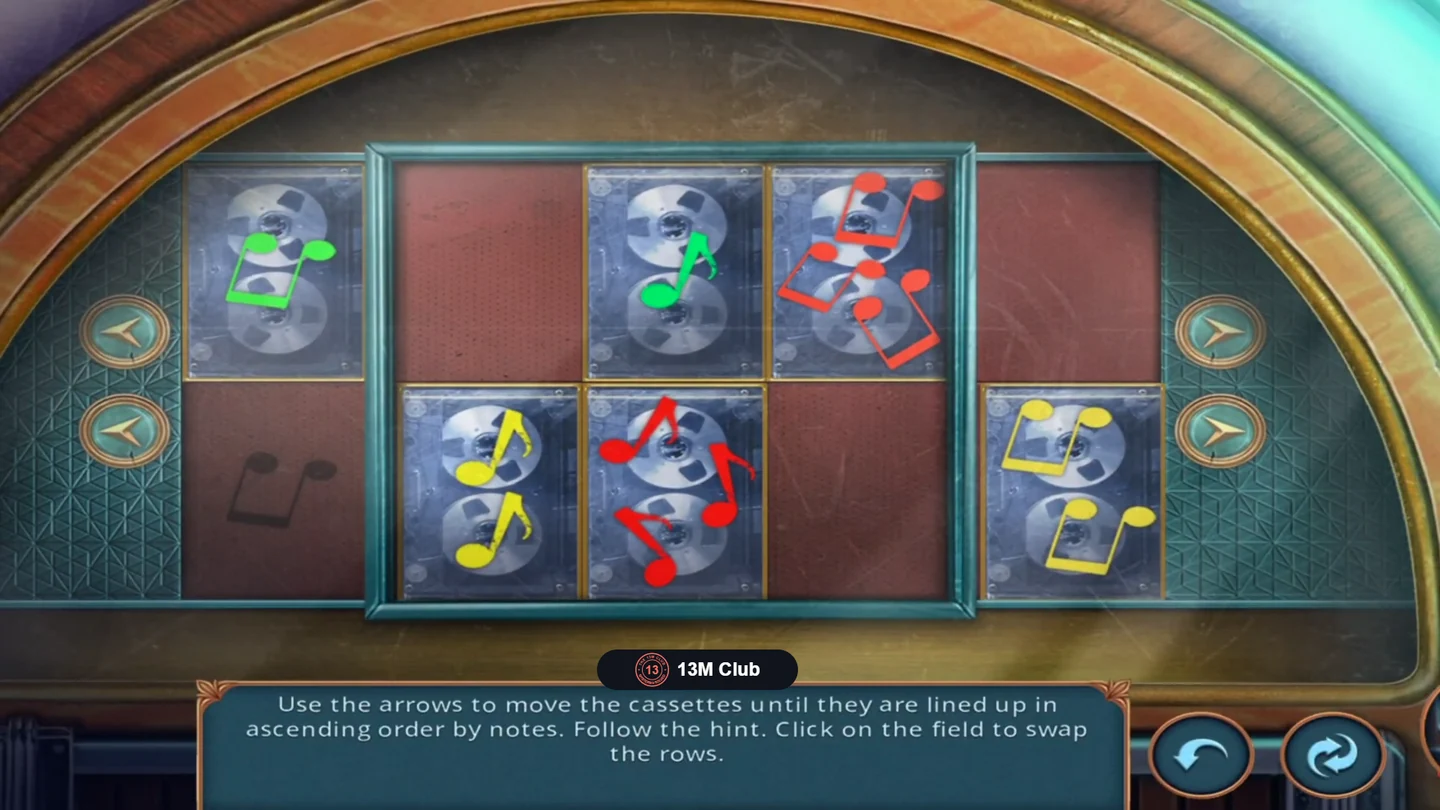
The jukebox in the Blood Moon Bar, beside the hanging planter, takes the coin.
- Insert the Coin into the jukebox slot.
- Puzzle: "Use the arrows to move the cassettes until they are lined up in ascending order by notes. Follow the hint. Click on the field to swap the rows." There are two rows of five cells: one cell at each end and three inside the central frame. Each row's arrows shift its cassettes left or right; tapping the central frame swaps its three cells between the rows. The faint note in each row's leftmost cell is the hint (top: a single note, bottom: a beamed pair). Solved arrangement seen in the recording: top row green single note, yellow beamed notes, red beamed notes; bottom row green beamed notes, yellow single notes, red single notes, each starting from the left cell. Each row ends up with one, two and three note symbols from left to right. The starting layout may differ.
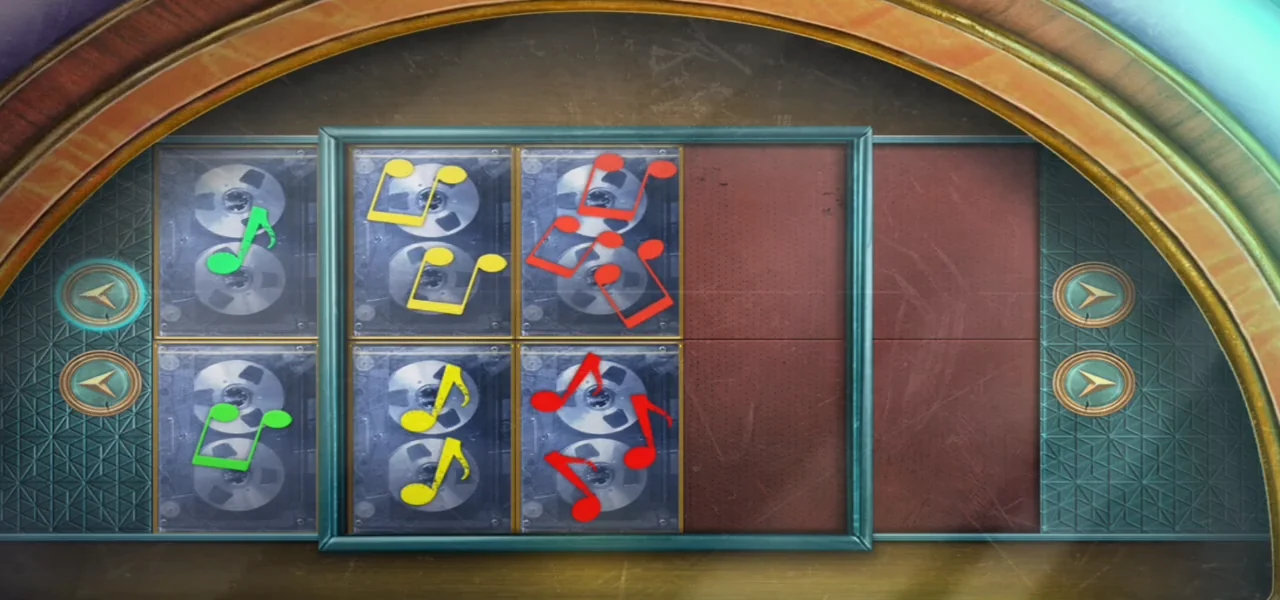
Solved arrangement in the recording: each row has one, two and three note symbols from left to right. - Take the Crystal Pendant from the jukebox drawer.
The reception glass case
The glass case on the reception desk in the front lobby opens with the pendant and then gives up a second prize for the bat figure.
- Go to the reception desk in the front lobby. Put the Crystal Pendant into the glass case. It opens; take the Newspaper ("Halloween in Romania: Myths and Mysteries of the Carpathians").
- Put the Bat Figure into the case and take Clock Hand 2/2.