Bunker Greenhouse
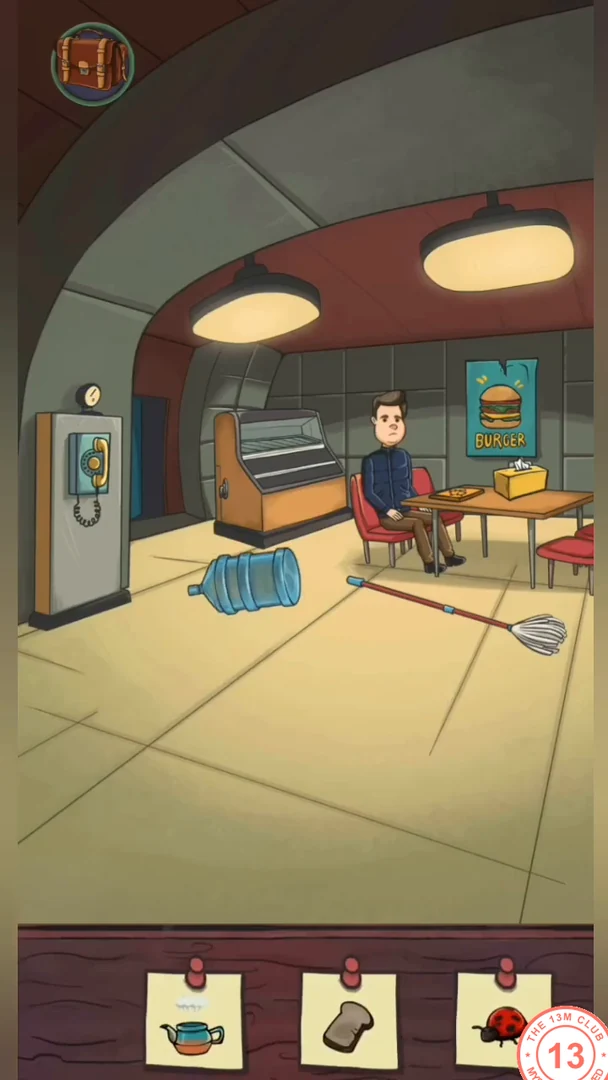
Mike is back in the bunker, this time in its cafeteria, kitchen and greenhouse. The phone numbers and the harvester robot program are the key puzzles here.
- Travel to the Bunker Greenhouse (as Mike). In the cafeteria, talk to the Director and play his board game: move your teal piece one point at a time along the lines; the Director moves his red piece after each of your turns. Land on his piece to capture it. Tap the cup he offers when you win.
- Slide the large water container on the cafeteria floor through the kitchen doorway on the left; it slides into the kitchen rather than into your backpack. Move the yellow napkin box on the table and tap the note it uncovers to take Robin's first note. Open the display case, move the potato aside and tap the bread.
- In the kitchen, find the water container on the floor where it slid in from the cafeteria, and put it on the cooler. Put the kettle under the cooler's tap to fill it, put it back on the stove and tap the boiled kettle. Open the oven and tap the fish bones inside.
- Open the kitchen drawer to take the basil seeds. Collect Robin's two notes in the kitchen: one tucked on the pipe at the top left and one on the ceiling lamp.
- Go to the greenhouse and take Robin's last note from the left of the room. With all four notes combined, give them to Robin and tap the book he offers.
- Tap the planter box and open its cover. Tap the ladybug, sow the basil seeds in the empty soil and turn the water valve. Tap the grown basil.
- Open the kitchen safe and drag the three green chips into the grid: two side by side on the fourth row (left and middle) and one in the middle of the third row. Tap the vial inside the opened safe.
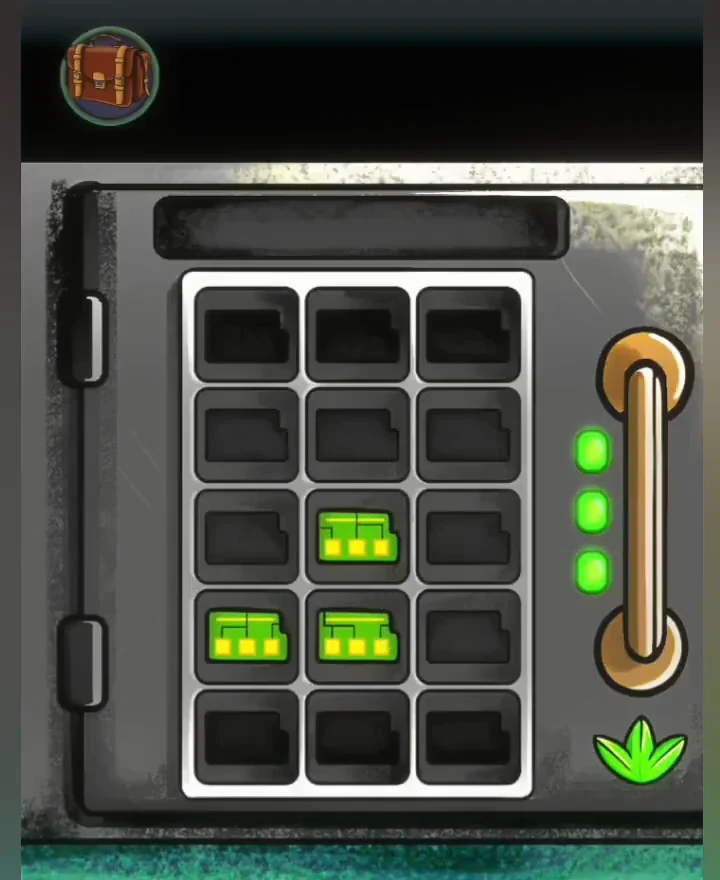
The chip positions that open the kitchen safe. - Read the number 2912 under the green-dial phone in the greenhouse. Dial 2-9-1-2 on the red-dial phone in the kitchen, then return to the greenhouse and tap the missed-call phone symbol.CODE2912
- Back in the kitchen, tap the tile beside the red-dial phone. It is the last item on the list.
- Go through the back door of the greenhouse to the tomato bed. Drag the arrow and scissors tiles into the program slots in this order, tapping the number under a direction tile to set how many times it repeats: Up 1, Left 1, Up 1, Right 1, Up 3, Right 1, Cut, Left 1, Down 5. Then press Start.
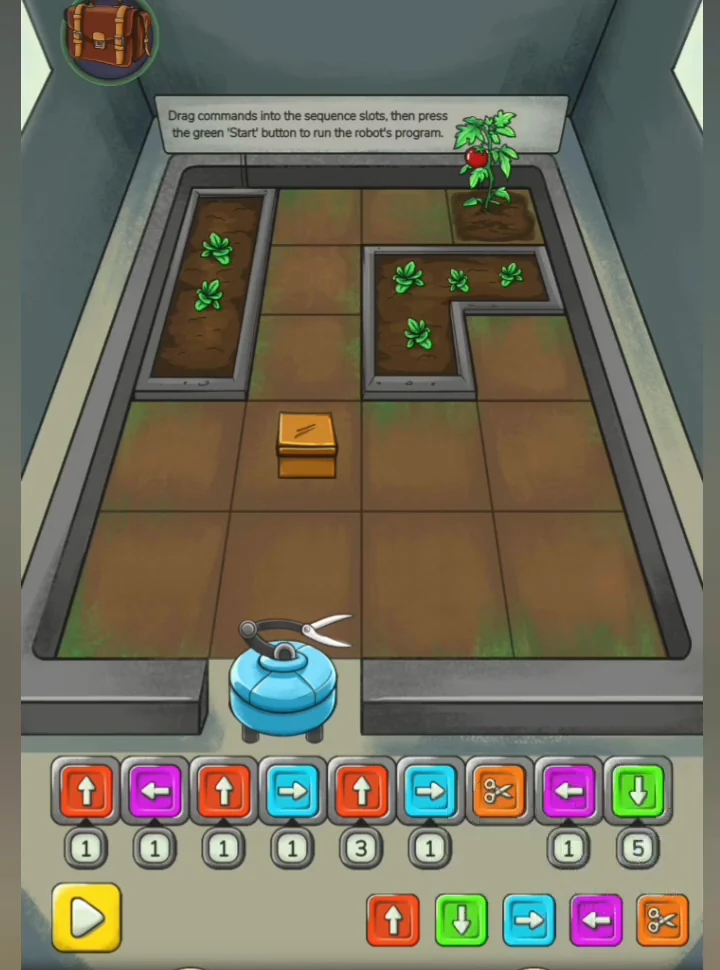
The harvester program in the command slots.
Pier
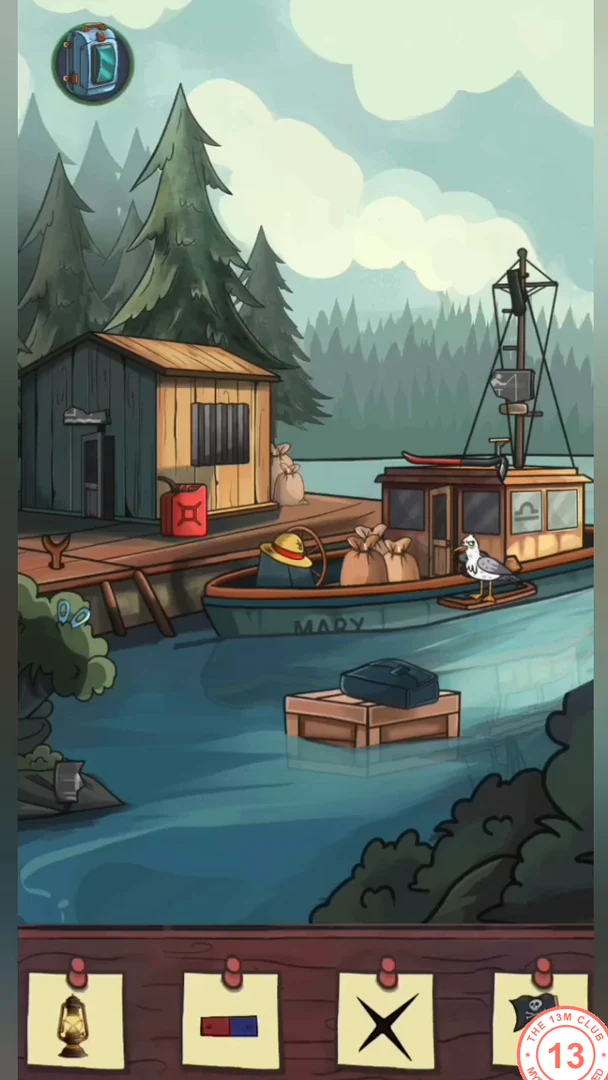
Lumen reaches a pier with a boat and a fishing shack. Raise the flag, light the lantern, open the safe and catch a fish before refuelling the boat. You need the matches from the Apartment and the fishing line from Seb's garage.
- Travel to the Pier (as Lumen). Move the scissors out of the bush on the left and take them. Pick up the fallen sign and fit it back above the shack door, then tap it. Move the sacks on the boat to uncover the name MARY and tap it.
- Take the crowbar from beside the boat's mast. Remove the cover from the shack window and tap the X mark behind it.
- Enter the shack. Pry up the loose floorboard with the crowbar and tap the clue hidden under it. Take the flag cloth from the chair and the fishing rod handle from the rack above the window. Move the coat to expose the magnet and take it. Pick up the wooden pole lying on the floor.
- Outside, fit the wooden pole to the boat's mast, attach the flag cloth and raise it. Tap the flag.
- Open the bag on the floating pallet to reach the journal and read it: a breakfast of two fried eggs, with a covered dish drawn on the page.
- In the shack, tap the lantern on the table. Open its glass, cut away the burnt wick with the scissors, raise a fresh wick and light it with the matches from the Apartment. Close the glass and tap the lit lantern.
- Combine the fishing rod handle with the fishing line from Seb's garage. Put the rod in the holder on the dock; when a fish bites, pull it up and tap the fish.
- Move the wallet on the shack floor into view, open it and tap the 5-cent coin.
- Open the four-dial safe. The photo shows a man with a parrot and the journal mentions eggs. Set the dials to 6, parrot, the Libra sign and the fried egg, as in the picture below. Tap the bomb inside the opened safe.CODE6 / parrot / Libra / egg
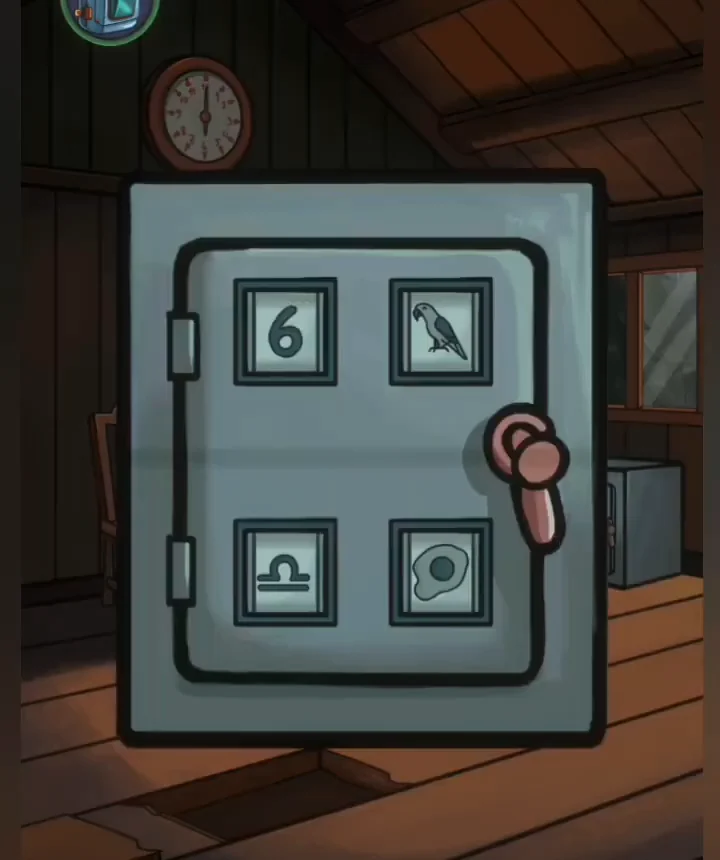
The safe set to 6, parrot, Libra and fried egg. - With every clue found, move the red fuel can onto the boat to refuel it. Set off On the Boat.
On the Boat
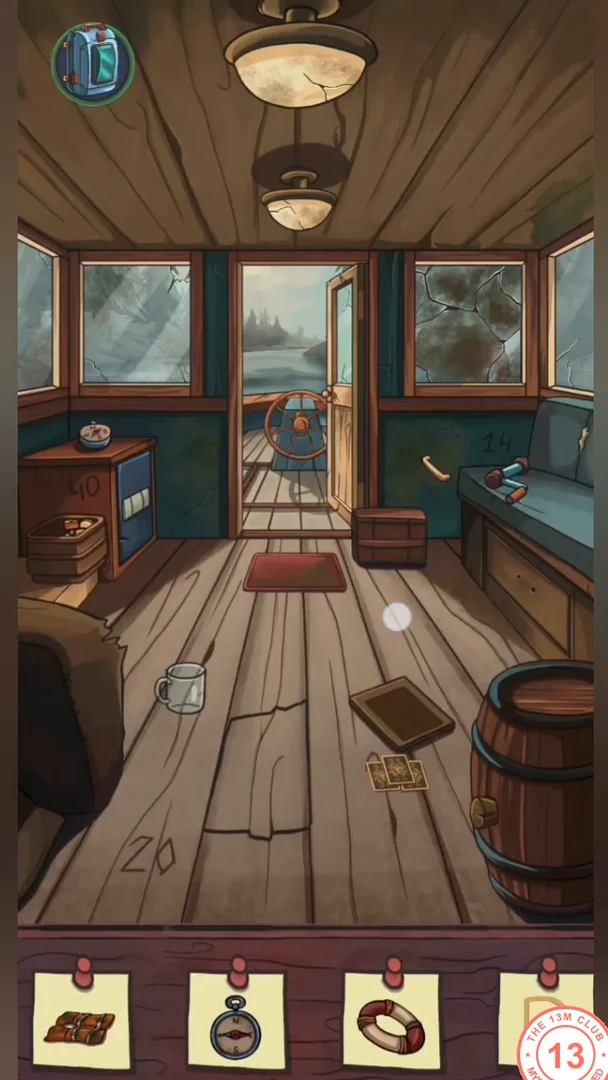
The journey continues on the boat. The card puzzle can take a while; the river crossing at the end is a steering mini-game.
- In the boat cabin, take the crank handle lying on the seat on the right. Open the small wooden box by the cabinet to the left of the door to get the loose tap, and fit the tap into the barrel. Move the glass from the floor under the tap, fill it and tap the drink.
- Move the box by the door to find the drawer handle. Attach it to the drawer under the right-hand seat, open the drawer and tap the lifebuoy inside.
- Tap the compass and hold the magnet beside its right edge so the needle swings round to point horizontally, then tap the compass.
- Tap the cards on the floor. Each card has gold line pieces in its corners; fill the four frame spaces with cards (use the orange arrow to cycle the deck) so the lines join up into the letter D from the checklist. This takes some trial and error: start with the cards whose curved edges form the round side of the D on the right, then find cards whose straight lines continue the left side. When the frame lights up, tap the finished D.
- Open the wall safe and enter 134. Tap the bottle inside the opened safe.CODE134
- On the deck, attach the crank handle to the red winch and turn it to reel up the anchor, then tap the plant caught on the anchor. Pick up the loose stone on the deck.
- Look through the spyglass and watch the birds fly past; when the pink bird appears, tap it.
- Pick up the message in a bottle floating by the boat, open it and tap the skull at the bottom of the unfolded note.
- Before leaving the deck, pull the orange life jacket out from beside the helm and tap it.
- In the cabin, throw the stone at the cracked window. Tap the bear visible in the distance through the broken glass.
- Take the helm. Turn the wheel left and right to steer around logs and rocks, and throw fish from the bucket at the crocodiles to keep them away from the boat. Avoid collisions to keep the Boat Health bar from emptying until you reach the landing.
Storehouse
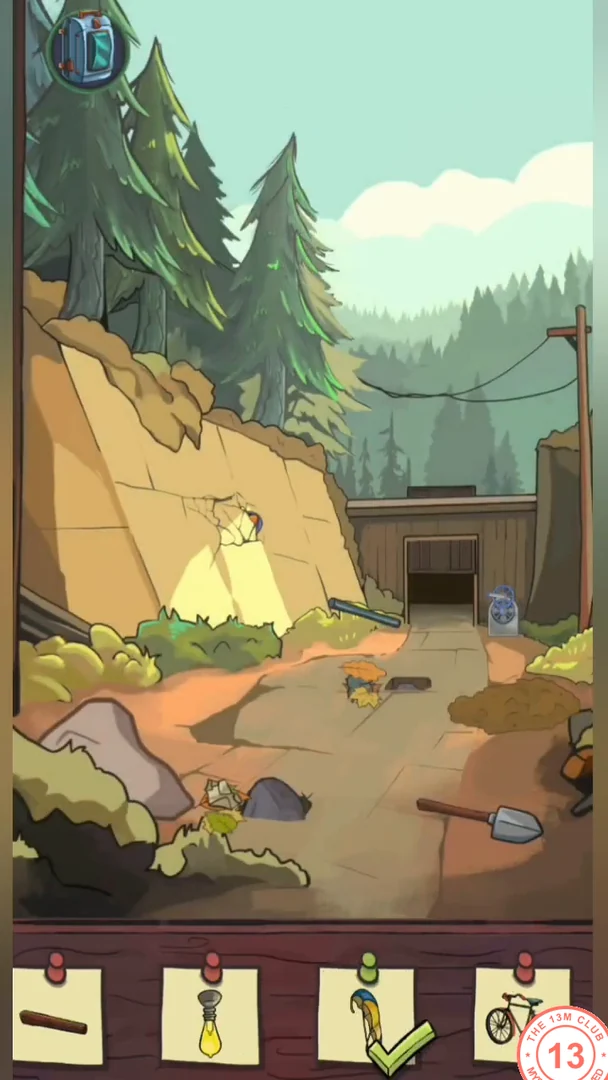
The boat lands near a storehouse. Open the gate with the two boulders, light the storehouse bulb with the hand-cranked generator, then build a pickaxe to reach the last item.
- Travel to the Storehouse. Clear the two piles of leaves in front of the gate to expose two pressure pads, then move the two boulders onto them; the gate opens and a rooster badge appears above it. Tap the rooster badge. Take the bicycle handlebar caught on the cliff edge on the left, and tap the blue-and-yellow parachute hanging at the top of the tree.
- Use the shovel to dig in the dirt mound and pull out the toolbox. Open it and use its saw to cut off a piece of the shovel's handle; take the wooden handle.
- Turn the crank of the generator by the gate until its charge bar fills; the bulb inside the storehouse lights for a short time. Go inside straight away and tap the lit bulb.
- Inside, push the barrel out through the door, then move it down the slope against the rock so it breaks. Tap the metal rim it leaves behind.
- Take the bicycle wheel from the rafters and fit it onto the bicycle frame. Put the saddle lying on the boxes behind the bicycle onto the frame, then add the handlebar from your backpack. Tap the completed bicycle.
- Look at the calendar on the small table: September has 9 and 7 circled, and turning to October shows 4 circled. Open the slider safe and set the sliders: top row to 9, middle row to 7, bottom row to 4. Open the unlocked safe and take the pickaxe head.CODE9 / 7 / 4
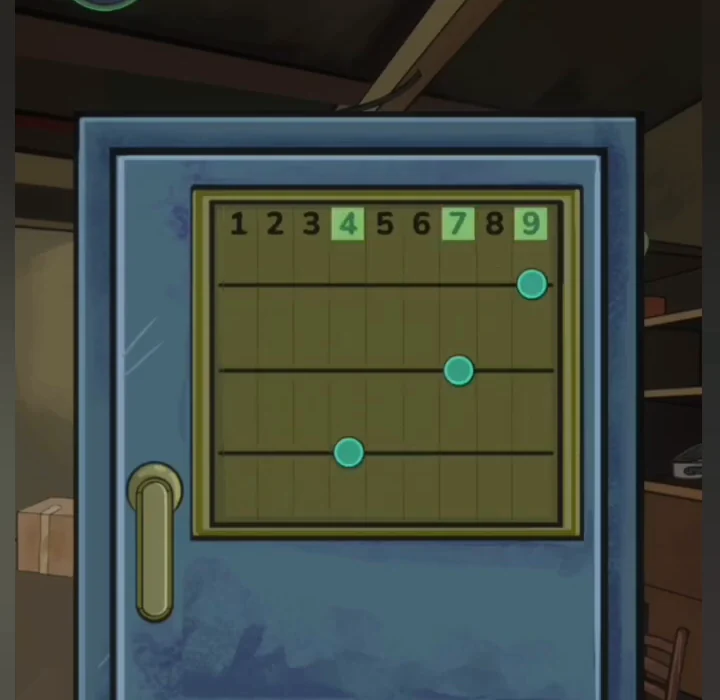
The slider safe set to 9, 7 and 4. - Stack the boxes under the window until they reach it, place the instant camera on top and take a photo; tap the tower in the photo. Rotate the can on the shelf to see its label and tap the meat picture.
- Combine the pickaxe head with the wooden handle, then go outside and break the cracked, glowing rock on the slope. Tap the sack of jewels behind it.
- Back inside, collect the supplies on Mike's list: the first aid kit under the small stool in the bottom-left corner, the bottle of water on the shelf at the back, the flour sack on the shelving on the right and the green gas mask on the upper-right shelf. The Barn unlocks.
Barn
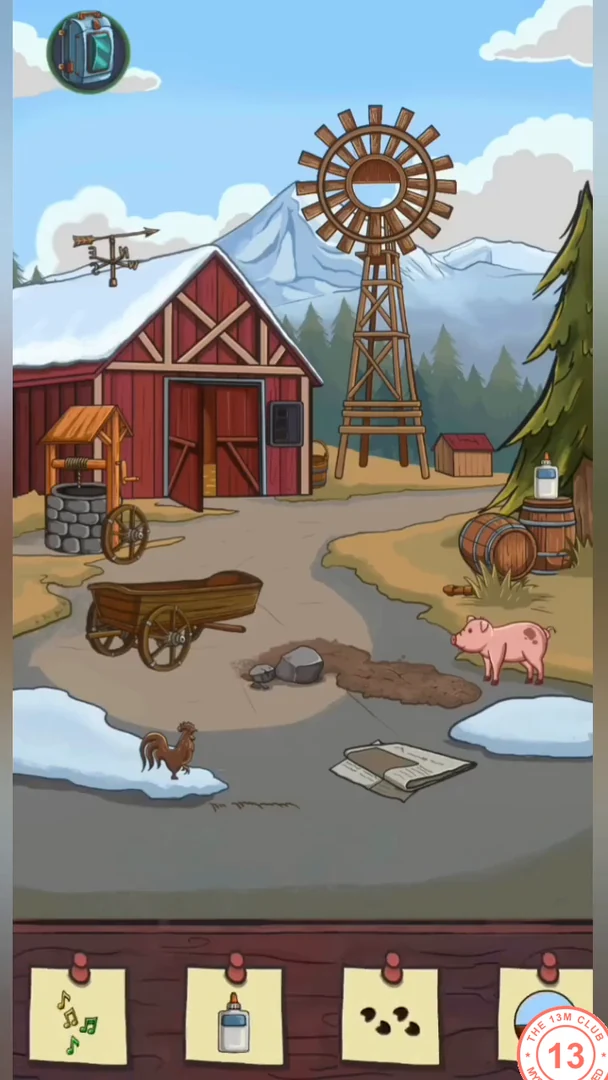
At the barn, Lumen completes the yard and barn checklists before Mike finally arrives.
- Travel to the Barn. Pick up the wooden rooster from the snow, attach it to the weather vane on the roof and tap the vane. Fit the wheel lying by the well onto the wagon, then move the wagon to find the saddle and tap it. Pull the short wooden flute out from the bushes to the right of the wagon and tap it. Tap the blue-and-white bottle with a gold cap standing on the upright barrel on the right.
- Attach the bucket to the well, draw water and pour it over the mud. Move the pig onto the wet mud and tap the tracks it leaves.
- Tap the windmill and rotate it until its round centre opening shows blue sky on the top half and wooden boards on the bottom half, like the clue. Tap the centre.
- Read the three newspapers on the ground (The First Robot - red mark, Robot Attacks Man - blue mark, A Deadly Epidemic - orange mark). Set the safe lights in the order these events happened: red, blue, then orange (an amber-orange shade). Tap the trophy.CODEred / blue / orange
- Enter the barn. Take the pitchfork from the rafters and use it to clear the smaller haystack. Tap the horseshoe-shaped clue it uncovers on the big haystack.
- Move the hen off her nest to uncover the egg. Tap the egg so it hatches, then tap the chick.
- Open the maze lock on the blue back door: drag the chained pin along the grooves from its start to the exit.
- After the blue door opens, tap the green plaid shirt hanging on it. Move the goat next to the horse, then tap both animals so they make music. Tap the music notes.
- With every clue found, go outside: Mike arrives with a bus and reunites with Lumen. Doug's House unlocks.
Doug's House
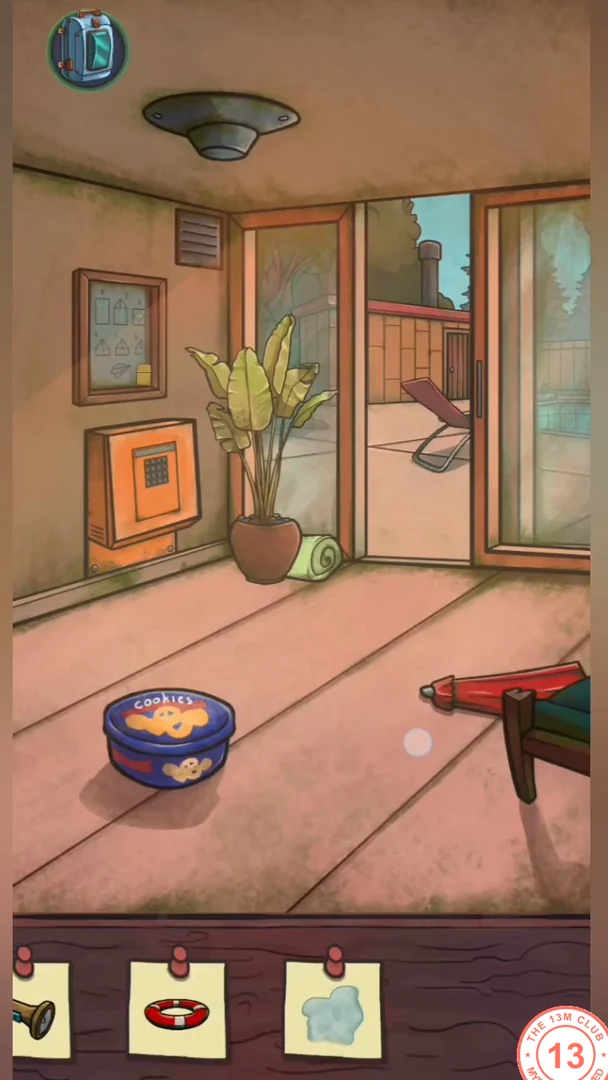
Lumen and Mike visit Doug's house to get his approval. The sunroom, pool and sauna all connect, and the sauna stove needs the lighter and the ladle.
- Travel to Doug's House. In the sunroom, take the closed red umbrella from the floor on the right. Open the cookie tin and tap the needle and thread inside. Take the rolled towel beside the plant pot. Open the vent above the window and take the flashlight from it.
- Go out to the pool. Move the black balls on the deck together and tap the group of three. Bounce the tennis ball and hit it with the racket so the parrot drops a feather; tap the feather. Take the ladle from under the lounger.
- Put the red umbrella up by the loungers. Drag the chameleon from the tree onto the umbrella; it turns red. Tap the chameleon.
- Enter the sauna. Move the bath whisk out from behind the stove and tap it. Take the metal part lying by the towels on the bench. Roll up the blue towel spread on the lower bench, put your rolled towel next to it and tap the pair. Open the stove door.
- In the sunroom, study the paper-plane diagram on the wall and take the lighter next to it. In the sauna, tap the sheet of paper and fold it as the diagram shows to make a paper plane, then tap the plane.
- Light the wood in the stove with the lighter. Fill the ladle with water from the bucket and pour it on the hot stones, then tap the steam.
- Open the orange panel in the sunroom. Place the metal covers (including the metal part) so that only three buttons stay uncovered: the top two and the bottom one in the right-hand column. Press those three buttons.
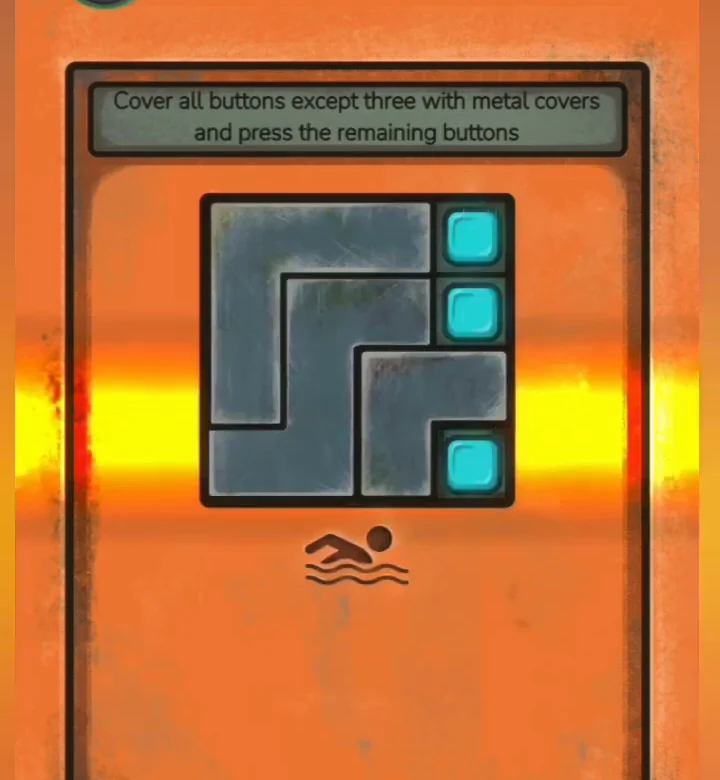
The covers in place: only the top two and bottom right-hand buttons stay uncovered. - A lifebuoy appears in the pool; tap it. Doug comes out to talk, and Lumen asks for his authorisation to proceed. Mike's House unlocks.
Mike's Country House
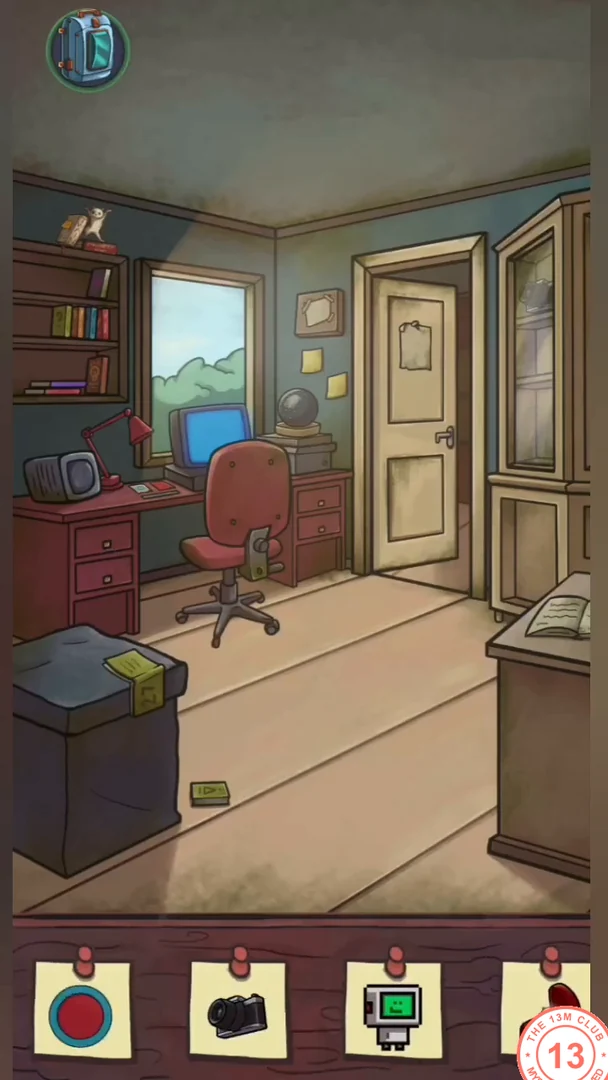
Lumen searches Mike's country house for the chip programmer. Note the author name on the book under the cat figurine; it is the computer password. This walkthrough adds Lumen as the exception at the Chip Programmer.
- Travel to Mike's House (as Lumen). In the study, move the object on top of the black box to uncover a key and take it. Drag the loose black ball lying beside the desk chair and throw it at the glass cabinet in the upper-right corner to break it, then tap the camera inside.
- Look at the cat figurine on the shelf: it stands on a book by TWAIN.
- Use the geometry set on the desk. The compass sets the radius, so open it to 3 on the ruler (half the width of the blue ring's opening), draw a circle on the red paper, cut it out with the scissors and place the red disc in the ring. Tap the finished red circle.
- Go into the library. Move the book lying under the rocking chair and tap the ring box it hides. Open the left pane of the window. Take the loaf of bread from the shelf to the left of the window and put it on the windowsill. After the blue bird takes a bite, tap the loaf.
- Tap the bookcase and push in the English Poetry books in order: Volume I, Volume II, then Volume III. The bookcase opens to a secret room; tap the smiling face marker that appears beside the opening.
- Enter the dark secret room and drag the flashlight beam around to light up each part of the room. Take the 300 g scale weight by the safe. Tap the spider that crawls on the wall near the ceiling. Open the safe with the key and take the floppy disk. Light the shelf on the left, move the box on it and take the chip programmer.
- In the library, put the 200 g weight on the left pan and the 300 g weight on the right pan of the scale. When the pans are level, a golden winged figure appears; tap it.
- Return to the computer and log in as Mike. The hint is 'My favorite Writer': type TWAIN. Tap the small robot that moves across the desktop.CODETWAIN
- Open the Snake game and play with the arrow buttons: eat dots and avoid the walls and your own tail until the score reaches 100 and WIN appears. Tap the 100.
- With the checklist complete, drag the floppy disk labelled 29.04 onto Mike's computer to load the update; the Chip Programmer opens. When Seb arrives, tick ADD EXCEPTION, use the arrows to select Lumen (the blue robot) and press APPLY. This walkthrough follows the route that adds Lumen as the exception. Seb shuts down and the Factory unlocks.
Factory and the Ending
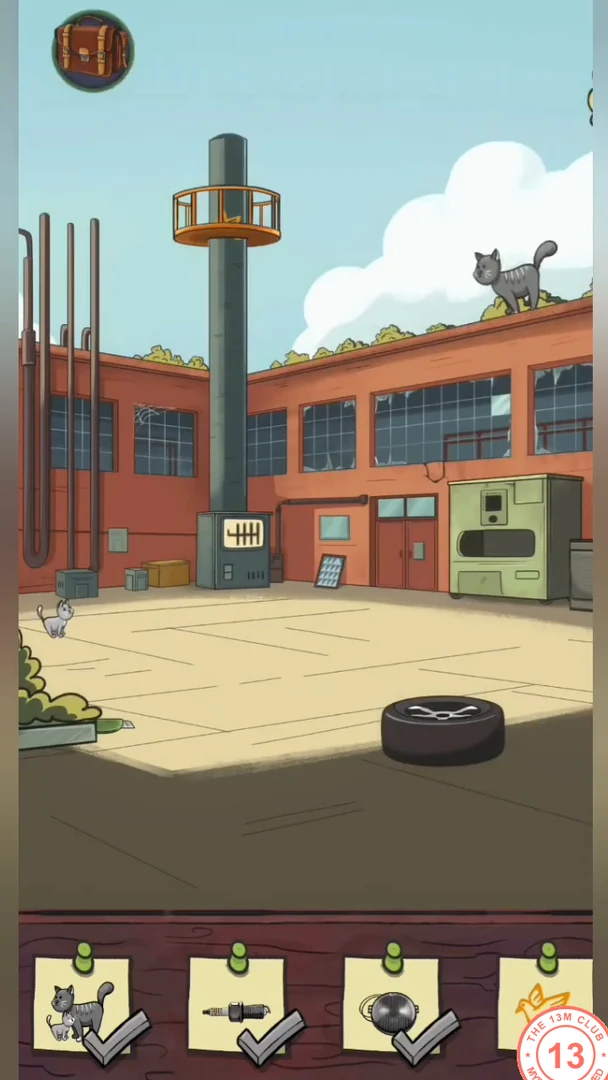
Mike reaches the factory for the final confrontation. Clear the yard and garage checklist, then face Doug. This walkthrough reaches the ending in which Lumen is switched off and remembered with a statue.
- Travel to the Factory (as Mike). Take the manual drill from the ground and the rag from the tyre.
- Tap the tile board on the wall and rotate the squares until they form four large white diamonds on blue, with a blue diamond-shaped gap in the middle (see the picture below). The board is not finished yet: the centre still needs a white piece.
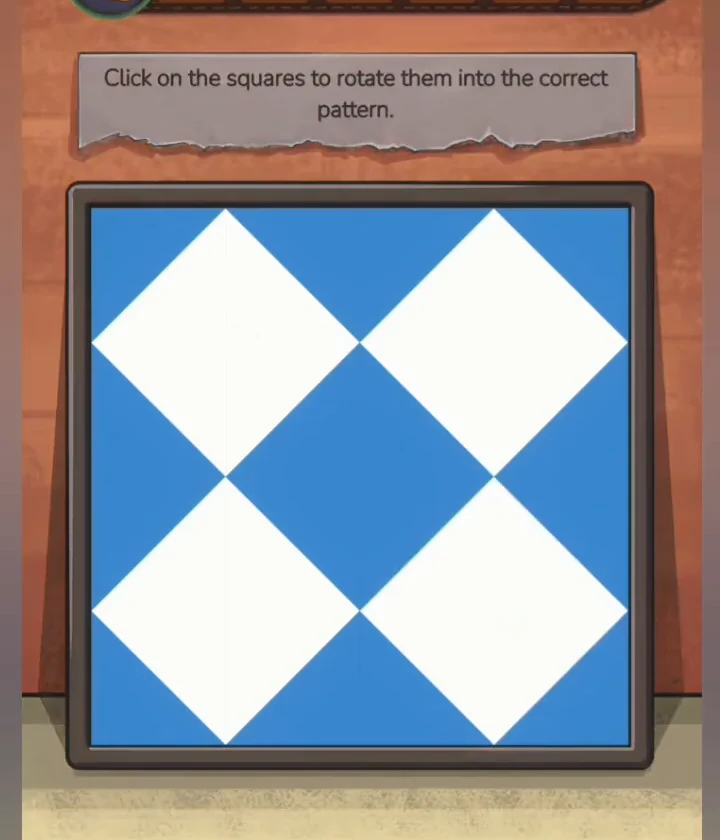
The tiles correctly rotated, before the white rhombus is placed in the central gap. - Enter the garage and take the white rhombus from the floor by the green tank. Return to the tile board, place the rhombus in the central blue gap and tap the white X that forms.
- Use the green terminal. Its note shows the target: a plus sign of five lights in the centre of the 5x5 grid. The buttons on the left invert a whole row, the buttons on top invert a whole column, and the arrows move every light one space (lights pushed off the edge disappear). The grid starts empty. From the empty grid, this sequence makes the plus: invert row 2, invert row 4, Left, invert row 2, invert row 4, Left, invert row 3, Left, Left, Right (rows counted from the top). If you have already pressed other buttons, press Left five times to clear every light and start the sequence again. When the plus appears, tap it.
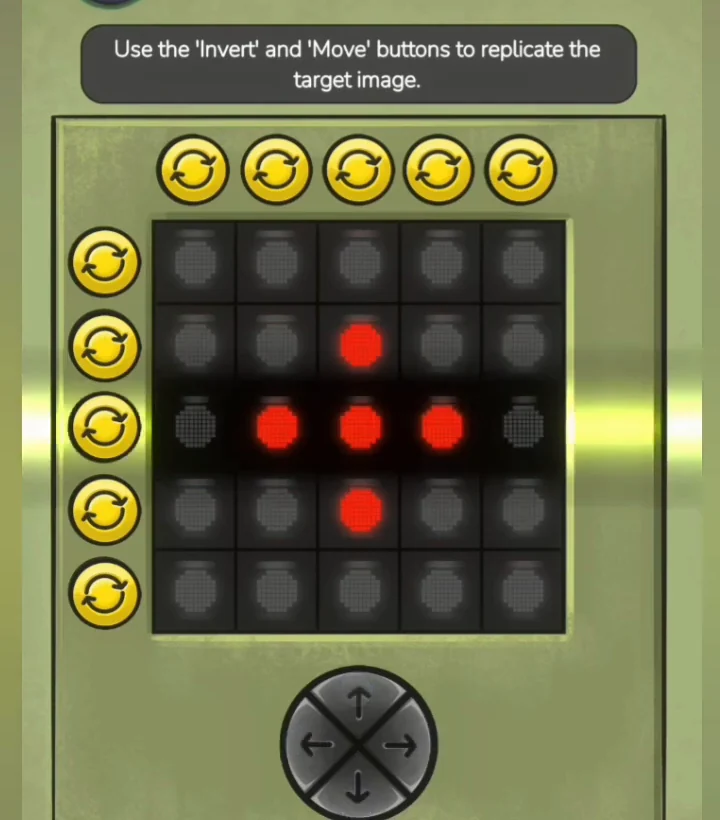
The target: a plus sign of five lights in the centre. - In the garage, open the cardboard box and tap the part inside. Move the cleaning spray out from behind the red car and take it. Look in the blue parts bin and take the drill bit.
- Combine the drill bit with the manual drill. Use the drill on the lock of the green drawer, open it and tap the blue files inside.
- In the yard, tap the crack in the wall beside the green machine so a brick falls out, and throw the brick through the factory window. Go into the garage and tap the broken glass on the floor.
- In the yard, clean the dirty control panel with the spray and then the rag. The code at the top reads 4168: move the lever into slot 4, then 1, then 6, then 8.CODE4168
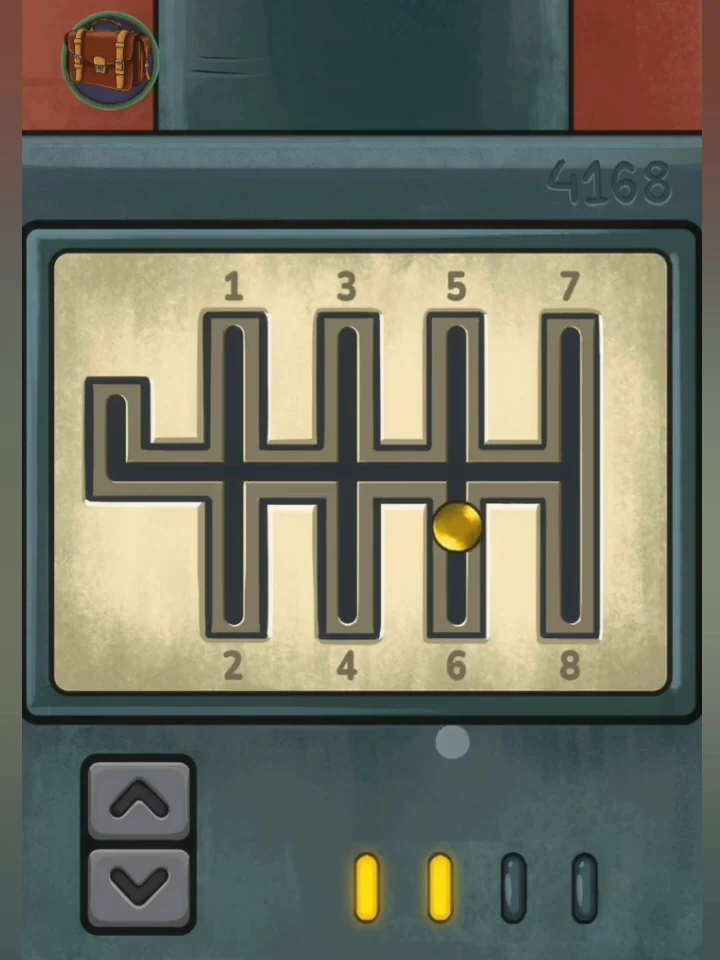
The lever gate. The code 4168 appears at the top right; move the lever into each slot in that order. - Use the arrows on the lever panel to lower the orange lift on the tower until it is level with the roof, and tap the bird mark on it. Drag the cat from the roof onto the lift, lower the lift to the ground, then slide the cat over to its kitten and tap the pair. Take the cutter that appears on the ground.
- Use the cutter to cut along the dotted seam in the bottom of the cardboard box in the garage. Lift the flap and tap the headlight underneath.
- Lumen arrives, then Doug attacks. Move the ceiling magnet so it hangs above Doug, lower it to grab him and raise it again. Then drag the raised magnet to the right, over the green tank, to drop Doug into it.
- Lumen asks Mike to switch him off too and hands him the remote. Press the red button. Four years later, a statue of Lumen stands in the park and THE END appears.