Gas Station on Elm Street
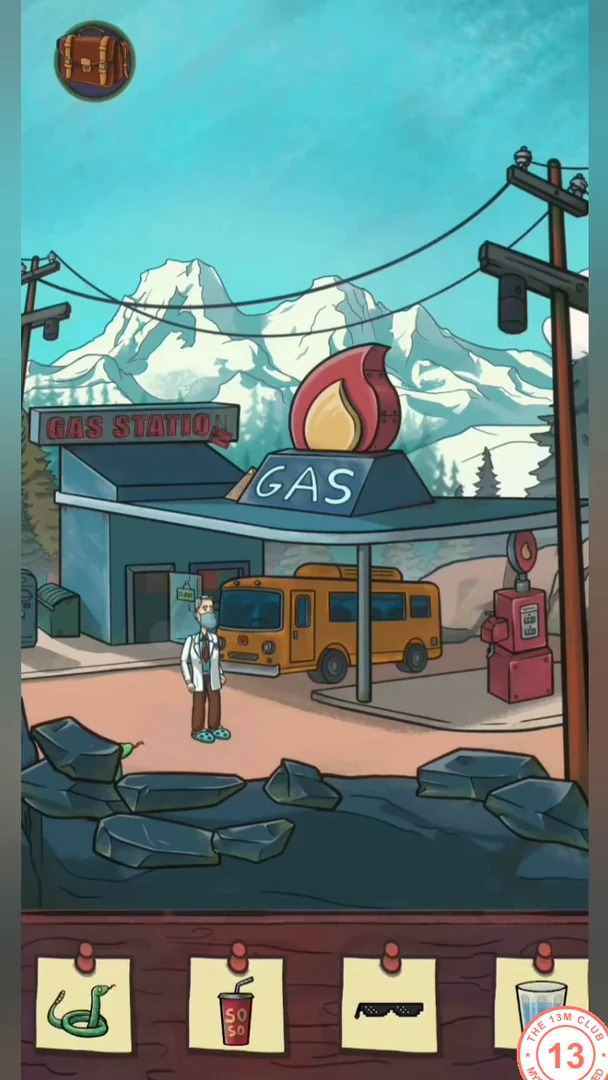
Chapter 2 opens with Mike and a few survivors meeting at a gas station. Collect the three virus test kits and fuel the bus before testing everyone. The drinks fridge has more than one valid answer, so a method is given along with one example.
- Close the Part 1 message. On the chapter card, choose Part 2: Survivors, then choose the Bus Station on the new map. A Two weeks ago scene follows: Mike finds a secret letter under his door telling survivors to gather at a gas station, and the story moves there.
- Drag the loose rocks in the bottom-left pile apart until a snake peeks out, then tap the snake. Tap the pyramid sitting on the gas station canopy, left of the GAS sign, to take the pyramid figurine. Then tap the snowy mountain peak on the left.
- Enter the bus driver's cabin. Lower the sun visor, take the virus test kit tucked into it and tap the ID photo on the visor. Move the key from the dashboard into the ignition on the lower left.
- Outside, tap the rear side of the bus. Slide its window open; the woman inside throws you a funnel. Open the small fuel flap on the bus and fit the funnel into it.
- Tap the red pump. Move the soda cup on top so you can tap it, and take the second test kit from the side of the pump.
- Enter the store. Slide the red jerrycan on the floor towards the exit so it is ready for the pump outside. Move the papers on the floor to find a coin and put it in the soda machine; it swallows the coin. Tap the jammed machine again until a cup of drink drops out, and tap the cup. Take the third test kit from the ceiling lamp.
- Tap the radio. If it stays dark when you turn the blue wheel on its side, turn the radio around to its back, open the rear cover, open your backpack and place the batteries inside, close the cover and turn the radio front side up again. Pull up the antenna and turn the blue wheel until the red needle sits between 102 and 104, just left of 104. If the four grey buttons to the right of the frequency scale are not already glowing green, tap the top one. Tap the four green signal bars when they light up.
- Tap the drinks fridge. The grid starts empty. Fill the 4x4 grid with the four products (chocolate bar, chips, sandwich, can) so no product repeats in any row, column or coloured 2x2 block; there is more than one valid layout, and one is shown below. When the fridge accepts it, pull the revealed pizza box up and tap it.
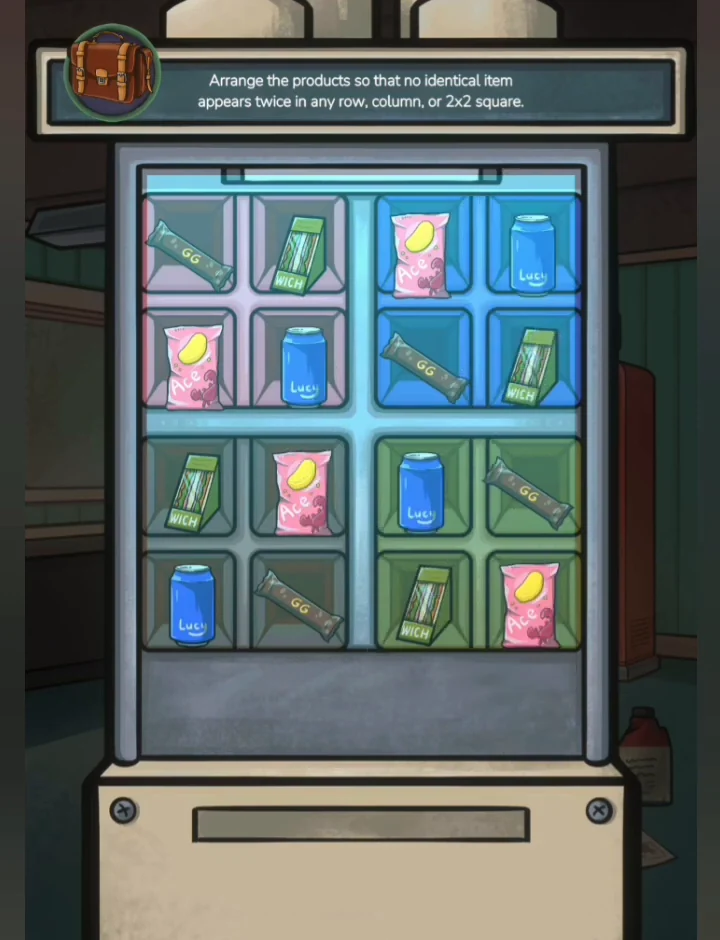
One valid final arrangement: no product repeats in any row, column or 2x2 block. Other arrangements also work. - Play the arcade machine: press the up button to move the crab across the road and the river, waiting for gaps in traffic and hopping only onto logs. After the crossing, tap the sunglasses that appear. Then move the small bottle from the floor onto the counter beside the axe.
- Go outside and fill the jerrycan at the pump. Pour the fuel into the funnel already fitted in the bus's fuel flap. In the driver's cabin, turn the key in the ignition, then tap the exhaust smoke behind the bus.
- Go back into the store. Place the pyramid figurine from the canopy on the counter beside the bottle and the axe: their shadows join into a lightning bolt on the floor. Tap the lightning bolt.
- With the lightning bolt found, use one test kit on each survivor: the man in the store, the doctor outside and the woman on the bus. The doctor tests positive and leaves; the others are negative. The Forest unlocks.
Forest Camp
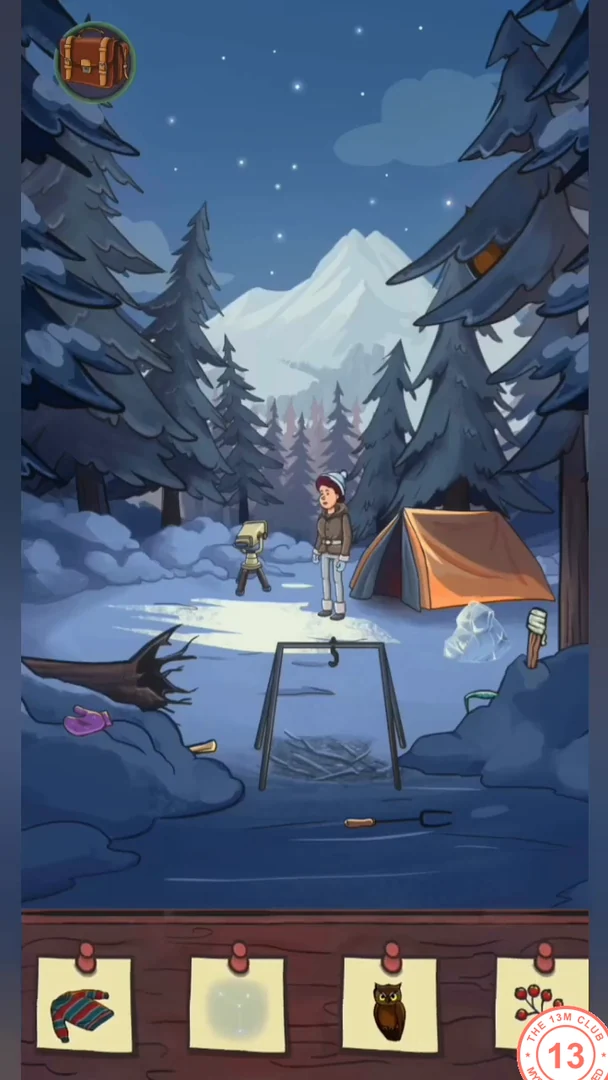
The group camps in the snowy forest. Lay the firewood first: the kettle, the pinecone and the sausage all depend on the campfire, which you light with the matches from the Apartment.
- Travel to the Forest. Move the axe out from under the log and use it to chop the log into firewood. Put the logs beneath the tripod.
- Tap the telescope standing beside Mike to get its viewing frame. Slide the frame up into the sky until its dotted lines line up with the stars, then tap the completed constellation.
- Move the leaves in the tree on the right to expose the owl, and tap it.
- Enter the tent. Use the shovel to clear the snow at the entrance and tap the small red branch it uncovers.
- Tap the paper with dots. Tap dots to join them to the flashing dot and draw the house outline, then tap the finished house.
- Tap the metal pot. The handle on the lid shows three numbers: 5, 9 and 7. Slide your finger along the arrows on the lid to turn it until the two ends of the handle point at numbers that add up to the first value, then the second, then the third. The accepted pairs were 4 + 1 = 5, 6 + 3 = 9 and 0 + 7 = 7. Take the roast meat from the open pot.
- Tap the folded striped sweater next to the man in the tent until it is checked off.
- Talk to the Director and play the memory game: take turns flipping two cards to find matching pairs. Remember every card you or the Director reveal and finish with more pairs than the Director. When you win, tap the donut you are offered.
- Move the lantern in the tent to expose the spider, then tap it as it climbs out until it is checked off.
- Open the book by the right-hand pillow and turn to the Robots are friends page. Tap the page until the crumpled paper is picked up; you need it for the campfire.
- Go outside. Put the paper from the book under the logs and light it with the matches from the Apartment. Hang the kettle standing beside the ice block on the tripod above the fire. When it boils, pour the hot water over the ice block to free the pinecone and tap it.
- In the tent, move the rolled sleeping bag to uncover the case and take the sausage. Put it on the roasting fork by the fire, roast it and tap the cooked sausage.
- When the wolves appear, light the torch in the fire and hold it in front of the wolves until they back off. The Cabin unlocks.
Cabin and Old Bridge
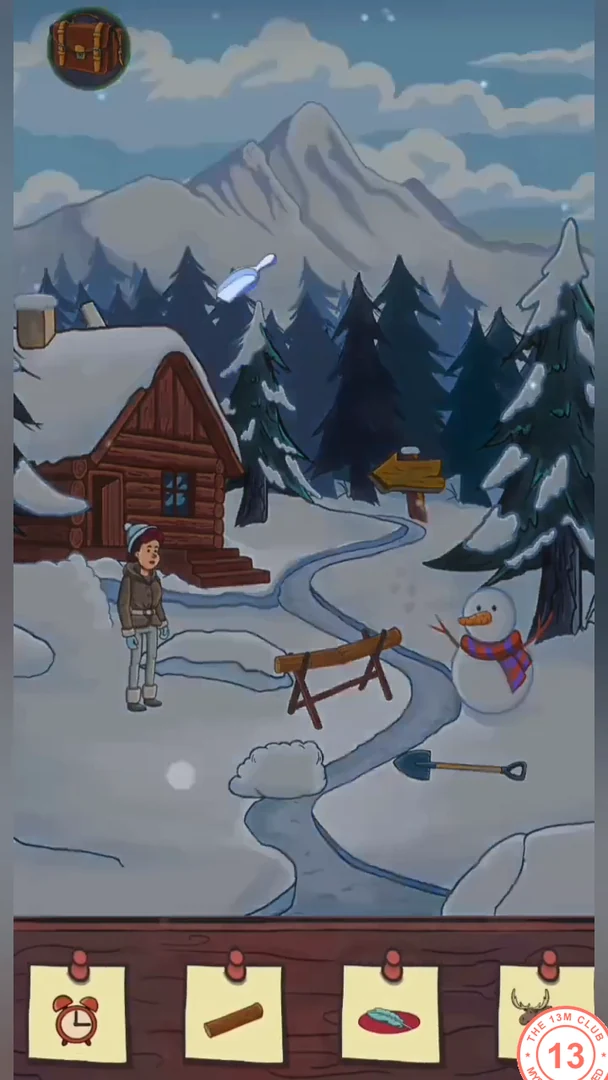
A cabin stands near an old bridge. Read the map on the cabin table before following the trail, and keep the carrot for the moose.
- Travel to the Cabin. Pick up the scoop sticking out of the snow. Use the saw by the cabin roof on the log on the sawhorse and tap the cut log. Tap the animal tracks in the snow, then take the carrot nose from the snowman.
- Enter the cabin. Move the pillow on the bed and take the lollipop it hides. Open the top drawer of the dresser and tap the alarm clock. A feather keeps circling in through the open window: close the window so the feather settles on the rug, then tap it.
- Move the wood out of the fireplace and tap the piece of charcoal behind it. Open the window again, fill the scoop with snow there and put the snow by the fireplace to melt; tap the puddle of water.
- Go outside and give the lollipop to your shivering companion. Tap the sparkle that appears.
- Inside, look at the map on the table: from the cabin the route goes to signpost 1, then 2, then 3, then the old bridge.
- Follow the trail toward the bridge. At signpost 1 tap the left arrow, at signpost 2 the right arrow, and at signpost 3 the straight-ahead arrow.
- Tap the rock wall with carved arrows. Start with the stone just right of the big middle stone (its arrow points up), then keep tapping the stone that the last lit stone's arrow points to until every stone is lit. Tap the crystal that is revealed.
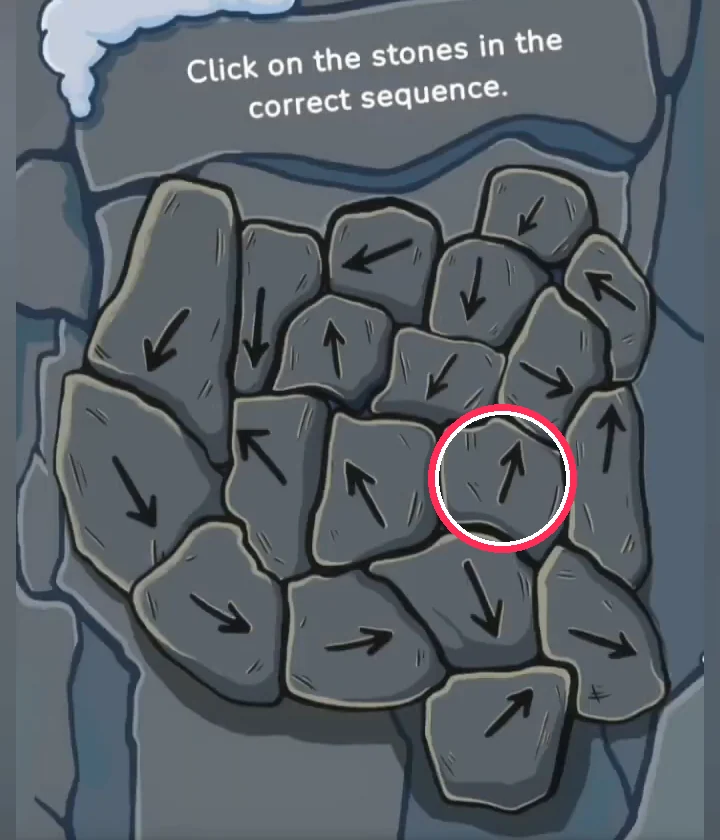
Start with the circled stone (arrow up), then follow each lit stone's arrow. - Put the carrot on the cliff edge. When the moose comes for it, tap the moose.
- Clear the snow by the bridge and tap the OLD BRIDGE sign. Look at the broken bridge: the hammer and the planks lie beside it, but there are no nails. Mike decides to ask the scientist for help.
- Return to the cabin and talk to the scientist; he gives you a box of nails.
- Go back to the bridge. Lay the planks together, place the box of nails next to the hammer, set three nails into the planks and hammer them in. Lay the finished board across the gap.
- Cross to the bunker door and clear the snow from the plaque. Riddle: 'The day before yesterday I was 25, and next year I will be 28.' Set the dials to DEC 31. The Bunker unlocks.CODEDEC 31
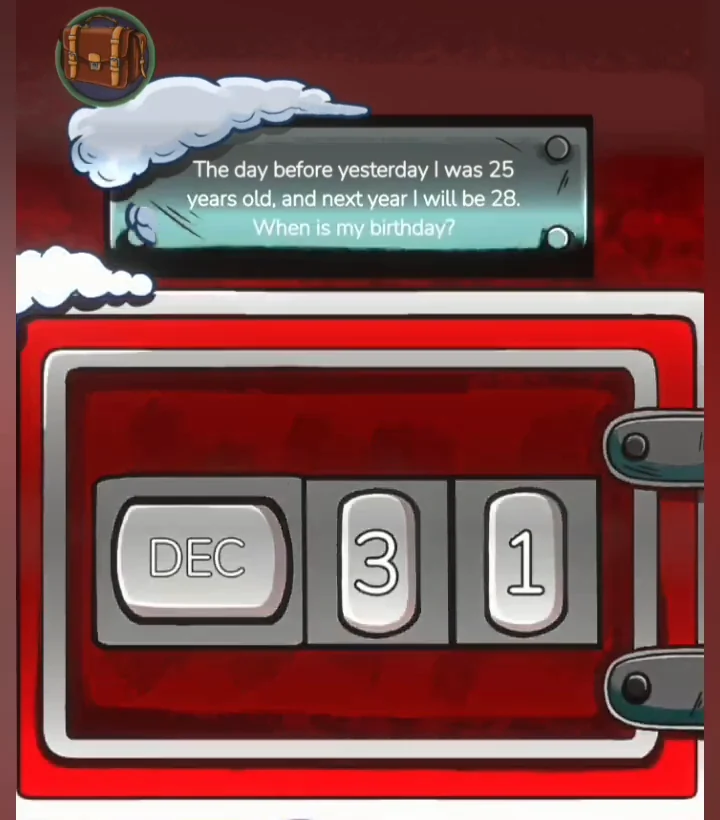
The plaque dials set to DEC 31.
Bunker: Entrance Level
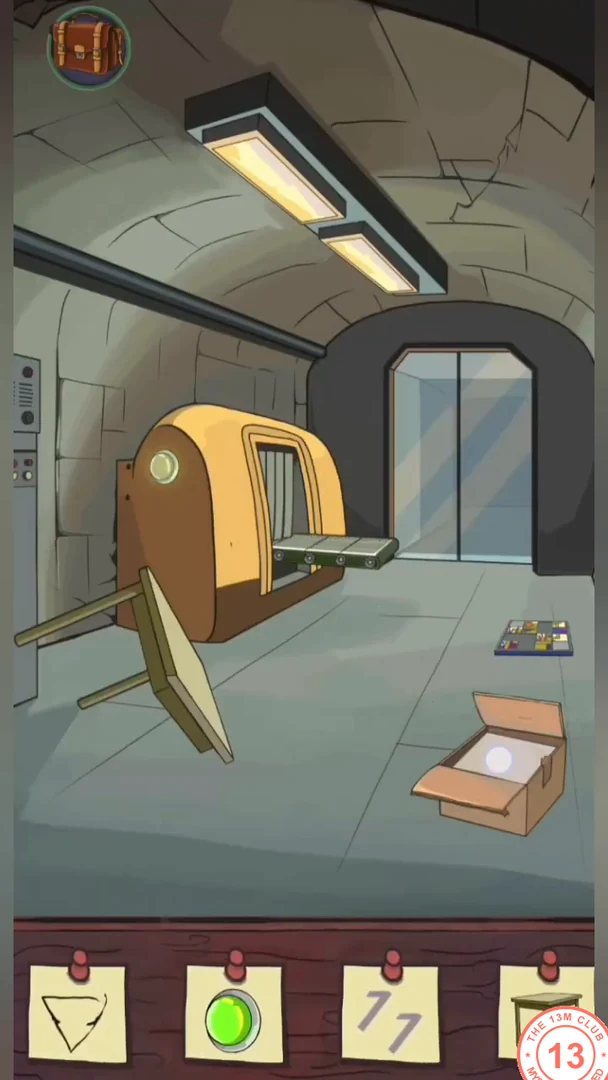
Mike enters the bunker through a decontamination room. Two table legs are hidden on this level; both are needed to repair the broken table before the elevator can be used.
- Travel to the Bunker. In the decontamination room, take the scalpel lying on the ledge above the machine, cut open the cardboard box with it and take the paper.
- Tap the floor panel. Slide each magnet button along its edge and press it to pull the picture pieces across the board until the robot picture is complete, then tap the robot picture.
- Place the can opener on the disinfection machine's track and let the machine carry it through. When the round indicator on the front of the machine turns green, tap that green indicator. Go through the doors into the corridor.
- In the corridor, take the can opener back from the yellow desk at the end of the track, and take the table leg beside the large crate on the right.
- Open the shoebox and turn the shoe over: tap the 11 on its sole. Move the loose board nearby and tap the footprint behind it.
- Tap the loose floor tiles to slide them aside and tap the amulet hidden underneath.
- Enter the storeroom. Pick up the second table leg from the floor. Open the coat, move the pencil up out of its pocket and tap it.
- Put the paper in the typewriter and type S. Move the carriage back to the same position and raise the paper slightly with the roller, then type S again so the two letters overlap into §. Tap the § symbol.
- Move the box that hides the can on the shelf, open the can with the can opener and tap the fish.
- Return to the decontamination room. Tap the triangle in the cracked ceiling. Attach both legs to the broken table and tap the repaired table.
- When the checklist is complete, Mike decides to look for an elevator. Go back into the corridor and through to the map, then choose the Bunker again to reach the elevator lobby.
Bunker: Upper Floors
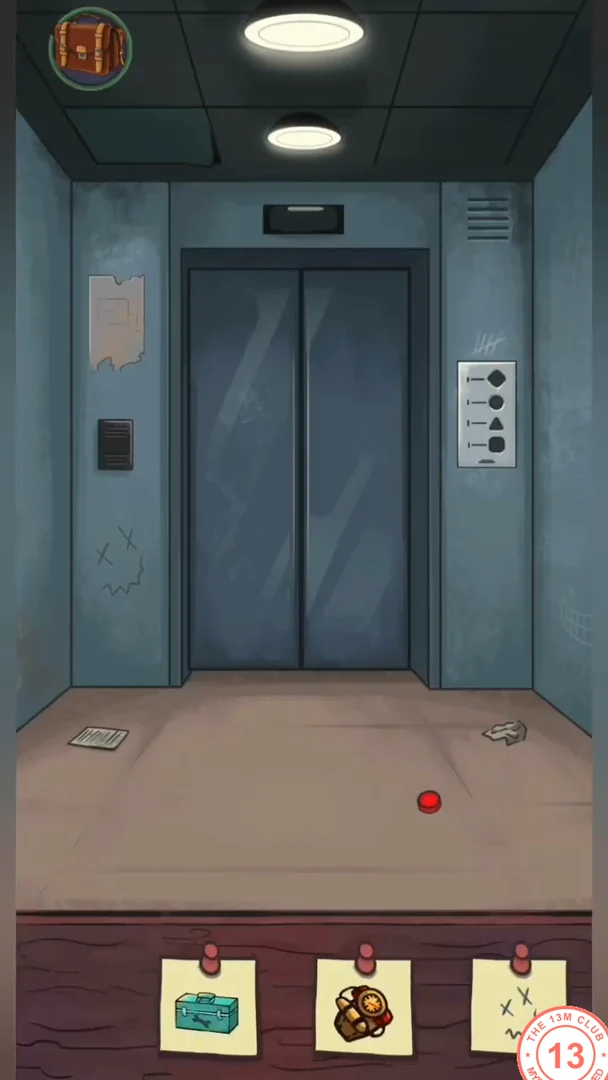
The bunker elevator needs shaped buttons to reach each floor. Collect the triangle and square buttons to unlock the radio room and the surveillance room. The quiz questions can change between games, so example answers are given.
- In the elevator lobby, drag the loose red circle button from the floor straight into the elevator panel. Tap the scratched drawing on the left wall. Press the red circle button on the panel and go through the opened doors into the reception hall.
- In the reception hall, take the second toolbox piece from the red sofa on the right and join it to the piece on the floor; tap the assembled toolbox. Open the floor hatch on the left and take the triangle button. Open the small compartment to the left of the wall monitor, turn the mug inside until the wolf design faces you and tap the wolf. Then watch the wall monitor: when the scientist coughs and raises his hand, tap his wristwatch. Tap the watch again when it appears on the floor.
- Tap the button panel. The numbers scratched above it read 3 4 1 1 2 3 1; press the four buttons (numbered 1 to 4 from left to right) in that order. When all seven lights are on, tap the ceiling lights that switch on.CODE3411231
- Put the triangle button into the elevator panel and ride to the radio room. Note the long wooden pole lying on the floor; leave it there for now, you will slide it out later. Tap the mug on the left desk to look at it closely, turn it from its BUNKER side to the side with the handprint and tap the handprint.
- Use the radio: switch it ON and turn the large dial until the pointer is just above 240 (between 235 and 245). Then tap the handheld microphone resting on top of the set. Mike reaches Lumen and they talk.
- Answer the quiz machine's general-knowledge questions; you need four correct answers in a row, one for each light. The questions can change between games. Examples: Canada's flag - Red and White; penicillin - Alexander Fleming; last state to join in the 20th century - Hawaii; capital of France - Paris. When all four lights are green, tap the money bag that appears.
- Move the blue box on the radio room floor to find the square button and take it. Slide the long pole on the radio room floor towards the exit to carry it into the elevator lobby. Raise it against the ceiling vent there to knock it open; if the cash stays caught in the vent, move it down. Tap the cash on the floor.
- Put the square button in the elevator panel and go to the surveillance room. Press the blue power button to switch on the lights and screens. Turn the mug on the desk to reveal the eyes and tap them.
- Ride to the radio room and tap the security camera high on the right wall, beside the ceiling light, to turn it towards the biplane poster. Back in the surveillance room, tap the biplane photo on the monitor. Turn the chair to expose the magnifying glass on its seat and tap it. Watch the theater feed on the monitors until Lumen walks in, then tap Lumen.
- Check the radio-room monitor: a figure appears in the room and leaves. Ride to the radio room and pick up the key from the floor. Back in the surveillance room, use the key on the desk drawer to reach the alarm clock and the schedule.
- The notebook says the watchman is in the Radio Room at 07:30. On the alarm clock, leave the black hands alone and drag the thin red alarm pointer to halfway between 7 and 8 (7:30), then press Set. The alarm rings at 07:30.CODE07:30
- Go to the radio room and meet Robin, the bunker watchman. Chapter 2 continues two years later.
Abandoned Mall
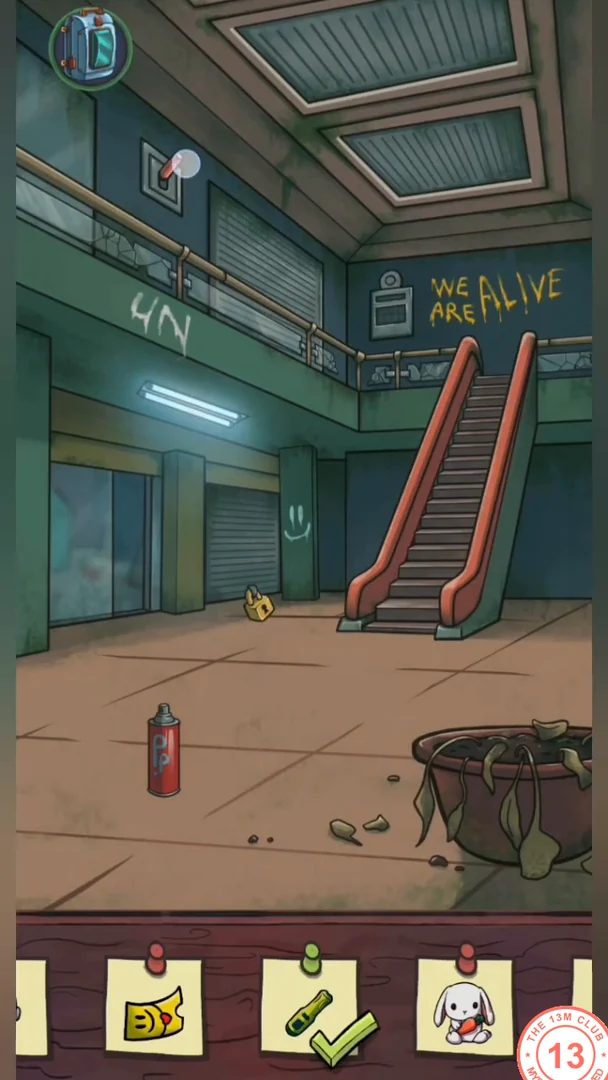
Two years later, Lumen explores an abandoned mall. The key from the toy store opens the clothes shop, and the red brick from that shop completes the toy-store house.
- Two years later, you play as a robot at the Abandoned Mall. Take the yellow screwdriver handle lying by the foot of the escalator. Press the light switch on the upper wall to the left of the WE ARE ALIVE graffiti; light falls through the skylight and a raven lands there. Tap the raven.
- Enter the Mobiloids toy store. Move the red toy car off the train and tap it. Move the toy boxes to expose the white rabbit and tap it. Tap the sheriff doll on the shelf, press the heart badge on his chest and tap the music notes that play. Drag the yellow knife held by the tin robot onto the beach ball to deflate it, then pick up the key it uncovers.
- Play the racing arcade machine: hold the red control to drive and steer left and right to dodge cars and pick up fuel cans so the fuel counter never runs out, until you cross the finish line. Tap the prize ticket the machine gives you.
- Use the key on the padlock of the shutter on the left of the atrium and enter the clothes shop. Put the head on the mannequin and move the mannequin in front of the mirror, then tap its reflection.
- Move the curtain of the changing room aside and take the spray paint. Tap the wallet lying on the wall rack. Fit the rod into the wardrobe, hang the hanger on it and hang the palm-print shirt from the floor on the hanger; tap the hung shirt. Take the red building brick from behind the sofa.
- In the atrium, use the spray paint on the wall above the shop to add the missing letter of RUN, then tap the word RUN.
- In the toy store, open the building-block puzzle, add the red brick and build the house as shown below: two orange posts on the green base, red door between them, yellow beam on top, then the blue roof halves with the light blue block between them, the small blue roof pieces and the orange chimney on top. Tap the finished house.
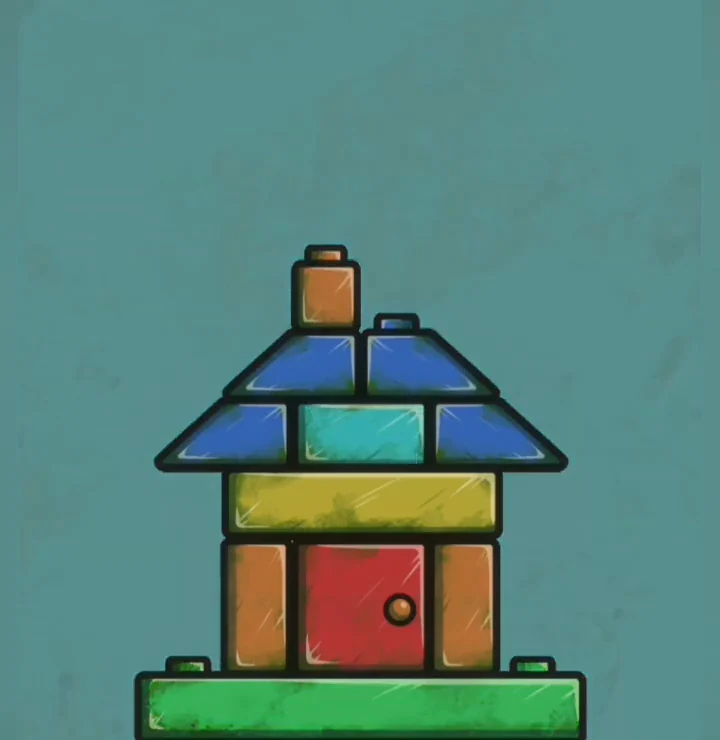
The finished block house. - The power cuts out. Open the fuse box in the atrium and drag the wire pieces into two separate paths: one joining the two red (+) contacts and one joining the two blue (-) contacts. One working layout is shown below.
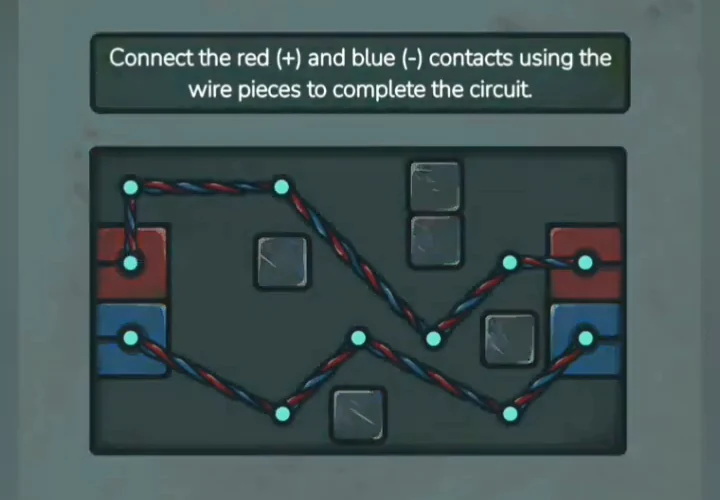
One working layout: red to red and blue to blue.
Seb's House
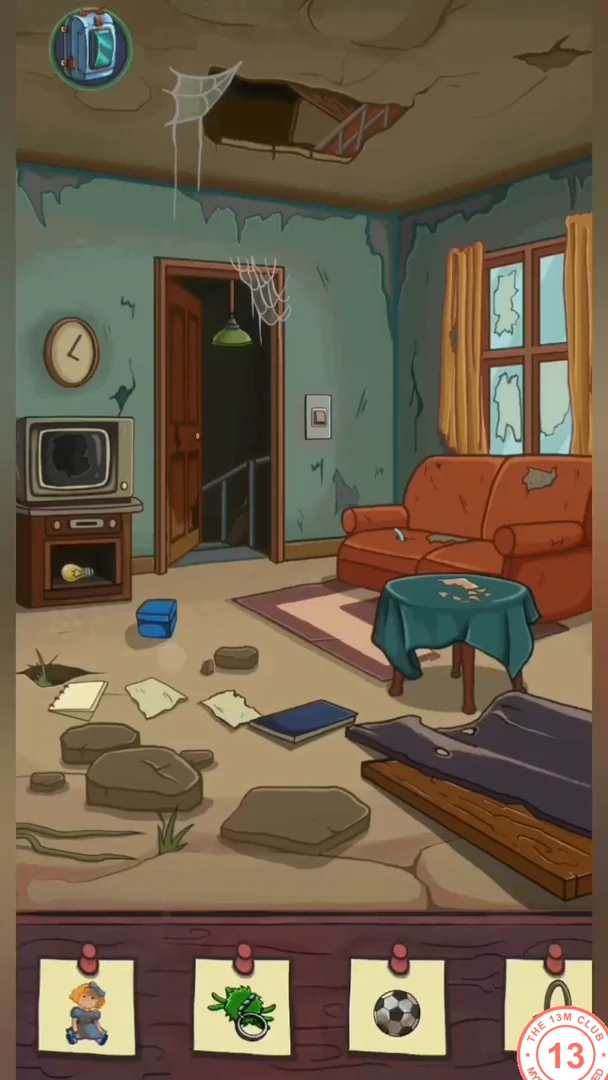
Lumen searches Seb's house and garage. Combine the screwdriver shaft with the handle from the mall to free the toy spider, and keep the fishing line for the pier.
- Travel to Seb's House. Take the light bulb from the TV cabinet and fit it in the hallway pendant lamp, then flick the light switch beside the door. Tap the yellow scoop lit up in the hallway. Tap the left end of the sofa so a spring pops out of the cushion, and tap the spring. Move the wall clock to uncover the car keys and take them.
- Open the puzzle box with the triangle. Place the numbers 1-9 so each side adds up to 17. Solution: top corner 3; left side 3-7-5-2; right side 3-9-4-1; bottom 2-6-8-1. Tap the watch inside the opened box.
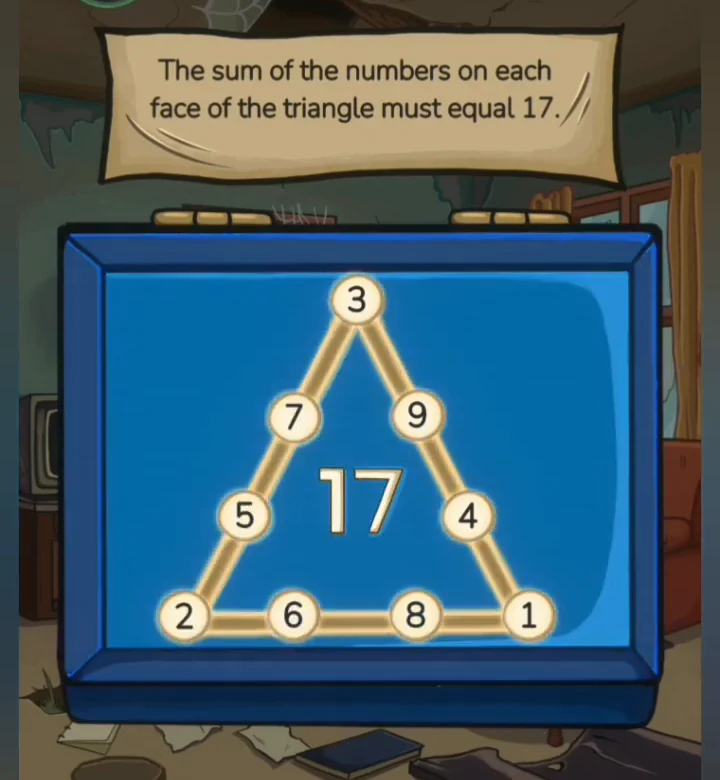
The solved triangle: each side adds up to 17. - Go into the garage. Sweep the cobweb with the broom and tap the chest it hides. Take the windshield washer fluid from the shelf and the screwdriver shaft from the cardboard box on the right, then combine the shaft with the screwdriver handle.
- Open the car's hood and take the wrench. Tap the red cap on the pale washer reservoir to open it, pour in the washer fluid from the blue bottle, then tap the reservoir again to close the cap.
- Get into the car and use the car keys in the ignition on the dashboard. Switch on the wipers to clean the windshield; SEB graffiti shows on the garage wall through the clean glass. Get out and tap the SEB graffiti.
- Use the screwdriver to unscrew the ceiling light fixture. Tap the green toy spider once it drops to the floor.
- Place the floor jack under the car and pump it to raise the car. Slide the soccer ball out from underneath and tap it. Then open the cupboard on the left and take the fishing line; you need it later at the pier.
- Back in the living room, move the stone blocking the hole in the ceiling and pull out the doll. Tap the doll.
- With every item checked off, Seb arrives. Take the torn photo pieces he offers and assemble the photo of a woman with a robot by dragging each piece into place. The map then moves to the Bunker Greenhouse.