Robo Pub
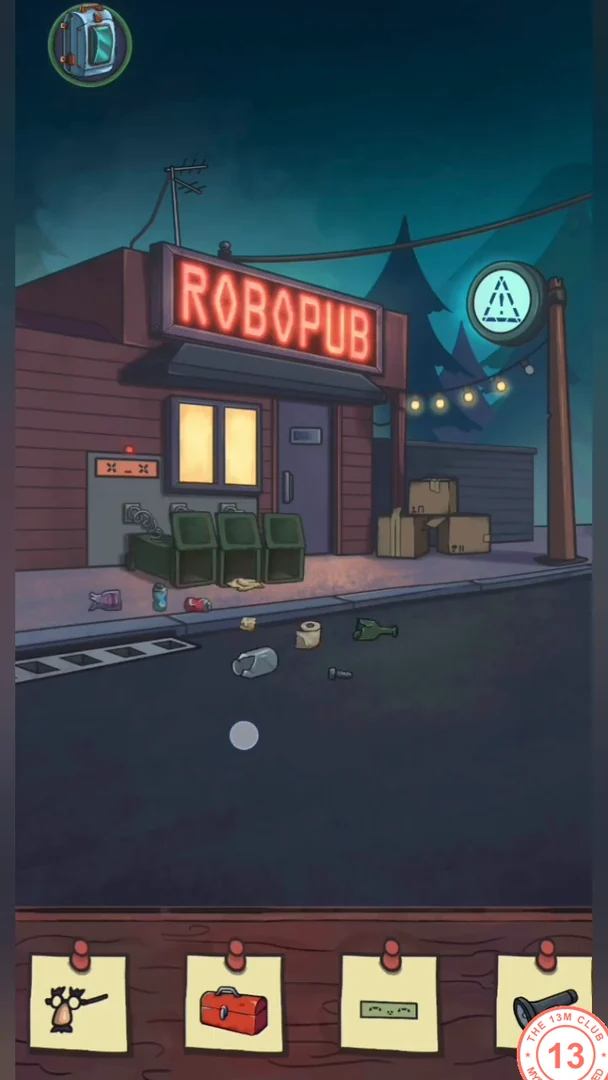
The Robo Pub has a street, a bar room and a back game room. You need the scissors half from Robots Depot to make a pair of scissors here.
- Travel to Robo Pub. Take the crowbar lying on the ground beside and partly behind the cardboard boxes to the right of the pub entrance.
- Tip over the three green bins next to the pub door so the rubbish spills onto the street. Then drag each piece back into the right bin by the symbol on it: paper into the bin with the paper sheet, metal into the bin with the bolt, and glass bottles into the bin with the bottle. When the street is clean, the panel on the wall above the bins changes to a smiling face; tap it.
- Open the peephole in the pub door and tap the disguise behind it. Bend the antenna on the roof: a mechanic robot comes out to fix it. Tap his red toolbox.
- Inside, pull the red curtain aside and use the crowbar to force open the green Robots Only door.
- Talk to Elliot, then beat him at air hockey: drag your striker to hit the puck into his goal three times. Tap the YOU WIN sign to collect it.
- Throw the three darts at the dartboard; the other scissors half drops from behind it. Combine it with the half from Robots Depot. Move the seat cushion to find the gun and tap it. Pick up the red button from the small round table.
- In the bar room, fit the red button to the round wall gauge and press it until the robot face appears. Go outside and tap the robot-face light on the pub sign.
- Count the lights in each part of the pub: four outside, three in the bar and eight in the game room. Open the safe on the game room wall with 4-3-8 and tap the chip inside.CODE438
- Outside, open the drain to find the tied parcel. Cut its string with the scissors and take the flashlight.
- Tap the no-humans sign on the Robots Only door in the bar if it is not yet checked. Return to the game room: Doug has arrived and sends Lumen away. The Stadium unlocks.
Stadium
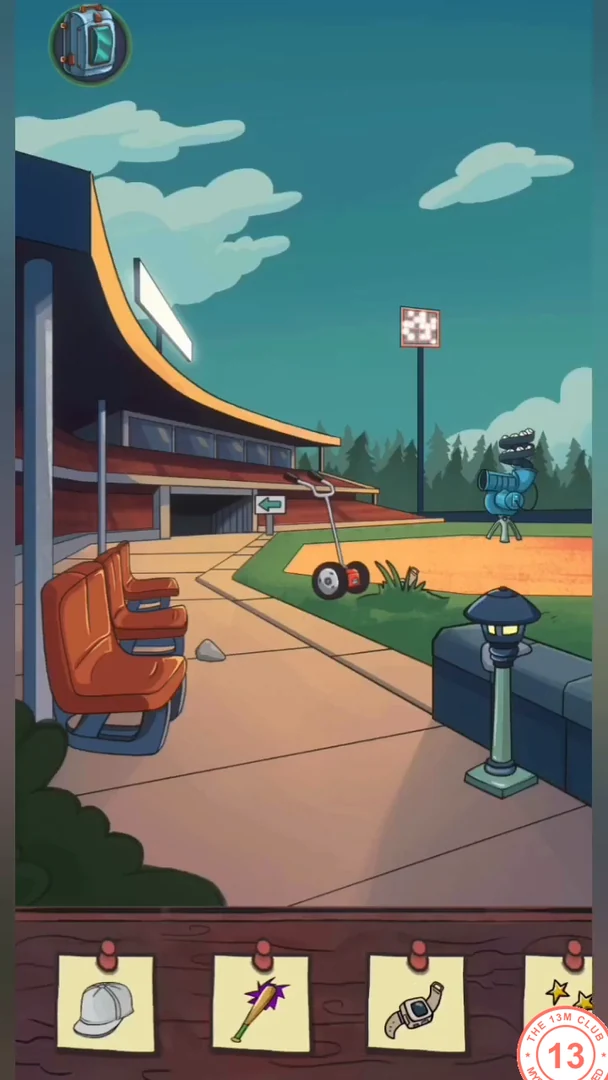
At the empty stadium, Lumen meets Mike. Collect the pieces of the baseball picture from the hallway and the locker room to complete the frame.
- Travel to the Stadium. Move the movable lamp to reveal the rag and take it. Move the lawn mower to reveal the wristwatch and tap it.
- Tap the floodlight panel. Sliding your finger across a bulb toggles it, and the panel asks you not to lift your finger while you slide. Plan a single continuous path that passes over every dark bulb an odd number of times and every lit bulb an even number of times. Then tap the lit floodlights above the field.
- Tap the pitching machine. Tap each baseball the moment it flies out of the machine; hit three in a row. Tap the WIN star afterwards.
- Enter the hallway. Move the coloured caps on the floor to find the white cap and tap it. Tap the team emblem on the robot poster, then collect the separate picture piece beneath the poster.
- Tap the trophy cabinet and tip the gold trophy to drop the ring; tap the ring.
- Go through the open door on the left wall of the hallway into the locker room. Drag the grey bucket on the floor down out of the room, then go back to the hallway: the bucket now stands beside the dark stain. Drag the rag into the bucket to wet it, wipe the stain and tap the baseball bat that appears.
- In the locker room, open the baseball cards on the table and flip through them to the orange card with the robot. Tap the three stars in its lower-left corner. Tap the glove by the bench. Collect the picture piece hidden behind the chairs.
- Tap the empty frame on the locker room wall. Two pieces already lie beside the board; drag your two collected pieces from the backpack onto it as well. Arrange all four to complete the baseball and tap it.
- Go back to the field and talk to Mike. He gives Lumen a walkie-talkie. The Apartment unlocks.
Mike's Apartment
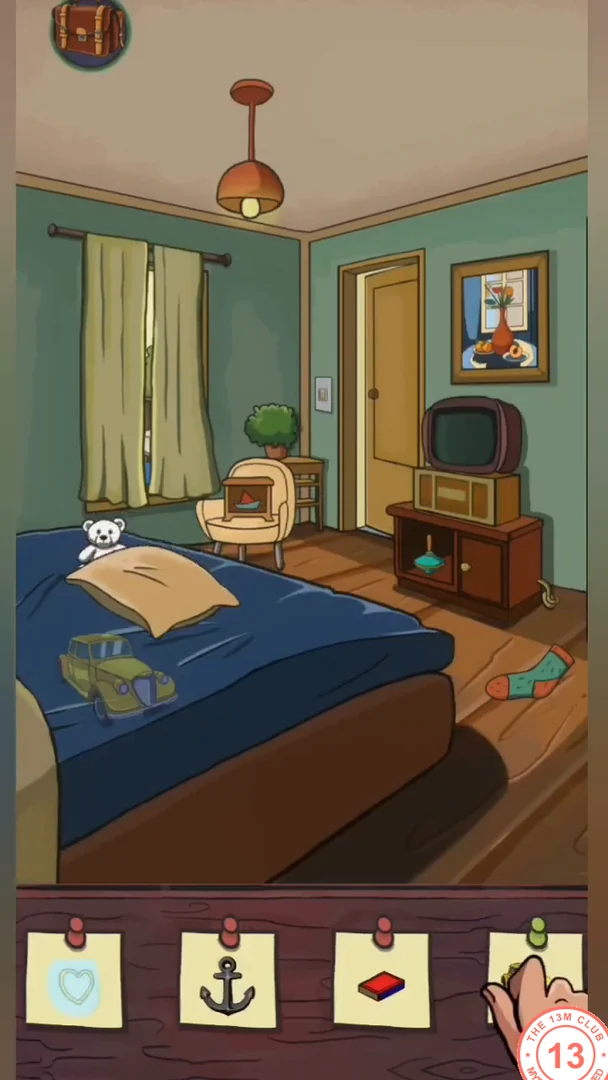
Mike is home in his apartment. The bedroom holds two assembly puzzles, and the towel hook from the bedroom is needed in the bathroom. Take the matches from the bedroom: they are used twice in Chapter 2.
- Travel to the Apartment (as Mike). Tap the model car kit and build the yellow JOE 23 car: add the doors, windows, panels and wheels on both sides, then the trunk and suitcase. Use the red arrows to rotate the model. Tap the finished car.
- Move the pillow on the bed to uncover the teddy bear and tap it. Move the sock on the floor to find the matches and take them; you need them much later in Chapter 2. Take the towel hook as well.
- Open the TV cabinet, take out the red book and leaf through it to find the paper with a red semicircle. Take it.
- Tap Mike's boat puzzle and drag the six boats onto the board so they fit without overlapping, as in the picture below; some round recesses stay empty. When the boats are placed, a drawer opens: tap the anchor inside.
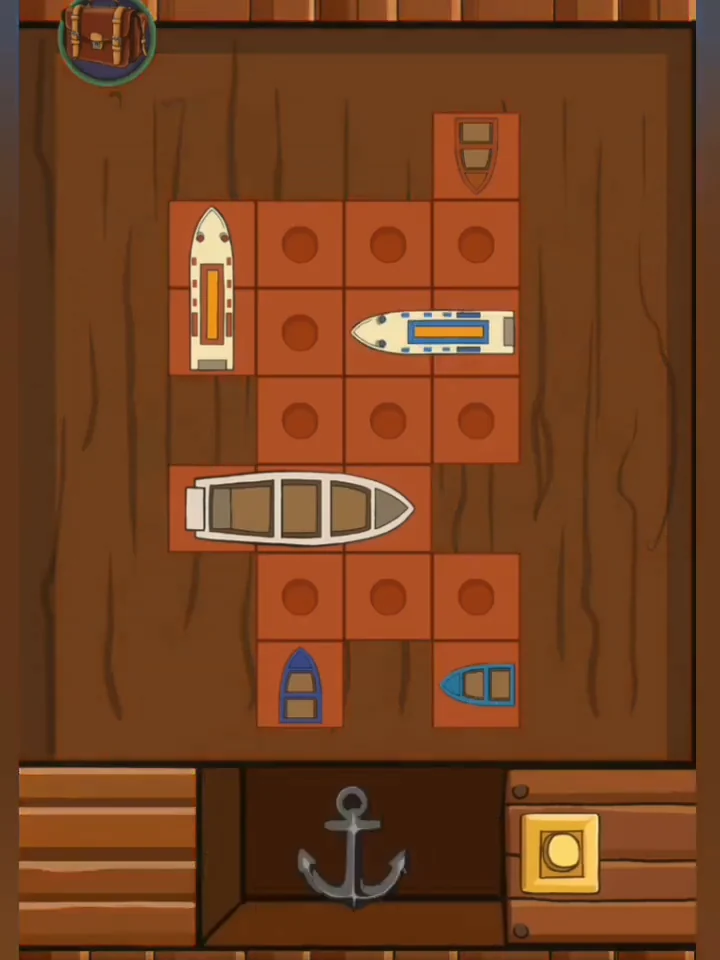
The six boats in place: one long boat upright at top left, two long boats lying across the board and three small boats on the top and bottom edges. Several round recesses stay empty, and the drawer below has opened to show the anchor. - In the bedroom, use the light switch on the wall between the armchair and the door to switch on the bathroom light before you go in. Tap the painting and place the red semicircle paper on it. Tap the paper to turn it upside down, then align it with the half circle in the painting's window, and tap the finished red circle. Look behind the curtains for the blue ball and tap it.
- Go into the bathroom. Put the towel hook on the wall, hang the towel on it and tap the pair of towels. Slide open the glass shower door. Open the mirror cabinet, drag its purple bottle into the shower, slide the green bottle to the left and put the blue bottle from the shower beside it; tap the blue and green pair. Open the soap case on the stool and tap the pink soap inside. Raise the toilet lid, then raise the seat fully as well so the rubber duck shows in the bowl. Drag the duck upward out of the bowl, then tap it.
- Turn on the shower, then close the glass door: a heart appears on the steamed-up glass. Tap it.
- Return to the bedroom and watch the news on the TV about the virus at the hospital. The Metro unlocks.
Metro
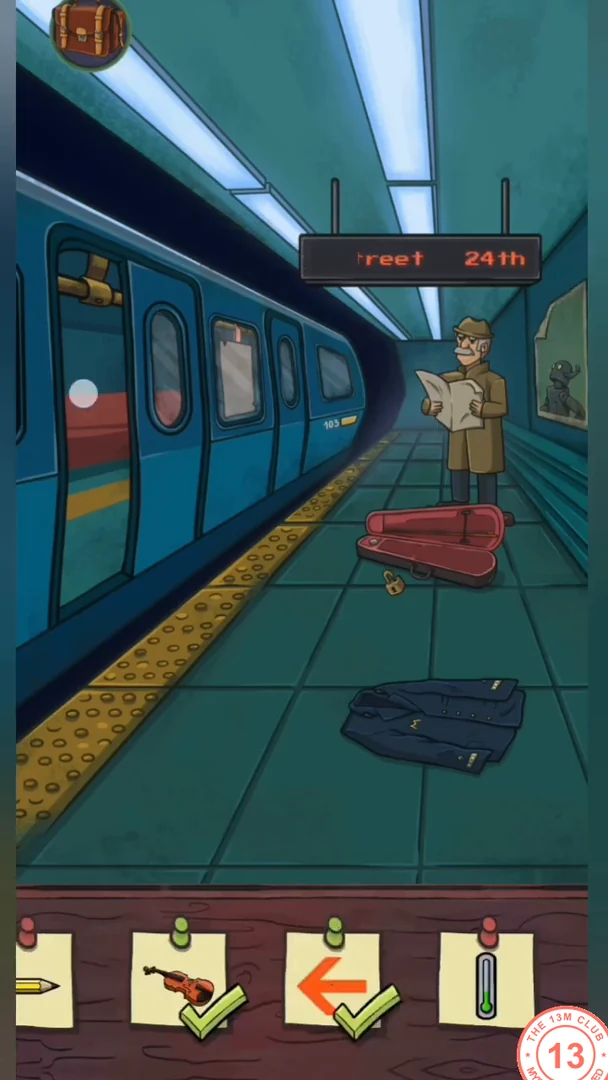
Mike heads for the hospital by metro. Remember the M badge on the uniform jacket: it is the pattern for the driver's cabin lock.
- Travel to the Metro. Tap the uniform jacket on the platform and take the key from it (note the M badge on the jacket).
- Use the key on the violin case and tap the violin. A mouse runs out carrying cheese; tap the cheese.
- Read the man's newspaper. Remove the paper covering the station sign and tap the left arrow it reveals.
- Board the train. Move the pencil on the floor and tap it. Remove the poster from the window, then step back out onto the platform and tap the grab handle through the window from outside; board the train again. Use the floor control to open the left door and tap the graffiti behind it.
- Tap the driver's cabin door and draw an M on the 3x3 pattern lock: up the left column, down to the centre, up to the top right, then down the right column.CODEM
- In the cabin, switch on the light and tap the plush rabbit it reveals. Take the medicine from the first aid kit.
- Tap the radio and turn the dial until the display shows 102.5. Tap the 102 number.
- Tap the button panel. Each number shows how many of the four buttons around it must be pressed. Working row by row (1 = pressed): 01000, 10101, 01101, 10110, 10001. The panel opens to reveal the metro map; tap the map.CODE01000 / 10101 / 01101 / 10110 / 10001
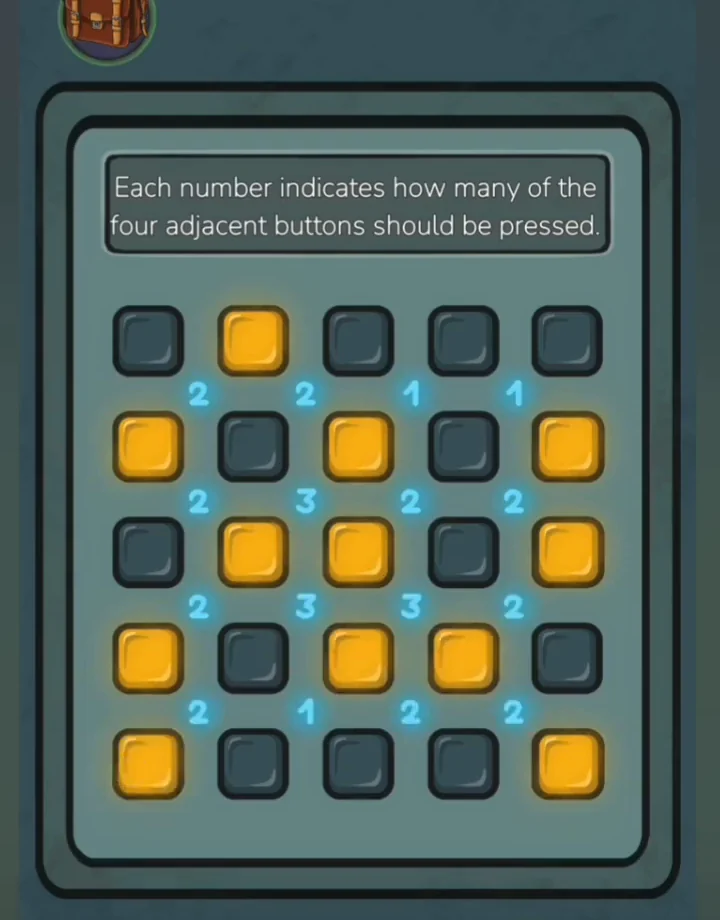
The solved button panel: pressed buttons are lit yellow, rows read 01000, 10101, 01101, 10110, 10001. - Return to the carriage and give the medicine to the sick passenger, then tap the thermometer that appears above him. A noise comes from the driver's cabin: go back in and read the dispatcher's message. The virus is spreading, all trains are halted and the subway is being evacuated. The Hospital unlocks on the map.
Hospital
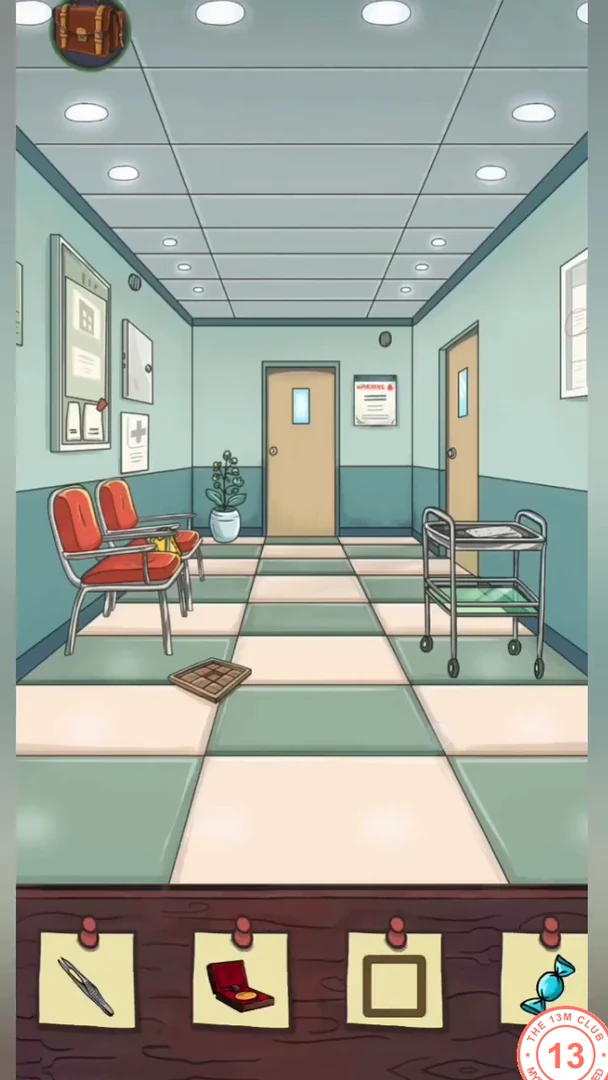
The virus has reached the hospital. Help the doctor by opening his safe, fixing the shift schedule and preparing the injection for the patient.
- Travel to the Hospital. Tap the medical tray in the hallway and take the tweezers lying beside the bandage and gloves. Take the clipboard, and move the chair aside to reveal the wallet; tap it.
- Enter the patient's room. Open the cabinet on the left and take the bed handle. Fit it to the foot of the bed and turn it to lower the bed, then tap the socket revealed on the wall. Attach the monitor's ECG lead to the patient's hand, then tap the heart that appears on the monitor.
- Back in the hallway, tap the loose floor panel. Tap a tile next to the empty space to move it into the gap. Keep moving tiles this way until the pipe pieces join into one closed square loop, then tap the square.
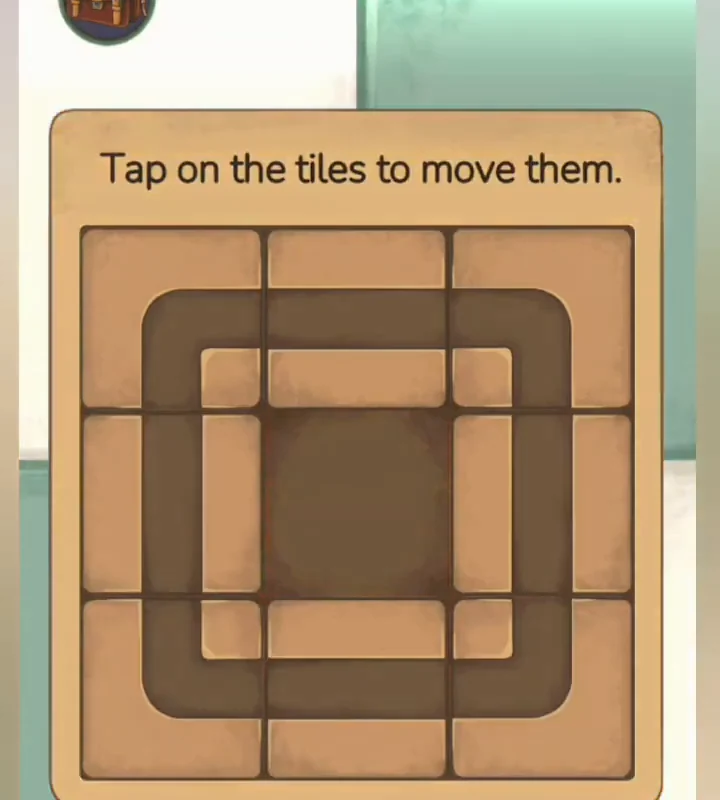
The finished floor panel: the pipes form a single square loop. - Enter the doctor's office and talk to him. Take the vial from the cabinet beside the books. Open the grey cabinet under the safe, take the small green figurine and place it on the doctor's desk: a compartment opens with an hourglass. Tap the hourglass.
- Slide the bookcase doors and count the gnomes of each colour (one is hidden behind the white mug). Enter the counts on the safe in the order of its lights: green, red, blue. With 3 green, 4 red and 3 blue gnomes the code is 343. Tap the medal in its red case inside the open safe.CODE343
- Arrange the doctors' shifts on the schedule board: Mon Andrea, Tue Jack, Wed Billy, Thu Andrea, Fri Jack, Sat Sam, Sun Kate. When the doctor offers a candy afterwards, tap it.
- Tap the warning sign on the isolation-zone door in the hallway.
- Talk to the doctor again to get the syringe, then go to the patient. Fill the syringe as the card shows: 2 yellow, 1 blue, 1 green (in that order), and add the mixture to the IV drip bag. The Laboratory unlocks.
Laboratory
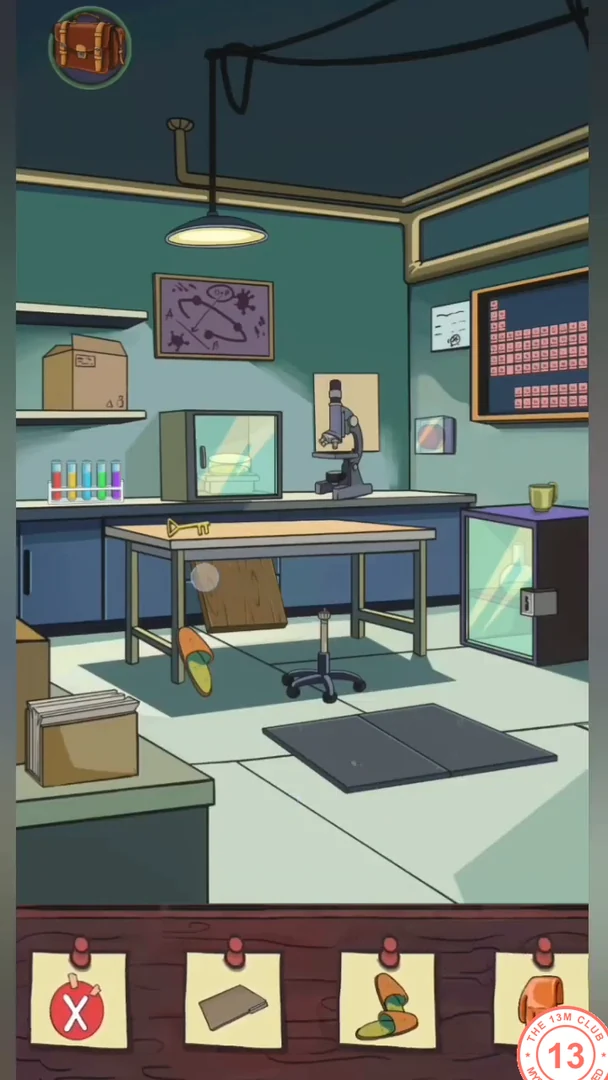
In the laboratory, Mike tests a possible cure. The lab has an upper room and a lower room reached through a floor hatch.
- Travel to the Laboratory. Move the wooden plank leaning under the table, open the drawer beneath the table and tap the flat mat inside. Then press the red button on the wall to open the floor hatch.
- Tap the periodic table, find Bismuth (Bi) and tap it.
- Before going down, drag the wheeled chair base from under the workbench into the open hatch so it drops to the lower lab. Climb down the hatch. Fit the loose seat lying on the floor onto the chair base and tap the finished chair. Pick up the screwdriver from the floor and unscrew the ceiling grille, then cut it open with the bolt cutters lying on the floor. Tap the safety goggles that drop out. Take the golden key from the console. Move the cloth by the ladder and tap the orange glove behind it.
- Still downstairs, place the transparent X on the console monitor, switch the display to red and tap the red X. Roll the floor mat aside and press the button on the wall beside the ladder: the floor hatch opens. Take the slipper inside.
- Use the analysis computer: drag a line across each virus cell so the two parts are equal or nearly equal by area (the counter must read close to 50/50, e.g. 48/52). Do this for all four cells, then tap the green check mark.
- Climb back up and open the glass cabinet with the golden key; tap the vial inside. Put the slipper next to the other slipper under the table and tap the pair.
- Tap the test tube rack. Pour the green liquid and then the purple liquid into the dish, and tap the brown mixture. When every item is found, take the medicine.
- Go down and place the medicine in the testing chamber under the screen. It is not effective against the virus. The Theater unlocks.
Theater
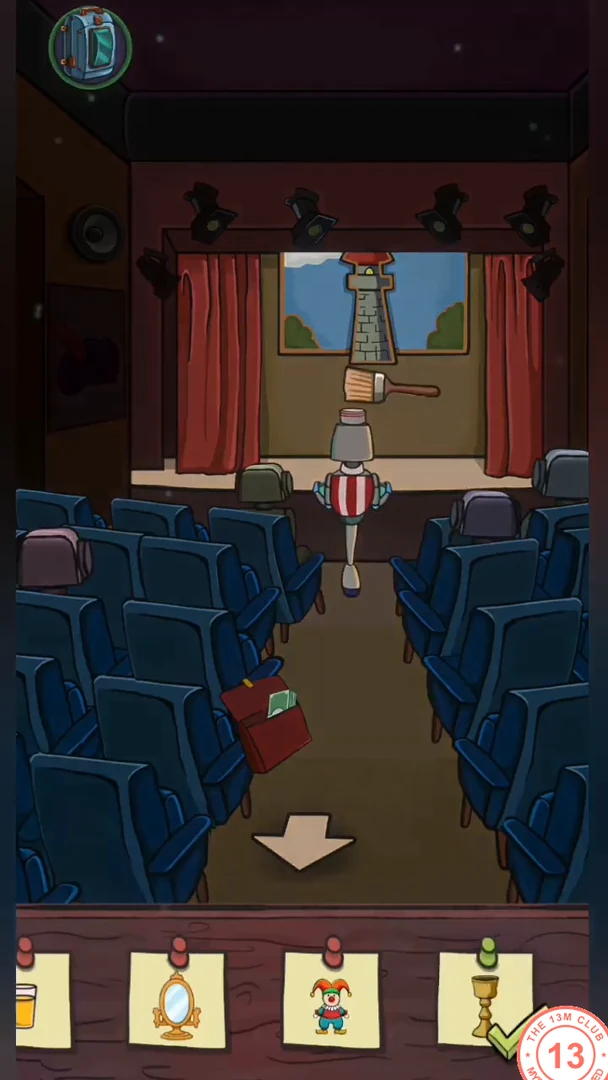
The final location of Chapter 1 is the theater. Get past the guard robot to reach backstage, where most of the puzzles are.
- Travel to the Theater (you play as the robot). In the entrance corridor, drag the red-and-white serving robot through the doorway on the left into the auditorium, then enter the auditorium. Open the red bag on the seats and lift out the banknote to take it. Move the hat on the left seats, join the seats so their pattern forms a triangle and tap the triangle. Tap the goblet on the stage.
- Drag the serving robot a second time, up the aisle until he stands just below the stage. Take the brush lying at the foot of the right-hand seats beside the aisle.
- In the corridor, move the newspaper off the paint cans. Dip the brush in the cans and paint the four wall squares in the green and orange pattern shown below, then tap the painted wall.
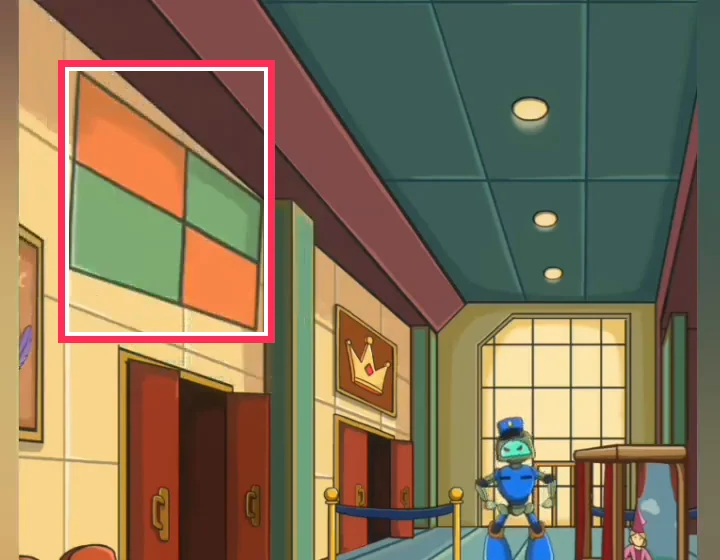
The finished wall panel in the corridor (outlined). - Drop the banknote on the floor in front of the blue guard robot. When he bends down to pick it up, press the red switch on his back to shut him down, then tap his switched-off screen. The way backstage is now open.
- Go backstage and tap the scroll. Place three props per fairy tale: Snow White - apple, dwarf hat, mirror; Cinderella - clock, glass slipper, pumpkin; Hansel and Gretel - bread, gingerbread house, pebbles; Little Red Riding Hood - wolf, basket, axe. When every row is complete, tap the rolled-up scroll.
- Move the bush backstage to reveal the hand mirror and tap it. While you are still backstage, tap the drink held by the serving robot you sent in; he now stands at the left of this view, beside the bush and the portrait. Tap the wall switch on the left wall, above the princess portrait, so it flips down: this turns on the stage spotlight. Look at the three portraits: the princess has a spiral, the knight a heart and the wizard a square emblem.
- In the corridor, open the puppet theater model and put the keys in the holes under the figures: square key under the wizard, heart key under the knight, spiral key under the princess. Take the theater mask.
- Go to the auditorium: the spotlight above the stage is now lit. Drag the lit spotlight to the left and tap the beret that appears on the left wall near the stage, above the seats.
- Backstage, open the chest. The card on top says 71; set the five dials to 93 - 22, which equals 71. Pull the clown up out of the chest and tap it.CODE93-22
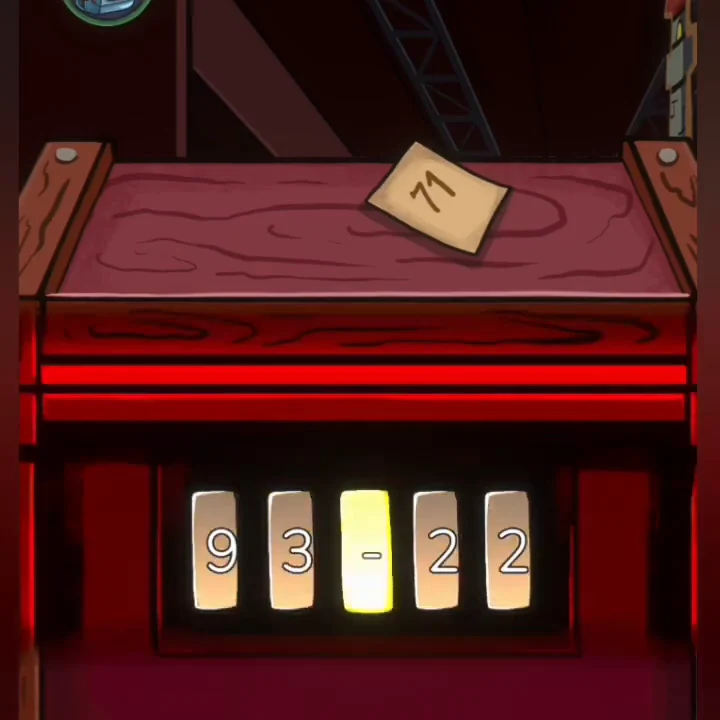
The chest dials set to 93 - 22, which equals the 71 on the card. - Go to the auditorium to watch Doug's speech, then answer the walkie-talkie. The game shows 'Part 1 is over' and Chapter 1 ends.