Out of the dungeon: the lever and the hands in the wall
You now play as Bastian and Laia. They start in a ruined hall with stone stairs, the open trapdoor and a wooden cabinet with symbol locks. Left of it is a room with a kneeling knight who begs for water; further left is a hall with a spiral staircase, a skeleton sitting at its foot, a brown door and a blue door. The spiral staircase leads to a gallery with a green door, a small red box on a wall shelf and a red door. Right of the starting hall is a courtyard with a blue-striped wooden door, a small hole in the wall beside it, stairs and a large arched door with a slot. The stairs climb along a cliff to a tree top with a glass case, a tree trunk with a keyhole and some scattered books. Look out for notes tucked into books in four of these rooms: each shows an animal and an arrow pointing to a mark on a ruler.
- In the knight's room, take the red-handled lever from the small barred niche in the wall.
- Climb to the tree top. Open the small red box among the books to get a magnifying glass, and read the note in the green book: a butterfly, with an arrow pointing to a mark on a ruler.
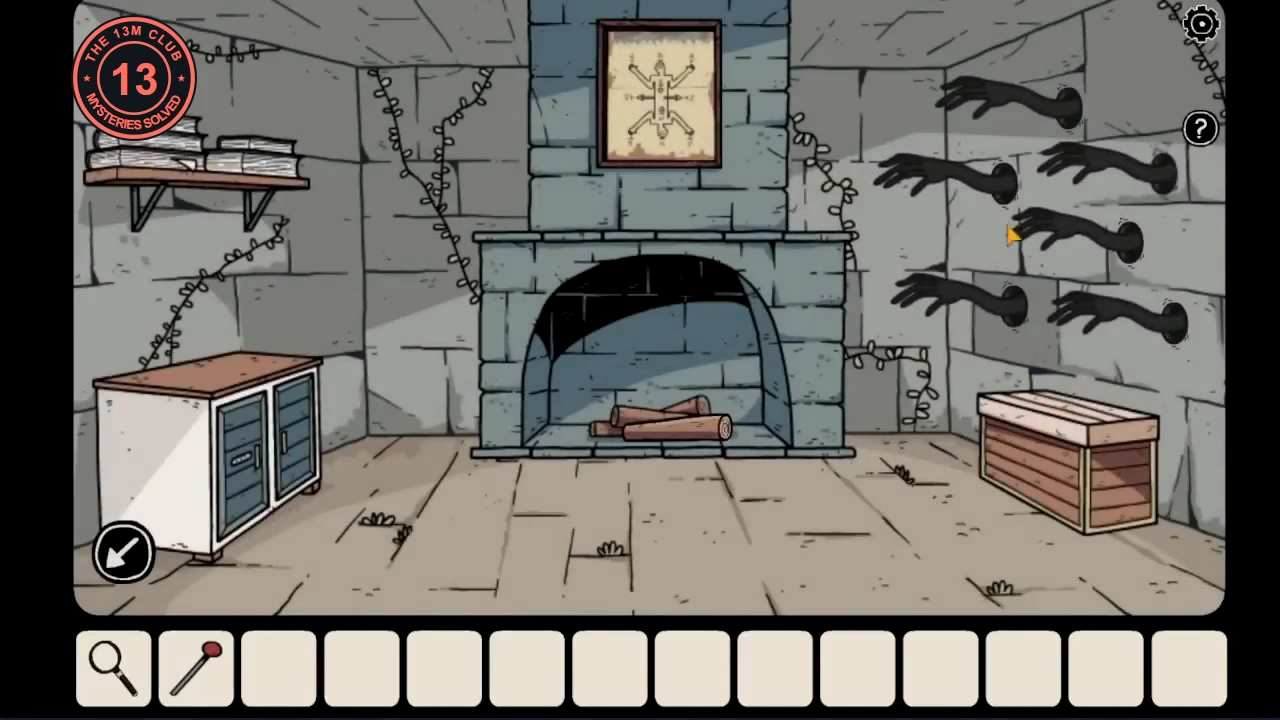
- Open the blue door in the hall with the spiral staircase to enter the fireplace room. Six shadowy arms reach out of holes in the right-hand wall. Touch them in this order: middle left, centre, bottom right, middle right, bottom left, top. Each correct touch pulls an arm into the wall; a wrong touch sends them all back out, so start again. If this order doesn't work in your game, find it one arm at a time: an arm that stays in is correct. The chest on the right opens: take the ring, which is missing its gem, and the old key.
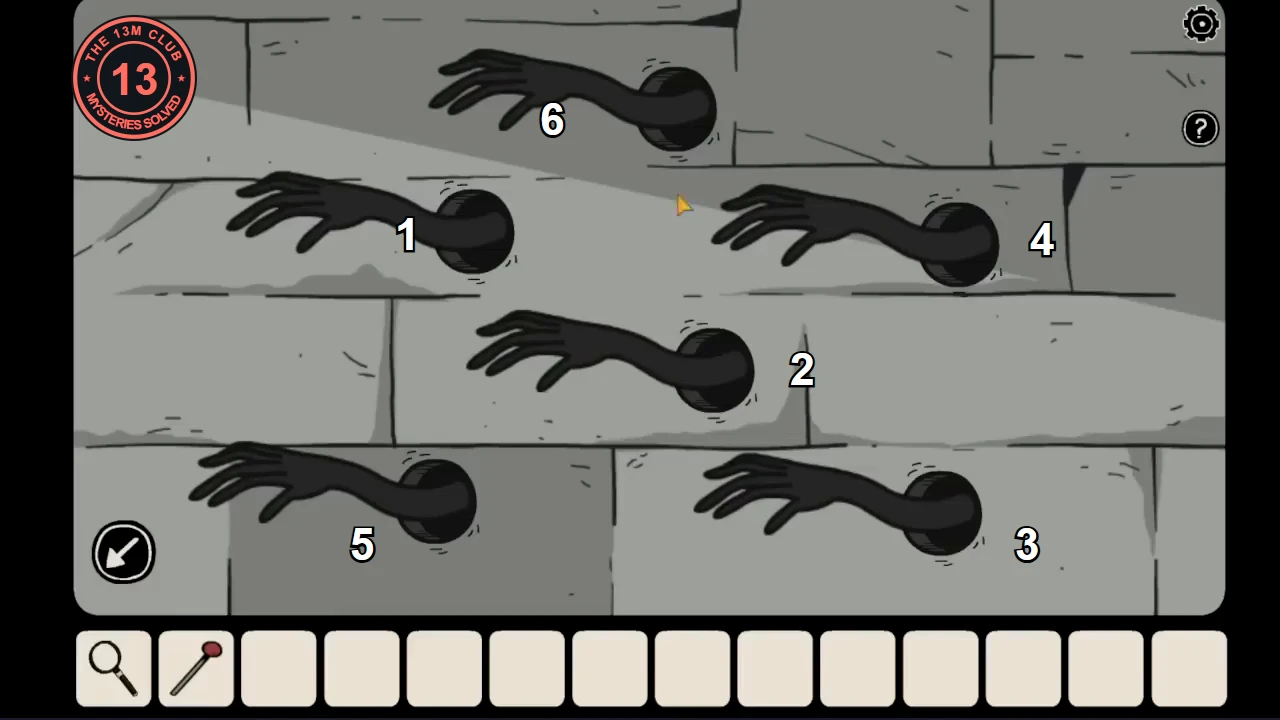
Touch order for the arms: 1 middle left, 2 centre, 3 bottom right, 4 middle right, 5 bottom left, 6 top. - Read the note in the books on the shelf at the top left of the fireplace room: a snail, with an arrow pointing to a ruler mark.
The lecterns, the hook and the animal frame
The old key opens the green door on the gallery. Behind it are four lecterns and a window onto a ledge where small goblins live. You will also reach the pipes room, which has a fountain and the animal frame.
- Unlock the green door on the gallery with the old key. Take the coat hanger from the shelf on the left.
- Optional, hidden shadow 3 of 10: look into the cardboard box on the same shelf.
- Read the note in the books on that shelf: a cat, with an arrow pointing to a ruler mark.
- Look at the four lecterns. Each open book shows a symbol, and a stone hand holds up fingers: waves 1, sun 2, star 3, moon 4.
- Go back to the wooden cabinet in the starting hall. Set its two locks, left to right, in finger order: waves, sun, star, moon. Take the pliers.
- Use the pliers on the coat hanger to bend it into a hook.
- In the courtyard, use the hook on the small hole in the wall left of the blue-striped door to open the door from the other side. Bastian remembers how his brother used to talk about a place like this.
- In the pipes room behind that door, read the note in the books lying on the cloth: a fish, with an arrow pointing to a ruler mark.
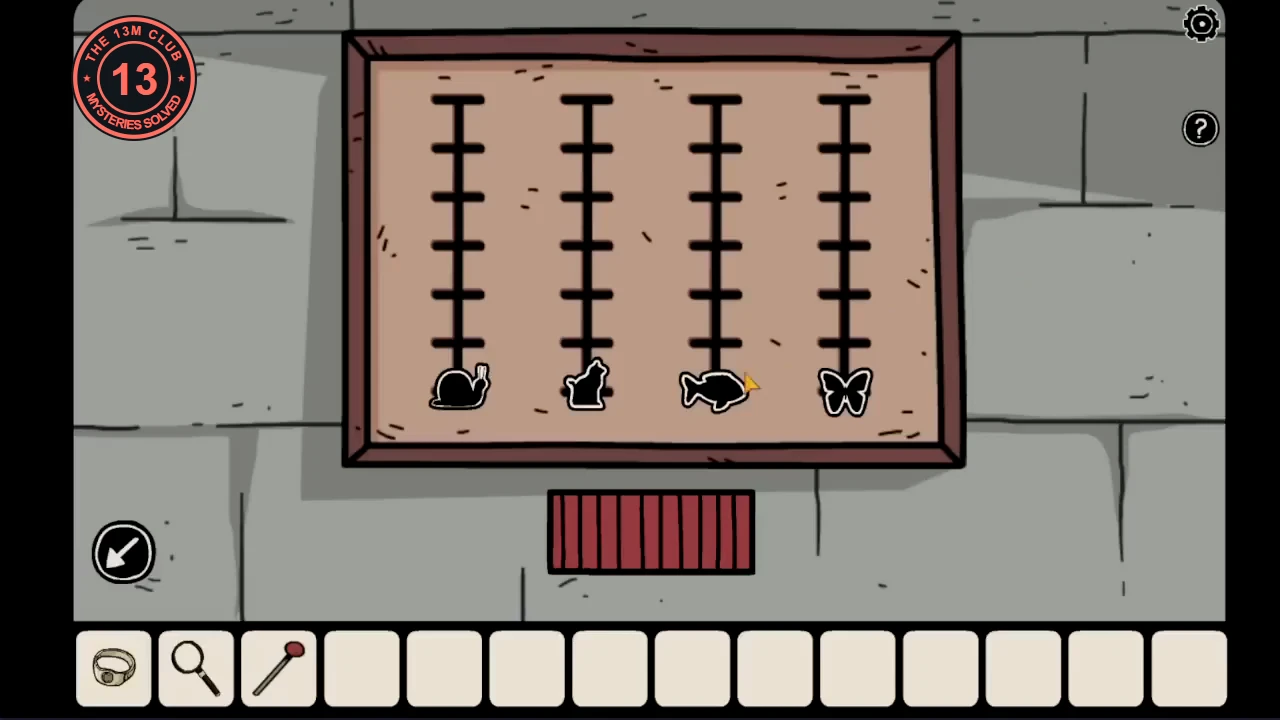
- Animal frame (right wall): four rails with seven marks each hold a snail, a cat, a fish and a butterfly. Move each animal to the mark its note points to, counting from the top: snail 3rd, cat 5th, fish 1st, butterfly 4th. The compartment below opens: take the chicken leg.
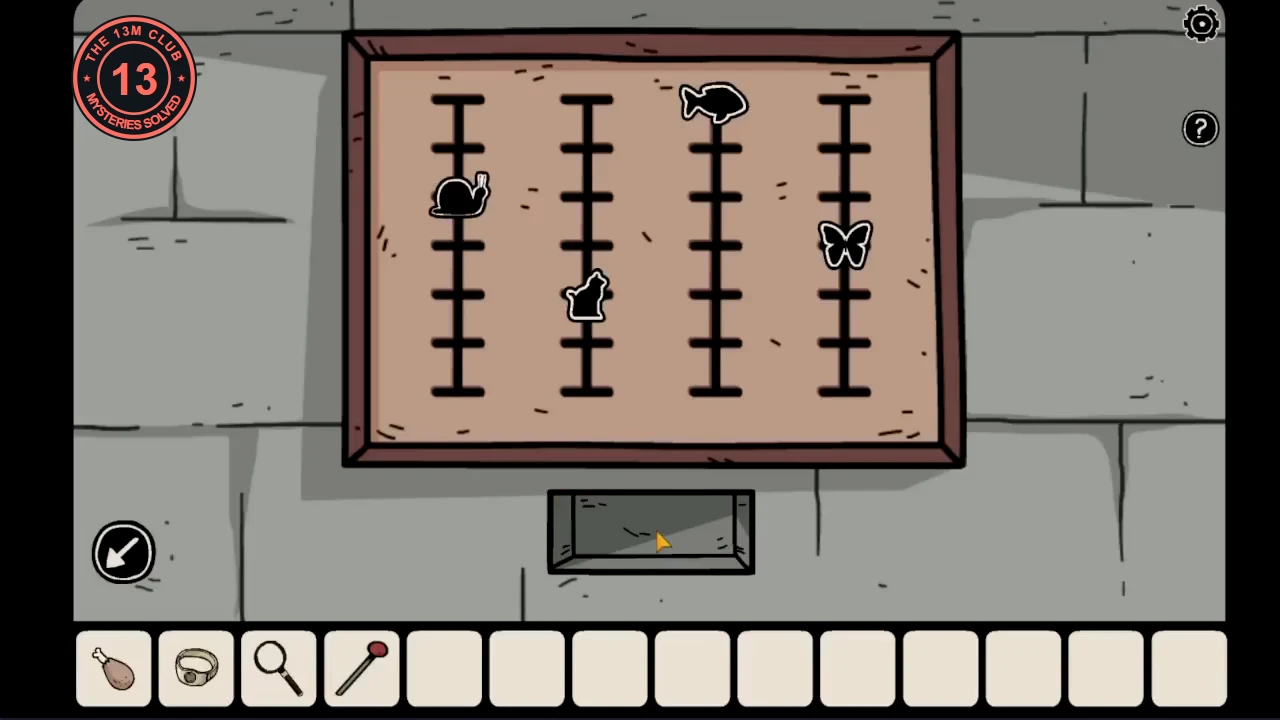
The solved frame. The compartment is already empty here because the chicken leg has been taken. - Put the red lever into the empty slot to the right of the fountain's lion head. It is useless until the pipes carry water.
- Back in the lectern room, open the window and give the chicken leg to the goblins. In return they hand over a spell that opens magically sealed doors.
- Stick the spell on the red door on the gallery. The door opens, but Laia drops through a trapdoor in the room beyond, and Bastian has to carry on alone.
Bastian alone: the painting, the pipes and the fountain
Behind the red door is a room of carved columns with a chest, a table with a drawer and a pink, long-beaked bird.
- Take the fish lying in front of the bird. Open the table drawer and take the transparent sheet.
- In the fireplace room, lay the transparent sheet over the painting above the fireplace. It circles four symbols and joins them with dashed arrows: first the symbol at the figure's arm on your left, then the one on its head, then the one at its lower-left foot, and finally the one in the middle below its heart.
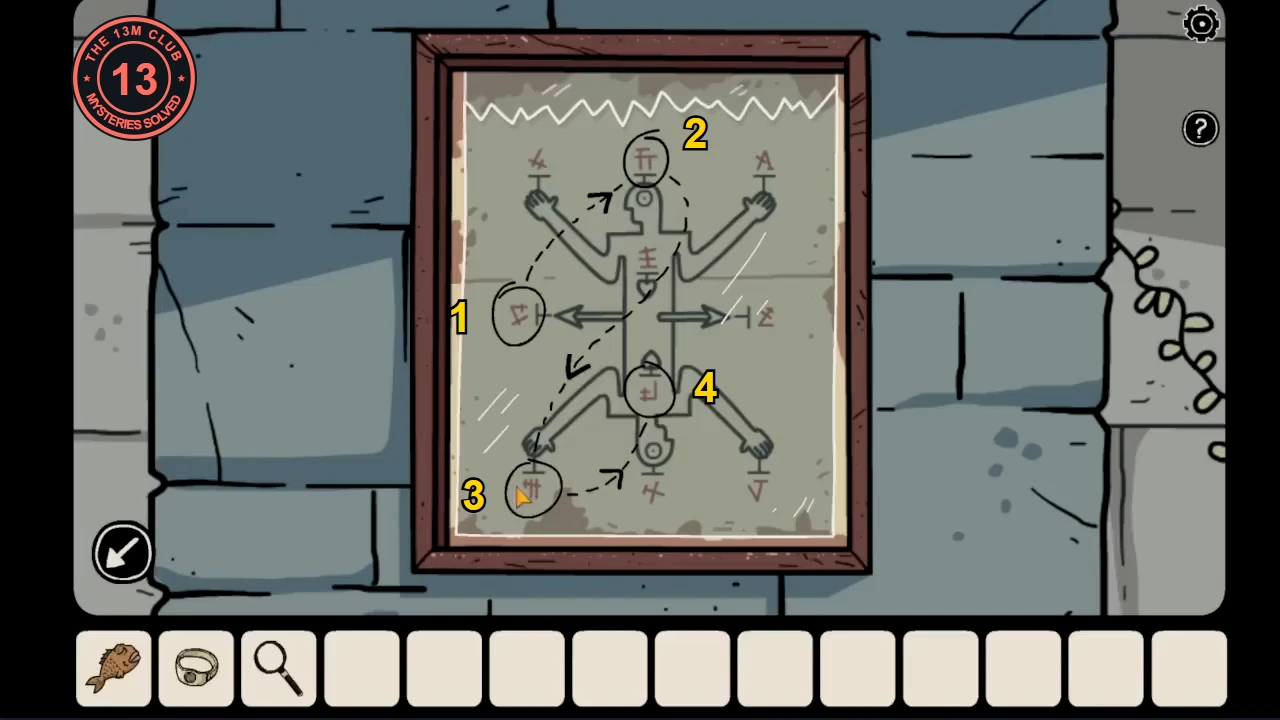
The transparent sheet on the painting. Enter the circled symbols in the numbered order; close-ups follow. 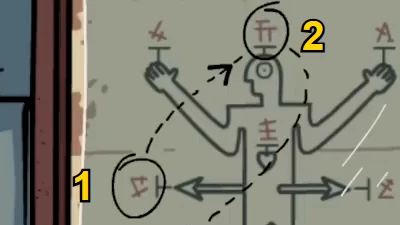
Close-up: symbols 1 and 2. 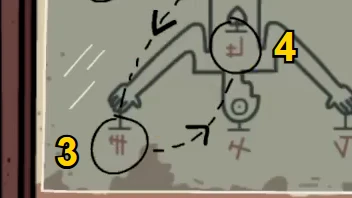
Close-up: symbols 3 and 4. - Open the white cabinet in the same room by entering those four symbols in the arrows' order. Take the glass cutter.
- At the tree top, cut open the glass case with the glass cutter and take the pipe piece.
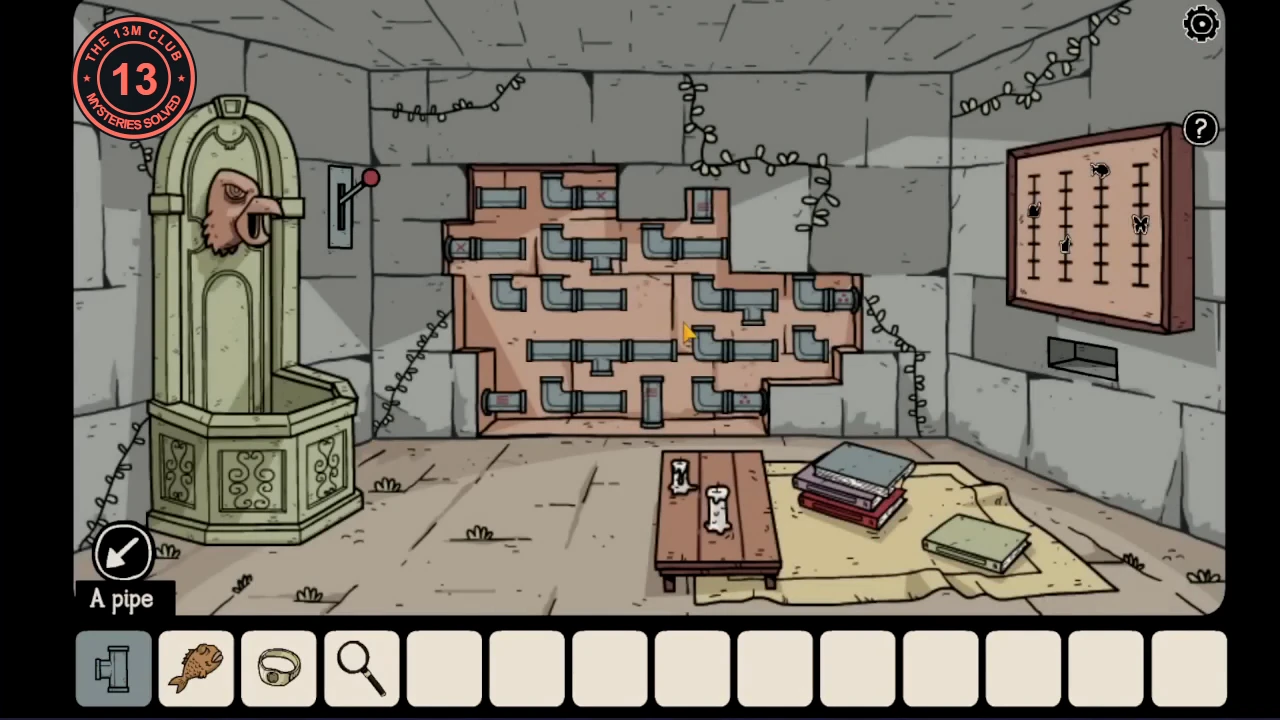
- In the pipes room, fit the piece into the gap in the pipe wall. Then tap pipes to rotate them until each pipe end connects only to ends with the same red mark: the three ends with three lines join each other, the two ends with three dots join each other, and the two ends with an X join each other. Bastian confirms that the water is flowing.
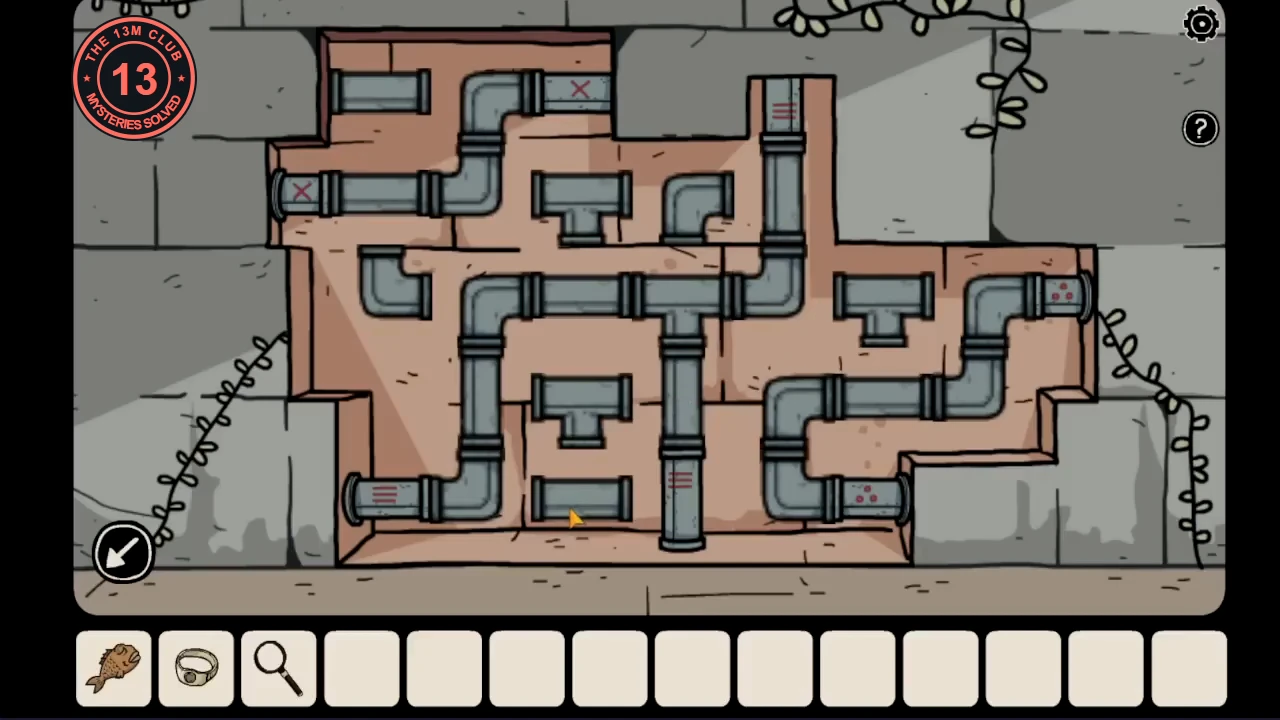
The finished pipe wall. Matching marks are connected to each other. - Pull the lever beside the fountain to fill it, then drop the fish into the water. It swims away and brings back a key.
The tree trunk, the skeleton and the ghosts on the ice
The fish's key fits the tree trunk at the top of the cliff, and the ring finally gets its gem.
- Unlock the tree trunk with the fish's key. Inside are an empty hourglass, an open book and a small gem: take the gem.
- Optional, hidden shadow 4 of 10: a red arrow painted inside the trunk points up. Look up inside the hollow to find the shadow.
- Combine the gem with the ring.
- Put the ring on the finger of the skeleton sitting at the foot of the spiral staircase. It gives you a red key.
- Open the brown door with the red key. In this egg room, take the pouch from the vase on the left-hand shelf.
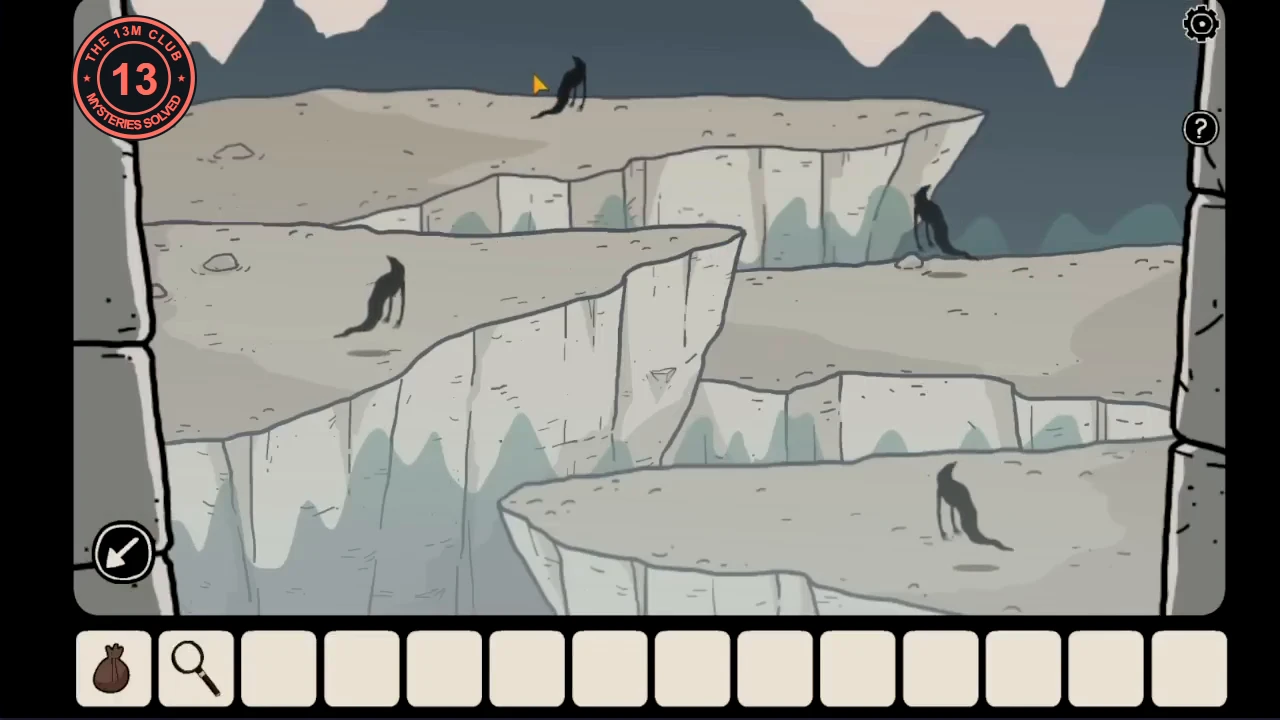
- Look out of the egg-room window. Four shadow figures move along the ice ledges, each tracing a shape: the one on the top ledge paces back and forth like a wave, the one on the left walks in a circle, the one on the right walks a square and the one at the bottom walks a triangle.
- The small red box on the gallery shelf has four tiles arranged like the ledges: top, left, right and bottom. Set the top tile to the wave, left to the circle, right to the square and bottom to the triangle. Take the empty glass.
- Fill the glass at the fountain and give it to the knight. He drinks and crumbles into a pile of sand. Take his broken sword from the pile and fill the pouch with sand.
The hourglass, the bird and the egg shelf
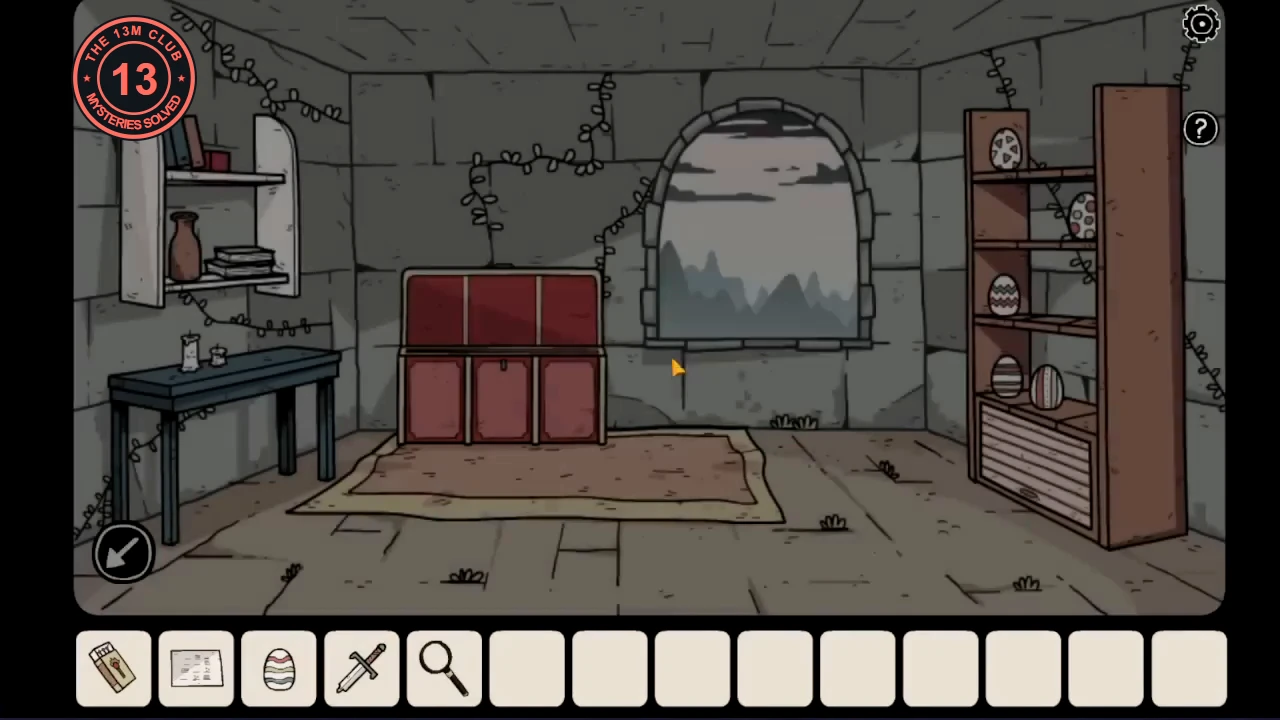
The egg room holds a red chest with a symbol padlock and a shelf of patterned eggs. The hourglass in the tree trunk and the bird room's columns give you the codes.
- Pour the sand into the hourglass inside the tree trunk, then look at it through the magnifying glass. Four symbols show in the sand: a circle with a vertical line through it, a shape like the number 4, an hourglass, and a shape like a small h with a crossbar.
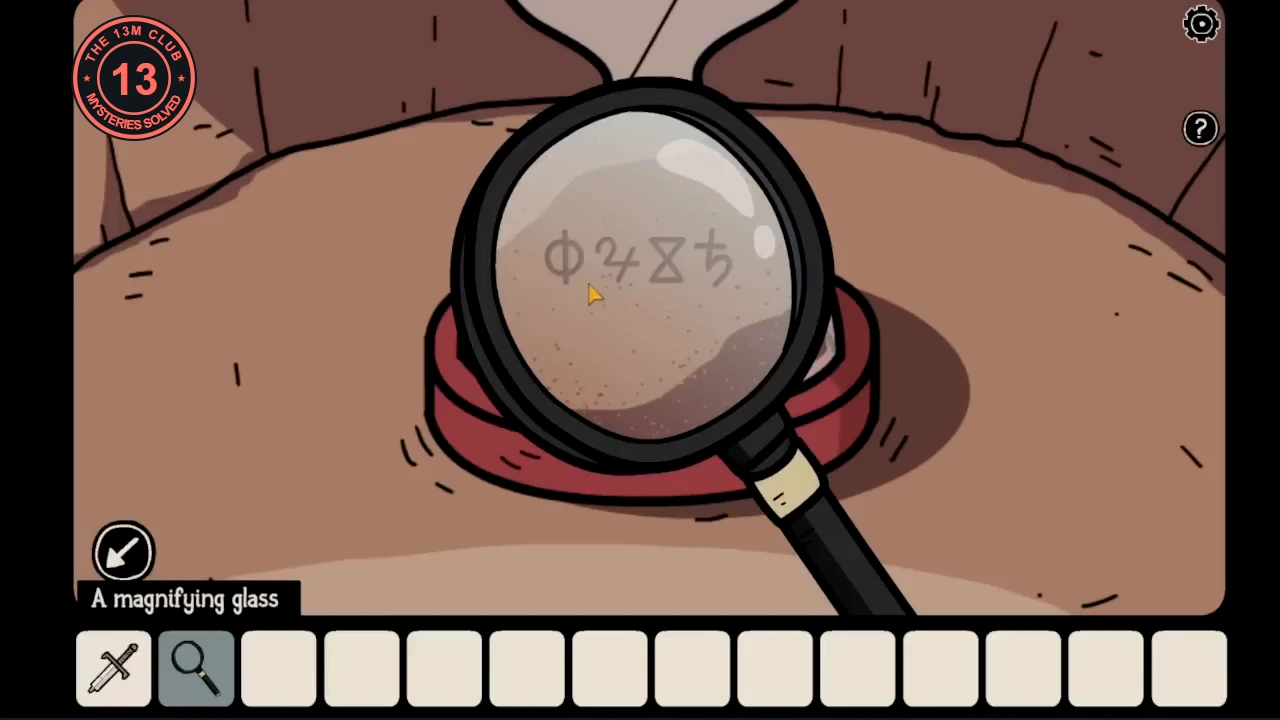
The symbols in the sand, seen through the magnifying glass. - In the egg room, enter those four symbols on the red chest's padlock in the same order. Take the bag of seeds.
- In the bird room, scatter the seeds. The bird eats, lays an egg and bursts up through the ceiling, letting sunlight in. Take the egg. The light now picks out one symbol on each of the four columns.
- Enter the four lit symbols on the bird room's chest, reading the columns from left to right: a Z made of two slashes, a square with a dot, three lines joined on the right, and a spiral like a G. Take the matches and the note with a grid of egg patterns.
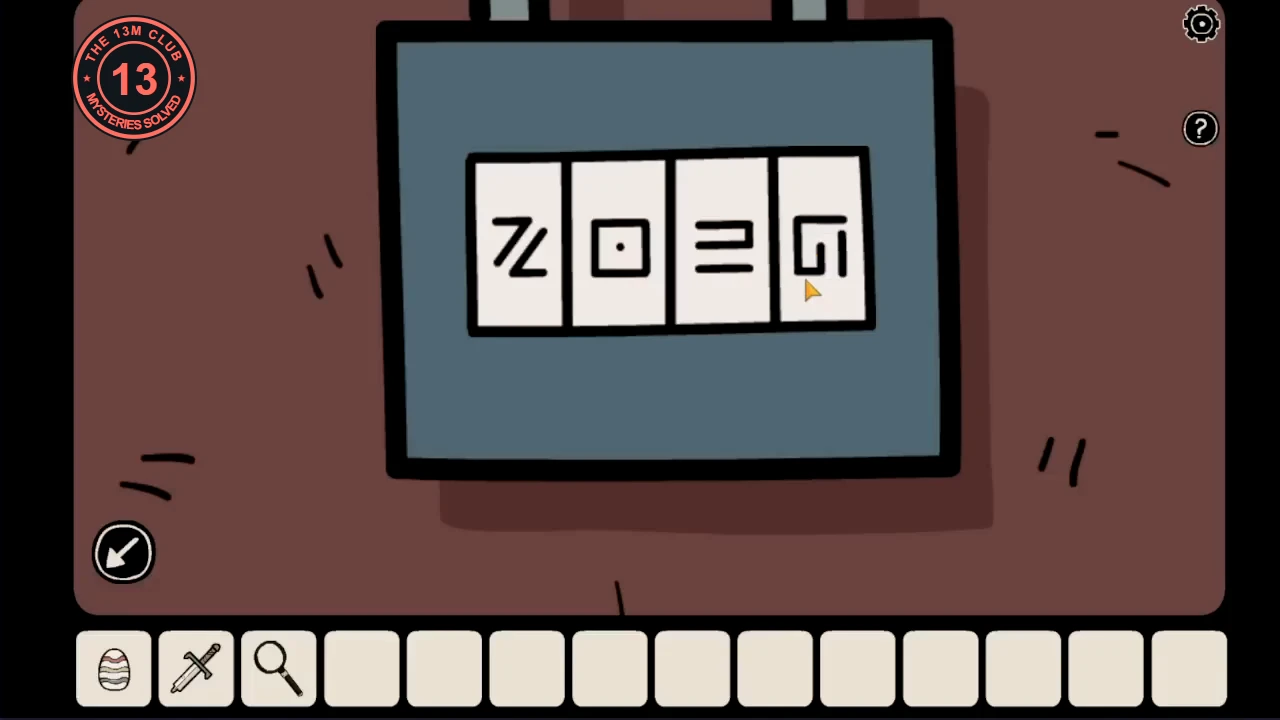
The bird-room chest set to the four symbols lit by the sun. - At the egg shelf, add the bird's egg and move the eggs to match the note. Top shelf, middle: zigzag. Second shelf, right: vertical stripes. Third shelf: wavy bands on the left, triangles on the right. Bottom shelf: spots in the middle, horizontal stripes on the right. The compartment under the shelf opens: take the broken-off piece of the sword blade.
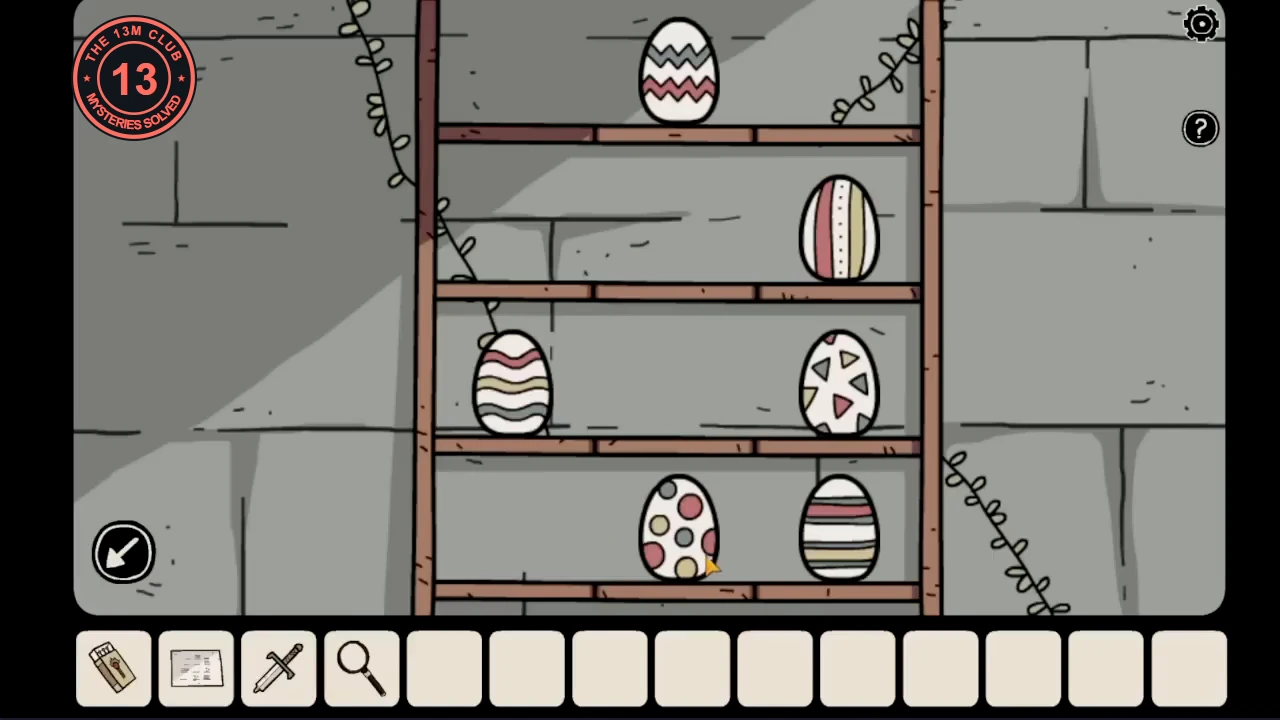
The finished egg shelf, matching the note from the bird-room chest. - Combine the blade piece with the broken sword. In the fireplace room, light the logs with the matches and hold the sword in the fire until the pieces join.
- In the courtyard, push the sword into the slot beside the large arched door. The door opens, the masked shadow seizes Bastian, and the story switches to Laia.