The sitting room, the tablet and the purple box
You play as Detective Ren Larsen. He starts in the sitting room of the house where Bastian grew up: a blue front door, a small table with a purple box, a round table with a chessboard, a side table with three photos and stairs going up. The study is to the left. Upstairs, the landing has a calendar, a red box on a small bookshelf, a bowl on a red table and a locked brown door. The arrow on the right leads to the second half of the landing, with a bookshelf, a wall shelf, a small desk and a locked red door.
- On the side table with three photos, tap the right-hand photo of the smiling boy and turn the frame over. Take the old key taped to the back.
- Go upstairs, then use the right arrow to reach the second half of the landing. Open the yellow box on the bookshelf and take the electric cable. Open the folder on the small desk and take the sheet with four rows of arrows.
- Go back down to the study and plug the cable into the socket under the desk. The tablet on the desk switches on.
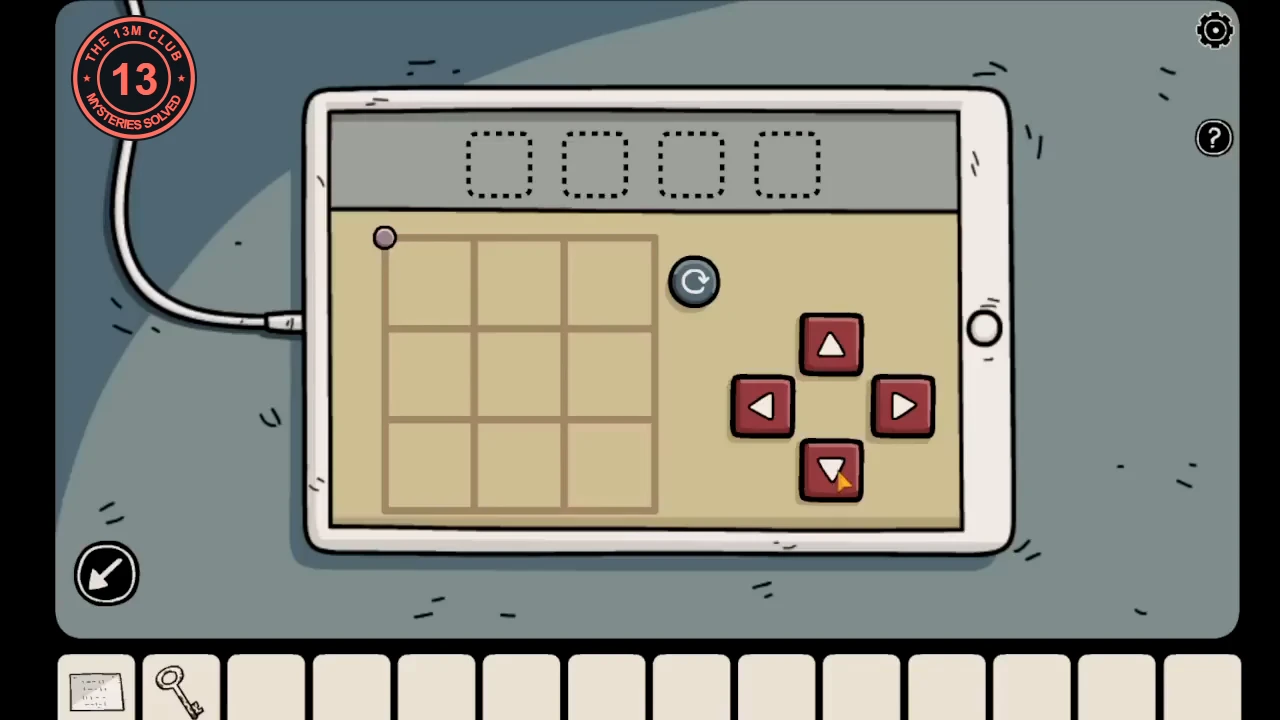
- Tablet puzzle: a line starts at the top-left dot of a 3 x 3 grid, and each arrow button extends it by one square. Each row of the arrow sheet draws one figure. When a row is finished, its figure drops into one of the four slots above the grid and the line starts again. Enter the rows in order. Row 1: down, down, down, right, right. Row 2: right, right, right, down, down. Row 3: down, down, right, right, right. Row 4: right, right, down, down, down. The round button clears a mistake. Note the four figures in the slots.
- In the sitting room, the purple box on the small table has four symbol tiles. Tap them until they show the tablet's four figures in the same order. The lid opens: take the latex glove and the blue key.
- Unlock the brown door on the landing with the blue key. It leads to Bastian's bedroom.
The bedroom safe and the tattoo photos
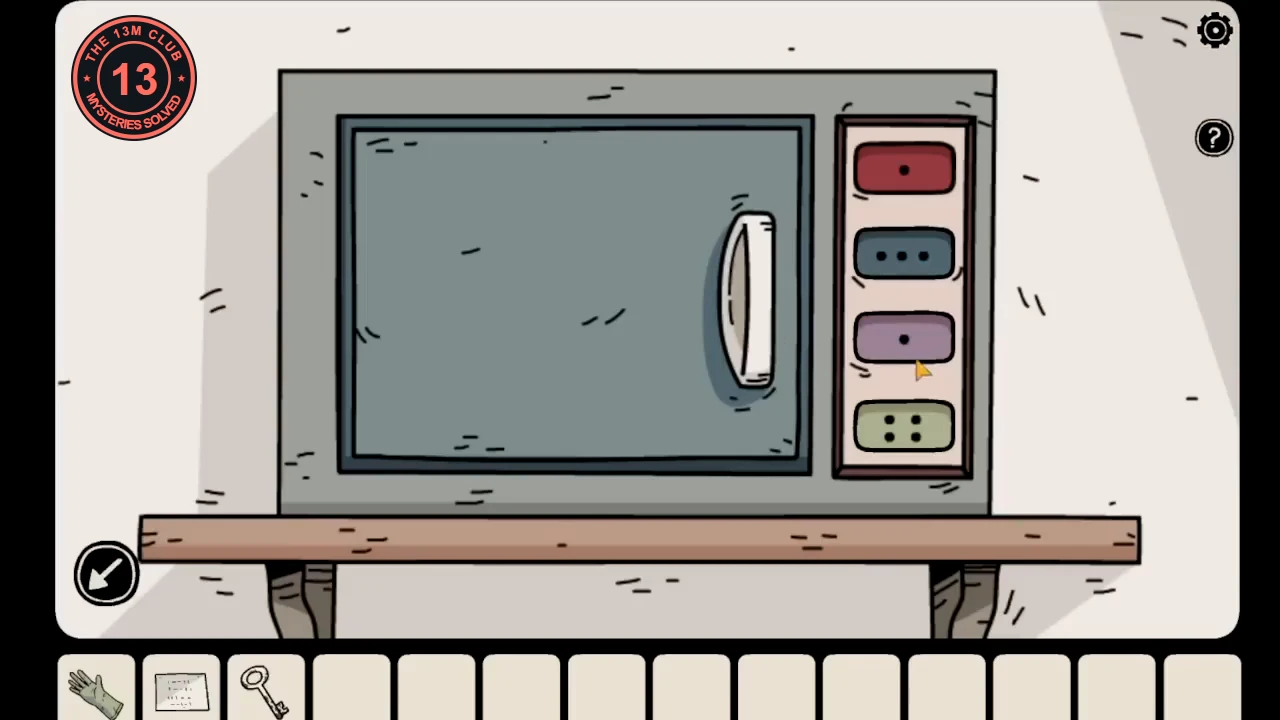
The bedroom has a desk with a laptop, a small safe with four coloured buttons on a wall shelf, a chair, a wardrobe and a window with a purple curtain.
- Optional, hidden shadow 1 of 10: tap the bottom of the purple curtain. A small shadow creature appears on the floor and is crossed off in the tracker.
- Open the wardrobe and look at the clothes: the blue jeans have 3 knots, the red top has 1 and the green jacket has 4. The purple curtain has 5 knots.
- Open the safe: its buttons are red, blue, purple and green, and each shows a number of dots. Set each colour to its number of knots: red 1, blue 3, purple 5, green 4. Take the external hard drive.CODE1354
- Connect the hard drive to the laptop on the desk. It shows four tattoo photos in a 2 x 2 grid. Open each one and note the red symbol drawn on the skin, keeping track of which position each photo is in.
- On the landing, open the red box on the small bookshelf. Its four tiles are in a 2 x 2 grid like the photos: set each tile to the symbol from the photo in the same position. Take the bottle of acid.
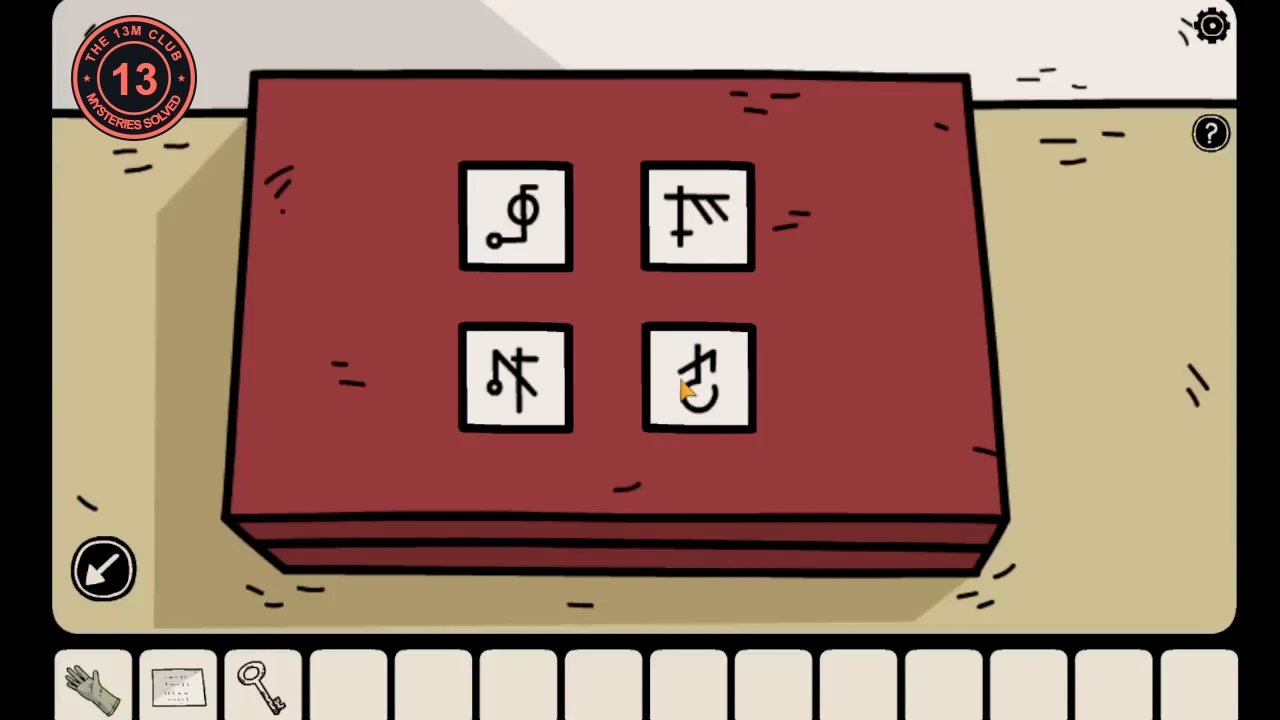
The red box set correctly, just before it opens. Each tile matches the laptop photo in the same position; the pointer is resting on the bottom-right tile. - Pour the acid into the bowl on the red table, drop the old key in to dissolve the rust, then lift it out with the latex glove. You now have a white key.
The photo album, the calendar and the chessboard
The white key opens the red door in the second half of the landing. The red room behind it has a red chest of drawers with a metal safe on top and a table with a book. The doorway on its right leads to the X-ray room, with shelves of ornaments, an X-ray scanner, a locked wall cabinet and a lattice cupboard.
- Unlock the red door with the white key. In the red room, the book on the table tells you that witches can take over other people's bodies and fear open scissors. Open the bottom drawer of the red chest of drawers and take the card showing a duck, a vase, an alarm clock and a rocket.
- Go right into the X-ray room. Open the lattice cupboard and take the blue photo album.
- Leaf through the album. Its four photos show a football shirt with the number 10, four snails, a birthday cake with candles reading 23, and a wheel with 12 sections. Now look at the calendar on the landing, where some June dates carry red symbols. Note the symbols on the 10th (an arch with three dots), the 4th (three wavy lines), the 23rd (a square in a frame) and the 12th (a triangle with a bar across its top).
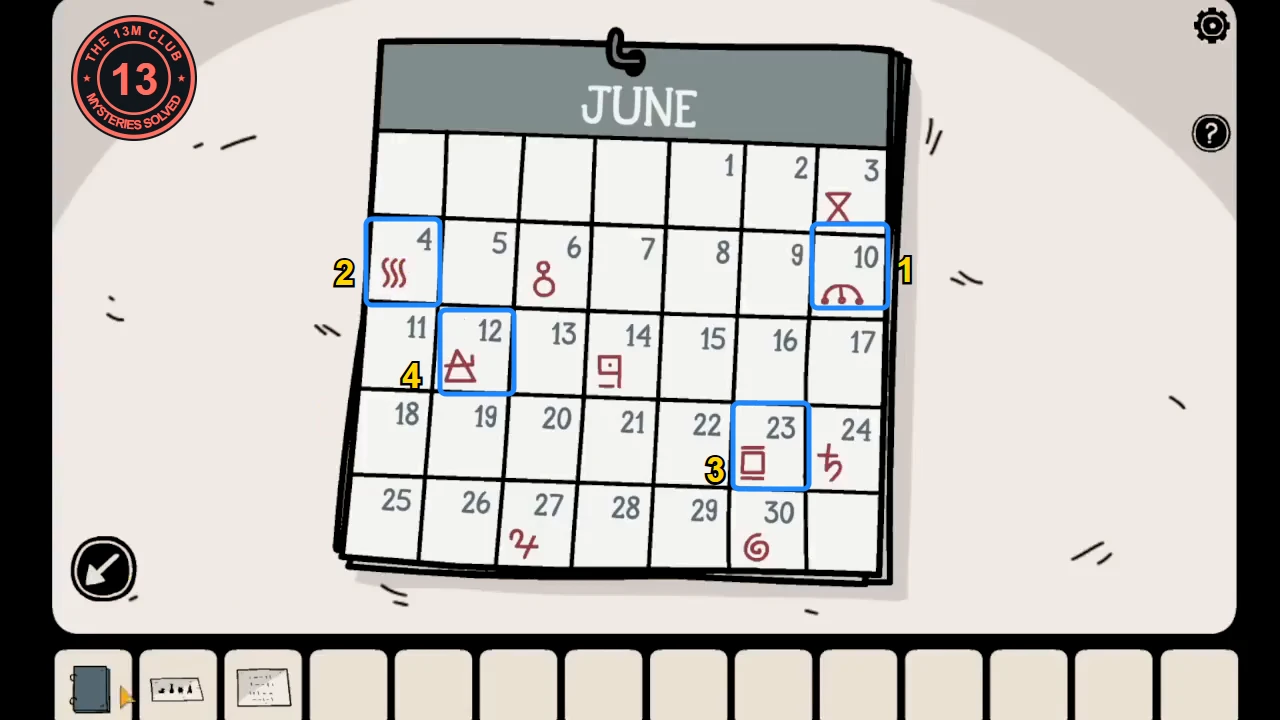
The landing calendar. The album's photos point to the 10th, 4th, 23rd and 12th, in that order. - In the study, the white cabinet has two locks with two symbol tiles each. Set them, left to right, to the symbols for 10, 4, 23 and 12: arch, waves, framed square, triangle. Take the wrench and the small figurine.
- In the sitting room, place the small figurine on the empty square of the chessboard.
- In the study, the easel holds six framed drawings of the chess pieces. Tap each frame to turn it over: the back shows a small grid with one red square, which is where that piece must stand.
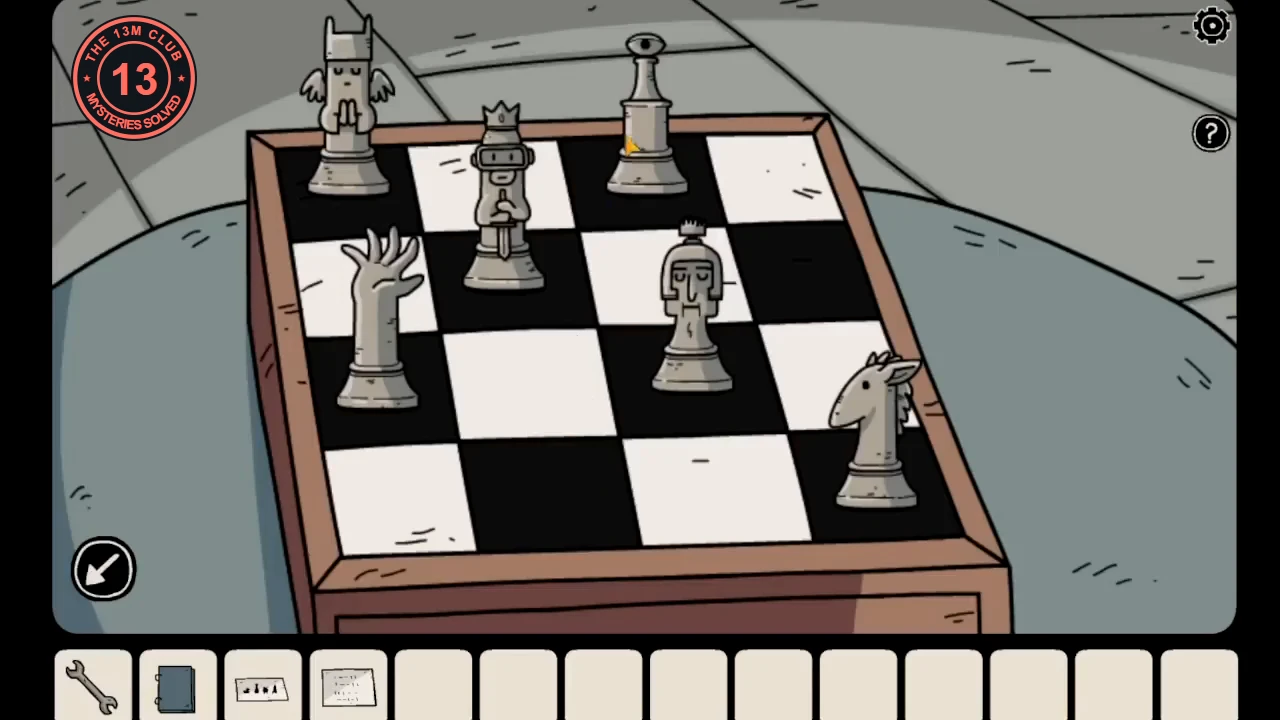
- Back at the chessboard, move each piece to the square shown on the back of its drawing. When all six are in place, the drawer under the board opens. Take the large battery.
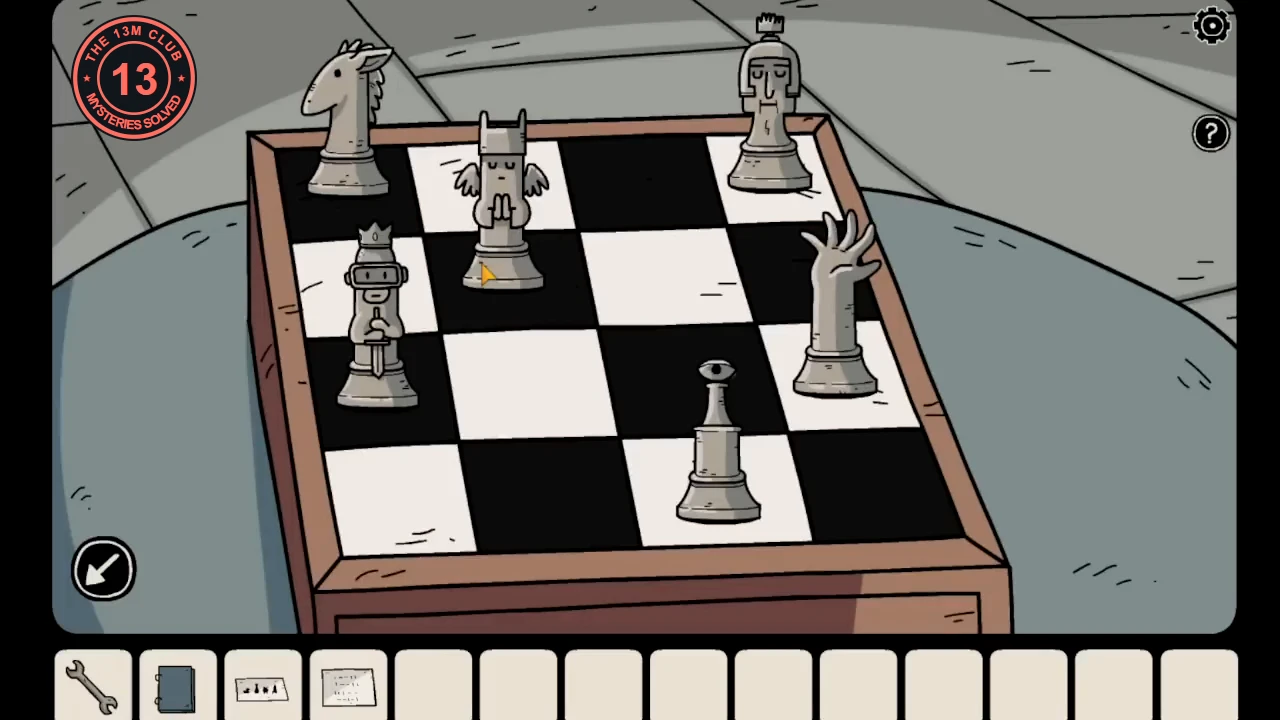
The finished chessboard, after every piece is on the square shown on the back of its drawing.
The X-ray machine
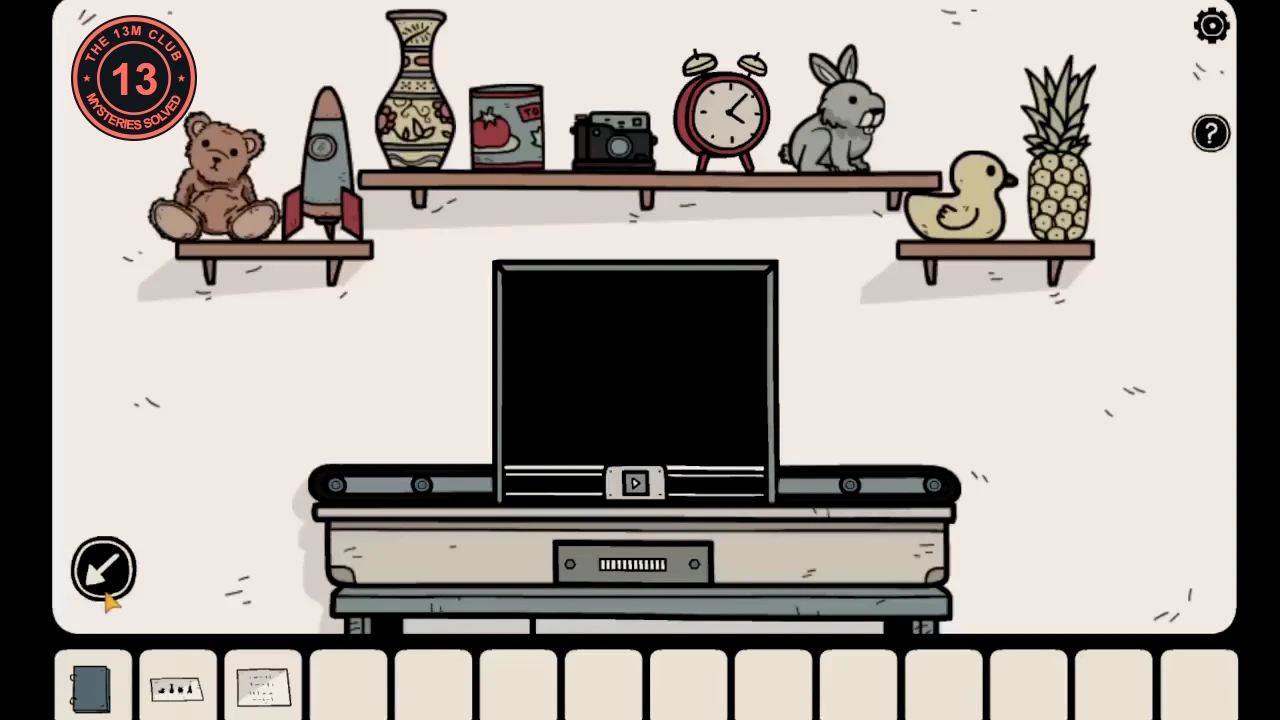
In the X-ray room, ornaments line the shelves above a large X-ray scanner. The card from the red chest of drawers tells you which four ornaments to scan and in which order.
- Use the wrench on the two bolts of the panel below the scanner's screen, open the panel and insert the large battery. The scanner now works.
- Optional, hidden shadow 2 of 10: put the red tin from the top shelf on the scanner and press the play button. A shadow creature shows up inside the tin on the screen.
- Scan the four ornaments in the card's order: duck, vase, alarm clock, rocket. Put each one on the scanner and press play: the screen shows a symbol hidden inside it. The duck holds a square with a dot, the vase a hook shape, the alarm clock a stack of bracket shapes and the rocket a curl like the number 9.
- The wall cabinet has an oval padlock with four symbol dials. Set them to the four scanned symbols in the card's order. Take the sandpaper and the bag of flour.
The hidden room behind the bookcase
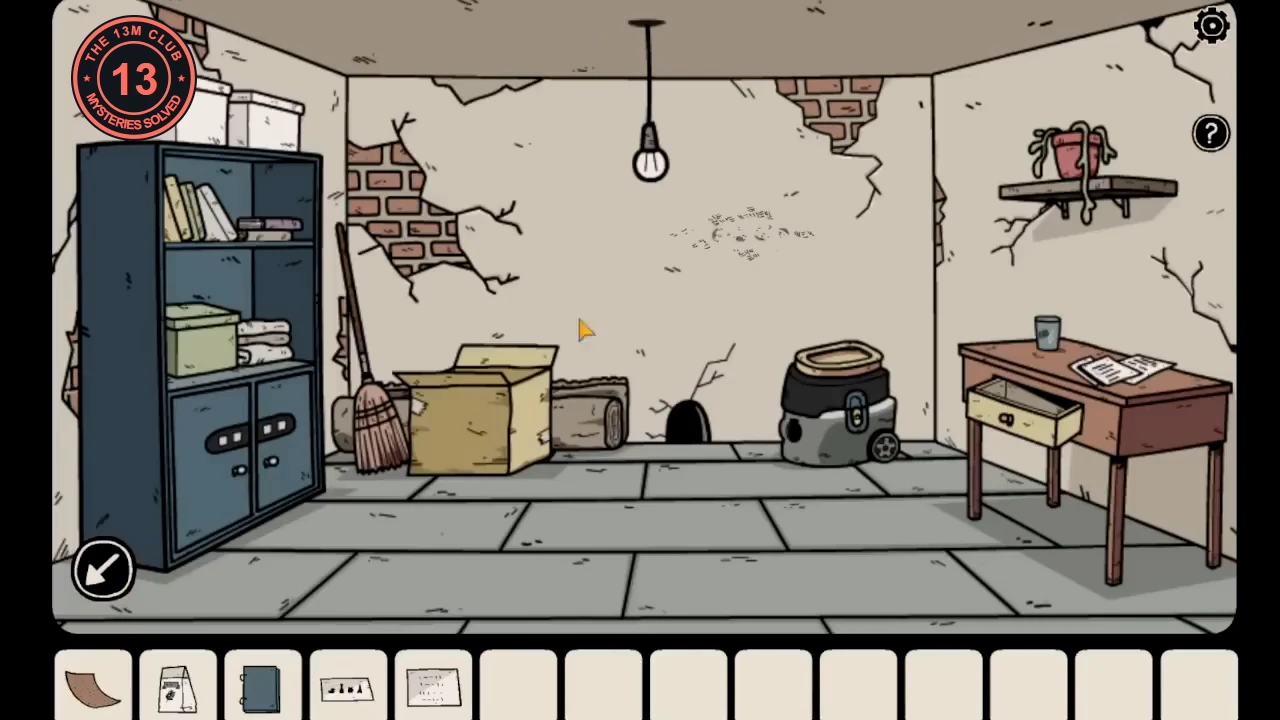
Ren keeps hearing footsteps in the study. The flour shows where they lead.
- In the study, use the bag of flour on the floor. Footprints appear and stop at the bookcase. Push the bookcase aside to uncover a doorway to a hidden room.
- In the hidden room, look at the glass on the table: there is a fingerprint on it. Rub the faded patch in the middle of the back wall with the sandpaper to reveal four symbols: a circle with a clock hand, a triangle in a circle, a circle with a cross and a circle with vertical bars.
- Set the blue cabinet's two locks to those four symbols, left to right. Take the box cutter and the paintbrush.
- Combine the bag of flour with the paintbrush, then brush the glass. The fingerprint now stands out clearly.
- Take the roll of scotch tape from the wall shelf in the second half of the landing, then press it on the glass to lift the fingerprint.
- Press the tape on the fingerprint pad on the right side of the small desk in the second half of the landing. A drawer opens: take the vacuum hose.
- In the hidden room, attach the hose to the vacuum cleaner, then tap the hose's free end to push it into the mouse hole in the wall. Switch the vacuum on: something gets sucked out of the hole into the bag. Open the vacuum, cut the bag with the box cutter and take the magnetic card.
- Insert the card in the metal safe on top of the red chest of drawers in the red room. Instead of the cabin's location, the folder inside holds Bastian's drawings of Penumbra.
Laia's shop and the map to the cabin
Ren drives to the magic shop to ask Laia about Penumbra, then returns to the station to make sense of Bastian's drawings.
- At the shop, ask Laia every question in the menu: what Penumbra is, how someone becomes a shadow, how to get to Penumbra and whether she knows a haunted cabin. Then choose to leave. Watch how she reacts as Ren says goodbye; back in the car, he begins to doubt that this is really Laia.
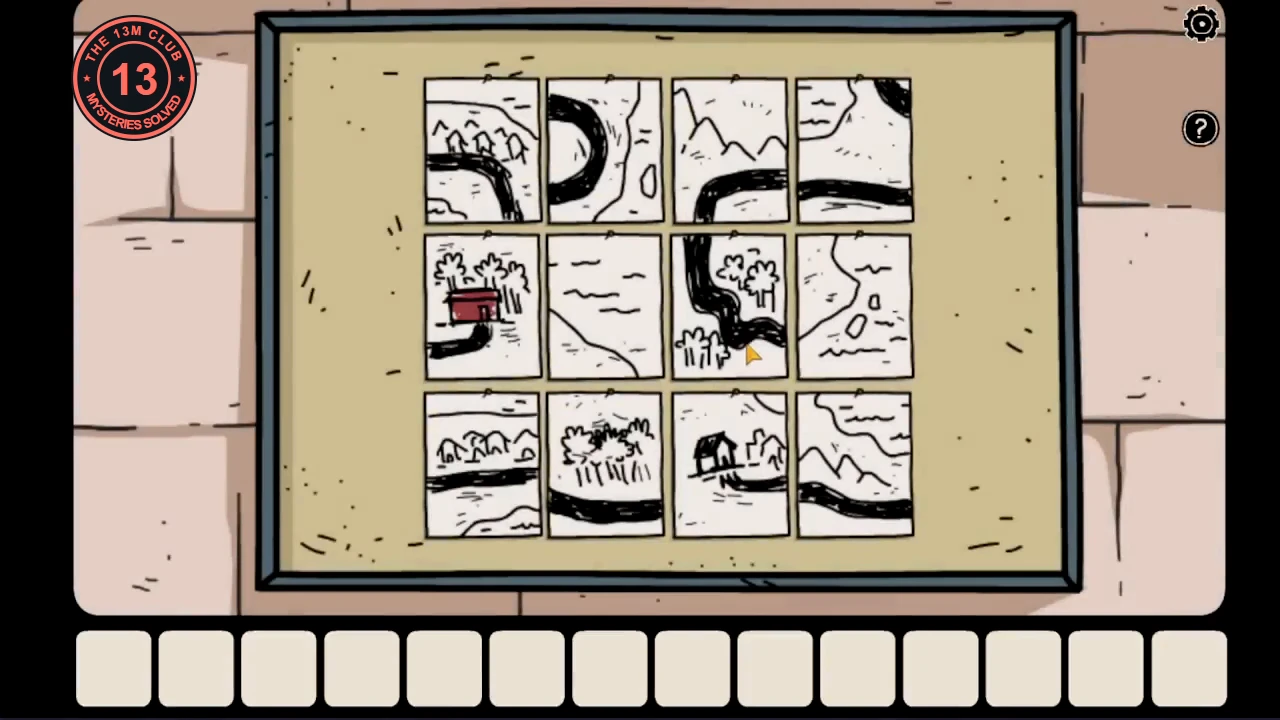
- At the station, rebuild the map from Bastian's drawings. Tap two tiles to swap them. The goal is one unbroken road from the small house in the top-left corner to the red cabin, which goes third in the bottom row. The road runs right along the top row, loops through the right-hand tile of the middle row, comes back left across the middle row, drops into the bottom-left tile and runs right to the cabin. Two tiles have no road: the rocky shoreline goes in the top-right corner and the plain lake in the bottom-right corner. Your tiles may start in a different order, but the finished map is the same.
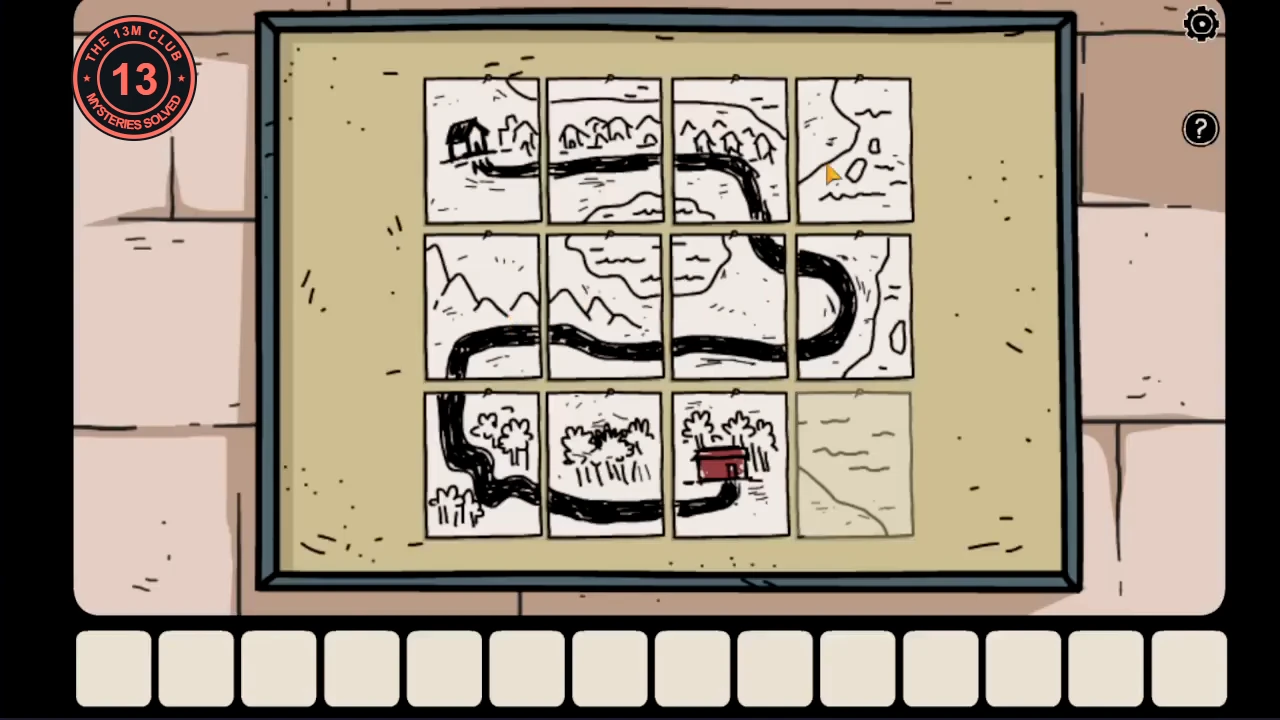
The finished map. The road links the small house at the top left to the red cabin. - Ren now knows where the cabin is. The story switches to Bastian and Laia, who wake up in a dungeon in Penumbra and climb out through a trapdoor.