The Cellar Ladder
The cellar hatch hides a ladder that reaches the lab window.
- Pry the planks off the cellar hatch with the crowbar. The ladder inside is broken; repair it with the hammer and take it.
- Place the ladder under the high window to start the board puzzle.
Capture the Board
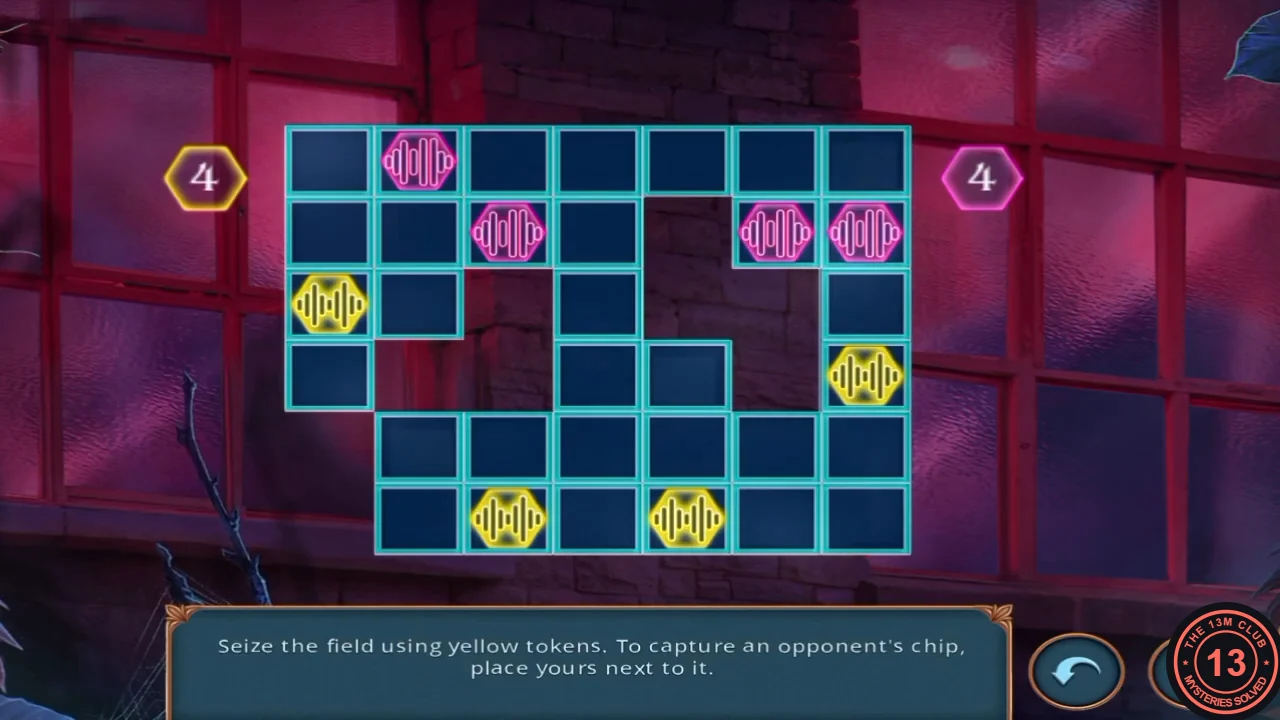
"Seize the field using yellow tokens. To capture an opponent's chip, place yours next to it." You play the yellow tokens against the computer.
- Place each yellow token next to as many of the opponent's chips as possible, because every adjacent chip is captured. The opponent's moves can vary, so there is no fixed move list. Tip: corners and edges have fewer neighbours, so tokens there are harder to take back. Finish with more tokens than the opponent; the recording won 23 to 10.
- Listen to the lab technicians: Frederick did not show up today, and they mention where he lives.
The Constable
A constable stops Thomas ("Oi, you! Stop right there!"). This is the last scored decision.
- Choose "Try to fool him" (free, 0 points), "Surrender" (25 coins, +2 Decision Points) or "Try to run away" (35 coins, +4 Decision Points). Fooling him and running away both lead straight to Frederick's house; the scenes after Surrender are not covered in this guide.
Frederick's Garden
New task: sneak into Frederick's house. The mailbox by the door needs a signal flag, which is lying in the pond. You need the hand rake and the net frame from the lab courtyard.
- Look at the mailbox by the door; it needs a signal flag.
- Open the pond close-up and use the hand rake to pull the plants at the edge aside. Take the sharp, blade-like shard that was hidden underneath.
- Open the birdhouse, which is tied shut with twine. Cut the twine with the shard; the roof opens and you can take the net mesh from inside.
- The net frame alone is not enough for the pond ("There must be another way."). Open the net frame in your inventory and attach the net mesh to make a scoop net.
- Use the scoop net on the pond to start the net puzzle.
Fish Out the Postal Flag
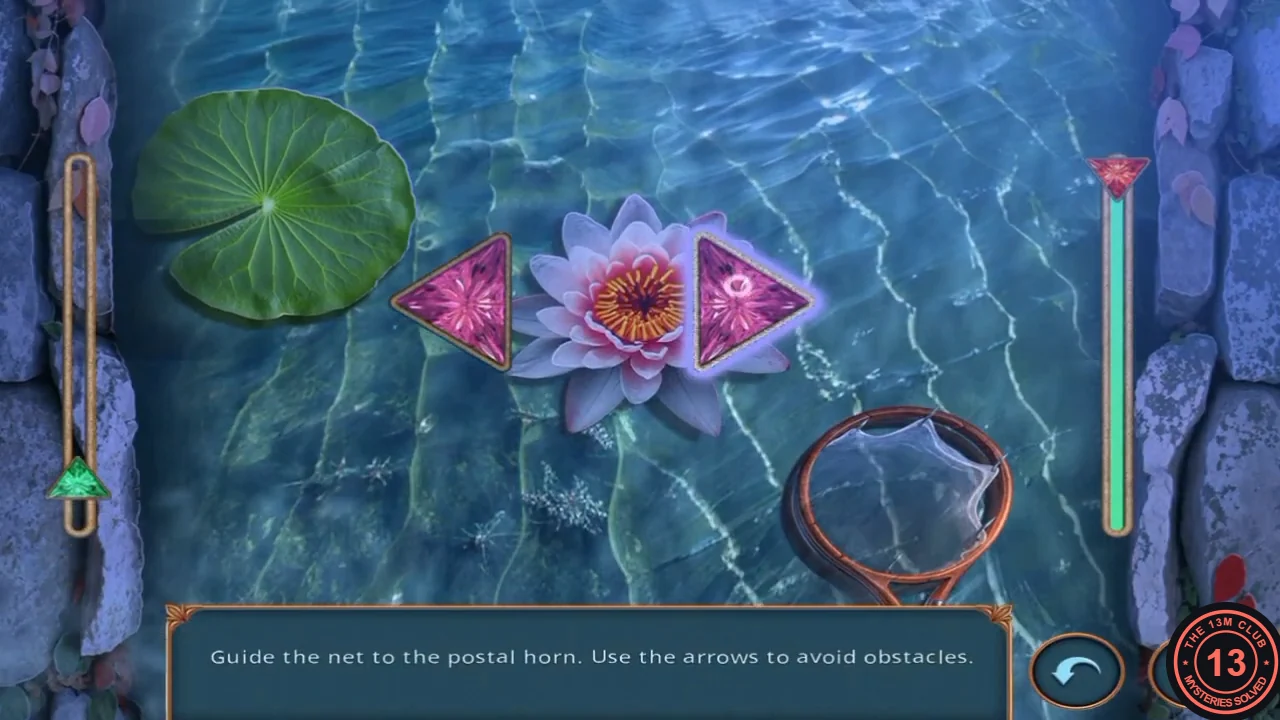
"Guide the net to the postal horn. Use the arrows to avoid obstacles." The net drifts forward through the pond on its own; you only steer it sideways.
- Press the left and right arrows to steer the net around the lily pads and water lilies that float towards it. Keep going until the net reaches the postal item, then take the Postal Signal Flag.
Frederick's Door: Swap the Keys
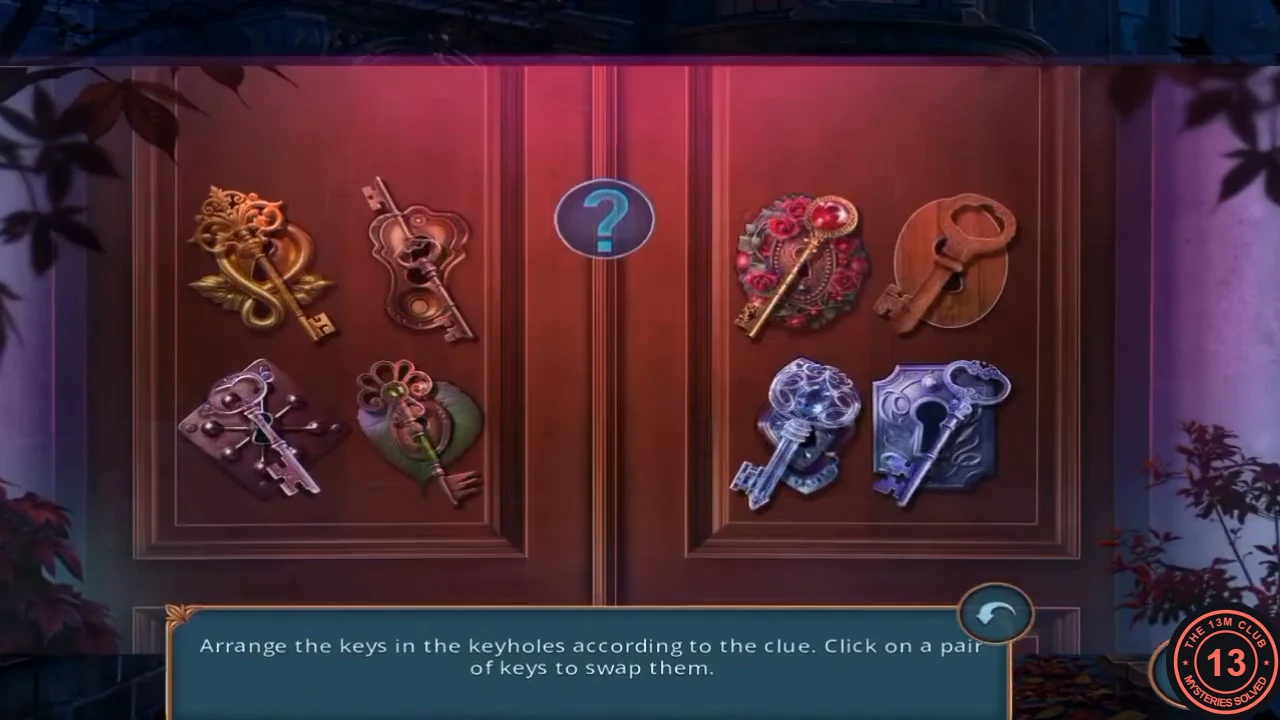
"Arrange the keys in the keyholes according to the clue. Click on a pair of keys to swap them." The question-mark button shows the clue.
- Put the signal flag on the mailbox. It opens; take the key ring.
- Use the keys on the front door to start the key puzzle.
- Press the question mark to read the clue: 1. A glass key opens the most sophisticated lock. 2. Gold opens with silver and silver opens with gold. 3. The simplest wooden lock has the most elaborate key. 4. A sharp key won't fit an upside-down lock. 5. Between the silver lock and the ruby key is a wooden key. At the start most keys sit on plates of their own colour; that is not the answer. Swap pairs until you have this arrangement, which was identical in two separate playthroughs. Left door: top left, the gold scrolled plate takes the plain silver key; top right, the copper plate takes the copper key; bottom left, the brown plate with rivets takes the pale blue glass key with the blue gem; bottom right, the green leaf plate takes the gold key with the ruby. Right door: top left, the rose plate takes the key with the flower bow and green gem; top right, the plain wooden oval plate takes the long dark ornate key; bottom left, the blue-violet plate takes the wooden key; bottom right, the silver plate takes the ornate gold key. The door opens.
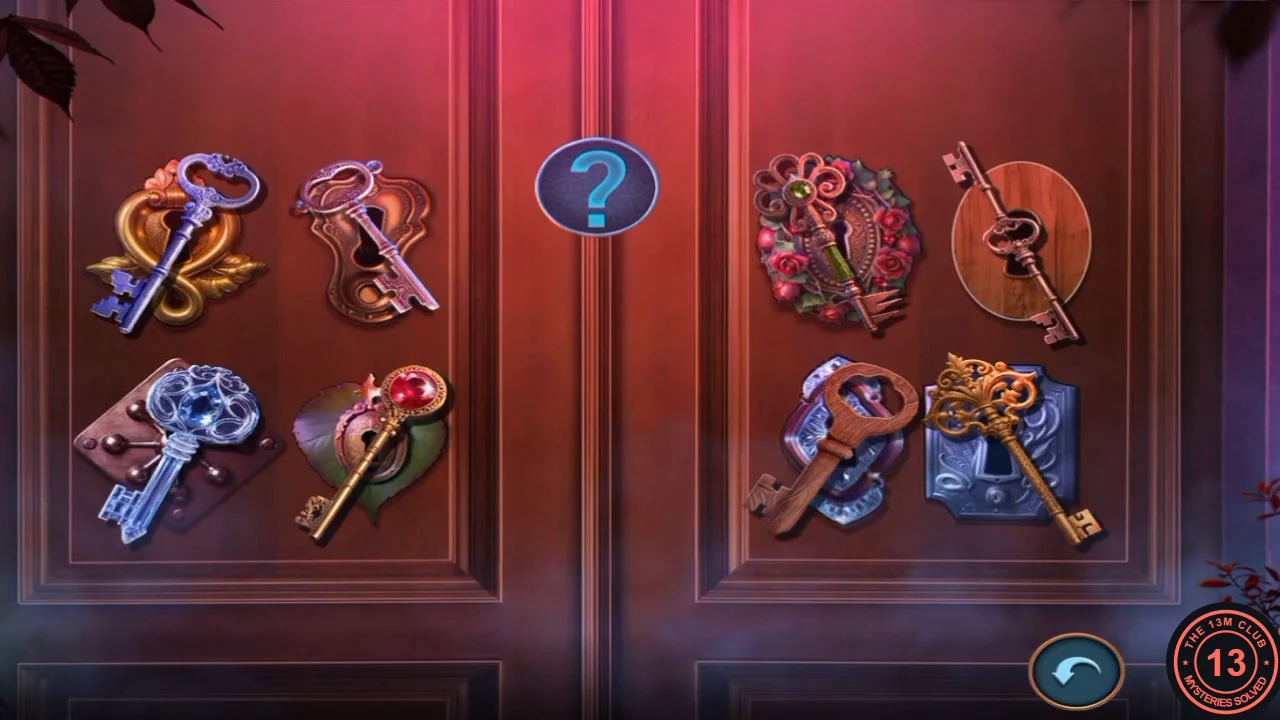
The solved arrangement described in step 3.
Decision Points and Endings
After the door opens, the game shows your Decision Points (out of 13) and the ending cards for 0, 4 and 10 points. The card your total reaches lights up: with 6 points the 4 card lit, and with 13 points the 10 card lit. The numbers read as minimum scores, so 0 to 3 points should give the 0-point ending, 4 to 9 the 4-point ending and 10 or more the 10-point ending. Explore the lab alone is worth 6 points, so the 0-point ending is only possible if you stay out of the lab. Neither recording shows that ending, so its scene is not described here.
- Read the summary of your five scored decisions. It uses short labels: George, Take offense 0 / Be confident 1; first talk with Mr. Banks, Stay silent 0 / Declare your intentions 1; second talk with Mr. Banks, Throw tantrum 0 / Stay confident 1; the gentleman, Stay out of the lab 0 / Explore the lab 6; the constable, Try to trick the constable 0 / Surrender 2 / Try to run 4. The maximum is 13.
- 4-point ending: Thomas finds a grey-haired man in a red waistcoat holding a syringe ("Thomas?! You... What are you doing here?!"). The man says he felt guilty, followed the killer's trail to Frederick and stumbled upon this scene. A gun lies on the table nearby. The episode ends. The recording reached this ending with 6 points (only Explore the lab).
- 10-point ending: the same scene continues, the screen goes dark briefly, then Thomas opens a wardrobe door and finds Emily tied up and gagged. The second recording reached this ending with all 13 points. Going by the card values, Explore the lab plus Try to run away (10 points) should also be enough, but no recording shows that exact combination.
Achievements
Eleven achievements appeared in the two recordings. Five unlock automatically with the story. The other six depend on how you play: use no hints in hidden-object scenes, never skip a mini-game, and solve quickly. The game did not show a complete achievement list in either recording, so this list covers only the achievements that appeared.
- Quick Thinking – "Complete a mini-game in one minute." Both recordings earned it on the first mini-game, the coin safe in Thomas's bedroom.
- Rebellious Spirit – "Break out of the room." Story achievement for escaping Thomas's bedroom.
- Top of the Morning! – "Wake the coachman." Story achievement for waking the coachman with the noisemaker ratchet.
- Detective's Eye – "Finish a HOP without any hints." Both recordings earned it on the first hidden-object scene in the back laboratory. Do not use the hint button during a hidden-object scene.
- Sharp Eye – "Find 3 hidden objects in 3 seconds." The second recording earned it during the list scene in the laboratory (thermometers, syringes, bags). The first recording did not earn it, so you need to tap three list items in quick succession.
- Relentless Tracker – "Complete 5 mini-games without skipping." Earned on the train schedule board, the fifth mini-game, in both recordings.
- All Grown Up – "Create a disguise." Story achievement for putting on the disguise at the station.
- Tireless Investigator – "Complete 10 mini-games without skipping." Earned on the apple basket puzzle. Never use the skip button on any mini-game if you want this and Relentless Tracker.
- Killer's Trail – "Find Emily's research." Story achievement for cleaning the soot from the burned note.
- Evidence Hunter – "Find 40 objects." Earned during the storeroom pairs scene, after objects found in the earlier hidden-object scenes.
- Try and Keep Up! – "Escape from the constable." Shown when the constable scene ends. The first recording earned it after fooling the constable and the second after running away.