Grandfather Clock Chips
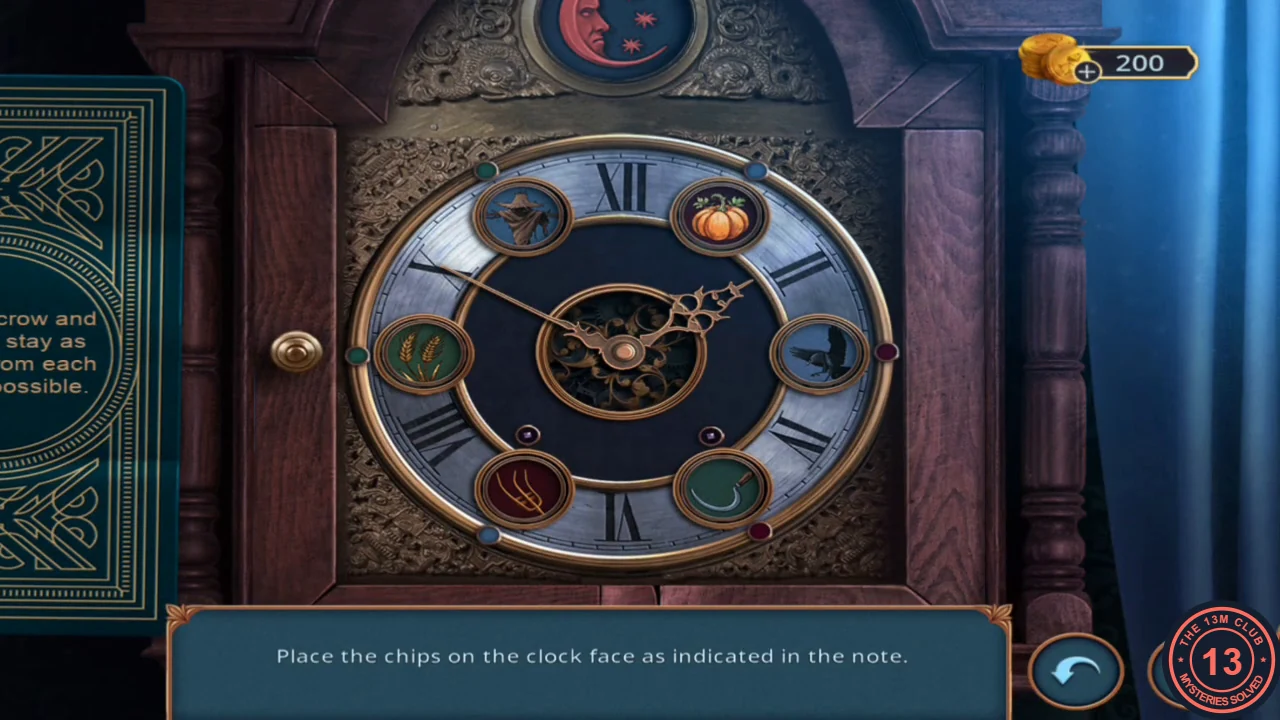
Collect the second clock hand, then arrange six picture chips on the lobby clock face by following four written clues. The clues lead to one arrangement.
- In the upstairs hallway, use the MULTI-TOOL to unscrew the round fitting on the mask in the left panel. The mask comes off; take CLOCK HANDS 2/2.
- Put the CLOCK HANDS on the grandfather clock in the lobby to open the chip puzzle.
- Six chip slots sit at 1, 3, 5, 7, 9 and 11 o'clock; swap chips to rearrange them. Click the note to read the four clues: the sickle and the pitchfork are on both sides of the scarecrow; the winged one (the raven) settled behind the third even number; the scarecrow and the raven stay as far from each other as possible; the thistle (the chip with green ears) is next to the sickle and away from the pitchfork. Counting round the dial, the third even number is 6, so the raven sits just after it at 7. Opposite the raven, the scarecrow goes at 1, with the sickle and the pitchfork either side at 11 and 3. The thistle must touch the sickle, so it takes 9, and the pumpkin fills 5. Final layout: sickle 11, scarecrow 1, pitchfork 3, pumpkin 5, raven 7, thistle 9.
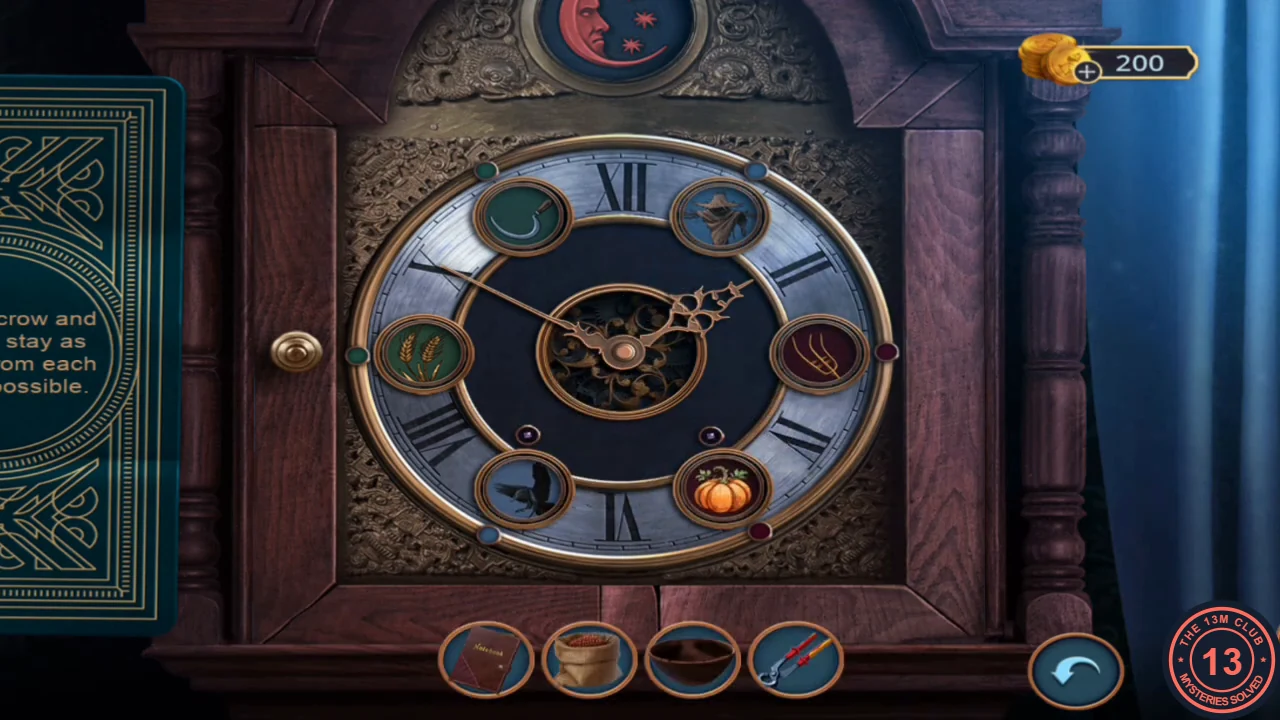
The solved layout from step 3. - The clock base opens with a note reading "Reward awaits the one who harvests on time". Take the KETTLEBELL.
Bull Amulet, Acid and the Ritual Page
Weigh down the straw doll, open the barn toolbox and take a rubbing of a hidden ritual.
- In the lobby, hang the KETTLEBELL on the arm of the straw doll inside the opened wall mechanism. Take the BULL AMULET.
- Go through the rye fields to the barn. Put the BULL AMULET on the blue disc of the front-left crate; a compartment opens. Take the ACID.
- Pour the ACID on the lock of the toolbox in the dirt pile to dissolve it, and open the box.
- Use the NOTEBOOK on the open box; a blank page is torn out and laid on the lid, and the notebook goes back to your inventory. Click the coal in the box to rub over the page. The rubbing reads: "To break the dark spell, paint the symbols above with a special brush dipped in a mixture of ash and dead water." Take the RITUAL page.
Notice Board Gloves and the Raven
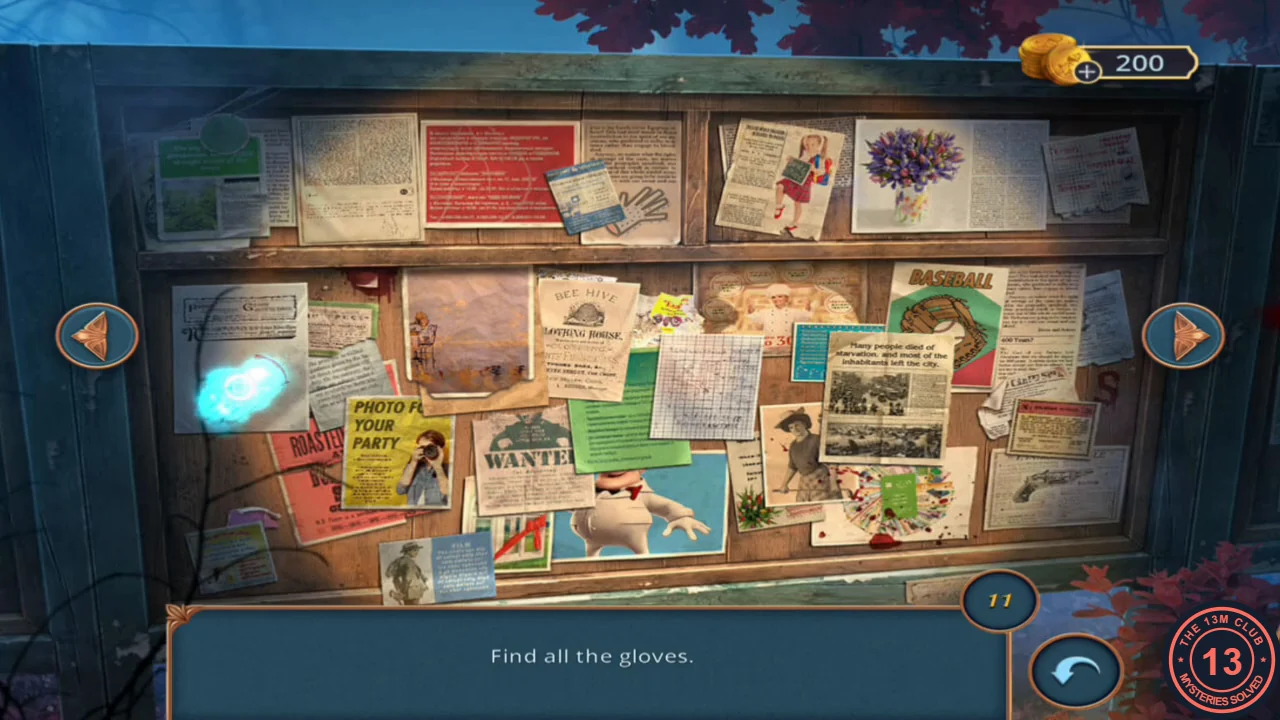
A second scene on the gate notice board asks for gloves. The reward lets you take a ribbon from the raven on the mailbox post.
- At the hotel gates, zoom into the notice board again. The task reads "Find all the gloves."
- Find twelve gloves spread over the three board panels, using the side arrows to switch panels, until the counter reaches 0. Collect the FALCONRY GLOVE.
- Zoom into the raven on the mailbox post; it has a red ribbon. Use the FALCONRY GLOVE to hold out your hand, then pour the GROUND GRAIN onto the glove as bait. When the raven lands on the glove, take the SCARLET RIBBON.
- Read the sign on the post: "THE BARGE IS IN SERVICE FROM 7 A.M. TO 10 P.M." After Alice checks her watch, the scene moves to MY ROOM, where Molly lies unconscious on the floor. New task: help the maid.
Hat Box, Wardrobe Swatches and Molly
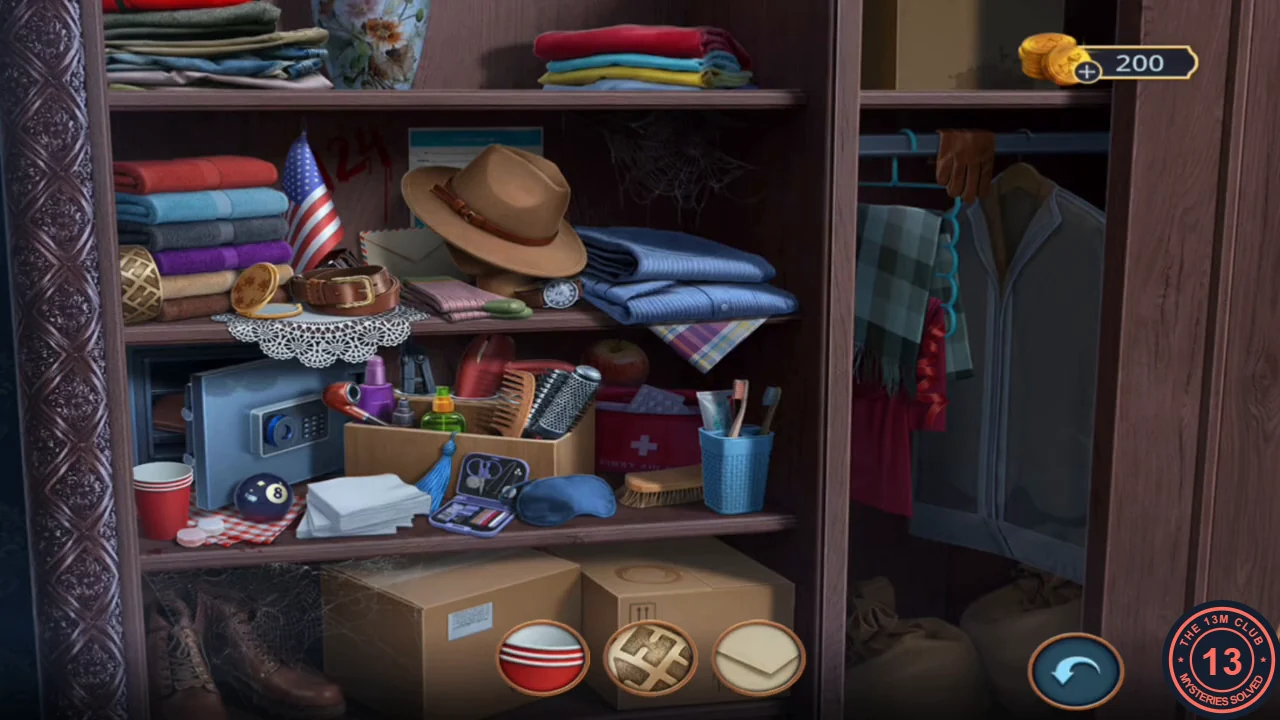
Open the hat box, play a close-up matching scene in the wardrobe and revive Molly. Molly's question is the last dialogue point before the finale.
- Use the SCARLET RIBBON on the hat box under the bed; it is stapled on as a handle. Lift the lid, read the Darkwood postcard and take the BRUSH.
- Zoom into the wardrobe. Three round frames at the bottom right each show a magnified close-up of part of an object; find that object in the wardrobe and click it. The frames refill until every object is found. Collect the AMMONIA. (The red "1124" scrawled inside the wardrobe is not used in this scene.)
- Use the AMMONIA on Molly. She comes round and explains that a masked attacker jumped her, and that she ripped a key, probably for a secret section of the library, off their belt. Choose "Why are you helping me?" (35 coins, 1 decision point) or "Thank you. I promise." (free, 0 points). The free answer gives you the KEY.
Library Pass, Ritual Book and Lighter
Use Molly's key in the library to find a library pass, a strange book and a lighter.
- In the Deserted Library, use the KEY on the keyhole of the cabinet with the flower carving. Take the LIBRARY PASS inside.
- Put the RITUAL page on the strange blue book in the same cabinet. Three empty slots appear: a bowl, a brush and a bottle. You fill them in Chapter 33.
- Put the LIBRARY PASS on the bookshelf with the green box. The borrower card shows that Bernard took out "Methods of Rye Cultivation". Take the LIGHTER from the book that comes out.
Barn Vision Shards
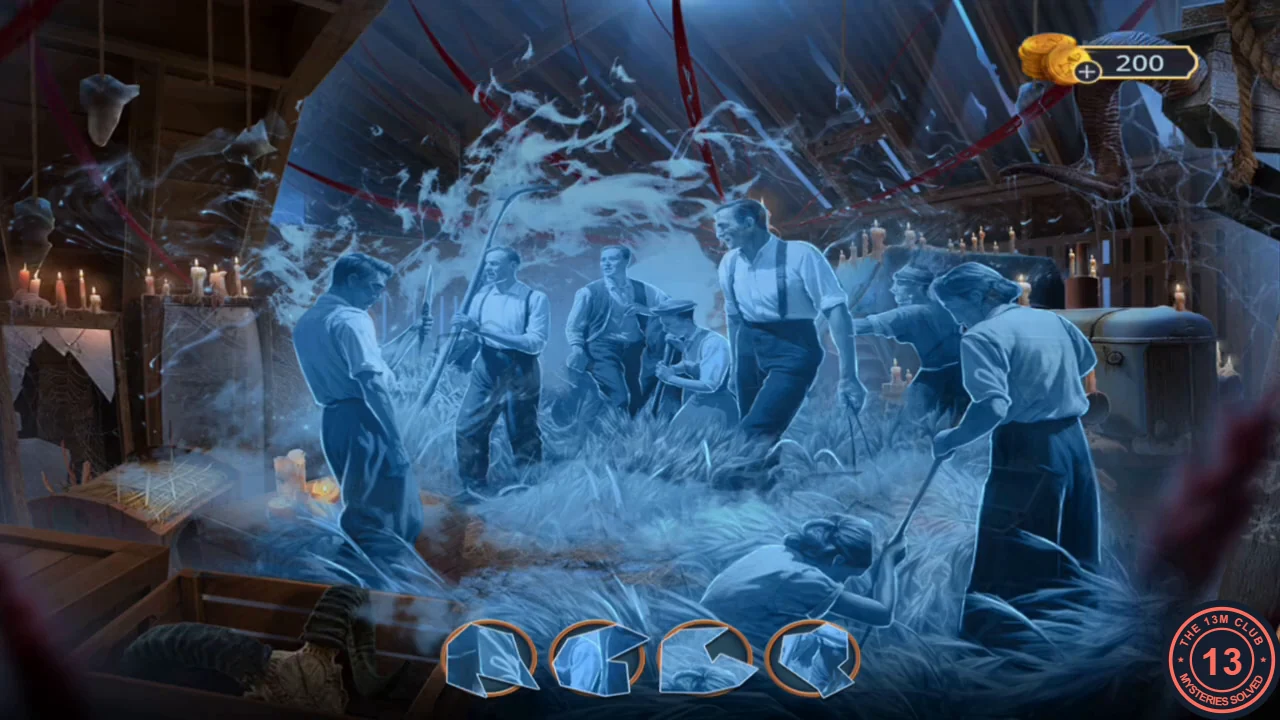
Burn the red rye for ashes, then a ghost shows you three scenes from the past. Fit glass shards back into each scene. This section explains the method rather than the position of every shard.
- In the barn, use the LIGHTER on the red rye in the collapsed rack. Scoop up the ash with the BOWL to get ASHES, then take the ROCK.
- A ghostly woman appears over the slab and a vision opens with four translucent shards in the tray. Each scene has faint shard-shaped outlines; drag every shard onto the outline with the same shape and edges. A wrong spot is rejected. Complete all three scenes (workers in a field, a hooded group at a moon altar, and a rye field with skulls), then collect the RITUAL KNIFE.
- Use the RITUAL KNIFE on the round stone slab. It cracks and a red hand rises from it holding a CENSER. Take the CENSER.
Scarecrow and the Stream Pairs
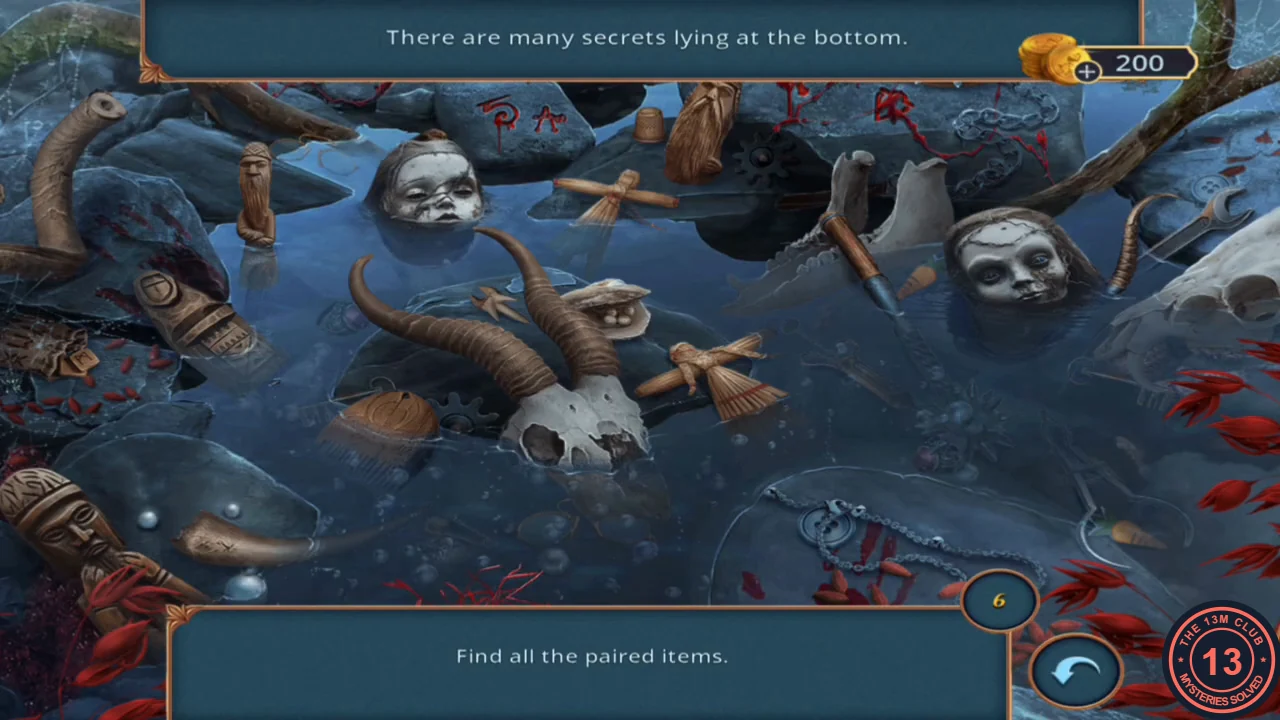
Smoke out the scarecrow, search the stream for a rope and climb down into the hole.
- In the rye fields, put the ROCK at the edge of the hole the wheelbarrow uncovered.
- Zoom into the scarecrow at the back of the field. Use the CENSER to wave smoke over it, then use the PINCERS on its coat to take the METAL SPIKE. Read the diary page signed P.R.; a cutscene then shows the scarecrow burst into flames and vanish.
- Zoom into the stream again. The task reads "Find all the paired items." Click both items of each of the six matching pairs; a matched pair glows. Collect the ROPE.
- At the hole, use the ROPE, then drive in the METAL SPIKE to anchor it, and click the hole. Open the red chest, read the message on the bloodied cloth and take the DEAD WATER.
The Ritual Book and the Final Choice
Complete the ritual book, then make the final decision, worth up to 4 points.
- In the library, put the DEAD WATER, the BRUSH and the ASHES into the three slots of the strange book. The mixture is made and the symbols are painted automatically. The book reveals: "EACH YEAR, ON THE NIGHT OF THE BLOOD MOON, THE RITUAL MUST BE PERFORMED AGAIN, OR THE ENTIRE CROP WILL PERISH".
- Through the window, villagers with lanterns gather in the rye and a man calls "It's harvest time!" Then Bernard comes for Alice. Choose "Do nothing" (free, 0 points), "Run" (25 coins, 2 points) or "Fight Bernard" (35 coins, 4 points). With "Do nothing", Bernard climbs in through the window and Alice raises her hands; with "Run", she flees from the library; with "Fight Bernard", she smashes a vase over him. Every choice leads to the same barricade puzzle.
Barricade the Door
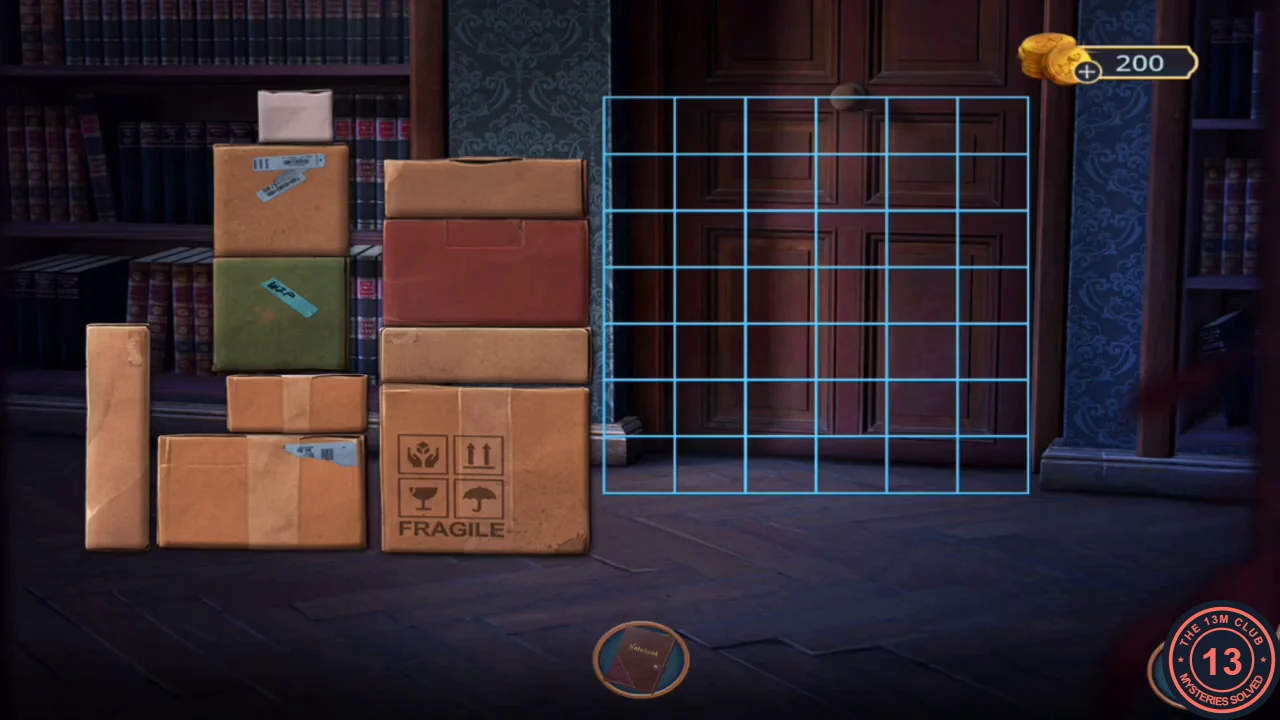
Barricade the door by packing boxes of different sizes into the grid in front of it. This is a shape-fitting puzzle; the section gives the approach rather than every move.
- Drag the boxes from the left onto the grid in front of the door. The grid must be filled completely with no gaps; click a box once it is in place to fasten it. Start with the largest boxes along the edges and in the corners, then fill the remaining gaps with the smaller ones. If you are left with a gap that no remaining box fits, move a larger box instead of forcing the small ones.
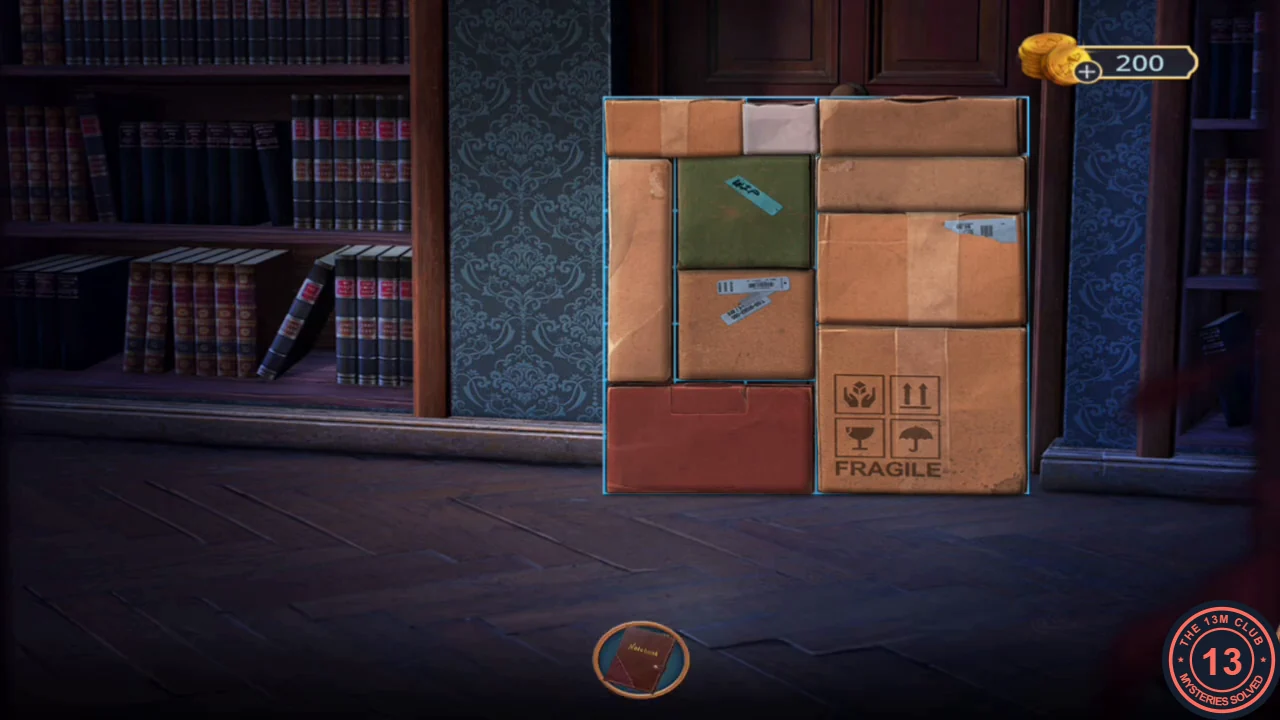
Example of a completely filled grid from one game.
Ending and Decision Points
The episode ends with a summary of your decision points and one of three outcome cards, marked 0, 4 and 10. Your total depends on the five decisions described in Chapters 3, 13, 21, 29 and 33.
- The "Your Decision Points" screen lists each decision with the points earned, out of 13: Frederick's offer (Chapter 3) 6; Molly's first talk (Chapter 13) 1; the farmer (Chapter 21) 1; Molly's second talk (Chapter 29) 1; the final choice (Chapter 33) 2 for Run or 4 for Fight Bernard. Free answers give 0. Totals of 6 and 7 points showed the 4 card, and a total of 2 points showed the 0 card. A third card marked 10 is shown, but we found no footage of it being reached, so the score it needs and its scene are not verified and not covered here.
- 4 card: a voice at the door says "It's me! They're gone. Come out." It is Molly, but she has red eyes, says "It's harvest time!" and blows red dust. Alice grabs the flashlight from the armchair; Molly comes back to her senses, confused about why she is there, and the episode ends with the SEASON 1: EPISODE 1 title.
- 0 card: the scene starts the same way, but after Molly blows the red dust the screen turns red and fades to black, with no rescue, before the episode title. We could not find footage of the 10-card scene, so it is not described here.