Hotel Gates: Suitcase, Penknife and Parcel
Alice arrives outside Darkwood Hall, a country hotel. Before you can ring at the door, collect three starting tools at the gates.
- Pick up your green suitcase beside the tree stump. It goes into the inventory as MY SUITCASE and is needed later in your room.
- Zoom into the small green mailbox on the wooden post behind the left fence; a raven perches on the post. Take the PENKNIFE stuck in the post beside the box. The box itself stays shut until you have a saw (Chapter 14).
- Use the PENKNIFE on the parcel lying on the tree stump. Take the NOTEBOOK (Alice's book draft) and the FLASHLIGHT. Keep the penknife. Leave the blade stuck in the stump for now: it needs a grip, a handle and sharpening before it becomes a saw.
Notice Board Silhouette Scene
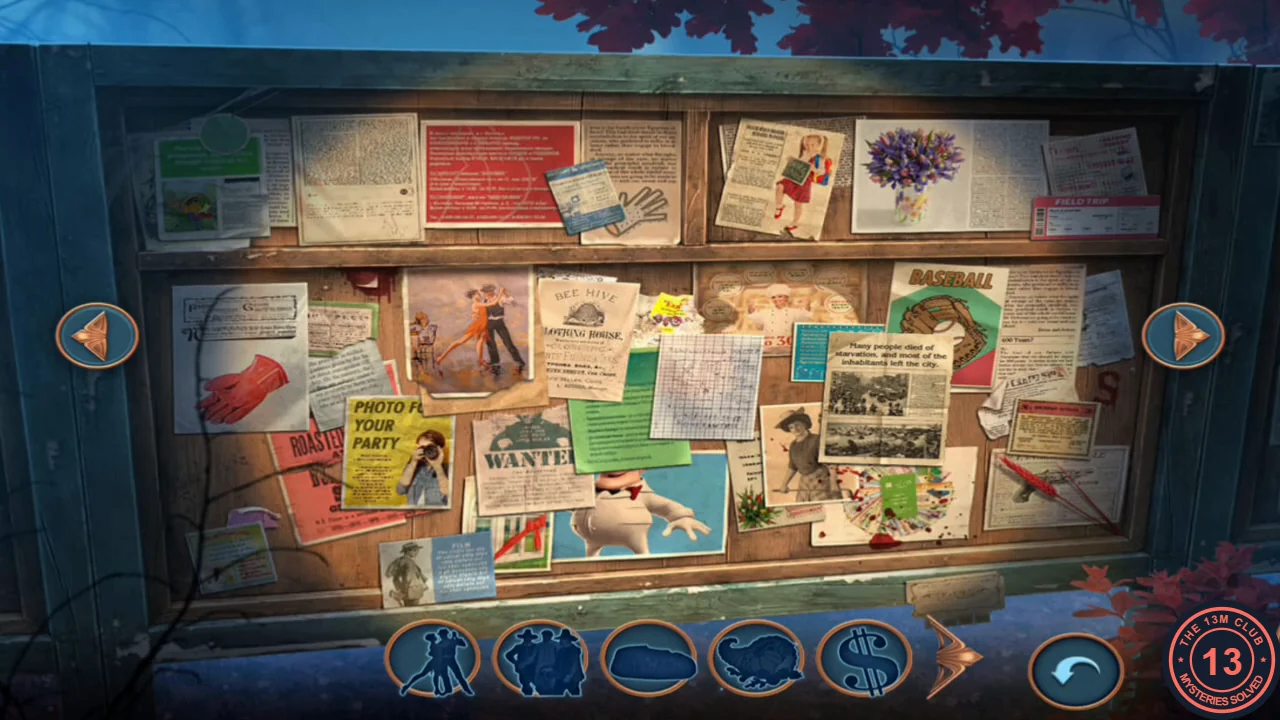
A hidden-object scene on the notice board to the left of the gate rewards the door buzzer.
- Use the FLASHLIGHT on the dark notice board to the left of the gate. The light starts a hidden-object scene.
- The bottom bar shows the outlines of the objects you need. Find and click each one; the board spans three panels, so use the arrows at the sides to switch between them. A new outline replaces each one you find until the bar is empty. Collect the BUZZER as your reward.
Front Door and Frederick Digory
Ring at the front door and check in with the hotel owner. This is the first decision point.
- Go up to the hotel's front door (the one with the wreath). Put the BUZZER into the empty socket beside it and press it. You are let into the lobby.
- The hotel owner, Frederick Digory, greets you. His dialogue ends in the first decision: "I'll talk to him. Thank you!" costs one of the app's keys and is worth 6 decision points; "Maybe another time." is free and worth 0. Either answer ends with Frederick handing you the ROOM KEY. The points are added up on the summary screen at the end of the episode (see the Ending).
Dining Room: Bernard and the Recipe
Bernard, a guest in the dining room, will only talk over a glass of punch. This starts a side task that runs until Chapter 19; collect the recipe and a coin now.
- Go into the dining room and talk to Bernard. You receive the task "Give Bernard some punch".
- Read the cook's note by the stove. Zoom into the shelf: the recipe card lists Rubrum berries 200 g, sugar 100 g and water 1.5 l. Take the COIN from the shelf.
Ice-Cream Dispenser Puzzle
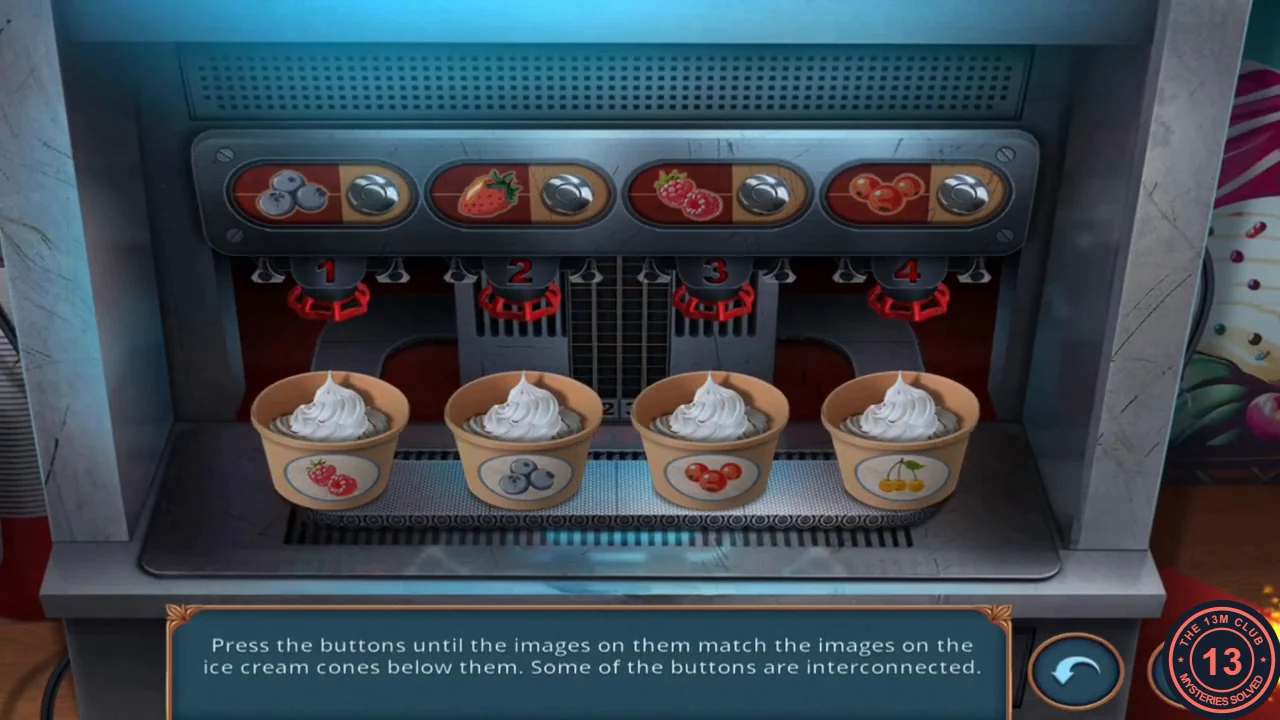
Four buttons change the flavours of four ice-cream scoops, and each scoop must match the berry drawn on its cup. The starting flavours may differ in your game or difficulty mode, so this section gives the button rules and a safe order instead of a fixed list of presses.
- Put the COIN into the ice-cream dispenser in the dining room to start the puzzle.
- Number the scoops and buttons 1 to 4 from left to right. Flavours always change along the same six-step cycle: cherry, strawberry, red currant, gooseberry, blueberry, raspberry, then back to cherry. Button 1 moves only scoop 1 forward one step. Button 2 moves scoop 2 forward one step and scoop 1 forward two steps. Button 3 moves scoop 3 forward one step, scoop 4 forward two steps and scoop 1 back one step. Button 4 moves scoop 4 forward one step, scoop 2 forward one step and scoop 1 back one step.
- The cups ask for: scoop 1 raspberry, scoop 2 blueberry, scoop 3 red currant, scoop 4 cherry. Work in this order: press button 3 until scoop 3 is red currant; press button 4 until scoop 4 is cherry; press button 2 until scoop 2 is blueberry; finally press button 1 until scoop 1 is raspberry. Button 3 is the only button that moves scoop 3, and each later button leaves the scoops you have already set alone, so nothing needs to be redone.
- Take the cup of RUBRUM BERRIES and the SCREW from the dispenser.
Lobby Rug and Oily Stairs
The lobby stairs are slick with oil. A rolled-up rug by the lobby's back doors gives you a safe footing.
- Zoom into the rolled rug by the lobby's back doors. Take the LACE and the LAMP HOLDER lying beside it.
- Use the PENKNIFE to cut the zip tie around the rug, then take the RUG.
- Lay the RUG over the oily stairs and go up to the hallway.
Upstairs Hallway: UV Lamp, Valve and Tweezers
Your room's keyhole is jammed with paper. Build a UV lamp, follow the footprints to a valve and use it to reach a pair of tweezers.
- A ghostly figure appears at the piano when you arrive. Zoom into the panel with masks on the left wall, peel back the loose wallpaper and take the UV TUBE and WOODEN PIECE 1/2.
- In the inventory, open the LAMP HOLDER and put the UV TUBE into it to make a UV LAMP.
- Use the UV LAMP on the hallway floor tiles to show hidden footprints. Lift the loose tile, read the note under it and take the VALVE.
- Fit the VALVE onto the steaming pipe in the panel on the right wall and take the TWEEZERS.
- Use the TWEEZERS on the paper wedged in your room door's keyhole. It is a threatening note reading "GET OUT! DEATH".
Room Door Bolt Lock
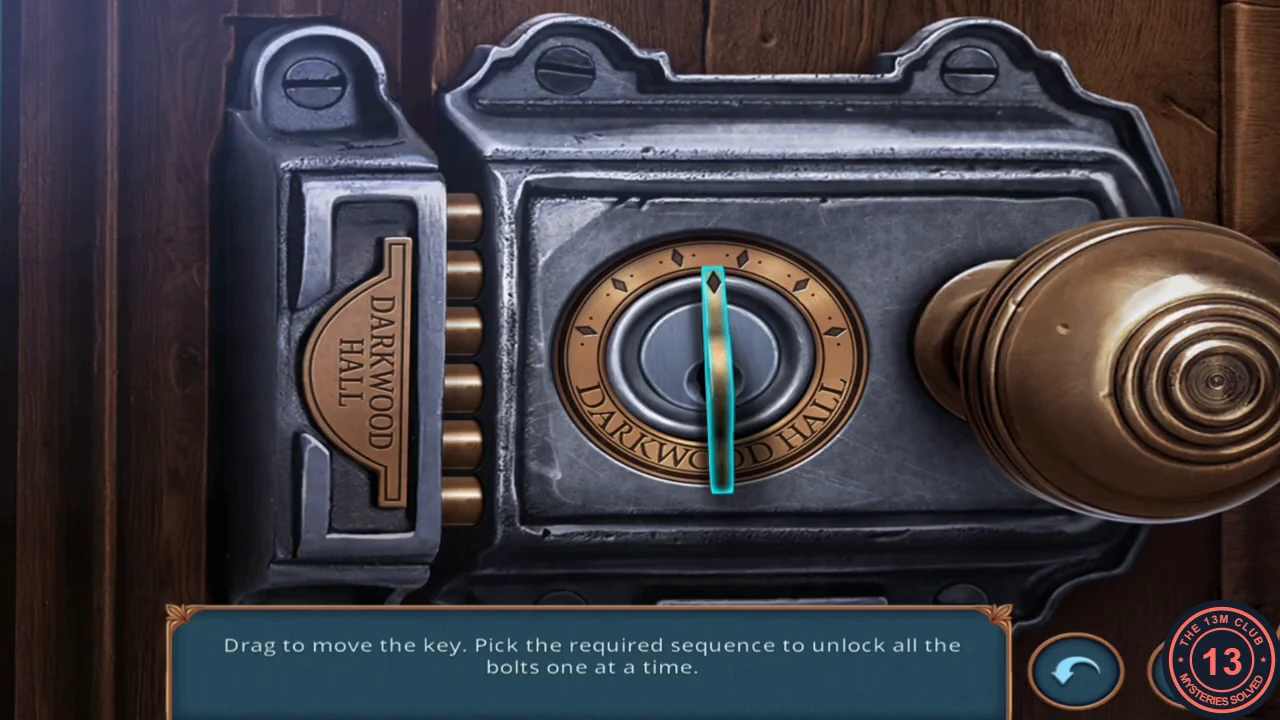
The lock has six bolts and six diamonds on an arc above the keyhole. Drag the key to the diamonds in the right order to withdraw the bolts one by one. The order may differ in your game or difficulty mode, so test the diamonds as described.
- Put the ROOM KEY into the cleared keyhole to open the lock puzzle.
- Drag the key to a diamond. If it is the next one in the sequence, it turns blue and one bolt slides back; if not, nothing happens and nothing resets. Keep trying the unlit diamonds until the next one lights, and repeat until all six bolts are open. Example from one game only, numbering the diamonds 1 to 6 from left to right: 6, 4, 3, 1, 5, 2.
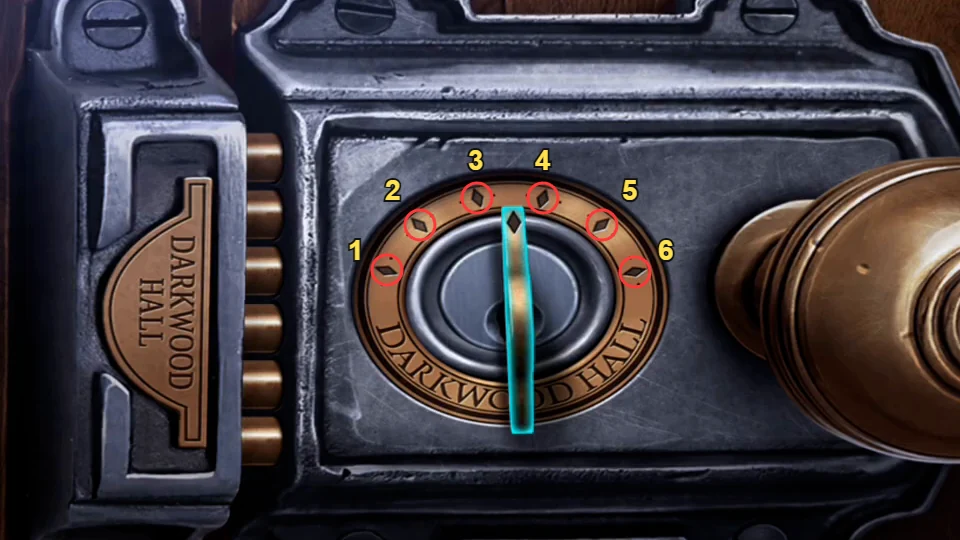
Diamond numbering used in step 2 (1 at the left end of the arc, 6 at the right). - Open the door and go into MY ROOM.
My Room: Table Drawer and Duster
The round table in your room holds a shopping list and several tools.
- Zoom into the round table. Use the SCREW on the drawer and open it. Take the LIST of twelve kitchen items, GEAR 1/2 and the RASP.
- Use the LACE on the loose feathers on the table to tie them into a DUSTER, and take it. The LACE comes back to your inventory; you need it again in Chapter 11.
Dining Shelf List Scene
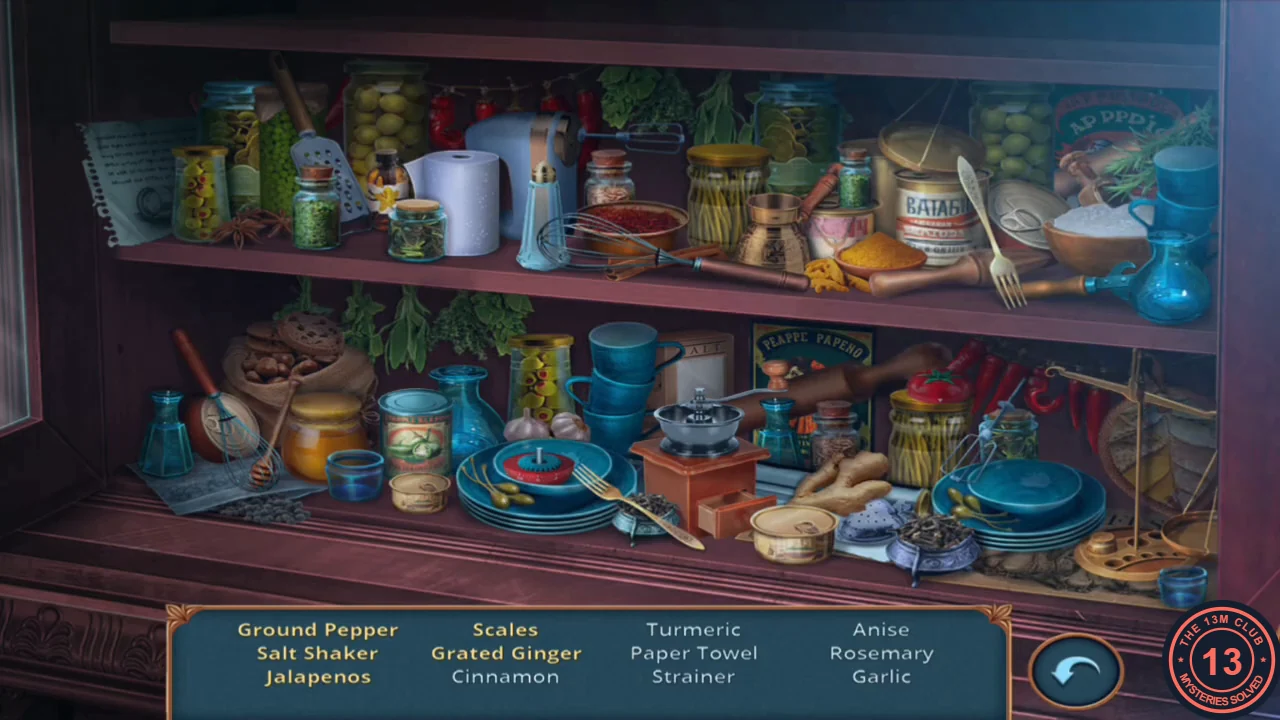
A hidden-object scene on the dining room shelf, played from a list. Five of the twelve items need an extra action before they count.
- Go back to the dining room and put the LIST on the shelf to start the scene.
- Find the twelve items named in the bottom list: Ground Pepper, Salt Shaker, Jalapenos, Scales, Grated Ginger, Cinnamon, Turmeric, Paper Towel, Strainer, Anise, Rosemary and Garlic. These five need an extra action inside the scene: grate the ginger for Grated Ginger; put the peppercorns into the pepper grinder for Ground Pepper; open the jalapeno can with the can opener lying in the scene; open the small box to reach the Salt Shaker; and put the missing bowl on the scales before clicking them.
- A note from Frederick turns up: shining a light into the eyes of a dazed, red-eyed person brings them round, though you cannot do it to yourself. Remember this for the Ending. Collect the OPENER.
Jammed Juicer and Saw Handle
Unjam the juicer, load the berries for Bernard's punch and give the blade in the stump a grip.
- Zoom into the dining room side table with the juicer. Click the juicer lid to lift it: something is jammed inside. Use the OPENER to pull it out and take the WINDING KEY.
- Put the RUBRUM BERRIES into the bowl beside the juicer. The juicer still lacks its auger (Chapter 17).
- Go out to the hotel gates and wrap the LACE around the blade stuck in the tree stump as a grip.
Wardrobe Unpacking Scene
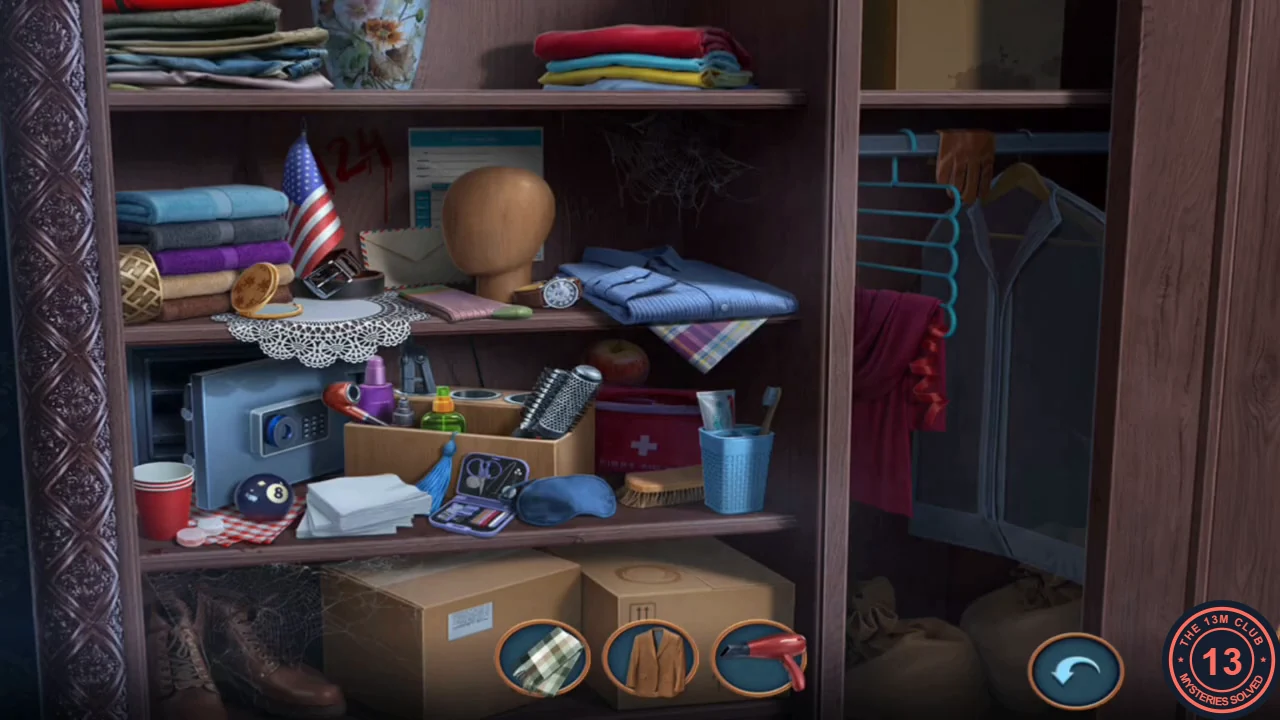
Free a ruler from under the bed, open the wardrobe and unpack your suitcase.
- In MY ROOM, use the DUSTER on the spider web under the bed. This uncovers a hat box; take the RULER lying on its lid. The lid has nothing to grip, so leave the box for now (Chapters 23 and 29).
- Use the RULER to pry open the stuck wardrobe doors.
- Put MY SUITCASE into the open wardrobe to start unpacking.
- Three of your belongings at a time wait in the tray at the bottom right. Drag each one to the place in the wardrobe where it obviously belongs, for example the brown hat onto the wooden mannequin head. A wrong spot is rejected with a message such as "That wasn't right." The tray refills until everything is put away and the task "Unpack" completes.
Molly's Picture Tiles
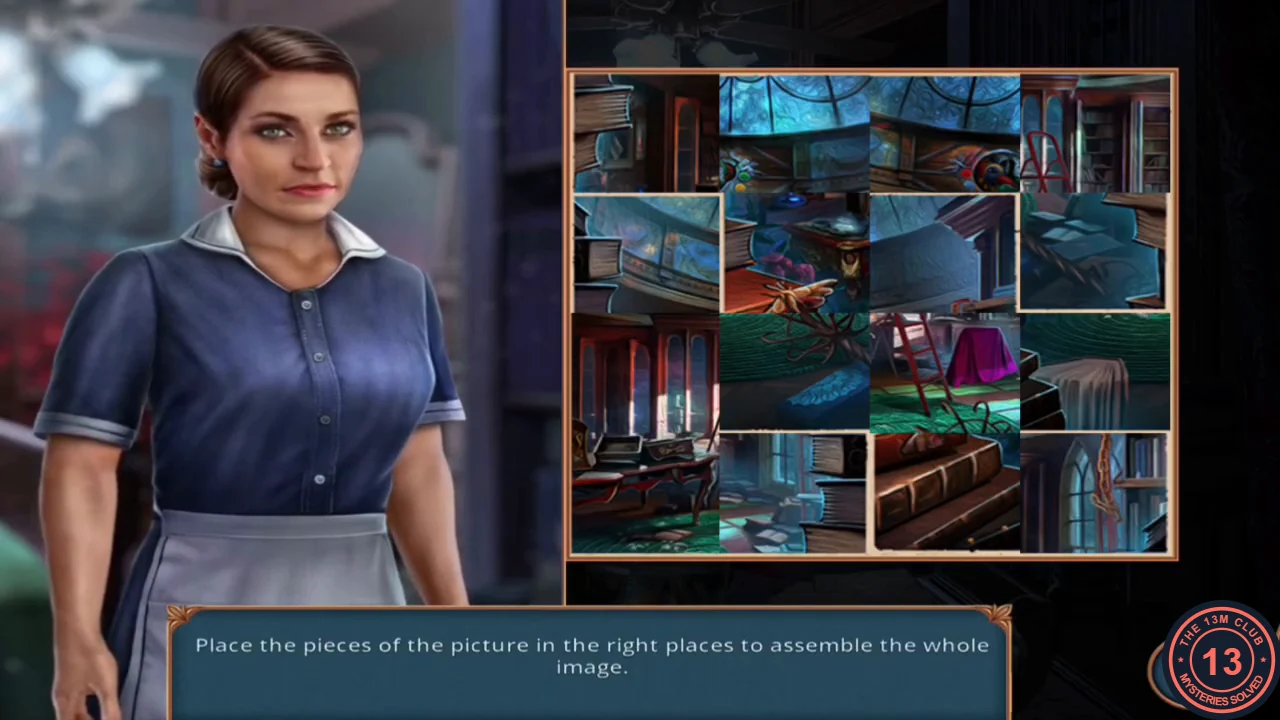
The maid, Molly, comes in after you unpack and a scrambled picture appears. Swap the tiles until the image is whole. The starting mix may differ, so this section gives the target and an approach rather than a list of swaps.
- When the unpacking task completes, Molly appears and the tile puzzle opens.
- Drag a tile onto another to swap the two. The finished picture shows a round library with a domed ceiling and a ladder. Place the dome and the top edge first, then the bottom corners, and fill the middle last; every correct tile becomes a landmark for its neighbours.
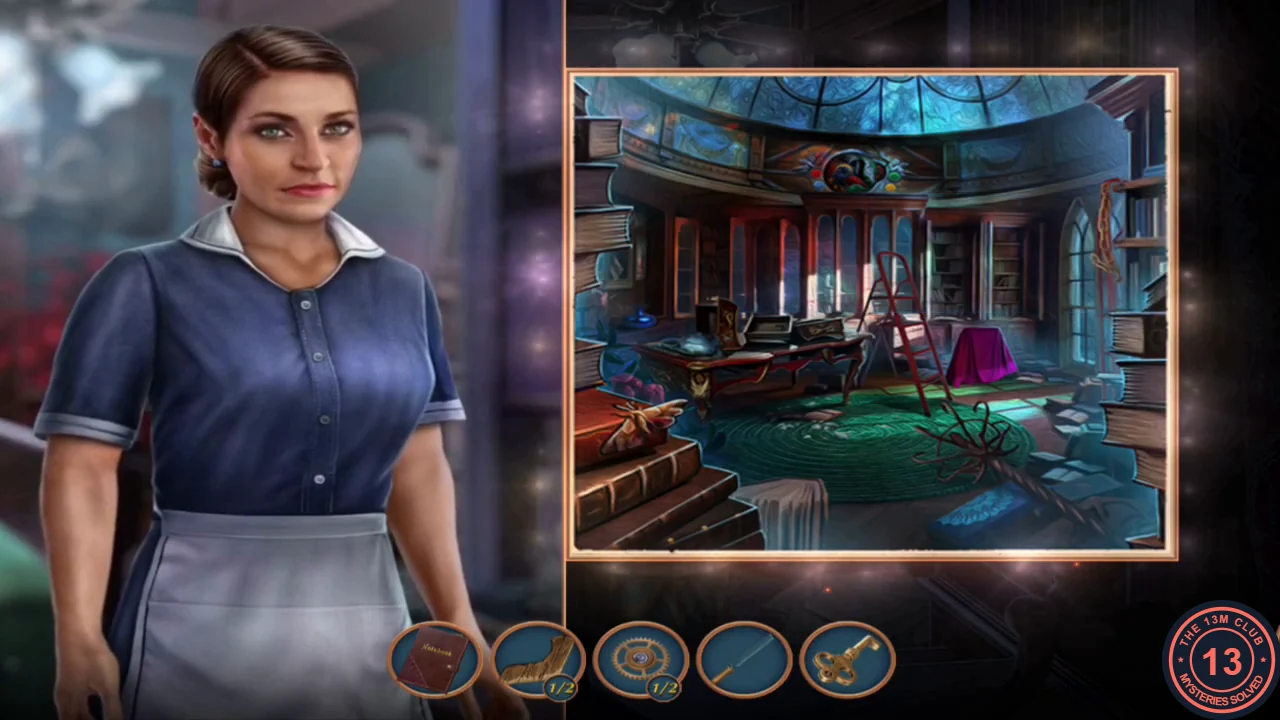
The finished picture to aim for. - Molly mentions the Harvest Festival. Choose "Please, tell me more!" (35 coins, 1 decision point) or "Tell no more." (free, 0 points). The free answer still ends with Molly giving you the REMOTE ("Take this, you'll need it."). New task: learn about the Harvest Festival.