Ceiling Fan, Saw and Mailbox
Use the remote to bring down the second wooden piece, finish the saw and cut open the gate mailbox.
- Use the REMOTE on the ceiling fan in MY ROOM. The fan spins and the second wooden piece drops; take it to complete the WOODEN PIECES.
- At the gates, fit the WOODEN PIECES onto the laced end of the blade in the stump as a handle and pull the blade out. It is too blunt to cut anything, so sharpen it with the RASP. You now have the SAW.
- Use the SAW on the green mailbox behind the left fence. Inside, read the FINAL NOTICE about Frederick Digory's debt and take the PALETTE KNIFE.
Mask Panel Symbol Chips
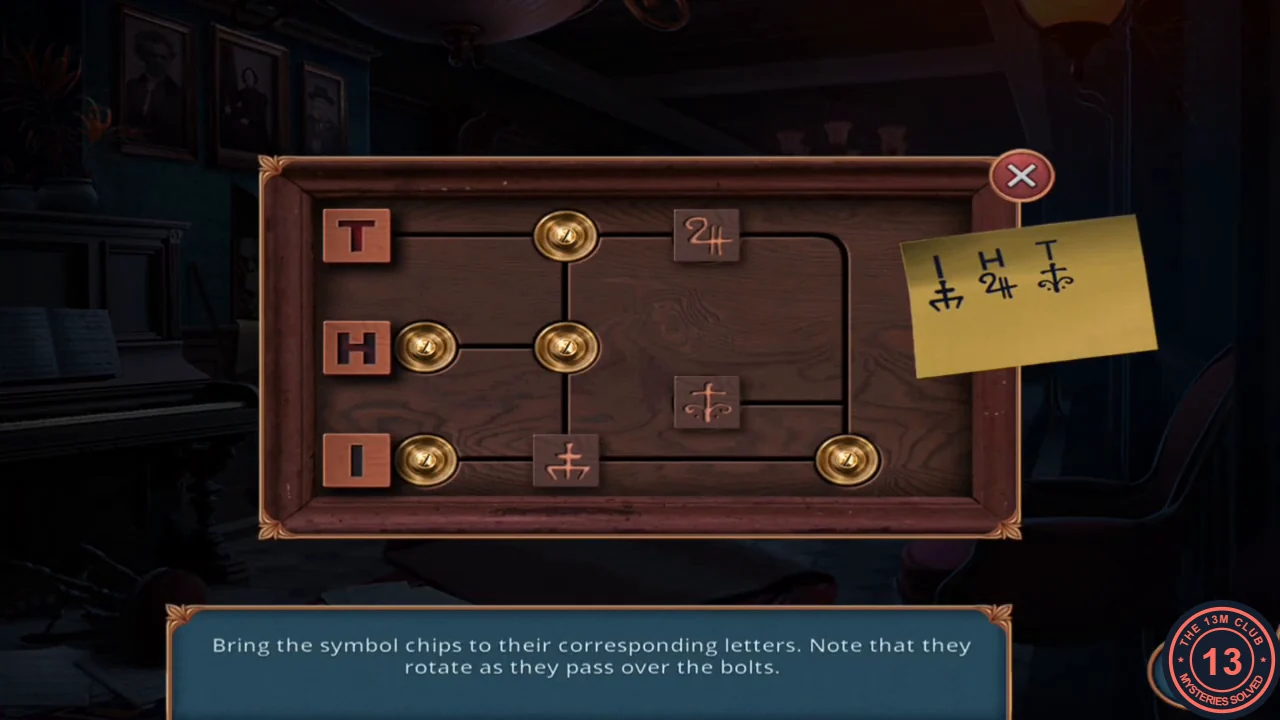
Slide three symbol chips onto the letters T, H and I. A chip turns whenever it passes over a gold bolt, so each must arrive turned the way the note shows.
- In the upstairs hallway, use the PALETTE KNIFE to scrape the red paint off the left mask panel. A photo of Frederick is revealed.
- Place the NOTEBOOK on the panel. A sticky note in it shows which symbol belongs on each letter and which way up it must sit.
- Click a chip; the empty circles it can reach light up. Click one to slide the chip there. The note pairs the symbol shaped like "2#" with H, the cross with a scroll with T, and the bowl-shaped symbol with I. If a chip reaches its letter turned the wrong way, slide it out over the nearest bolt and back again, repeating until it matches the note. When all three sit correctly, the panel reads "THE BLOODY HARVEST IS COMING".
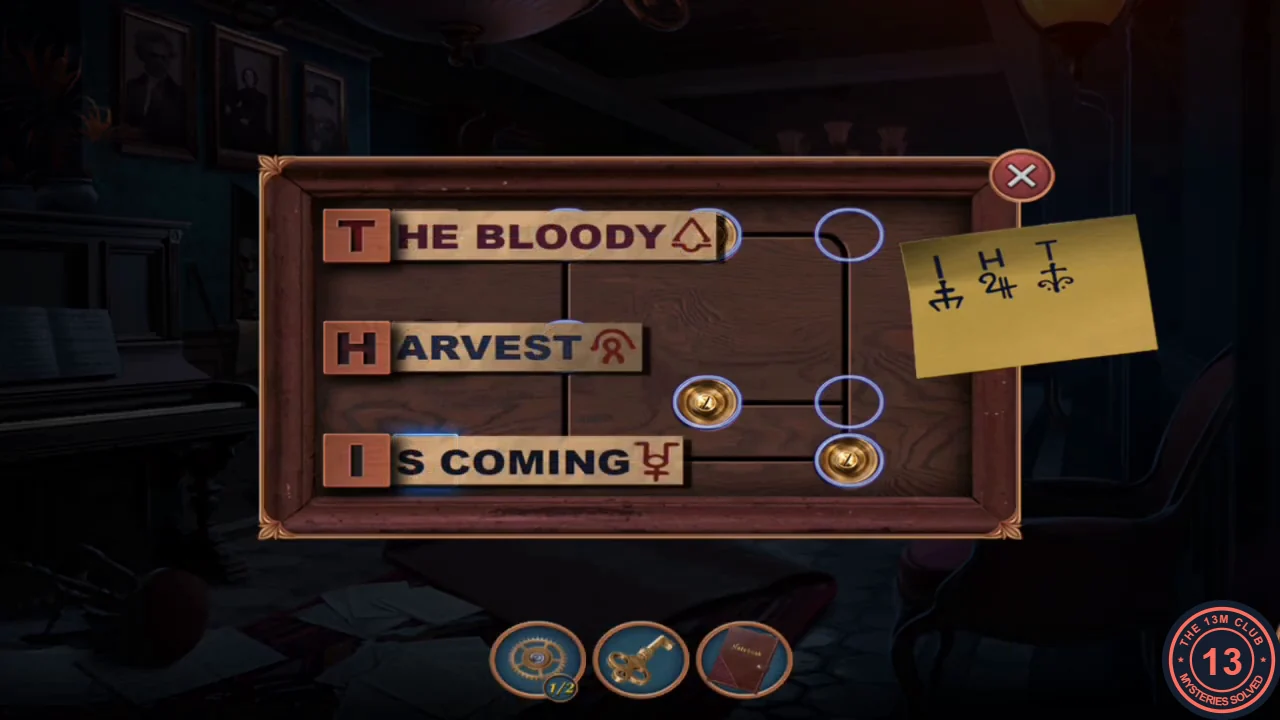
Solved: each chip sits beside its letter, turned as on the note. - Take the SYMBOLS note. It shows three symbols in order: a triangle, an arch and a sign resembling the astrological symbol for Mercury. Alice writes about the bloody harvest in her journal.
Symbol Button Panel and the Key Lock
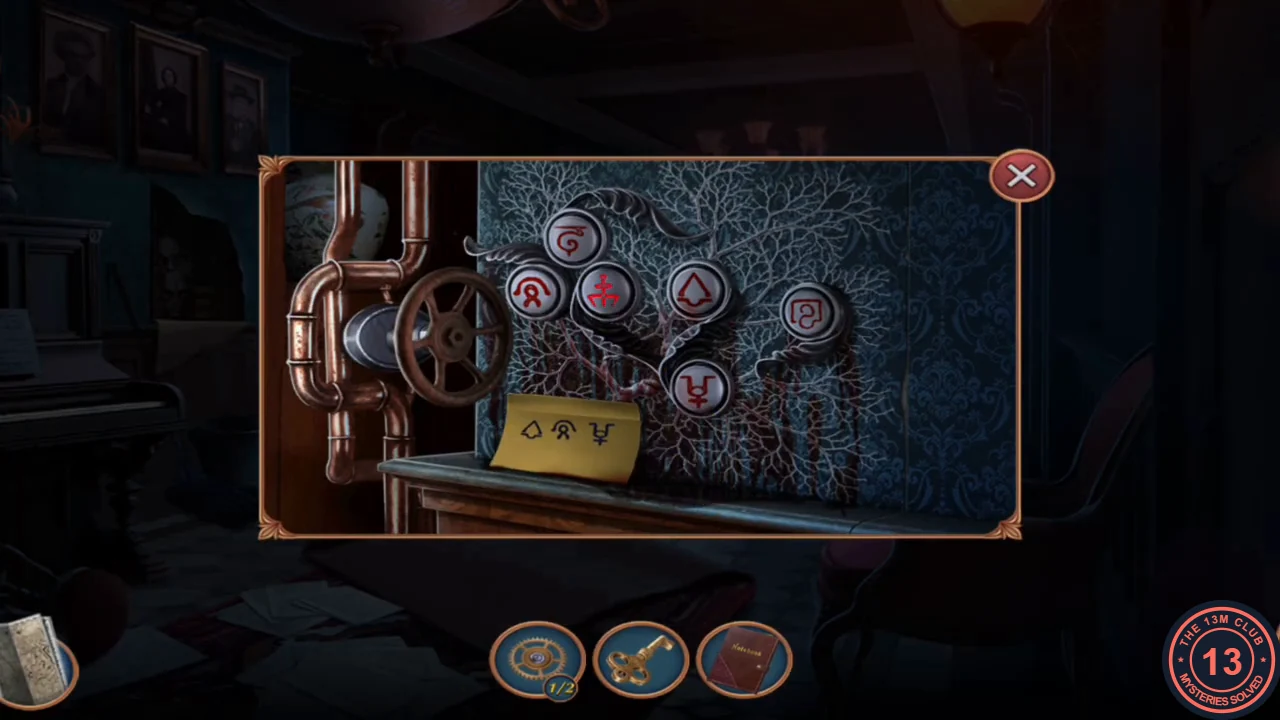
Seven round symbol buttons on the right hallway wall open the way to the Deserted Library. Continuing past this point costs one of the Mystery Files app's keys.
- Put the SYMBOLS note on the right wall panel with the pipes and seven round symbol buttons.
- Press the three matching buttons in the note's order: triangle, then arch, then the Mercury-like sign.
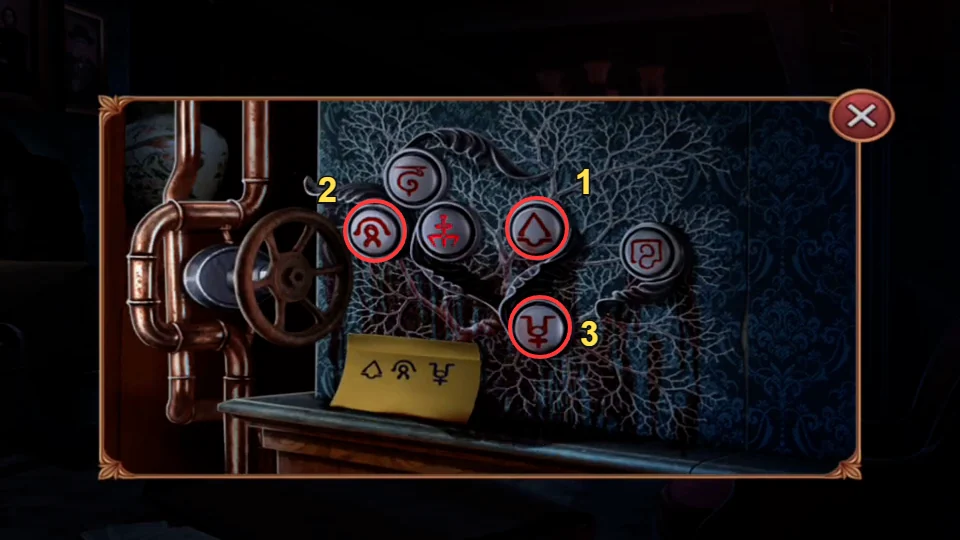
Press order: 1 triangle, 2 arch, 3 the Mercury-like sign. - A padlock screen appears: "Use the key to continue the adventure." Spend one key to unlock the rest of the episode. The DESERTED LIBRARY opens.
Deserted Library: Ball, Crowbar and Ladder
Collect tools in the library, then go back downstairs and squeeze the Rubrum juice.
- Zoom into the library cabinet with the keyhole and the flower carving. Take the deflated BALL and the CROWBAR. The cabinet itself stays locked until Chapter 30.
- At the bookshelf with the chained ladder, use the WINDING KEY on the green box. Take the FRUIT AUGER and the DUCT TAPE inside.
- Break the chain with the CROWBAR and take the LADDER.
- In the inventory, use the DUCT TAPE on the BALL to patch it. Alice notes that it still needs some weight (Chapter 22).
- In the dining room, fit the FRUIT AUGER into the juicer. Pour in the berries and fill the cup to get the RUBRUM JUICE.
Dining Shelf Odd-One-Out Scene
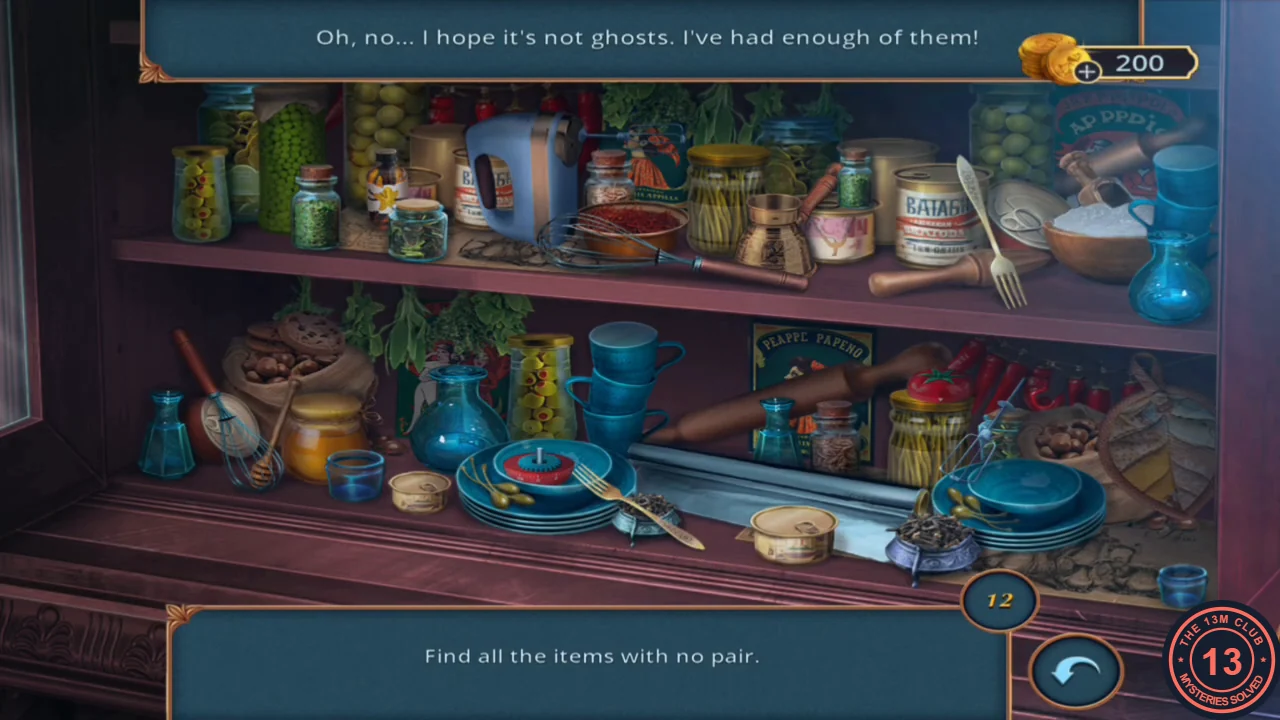
The dining room shelf opens a second hidden-object scene: find the twelve objects that have no twin.
- Zoom into the dining room shelf again. The new task reads "Find all the items with no pair."
- Most objects on the shelf appear twice. Click the ones that appear only once; the counter drops from 12 to 0. One needs an extra action: the game reports that the timer is missing a part, so find that part in the scene and fit it before the timer counts.
- Collect the SUGAR as your reward.
Red Punch for Bernard
Cook the punch and win Bernard over. This completes the side task from Chapter 4.
- Zoom into the pot on the dining room stove. Add the SUGAR, then pour in the RUBRUM JUICE.
- Click the pot to fill the empty cup with punch and take the RED PUNCH.
- Give the RED PUNCH to Bernard. He warms up at once and offers to tell you about the local folklore. The task "Give Bernard some punch" completes.
Library Stained-Glass Window
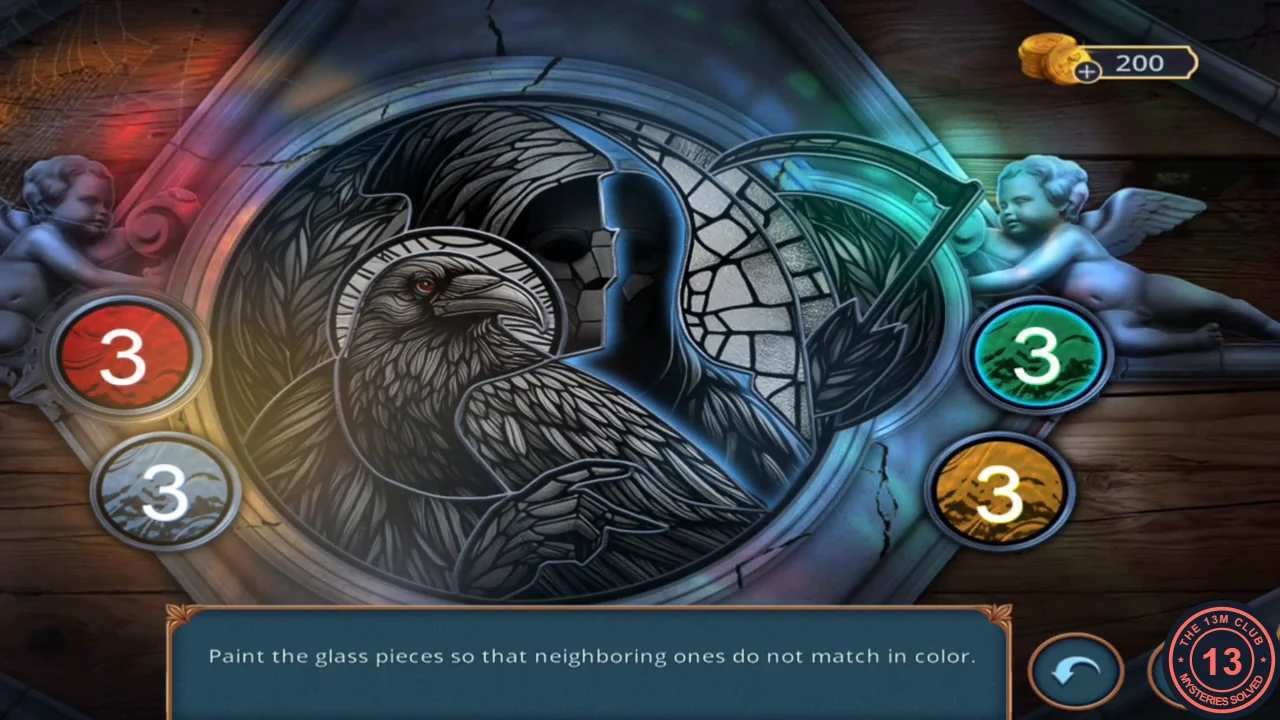
Paint the twelve pieces of a stained-glass window with four colours so that no two neighbouring pieces match. The colouring below is one working solution; if your version differs (for example on another difficulty), the rule still decides it.
- In the Deserted Library, put the LADDER in front of the rear windows and climb to the stained glass.
- Click a paint pot (red or white on the left, green or gold on the right), then click a glass piece to colour it; click a painted piece to clear it again. Each pot holds enough for three pieces. A working solution: red for the feather fan on the left, the raven's red wing and the wheat inside the scythe; gold for the halo behind the raven's head, the tail feathers at lower left and the small wheat sheaf at lower right; green for the green wing at the bottom, the reaper's robe in the centre and the curved band right of the window; white for the raven's head, the reaper's hood and the leaded window panel. If your pieces or pots differ, colour the large central pieces first and give each piece a colour none of its neighbours uses.
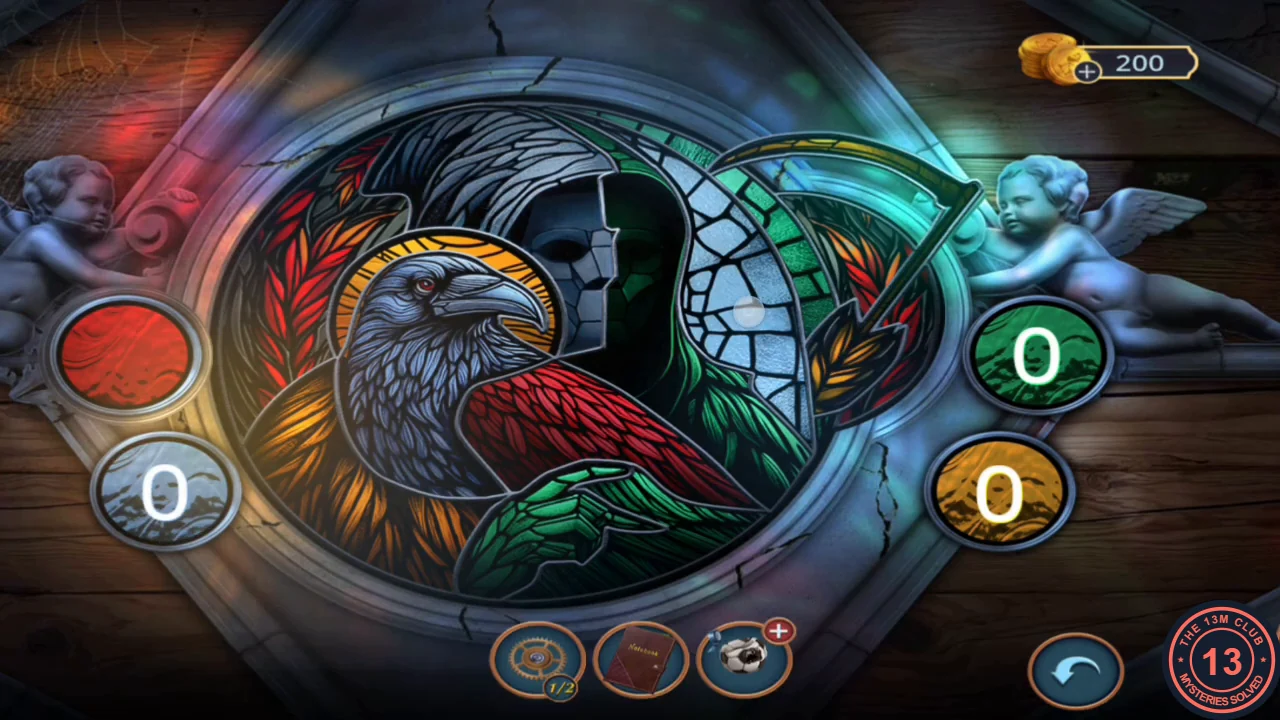
One working colouring, matching step 2; no two neighbouring pieces share a colour. - A disc of RED GLASS is left in the red pot. Take it.
Library Painting and the Wall Mechanism
The red glass reveals the second gear, which opens a hidden mechanism in the lobby and the way to the rye fields.
- Put the RED GLASS on the picture on the library's left wall. The picture changes; click the symbol on it to open a compartment. Read Frederick's note and take GEAR 2/2. A cutscene follows in which Bernard is reminded that they need a special guest for the festival.
- In the lobby, put GEAR 1/2 and GEAR 2/2 into the wall mechanism near the stairs. It opens to show a straw doll. Take the STAPLER and the SICKLE PIN beside it.
- The back-left door of the lobby, under the EXIT sign, has a handle shaped like a hand, but the hand is empty. Put the SICKLE PIN into it, open the door and go out to the RYE FIELDS.
- A farmer tells you the fields are private property. Choose "Sorry, I guess I got lost somewhere..." (35 coins, 1 decision point) or "I heard you and Mr. Digory." (free, 0 points). The free answer was followed by the same route described below.
Rye Fields: Flail Timing Game
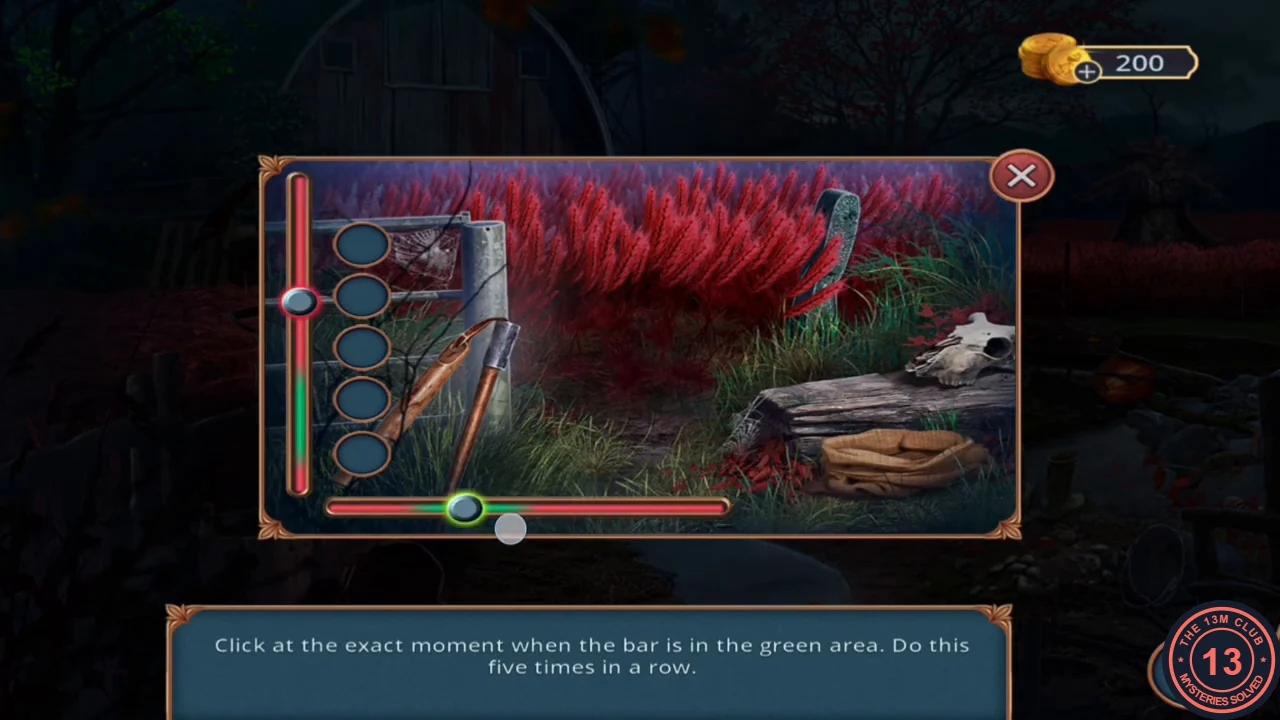
Find a flail under the broken wheelbarrow, then thresh grain by stopping a moving marker in the green zone five times in a row.
- Zoom into the stream on the right and take the PUMPKIN.
- Zoom into the wheelbarrow, which has lost its wheel. Take the BOOTS from it, then fit the PUMPKIN as a wheel. The barrow rolls aside and uncovers a hole; take the FLAIL. Remember the hole for Chapter 32.
- Put the BOOTS into the stream. Searching the water still needs proper equipment; you make a net in Chapter 23.
- Use the FLAIL on the rye by the left fence. A marker moves along the bar; click while it is inside the green area. You need five successful clicks in a row to light all five lamps. Collect the GROUND GRAIN.
- In the inventory, pour some GROUND GRAIN into the patched BALL to give it weight. The grain sack stays in your inventory for Chapter 28.
My Room: Fan Casing and Net
Knock the fan casing open with the weighted ball and free a net from the table.
- In MY ROOM, put the STAPLER on the hat box under the bed. The lid still has nothing to hold on to; the handle comes in Chapter 29.
- Zoom into the ceiling fan and throw the weighted BALL at its casing. Take CLOCK HANDS 1/2 and the CROCHET HOOK.
- Zoom into the round table with the vase and use the CROCHET HOOK to unpick the NET, then take it.
Stream Riddle Scene
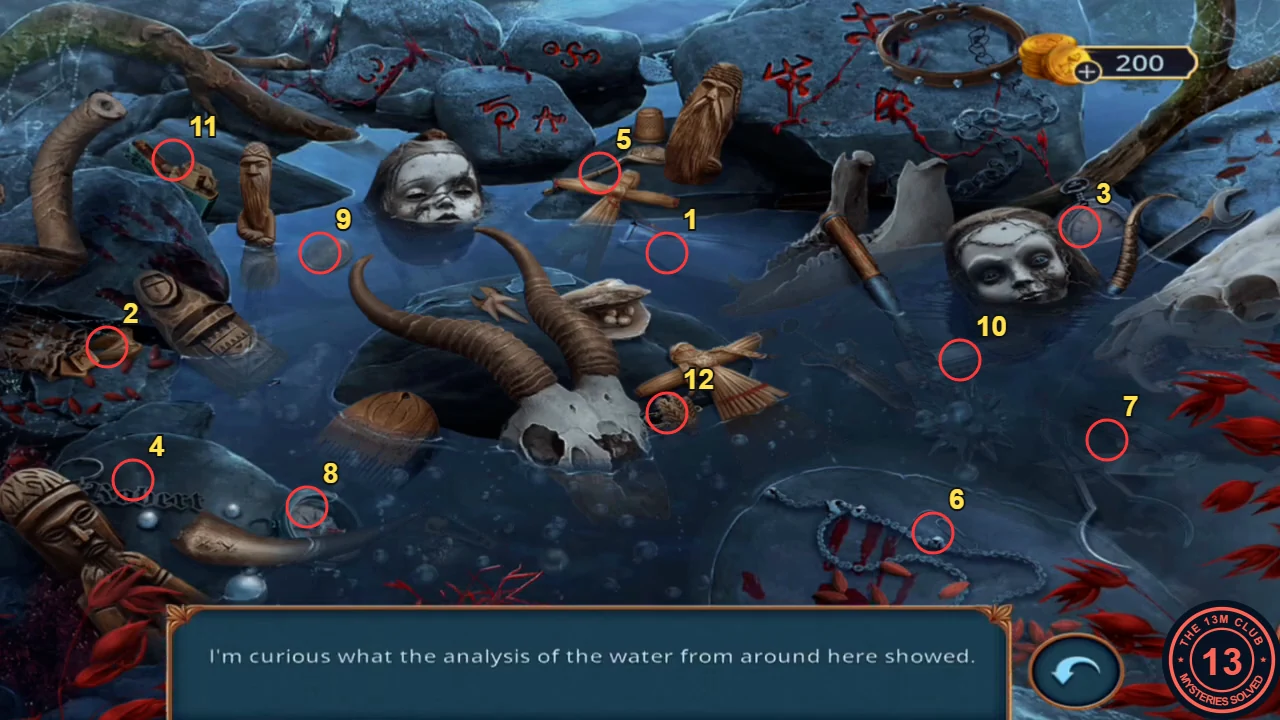
A riddle-based hidden-object scene in the stream. Each riddle describes one object in or around the water; the next riddle appears after each find.
- Return to the rye fields and use the NET on the stream where you left the boots to start the scene.
- Find the object each riddle describes. The twelve riddles and their answers, in the order they appeared in one game (if your order differs, match by the riddle text): "I'm curious what the analysis of the water from around here showed." - the thin glass test tube in the water below the straw cross (upper centre). "I understand that you can lose earrings, rings... but teeth?!" - the tooth among the carved rune stones (left). "Time has stopped, but why?" - the pocket watch beside the doll's head (upper right). "Keeping that name was important to someone." - the "Robert" name tag on the stone (lower left). "A tea party right in the middle of a field? Quaint..." - the teaspoon (upper centre). "Maybe it was binding important documents." - the paper clip on the chain (lower right). "Is it something that can be used for defense, or is it only good for sharpening pencils?" - the faint pocket knife under the water (right). "What's the chance of getting lost here without it?" - the compass (lower left). "I wonder if it was lost or someone was making a wish?" - the coin in the water (left). "Music makes work in the field a lot merrier." - the harmonica under the water (centre right). "The smoker who lost it must be distraught." - the lighter (upper left). "The trademark of a local hobby club, perhaps?" - the small woven straw charm between the goat skull and the straw doll (centre).
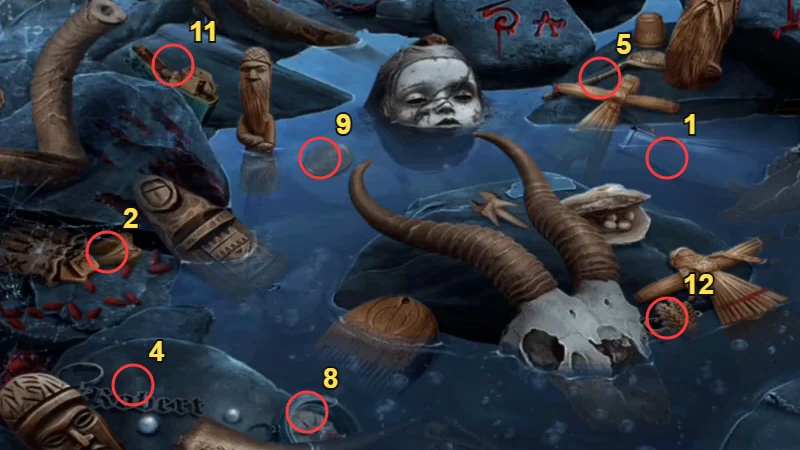
Left side: 11 lighter, 9 coin, 2 tooth, 4 "Robert" name tag, 8 compass; centre: 5 teaspoon, 1 test tube, 12 straw charm. 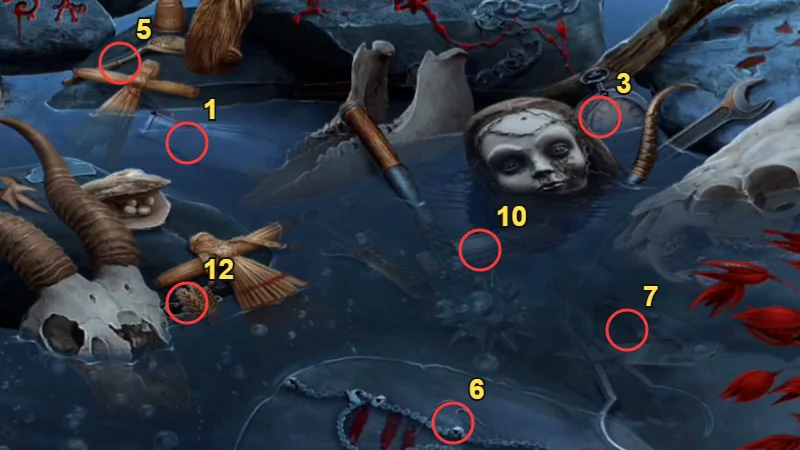
Right side: 3 pocket watch, 10 harmonica and 7 pocket knife under the water, 6 paper clip on the chain. - Collect the SCYTHE as your reward.
The Barn: Hidden Tools
Cut a path through the rye to the barn and gather the tools hidden inside.
- Use the SCYTHE on the tall rye by the left fence and follow the new path into the BARN. A dark hooded figure appears as you enter.
- Zoom into the wooden crate at the front left, the one with a round blue disc on its side. Take the BOWL and the TROWEL.
- Dig into the dirt pile by the tractor with the TROWEL. A locked metal toolbox is uncovered; take the PINCERS. Leave the box for Chapter 27.
- Use the PINCERS to pull the nail from the wooden rack of red rye. The rack collapses; take the PITCHFORK. Keep the pincers for Chapter 32.
- Use the PITCHFORK to clear the hay from the round stone slab in the centre and take the MULTI-TOOL hidden in it. A short scene at the cracked slab follows, and the task "Find the secret place" completes.