Thorn Bush, Hammer and Car Window
The tower lot has the tower on the left, a wrecked car on the right, red thorn bushes and a scrap pile in the middle.
- Tap the red thorn bush at the lower left. Something metal is stuck deep in the thorns; you come back for it later. Take the keys and the red-tipped wooden handle from the ground in front of it.
- Tap the scrap pile behind the cardboard boxes in the centre, under a rusty blue metal sheet. Place the wooden handle by the hammer head lying there, then use the blue tape to bind them. Take the hammer. The blue tape returns to your inventory.
- Tap the rear side window of the wrecked car on the right and break it with the hammer. Tap the cardboard box on the back seat.
Car Toolbox Sliding Puzzle
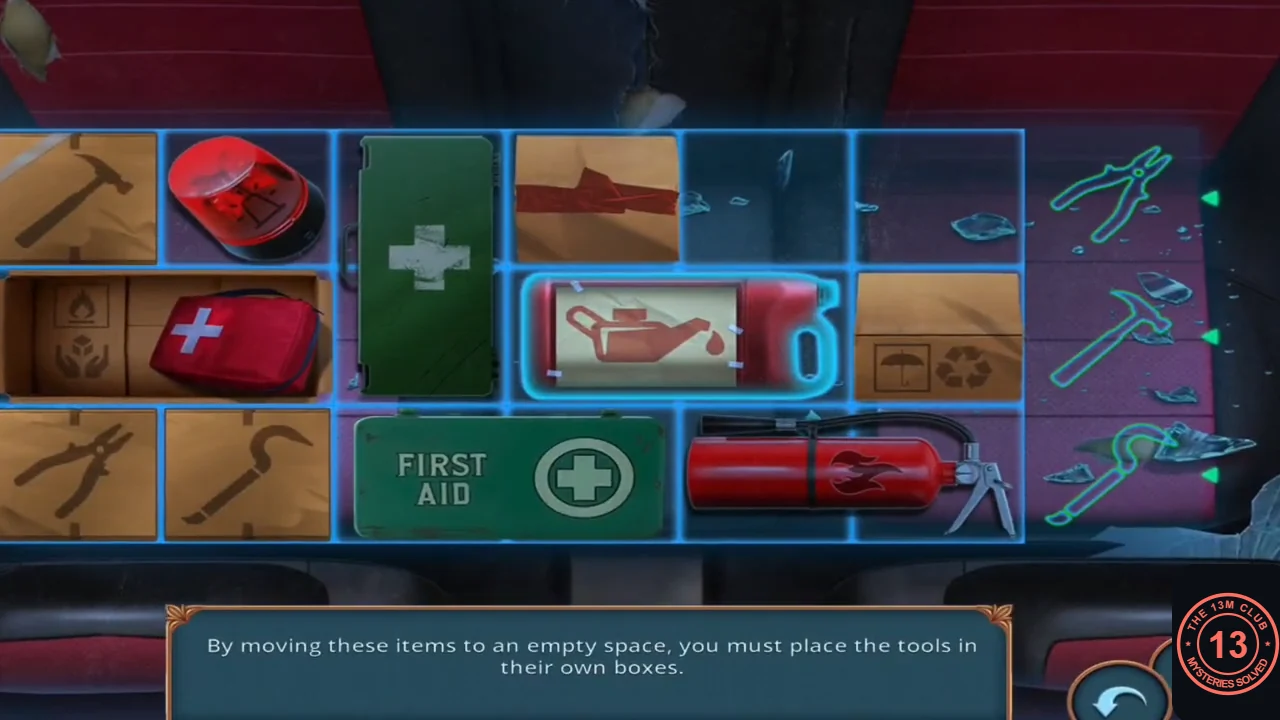
Slide the cases so that the Pliers, Hammer and Crowbar boxes end up in the right-hand column in their matching outlines. This is a lengthy sliding-block puzzle, so this guide gives the target and a method rather than every slide.
- The board has 6 columns, 3 rows and two empty cells; a case slides one cell at a time into an empty space, and wide cases can also move up and down. Target: Pliers box top right, Hammer box middle right, Crowbar box bottom right. At the start the Hammer box is at the top left and the Pliers and Crowbar boxes are at the bottom left, so open the board up first: slide the Tape box two cells right, the Oil can up, the Umbrella box two cells left and the Extinguisher up. This frees the bottom row, so the FIRST AID case, Crowbar box and Pliers box can shuffle right. Keep both empty cells near the right-hand column and park the green kit and Beacon in the left-hand column while the tool boxes move across. Place the Crowbar box last in the bottom-right outline and finish with the Pliers box up into the top-right outline and the Hammer box right into the middle-right outline. The achievement "Sprouts" appears.
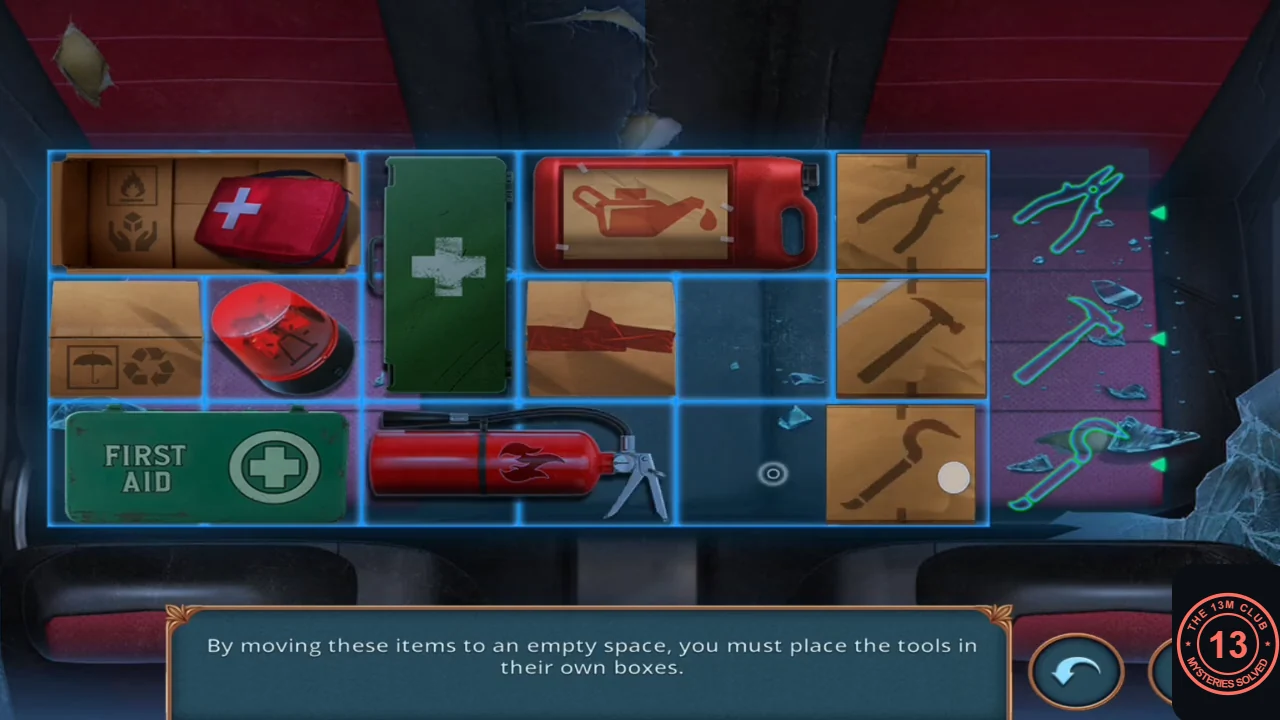
Solved: pliers top, hammer middle, crowbar bottom. - Tap the cardboard box on the back seat again and take the long crowbar.
Climb the Tower
The bottom section of the tower ladder is raised out of reach.
- Tap the ladder at the base of the tower on the left. Use the long crowbar to hook the raised ladder and pull it down; the lower rungs slide into reach. Tap the ladder to climb to the platform. "So that's where the problem is!" The task "Check out the tower" completes and a repair task starts.
Tower Platform: Stain, Aerial and Gas Cylinders
On the platform there is a glass partition in the middle, a radio aerial at the upper right, a wasp nest on the floor by the central post and a sparking electrical box on the left railing post.
- Tap the ledge of the glass partition in the centre. A red glove lies beyond the glass and a blue-green stain covers the wood ("Oh, this stain ruins everything..."). Place the sponge on the stain.
- Tap the aerial and radio box at the upper right ("I need to look inside there..."). Use the hand mirror from the barn to look into the gap: it shows a plate held by two screws ("Is there something I could use to unscrew it?").
- Tap the electrical box on the left railing post. Use the keys on the gas cylinders below it, then wrap the blue tape round the hose. Take the gas cylinders and the green-handled pliers from the floor. Leave the sparking wires alone for now ("Safety first!").
Antenna, Wasp Nest and Gas Torch
The gas cylinders need a valve before they work ("I need something to open the gas flow.").
- Tap the aerial at the upper right and use the green pliers on the radio's telescopic antenna. Take the metal antenna rod.
- Tap the wasp nest on the floor by the central post. Use the antenna rod to hook out the bottle beside it and take the bottle. The wasps stay for now.
- Tap the glass-partition ledge and use the bottle on the sponge. The sponge wipes away the stain; take the blue valve knob.
- Open the gas cylinders in the inventory and attach the valve knob to the blue tank. The torch lights; take the gas torch.
- Climb down to the tower lot, tap the scrap pile in the centre and cut the rusty blue metal sheet with the gas torch. A hidden-object scene opens.
Scrap Pile Hidden-Object Scene
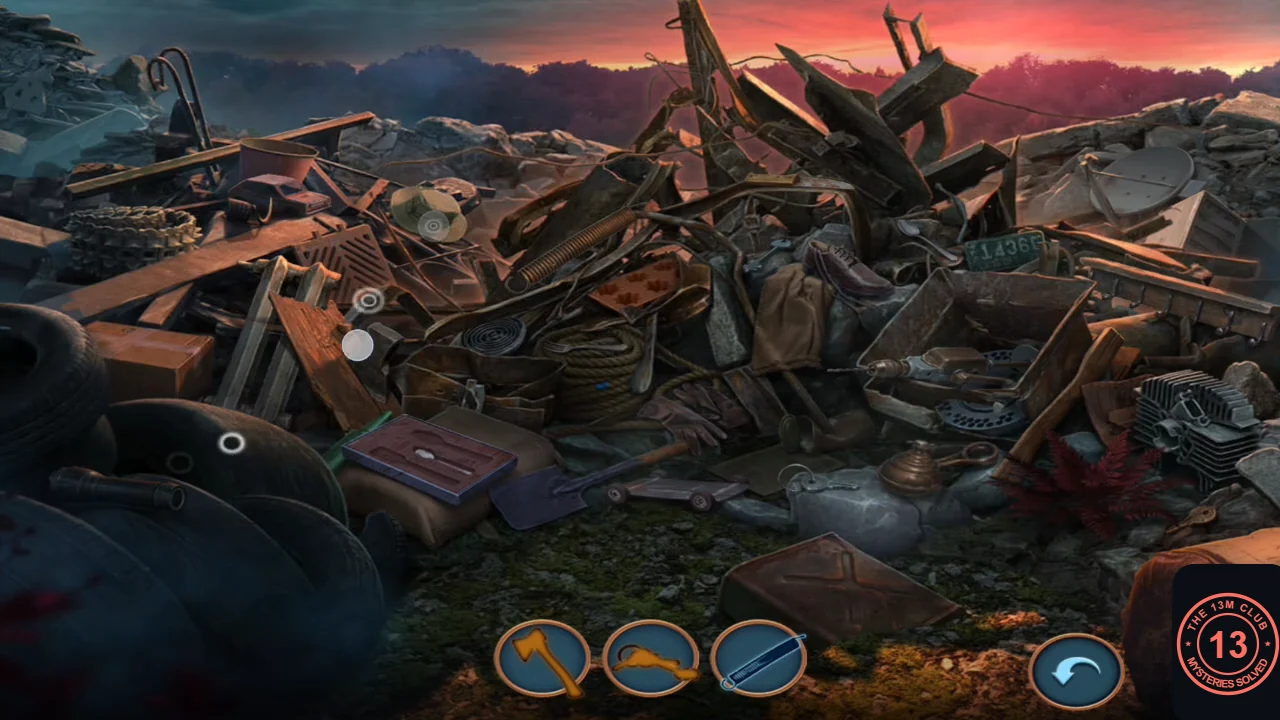
The item bar shows three silhouettes at a time. Blue silhouettes can be collected straight away. An orange silhouette means the item is incomplete: tap it to see what is missing, then find that part.
- There are 11 items; the bar shows three at a time, in an order that changes as you collect. Locations (left, right and so on are as seen on screen): (1) Axe (orange): tap the spring-wrapped handle lying diagonally in the upper centre, just above the orange baking tray, to fit it, then take the axe head from beside the leaning wooden board left of the black hose reel. (2) Knife: the brass-handled blade lying across the top of the pile above the brown sack. (3) Key ring (orange, "Where are the keys?"): tap the small key on the grey rock left of the brown sack, then take the key ring from the stone by the little wheeled toy chassis at the lower centre. (4) Drill: in the rusty open crate right of centre. (5) Saw: the long toothed blade lying to the right of the green licence plate "436". (6) Satellite dish (round silhouette): on the rocks at the upper right. (7) Boot: the dark boot on the ground just left of the brass oil can. (8) Wooden step frame ("II" silhouette): the pale two-rail frame leaning against the large wooden board on the left. (9) Toy car (orange): tap the red toy-car body on the plank at the upper left, next to the khaki hat; it drops onto the wheeled toy chassis at the lower centre. Take the finished car. (10) Flashlight (orange cylinder): it lies on the black tyre at the far left. Tap its open end; in the recording this fitted a red-tipped battery. Then take the flashlight. (11) Cutlery case (orange, "I need to find the missing cutlery."): the purple case at the lower left already holds a teaspoon. Tap the large spoon between the brown shoe and the licence plate, and the fork lying on top of the coiled rope; both fly into the case. Take the case. You receive Secateurs.
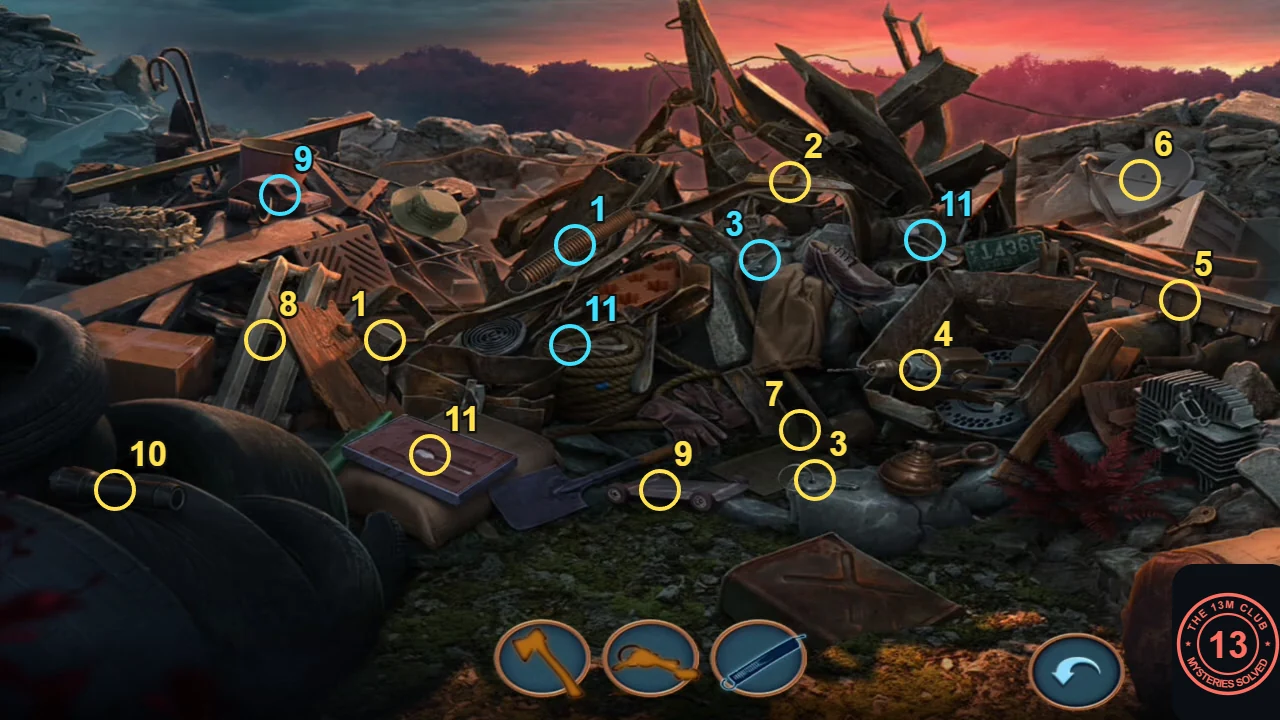
Item locations, numbered as in the step. Yellow: the item to take. Cyan: the part to tap first.
Respirator and Soporific Gas
Prepare to put the wasps to sleep.
- Tap the red thorn bush at the lower left and cut the thorns with the secateurs. Take the blue respirator.
- Climb to the platform and tap the wasp nest. Place the respirator, then use the soporific gas can. A maze puzzle opens.
Honeycomb Gas Maze
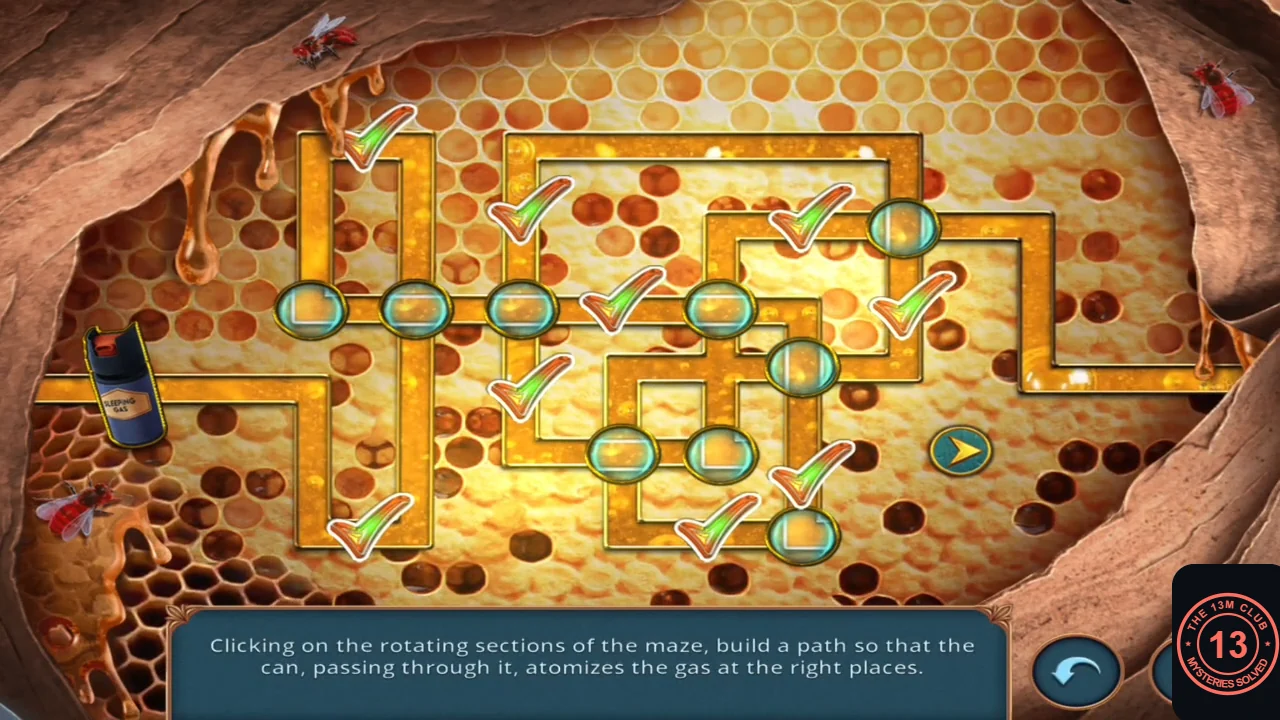
The spray can moves along the honeycomb track on its own; your job is to steer it by turning junctions. Because the can is moving, this guide gives the method rather than a fixed tap sequence.
- The can enters from the left. Tap the 9 round junctions to rotate them and build a path that sends the can over all 9 green check marks; each mark it passes turns into a gas cloud, and the clouds stay. Set the next junction ahead of the can before it arrives. Once all 9 marks are clouds, route the can to the exit on the right.
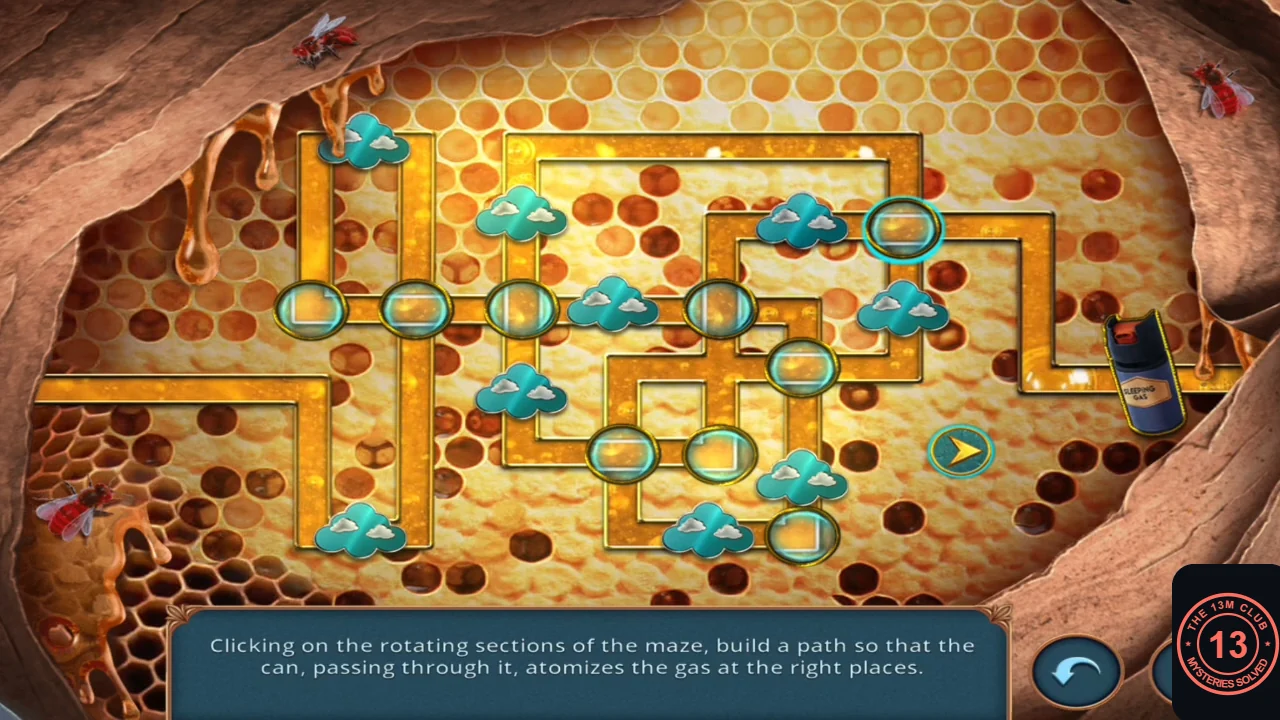
Solved: every spot sprayed and the can at the exit. - The wasps fall asleep. Tap the nest and take the orange-handled screwdriver from its opening.
- Tap the aerial at the upper right and use the screwdriver on the plate's two screws. Take the metal strip behind it; it is the first of a two-part set (1/2).
Smoking Scrap Pile Scene
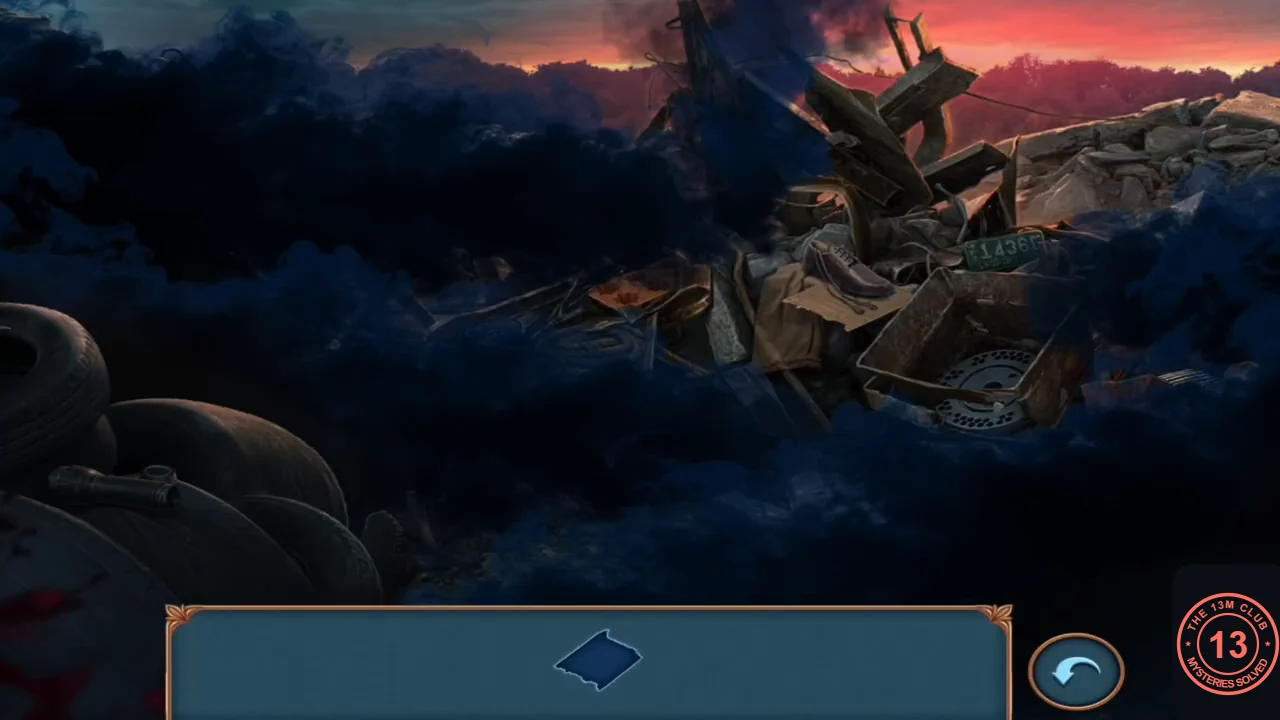
Black smoke now rises from the scrap pile in the tower lot.
- Climb down and tap the smoking scrap pile. While smoke covers it, the bar shows one flat diamond-shaped silhouette: tap the flat piece of cardboard lying under the brown shoe, right of centre. The smoke clears. The bar then shows close-up pictures, three at a time; there are 12. In the order collected in the recording: (1) green glass bottle between the black tyre and the brown sack at the lower left; (2) orange star-cup baking tray in the upper centre, above the coiled rope; (3) green licence plate "436"; (4) red bucket on the plank at the upper left; (5) finned engine block at the right edge, behind the red fern; (6) brown cardboard box at the left edge, above the tyres; (7) coiled metal track at the far left, above the long plank; (8) round perforated blue disc inside the rusty open crate; (9) orange grate with chevron slots, left of the khaki hat; (10) black coiled hose reel left of centre; (11) grey slatted box on the rocks at the right edge; (12) flat beige square on the ground below the gloves, left of the grey stone. After the last item a hooded ghost appears: "Looks like there was some kind of spell that caused this smoke. Someone is trying to stop me!" You receive a Metal Corner.
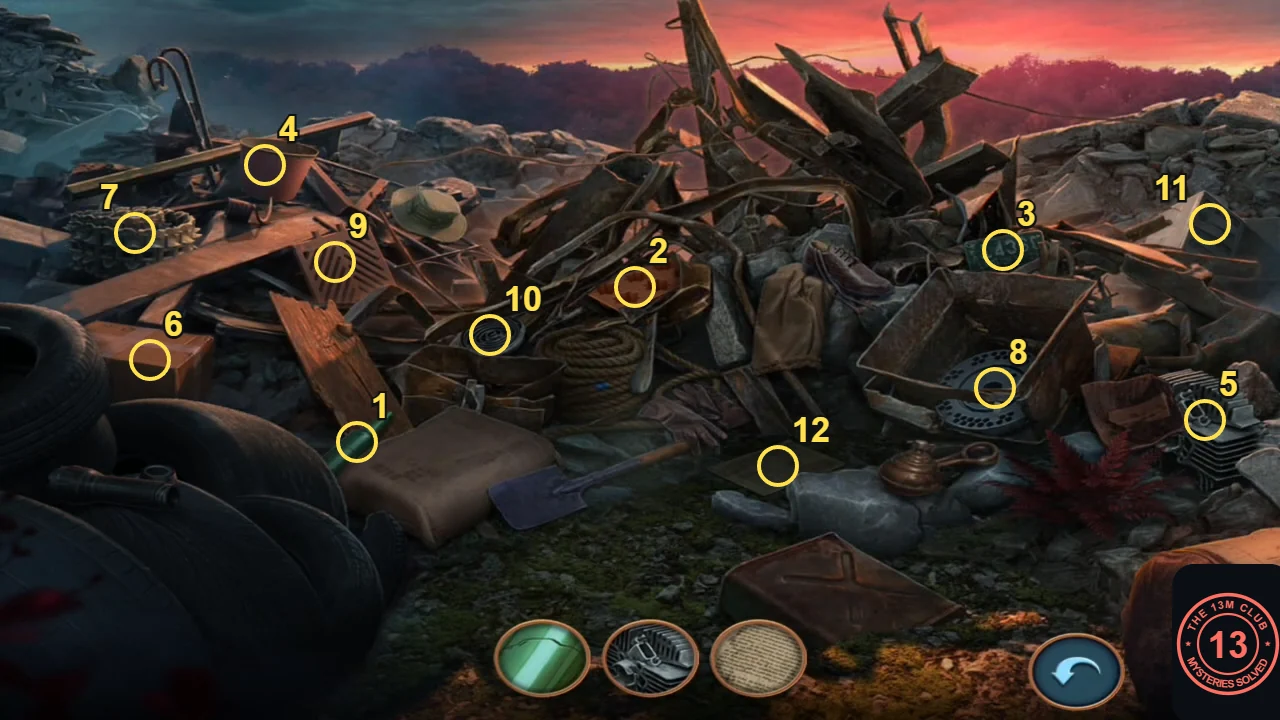
After the smoke clears: the 12 picture items, numbered as in the step.
Dig Up a Plank and Get the Rubber Glove
The red glove beyond the glass partition protects you from the sparking wires.
- Tap the dirt mound beside the red thorn bush at the lower left and dig with the metal corner. Take the wooden plank; together with the metal strip it completes the two-part set (2/2).
- Climb to the platform, tap the glass-partition ledge and lay the plank and strip across the glass. Take the red rubber glove.
Tower Circuit Puzzle
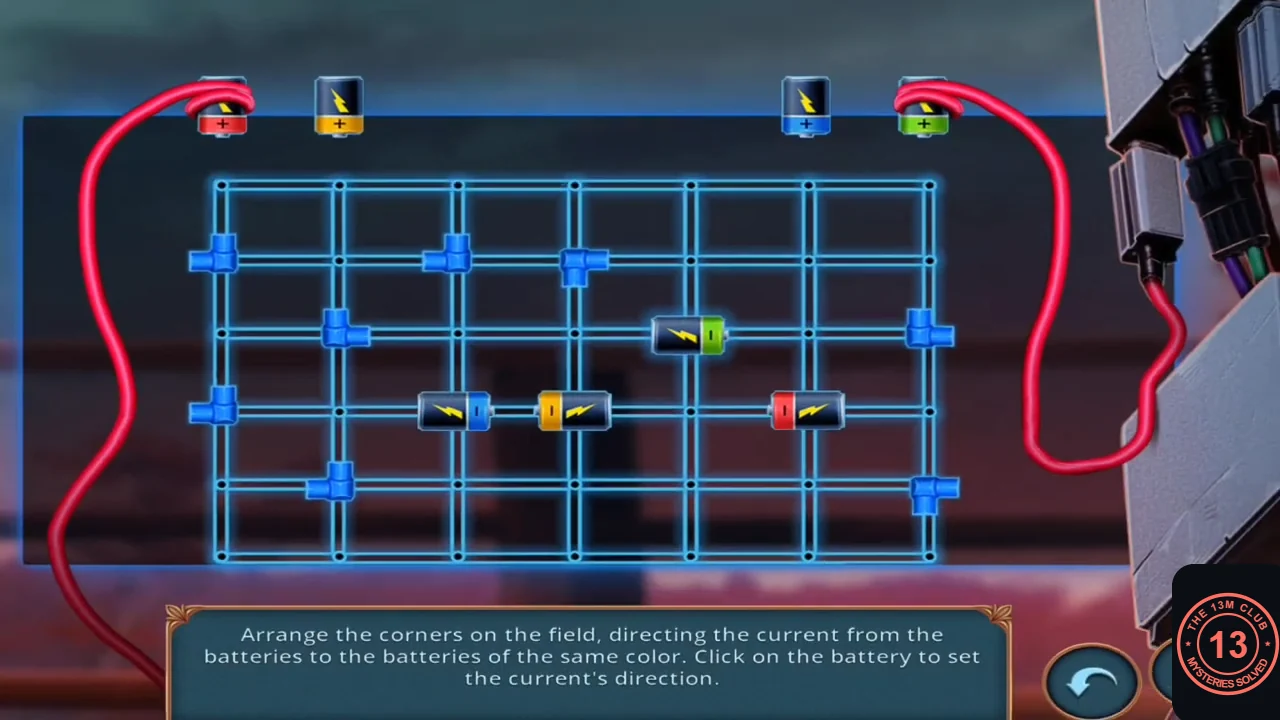
Repair the sparking electrical box on the left railing post. Route each coloured current from its source battery to the field battery of the same colour.
- Tap the electrical box with the sparking wires and use the red glove.
- Place the 8 corner pieces on the grid and tap each field battery to turn it upright so that its ends face up and down. Using 7 columns from the left and 6 node rows from the top: the source batteries sit above column 1 (red), column 2 (yellow), column 6 (blue) and column 7 (green); the field batteries are blue at column 3 row 4, yellow at column 4 row 4, green at column 5 row 3 and red at column 6 row 4. Solution: red runs down column 1 to a corner at row 6, right along row 6 to a corner at column 6, then up to the red battery. Yellow runs down column 2 to a corner at row 5, right to a corner at column 4, then up to the yellow battery. Blue runs down column 6 to a corner at row 1, left to a corner at column 3, then down to the blue battery. Green runs down column 7 to a corner at row 2, left to a corner at column 5, then down to the green battery.
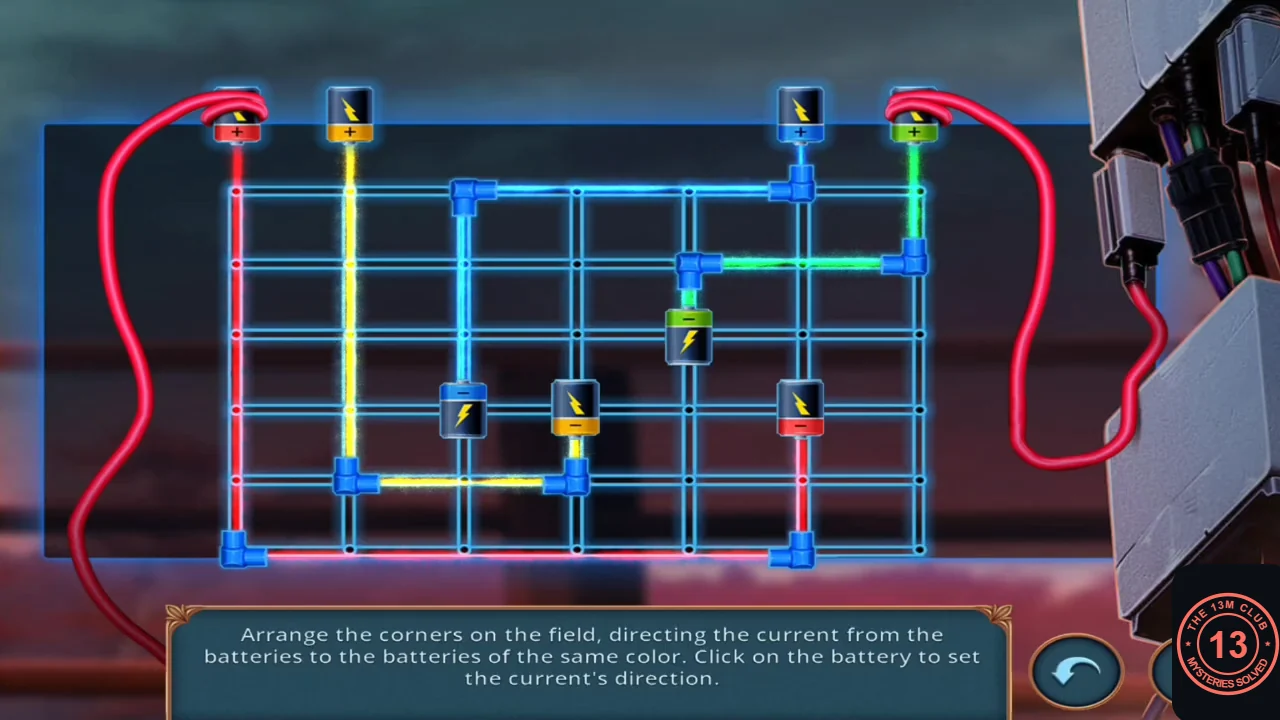
Solved: each colour reaches its own battery.