Show the Sheriff the Photo
The Sheriff greets you with "What do you want from me?". This scene contains your third decision-point choice.
- Give the photo to the Sheriff: "So it's all true!" Then choose a reply. "Please, tell me more." costs 35 coins and gives 1 decision point. "No, it doesn't." is free and gives 0 points. Either way the Sheriff explains that the locals perform harvest rituals with human sacrifice and shows you a picture puzzle.
Rotating Circles Picture Puzzle
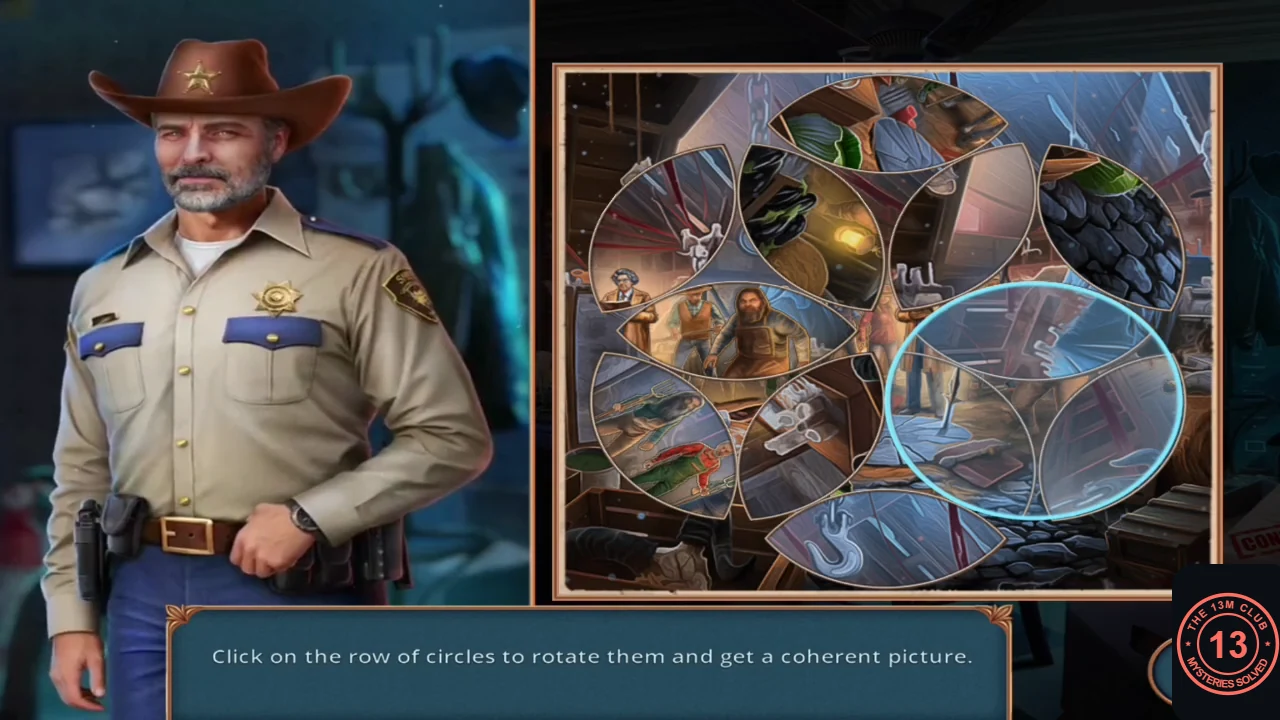
Seven overlapping rings (one in the centre and six around it) make up a scrambled picture. Rotating one ring also moves the pieces it shares with its neighbours, so this guide describes the target and a method rather than a tap sequence.
- Tap a ring to rotate its row of circles. The finished picture shows a barn interior: hooks and chains along the top, a crowd of farmers with pitchforks around a man in a top hat in the centre, a lantern on the right, a table with jars on the left and cobblestones with a blue tarp at the bottom centre. Fix the centre ring first using the man in the top hat, then turn each outer ring until its edges continue the picture into the neighbouring rings.
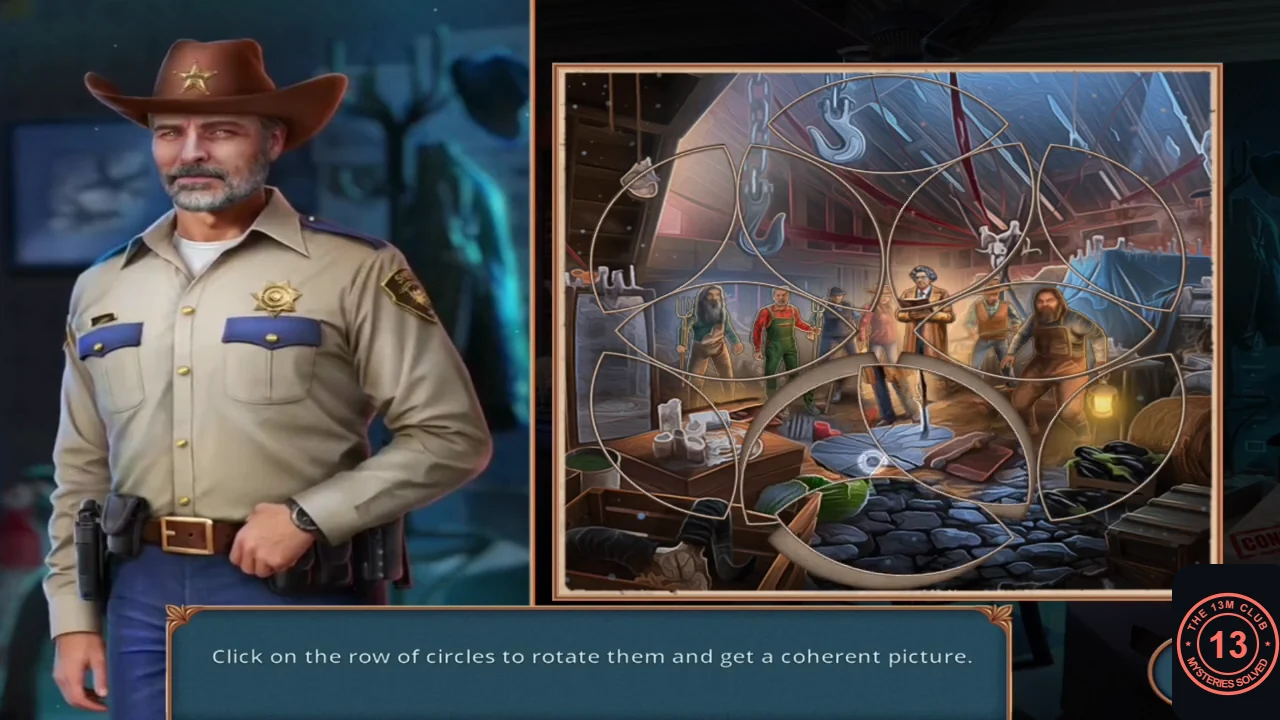
The completed picture. - The Sheriff decides to visit Frederick, but the key to the gun locker is gone. The task "Find the key for the Sheriff's gun locker" starts.
City Plan Model, Cabinet and Statue
Search the office around the Sheriff's desk.
- Tap the Darkwood City Plan model on the small table right of the desk. Take the gold sword hilt and the gold crow skull.
- Tap the cabinet in the bookcase behind the desk (rows of medals with a drawer above). Place the crow skull on the drawer; it works as a handle and the drawer slides open. The empty stand above is for an item you find later ("This place is for something.").
- Tap the Lady Justice statue on the cabinet right of the desk. Place the sword hilt on her sword and use the glue tube to fix it. Six symbols appear on the blade.
Lady Justice Scale Puzzle
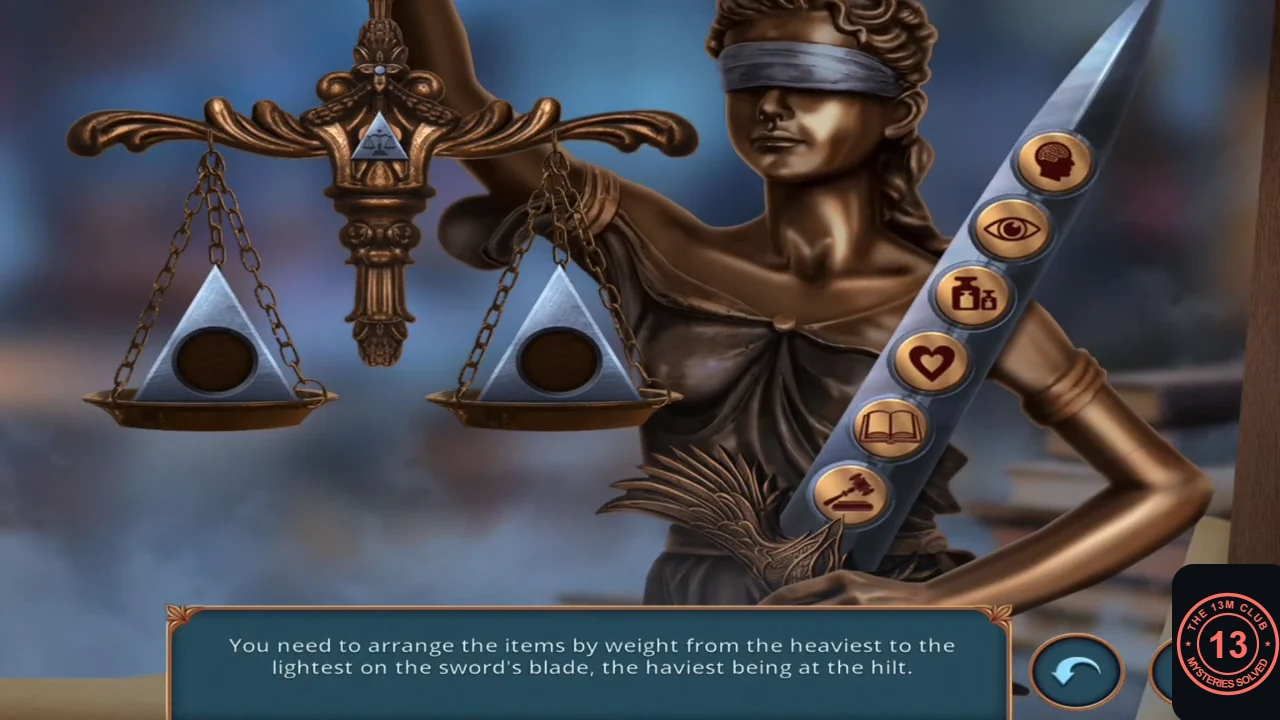
Arrange the six items on the sword blade by weight, heaviest at the hilt and lightest at the tip. Use the two scale pans to compare items if you want to check them yourself.
- From the hilt to the tip, the solved order is: Weights, Eye, Head (brain), Heart, Gavel, Book. Swap items until the blade shows this order.CODEWeights, Eye, Head, Heart, Gavel, Book
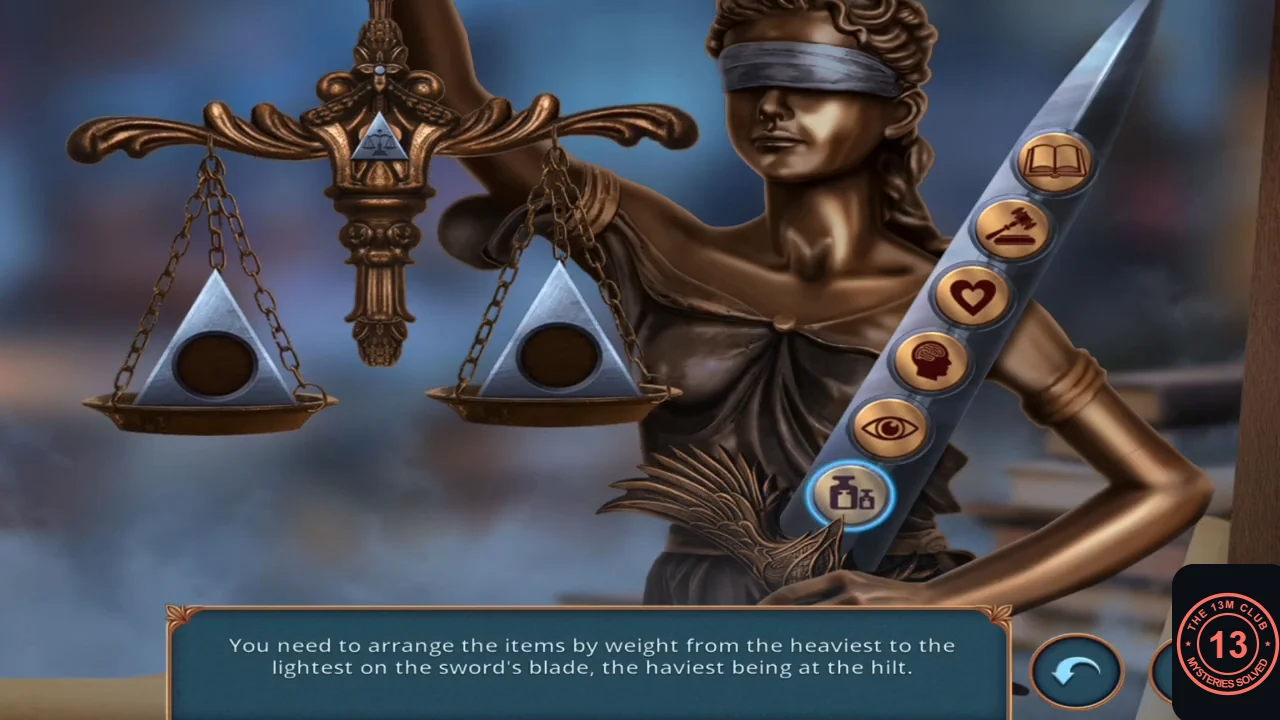
Solved order, heaviest at the hilt.
Coloured Pencils, Toy House and Pliers
The scale puzzle opens a drawer in the statue base.
- Take the coloured pencils from the drawer in the statue's base.
- Tap the small toy house at the left corner of the Sheriff's desk. Place the red ink pad on the desk beside it, then use the coloured pencils to pry the house loose. Take the model house.
- Tap the City Plan model again and place the model house on the empty plot left of the big house. The model's base drawer opens; take the pliers.
Reception Drawer: Flashlight and Discs
A key is stuck in the reception desk drawer in the hall.
- Tap the reception desk drawer in the hall. Your fingers slip on the key, so use the pliers to turn it. The drawer opens: it holds a flashlight, a small lockbox and blue tape. Take the blue tape.
- Tap the flashlight ("This flashlight is working on batteries."), insert the red batteries from the barn and take the flashlight.
- The lockbox needs something slim. Use the purple push pin on it and take the discs.
Storage Room: Find the Differences
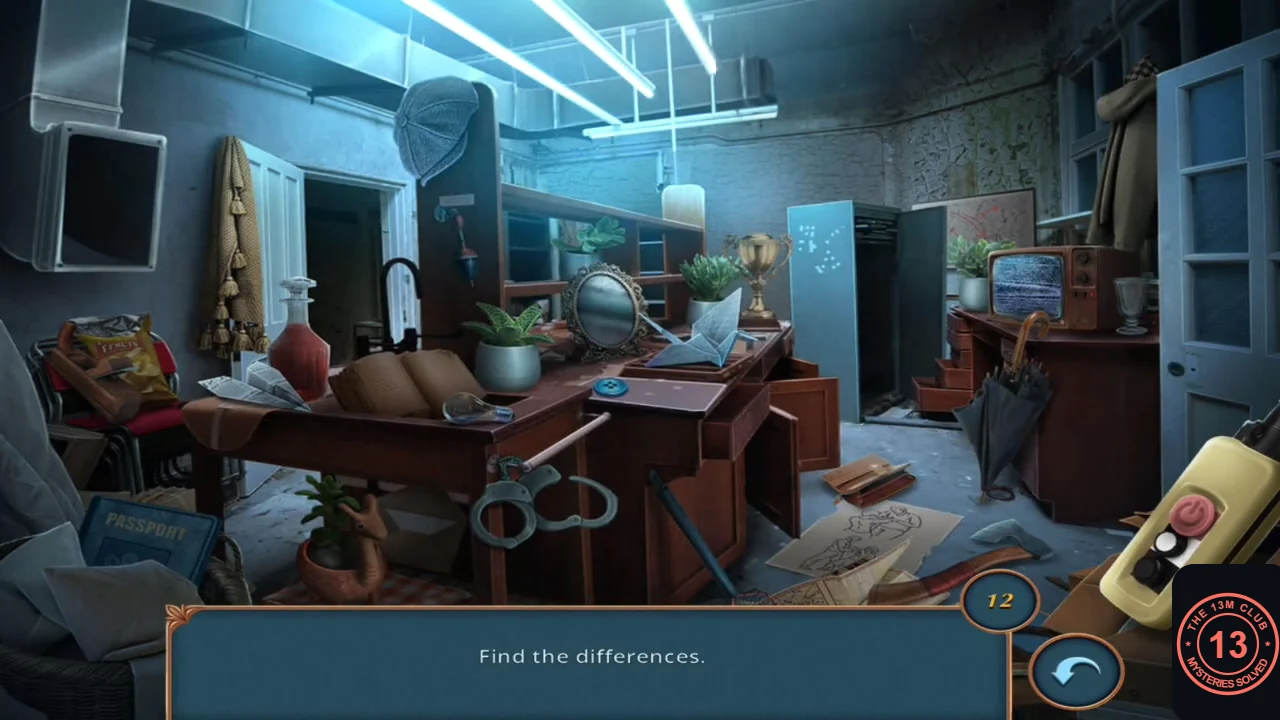
Go back through the lounge to the storage room ("Have I missed something in there?"). The flashlight is used automatically and the flickering light starts a 12-difference scene.
- Find the 12 differences: the chips bag on the red chair at left, the decanter, the framed book on the desk, the plant on the shelf, the trophy, the top of the blue locker and the wall to its right, the phone on the desk, the drawer front, the handcuffs, the passport at bottom left, the drawing on the floor at right and the small TV on the right-hand desk. An achievement appears during the scene. You receive the Cable.
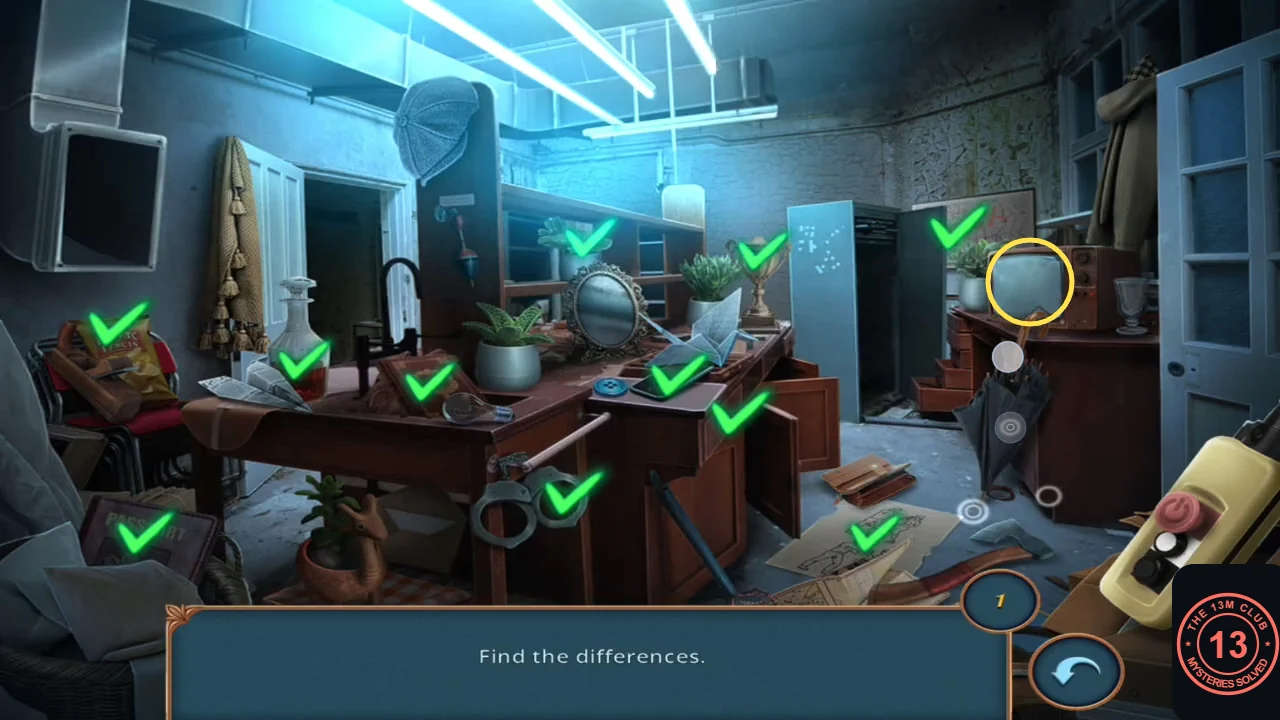
Eleven differences ticked; the circled TV on the right desk is the twelfth.
Watch the Security Footage
Connect the lounge TV.
- In the lounge, tap the TV on the right. Use the cable, then insert the discs. Security footage plays showing two figures: "Who's that? It seems that the Sheriff is close to him..." The task "Learn more about the Sheriff" is complete.
Hidden Bookshelf Puzzle
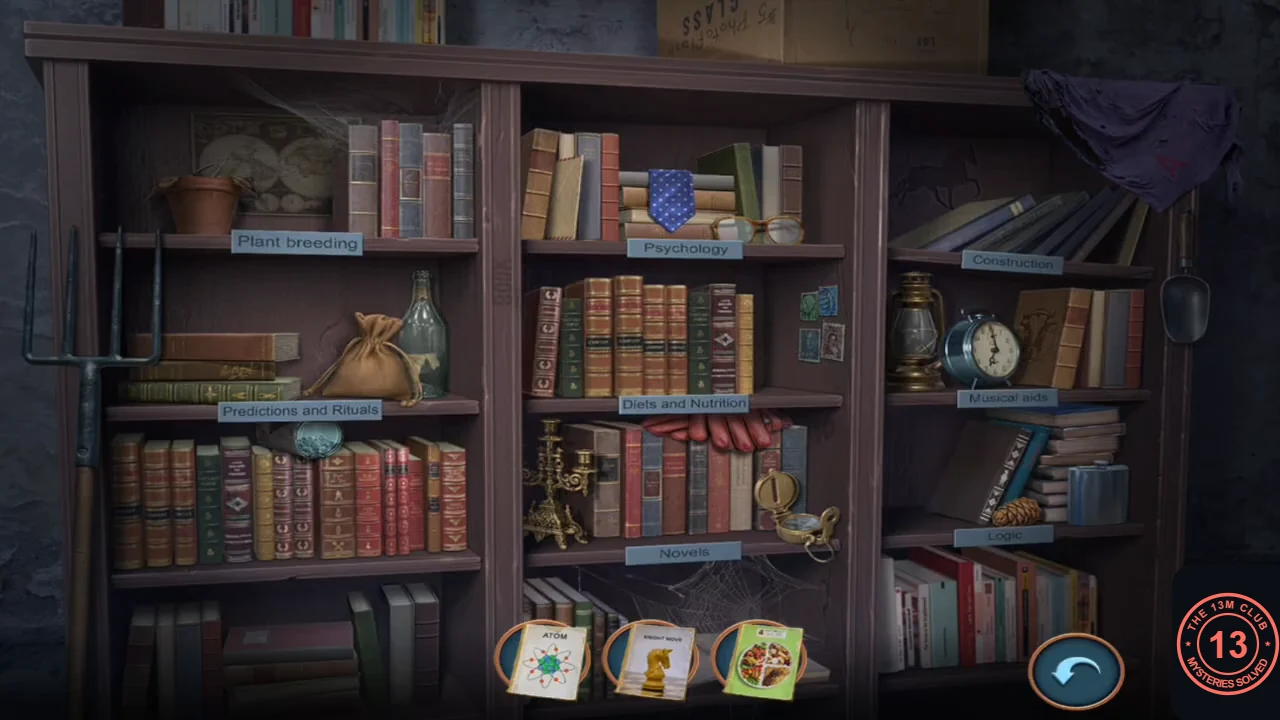
The dark hole in the brick wall on Main Street hides a bookshelf.
- Go out to the street, tap the dark hole in the brick wall on the right and use the flashlight. A bookshelf is lit up: "Some books are missing."
- Drag each book card from the tray onto the shelf above its matching label (three cards show at a time; a wrong shelf gives "There must be another way."). Logic: Knight Move (chess) and Atom. Diets and Nutrition: the healthy-food plate book and Recipes for the Holiday Table. Psychology: Meditation and the book with two people talking. Construction: The Walls and Rules of Bricklaying. Plant breeding: the wheat-ear book and the wheat-field book. Predictions and Rituals: the pentagram book and Know Your Future. The Musical aids and Novels shelves stay as they are. After all 12 books you receive a Flag.
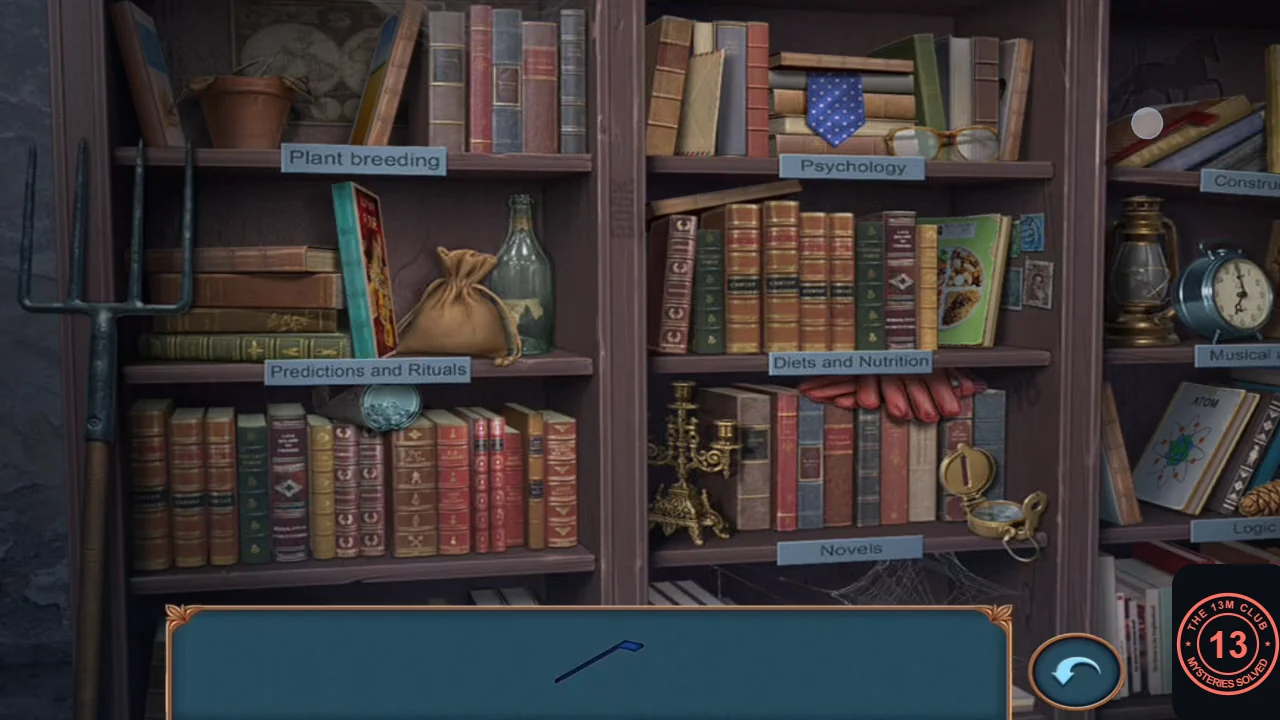
All books placed. The puzzle view cuts off part of the Construction and Logic shelves at the right.
Molly's Note in the Mailbox
Use the flag on the mailbox by the shop on the left of the street.
- Tap the mailbox on the left near the hydrant and attach the flag. The flag rises and the mailbox opens. Read Molly's note: she saw the Sheriff talking with Frederick at the hotel and found this key. Take the key. This happens after either Turn away or Free Molly in the barn.
- Return to the Sheriff's office. In a cutscene Frederick holds the Sheriff at gunpoint ("I hear you want to stop me. Seems like you forgot your place!"), and the Sheriff is left wounded. The gun-locker task completes and the task to bandage the Sheriff's wound starts.
The Sheriff's Desk Drawer and Letter
Use Molly's key on the Sheriff's desk.
- Use the key on the front drawer in the centre of the Sheriff's desk. The drawer holds a pistol, a photo and a letter.
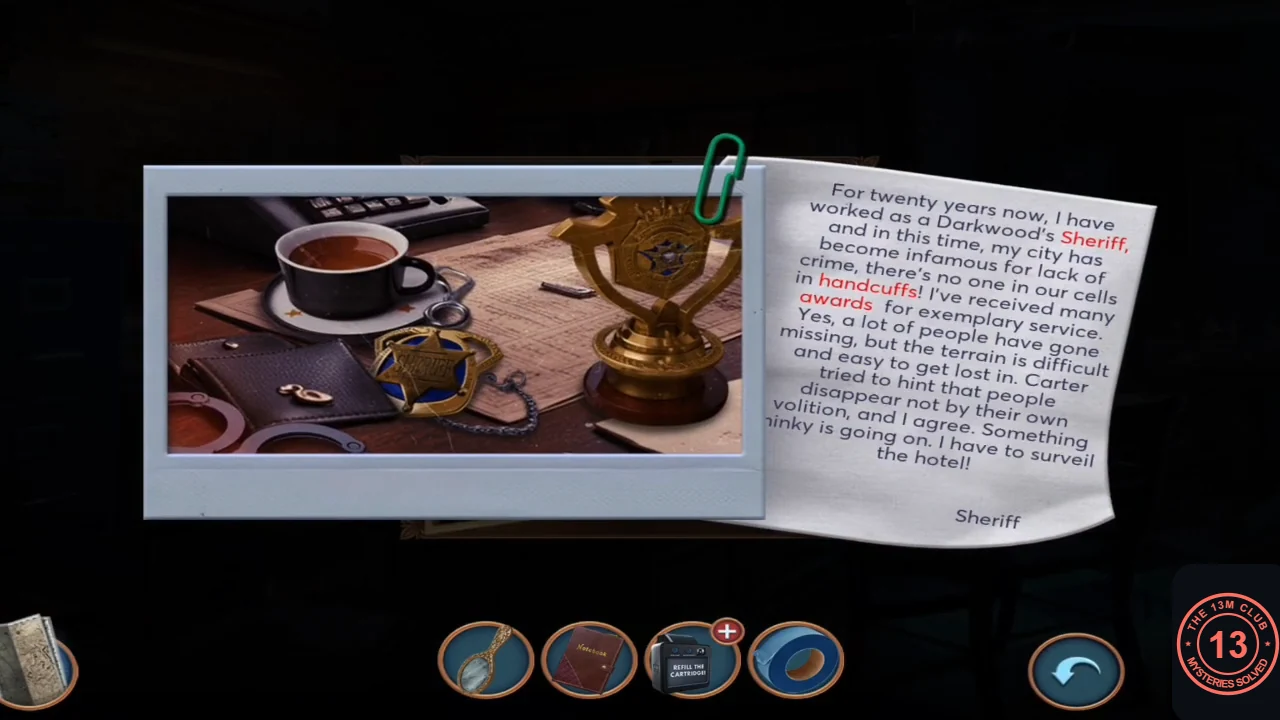
- Read the letter ("For twenty years now, I have worked as Darkwood's Sheriff..."). Tap the three items named in red in the photo: the sheriff's star badge on the wallet, the handcuffs at bottom left and the trophy on the right. An achievement appears.
- Take the red, white and blue award from the drawer.
Medal Cabinet Puzzle
The empty stand in the bookcase cabinet behind the desk takes the award.
- Tap the bookcase cabinet (the crow skull is already on its drawer) and place the award on the empty stand between the two cups.
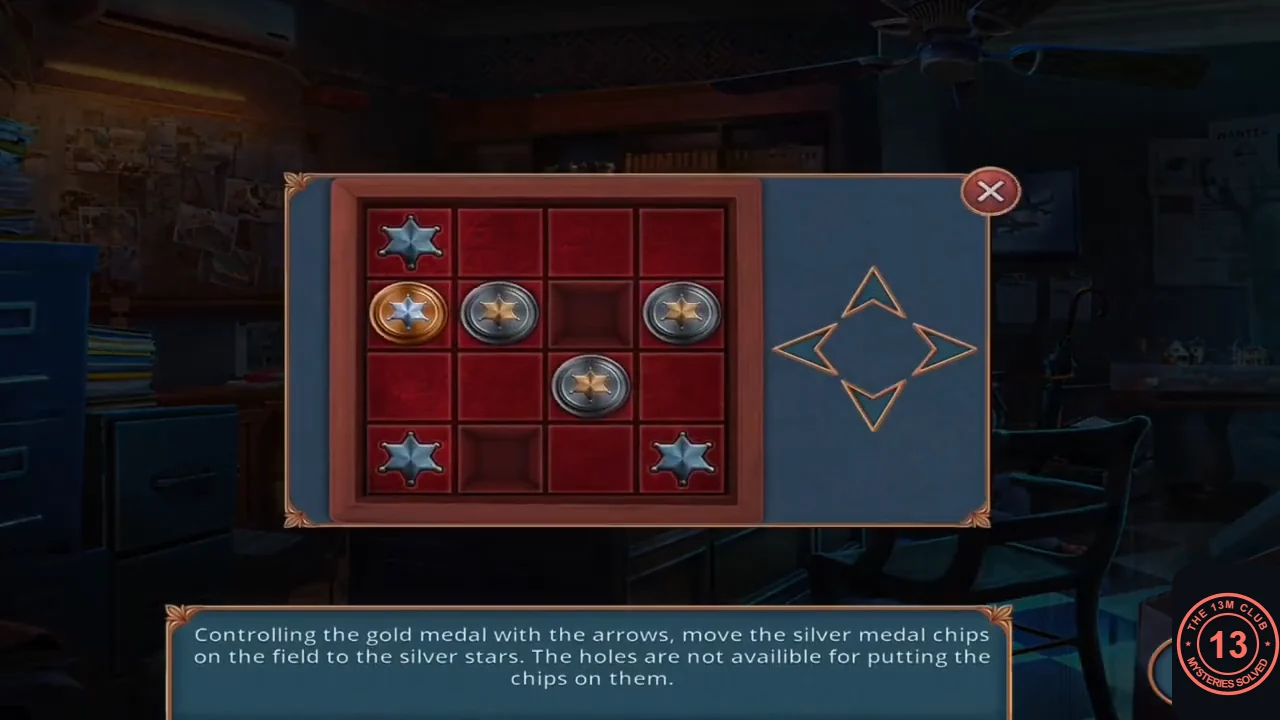
- Use the arrows to move the gold medal; it pushes the silver medal chips. Put a silver chip on each of the three silver stars; chips cannot be pushed onto the holes. In the 4 by 4 grid the stars are at the top-left corner and both bottom corners, the gold medal starts in row 2 column 1, the silver chips start in row 2 column 2, row 2 column 4 and row 3 column 3, and the holes are in row 2 column 3 and row 4 column 2. Press the arrows in this order (18 presses):CODEUp, Right, Right, Right, Down, Down, Left, Left, Up, Left, Down, Right, Right, Right, Up, Up, Left, Left
- Take the soporific gas spray can and the green bandage from the cabinet's lower drawer.
Bandage the Sheriff
Your fourth and last decision-point choice comes after you treat the wound.
- Use the bandage on the Sheriff. He says he must report to the Head of County, but someone has damaged one of the radio towers. Choose a reply: "Are you in on this with Fredrick?" costs 35 coins and gives 1 decision point; "(Stay silent)" is free and gives 0. The Sheriff asks you to fix the tower, and the task "Find the tower's location" starts.