Waterfall: wick, fishing rod and climbing gear
Task: Get into Eldred's house. A suspension bridge crosses the waterfall and a wildcat sits on the stone steps on the left.
- Open the flowerbed with the red flower in the centre foreground. Take the wick bundle (+) and the stone. The red flower cannot be carried yet ("How can I carry it?").
- Open the dirt mound to the right of the bridge. Take the coil of fishing line. The fishing-rod handle is stuck ("Heavy and strong is the way to go here.") and the thorns behind it are too thick for now.
- Use the stone on the mound to knock the rod loose, then take the fishing rod.
- Open the wildcat's niche on the stone steps. Use the fishing rod on the pile of gear under the cat, then take the reel (+) and the climbing equipment.
- Open the cliff below the building above the waterfall and use the climbing equipment. The cliff path puzzle starts.
Cliff path puzzle
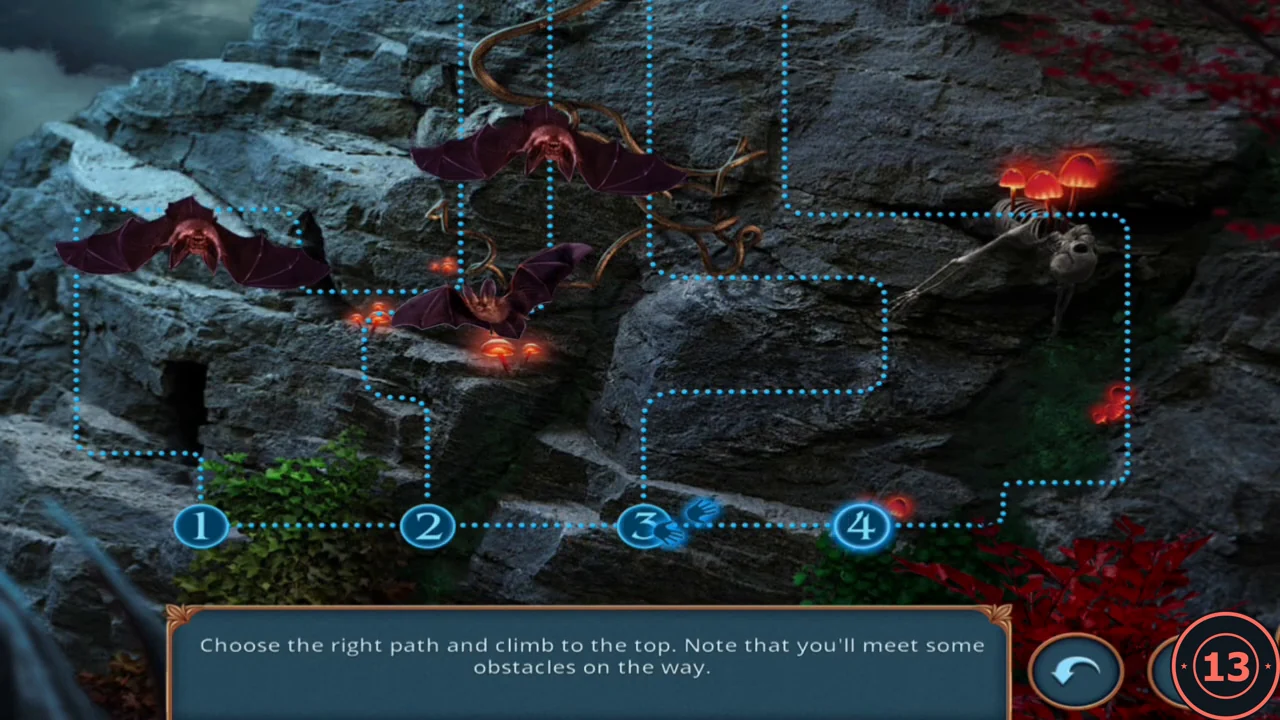
Goal: "Choose the right path and climb to the top. Note that you'll meet some obstacles on the way." There are three stages. In each stage pick one of four starting numbers (1 to 4) at the bottom; the climber follows that route.
- Stage 1: choose 3. Stage 2: choose 1. Stage 3: choose 3. Before choosing, trace each route upward and avoid paths that end at an obstacle; these starts reach the top, and the same tracing works if your layout differs.CODE3, 1, 3
- Enter Eldred's laboratory. Get into Eldred's house completes and a task to save Alice starts. Alice is held in a stasis tank in the centre.
Eldred's lab: blue flashlight and the wooden stencil
Collect a blue light source and a rune stencil.
- Open the steaming pipe panel to the right of the tank. Cut the blue-wrapped bundle with the pocket knife and take firecracker 1/4 and the blue cellophane (+).
- Open the blue cellophane in the inventory. Add the flashlight, then the duct tape, to make a blue-light flashlight.
- Open the safe in the right-hand bookcase. Take Eldred's note and picture; the note mini-task opens.
Eldred's note
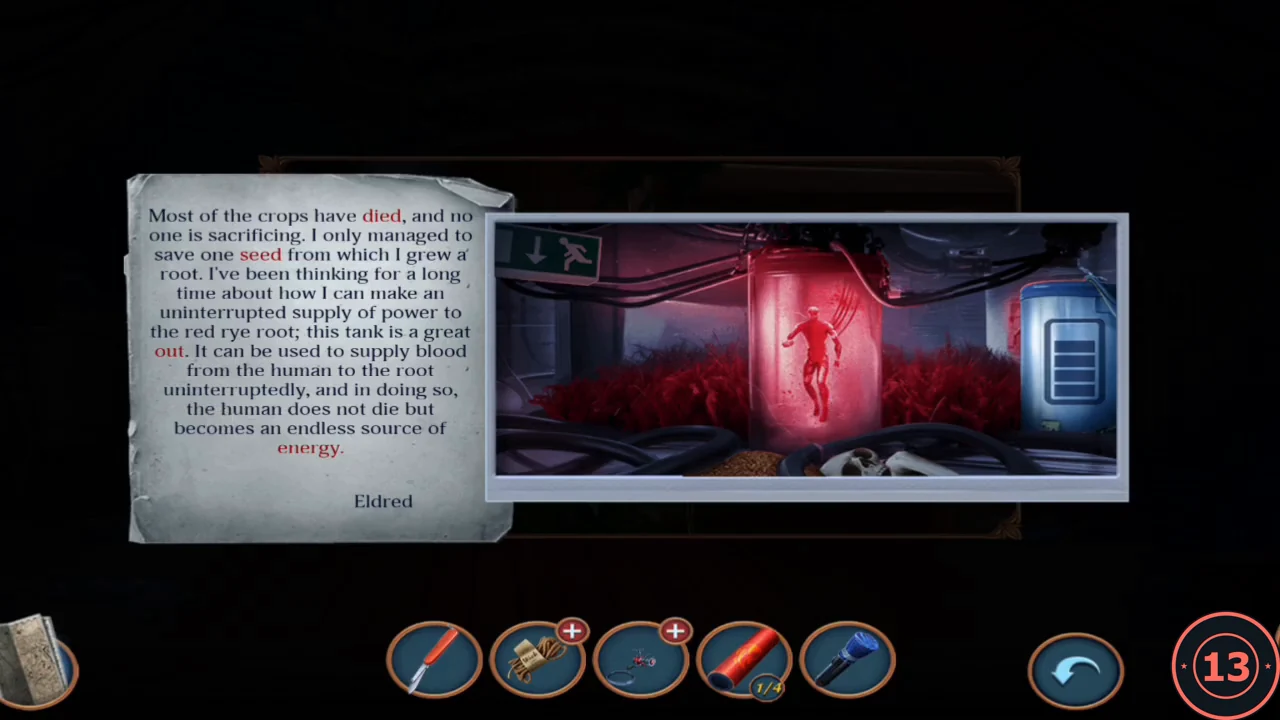
Four words in the note are red. Tap the matching part of the picture for each one; the word turns black when it is matched.
- Match the words: "died" to the skull and bones at the bottom, right of centre; "out" to the EXIT sign at the top left; "energy" to the battery on the right; "seed" to the pile of seeds under the tank at the bottom.
- Back at the safe, the plain wooden board says "I need something to cut out these symbols here." Carve it with the pocket knife and take the wooden stencil.
- Open the notebook with the rune cipher on the left desk. Place the stencil and shine the blue-light flashlight over it. The hidden text reads BLUE LIGHT and the desk becomes a hidden-object scene.
Rune hidden-object scene
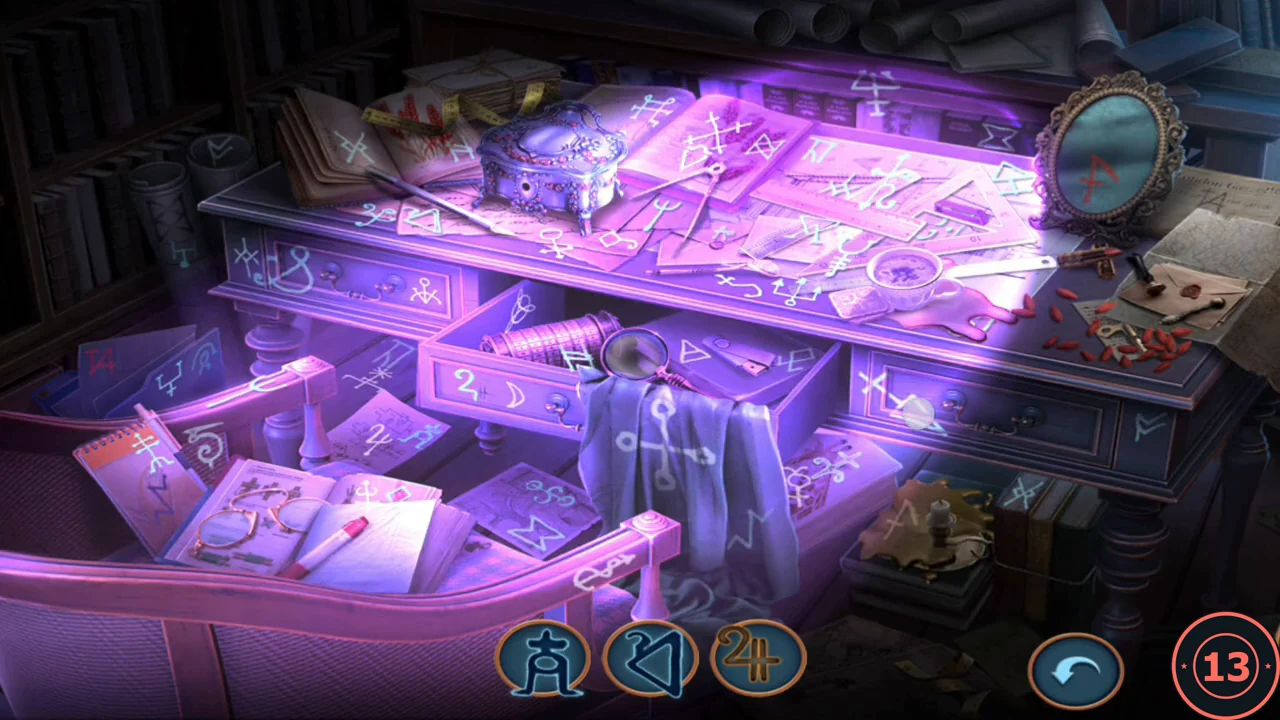
The tray shows three runes at a time. Find each glowing rune on the desk.
- Tap the matching runes on the desk as they appear in the tray. Runes with an orange outline need an extra action: take the magnifying glass ("I need a closer look") and use it on the papers at the top right to reveal a tiny rune, and open the jewelry box on the desk ("One, two, and it's open!") for the last one.
- Take the reward: the reservoir remote.
Freeing Alice and Decision 4
Open the stasis tank.
- Use the reservoir remote on the tank panel (the "Patient" lock screen). The tank opens and Alice steps out in a trance.
- Decision 4: "Get scared" is free and worth 0 decision points; "Stop Alice" costs 25 coins and is worth 2; "Try to wake Alice up" costs 35 coins and is worth 4. This guide takes "Get scared". Alice clutches her head and leads you to the root ruins.
Root ruins: lighter, red root and the altar
Task: Remove the spell. A huge red root grows through the ruins.
- Open the base of the tree (the green bulb among the roots, right of centre). Take the green lighter and the small red root sprout. The bulb itself needs "a special approach" later.
- Open the skull altar in the centre and use the red root on the left ram skull's eye socket. The root crawls in and pushes out a crumpled note, a blue dial arrow (1/2) and a wooden crescent. Read Eldred's note (he hid an antidote "where no one would think to look"), then take the arrow and the crescent.
- Open the threaded valve post and place the wooden crescent under the nut. The valve puzzle starts.
Valve drop puzzle
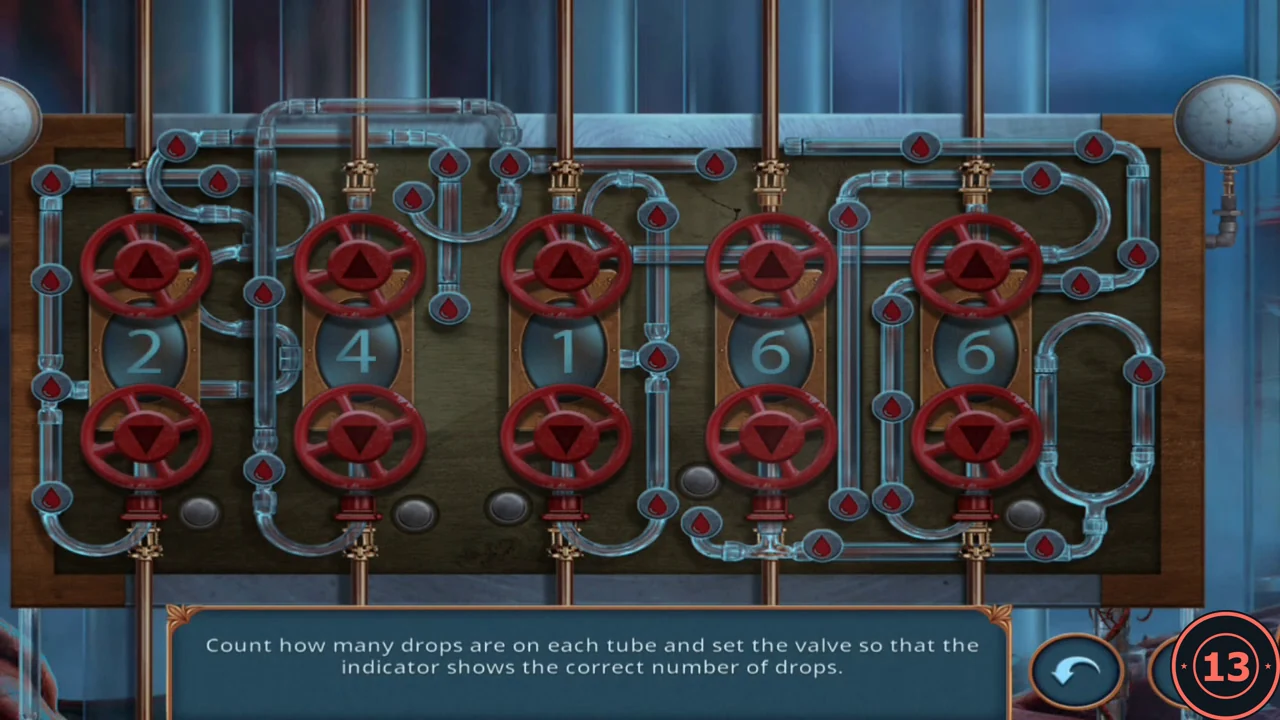
Goal: "Count how many drops are on each tube and set the valve so that the indicator shows the correct number of drops." Five tubes each have a counter; the wheel above a counter raises it and the wheel below lowers it.
- Count the drops on each tube and set the counters to 8, 5, 6, 4, 7 from left to right (example starting values: 2, 4, 1, 6, 6).CODE8, 5, 6, 4, 7
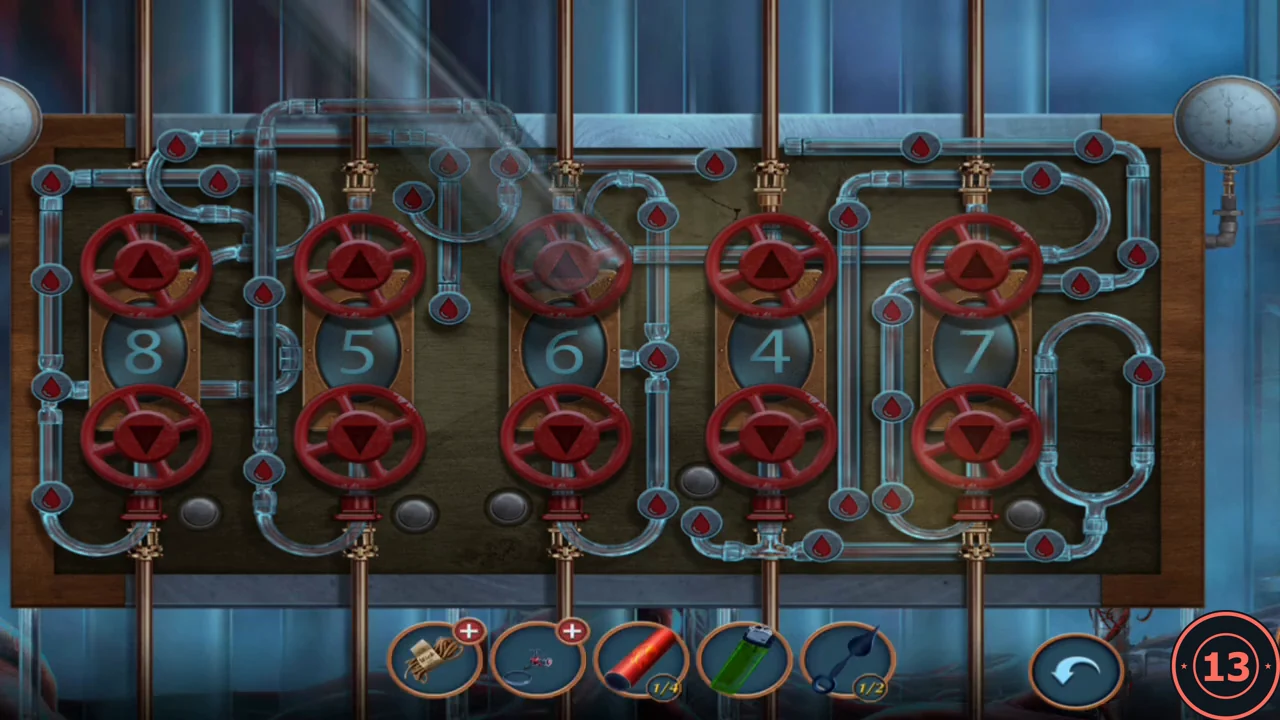
Solved counters: 8, 5, 6, 4, 7. - Take the antidote jar labelled "Prototype No. 535".
Alice's memory: fragment swap puzzle
Give Alice the antidote; she starts to remember what Eldred did.
- Use the antidote on Alice, who is lying on the left. She explains that Eldred wants revenge and to revive the rye through her.
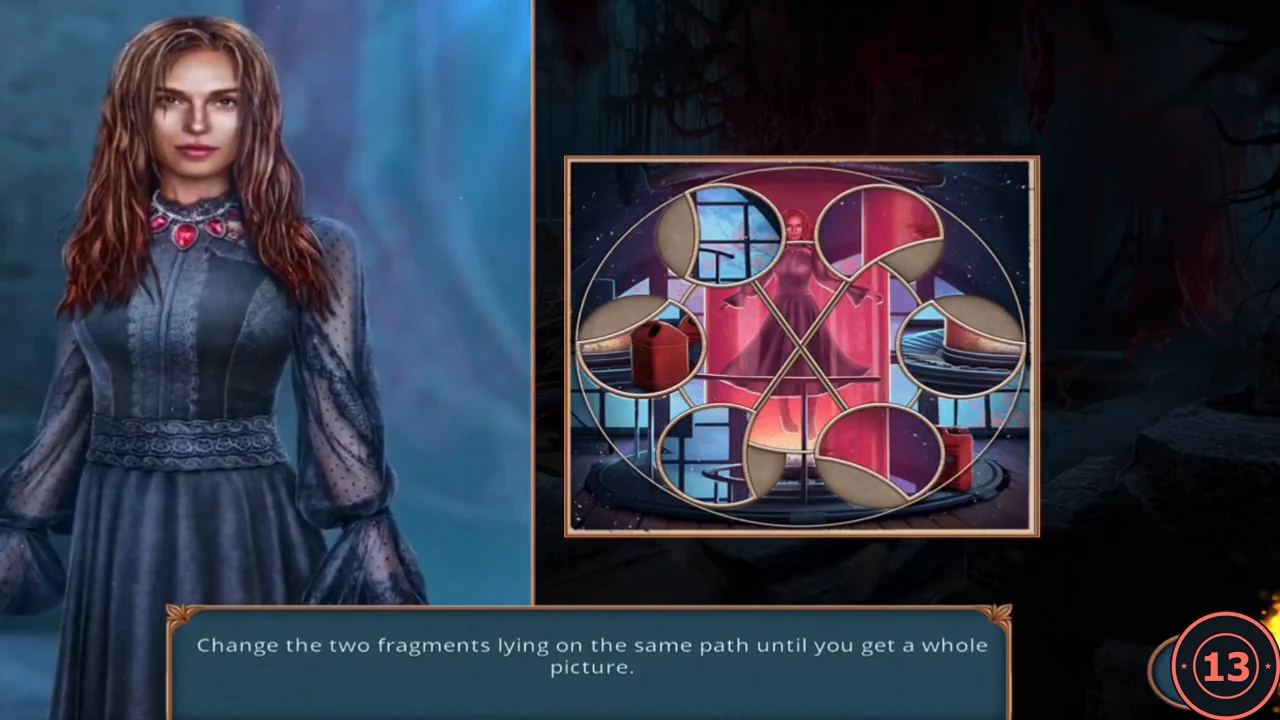
- Goal: "Change the two fragments lying on the same path until you get a whole picture." Six circular cutouts sit around a crossing X of curved paths, and each cutout is split into two picture pieces. Tap a piece (it is outlined in blue), then another piece on the same path, to swap them. The finished picture shows Alice floating in a red stasis tube on a round railed platform, with two red canisters at the lower right and arched windows behind. The starting arrangement may differ in your game: place the pieces with obvious landmarks first (the canisters, the windows, the platform rail), then swap the rest along their shared paths.
Decision 5: the locked greenhouse
Alice mentions Eldred's greenhouse of prototypes and a passage to it. The game asks: "Do you want to go inside and maybe learn more about Eldred's connection to the rye?"
- Decision 5: "I have to see this!" costs 1 key and is worth 6 decision points; "I don't need it." is free and worth 0. This guide spends the key and takes "I have to see this!". The rest of this guide follows that path; the free path is not covered.
- After the scene you automatically receive a sapper shovel and arrive in the greenhouse. The task Learn how Eldred got his powers starts.
Greenhouse: plant fang and spray bottle
The greenhouse has a microscope on the left, a computer desk at the back, a geodesic dome and a carnivorous plant on the right.
- Open the microscope desk on the left. Take the glass slide, the red funnel and the wooden ruler.
- Open the carnivorous plant in the right foreground and hold out the ruler. The plant bites it; take the plant fang it leaves behind.
- Open the red lockbox on the computer desk ("Opening this box requires some additional help.") and use the plant fang on the lock. Read Eldred's note about the destroyed rye fields and take the empty spray bottle.
- Open the metal locker beside the dome with the large glass flask. Place the spray bottle, insert the funnel and let the flask pour. Take the filled spray bottle.
Waterfall: secateurs, flower spray and the second arrow
Travel back through the root ruins and the lab to the waterfall.
- Open the red flower in the centre foreground and dig the dirt pile beside it with the sapper shovel. Take the secateurs.
- Use the filled spray bottle on the red flower. The liquid turns pink; you now have a flower spray.
- Open the thorny bush behind the dirt mound right of the bridge and cut it with the secateurs. Take the fishing hook and the second blue dial arrow (2/2).
- Travel to Eldred's lab, open the steaming pipe panel to the right of the tank and place both dial arrows on the gauge. The dial puzzle starts.
Pressure dial puzzle
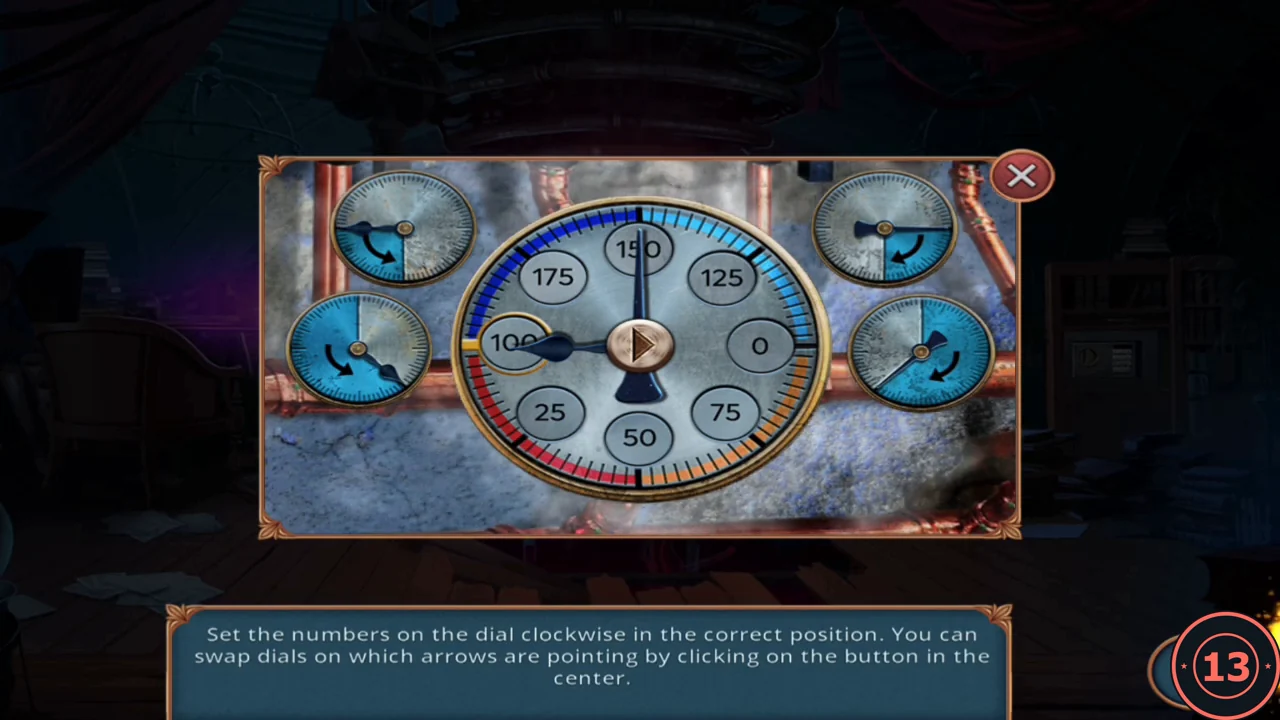
Goal: "Set the numbers on the dial clockwise in the correct position. You can swap dials on which arrows are pointing by clicking on the button in the center." Eight number discs (0, 25, 50, 75, 100, 125, 150, 175) sit around the big gauge. Two hands point at discs; the four small side gauges move the hands, and the centre button swaps the two discs the hands point at.
- Put 0 at the gold marker on the left, then continue clockwise: 25 at the upper left, 50 at the top, 75 at the upper right, 100 on the right, 125 at the lower right, 150 at the bottom and 175 at the lower left. Point the two hands at a wrong disc and the disc that belongs in its place, then press the centre button to swap them. A disc in its correct place gets a green ring. Fix one position at a time. Example start: 150, 125, 0, 75, 50, 25, 100, 175 clockwise from the top; your start may differ.
- Take the blue key card from its holder on the pipe panel.