Jen's Abandoned Campsite and Lockbox
Ranger Ethan Hill starts on the trail with a note from his colleague Jon. The first lock is in Jen's torn tent.
- Read Jon's note at the start of the trail. It tells you to head north-east (bearing 45°) from the old tool shed; the game then walks you to Jen's ransacked campsite.
- Tap the ranger ID lying on the ground: it belongs to Jennifer Reid, born 12/18/1947. The ID is saved in your journal.
- Go into the torn orange tent and open the backpack. Inside is a small lockbox with four number dials.
- Set the dials to 2 1 8 1. The lockbox opens and gives you Jen's journal, which holds four photos of trail landmarks.CODE2181
Trapper Cabin and Wardrobe Block Lock
Jen's landmark photos lead to a trapper's cabin. Search the ground floor and open the wardrobe.
- Follow the landmarks from the campsite: past the rocky outcrop, the fallen log and the bleached dead tree to the trapper cabin.
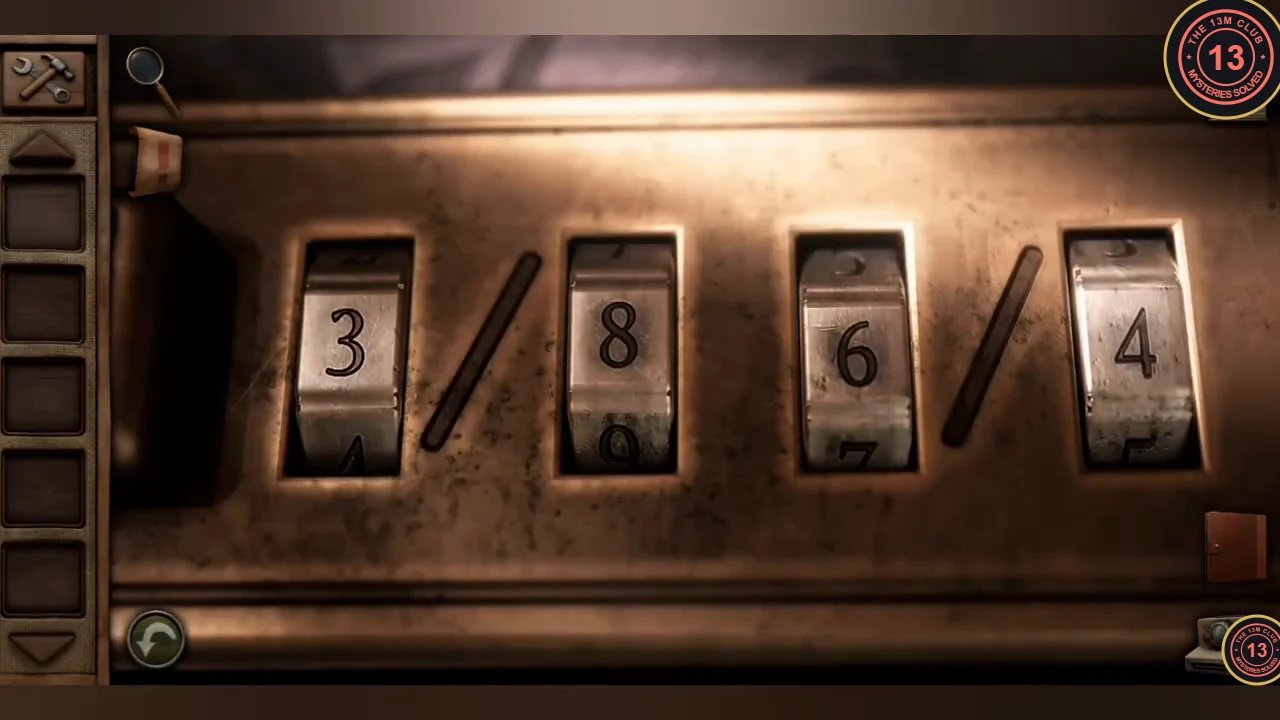
- Inside the cabin, note the number 6 inside a hexagon on the plaque under the mounted deer head. The back door is locked for now.
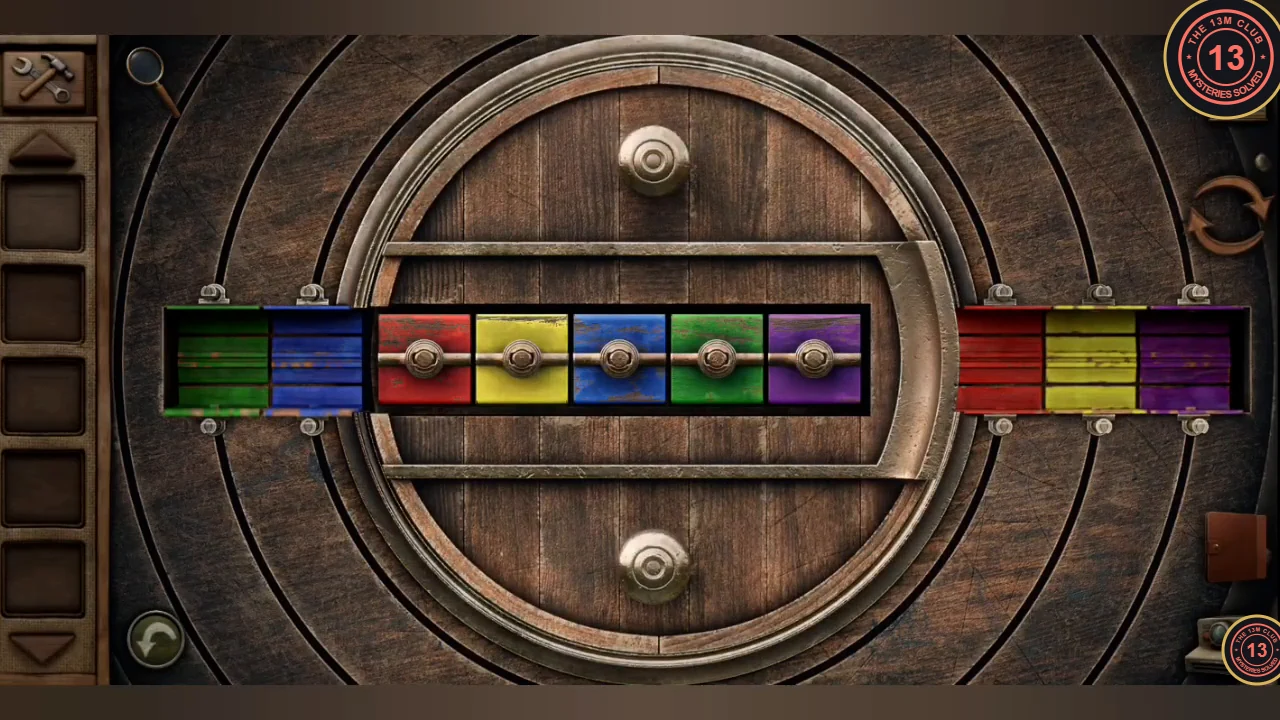
- Open the wardrobe's block lock. The left track has green and blue slots and the right track has red, yellow and purple slots; the five coloured blocks start in the centre bar. Slide blocks along the bar and rotate the centre disc to move them out of each other's way, until every block sits on its matching colour: green and blue on the left, red, yellow and purple on the right, with the centre bar empty. Your starting arrangement may not match the one shown; aim for the finished layout rather than copying moves.
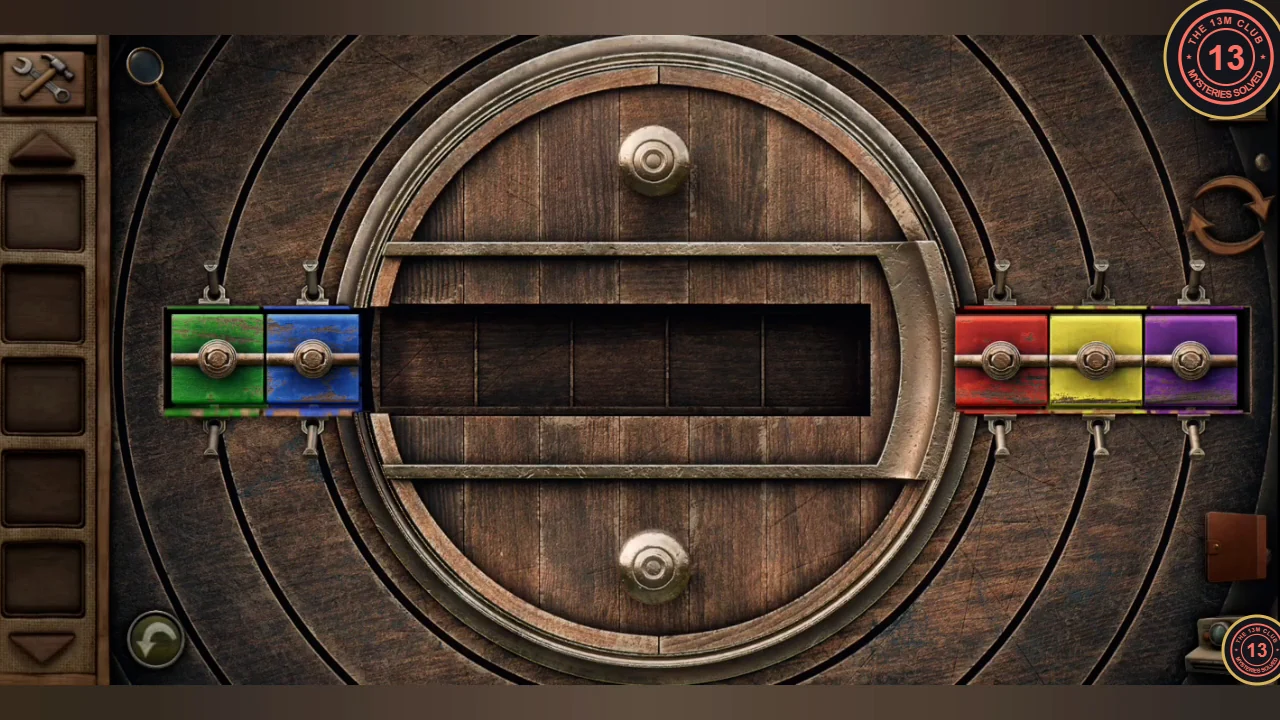
Finished layout: green and blue on the left, red, yellow and purple on the right, centre bar empty. - Take the coat hanger from the wardrobe and look at the rabbit decoy inside: a square card taped to it shows the number 4.
- In the kitchen, take the empty teapot. Look at the photos from Jen's broken camera on the floor: a radio tower in the distance and a hunter standing in a doorway.
- Note the Ironclad floor safe with a round lock made of ring segments. You will open it later with the shooting-target clues.
Cabin Attic
The coat hanger reaches the attic hatch in the ceiling.
- Hook the coat hanger into the ring in the ceiling to pull down the attic ladder, then climb up.
- Look out of the attic window at the birdhouse: it shows the number 8 inside a circle.
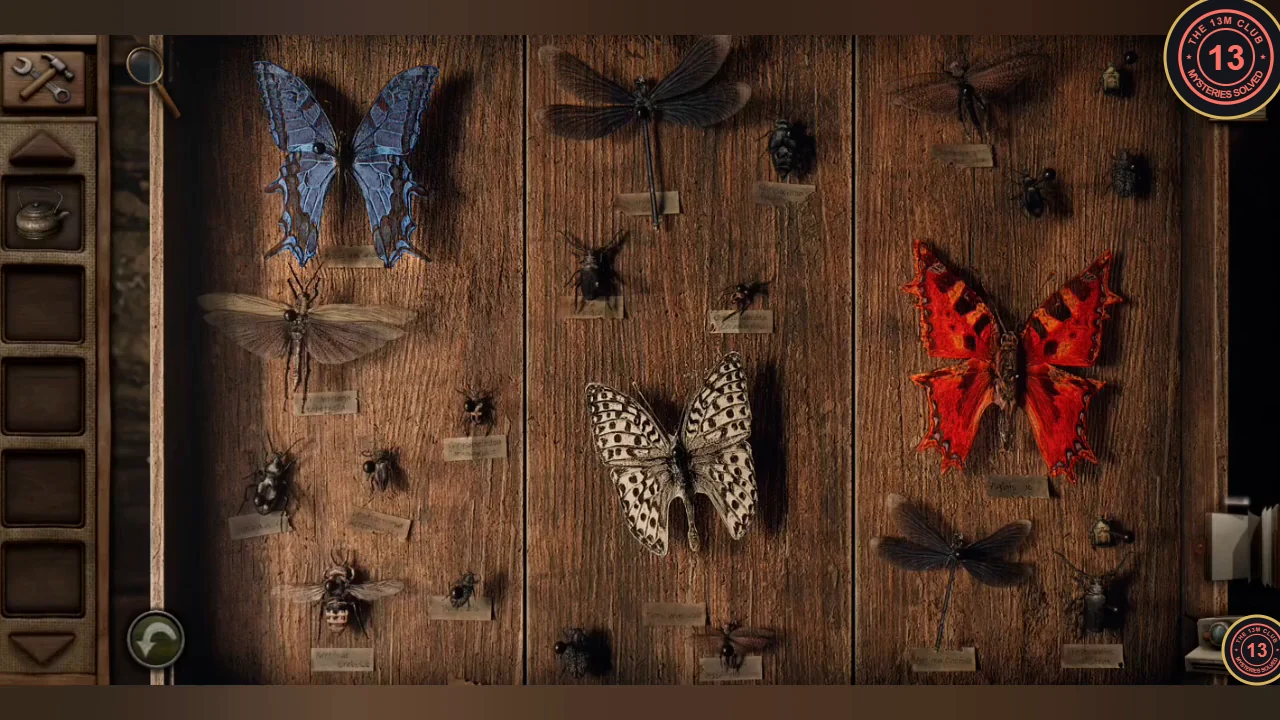
- The nightstand drawer is locked. Photograph the butterfly display on the wall: a blue swallowtail, a white spotted butterfly and a red butterfly. You need their wing shapes for the outbuilding lock.
Cabin Yard and Butterfly Shed Lock
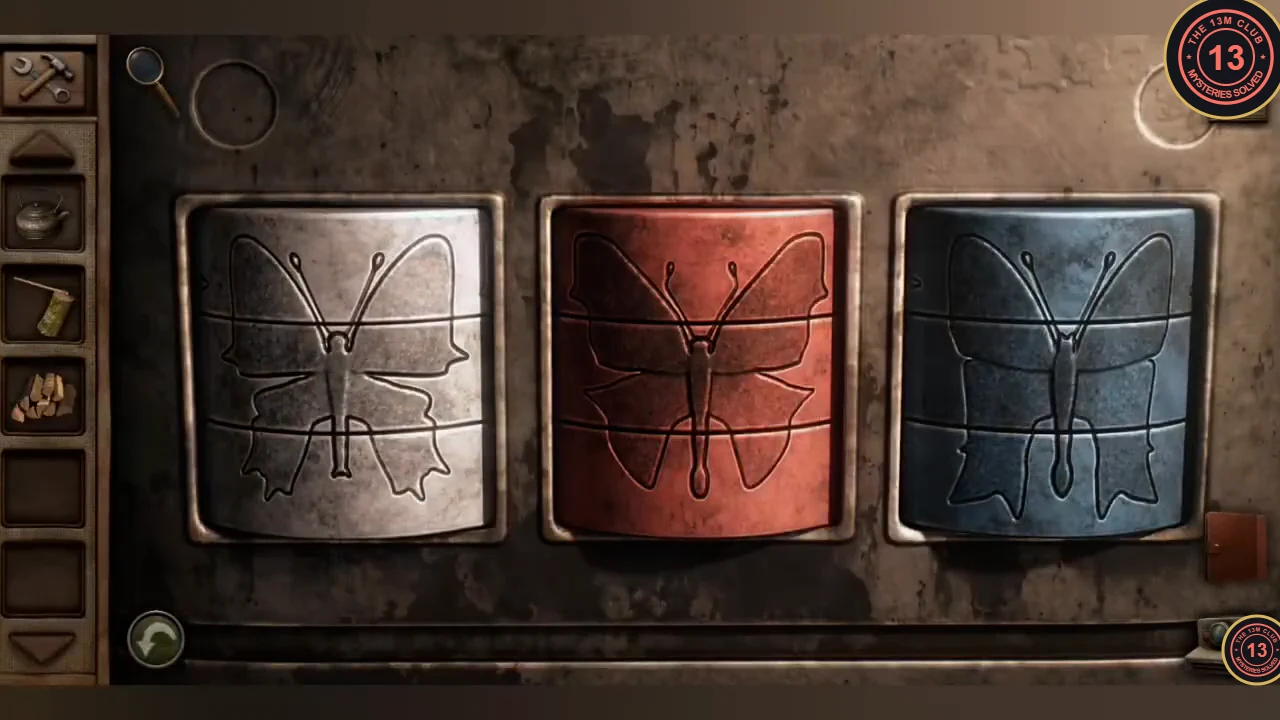
Collect firewood in the yard and open the outbuilding with the butterfly shapes from the attic.
- On the porch, note the axe stuck in a log and the thermometer on the wall.
- Take firewood from the wood shelter. Next to it stands a hydraulic log splitter.
- The outbuilding lock has three coloured butterfly plates whose wing shapes you can change. Tap the wings until each plate matches the butterfly of the same colour in the attic display: rounded wings on the white plate, jagged wings on the red plate and swallowtail wings on the blue plate. The door opens.
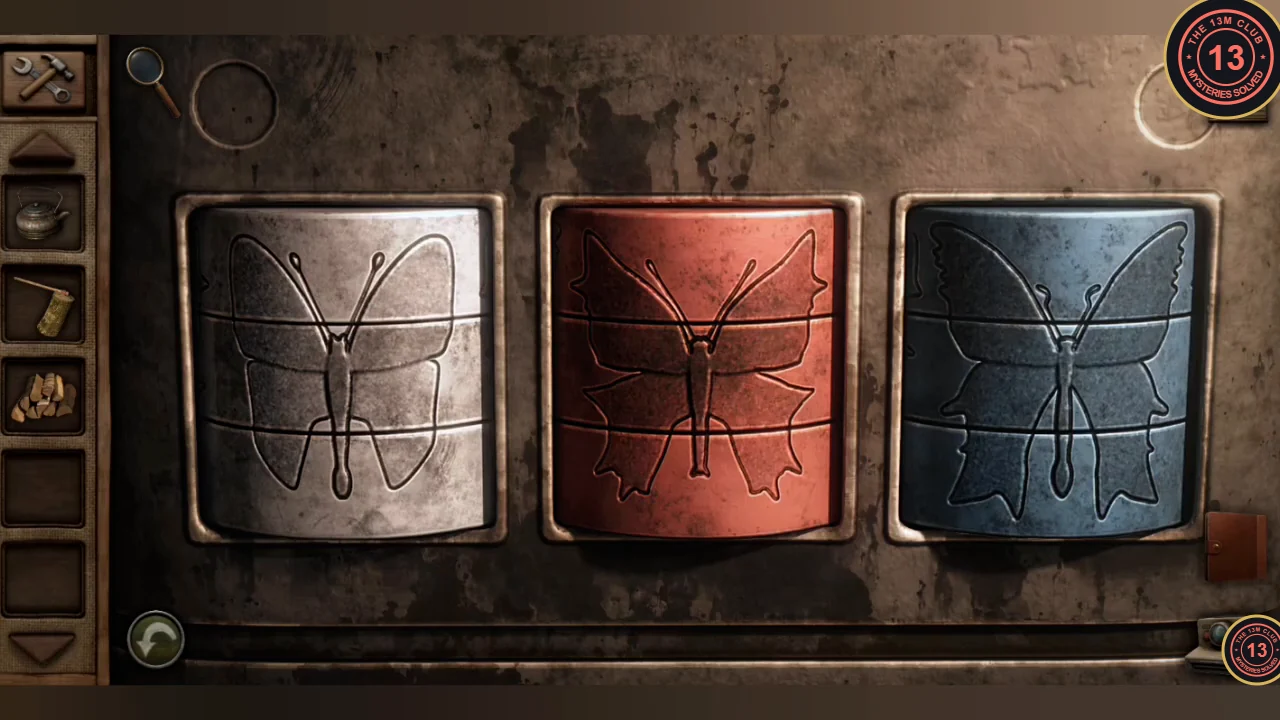
Solved: rounded wings on white, jagged wings on red, swallowtail wings on blue. - Inside, take the handle. The tool cabinet hatch is held by screws, so you need a tool before you can open it.
Log Splitter and Hunting Stand
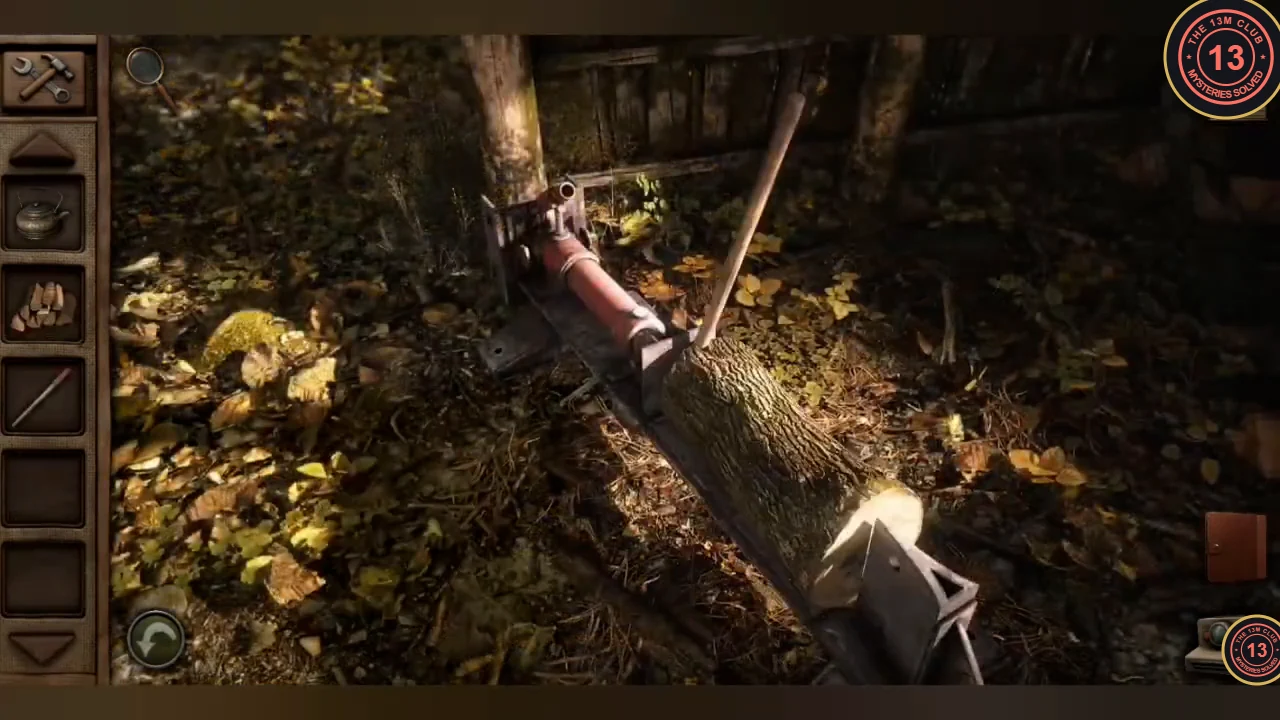
Free the axe, then reach the hunting stand in the woods.
- On the porch, pick up the log with the axe still stuck in it. You cannot pull the axe out by hand yet.
- Put the log with the axe in it on the log splitter, attach the handle and pump it until the log splits. The axe comes free and goes into your inventory.
- At the shooting range, photograph the paper target with its bullet holes.
- Further along the trail a sack hangs from a bent sapling. Chop the sapling with the axe so the sack falls, then take the rope ladder out of it.
- Hang the rope ladder on the hunting stand and climb up. Photograph the second paper target, take the bear trap and note the chest with an animal-track lock (it starts at 4-1-3-9). The overlook here needs a viewing aid that you get later.
Dry Well and Ironclad Safe
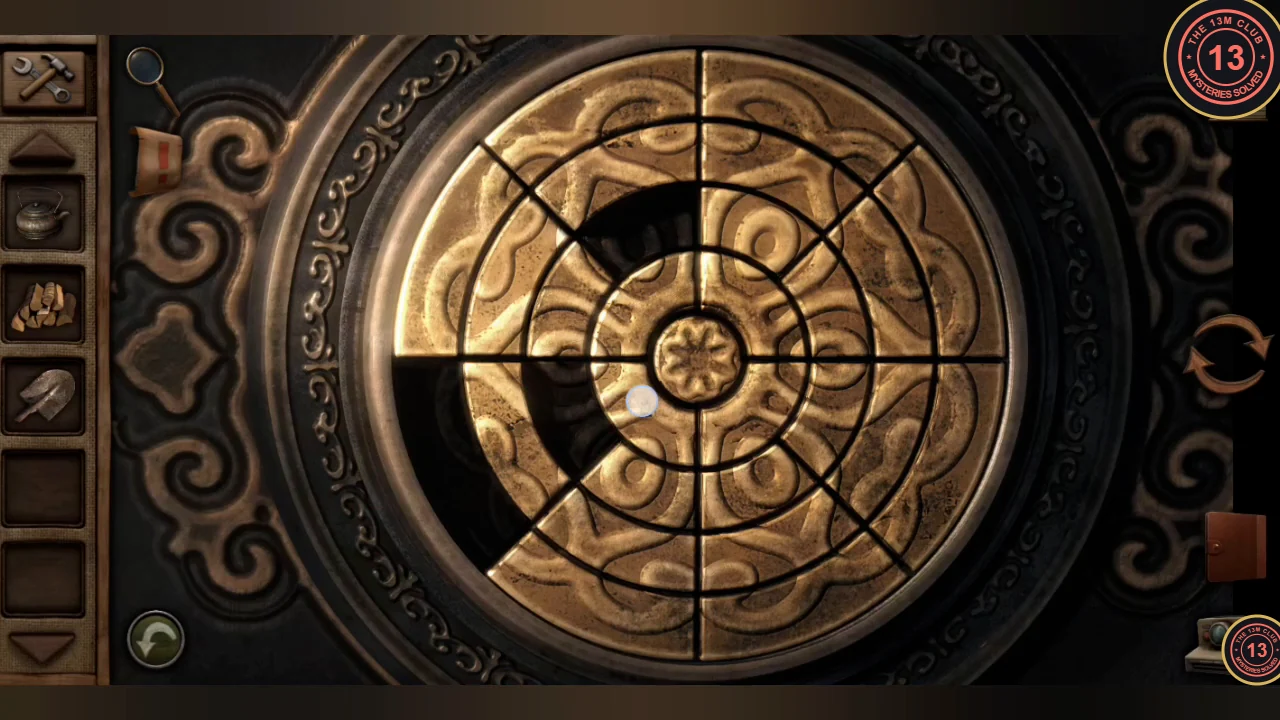
Fish a spade head out of the well and open the floor safe with the two targets.
- At the dry well, attach the bear trap to the well rope, lower it and wind it back up. It brings up a rusty spade head.
- At the Ironclad safe in the cabin, combine the bullet holes from both target photos: press in every ring segment that has a hole on either target. When all the matching segments are pressed in, the safe opens.
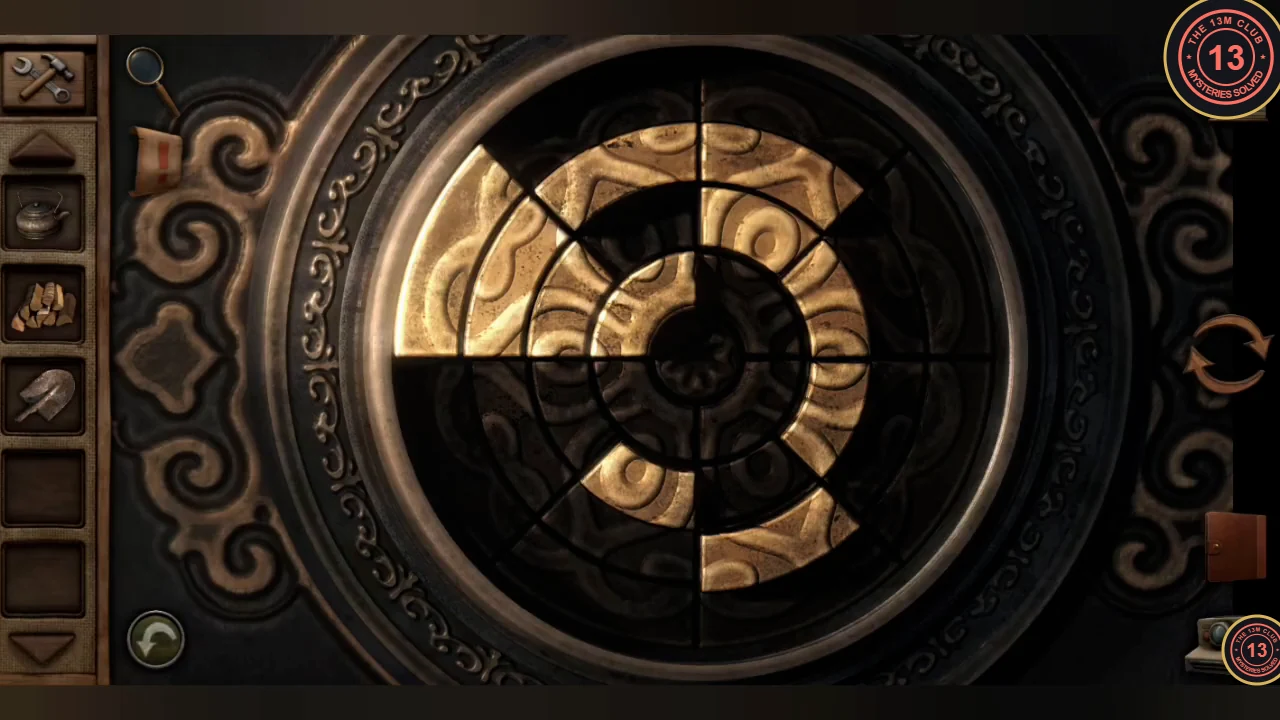
Solved: the dark segments are the ones pressed in, matching the bullet holes on both targets. - Take the small ornate key and look at the photo of a mossy rock marked with a red X.
- Go back to the attic, unlock the nightstand drawer with the ornate key and take the hex key.
Wire Panel Cabinet and Buried Chest
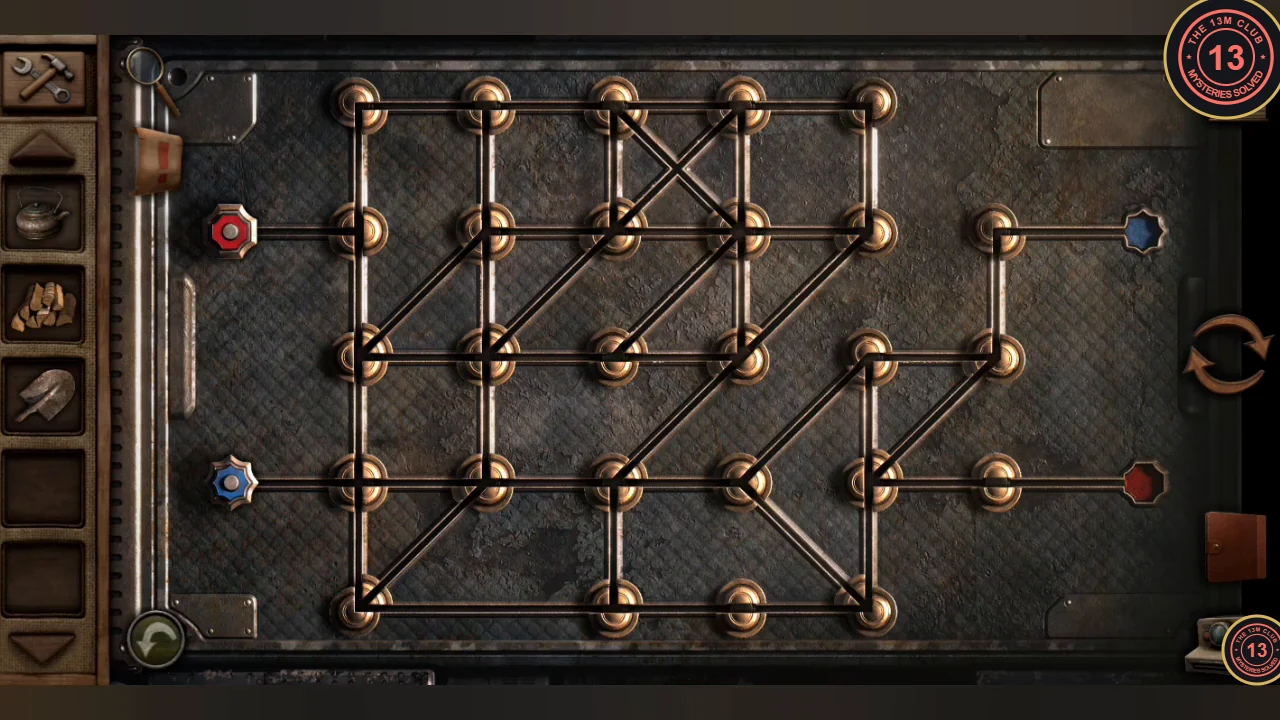
Open the tool cabinet, repair the spade and dig up a chest.
- In the outbuilding, unscrew the tool cabinet hatch with the hex key. Behind it is a panel of gold junctions joined by wires, with a red nut and a blue nut on the left.
- The red nut starts on the left of the second row and must reach the red socket on the right of the fourth row; the blue nut starts on the left of the fourth row and must reach the blue socket on the right of the second row. Only the two nuts move; the gold junctions are fixed. Tap a nut, then tap one of the glowing junctions next to it to move it one junction along a wire. Every junction a nut passes through turns dark and can never be entered again by either nut, so the two routes must not share a junction. Wires may cross where they form an X without a junction. If you get stuck, the round arrows on the right reset the panel. In the routes below, rows are counted from the top and junctions from the left; the bottom row has only four junctions.
- Red nut: move it to the first junction of row 2, up to the top-left corner, right along the top row to its third junction, then diagonally down-right across the X to the fourth junction of row 2. Continue diagonally down-left to the third junction of row 3, left to the second junction of row 3, down to the second junction of row 4 and diagonally down-left to the bottom-left corner. Go right along the bottom row through its next three junctions, up to the fifth junction of row 4, right to the last junction of row 4 and into the red socket.
- Blue nut: move it to the first junction of row 4, up to the first junction of row 3, diagonally up-right to the second junction of row 2 and right to the third junction of row 2. Cross the X diagonally up-right to the fourth junction of the top row, go right to the top-right corner and down to the fifth junction of row 2. Then go diagonally down-left to the fourth junction of row 3, diagonally down-left again to the third junction of row 4, right to the fourth junction of row 4, diagonally up-right to the fifth junction of row 3, right to the last junction of row 3, up to the last junction of row 2 and into the blue socket. The cabinet opens. You can move the nuts in any order or take turns, as long as each follows its own route.
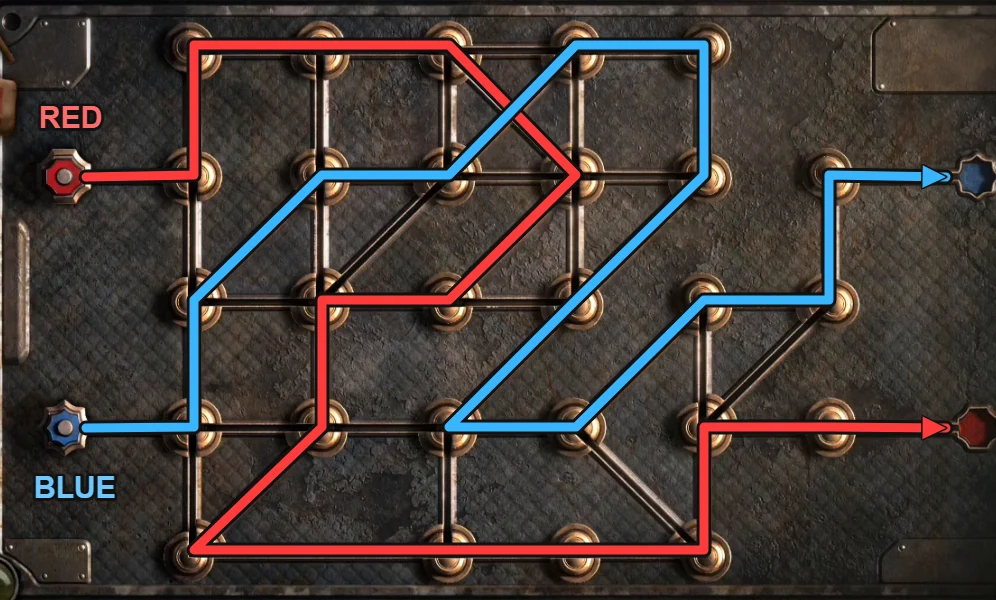
The two routes from the recording: red and blue never share a junction and cross only at the X near the top. 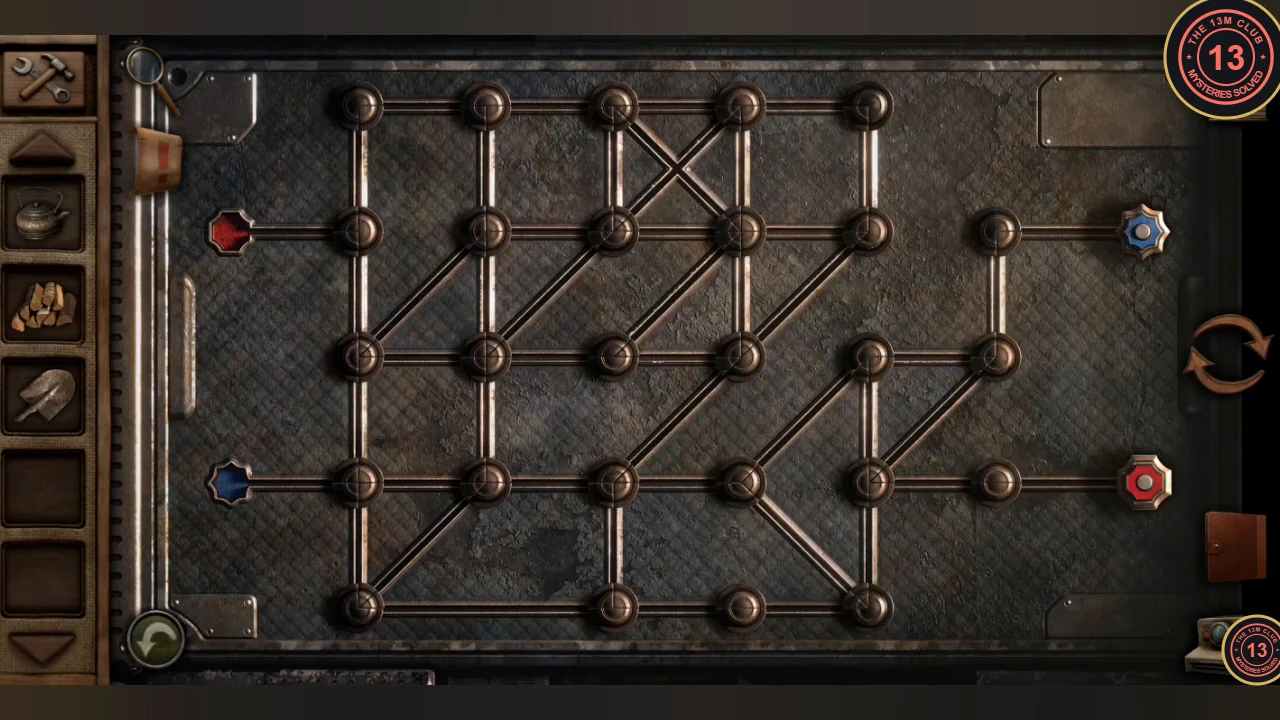
Solved: blue nut in the upper right socket, red nut in the lower right socket. - Take the spade shaft and combine it with the rusty spade head to make a spade.
- Find the mossy rock from the red X photo near the shooting range and dig in front of it with the spade. A small chest comes up.
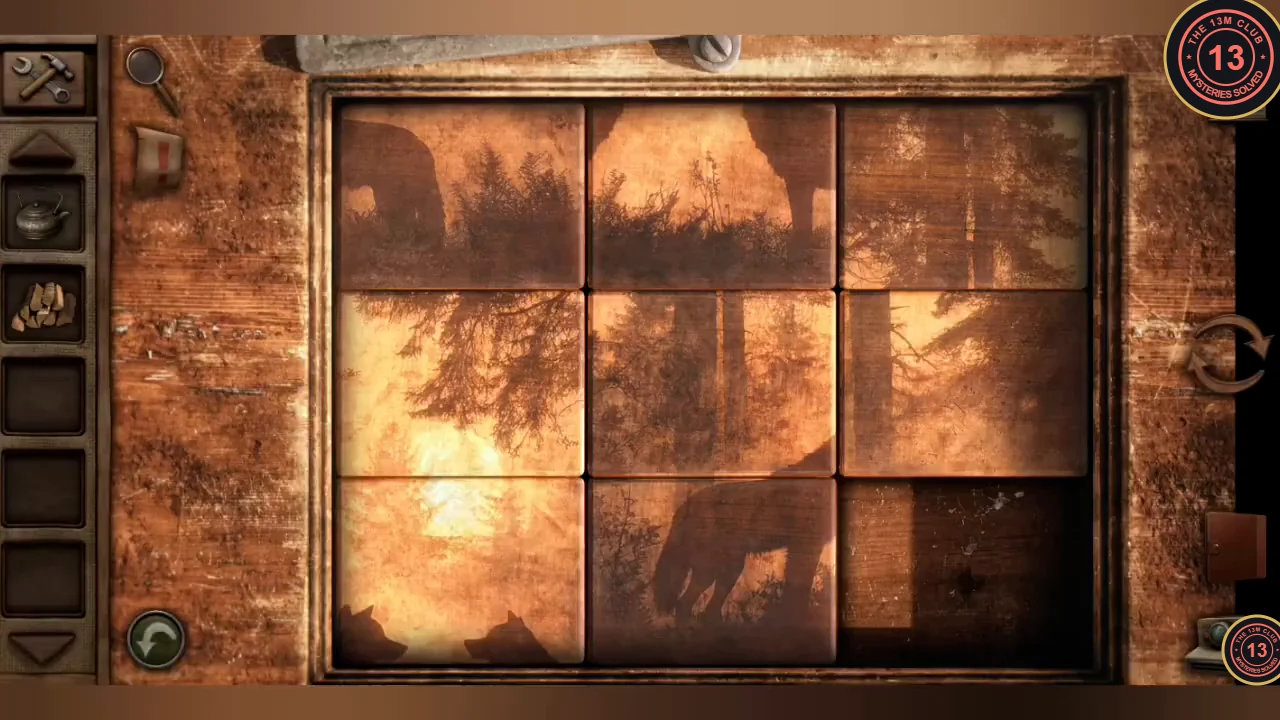
The wolf sliding picture on the chest lid (your starting order may differ). - The chest lid is a 3x3 sliding picture of two wolves. Slide the tiles until the picture is complete. The starting order may differ, so build it row by row: finish the top row first, then solve the last two rows together. Take the old key inside.
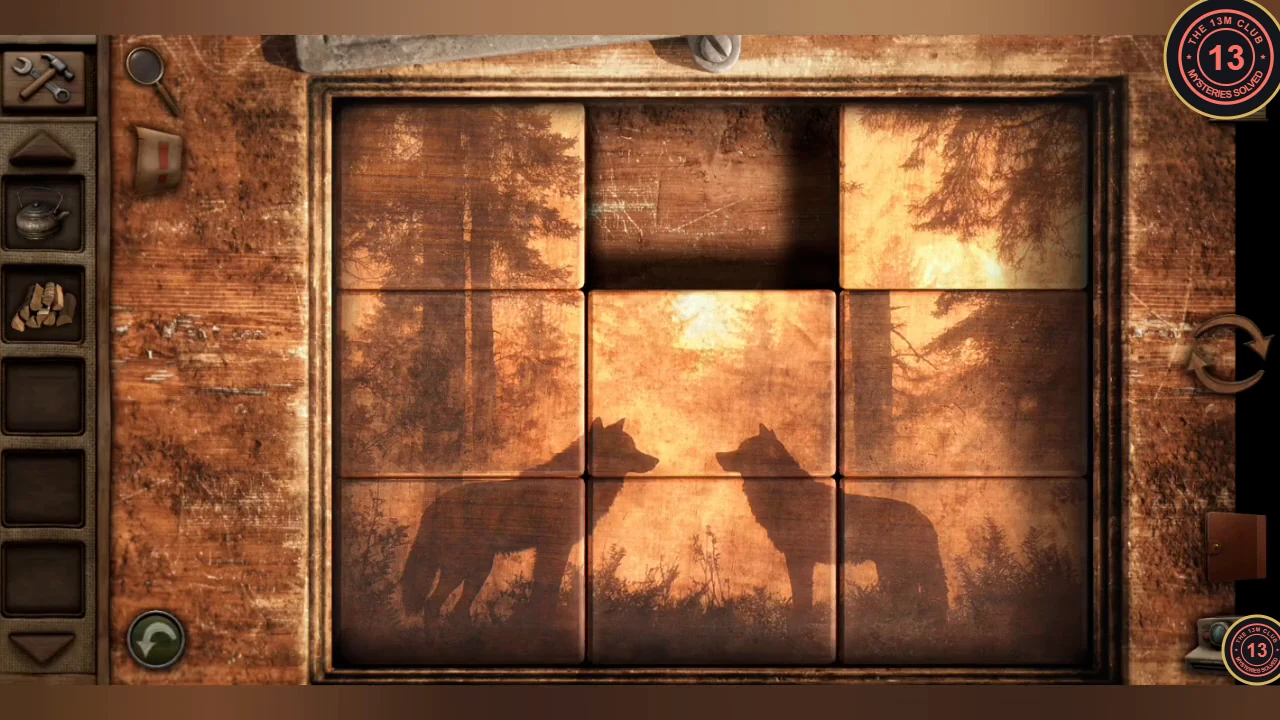
The completed wolf picture. In the recording the gap ends at the top middle.
Cabin Cellar and Animal-Track Lock
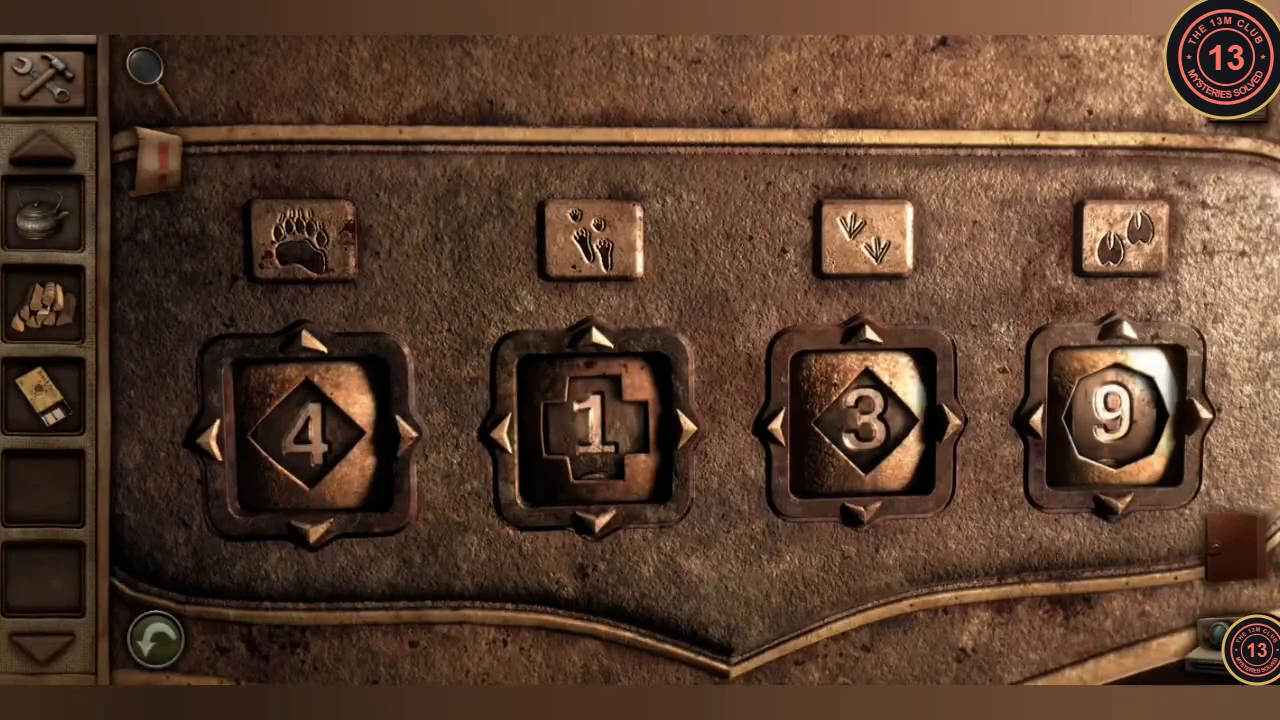
The old key opens the cabin's back door. The animal numbers and shapes you have collected open the hunting stand chest.
- Unlock the cabin's back door with the old key and go down into the cellar.
- Lift the corner of the bear-skin rug to find the number 3 inside a cross shape, and take the matches. A chest with five number dials stands here too.
- Climb back up the hunting stand. The chest lock shows, from left to right, a bear paw, a rabbit track, a bird track and a deer hoof. Each dial shows a number inside a shaped frame, and both must match that animal's clue. The left and right arrows beside a dial change the frame's shape; the up and down arrows change the number. Set bear 3 in a cross (rug), rabbit 4 in a square (decoy), bird 8 in a circle (birdhouse) and deer 6 in a hexagon (deer head). Take the spigot from the chest.CODE3486
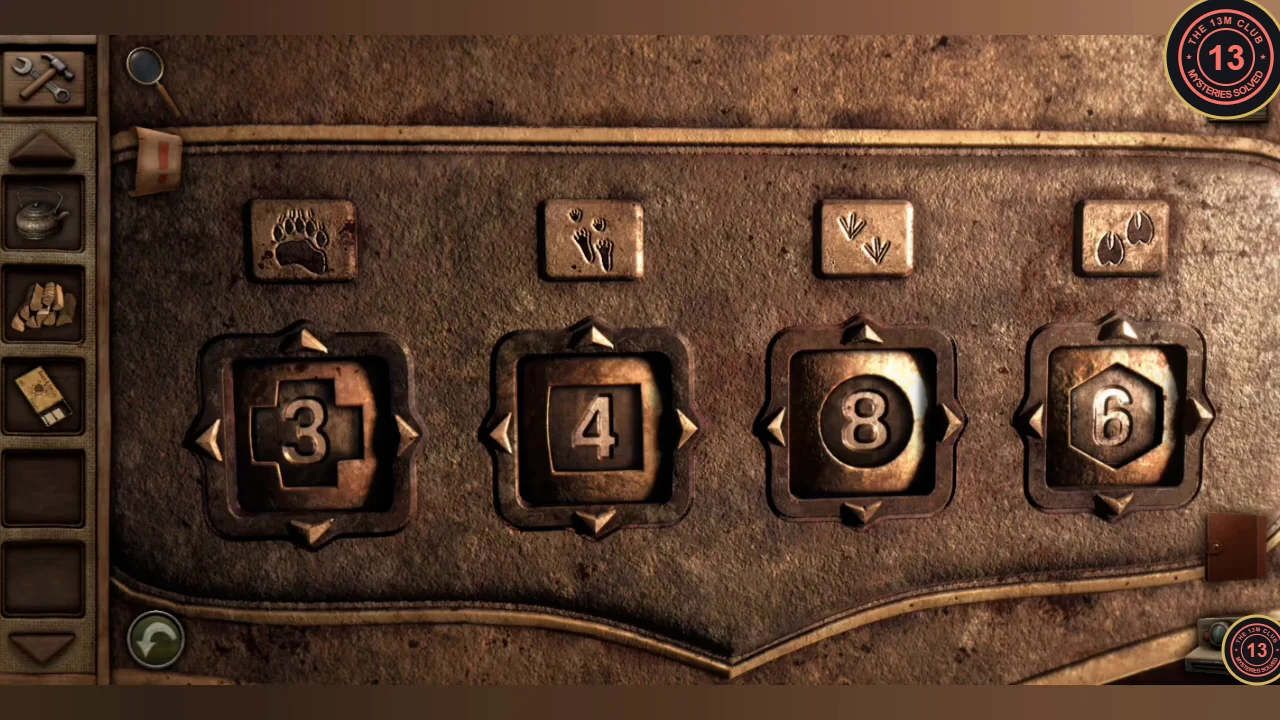
Solved: bear 3 in a cross, rabbit 4 in a square, bird 8 in a circle, deer 6 in a hexagon.
Boiling Water and Cellar Thermometer Code
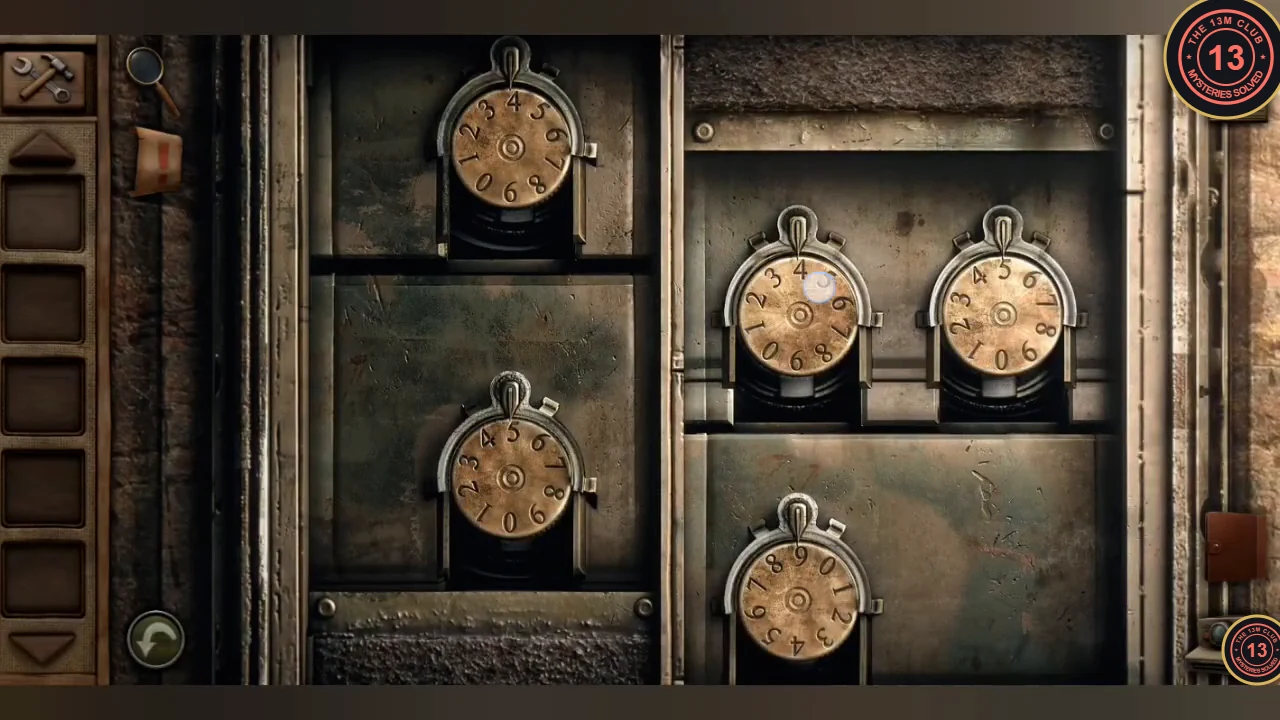
Boil water to heat the porch thermometer. Its marked temperatures open the cellar chest.
- Fit the spigot on the rain barrel, put the teapot under it and open the tap. Take the full teapot.
- Put the firewood in the cabin stove and light it with the matches. Place the teapot on the stove and wait until the water boils.
- Hold the hot teapot under the porch thermometer. The mercury rises to the two values marked in orange: 80 °C and 160 °F.
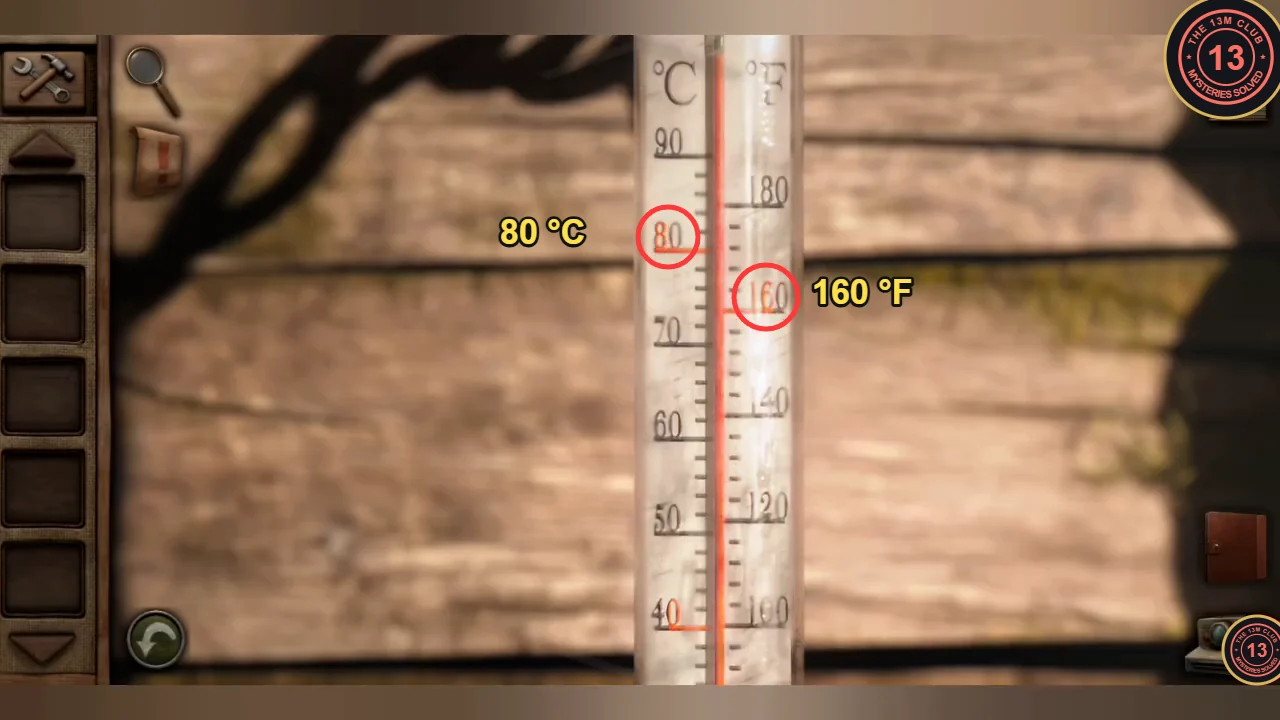
The orange marks on the thermometer: 80 °C and 160 °F. - In the cellar, set the chest dials to the two temperatures: 8 0 in the left pair and 1 6 0 in the right group. Take the rifle scope.CODE80 / 160
- Return to the hunting stand and look through the rifle scope from the overlook. Ethan spots the radio tower from Jen's photo and sets off towards it. Only the rifle scope stays in your inventory for the next area.