Trail Clues
Past the "Do not cross" tape, the trail leads to a picnic area, restrooms and an old shack. Four spots each show a plain number and a number inside a shape. You need all of them for the red toolbox.
- Follow the trail past the locked trash bin to the first picnic table. Take the watering can and note the scratched numbers: 8, and 7 inside a square.
- The trail sign shows 1 inside a square (Restrooms) and 2 (Picnic Area).
- The bench near the water pump shows 6, and 5 inside a circle.
- The shack wall shows an orange 4, and 3 inside a diamond.
Red Toolbox
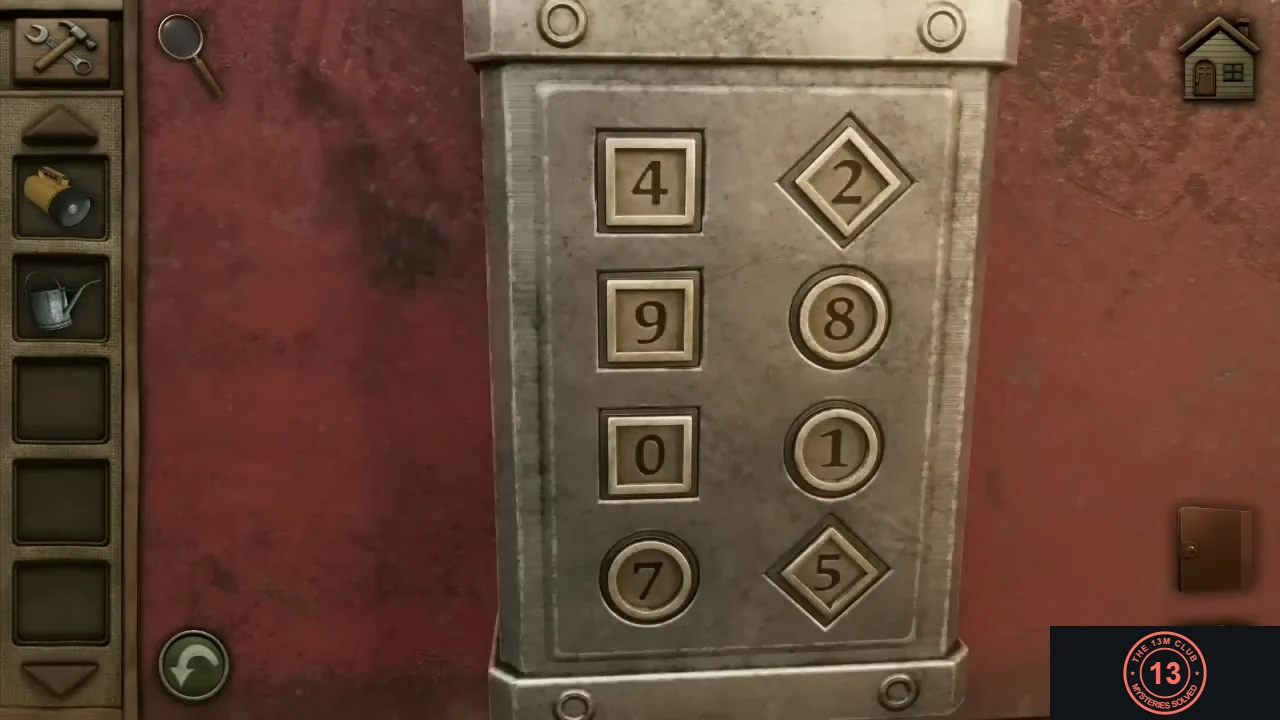
The red toolbox on the second picnic table has two columns of four number wheels. Each wheel sits in a square, circle or diamond frame.
- Match each number to the frame of the same shape. Set the left column, top to bottom, to 1, 7, 6, 4 and the right column to 8, 2, 5, 3. Take the pliers from the toolbox.CODE1764 / 8253
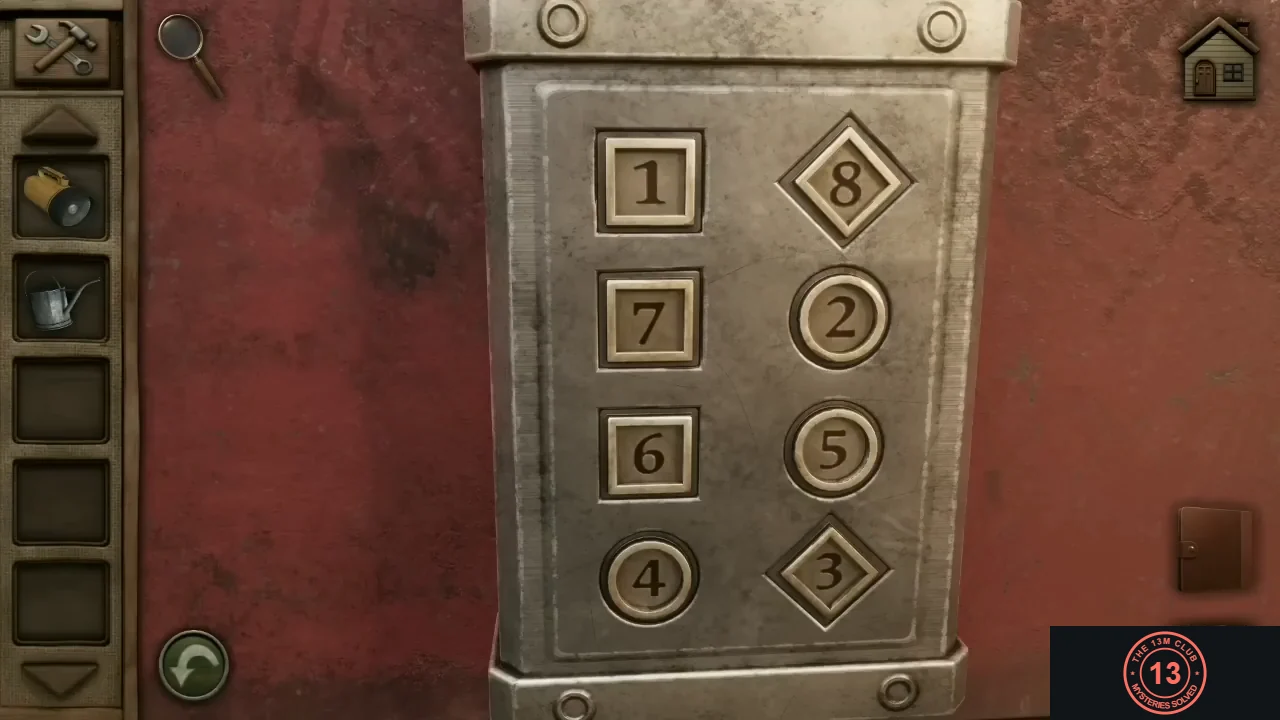
The solved toolbox lock.
Trash Bin Slider
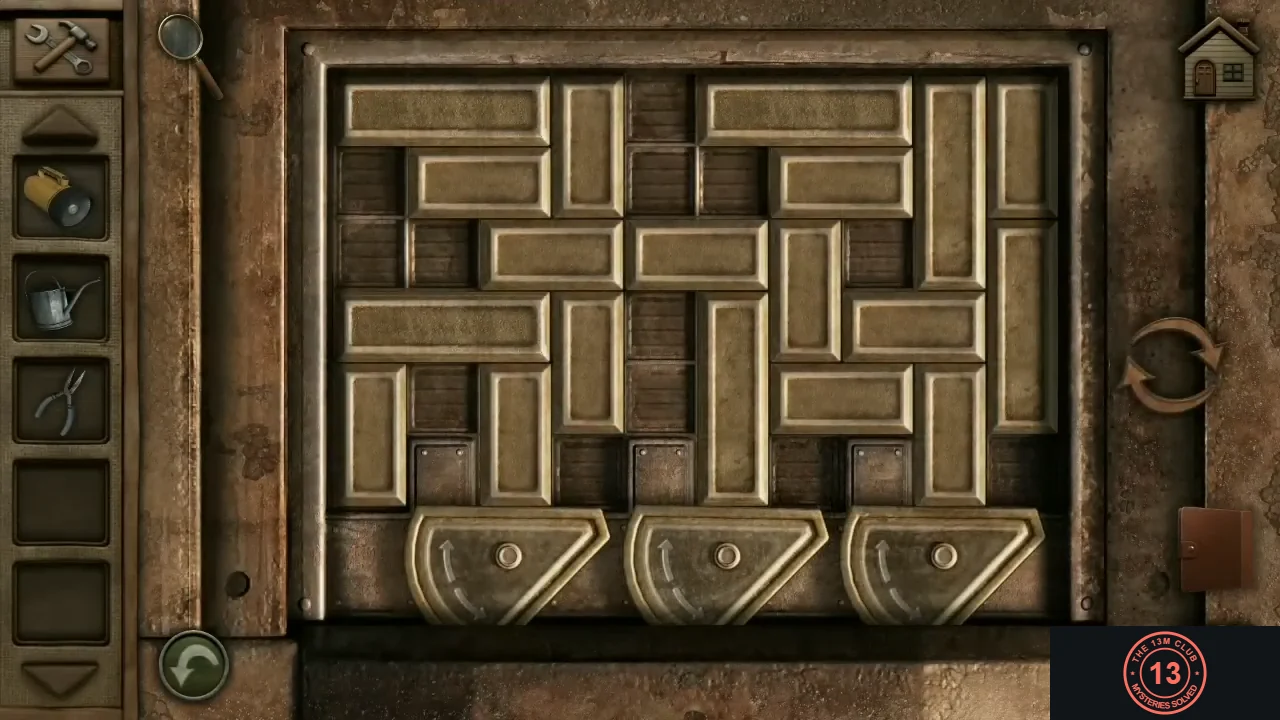
The trash bin by the trail stairs needs a hex key. Inside, a sliding-block lock holds the washroom key. Solving it takes many moves, so this section explains the goal and an approach.
- Reach through the shack's broken window with the pliers and grab the hex key.
- Open the trash bin with the hex key. Horizontal bars slide left and right, and vertical bars slide up and down. Three small fixed square pins sit in the bottom row, each just left of a wedge's round knob. A wedge swings up only when the bottom-row cell directly right of its pin (right above the knob) is empty. Empty all three of those cells at once. Work on one wedge at a time, and do not slide a bar back into a cell you have already emptied. When all three wedges point up, the bin opens. Take the washroom key.
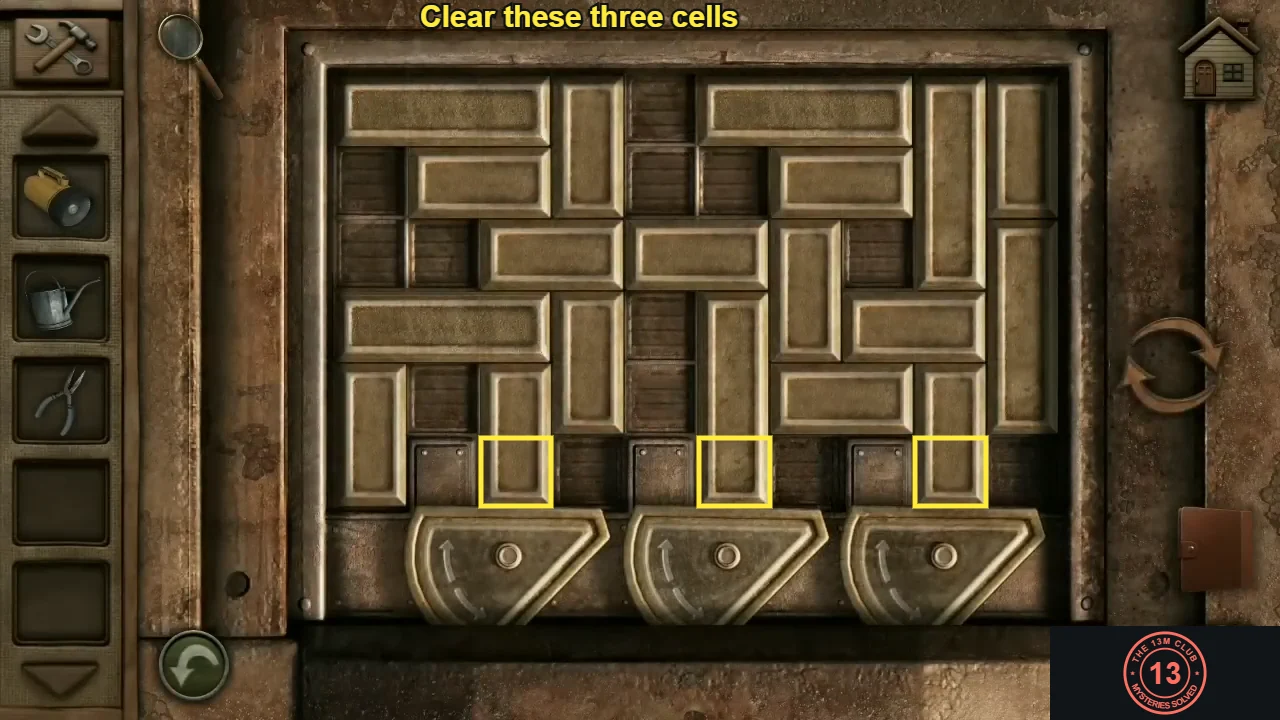
The goal, marked by 13M Club: empty these three cells, the ones right of the pins and above the wedges' round knobs. 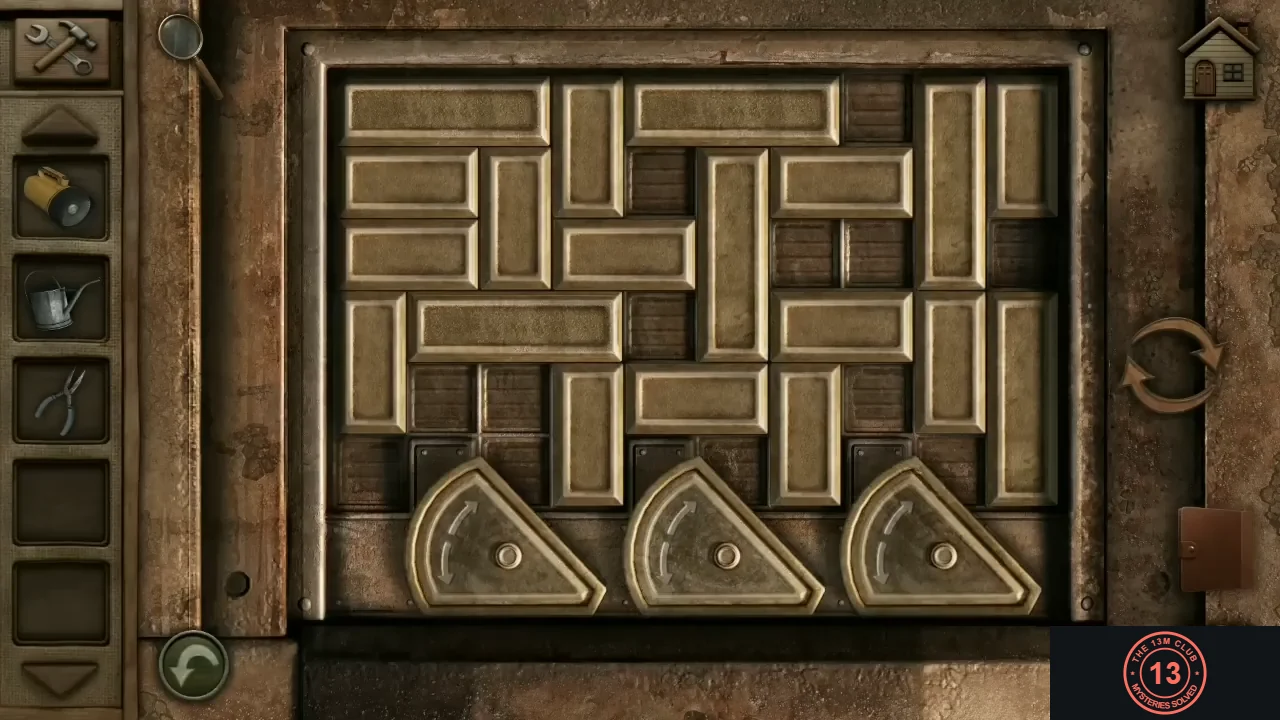
The solved lock with all three wedges up. This arrangement is one example; other arrangements also work.
Shed Lock
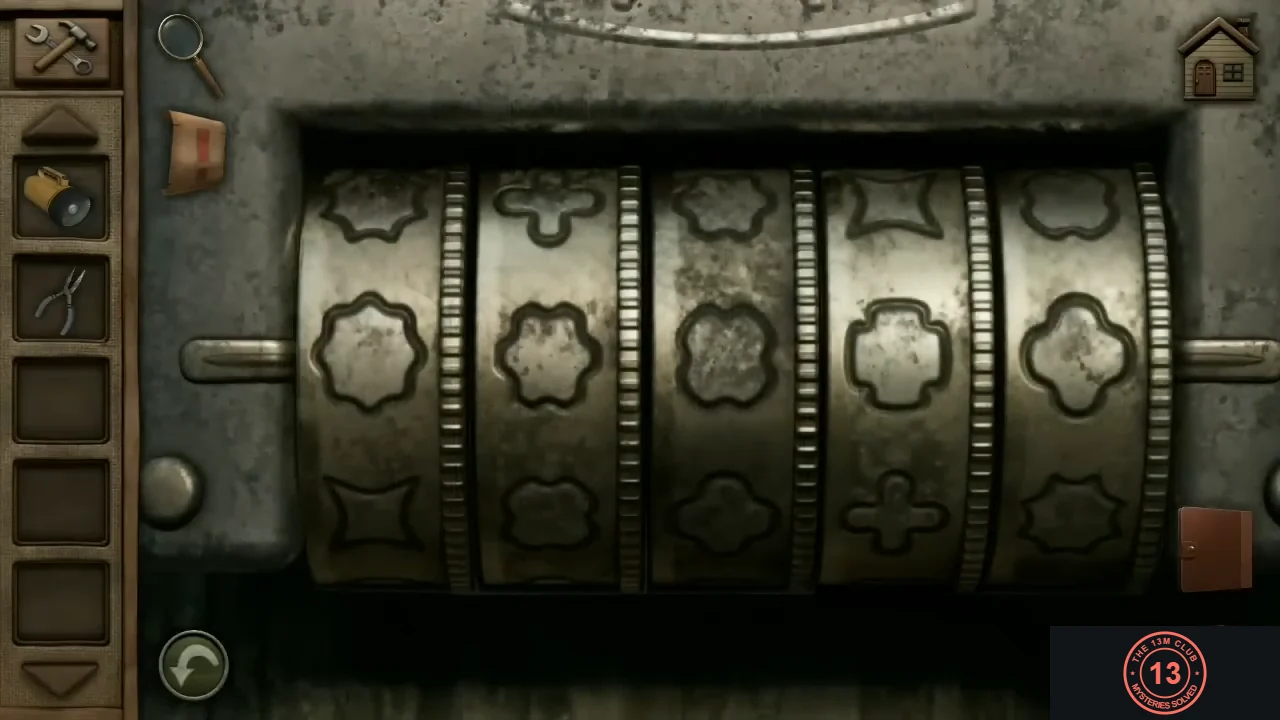
Unlock the washroom with the key. The shed's five-wheel symbol lock uses the odd shapes hidden in the washroom's paper towel.
- Unlock the washroom. Read Jen's note with the photo by the window: she is searching for clues off the main trails. Start from the old tool shed and head north-east into the forest at a bearing of 45 degrees; she will set up a camp and wait there. Then look at the paper towel in the dispenser by the sink. Its print of circles hides five odd shapes.
- At the shed, turn the five wheels so the row beside the pointer shows those shapes, left to right: a wavy cushion-shaped square, a round four-lobed quatrefoil, a smaller scalloped quatrefoil, an eight-point scalloped badge and a spiky eight-point flower. The shed opens. Take the crowbar from the box inside.
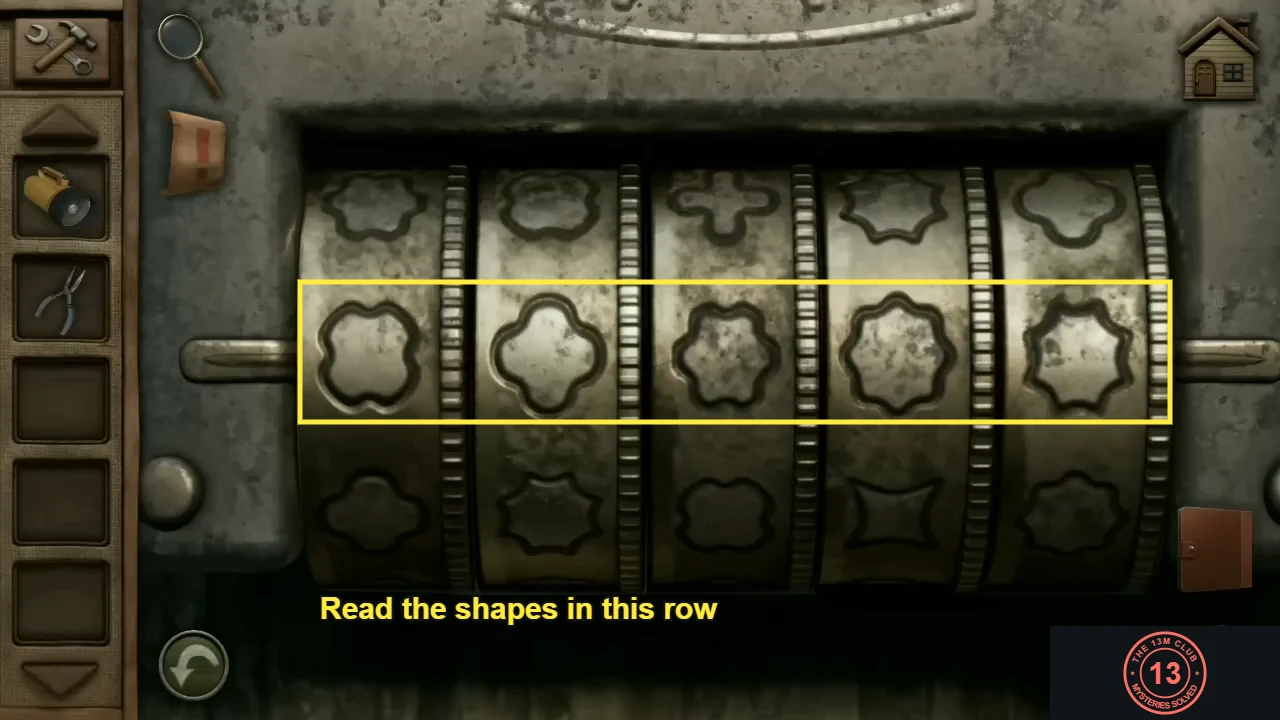
The solved lock. Match this middle row of shapes.
Washroom Pipes
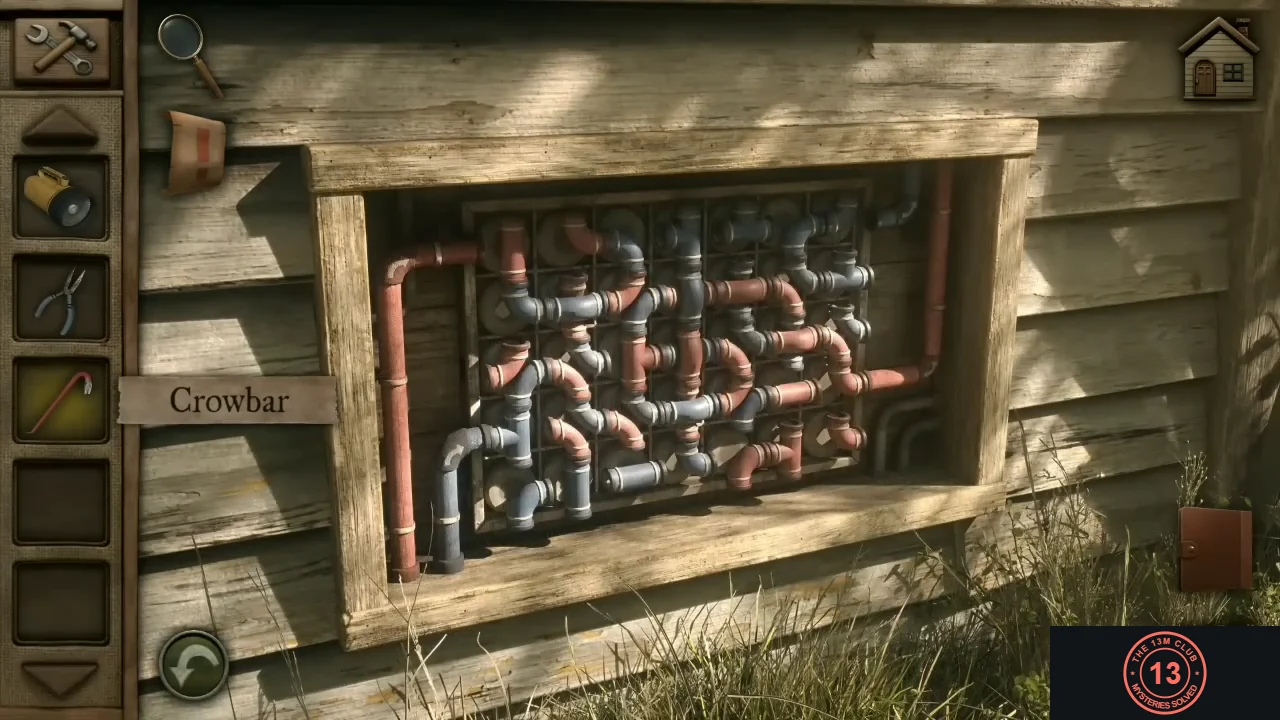
The washroom sink is dry. Pry off the wooden panel on the outside wall to reach the water pipes. Solving them takes many moves, so this section explains the goal and an approach.
- Open the panel with the crowbar. Tap the round fittings to rotate them until the red line runs unbroken from its inlet at the top left to its outlet on the right, and the blue line runs from its inlet at the bottom left to its outlet at the top right. Many fittings carry both colors, so trace one color at a time from its inlet and make sure each turn doesn't break the other line. Ethan says it's solved when both lines connect.
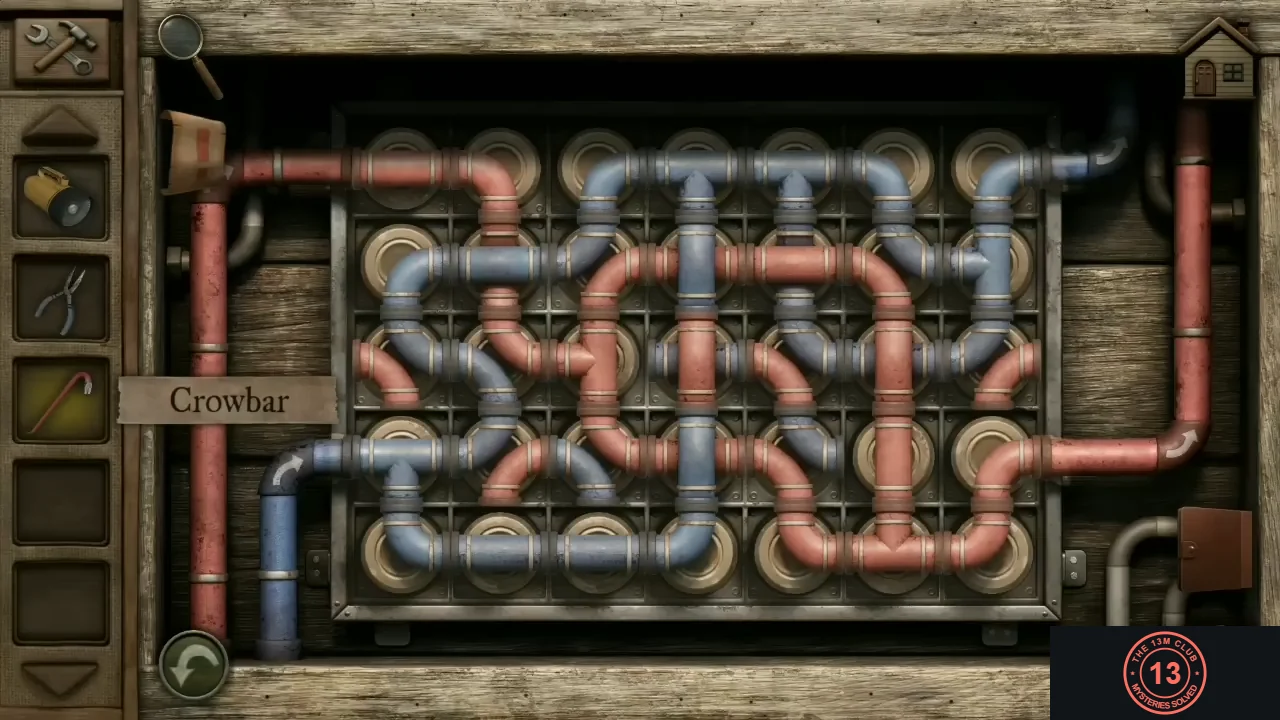
The solved pipes.
The Compass
Something is stuck deep in the toilet pipe. To get it out, you need water, light and a ladder.
- Use the pliers on the rusted hose at the water pump and take the hose.
- In the washroom, attach the hose at the sink and fill the watering can.
- Pry the loose toilet pipe off with the crowbar and look inside with the flashlight. The flashlight runs out of battery, and pouring water into the dark pipe does nothing yet.
- Go back to the shed and take the ladder. Set it under the tree beside the toolbox picnic table, climb up to the hanging lamp and take its 6-volt battery. Combine the battery with the flashlight using the tool icon.
- Look into the toilet pipe again with the flashlight: a compass is stuck far down inside. Pour in the full watering can to float it up, then take the compass.
Into the Forest
Jen's note said to start from the old tool shed and head north-east into the forest at a bearing of 45 degrees. The cleaned compass lets Ethan follow that bearing.
- With the compass in your inventory, leave the washroom and go to the old tool shed. Reaching the path beside the shed starts the final scene: Ethan takes out the compass and follows Jen's bearing of 45 degrees, north-east, off the path and into the forest. He reaches a campsite with an orange tent, and Chapter 1 ends with "To be continued...".