Visitor Center Search
At the visitor center, a few things are worth collecting before the first puzzles. Watch for the carved animals on the trail map. They set the order for a code later.
- Look at the Copperfield Trail Map beside the start of the forest trail. Note the six carved animals on its posts: bird, deer and fox on the left post (top to bottom), and rabbit, fish and bear on the right post.
- Go inside. Open the bottom-right drawer of the drawer unit by the window near the front desk and take the agate.
- Take the pyrite from the top of the rabbit display case.
Display Case Shape Tiles
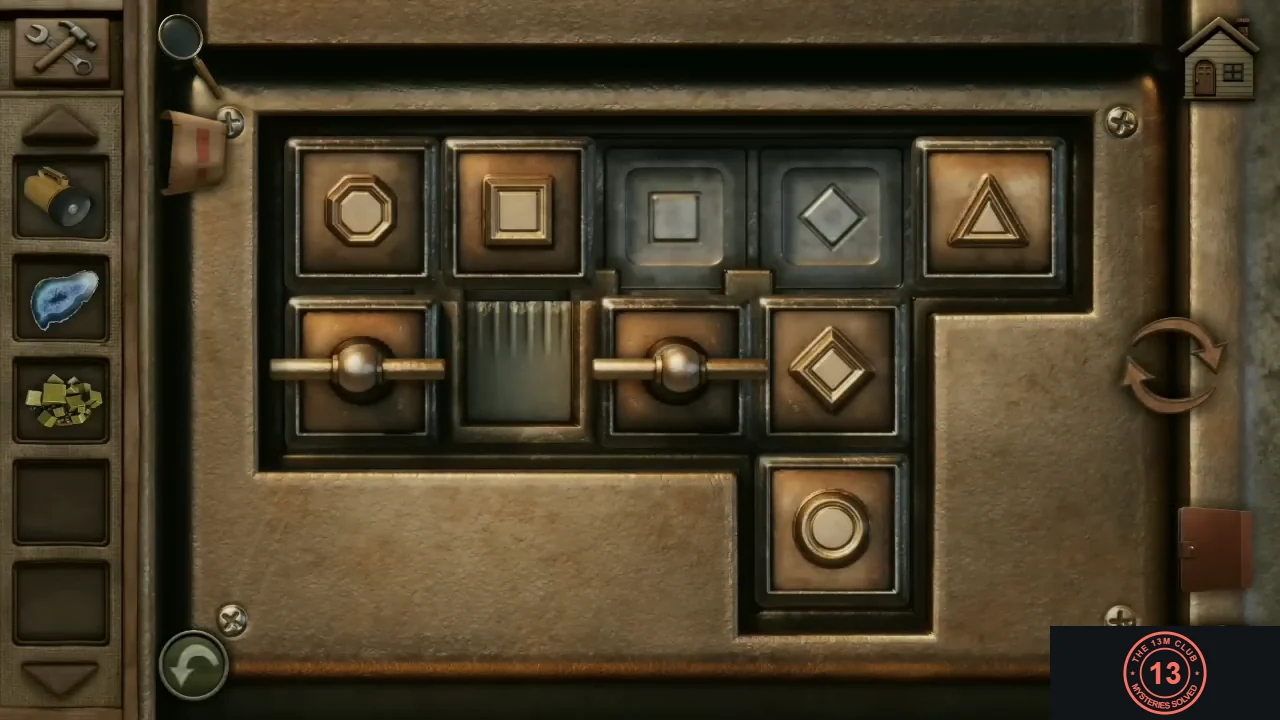
The locked glass case behind the front desk has a sliding shape-tile lock. The grey engraved outlines in the top row show where each shape belongs. Solving it takes many moves, so this section gives the target and an approach instead of a move list.
- Slide the shape tiles and the two handle bars through the empty spaces until the top row reads, left to right: triangle, circle, square, diamond, octagon. Use the empty cells in the lower rows and the single cell at the bottom as parking spaces. Fill the top row from one end, and move a finished shape only when you have to.
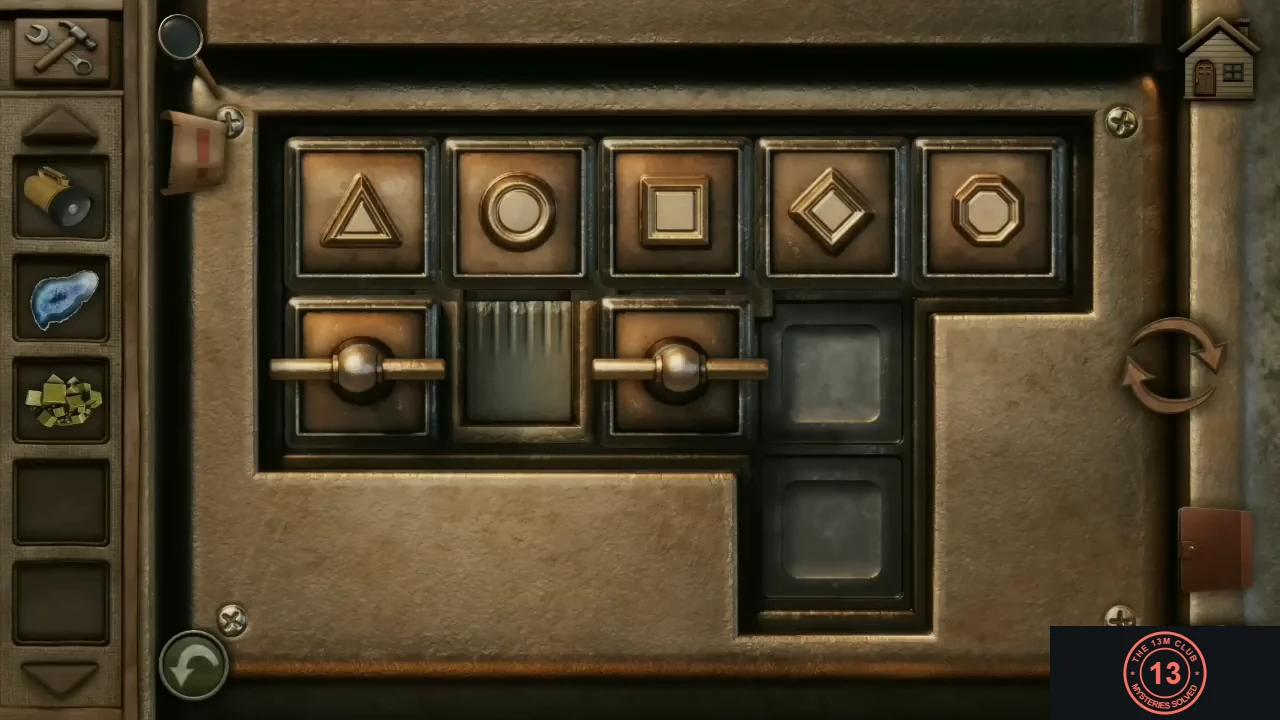
The solved top row: triangle, circle, square, diamond, octagon. - The case opens. Take the pocket knife and the black gemstone (stibnite).
Mailbox Flags
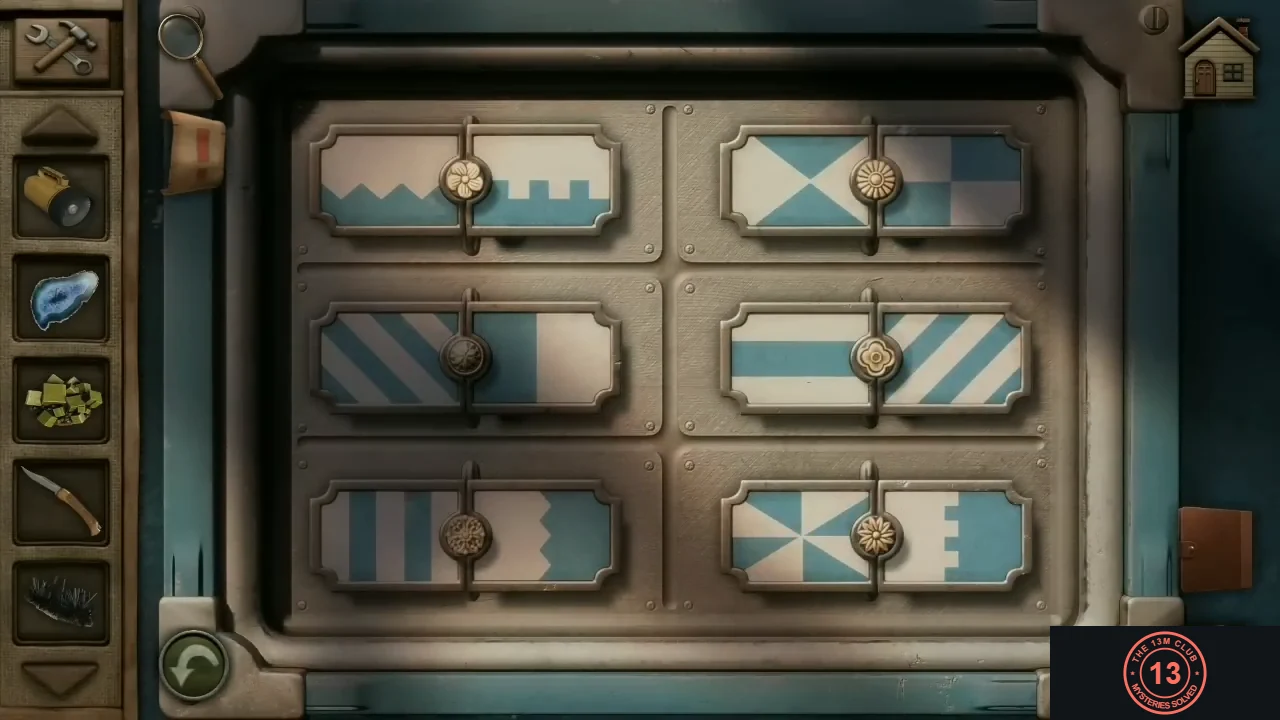
The mailbox outside the front door has six panels, each split into a left and a right half. The hint says the drawers near the front desk hold the clues.
- Open each of the six drawers in the unit beside the front desk. Each drawer's knob matches one mailbox panel's knob. The pattern on the drawer front is that panel's left half, and the pattern inside the drawer is its right half.
- At the mailbox, swap the halves until every panel matches its drawer. Solved: top left (five-petal flower knob): horizontal band | vertical zigzag edge. Top right (daisy knob): diagonal stripes | crenellated bottom edge. Middle left (dark round knob): zigzag bottom edge | vertical half. Middle right (four-lobed knob): hourglass X | diagonal stripes. Bottom left (ornate knob): pinwheel | notched vertical edge. Bottom right (sunflower knob): vertical stripes | checkered quarters.
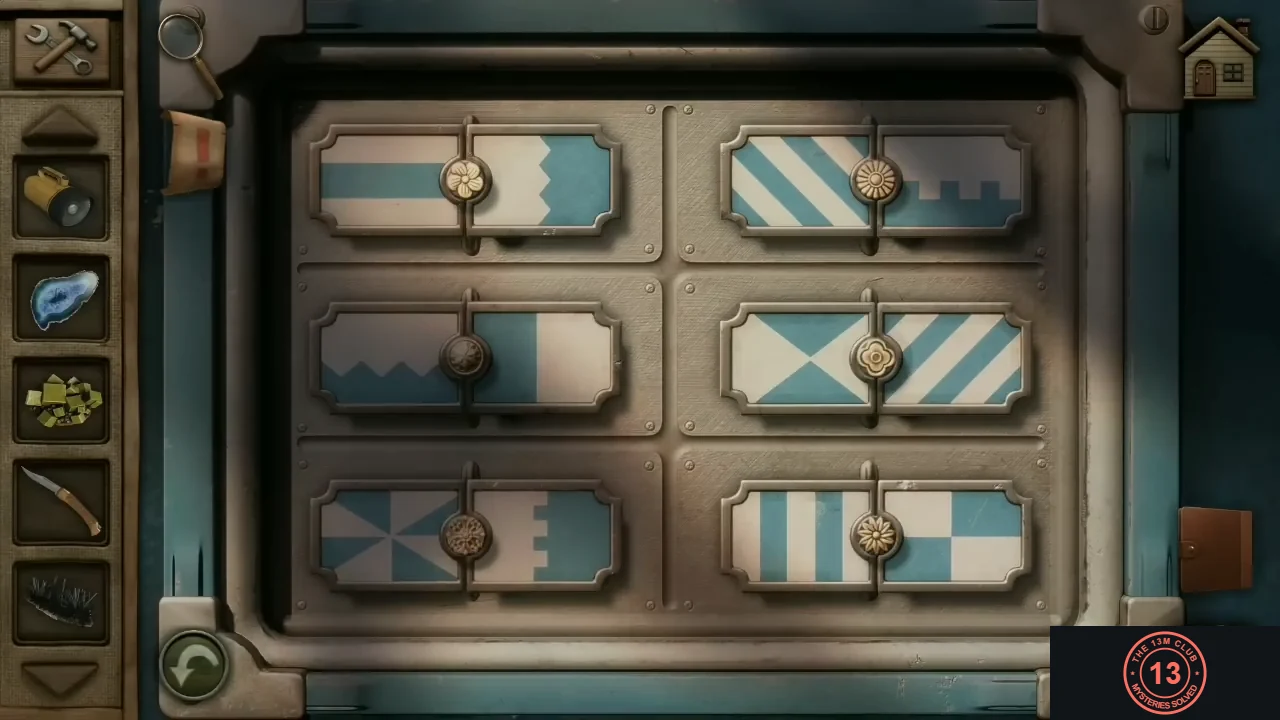
The solved mailbox arrangement. - The mailbox opens. Cut open the parcel with the pocket knife, take the magnetic dart and the string, and combine them with the tool icon.
Gift Shop Key
The gift shop key lies at the bottom of the storm drain under the porch.
- Look at the storm drain grate under the porch, to the right of the stairs. Use the flashlight to see inside, then lower the magnetic dart on its string and pull up the gift shop key.
- Unlock the gift shop door next to the vending machine.
Gift Shop Gemstones
The gift shop has the last gemstones and the color order for the cash register.
- Take the quartz crystal from the center counter.
- Take the furnace handle from the cardboard box on the floor. Attach it to the furnace in the back room, open it and take the topaz.
- Look at the tape stuck to the cash register. It lists colors in order: orange, yellow, white, purple, black, blue.
Gemstone Shelf and Register
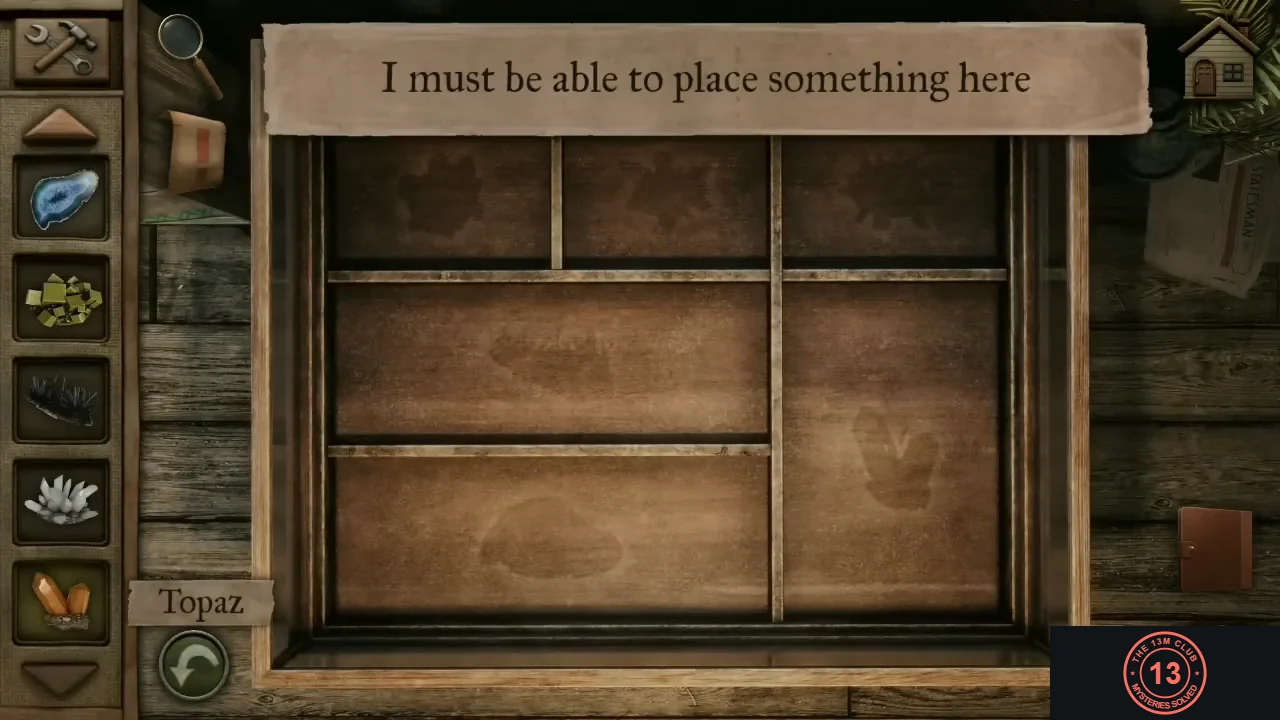
The wooden shelf next to the fox display case has six shaped cubbies, one per gemstone. Its layout matches the keys on the cash register.
- Place each gemstone in the cubby that matches its shape: pyrite top left, quartz top right, stibnite in the wide middle-left cubby, topaz in the tall right cubby and agate in the wide bottom cubby. The top-middle cubby stays empty, and Ethan remarks that he missed an item near the trailhead sign.
- Go back outside to the trail map and take the amethyst from the leaflet box below it. Place it in the top-middle cubby.
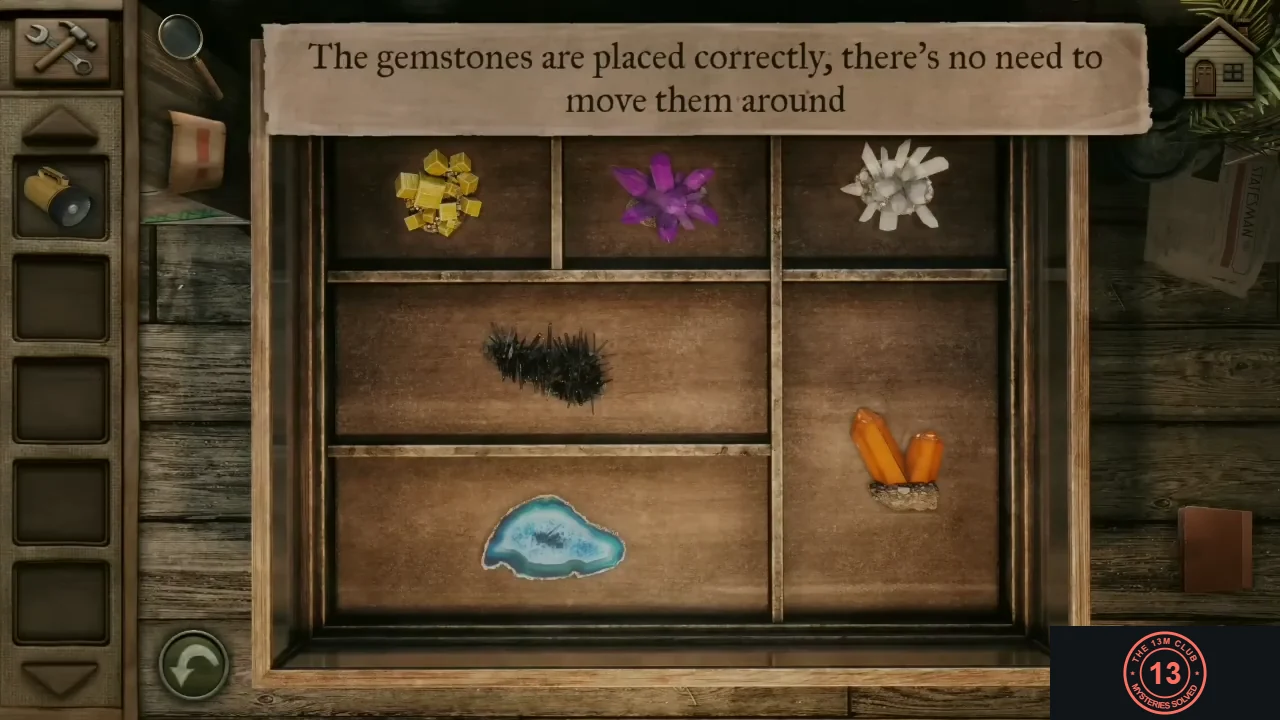
All six gemstones in place. 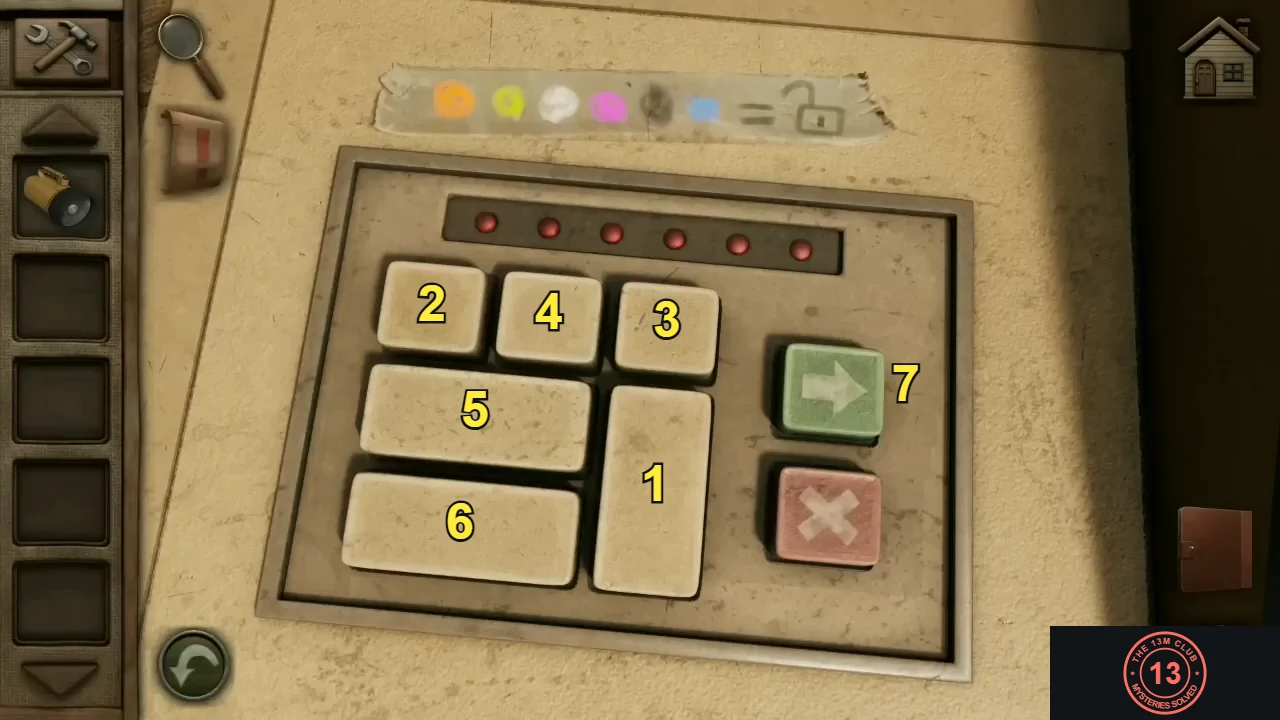
The register keys numbered by 13M Club in the tape's color order; press 7, the green arrow, last. - At the cash register, the keys are laid out like the shelf. Press the key in each gemstone's position in the tape's color order: tall right (orange topaz), top left (yellow pyrite), top right (white quartz), top middle (purple amethyst), wide middle (black stibnite), wide bottom (blue agate), then the green arrow. Take the coins and the toy viewer disc from the drawer.
Staff Only Door
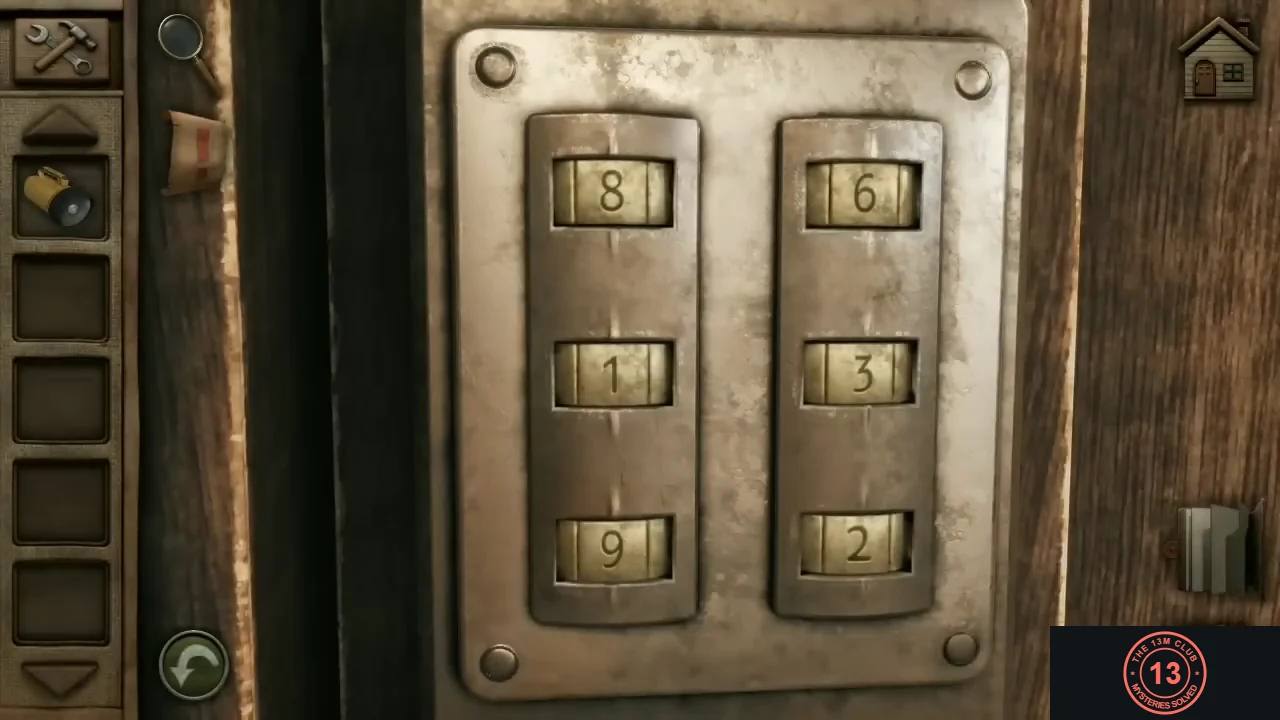
The Staff Only door has two columns of three number wheels. Each wheel takes the number tied to one of the trail map's carved animals.
- Put the coins in the vending machine and take the can of Root Bear soda. The bear on its label is next to "Only 5 calories": bear = 5.
- Put the toy disc in the red toy viewer on the gift shop window shelf and click through the slides. Slide 3 shows a deer and slide 6 shows a bird: deer = 3, bird = 6.
- Find the other numbers: the fish plaque in the gift shop says 9 pounds (fish = 9), the fox case is Exhibit 2 (fox = 2) and the rabbit case is Exhibit 1 (rabbit = 1).
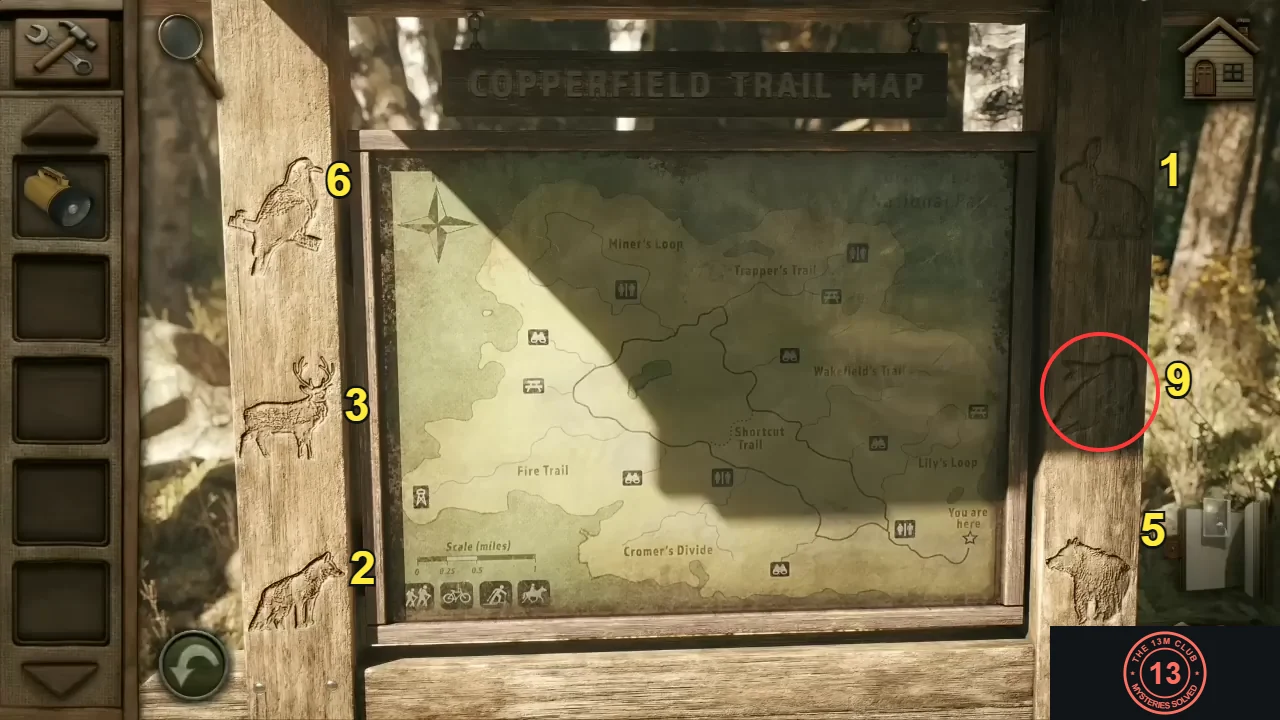
The trail map carvings with their numbers. The faint fish carving is circled. - Enter the numbers in the trail map's carving order. Left column, top to bottom: bird 6, deer 3, fox 2. Right column, top to bottom: rabbit 1, fish 9, bear 5. The door opens.CODE632 / 195
- Read Jen's note on the office desk. She found a lead on Patrick and went down Trapper's Trail. Ethan sets off after her.