Get Ready for Work
Ethan wakes up at home. The game gives him a short checklist: car keys, ranger uniform, camera, photo album and a bite to eat. Collect all five before you leave.
- In the bedroom, take the camera from the desk. The checklist appears when you pick it up.
- Go into the bathroom and take the ranger uniform hanging on the shower rail.
- Go downstairs to the kitchen and take the energy bar from the table.
- In the living room, lift the couch seat cushion and take the car keys.
- Open the louvered closet beside the front door and take the photo album from its shelf. All five items are now ticked off.
- Go outside, use the car keys on the car and drive to the ranger station.
Make Coffee
At the ranger station, your first task is to make coffee. Brewing it blows the fuses and leaves the station dark, and a glowing clue appears.
- Enter the office on the far left (Jen's office) and take the coffee pot from the desk.
- Go through the open doorway into the side room on the right and take the coffee can from the cupboard above the desk.
- At the coffee machine, put in the coffee and the coffee pot, then flip the switch. The fax machine starts up, the fuses blow and the lights go out.
- In the dark, the celestial planisphere on the wall glows. Zoom in and photograph it with the camera. The photo records where each zodiac sign sits on the star map; there are no arrows on the chart, so the order comes from the locker in the next section.
Zodiac Dial Locker
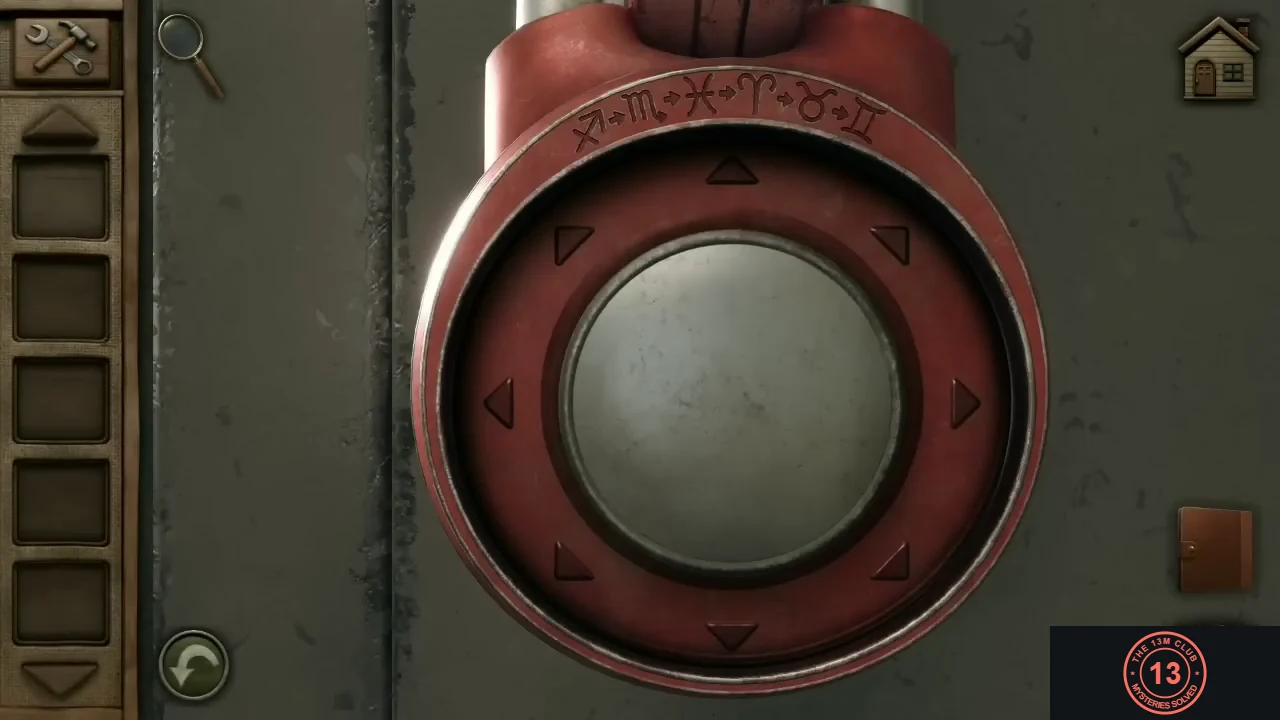
The metal locker in Jen's office has a push knob with direction arrows around it. The six-sign sequence is engraved on the lock: Sagittarius, Scorpio, Pisces, Aries, Taurus, Gemini. The planisphere photo shows where each sign sits.
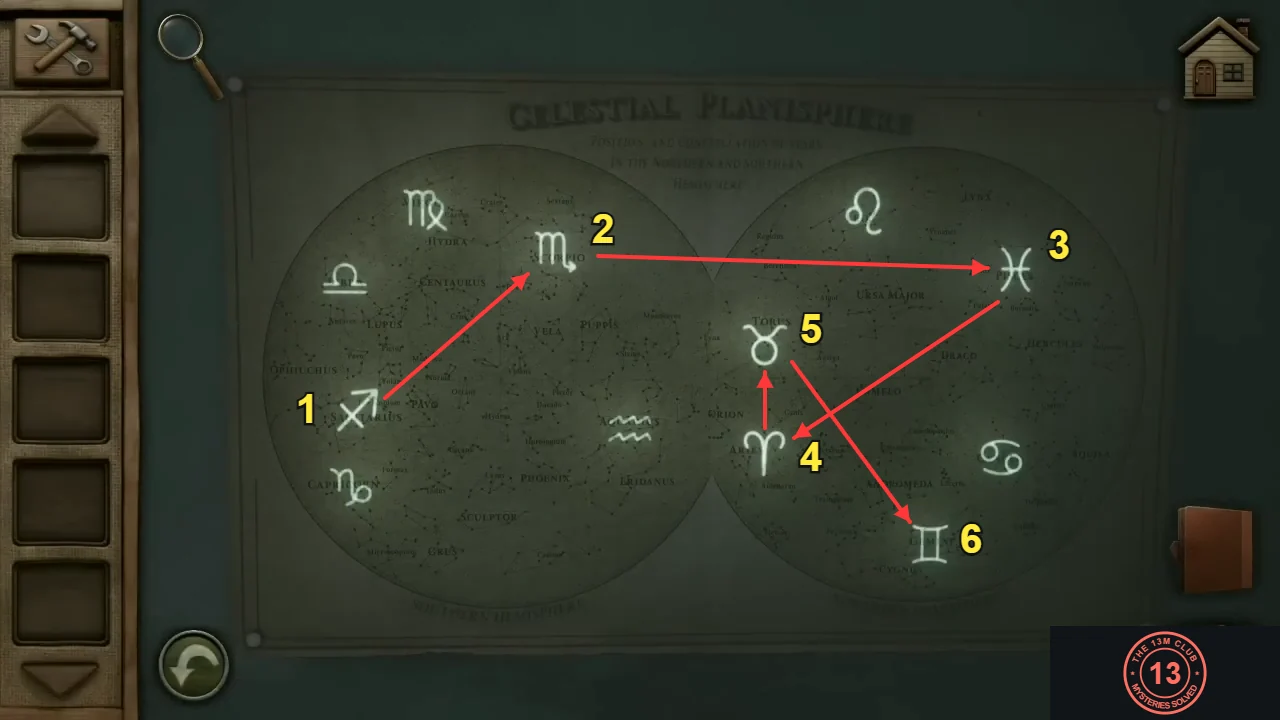
- Start at Sagittarius on the planisphere photo. For each next engraved sign, push the knob in the direction you would move on the map to reach it: Scorpio is up-right, Pisces is right, Aries is down-left, Taurus is up and Gemini is down-right (clock positions 2, 3, 7, 12, 5).CODE2, 3, 7, 12, 5
- Take the flashlight and the hairpin from the open locker, and look at the bar graph note inside. Its five bars are the clue for the next lock.
Picking the Office Door
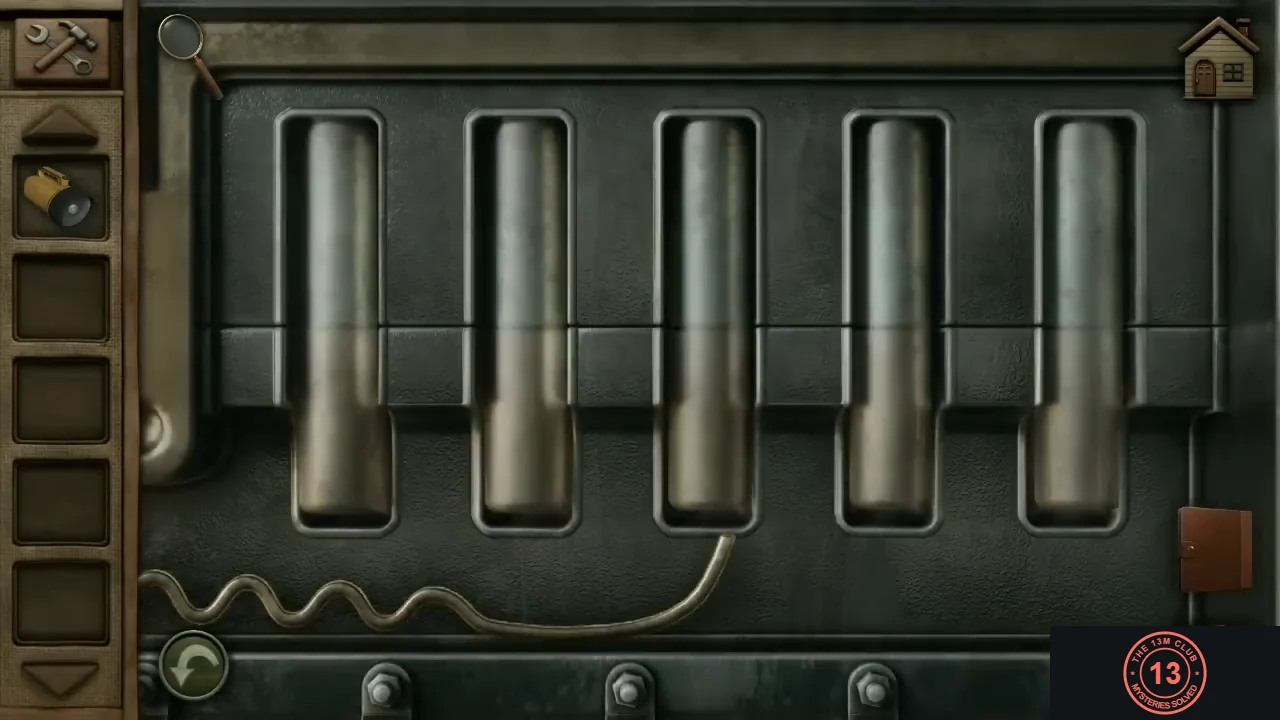
The door of the dark office has a broken key stuck in its lock. Clear the lock first, then pick it with the hairpin.
- In that office, open the red pencil case on the cluttered desk beneath the missing-person poster and take the tweezers.
- Use the tweezers on the door's lock to pull out the broken key.
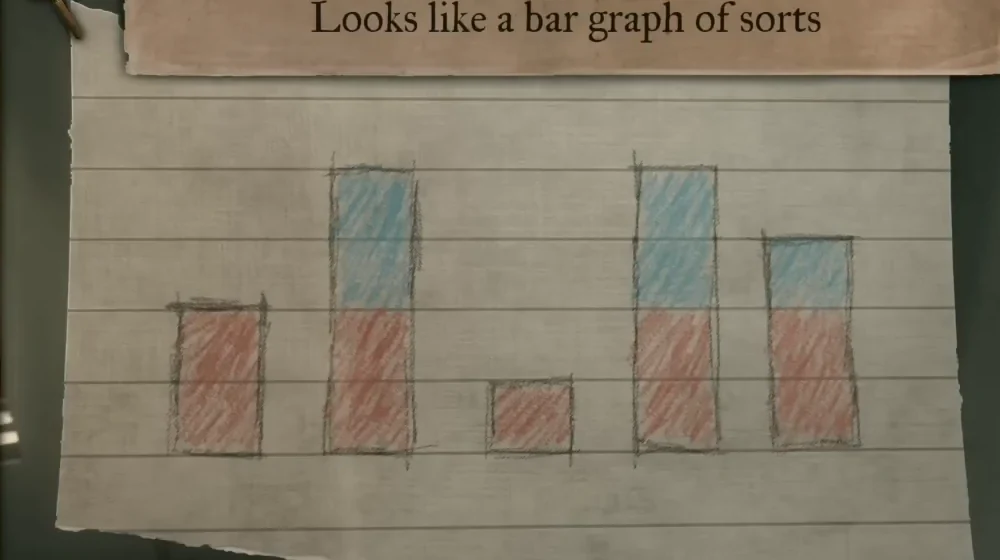
The bar graph note from the locker. The bar heights, left to right, are the pin heights. - Use the hairpin on the lock. Raise the five pins to the heights of the bars on the bar graph note, from left to right: 2, 4 (all the way up), 1, 4 (all the way up), 3. The door opens to a back corridor.CODE2, 4, 1, 4, 3
Desk Button Grid
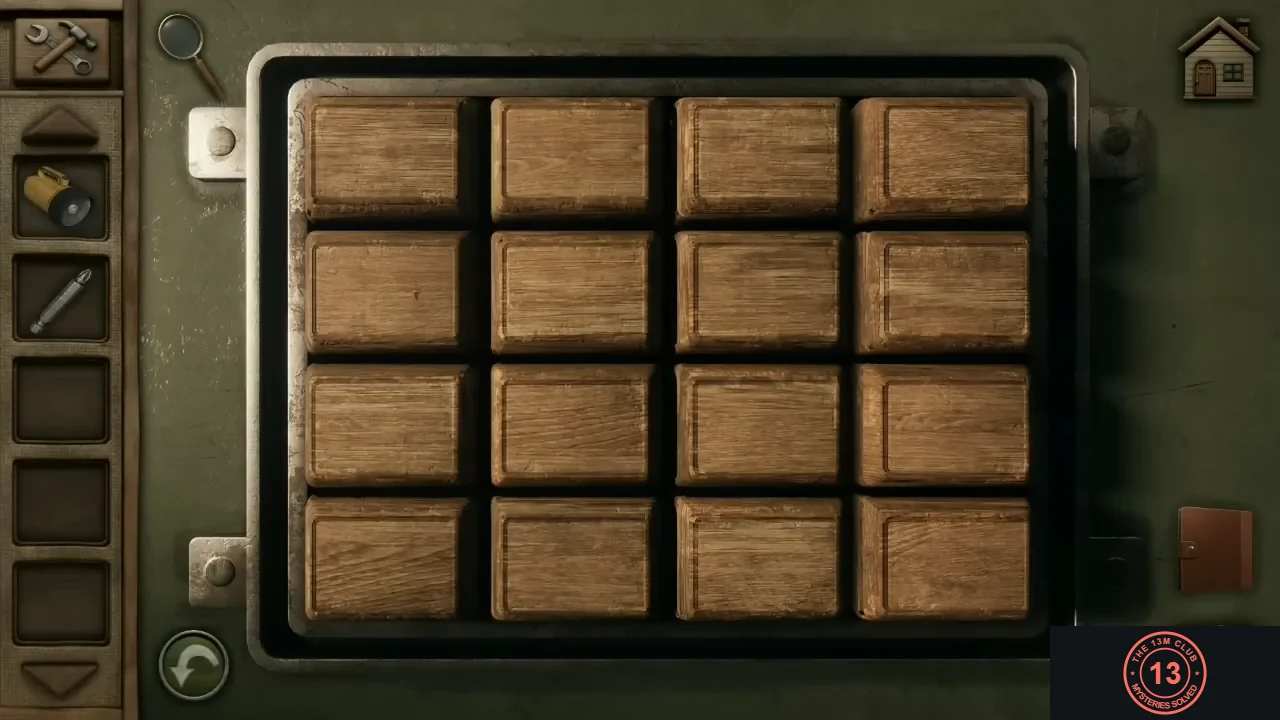
Chalk drawings on the back corridor wall show three 4x4 button patterns followed by a question mark. The desk in the nearby office has a matching 4x4 grid of buttons.
- In the corridor, take the screwdriver bit from the wall and study the three chalk grids and the question mark.
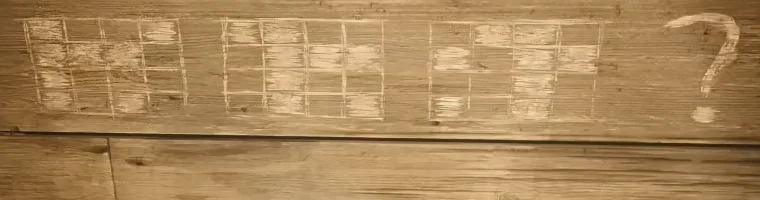
The chalk patterns on the corridor wall. The desk needs the pattern that replaces the question mark. - At the desk, press the buttons for the pattern that comes next. The solved pattern, counting buttons from the left: row 1, buttons 1 and 2; row 2, button 3; row 3, buttons 1, 2 and 3; row 4, buttons 1 and 3. Every button in the right-hand column stays up. The drawer opens.
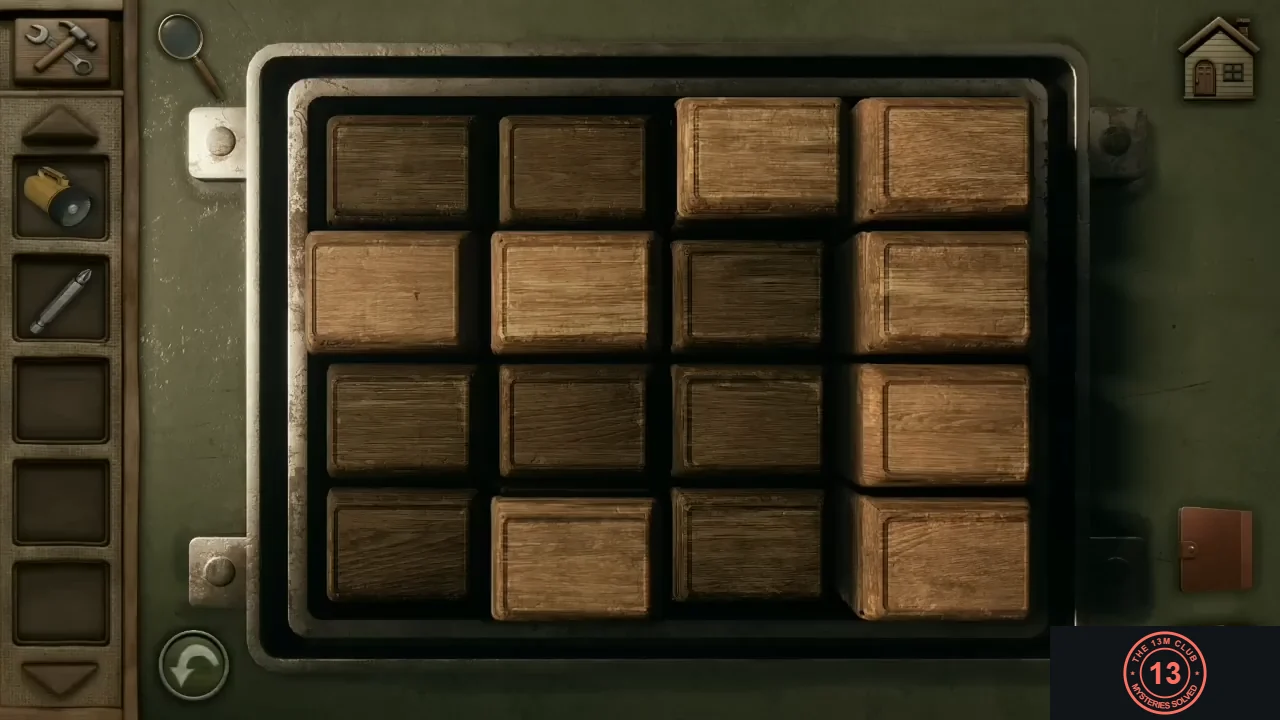
The solved grid. The darker buttons are pressed in. - Take the tubular key and the screwdriver handle from the drawer. Open the tool (hammer and wrench) icon and combine the handle with the screwdriver bit to make a screwdriver.
Fuse Board
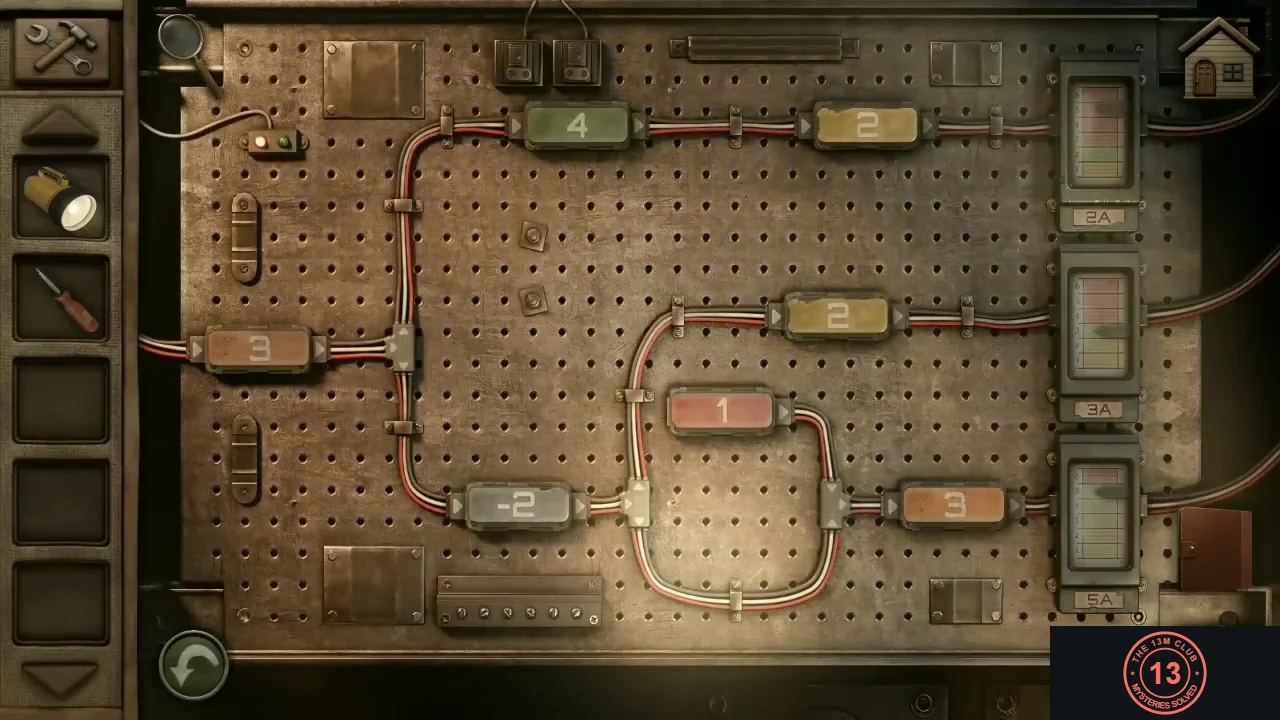
The upper electrical panel in the corridor holds a fuse board. Each meter on the right (2A, 3A and 5A) must read its value.
- Open the upper electrical panel with the tubular key. Ethan removes the blown fuse.
- Go outside to the phone booth to the right of the truck shelter. Unscrew its panel with the screwdriver and take the fuse.
- Put the fuse in the panel, then swap fuses between slots. The fuses along each route from the entry fuse on the left to a meter must add up to that meter's value. The solved layout: -2 in the entry slot; 2 and 2 on the top line (to 2A); 1 in the lower-left slot; 4 on the middle line (to 3A); 3 in the loop and 3 on the bottom line (to 5A). The power comes back on.
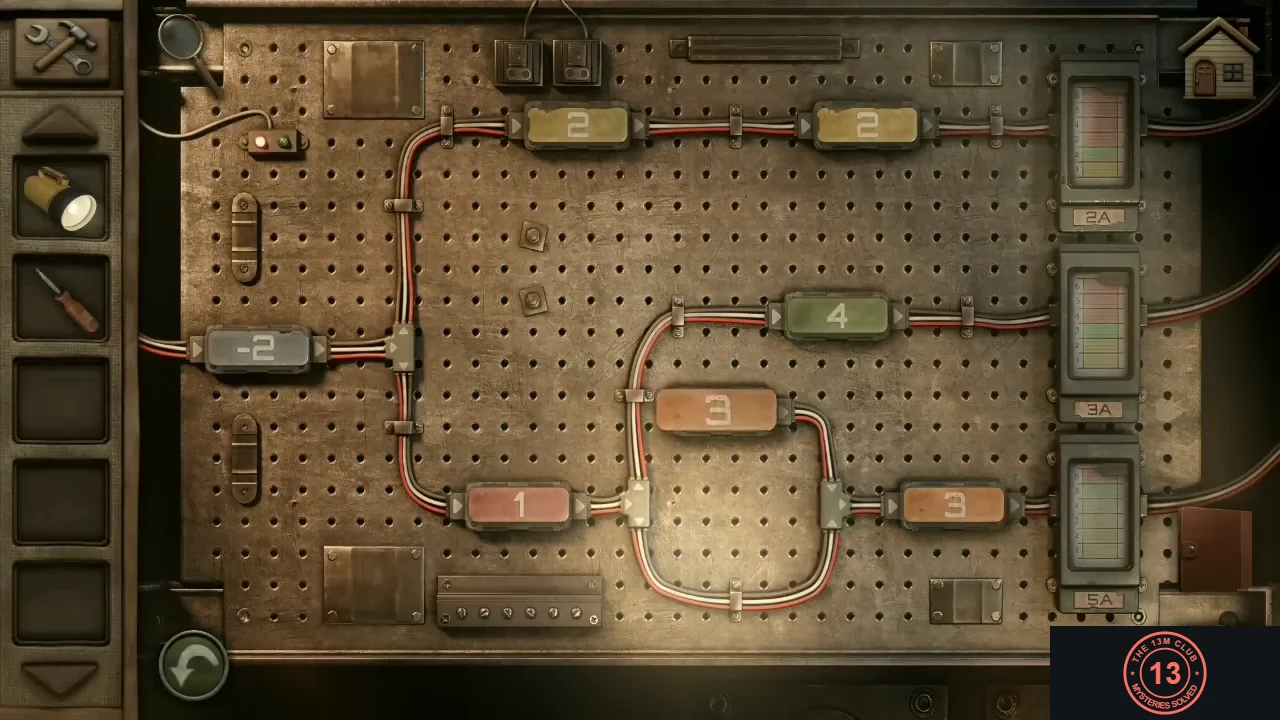
The solved fuse board. Each route's fuses add up to its meter.
Tube Panel and the Fax
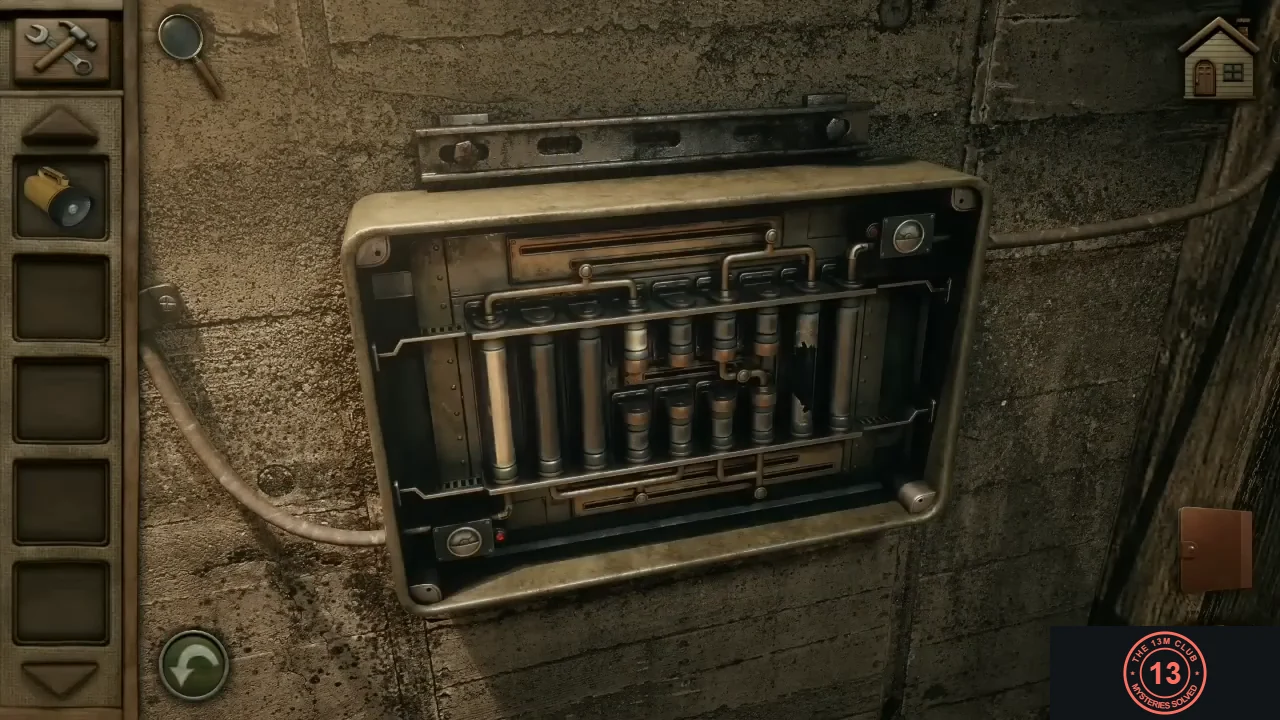
With the power back, the screwed-shut lower panel in the corridor controls the electronic lock on the basement door. After that, the fax machine has a message from Jen.
- Unscrew the lower panel with the screwdriver.
- Slide the brass connectors along the top and bottom pipes to link the vertical tubes into one continuous path from the gauge at the bottom left to the gauge at the top right. Skip the cracked tube. The finished path goes up the first tube, down the third, up the second, through the short upper tube and the middle connector, down the short lower tube, and up the rightmost tube to the gauge. This unlocks the basement door.
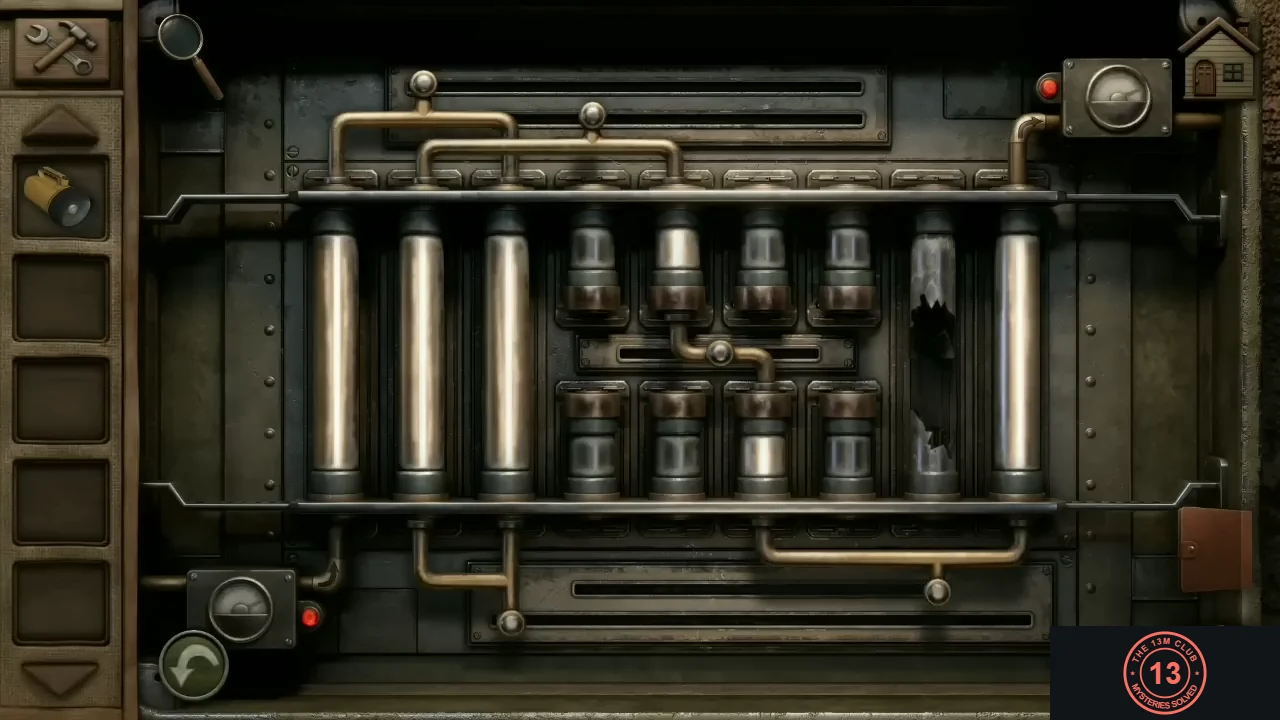
The finished path from the bottom-left gauge to the top-right gauge. - Go back to the fax machine and read the fax. Jen is at the park visitor center, and she says the spare set of ranger truck keys is in the archive room in the basement.
Missing Person Reports
The archive room has a map board with six empty photo slots. Photograph each missing person's report or poster to collect the six clues.
- Go through the unlocked door down to the archive room. Read Linda Harrison's report on the desk and photograph it.
- Photograph the other five: Qadir's poster on the green desk in the office you lock-picked; Marvin Warner's poster on the cluttered desk in the office with the red pencil case; Patrick Murphey's photo on Jen's desk; Harrisson Mueller's report on the lamp desk in the side room; and Clara Summers' poster on the pole beside the phone booth outside.
Missing Persons Map Board
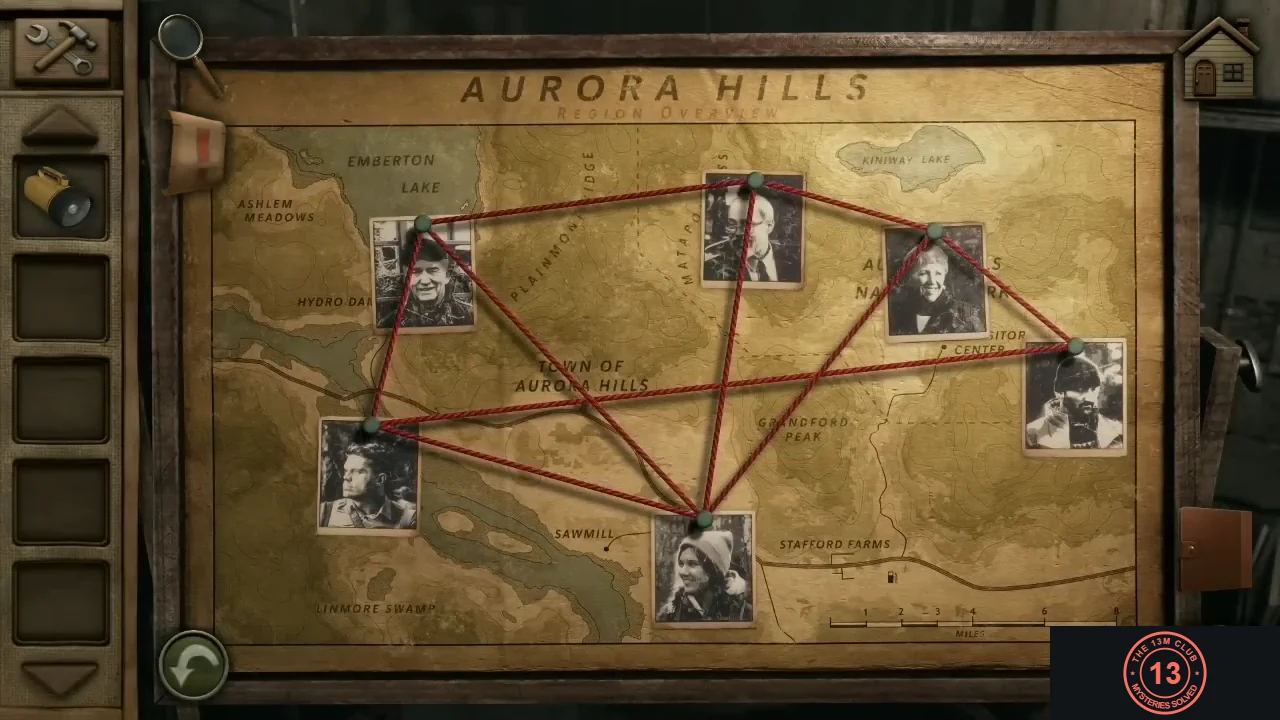
Back in the archive room, place each person's photo where their report says they were last seen.
- Place the photos: Linda at the bridge where the I-64 crosses the Hayven River; Clara between Plainmont Ridge and Matapan Pass; Patrick in Aurora Hills National Park above the Park Visitor Center; Harrisson in the Town of Aurora Hills (last seen on his front porch); Qadir at the sawmill south of town; and Marvin at Stafford Farms. Ethan confirms that all the photos are in the correct positions.
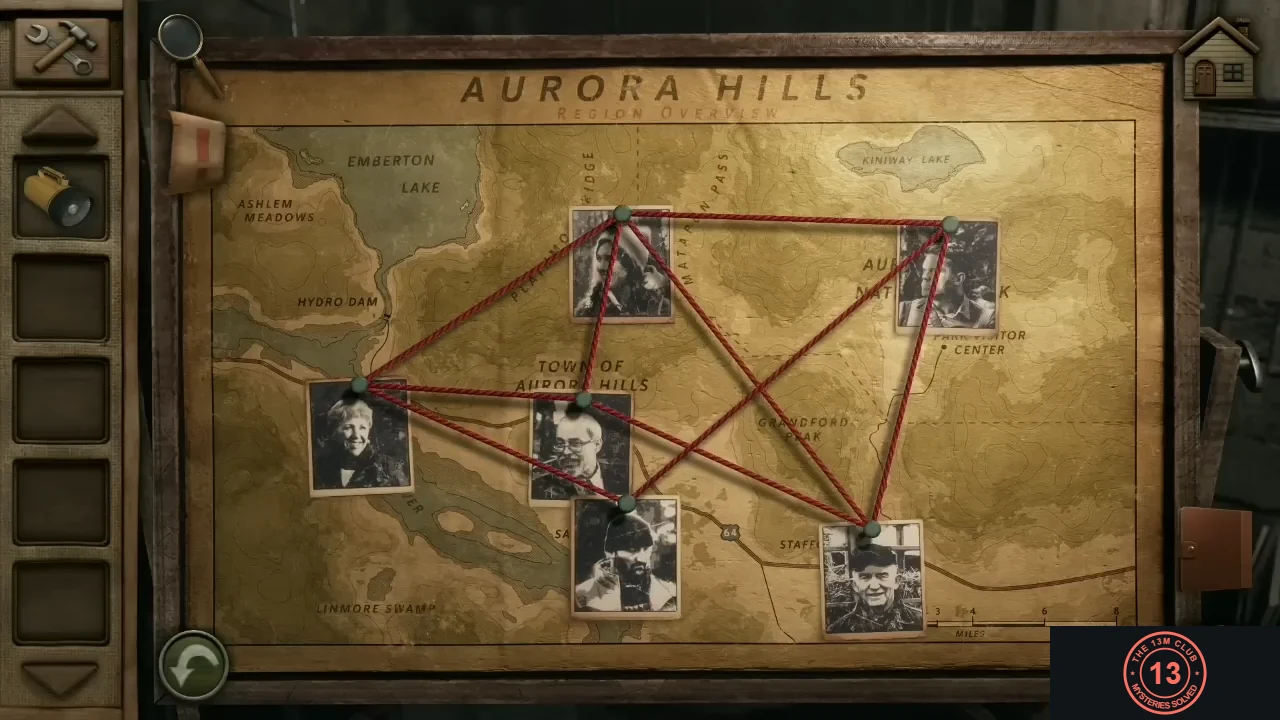
All six photos in their correct places.
Shape Safe
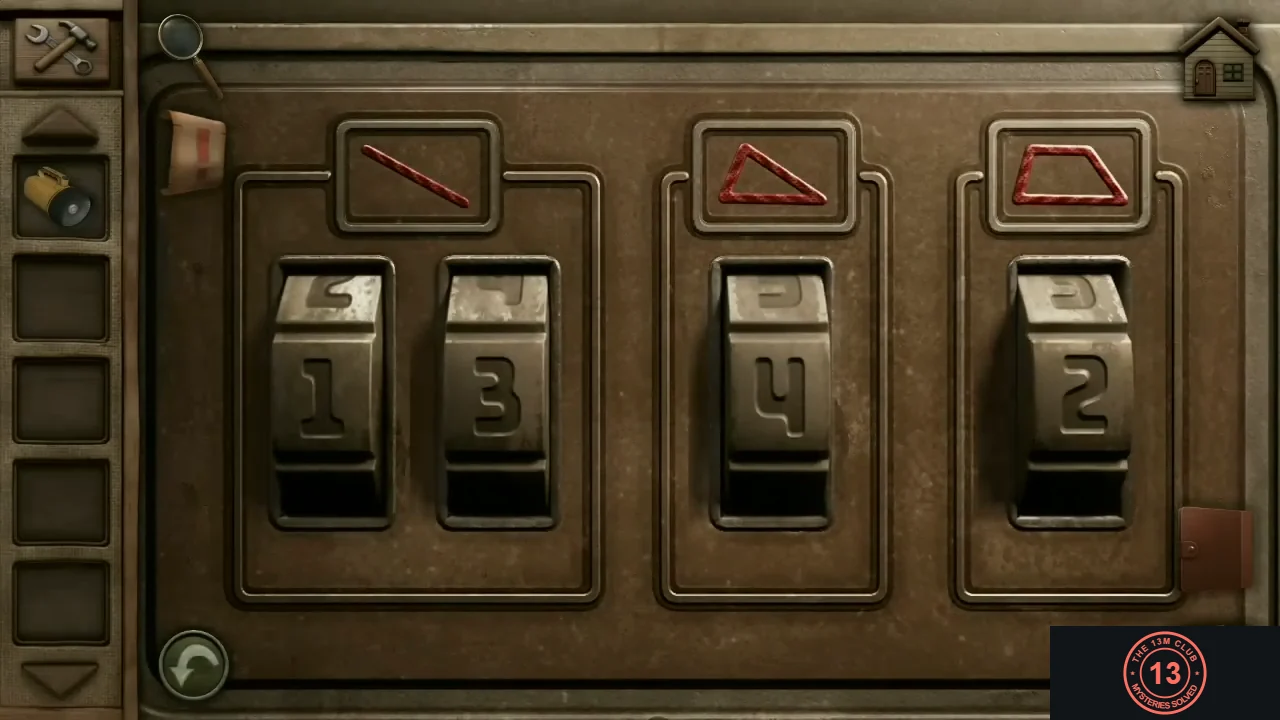
The safe in the archive room has three counters marked with a line, a triangle and a trapezoid. The line counter has two digit wheels, so there are four wheels in all. It opens once the map board is solved.
- Set the line counter's two wheels to 13, the triangle wheel to 4 and the trapezoid wheel to 2. The safe opens. Take the park ranger truck keys.CODE13, 4, 2
- Go outside, use the keys on the park ranger truck and drive to the visitor center.